DIY A Tile Accent Wall
So we just started the ORC Week 2: DIY A Tile Accent Wall , and this week main focus is all about the dreaded tile work for our One Room Challenge.
This season we will be completing our Master Bathroom for the One Room Challenge. We are currently in ORC Week 2: DIY A Tile Accent Wall . You all may remember got it’s started last fall with our little toilet room upgrade, for the $100 room challenge, The Game of Thrones. That challenge just left us thirsty for more beautiful things in the rest of our Master Bathroom and Hallway, so now we begin the tile work in this area. Which we have never done tile work before so this should prove to be interesting, follow along as we DIY A Tile Accent Wall.
WEEKS AT A GLANCE:
WEEK 1 WEEK 2 WEEK 3 WEEK 4 WEEK 5 REVEAL
Just in case you maybe wondering exactly what The One Room Challenge is, here is the link, and the scoop. This event was started by Linda Weinstein @ Calling It Home and is hosted twice a year, in April and October for the past 15 seasons. The ORC has hosted over 300 interior designers & home decor bloggers, that have joined together in this challenge to makeover one room in their own homes. The participants have total of six weeks, from start to finish, to complete a full room transformation. Over 3,500 rooms have been transformed through the One Room Challenge to date, and many spaces have been recognized and featured by several prestigious sites seen here:


THE INSPIRATION BOARD:
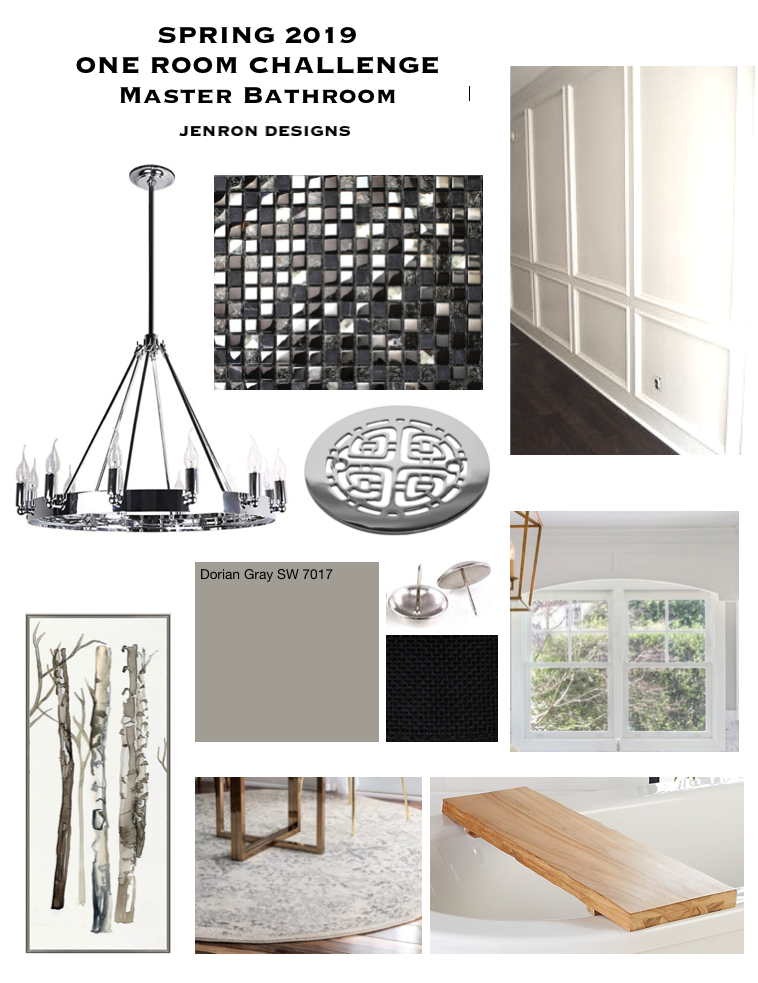
THE MASTER BATHROOM BEFORE PICTURES:
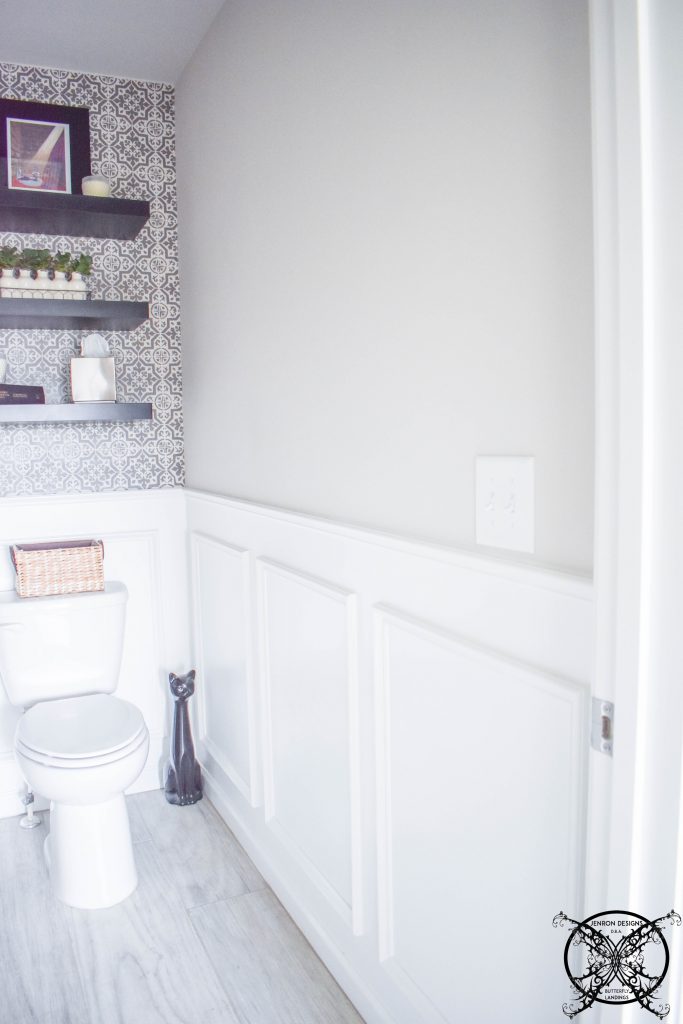
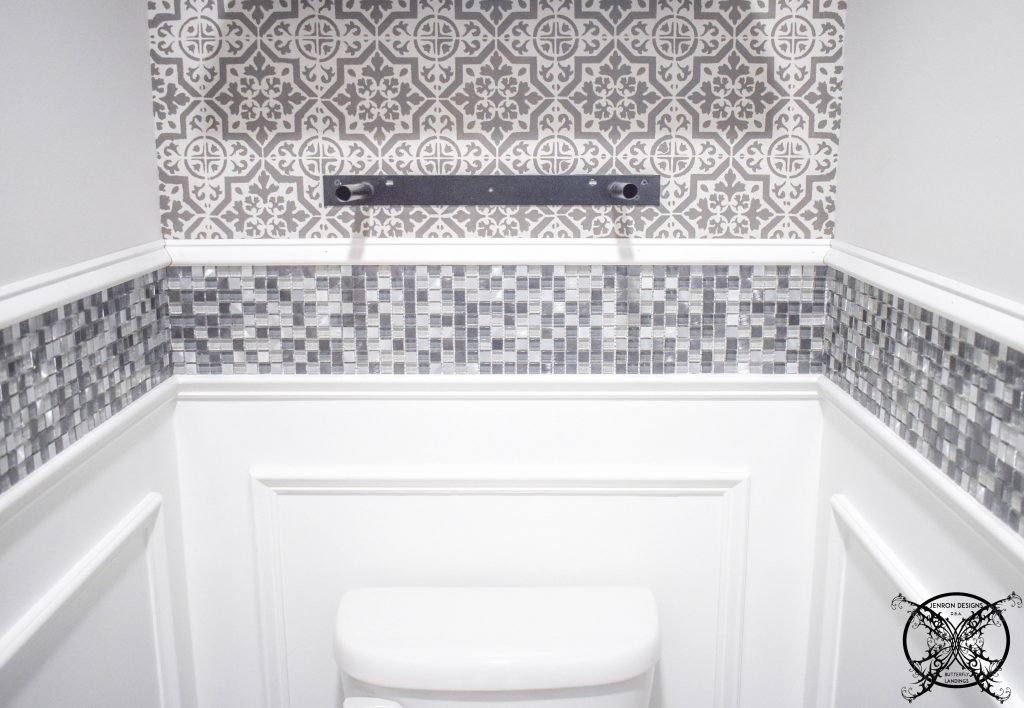
So this is where we left the toilet room after the $100 room Challenge with the chair rail height wainscot panels and the hand stenciled accent wall. Believe me we absolutely love the the upgrade, but sometimes you always want just a little bit more.
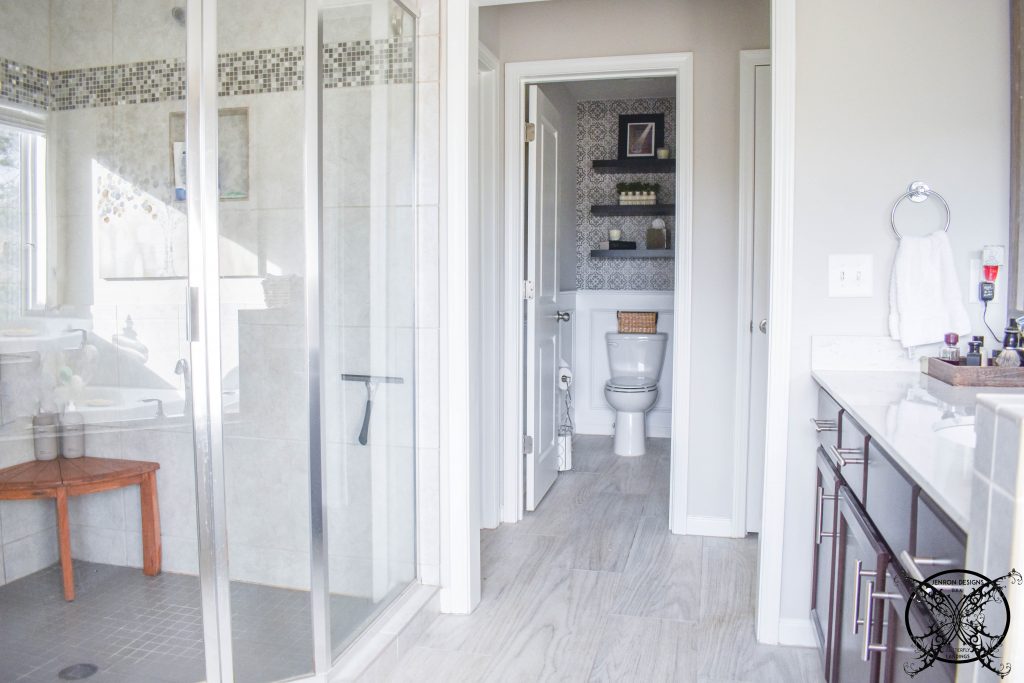
Since this room is directly across the hallway from the rest of the master bathroom it only inspired us to design the rest of the space to match our elevated throne room. However we decided it would be really nice to incorporate the tile seen in our shower over in the space across the hall to make the space feel more apart of one area, instead of being disjointed by the hallway.
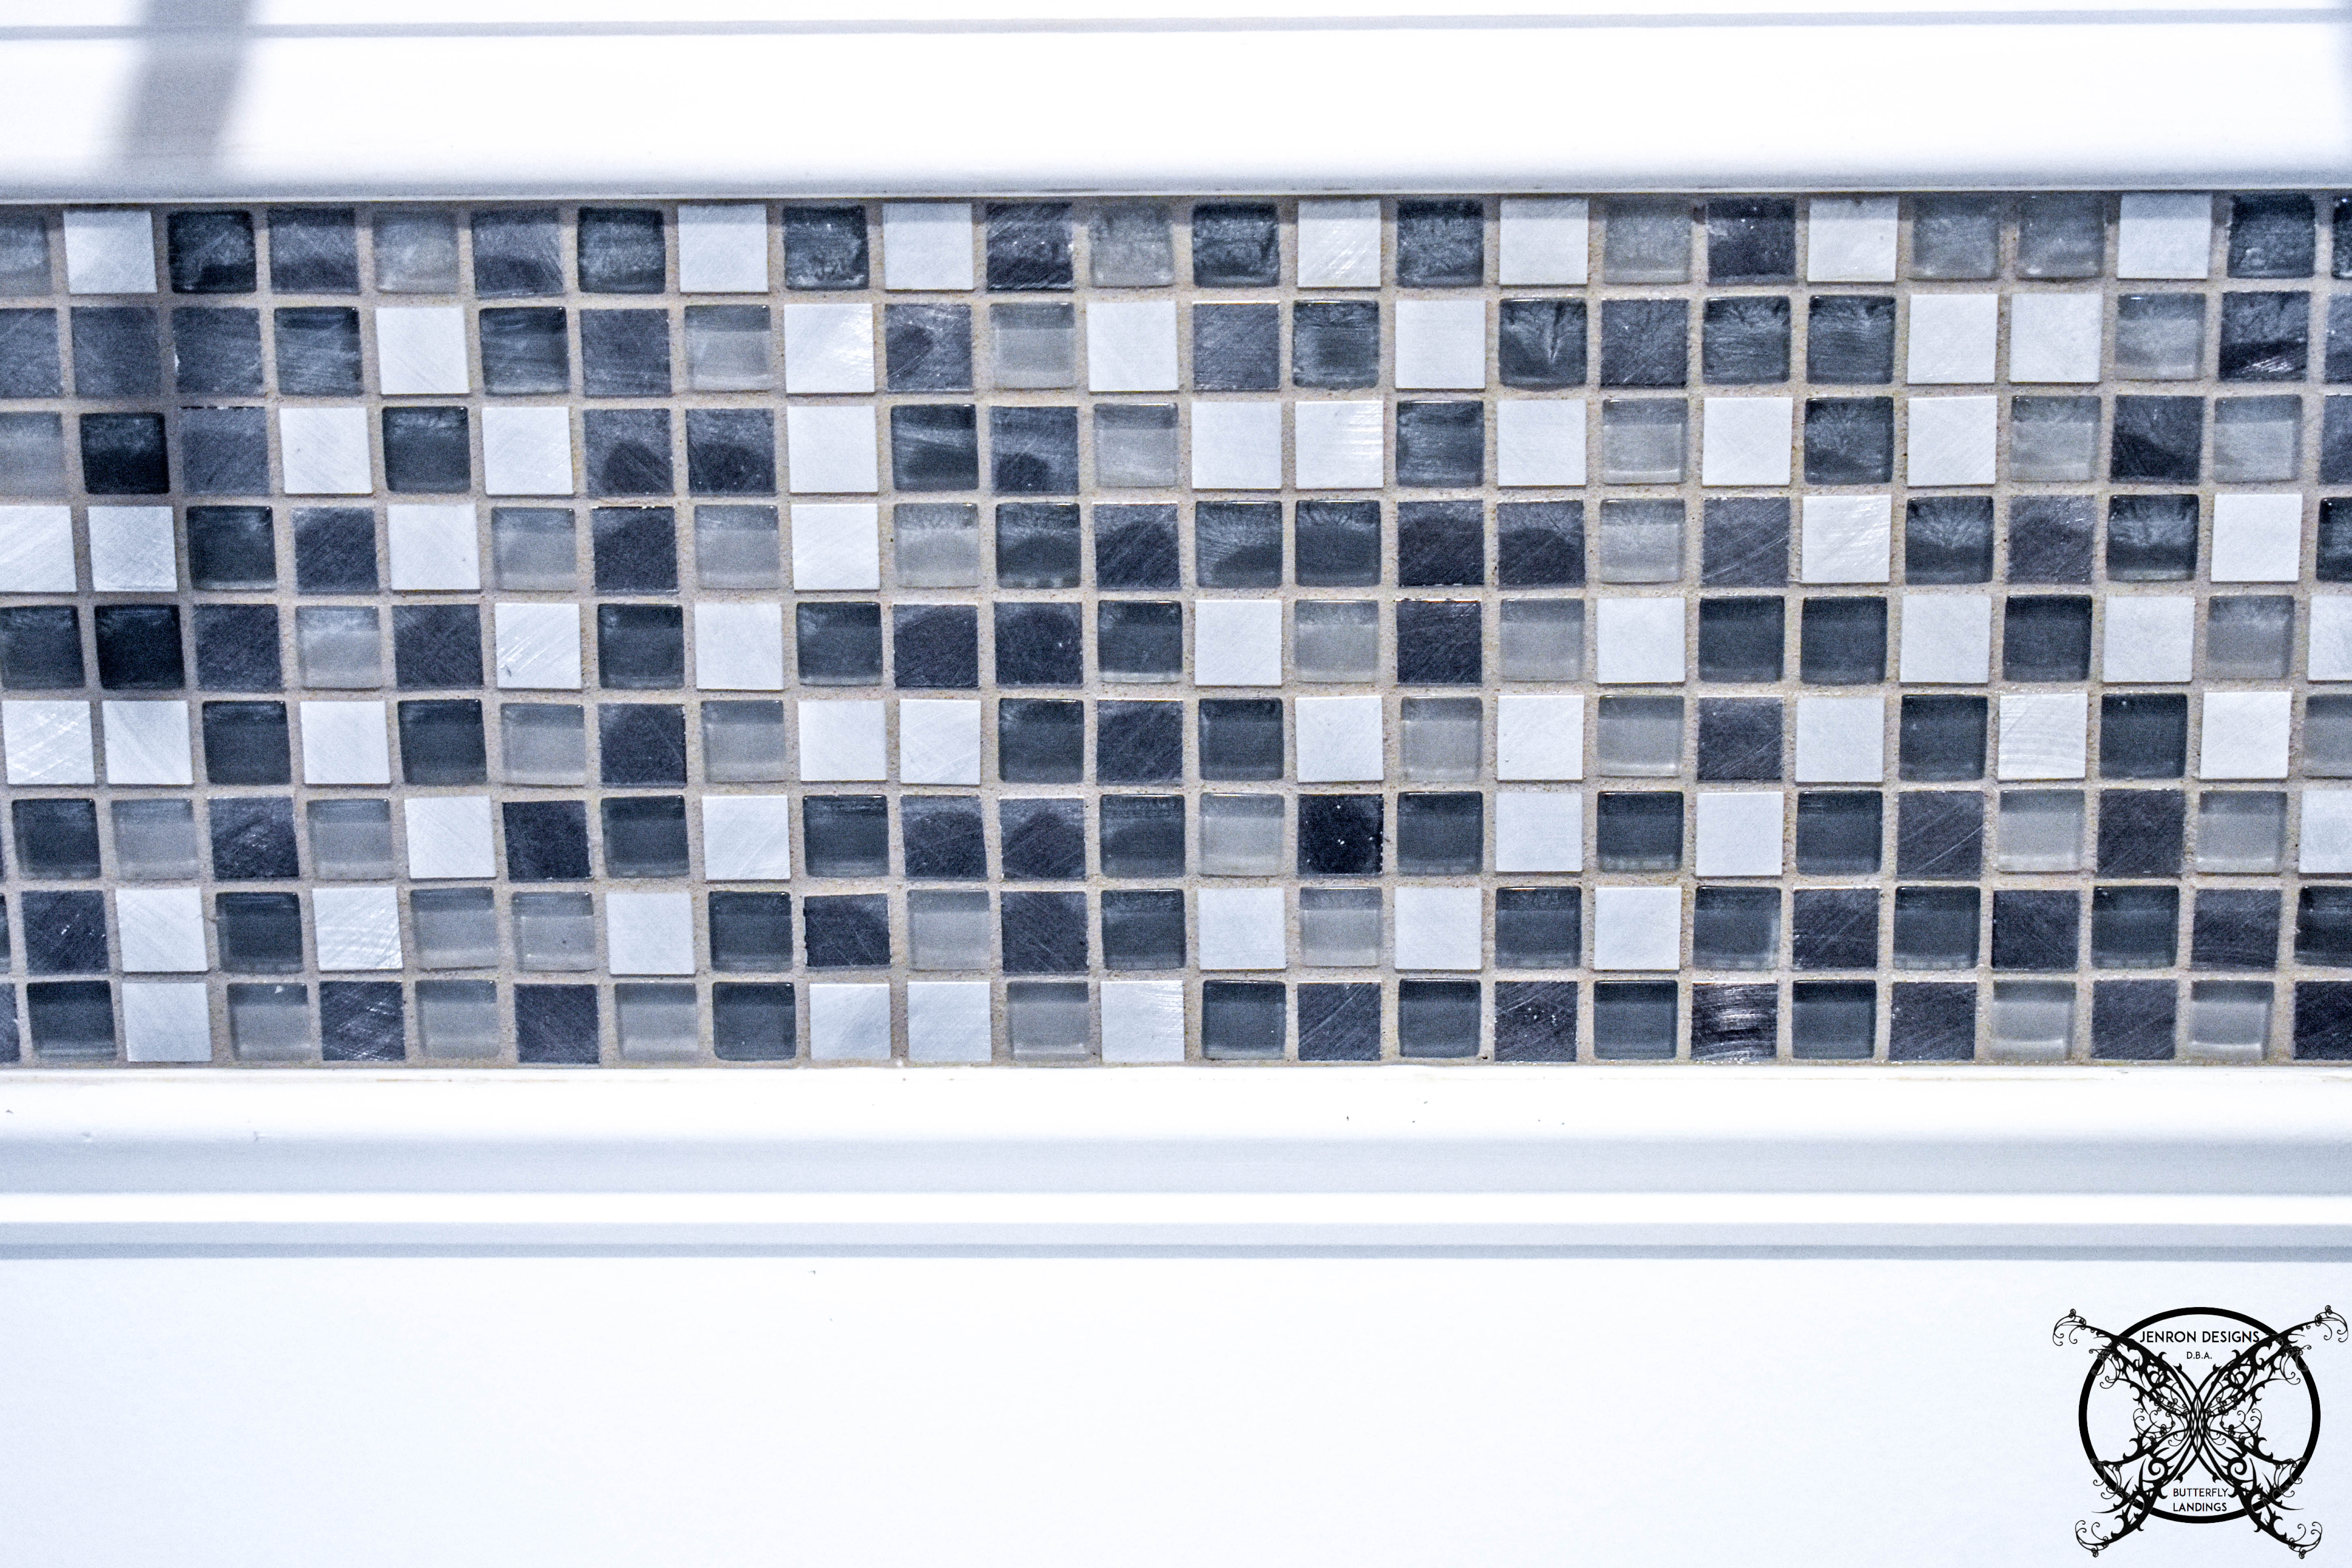
So we ordered more of our existing tile, and cam up with the plan to add an accent boarder to the top of the chair rail in the toilet room. We calculated the required amount of tile needed based on a band width the exact same height as the band in our shower which was 9 tiles high, which is exactly half of a sheet of tile. Which for us meant we could get away with exactly one box of tile for the entire project, as long as we made no mistakes….LOL.
*Yes I did know this when we were building originally this little trick saved me a bundle on the cost of tile. This one is my secret weapons when it comes to budget design. If you get all the facts, such as how big the tiles truly are, you can make an informed decision on how big you can make your decorative band before you just create waste that gets tossed and not utilized at all. In this case 9 was the magic number when the tile could be split exactly in half.
DIY A Tile Accent Wall:
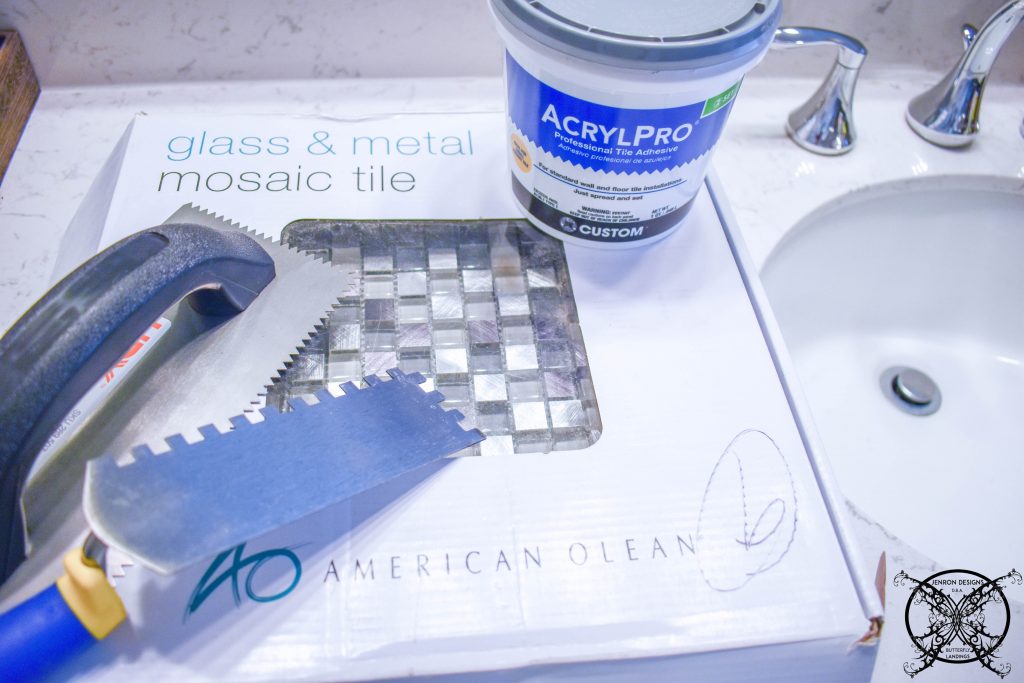
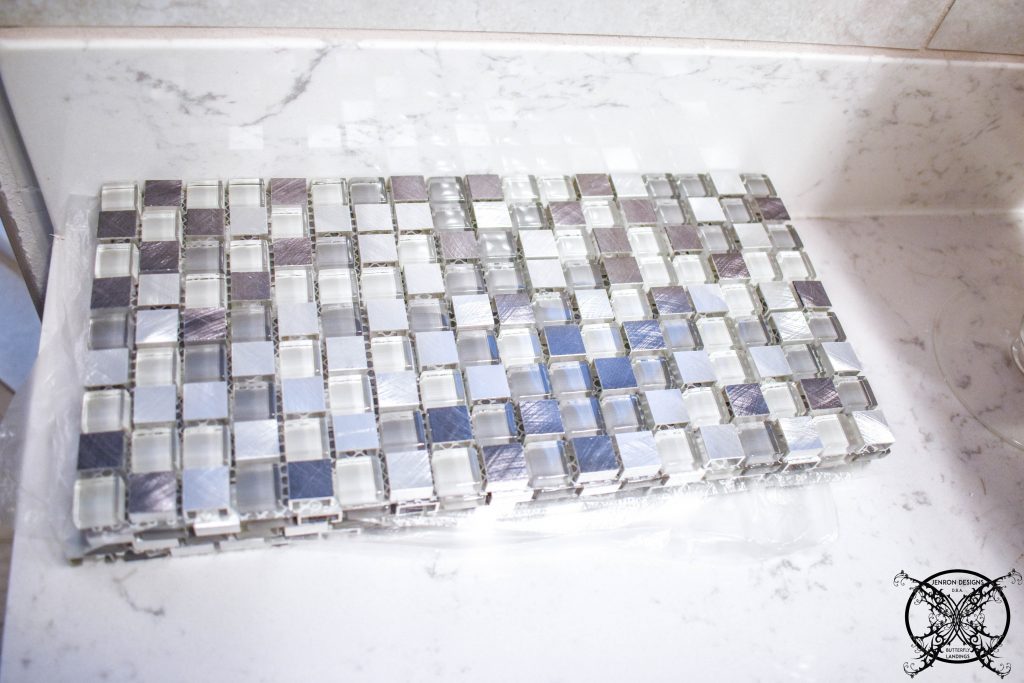
The first thing we did was gather all of all supplies for the project. As I mention above after very carful calculations we determined that if we were careful we could get away with only one box of tile which was amazing considering this was a bit more pricey due to the stainless steel mosaics tiles. One trowel was all we used I ended up taking back the at the bottom with the wider tooth placement since it was not really what w needed, and picked up a float for the grout instead. The grout we already had since the builders left behind two huge boxes in our basement of oyster gray so we will be utilizing that when we get to the grouting.
 One of the first things we did was split the tile sheets in half. The accent bands are each 9 tile high which are exactly half a tile. We used a basic razor to cut the backing. Note, make sure to put a piece of card board, we used the box, under the tiles as you cut. This way you will not cut through to a delicate surface like your very nice countertops.
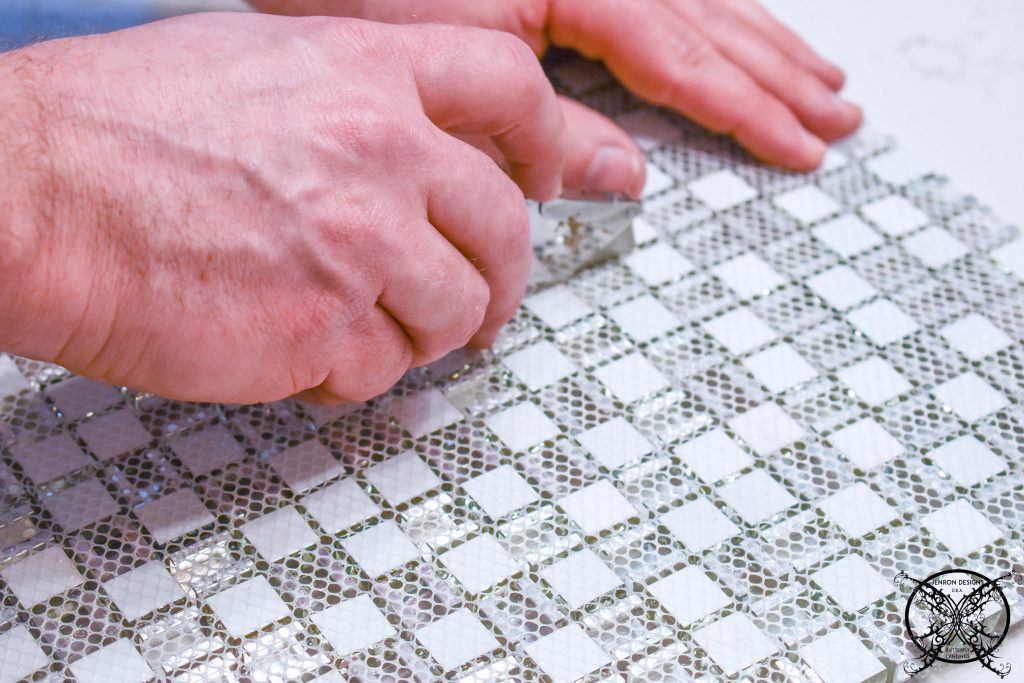
 Once we had all the tiles cut it was time to basically glue them to wall. We measured up 9 inches and added a light pencil line so we would know where to add the adhesive, without covering to much of the wall. Then apply with a basic 3 inch putty knife. Once the adhesive was filled into the space you run the trowel across to make the indentions and level the adhesive.
 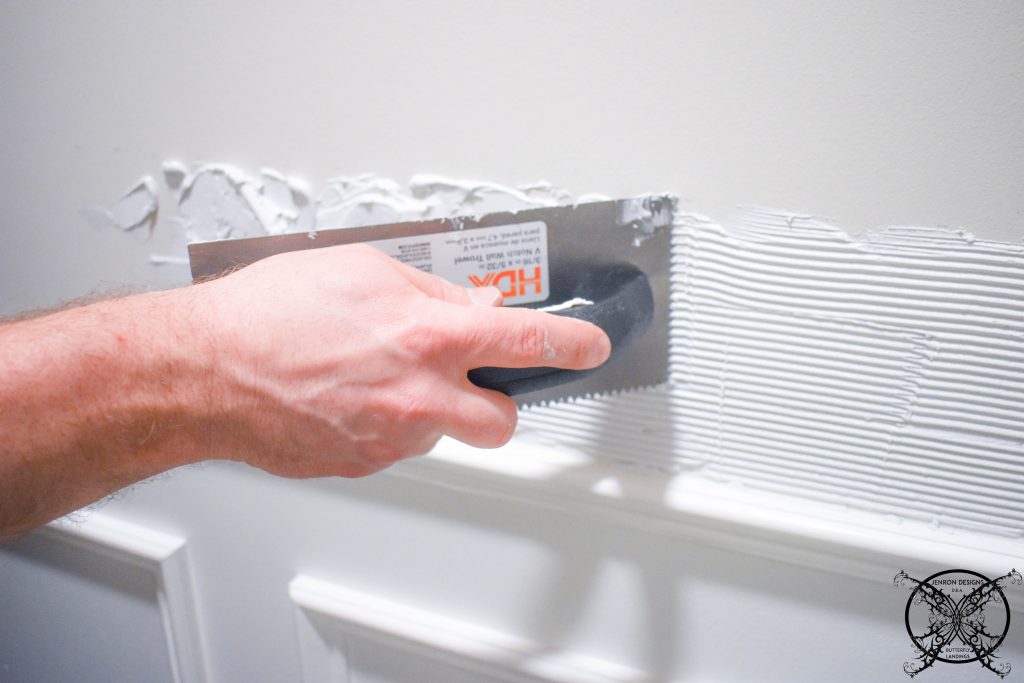 It is okay if you have to start and stop in areas just try to keep consistent lines and the adhesive level, because this is what will make you tile level. You will find that you will need to scrap the excess from your trowel between passes quite regularly. We just put it right back into the container to reuse.
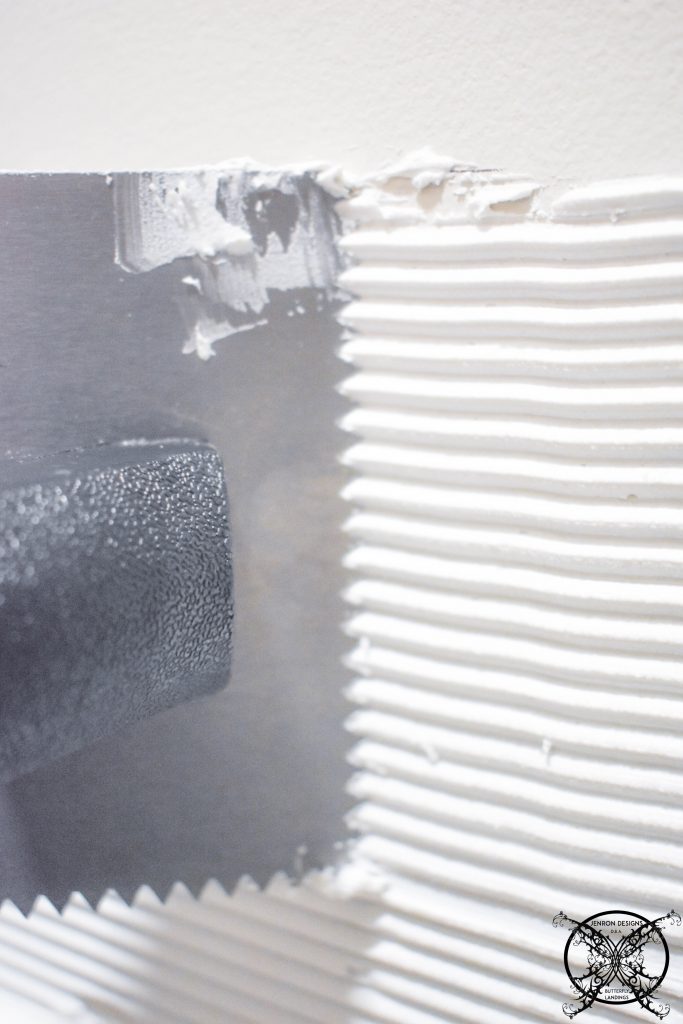
 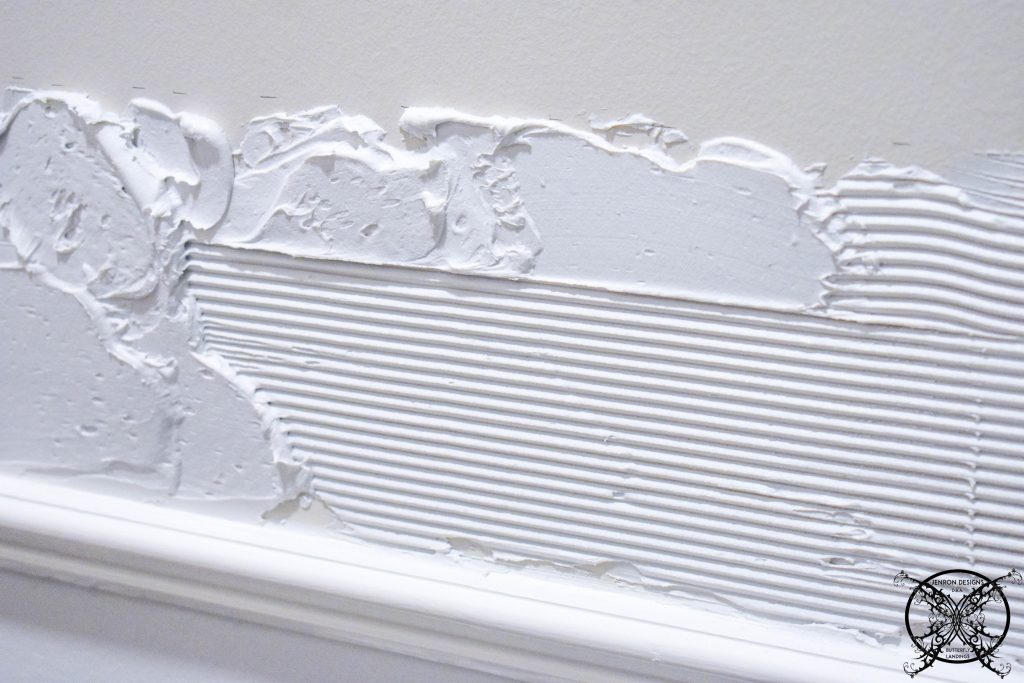 The one thing you need to avoid having is large gaps in the adhesive like this. Since this is at the bottom edge this could be problematic so we are just going to add more adhesive and re-trowel this area before we apply the tile.
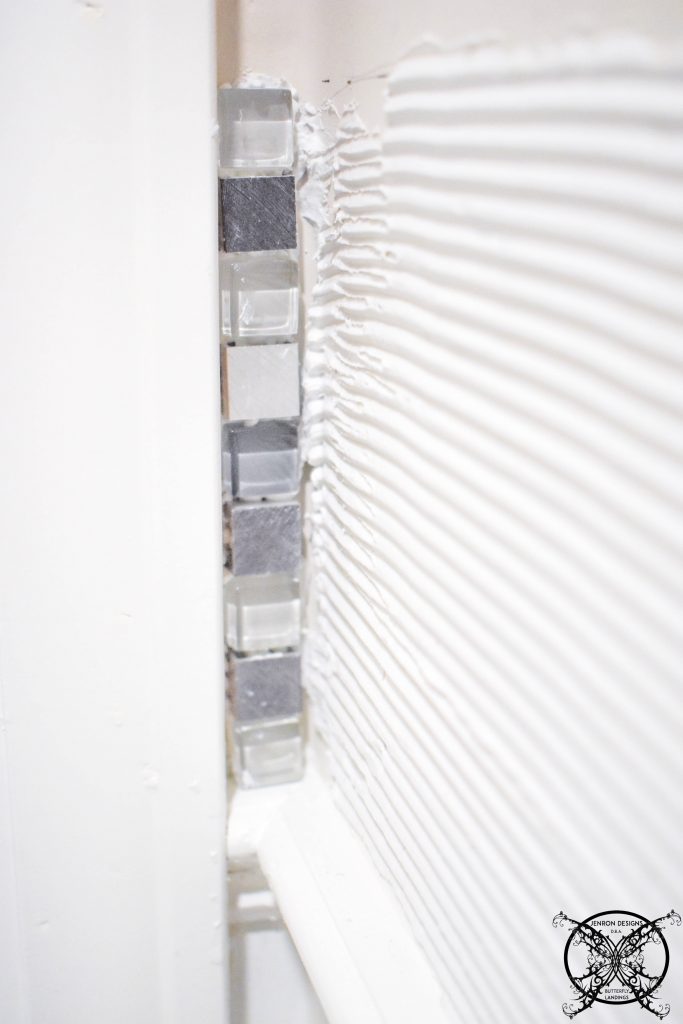
 When you are ready to apply you tile with this type of tile in vertical application, we recommend starting from the bottom the pressing it up into the wall. It also helps to leave a bit of a gap so you slide the tile to exact spacing to keep your grout lines uniform and consistent.
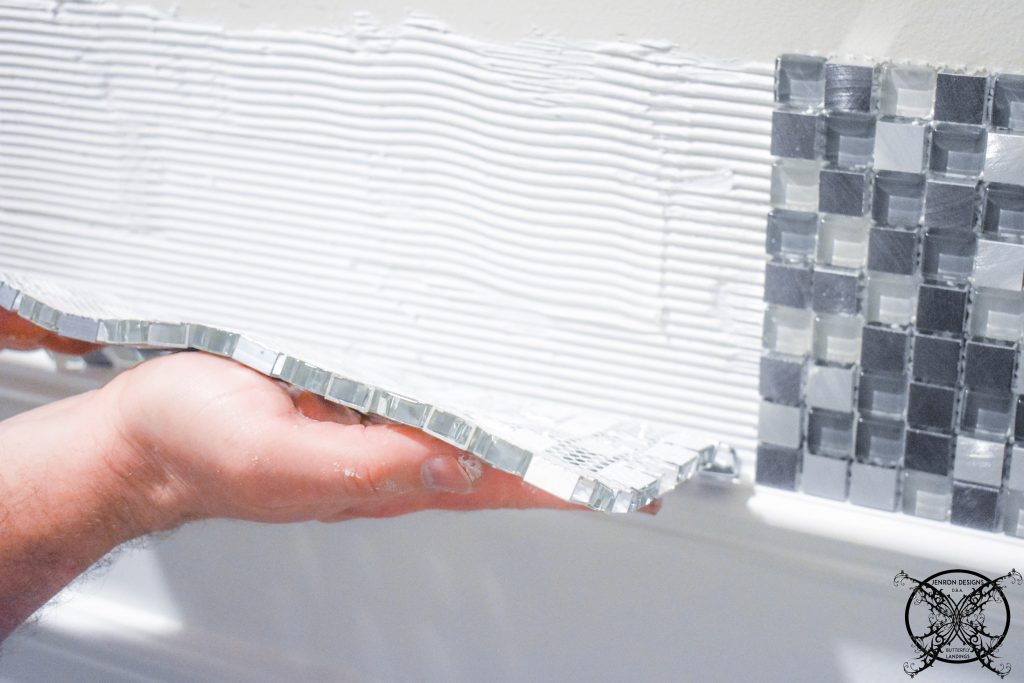
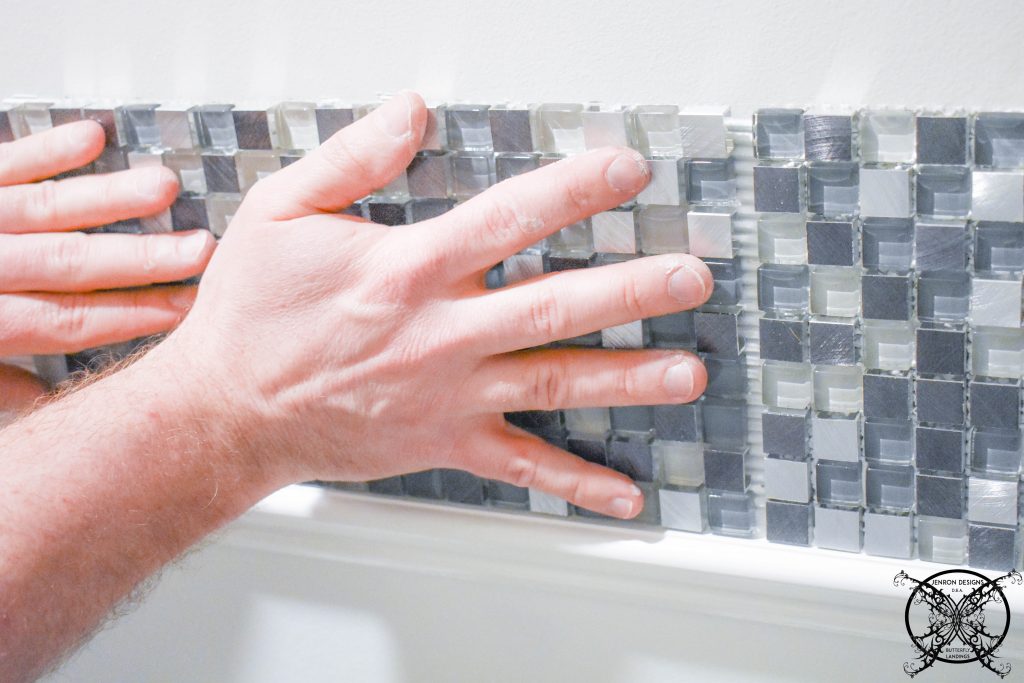
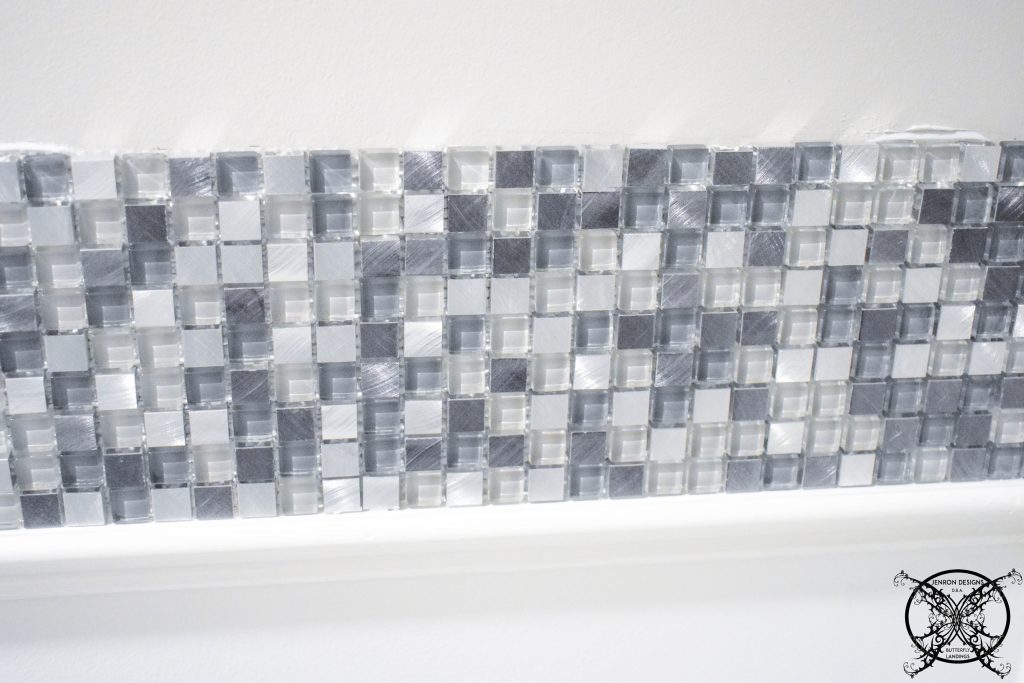
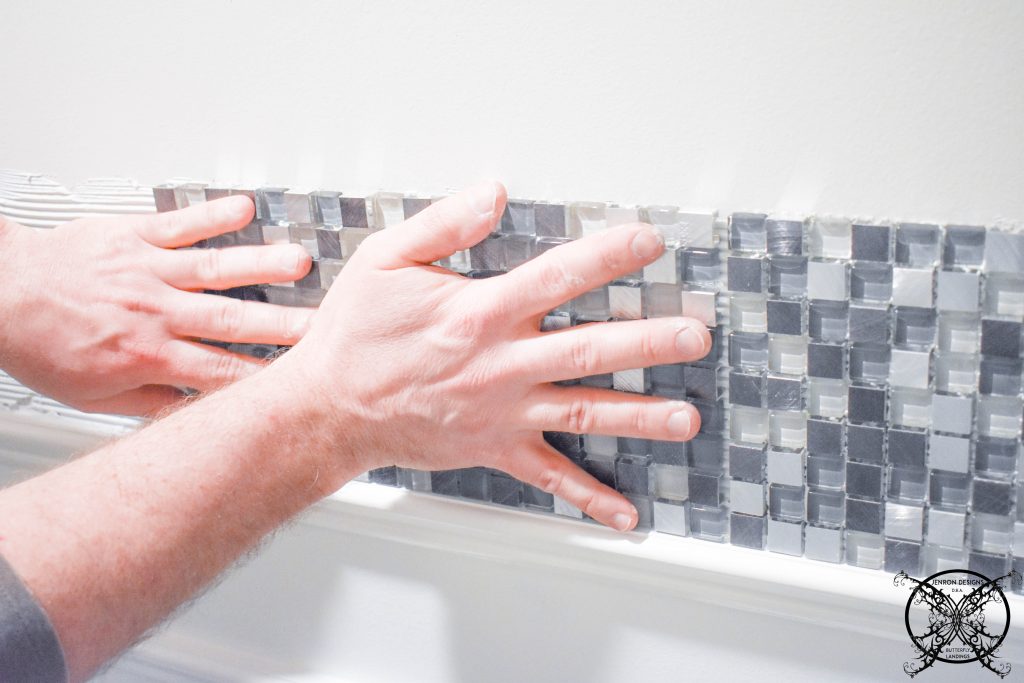 As you apply the tile you should see the adhesive press through the tile backer into your tile, which is a good sign. This will take 3 days to cure and then you can grout your tile in for a permanent placement.
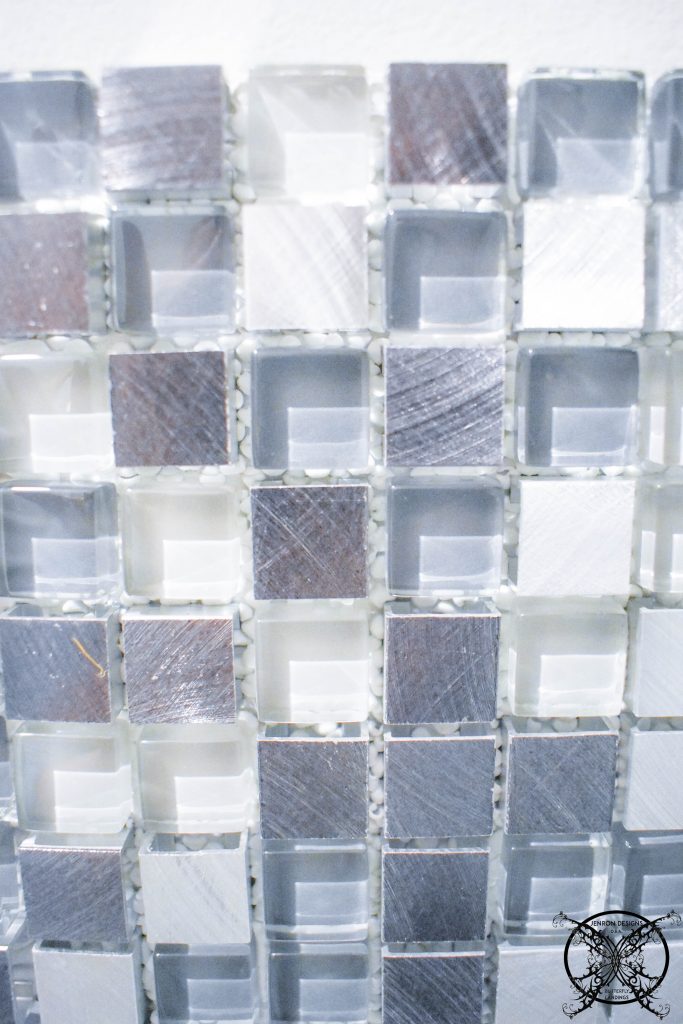
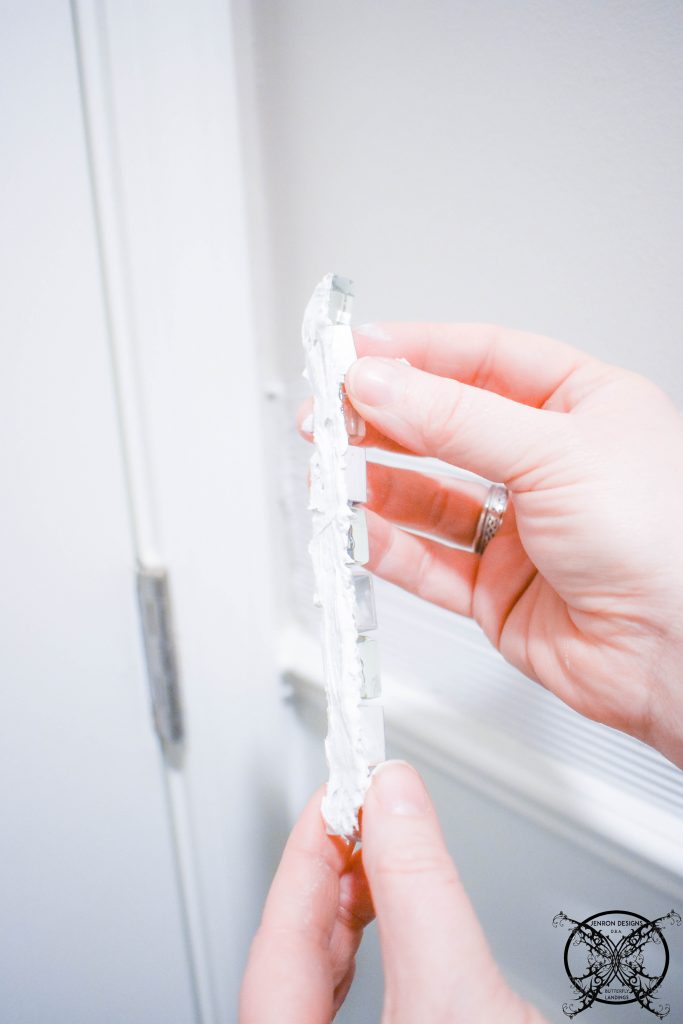
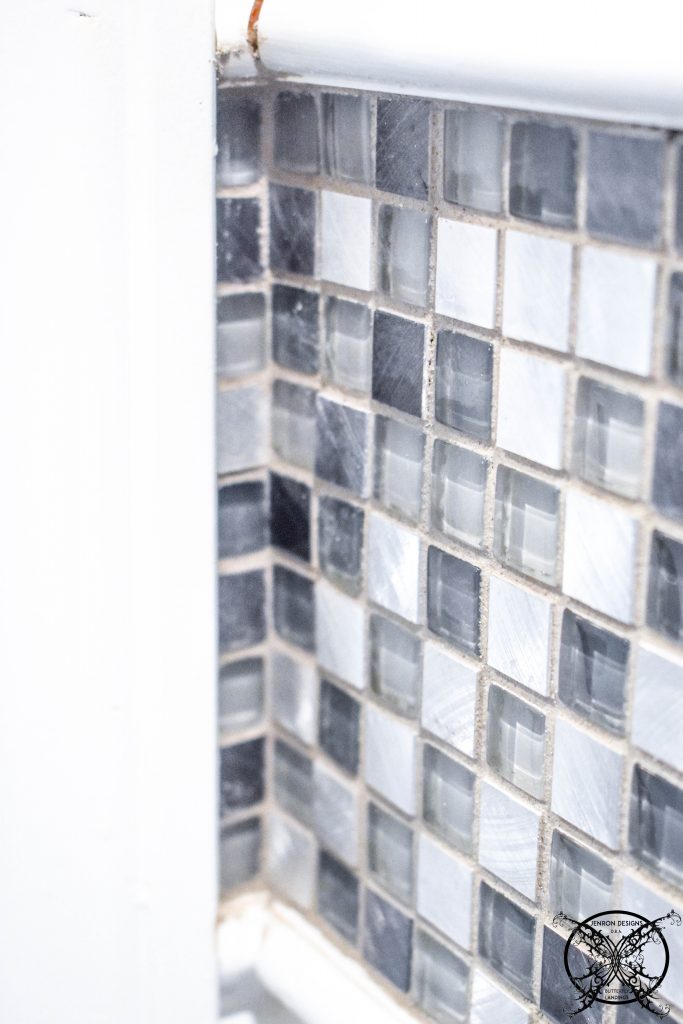
 We did have a few areas that were a little tricky that we wanted to share, like these tight spaces around the door jams. For each of these areas I cut a small 1 strip piece and 2 tile piece. Then added the adhesive, as best I could using my index finger, to the back of the tile and apply the tile to the wall.
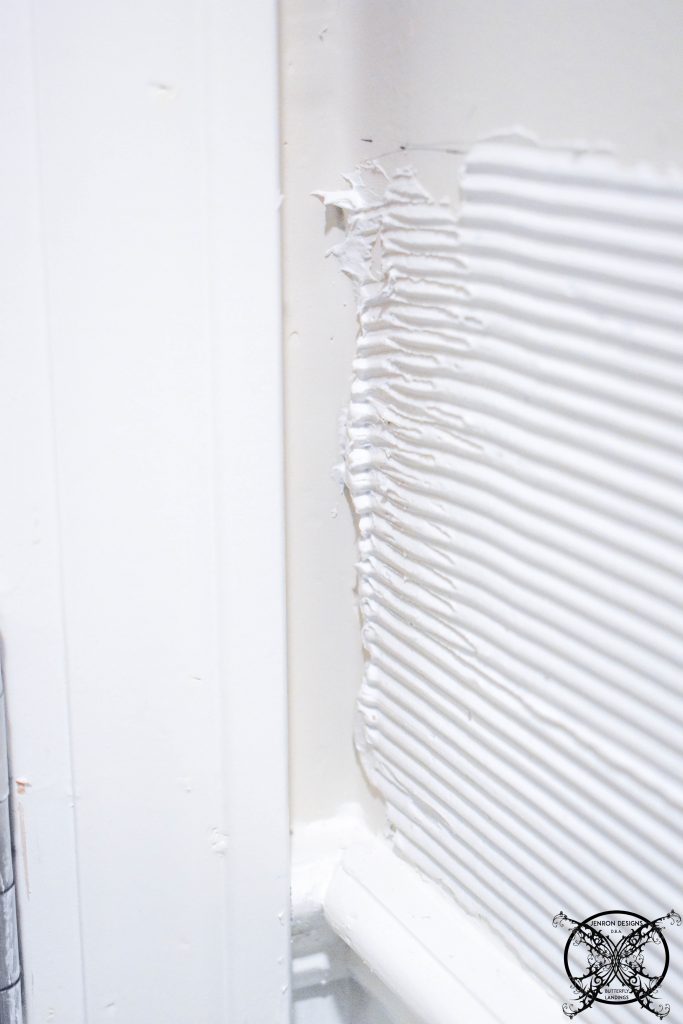
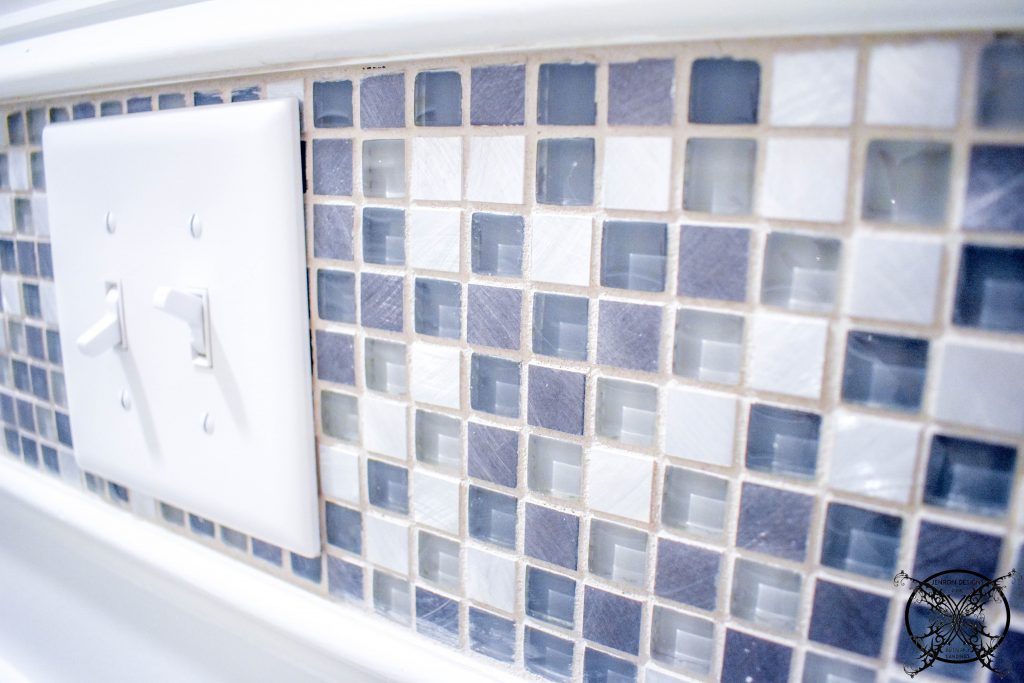
 Then next tricky spot was around the light switches. Which we recommend that you cut the power for the part. Since you will need to remove the the switches for the wall box and allow them to float. Then cut your tile out leaving a a opening for the box. You can calculate by holding the tile sheet above as seen in the picture and just counting the number of spaces over and down that need to be removed. Then using a razor blade remove that section and your tile should fit just fine.
 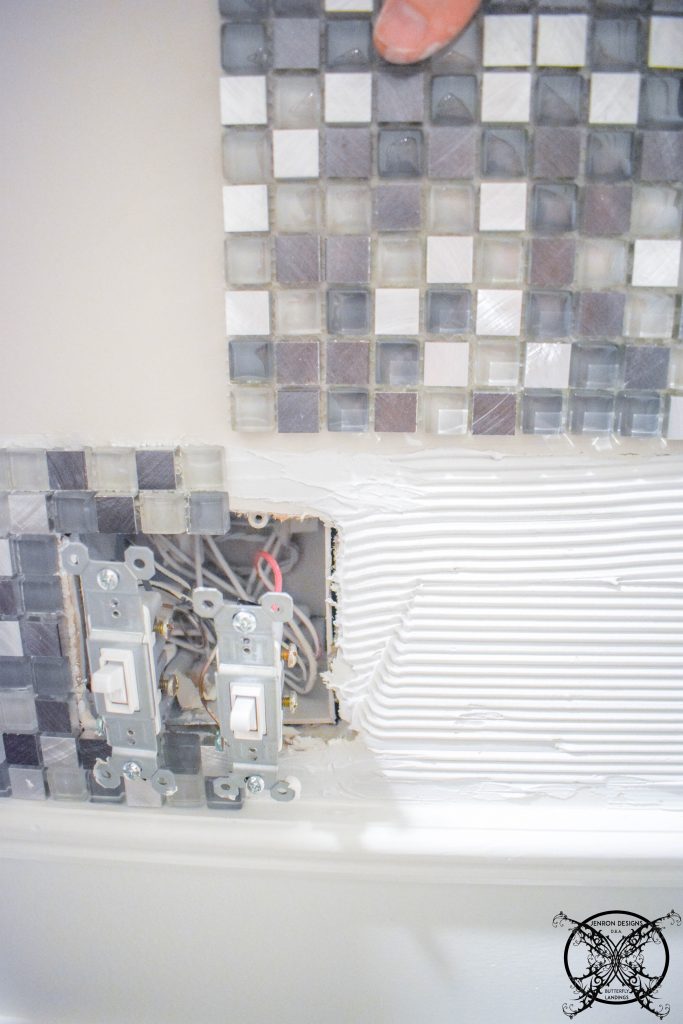 Once all the tile was installed, we were ready to add the cap trim to make the boarder accent complete.
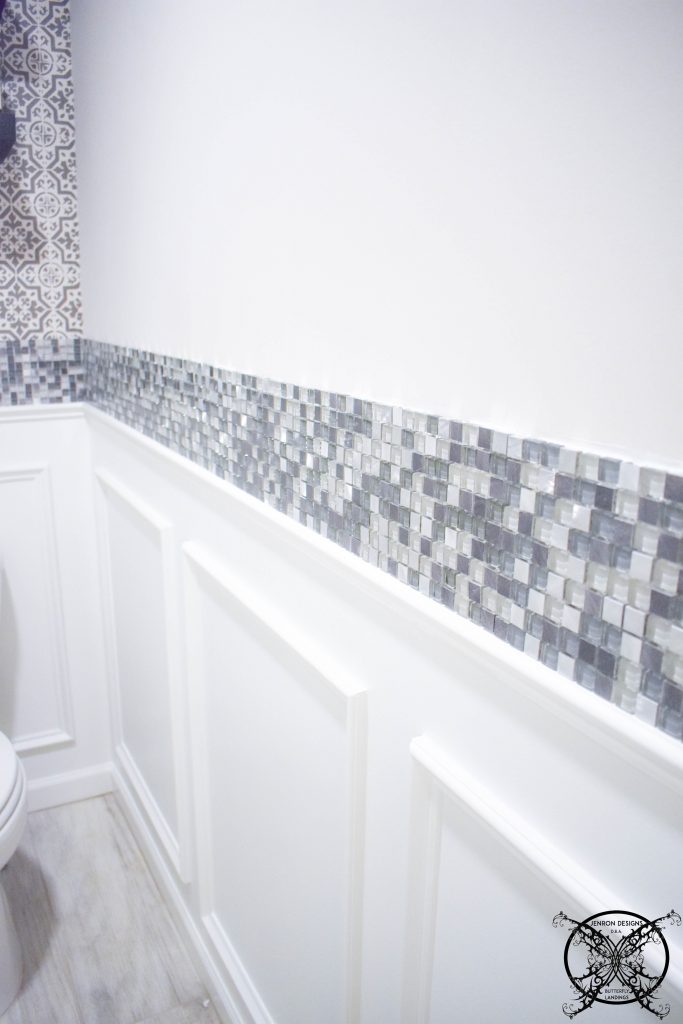
 This was done by using the same trim as the wainscot panels and the chair topper but just flipping upside down to make a top ridge cap. Since the tile needed 3 days to cure prior to grouting we were able to add the trim during the time in between and just gets us a little further ahead on this project.
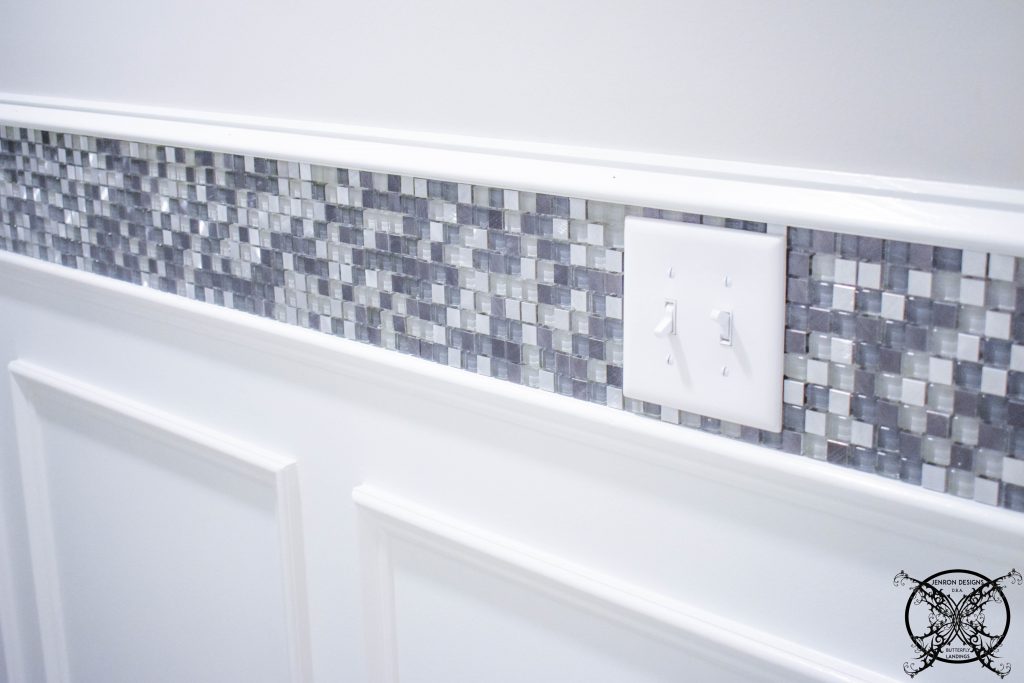
Grouting:
Ironically I think this might have been the part that was a little daunting to me for some unknown reason, but it was actually the easiest part. I mixed the grout up with water to consistency of peanut butter per package directions. Then after watching several Youtube videos I tried to add to to wall with a float, which quickly turned into adding it with my hands. 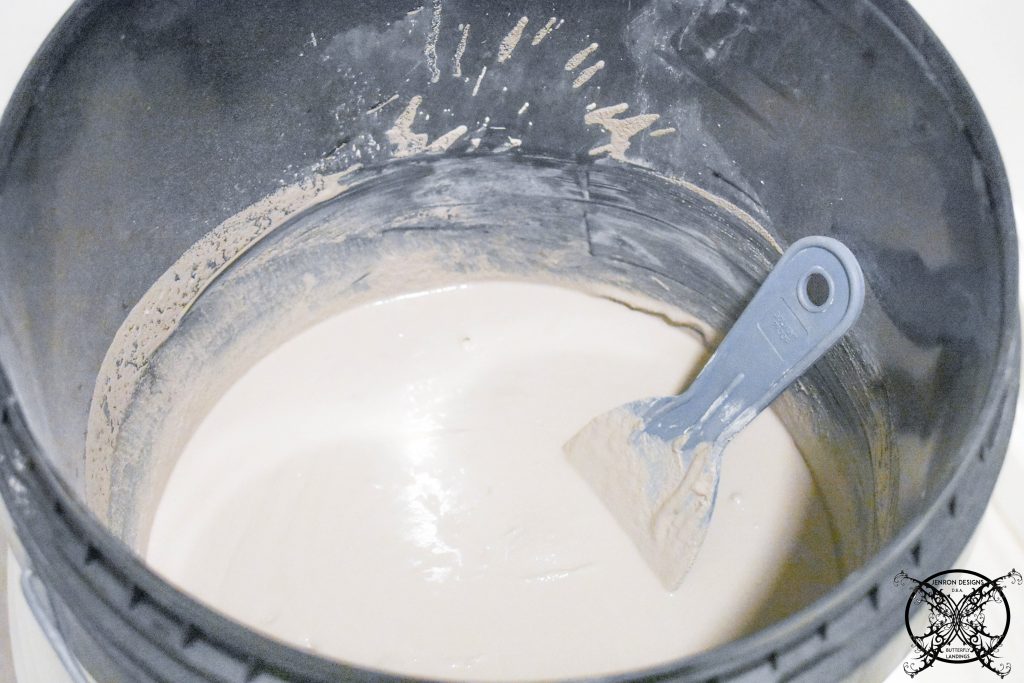 I am sure that if set tile on regular basis I would really learn to use a float properly, but I will say that for this application just dipping my hands and pressing the grout directly into tiles worked really well. It was rough on my hands, but I am used to that, being a floral designer, they take a beating anyways.

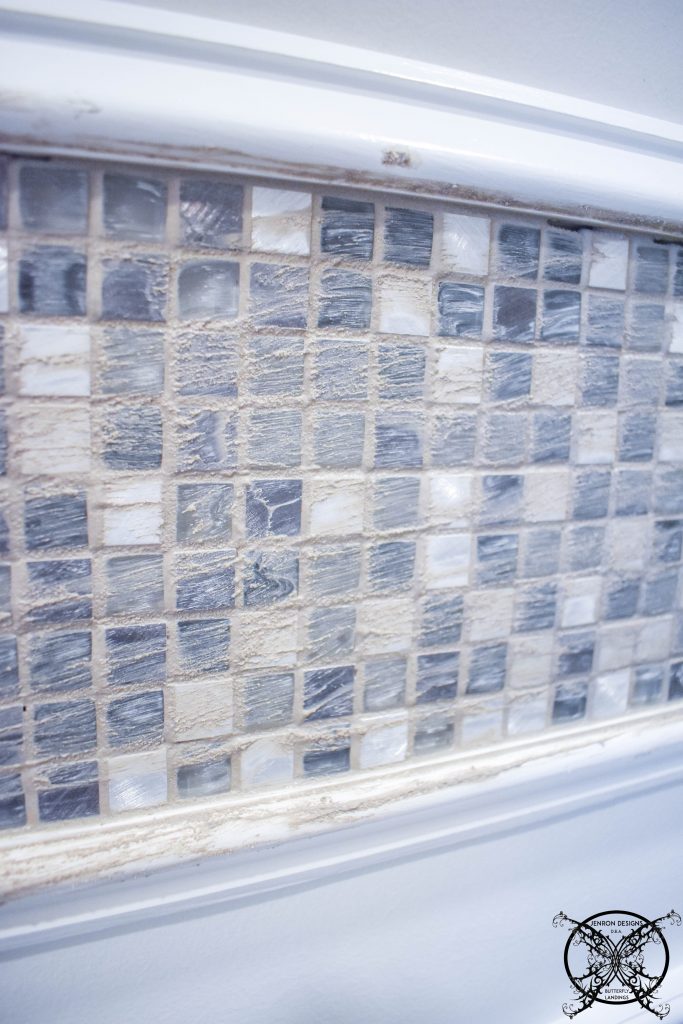 I still added the grout in 45 degree angle just as you would with the float, and I still pressed the grout into the tiles as well, the only difference was I could keep a majority of the loose grout from slide off the float onto the floor. Which is turn made the process a lot cleaner for me in the long run. Once the grout was placed on the tile I allowed it to sit for 5-10 minutes, as I continued to fill the rest of the wall, making sure that all the crevices were completely filled.
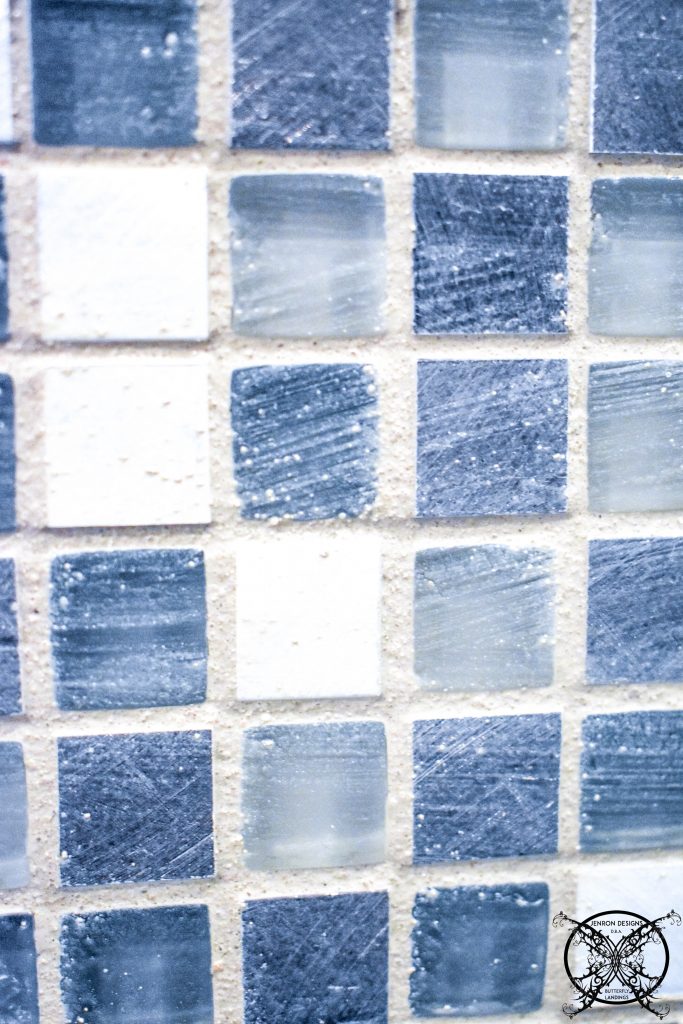
 Once I completed the first layer I took a large sponge and gently wiped off the excess grout to verify that I had indeed properly filled the the gaps. If I notice a gap I simple added more grout to that area and repeated the process. There will be a slight film left on the tile which is fine and can polished off after the final curing which is again after 36 hours.
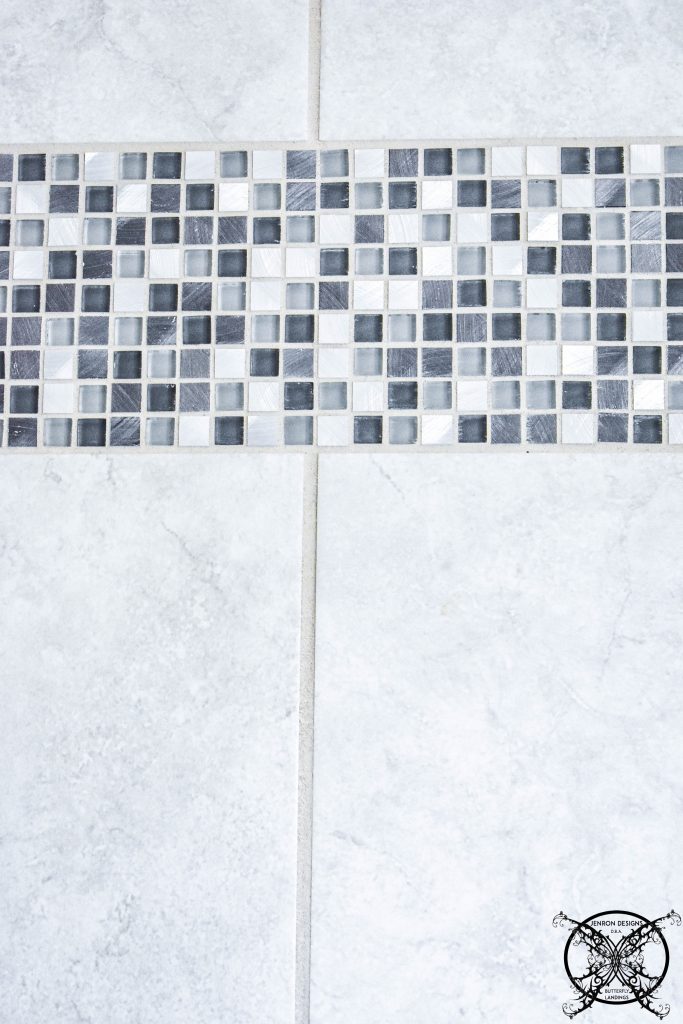
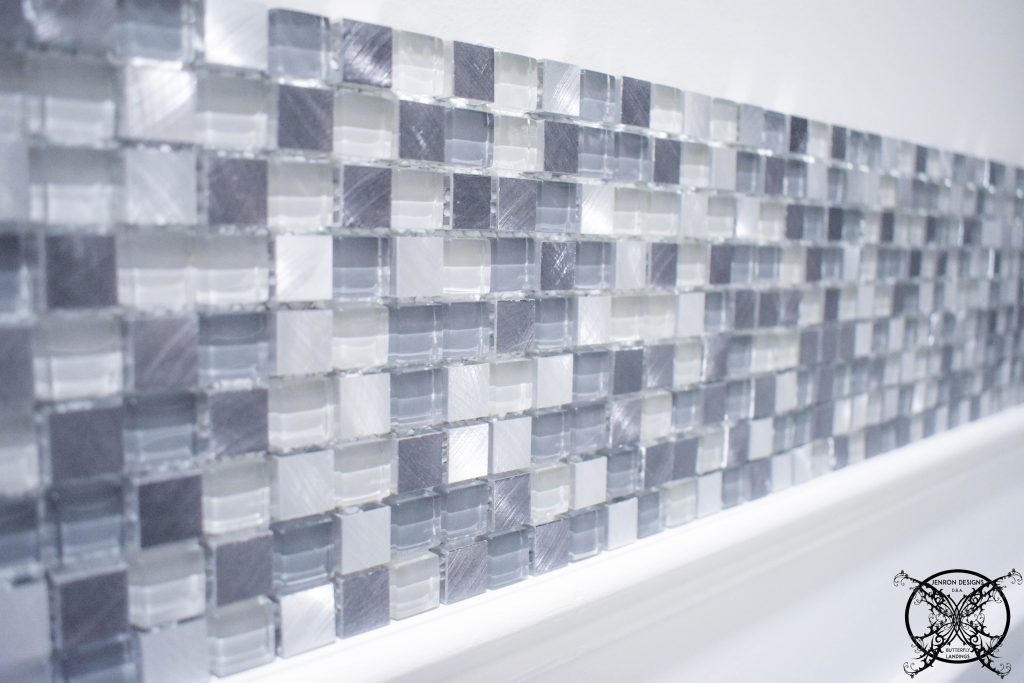
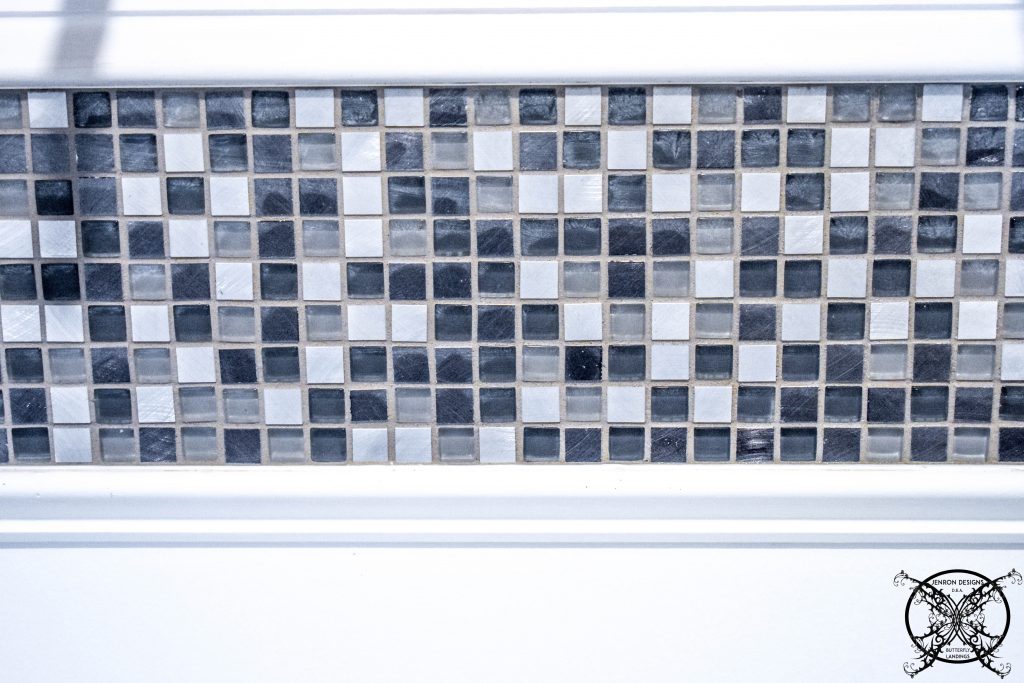
 As you can see once you polish off the film you tile is beautiful, and at this point you will want to seal your tile, especially if it is a floor tile or tile in your shower. I will be the first to tell you this the first thing I did prior to moving into to our home and I am so glad that I did. It has really saved us a ton of stains that I am sure would have normally set with out proper sealing.
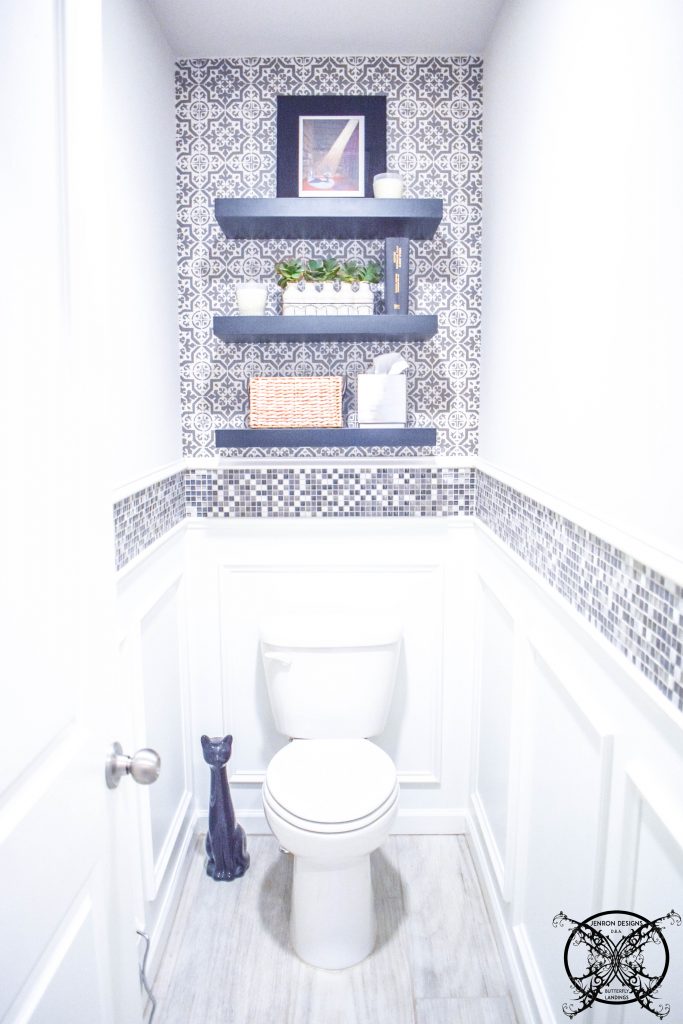
 So the tile part of this project is done and I love how it elevated this room. I am now thinking that I want to add additional wainscot panels above the tile board on the adjacent walls, which was not in the original scope of the project, but now is the time to make the decision.
THE PROPOSED SCHEDULE:
WEEK 1: Introduction, Inspiration Board, Ordering and Procurement of Supplies
WEEK 2: TILE- Tile Work in Toilet Room
WEEK 3: TRIM- DIY Wainscot Panels & Built In Window Cornice
WEEK 4: PAINT – Paint Room, Paint Closet Unit, Work on Linen Closet, (DIY-A Tub Tray?)
WEEK 5: ELECTRICAL- Light Fixtures, Chandlier Installation, Ceiling Decor Trim Out, Finishing Touches
WEEK 6: REVEAL
I’ve always wanted to learn to tile. Nice work
O wow I really enjoyed reading this! I plan on buying my first home and my biggest concerns are who can do repairs and fix things! Now I know I can!
Beautiful!!! And so clever to cut the sheet into two. Appreciate the thorough tutorial, too. I’ve never set tile, but am inspired by this post. Great job, Jen. It looks amazing!
The tile makes such a huge impact with the chair rail! Love it!
Looks great!!
Yay! I love that you found a way to stretch the budget even further with that tile hack. Great idea!
Your post makes me feel like I could install tile on my own! Thank you for the through instructions and photos. Great job!
It’s getting really pretty! I love the color palette you chose, and these tiles are a perfect detail adding texture and pattern.
Fiorella |
I love the mosaic tile! I want to add some of this to our guest bathroom, but was nervous about tiling. Your post makes it look so easy!
Great job with the tiling! The bathroom looks great already!
The tile job looks great and definitely ties it all together!
I am feeling much more confident about tiling for the first time now! The tile looks beautiful my friend.
It amazes me how easy it is now to do your own tile!m. I think I have a project to do!
Just when I think you have a room done, you add another detail to make it pop! Love how the tile pulls together the rest of the room.
Great instructions Jen! I also really like grouting, I find it the most satisfying part of the tiling project. Looking forward to seeing your completed bath
It looked beautiful before but the tile just finishes it off so nicely. Great tips for tiling too!
The tile looks beautiful! I love the wood trim on the edge!
Looking so beautiful and I love the tile.
I do believe I learn something new everytime I come to your site.