Easy Ceiling Accent & Chandelier Installation
ORC Week 5: Easy Ceiling Accent & Chandelier Installation this the light at the end of the tunnel. See how the new chandelier will bring new light to our project along with this custom ceiling design.
Welcome to ORC Week 5: Easy Ceiling Accent & Chandelier Installation as we install the new chandelier and we are hoping this brings us some light as we head toward the end of the project tunnel. This season on the ORC we will have been completing our Master Bathroom, which you all may remember got started last fall with our little toilet room upgrade, for the $100 room challenge, The Game of Thrones. That challenge just left us thirsty for more beautiful things like a chandelier, in our Master Bathroom
WEEKS AT A GLANCE:
WEEK 1 WEEK 2 WEEK 3 WEEK 4 WEEK 5 REVEAL
Just in case you maybe wondering exactly what The One Room Challenge is, here is the link, and the scoop. This event was started by Linda Weinstein @ Calling It Home and is hosted twice a year, in April and October for the past 15 seasons. The ORC has hosted over 300 interior designers & home decor bloggers, that have joined together in this challenge to makeover one room in their own homes. The participants have total of six weeks, from start to finish, to complete a full room transformation. Over 3,500 rooms have been transformed through the One Room Challenge to date, and many spaces have been recognized and featured by several prestigious sites seen here:

THE INSPIRATION BOARD:

Easy Chandelier Installation:
This is the last week to really get things done so we have been doing several projects to get this room complete. The chandelier came in and we loved it. Below is the area where it needs to go, but you may notice there is no existing electrical. So we needed to run a box up to the area of the ceiling and add in additional switch to control the light. This is an area I would recommend that you hire a licensed electrician, especially if you do not have the background in Electrical as my husband does. However in the spirit of the competition, we are going to show you the full DIY portion. 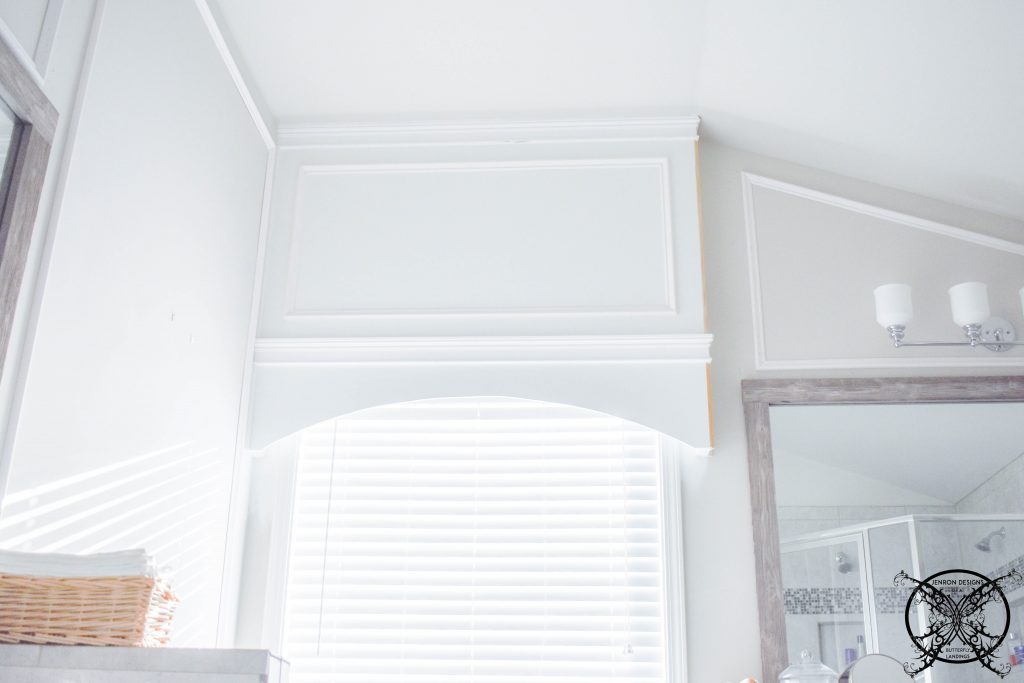 Before starting any electrical project you will want to shut off the circuit breaker to area that you are working. Then the first thing we had to do was verify the placement of where to mount a weight baring electrical box. The box below is standard code for any weight barring light fixture or ceiling fan in residential use.
  This verification was done from the attic. So while you are up there, this is a great time to go ahead and pull the wire you will need as well. This process is done by using a wire snake, and fishing down through the wall and pulling the wire up through your existing box area over to the new light fixture box.
Once you have the wire in place with a little extra it is time to cut your hole, find the center and cut a hole in your ceiling to install the brace kit. The brace is meant to attach or span between your rafters or beams directly to brace your electrical box.
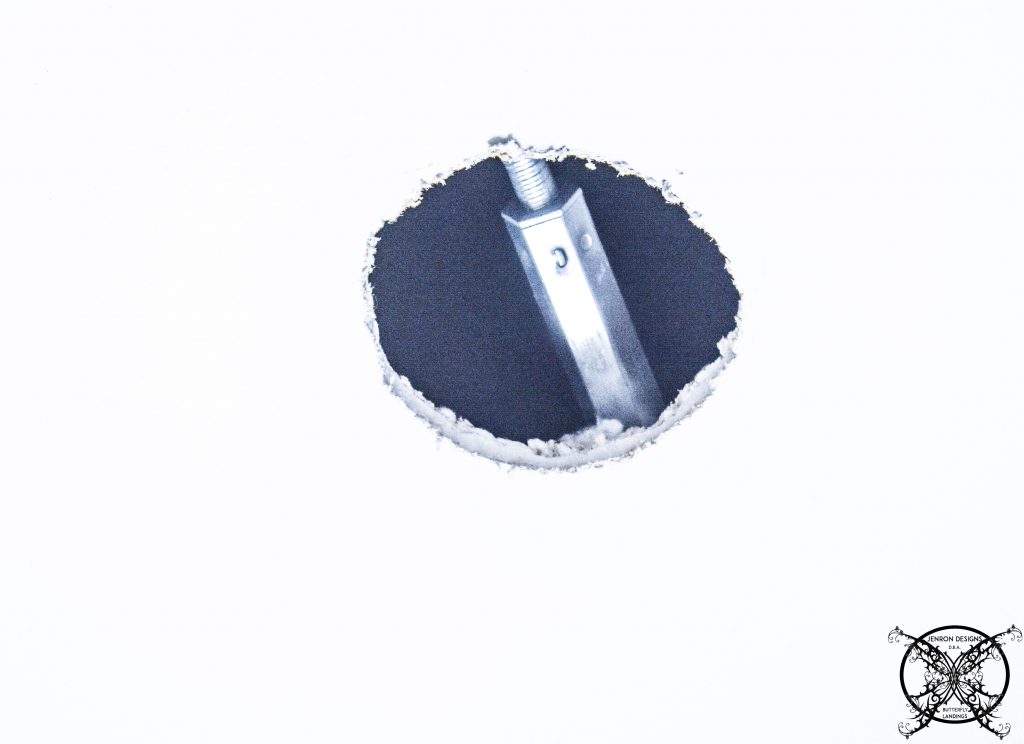 Then you install the electrical box directly to the support bar. Now you are ready to pull the wire through the box and install the chandlier.
 ![]()
For the switches, that will require a little more work since you are going from a double box to a triple box. As you can see I currently have one dimmable light and an exhaust fan in this box. We will be adding a second dimmable switch for the chandlier, and cutting out the wall for the bigger box.
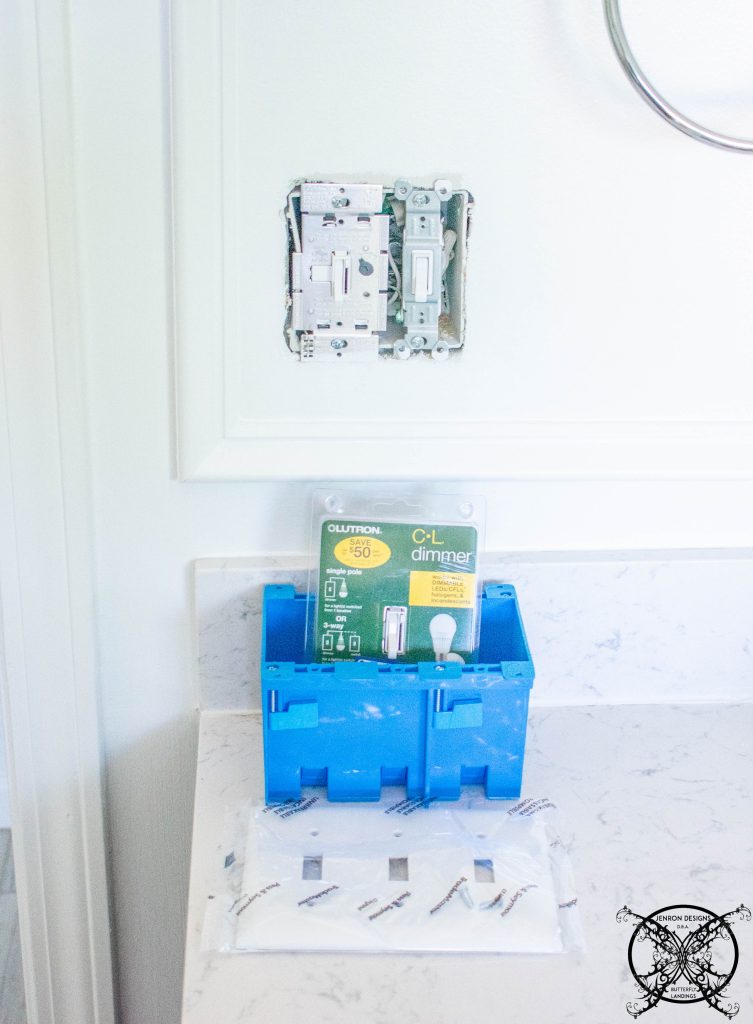
Again, MAKE SURE THE CIRCUT and ALL POWER IS OFF! You will want to remove the the existing switches. You can see where the new line has been run to the far right since the wire is not already cut. This will help you with switch placement too. Since I want the fan switch to be closest to mirror, and the vanity light to be the closest to the door. 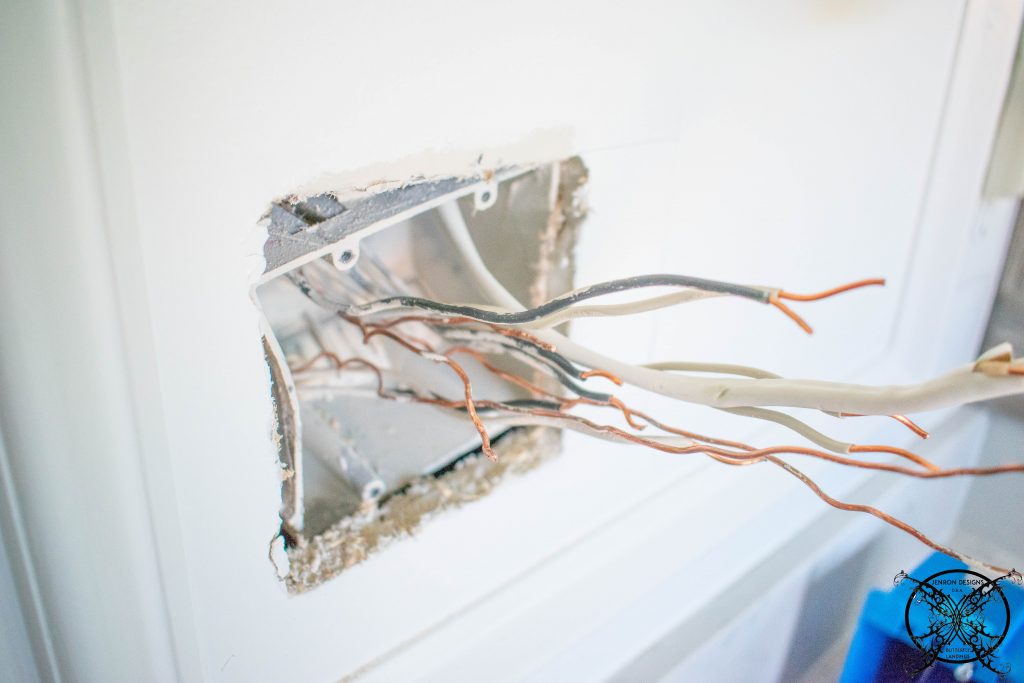 Once you have the old box cut free from the wall screws you will cut out the sheet rock to make more room to remove the box. Measure the box and draw a basic line on the wall to give yourself a template.
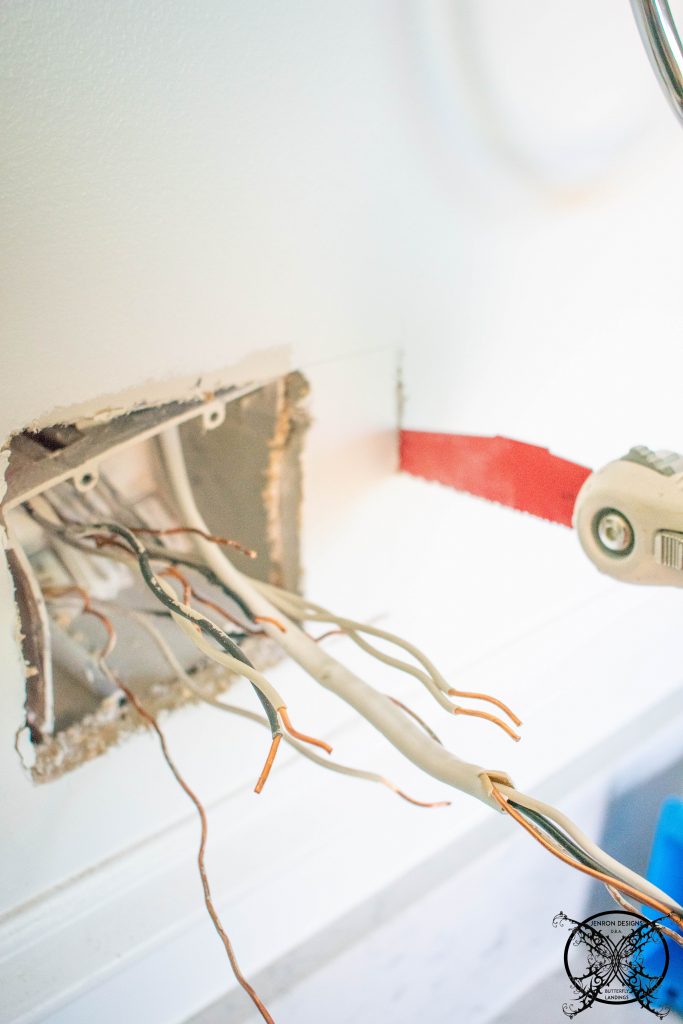 We were very lucky and came in just shy of the next stud, so three switches is our max capacity in this space. If we had run into a stud we had a little room to shift back to the left, but we had already done preliminary work with a stud finder and our pre-build pictures to verify what was in that wall.
 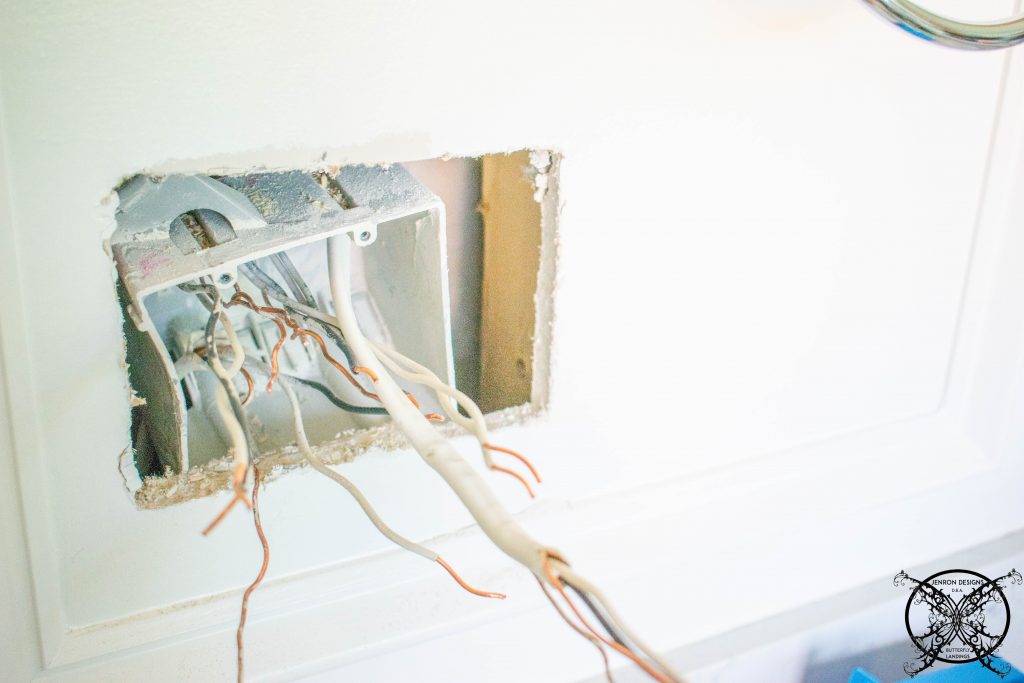 We added the new box with our desired layout of switches. Then stripped down the new wire for the chandlier switch in the middle.
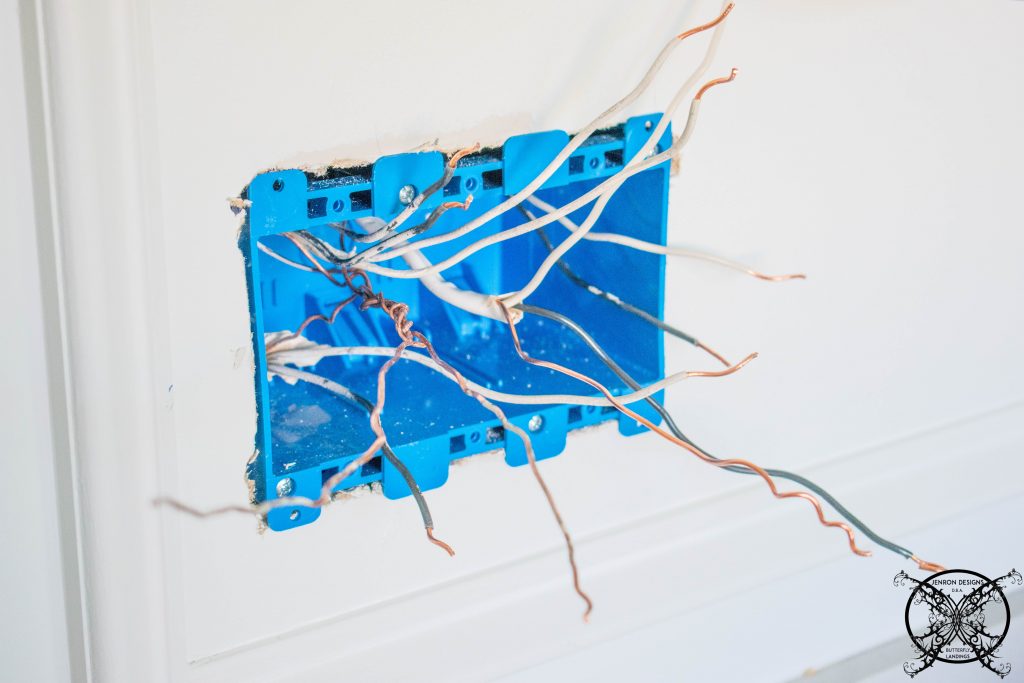 Then wired up all the the switches and ground wires accordingly to complete the circuit. Then put all the switches neatly into the box.
 ![]()
 Now we have a bank of three switches versus two and both our vanity and chandelier lights are dimmable.
 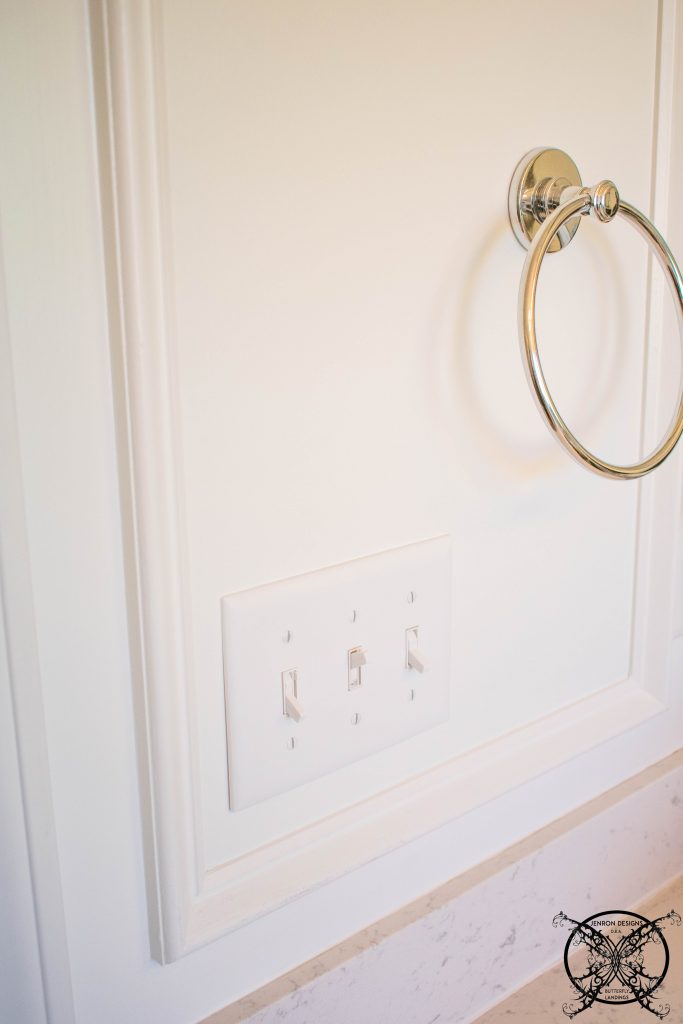 I am so excited to have a gorgeous chandelier above my jetted garden tub, which feels like it should have always been there since day one. It adds just the right amount of formalness to the space but still keeps that modern industrial farmhouse vibe that I love so much. Meet the OSAIRUOS W39” Vintage Rustic Rod Iron Chandelier Farmhouse Ceiling Pendant isn’t she pretty?
 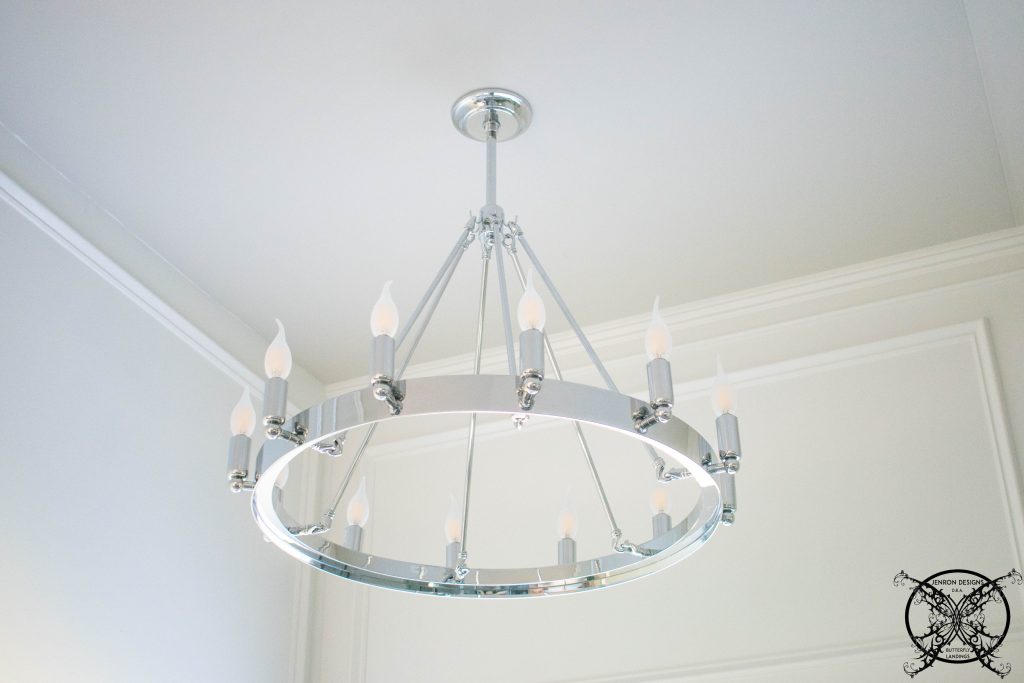 Also I know I had mentioned using Edison bulbs in this fixture, which I do love. However, when I saw this fixture in place I felt like the frosted candelabra bulbs matched the vanity shades better. Also a little birdie at Highpoint Market mentioned that Edison Bulbs were on the the way out as far as trends go, so there is that.
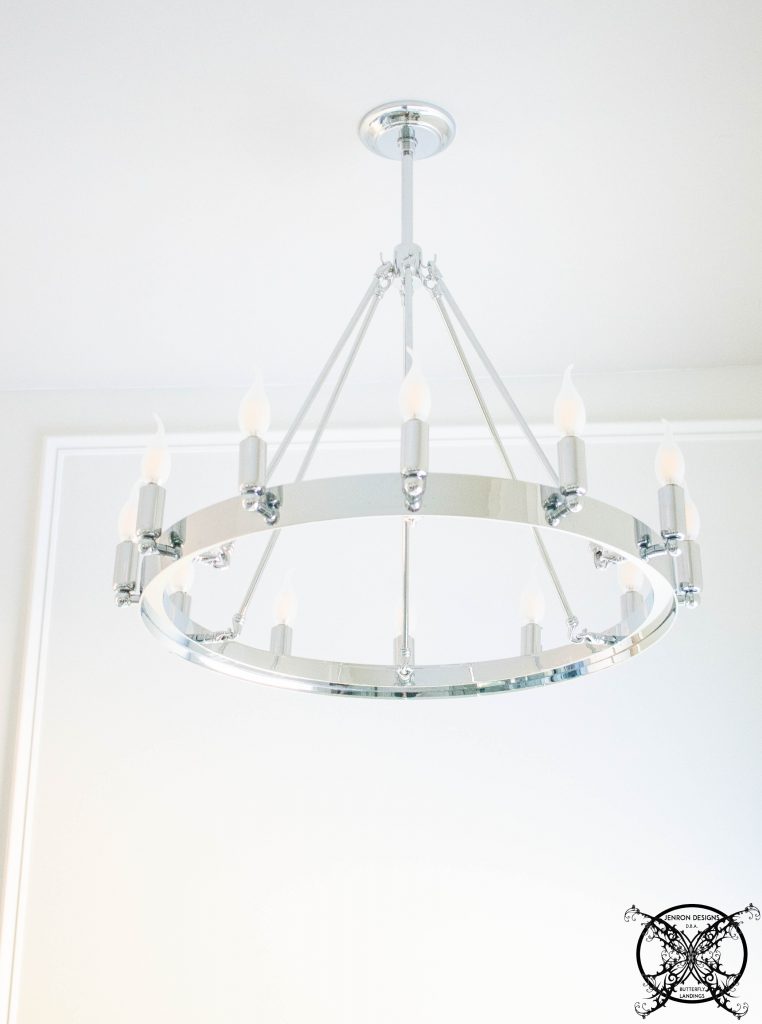
Not to. mention that Edison bulbs are not very functional for a bathroom space since the amount of light they put out is not so great. They are really great for creating mood lighting, so I say if you love them keep them for your media rooms and bar areas, but maybe not in all the other spaces of your home.
![]()
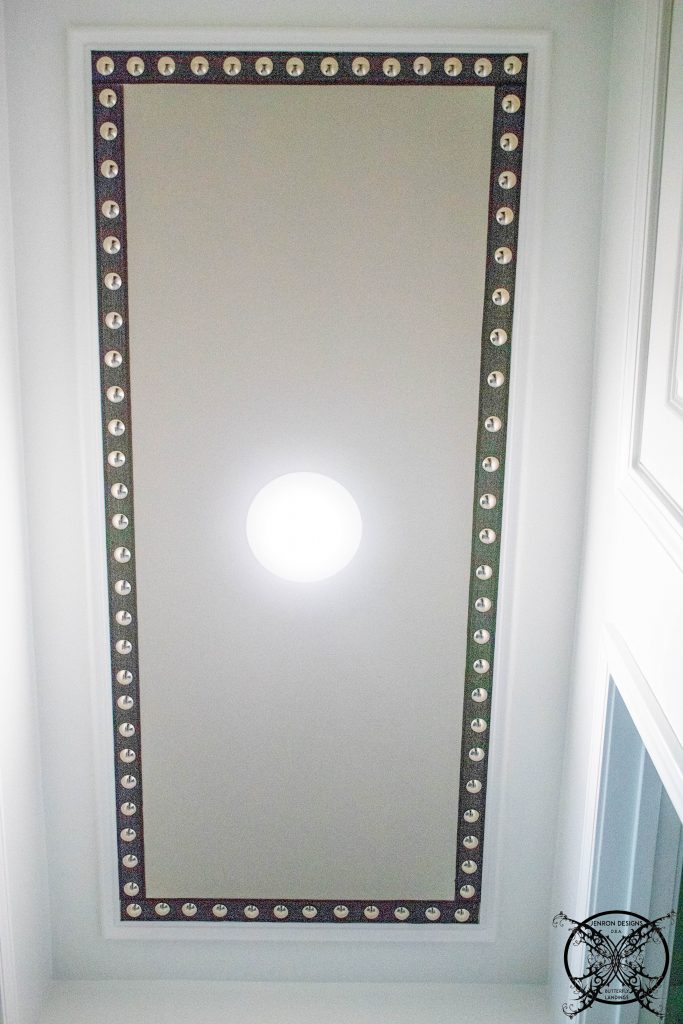
DIY Ceiling Accent
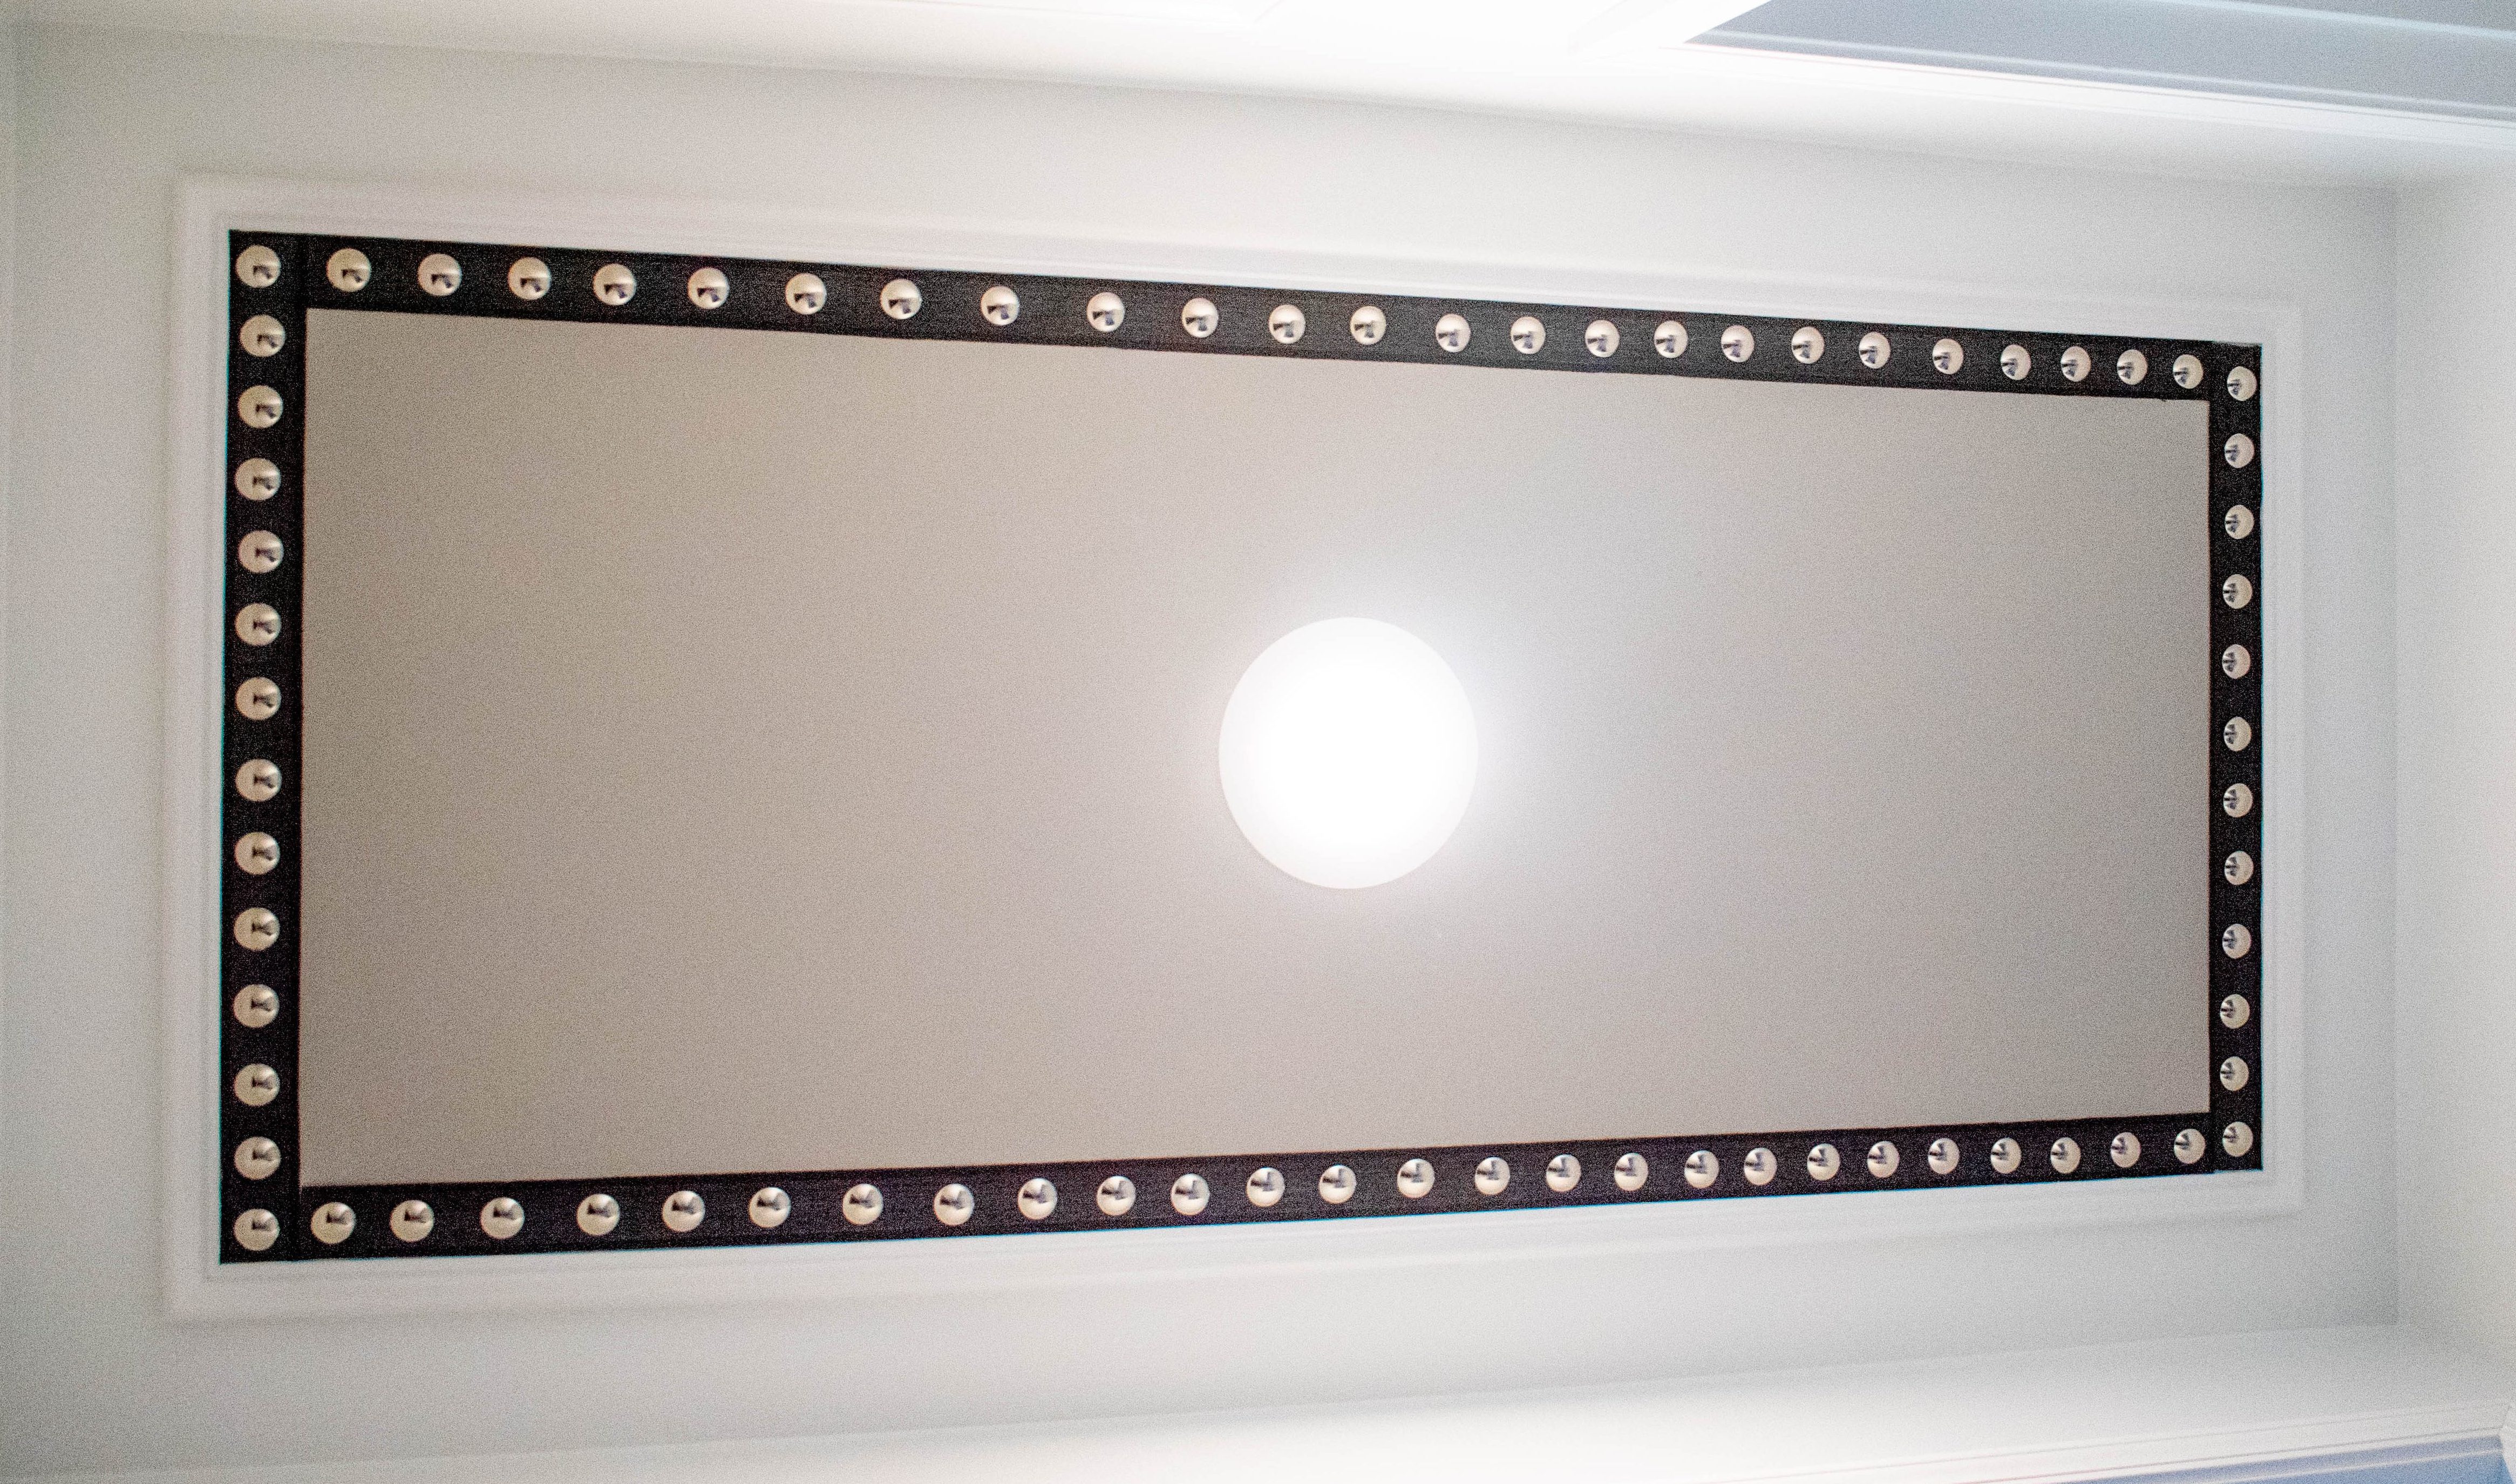
This is such a fun and easy project and the wow factor is so amazing. I am not even going to lie, I saw this application last year at the Atlanta Southeastern Designers Show House and it has been stuck in my mind ever since. However, they used a brown burlap ribbon and brass tacks and I dressed mine up with a black burlap ribbon and stainless steel tacks.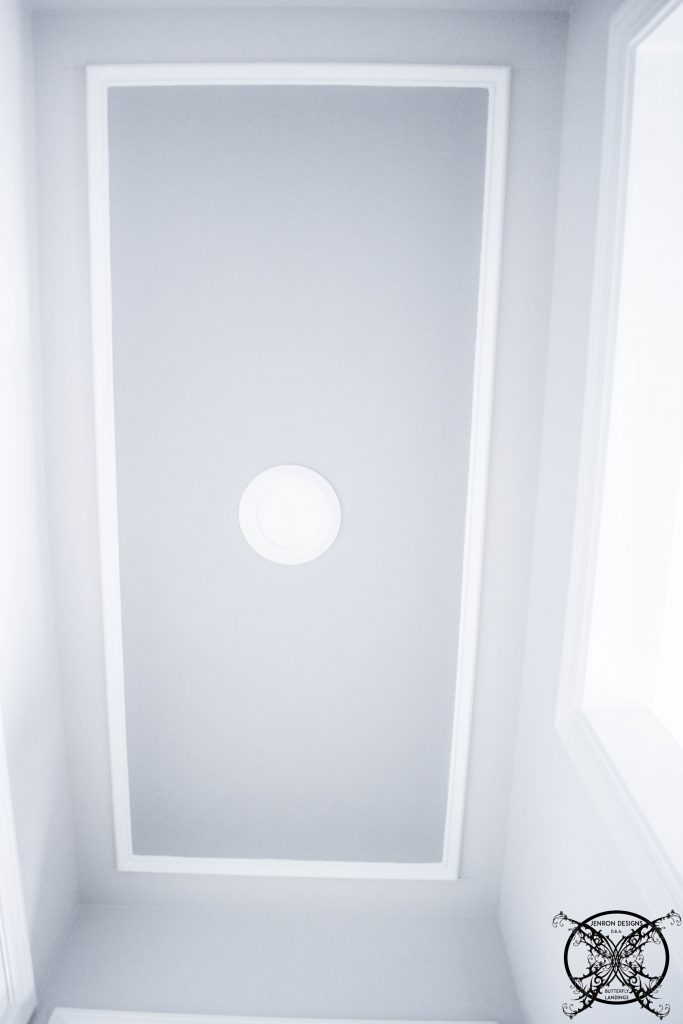 So check this out…. now do you see why I was completely obsessed with this idea? Okay so here is how I did it.
 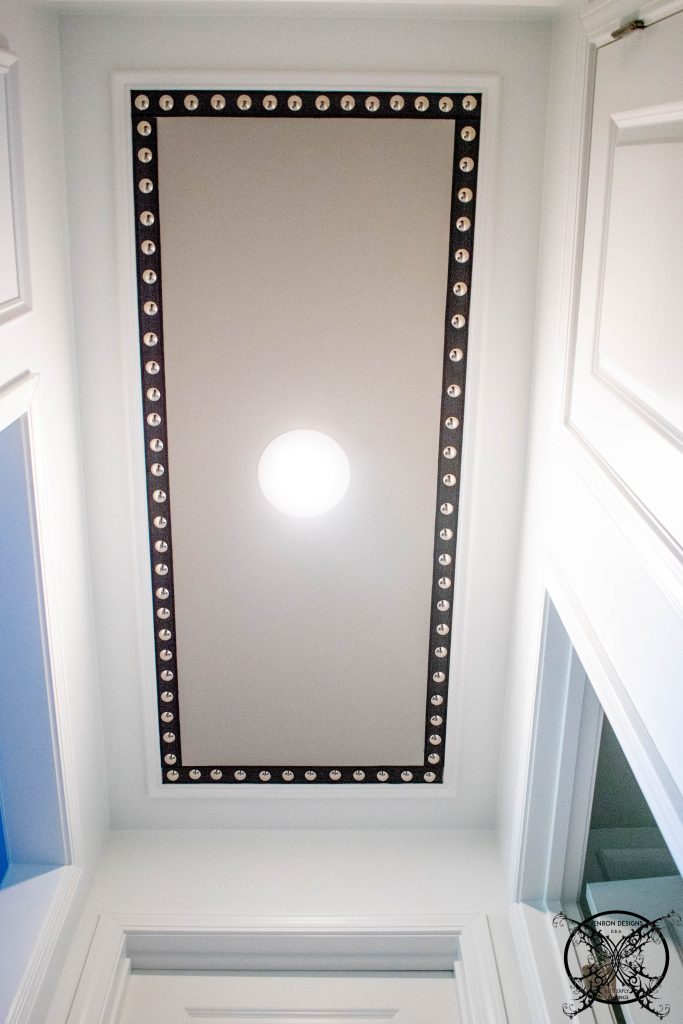 First I painted the inside of ceiling Dorian Gray from Sherwin Williams. I used a black burlap ribbon measuring 1-3/16″ stainless steel upholstery tacks.
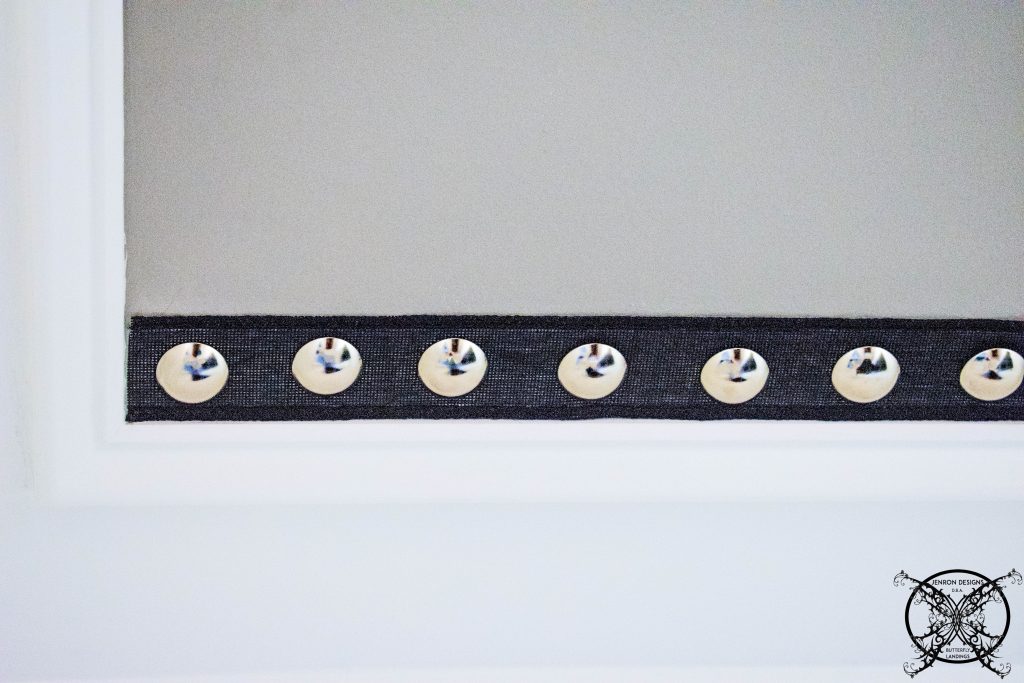
 I pre cut the ribbon the length of each side and even distributed the upholstery tacks into the ceiling. No glue, not even big holes will be left if even if you decide to take it down or change it out. Honestly this concept is brillant.
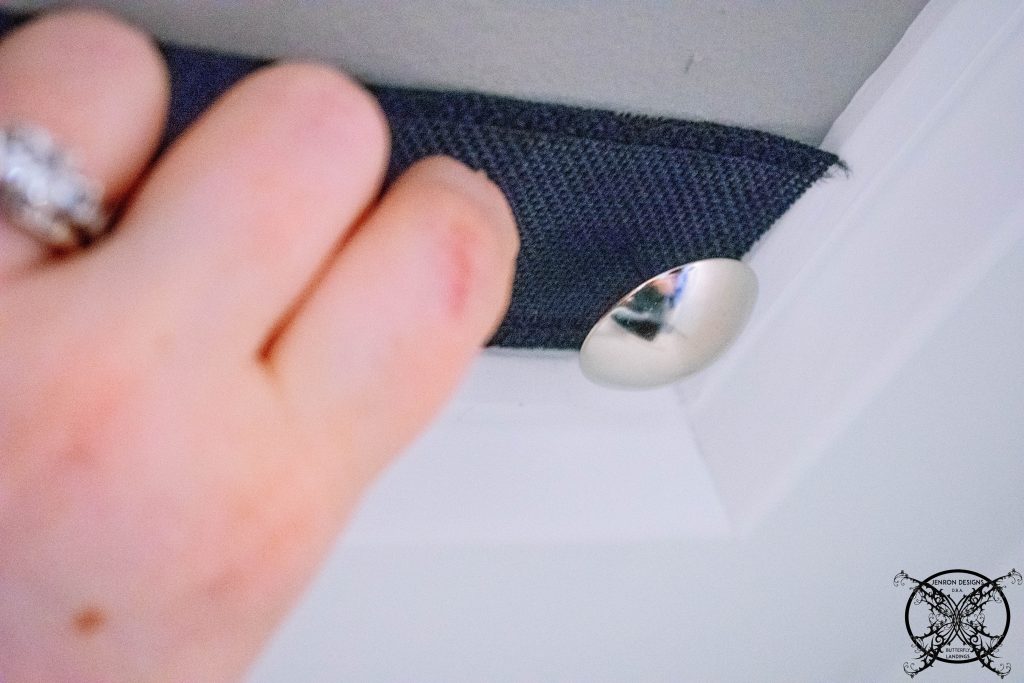
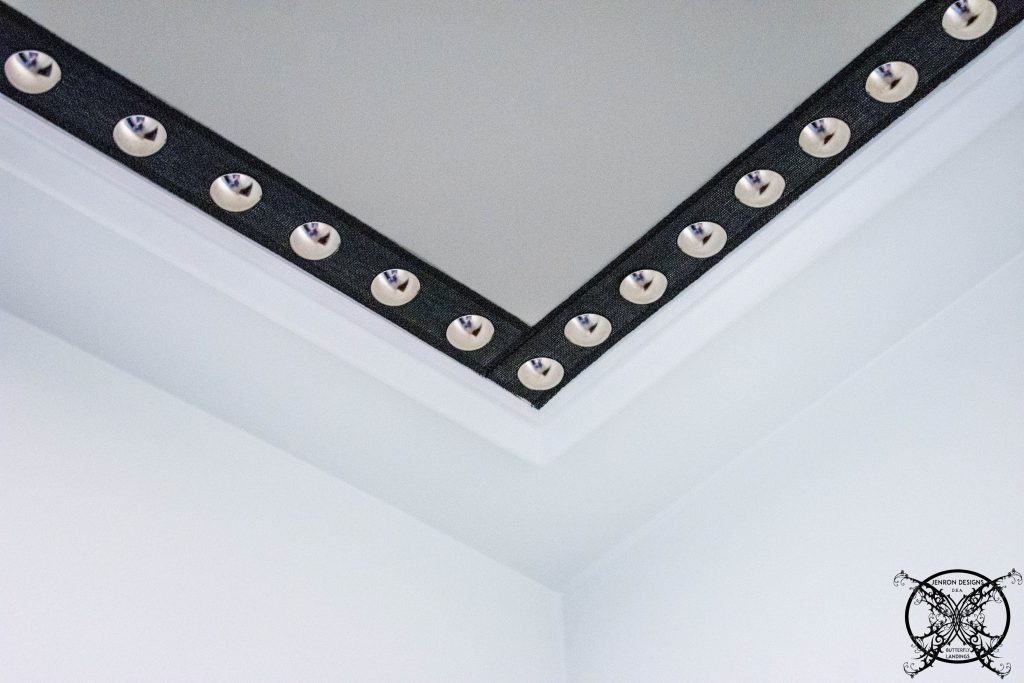
 My only tip and suggestion is that you do not allow the ribbon to overlap. Since it is burlap over lapping creates a dark area so you will want to be pretty precise in your cutting at the corners.
The Final Projects:

We also have the installation of our new Designer Drain Cover that I custom ordered. I am so excited about this one and it was such a find. I met up with these vendor while I was at the Interior Designer Conference in Atlanta in February and fell in love with their products and knew I needed a custom piece for this challenge. I have a DIY art project for the walls that I will be sharing the full tutorial with you later on this month. Just know this is the before picture and I will repurposing this piece and working my painting magic on this one!
  Plus we are still making a DIY Tub Tray, but I think I am going to save the full DIY on this for after the challenge since my post is getting so very long.
THE PROPOSED SCHEDULE:
WEEK 1: Introduction, Inspiration Board, Ordering and Procurement of Supplies
WEEK 2: TILE- Tile Work in Toilet Room
WEEK 3: TRIM- DIY Wainscot Panels & Built In Window Cornice
WEEK 4: PAINT – Paint Room, Paint Closet Unit, Work on Linen Closet
WEEK 5: ELECTRICAL- Light Fixtures, Chandlier Installation, Ceiling Decor Trim Out, Finishing Touches, (DIY-A Tub Tray?)
WEEK 6: REVEAL
This is gorgeous! Electrical stuff makes me nervous 🙈 but I might have to update some lighting in my house now!
OMG! So beautiful. I’ve been wanting to change the chandelier in my dining room but have been nervous about it. I still don’t know if it’s something I want to tackle or let someone else do. Yours looks great.
Great chandelier and I love the accent feature on the ceiling – fantastic idea!
Good luck in the final week 🙂
Love the chandelier above the tub! And that accent with the tacks is SO cool! Love it!
So many fun details here. Such pretty lighting
Love that chandy! Now…you’ll be lounging in the tub for hours. Oh and way to sneak in that genius ceiling treatment. Filing this one away …Beautiful, Jen!
The chandelier is so beautiful! What a great idea for that ceiling. Love it
The chandelier is gorgeous! I wish my husband had a background in electrical… 😉 Your ceiling is gorgeous, too!
Jennifer, thanks so much for the post.Much thanks again. Really Cool.
Ooooh it looks so great! That is the perfect spot for a chandelier. My dad is an electrician too and they sure do come in handy!
I love that designer drain grate. What a great idea!
Lauren | https://www.laurelandiron.com
I love these updates! SO beautiful!
The burlap detail on the ceiling is such a great addition! and loooove that drain cover!
It’s all in the details! Great job! It’s going to be amazing.
Oh wow Jen! The nailhead border, what an amazing touch! It looks absolutely beautiful and really gives some dimension. And that gorgeous lighting!
I love how it turned out! I am inspired. Thank you.
Jen,
The lighting is STUNNING and kudos for you guys doing it yourself. I always get so nervous when my husband says he got it (and he was trained in the Navy)! It’s looking gorgeous and I’m excited for your reveal. xx
Loving the chandelier!! Looking great for th reveal, Jen! Good luck with the final push!
Love the Chandelier over the tub I agree every tube needs one.
Love the new chandlier and how you have added it to your space now, what a great idea. Even if you have to hire a contractor for the electrical portion it really would add so much impact to that particular room.
WOW I love everything the chandlier and the linen closet ceiling it is all wonderful. I must say you have dressed it up nicely and your master bathroom is such a dreamy space now.
I think the ceiling is really something special what a great idea and so easy too. Plus the addition of the chandlier has made you master suite a magazine worthy space.
Hey! I just wanted to ask if you ever have any problems with hackers? My last blog with WordPress was hacked and I ended up losing months of hard work due to no back up. Do you have any methods to stop hackers?
Hi Micheal I am so sorry to hear this. It is a crazy world with those kind of things happenings all the time. I would recommend that your check in getting a good IT security firewall, and of course you always want to have all your backup, hard copies of all your work stored elsewhere just in case the worst should happen. Wishing your the best of luck.
Love this space and gorgeous ceiling you created that is hot!
It’s remarkable how just adding a simple new light fixture will change the look of a room, and I love that ceiling it is soooo glamorous!