Dream Catcher Tree & DIY Rustic Tree Box
This year I opted for a Rustic Christmas Tree Box as the stand for our master bedroom Dream Catcher Tree, so Ron used some old pallet wood to create this easy holiday DIY.
JUMP TO DIY
This year I wanted something cozy to promote a dreamlike vibe for our master bedroom tree theme. I was completely inspired by some beautiful Native American Dream catchers I found over the summer. They were so beautiful with a rustic quality and beautiful feathers, I immediately could invasion this trees, in the middle of June, and I just knew they would be the primary focal point of the master bedroom tree.
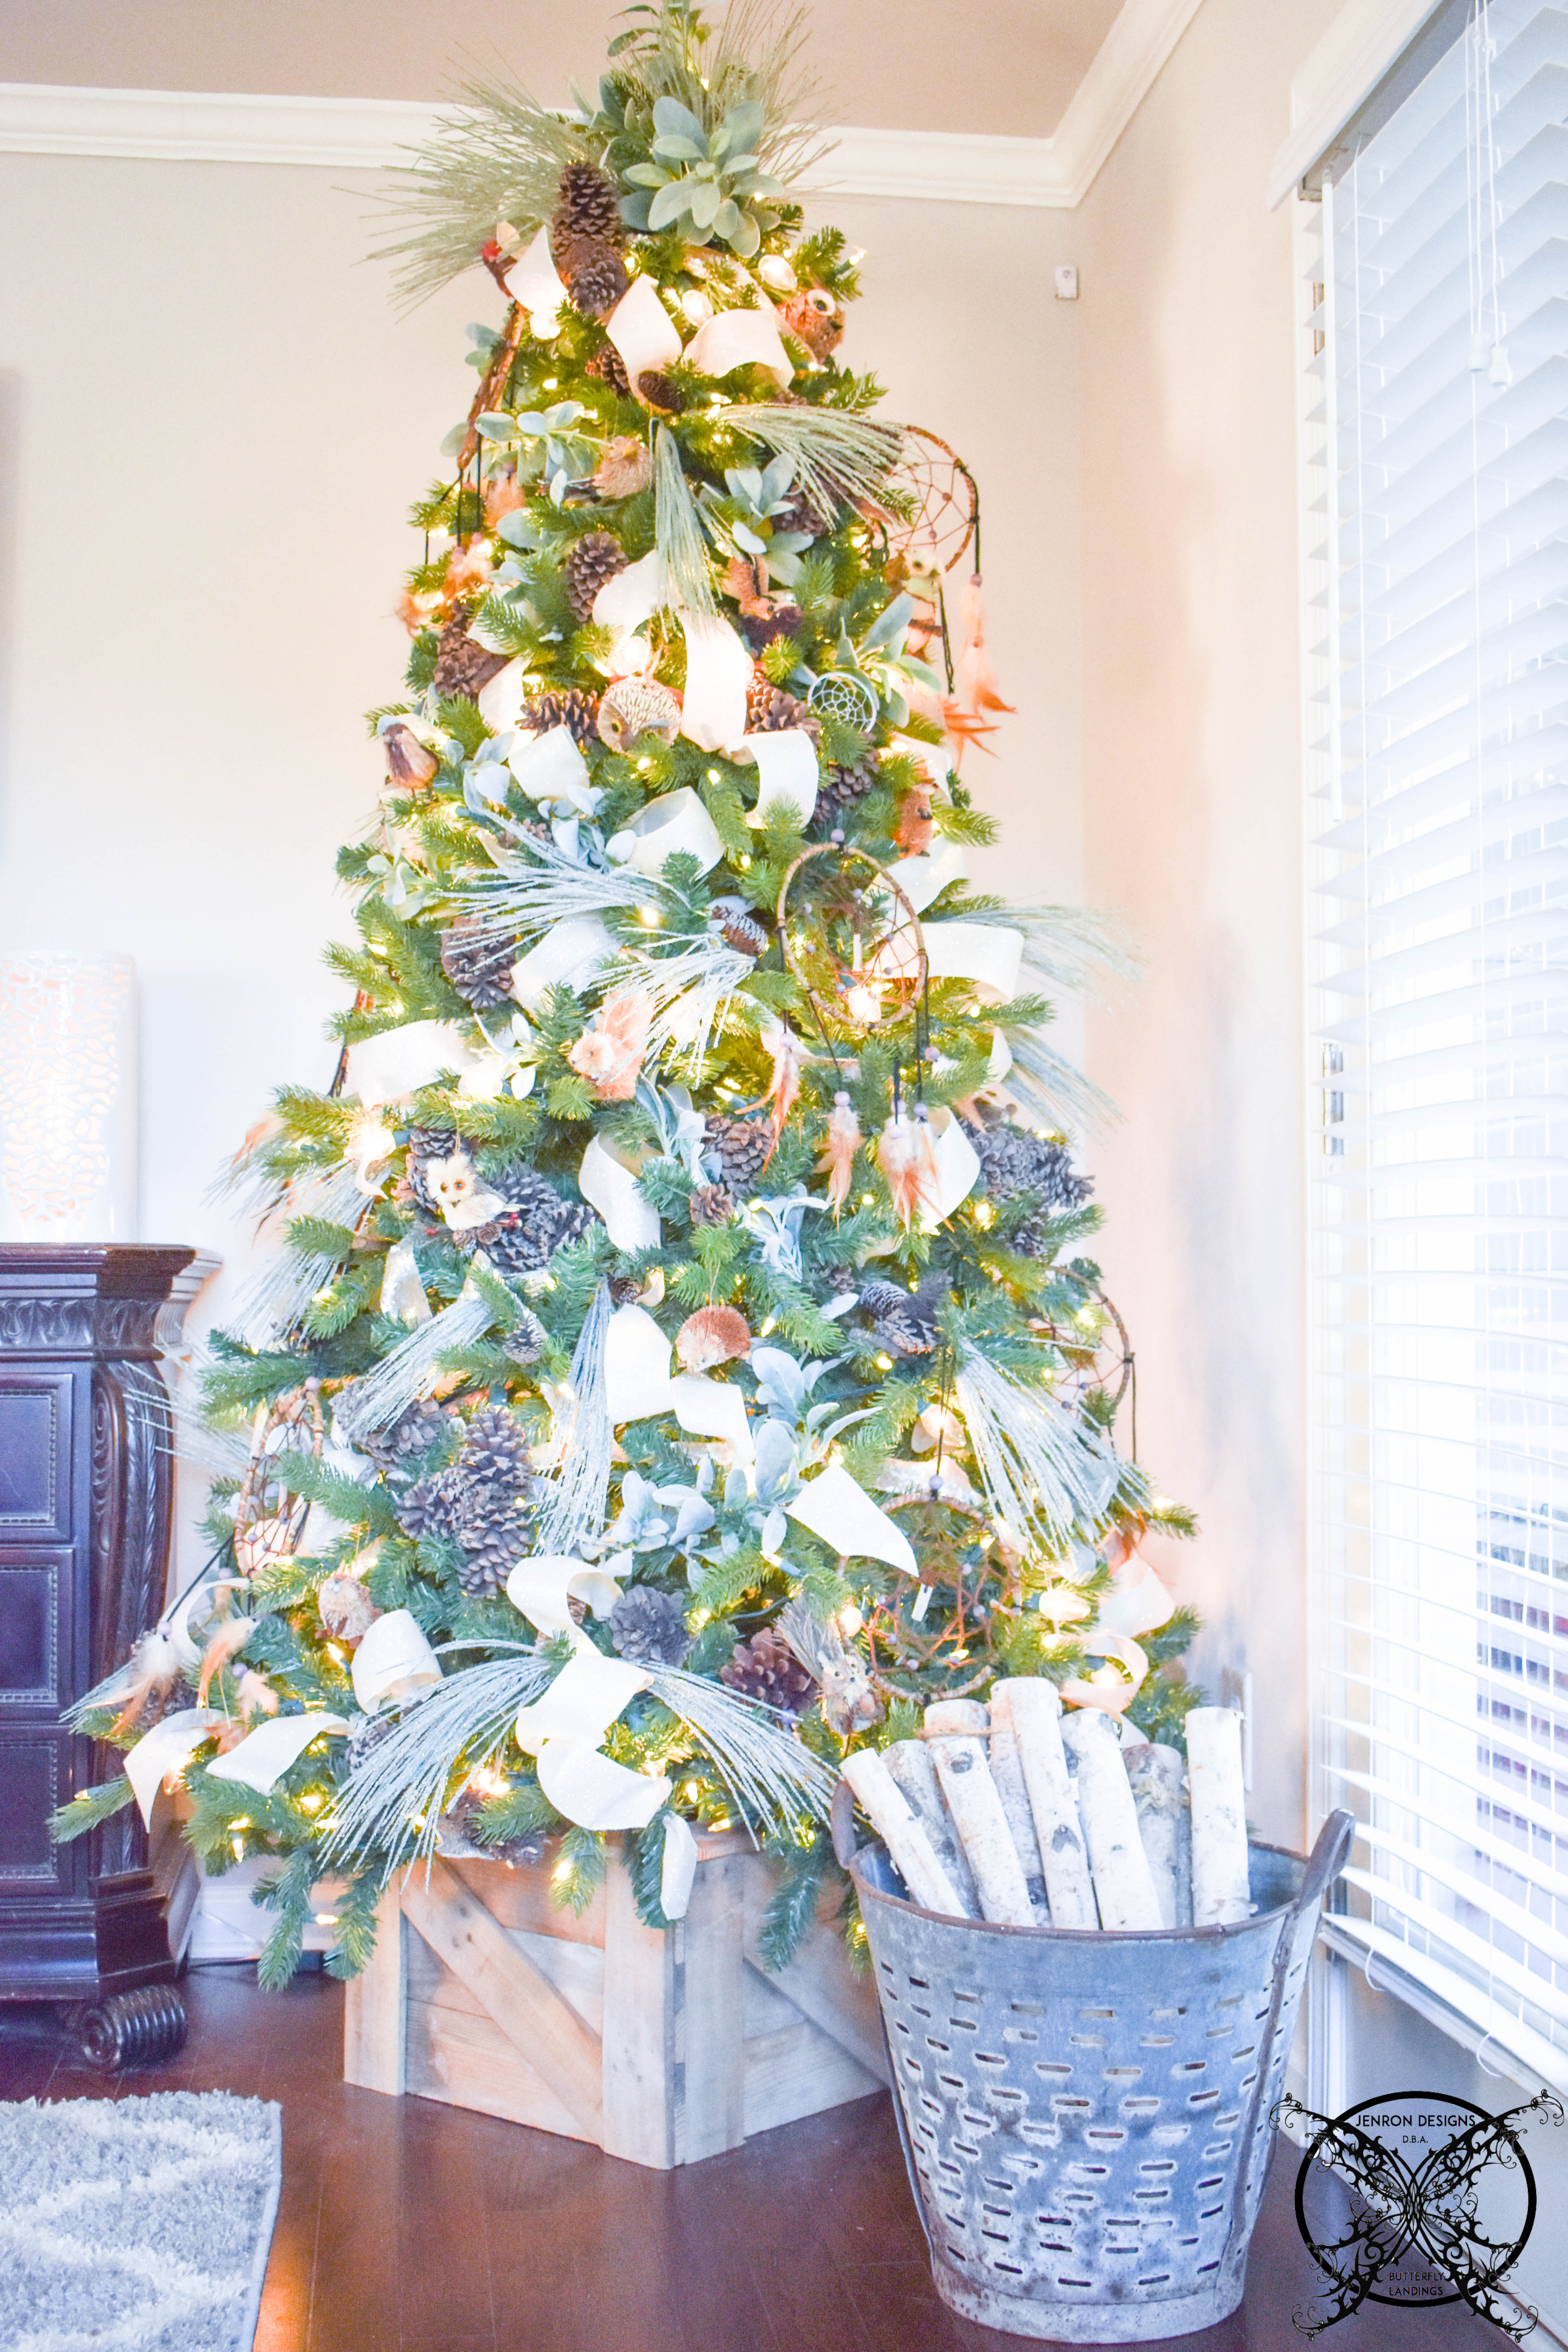 I added in shimmery ivory ribbon loops, icy pine branches and filled the tree up with rustic pine cones and luscious silk lambs ear to create the perfect base for our collection of bottle brush woodland ornaments.
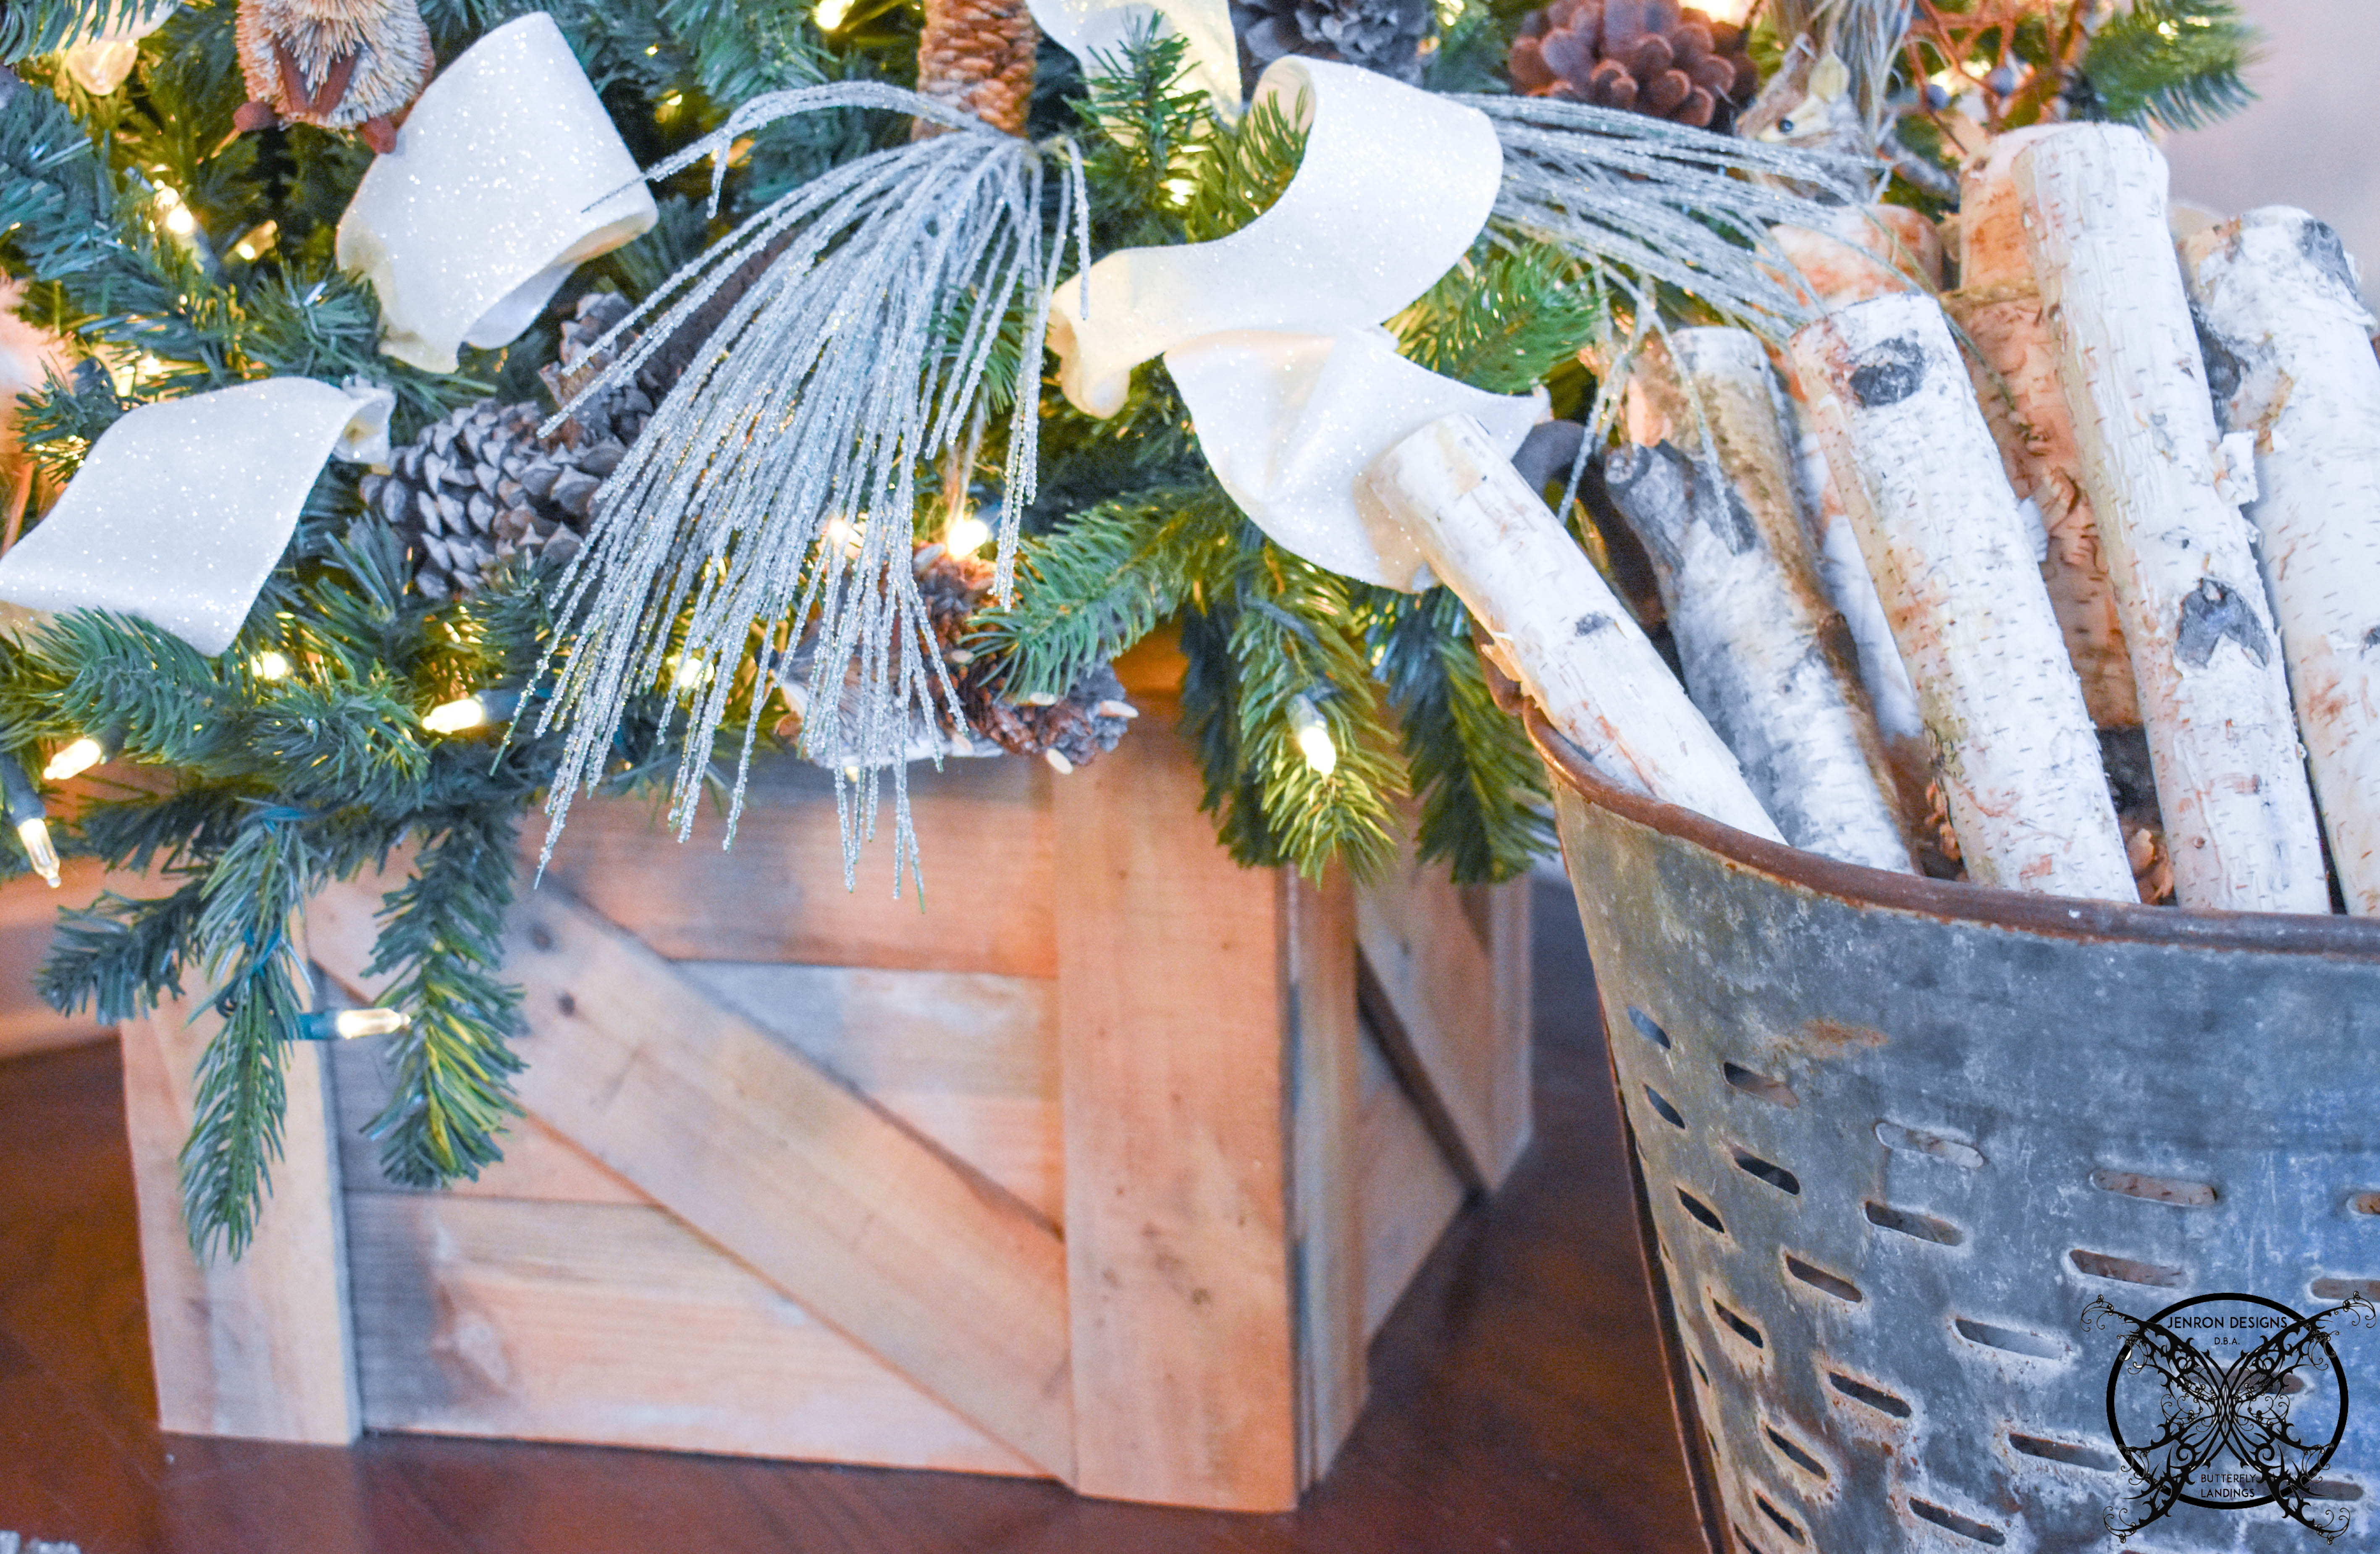
 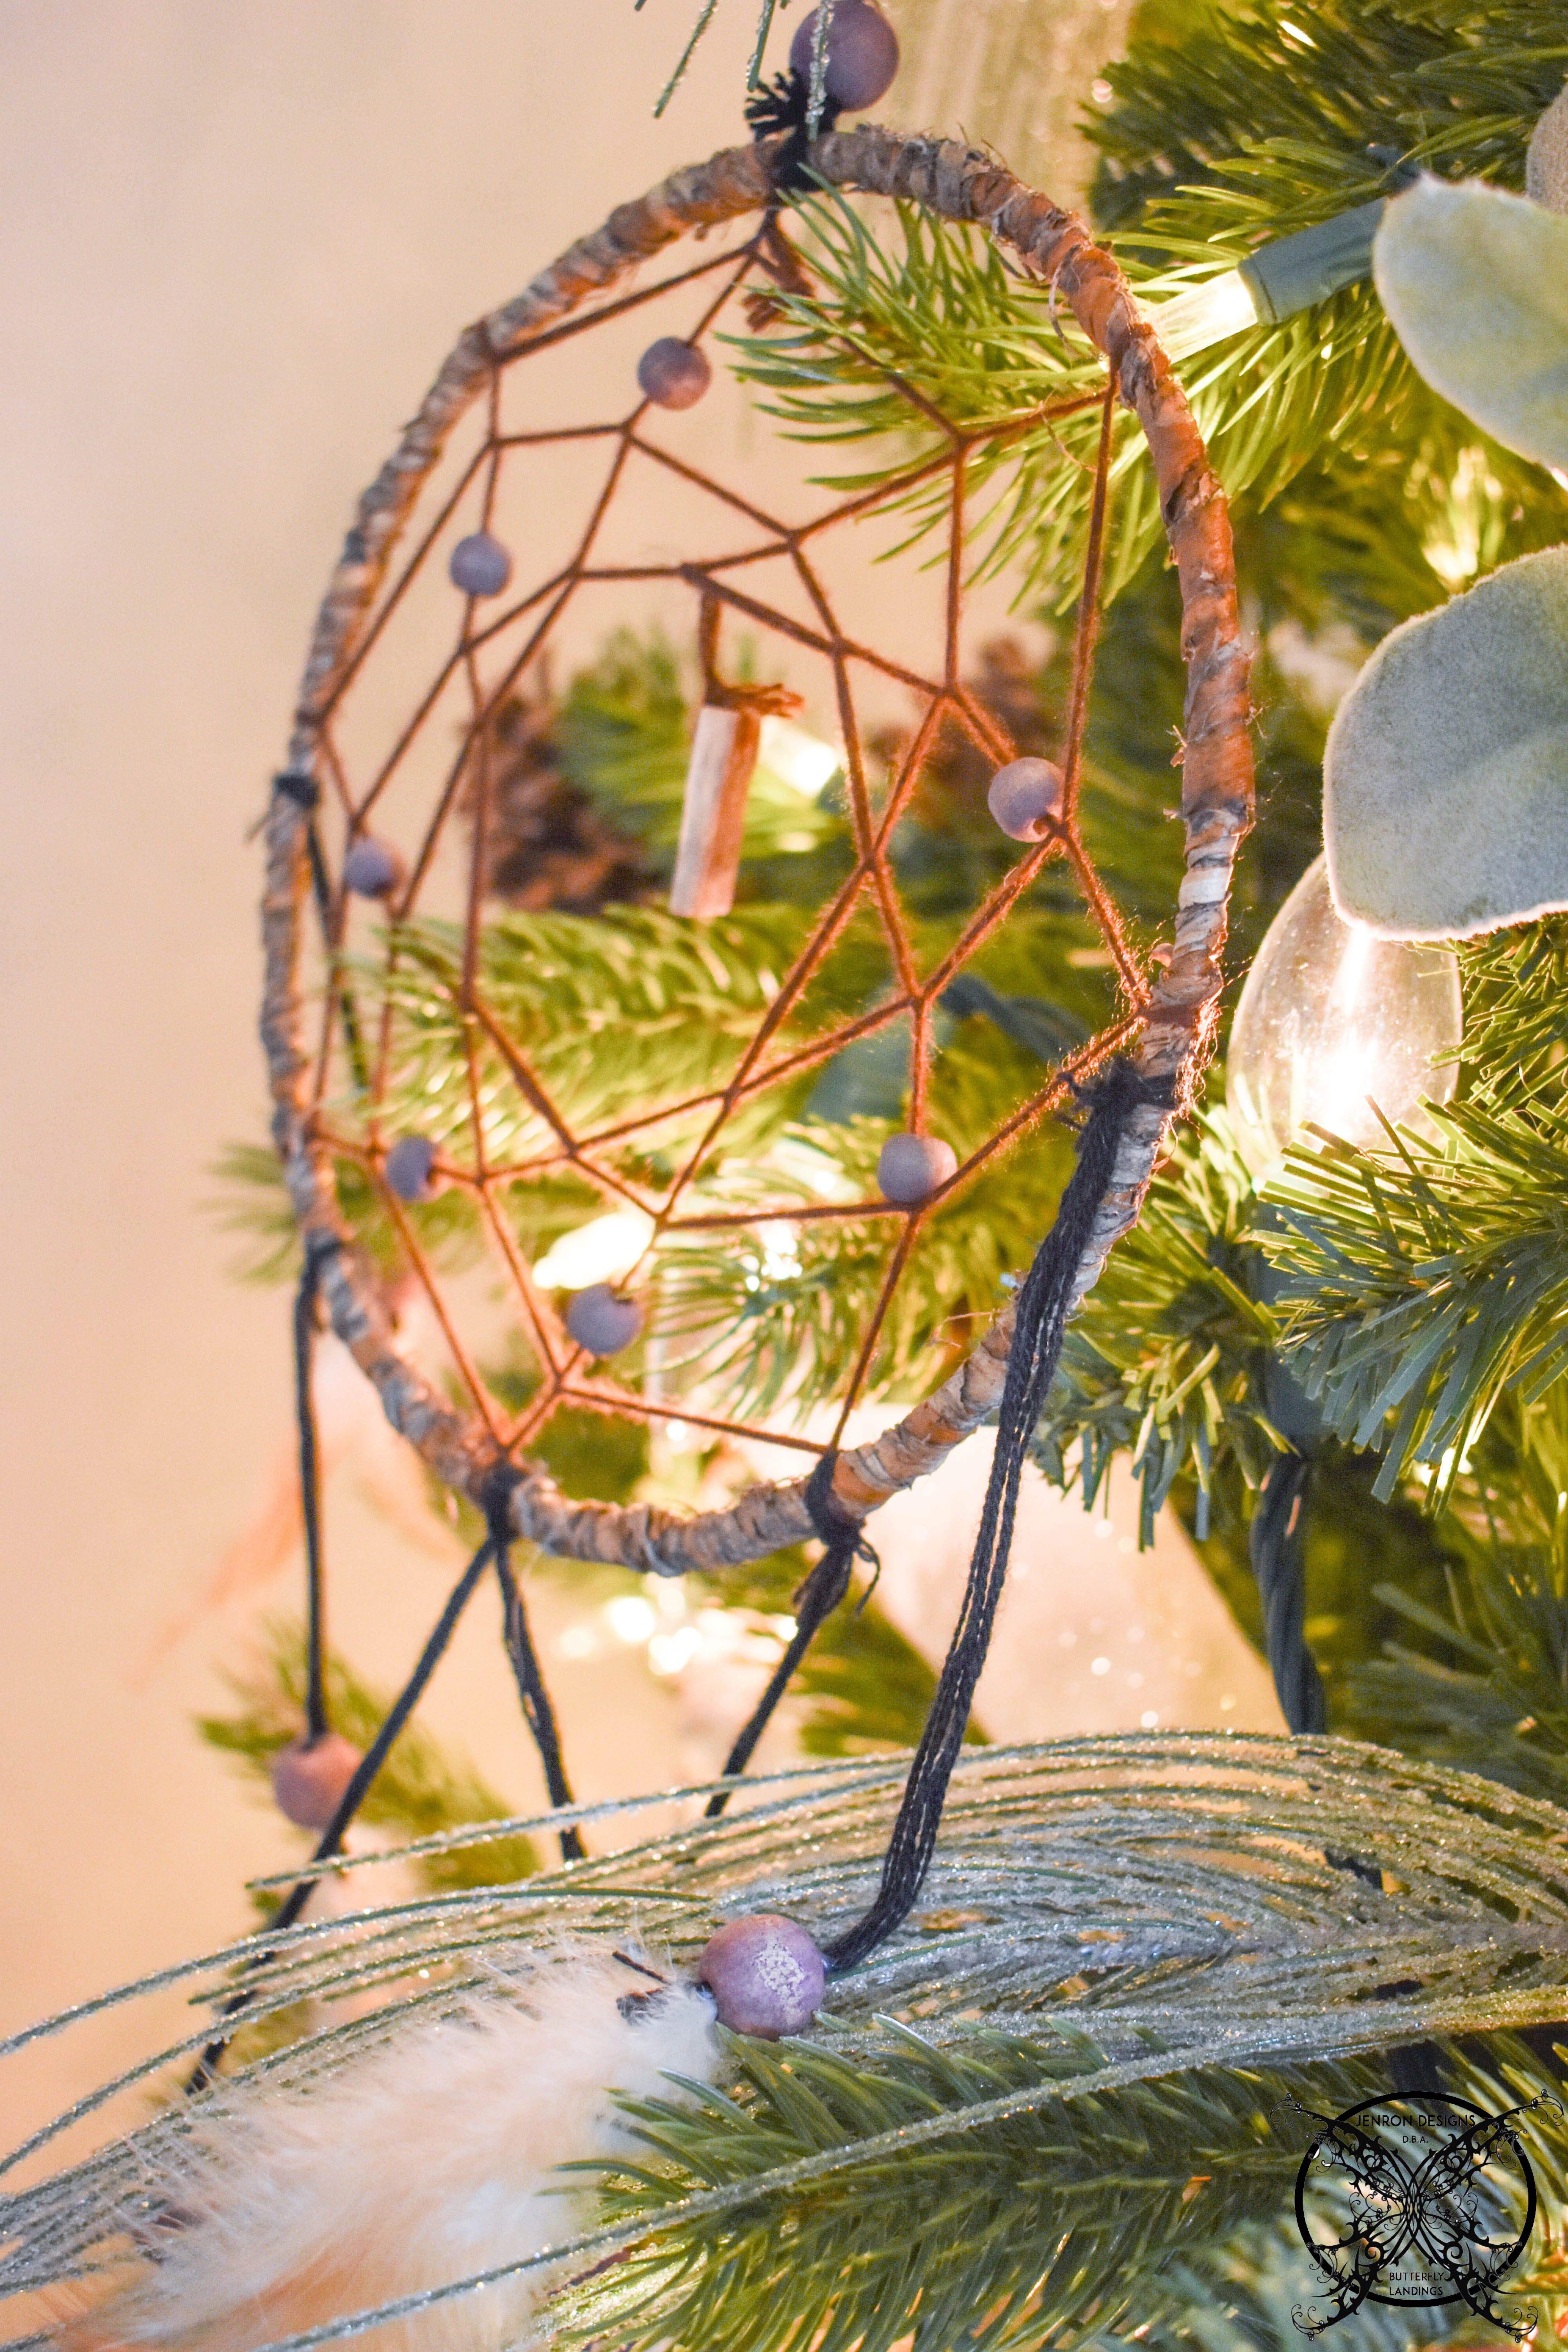 These were the perfect addition to the beautiful Native American dream catchers which are works of art. Just the right amount of feathers and twine to catch all of our holiday dreams and make them a reality. Then I added in a few rustic birch logs and seasoned pine cone clusters to add even more character to this woodland tree.
 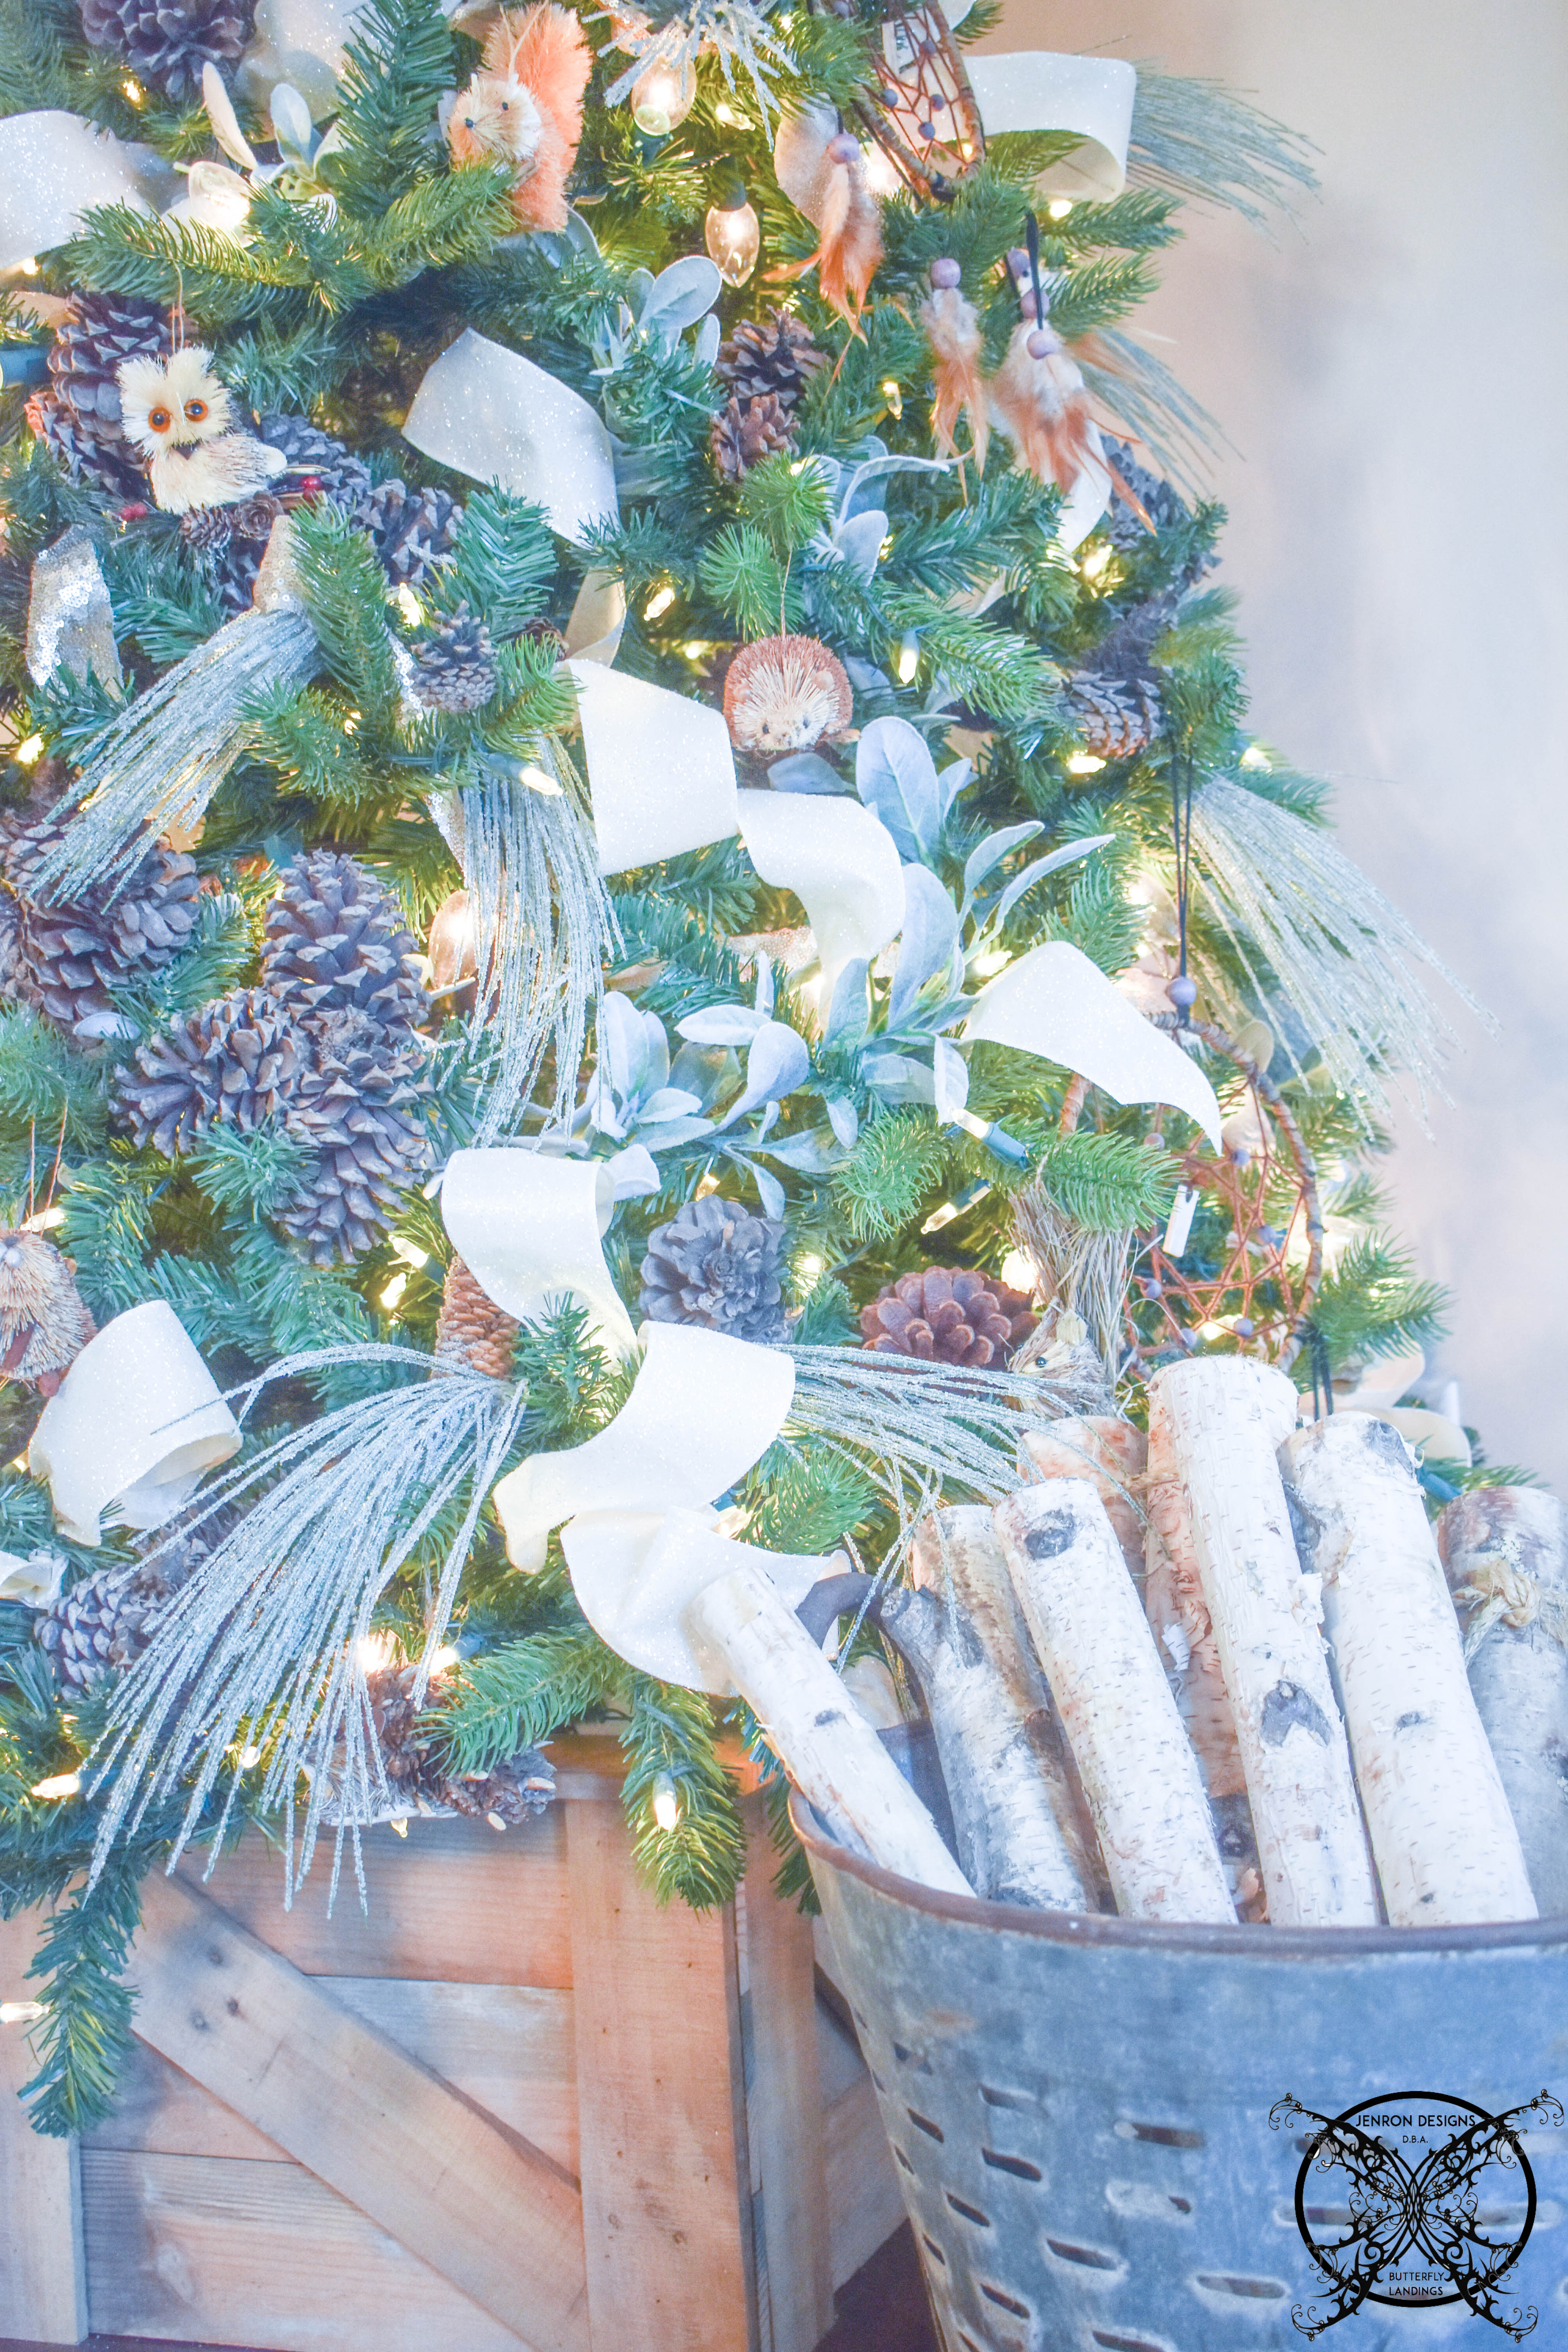 For the rest of the bedroom I decided to just, for simplicity and comfort, to keep our basic white comforter and coverlet set and accent with seasonal throws and pillows. This design technique is much easier to pack away or transition into other holidays depending on the patterns and colors that you choose. Plus I am really picky about sheets and thread count, so I am not one to pick up any old set of holiday print sheets to toss on the bed.
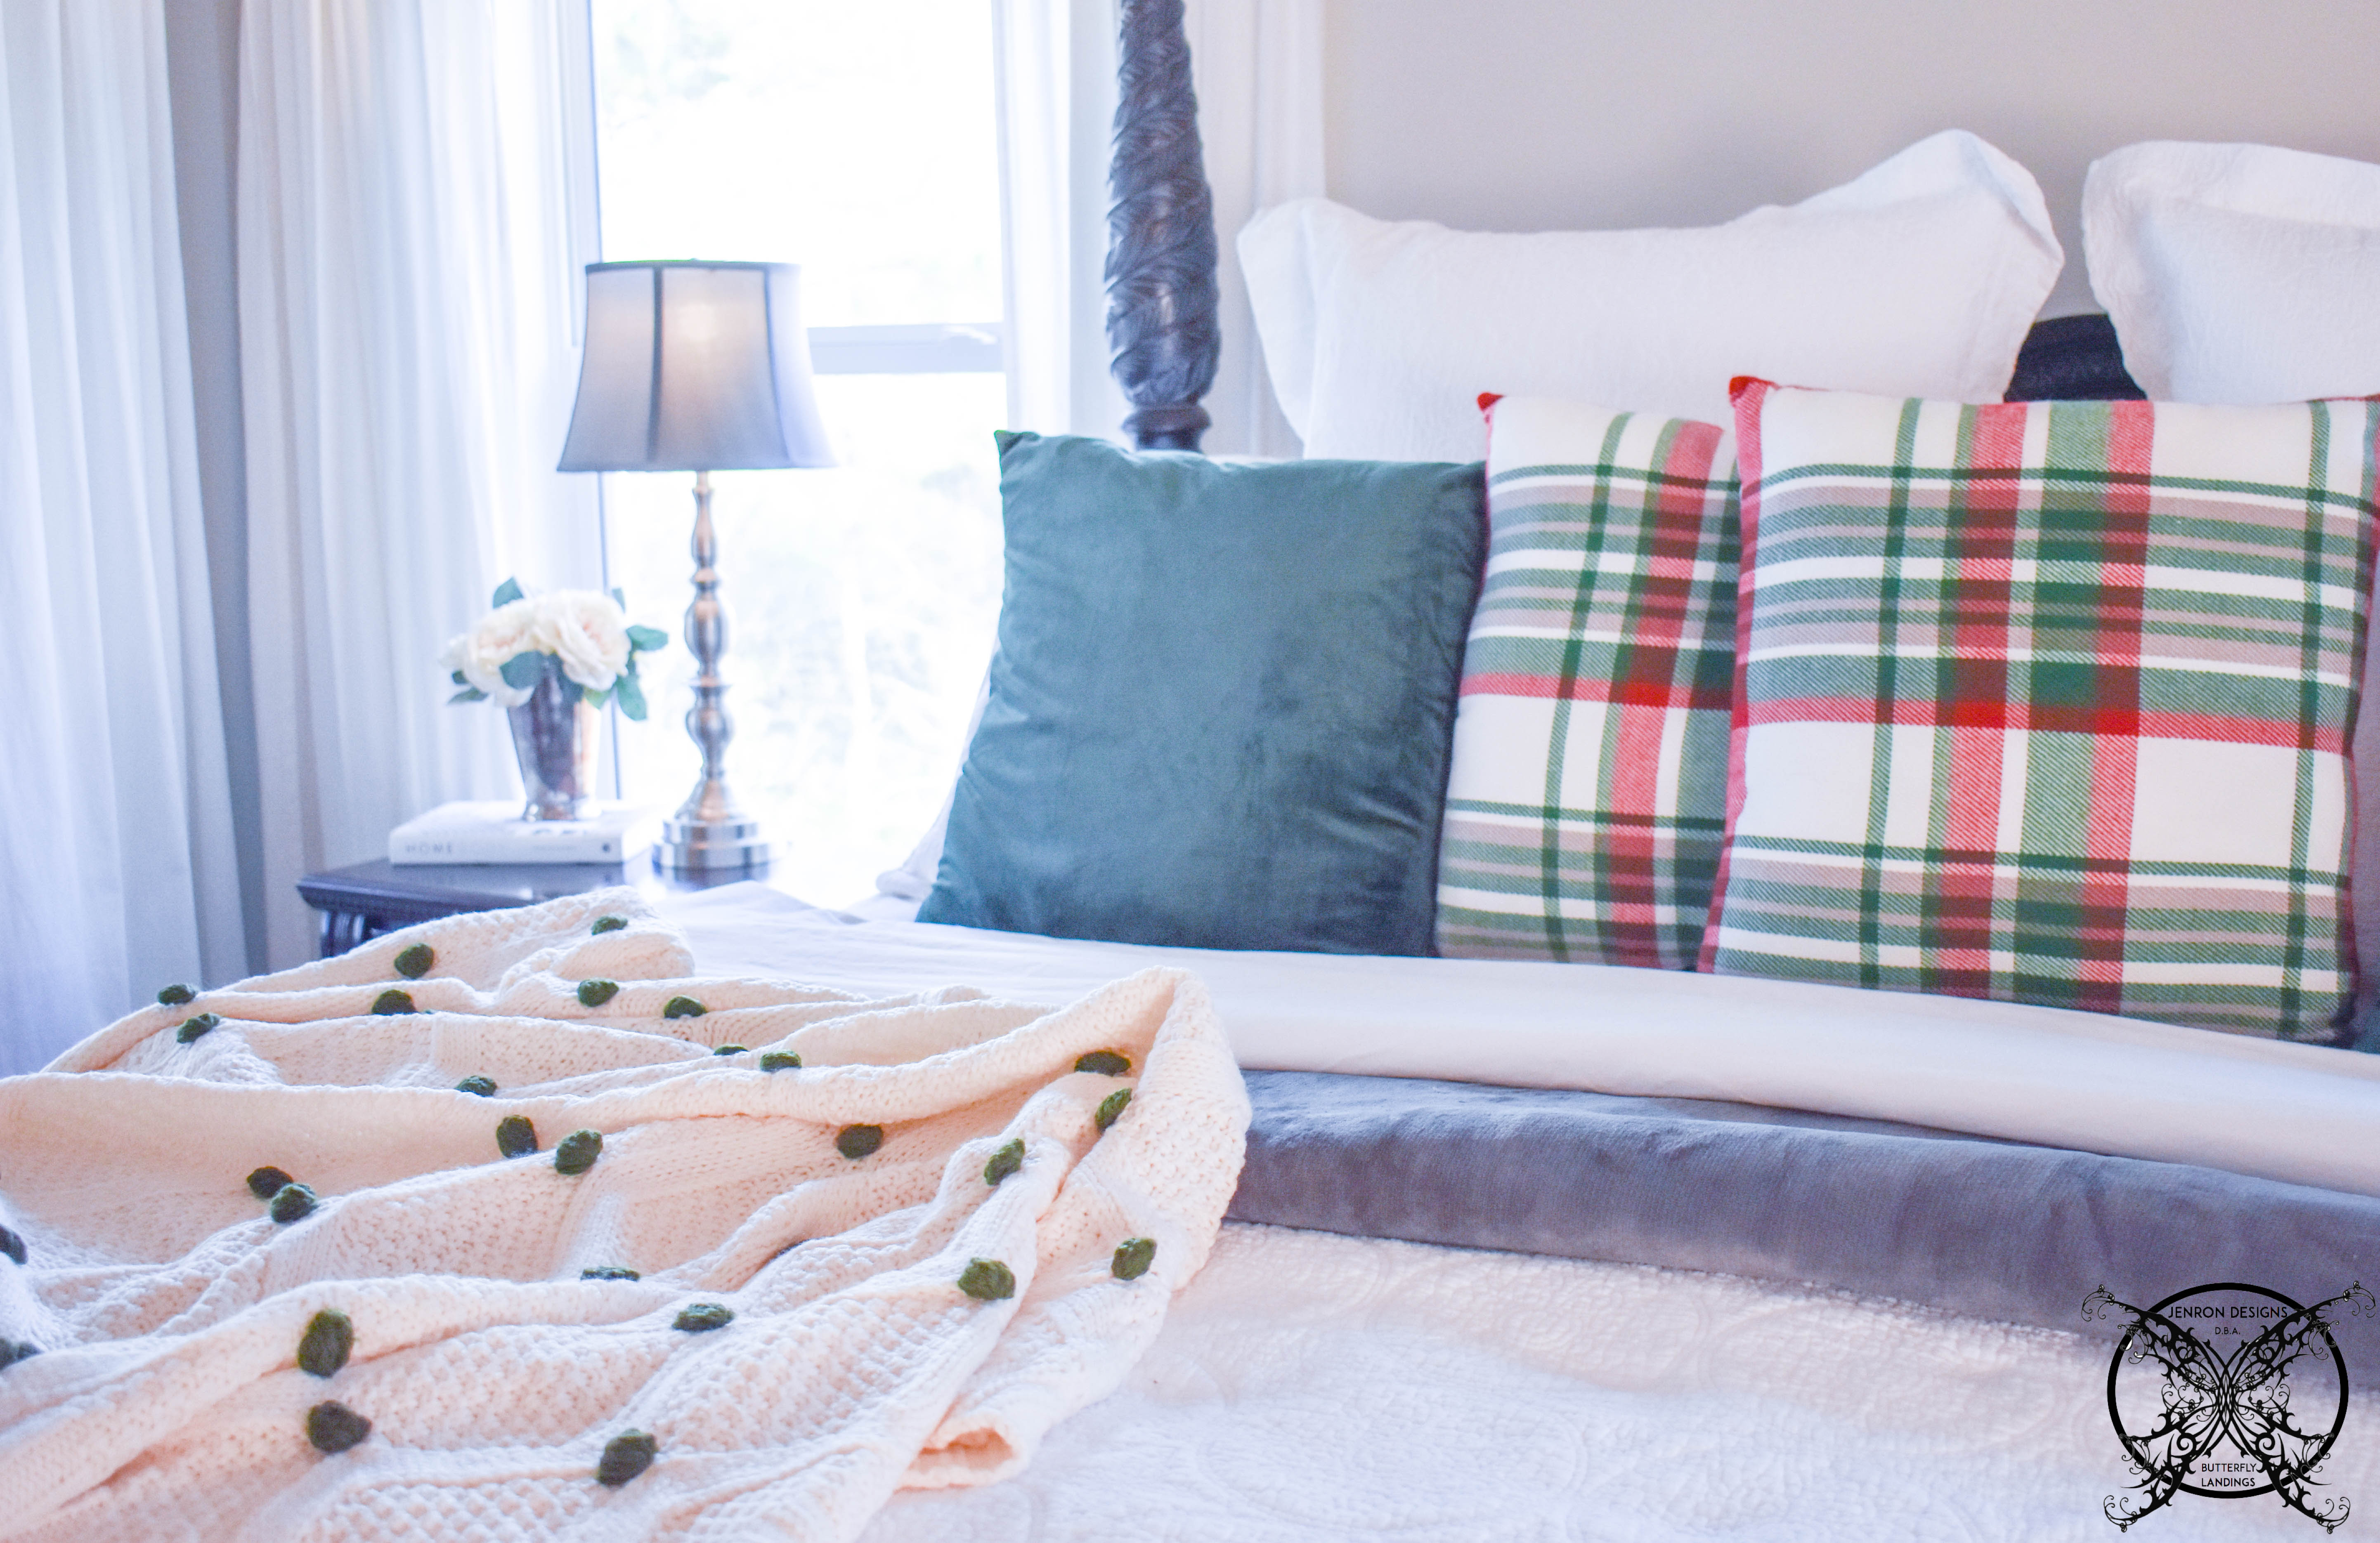 I continue with the color story of natural green tones by adding a few lush dark hunter green velvet pillows. Then added a few of these great tartan plaid pillows that are all the rage this year, which adds just a pop of color to make the room feel like Christmas. I found the fantastic nubby hunter green and ivory throw at my local Pottery Barn Outlet. Which is having some great sales right now. Be sure to Shop My Style at the bottom to see more available holiday steals and deals.
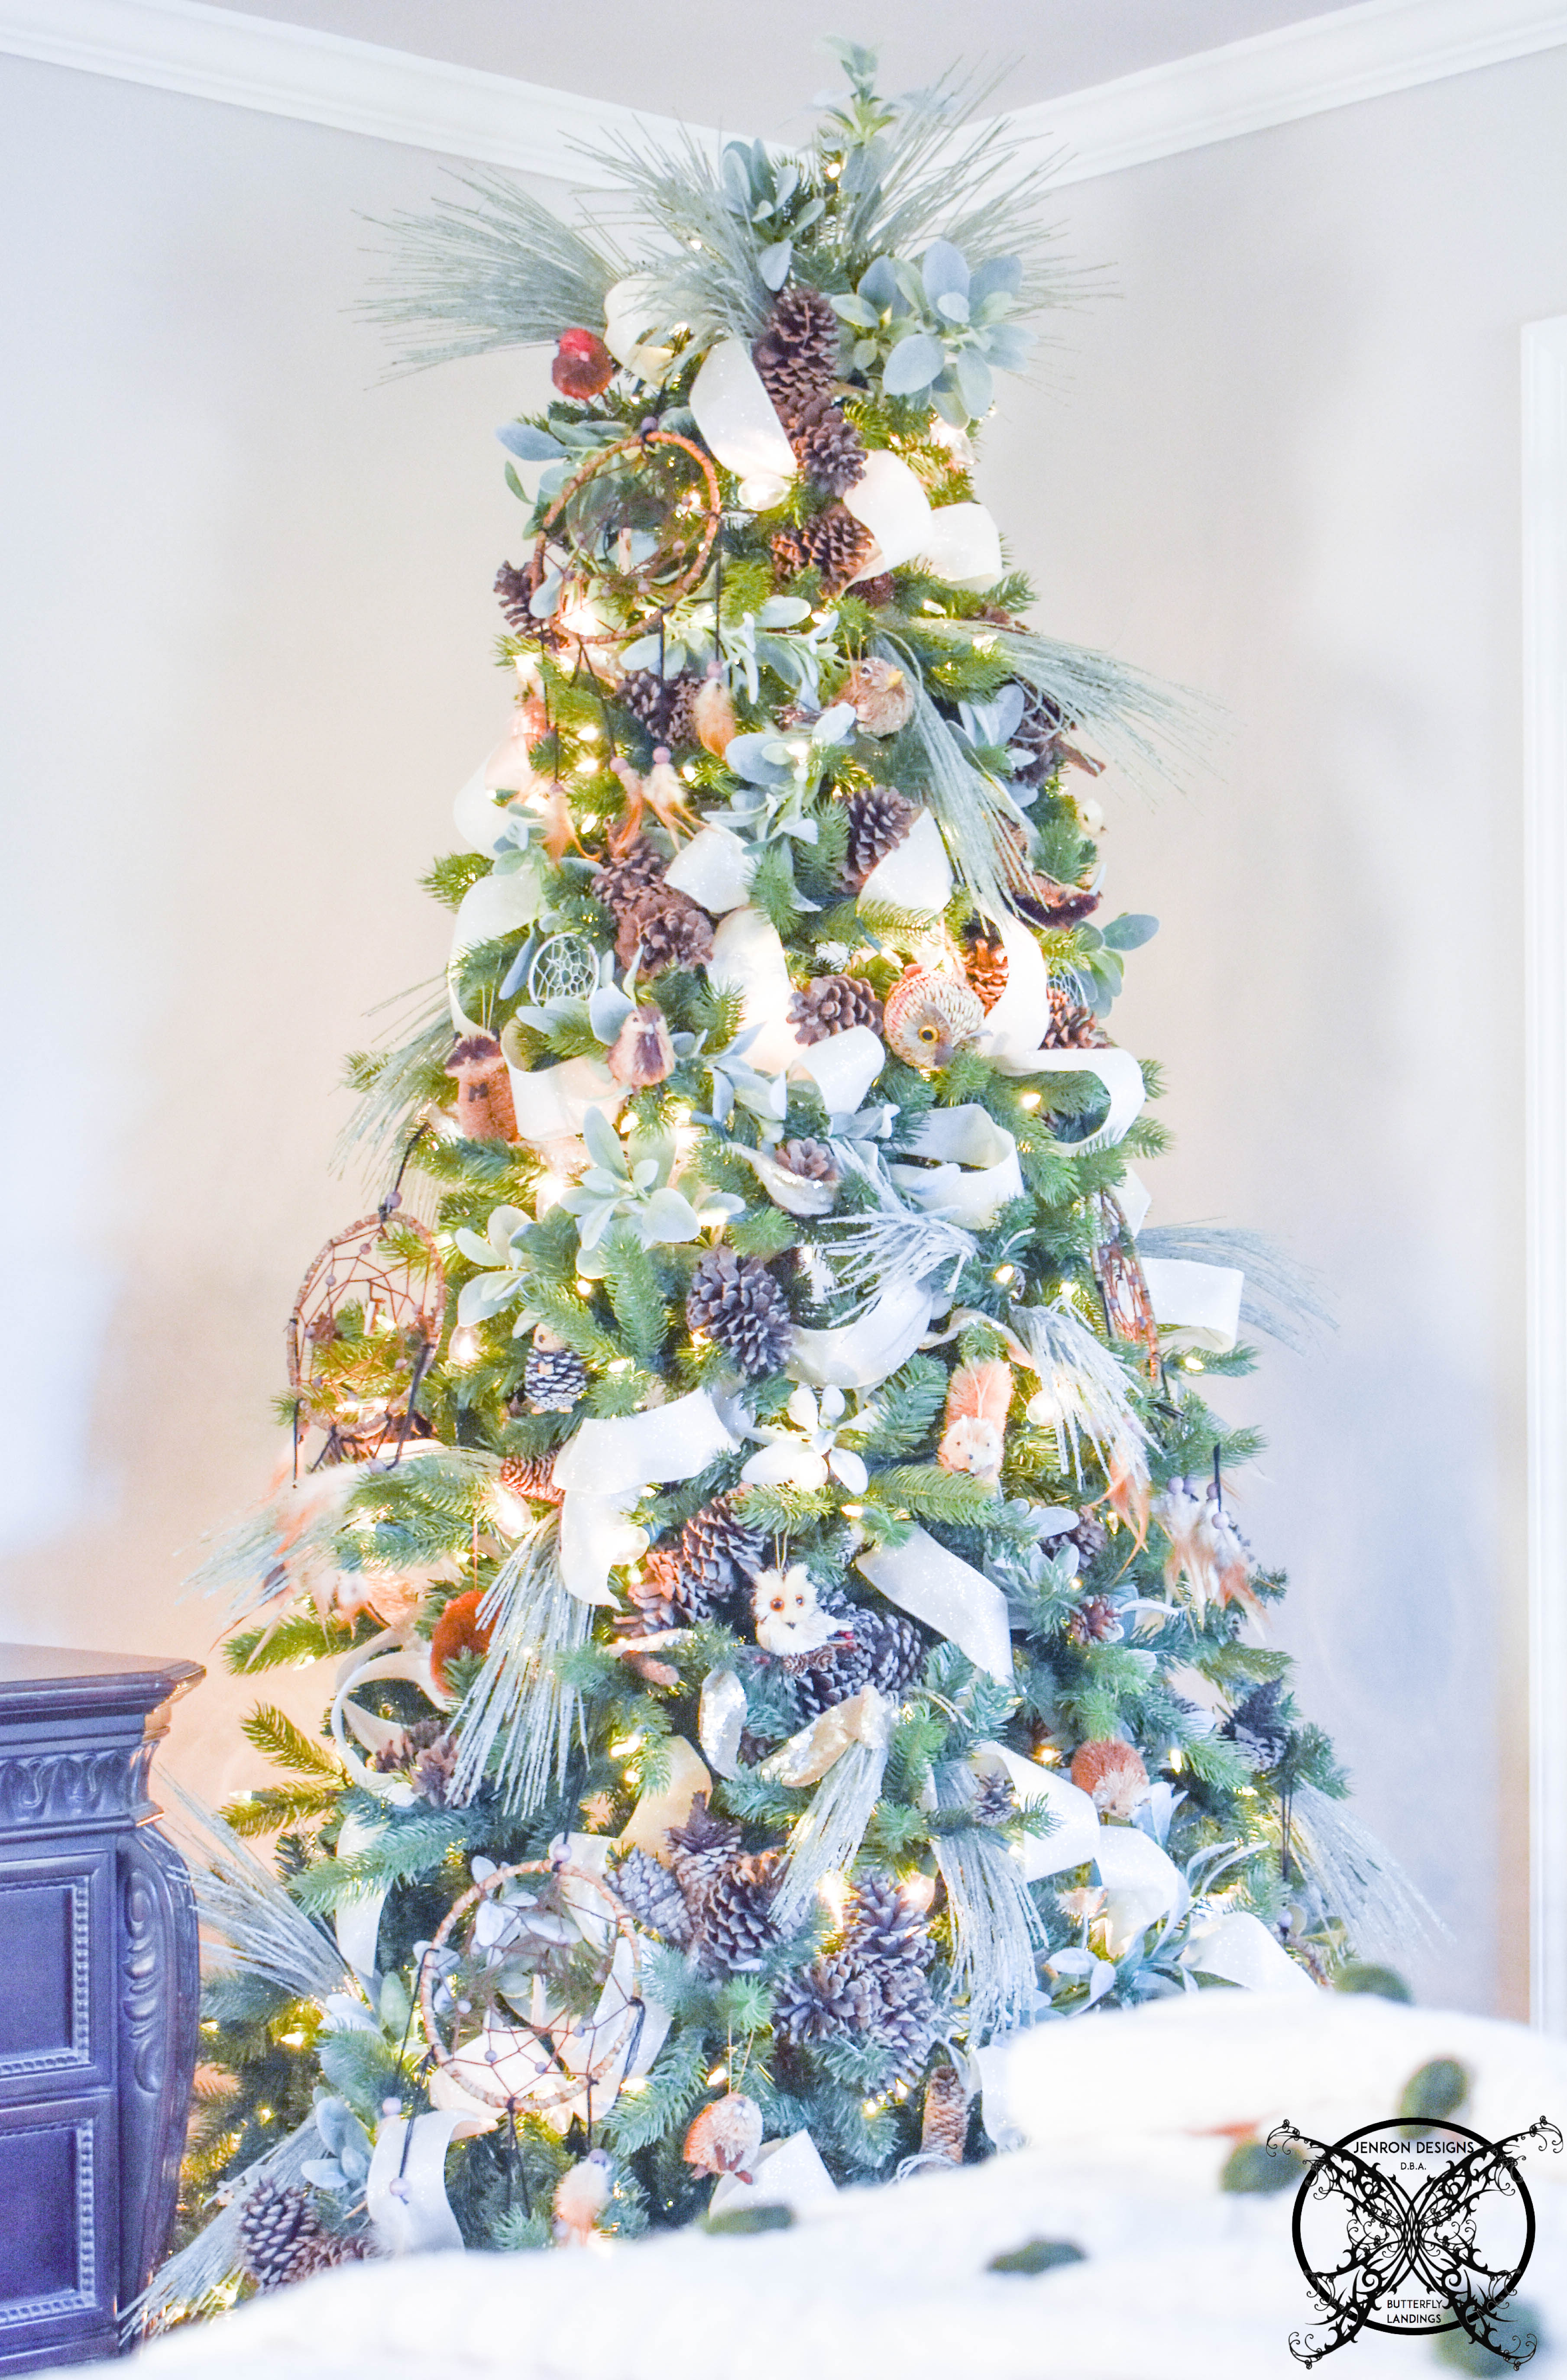 This tree was beautiful, the perfect thing to fall asleep under during the magical holiday season and wake up to each beautiful morning. However, I remembered that I did not want to spend my magical season pulling my handmade tree skirt out of the Roomba again like I did last year. Don’t get me wrong, I love my Roomba but tree skirts and Roomba’s are not a great mix, so I had planned that all the trees in the house would get new bases that were raised platforms or solid without skirts.
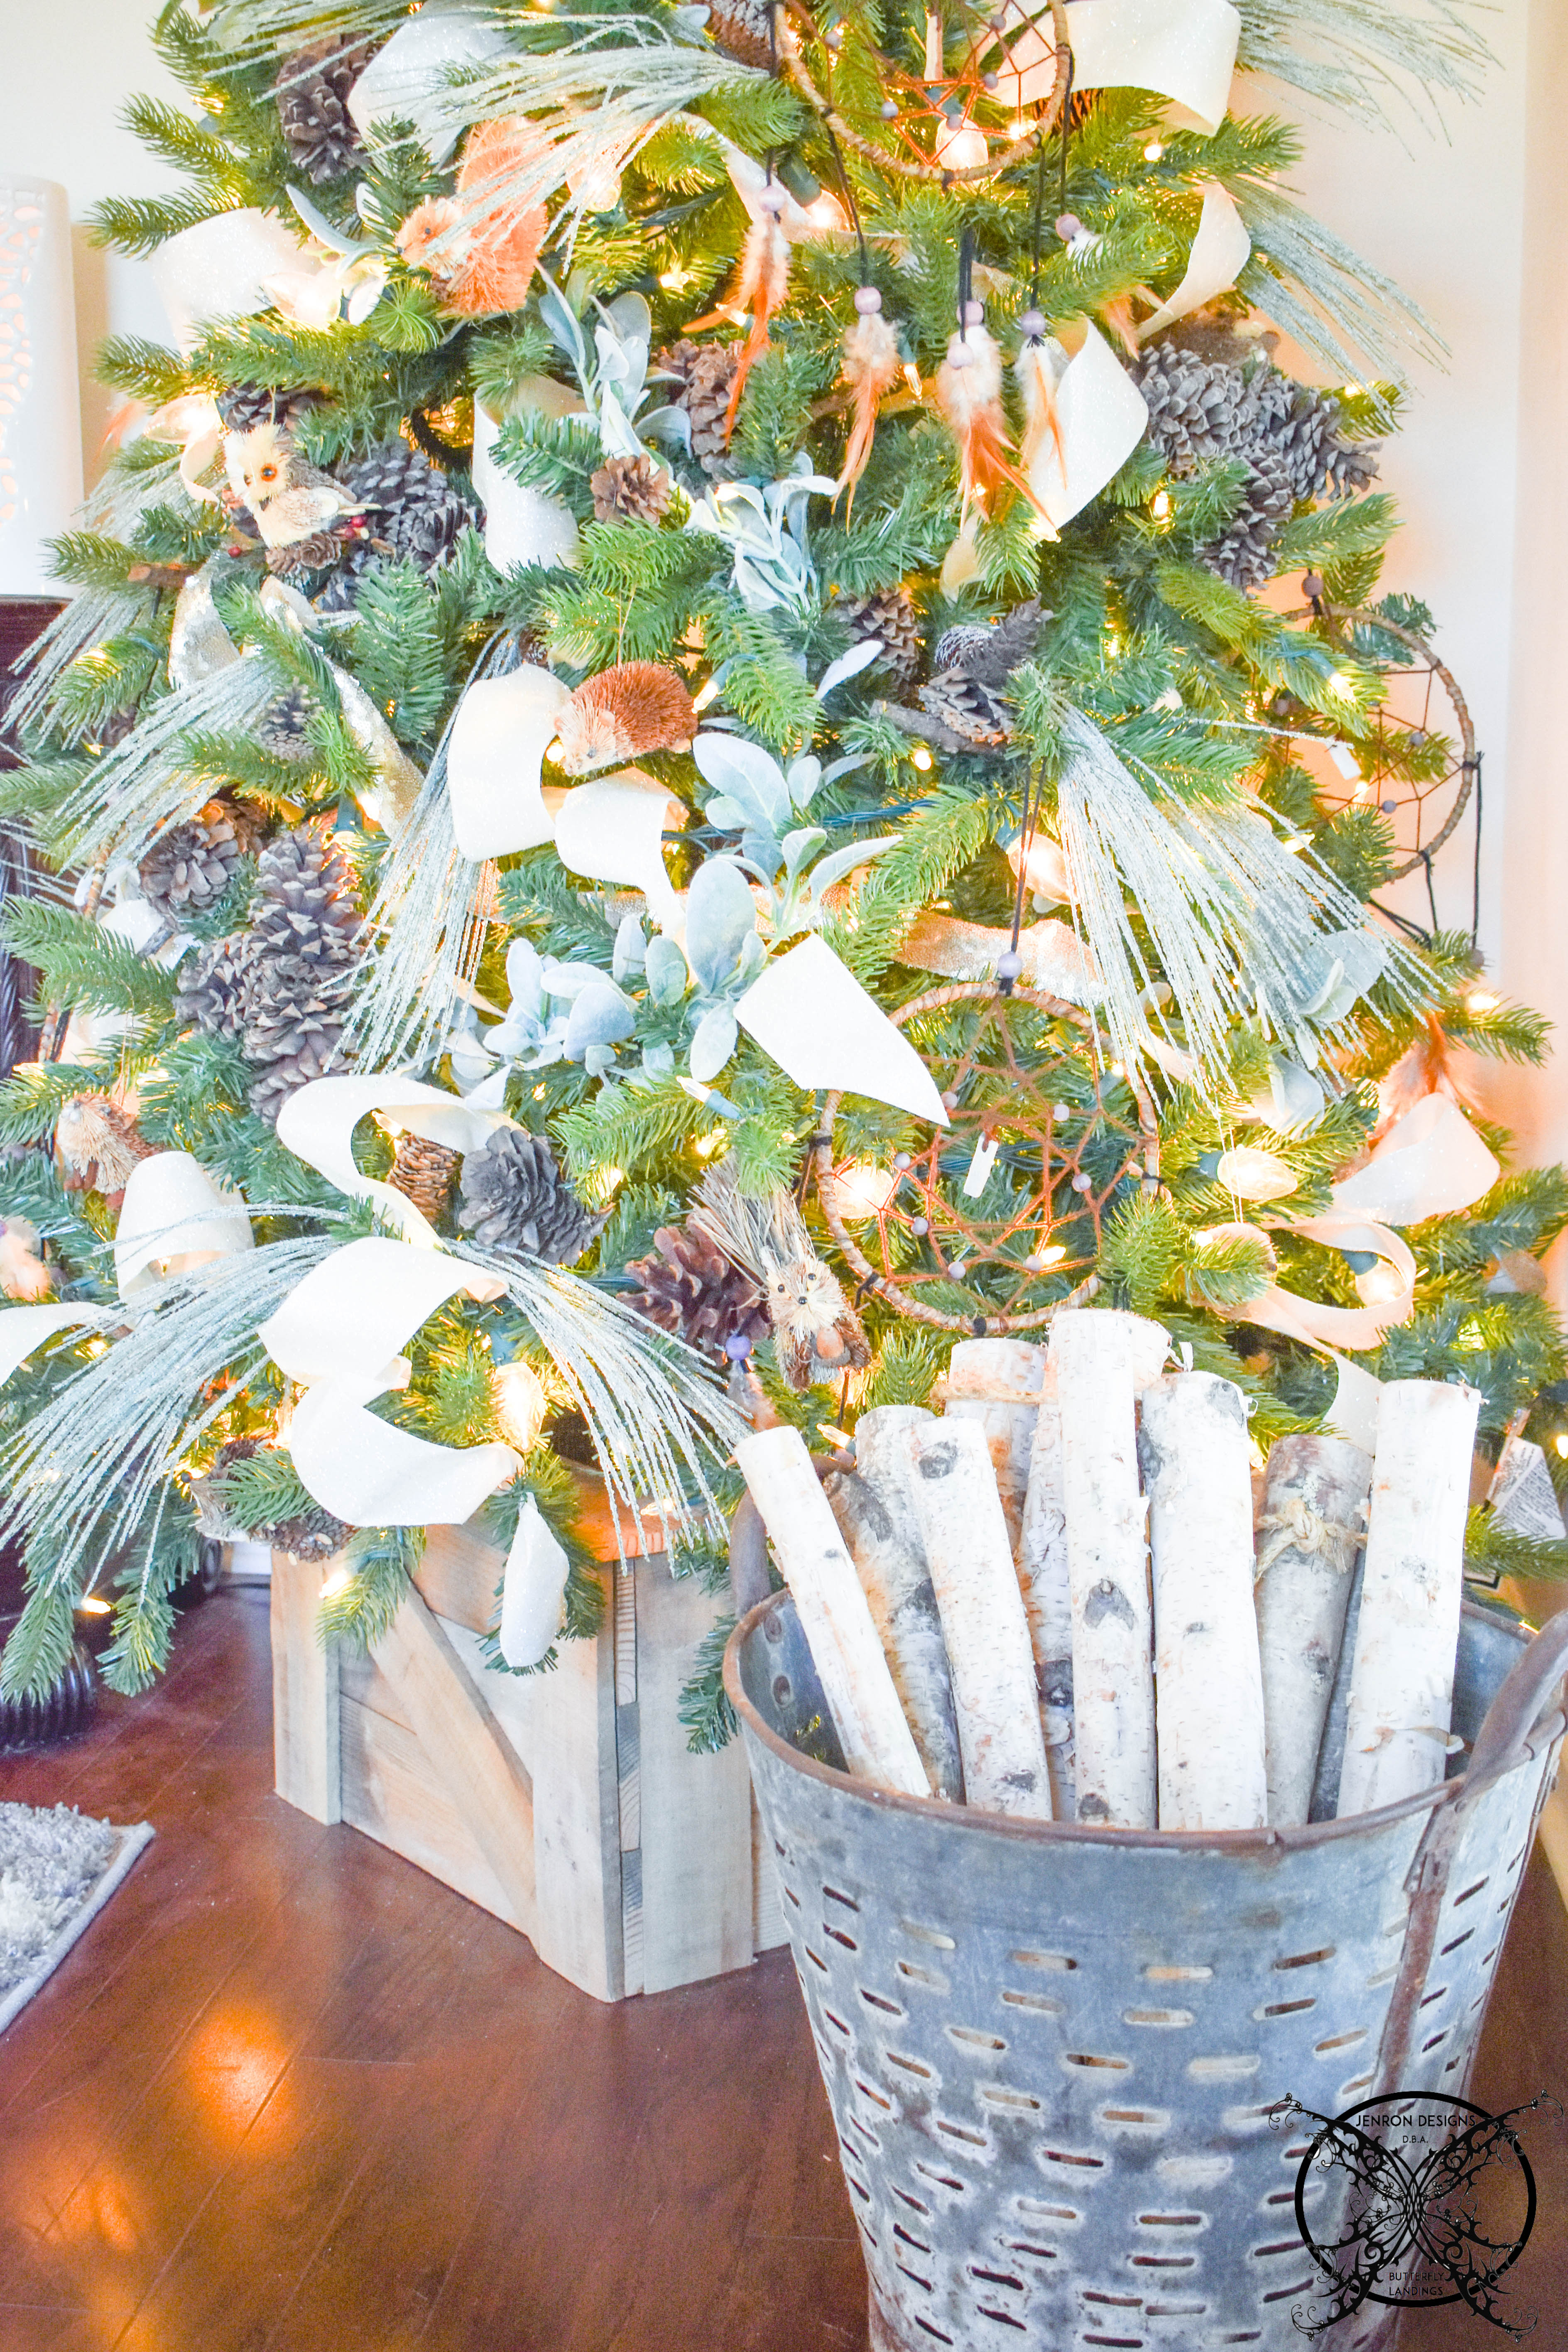
*Please note that this post may contain affiliate links for your convenience. These involve no extra cost to you, but may result in me receiving a small commission – for which I am very grateful! You can view my full advertising disclosure here.
SHOP MY RUSTIC HOLIDAY STYLE:
Did you love this tree, want to see more of my holiday trees? You can see more at these great holiday tree posts:
DIY TREE BOX STAND TUTORIAL:
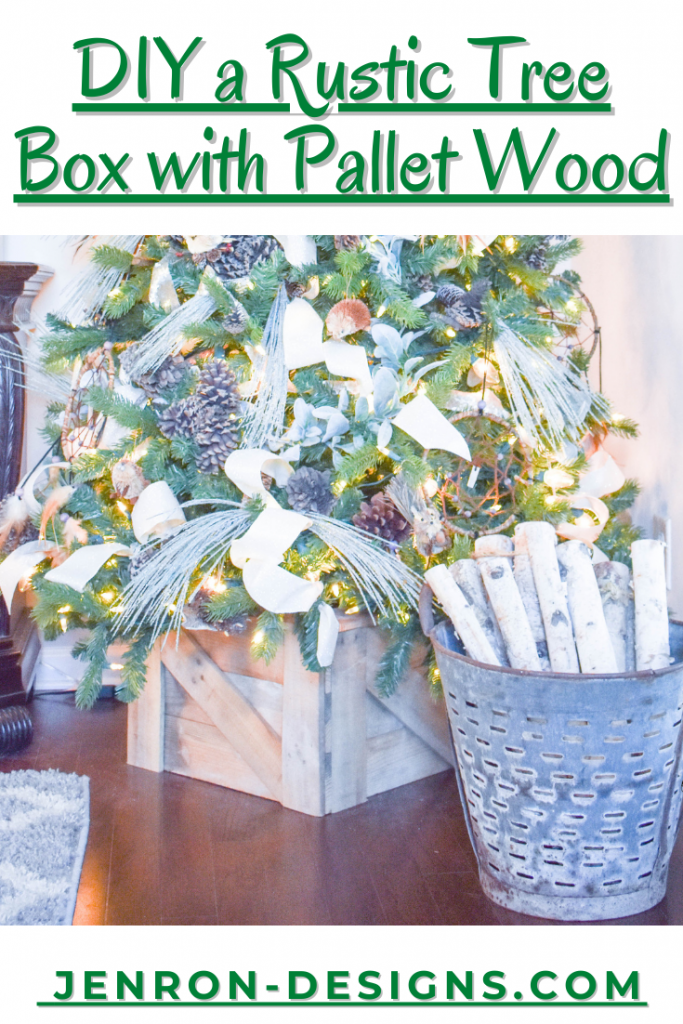
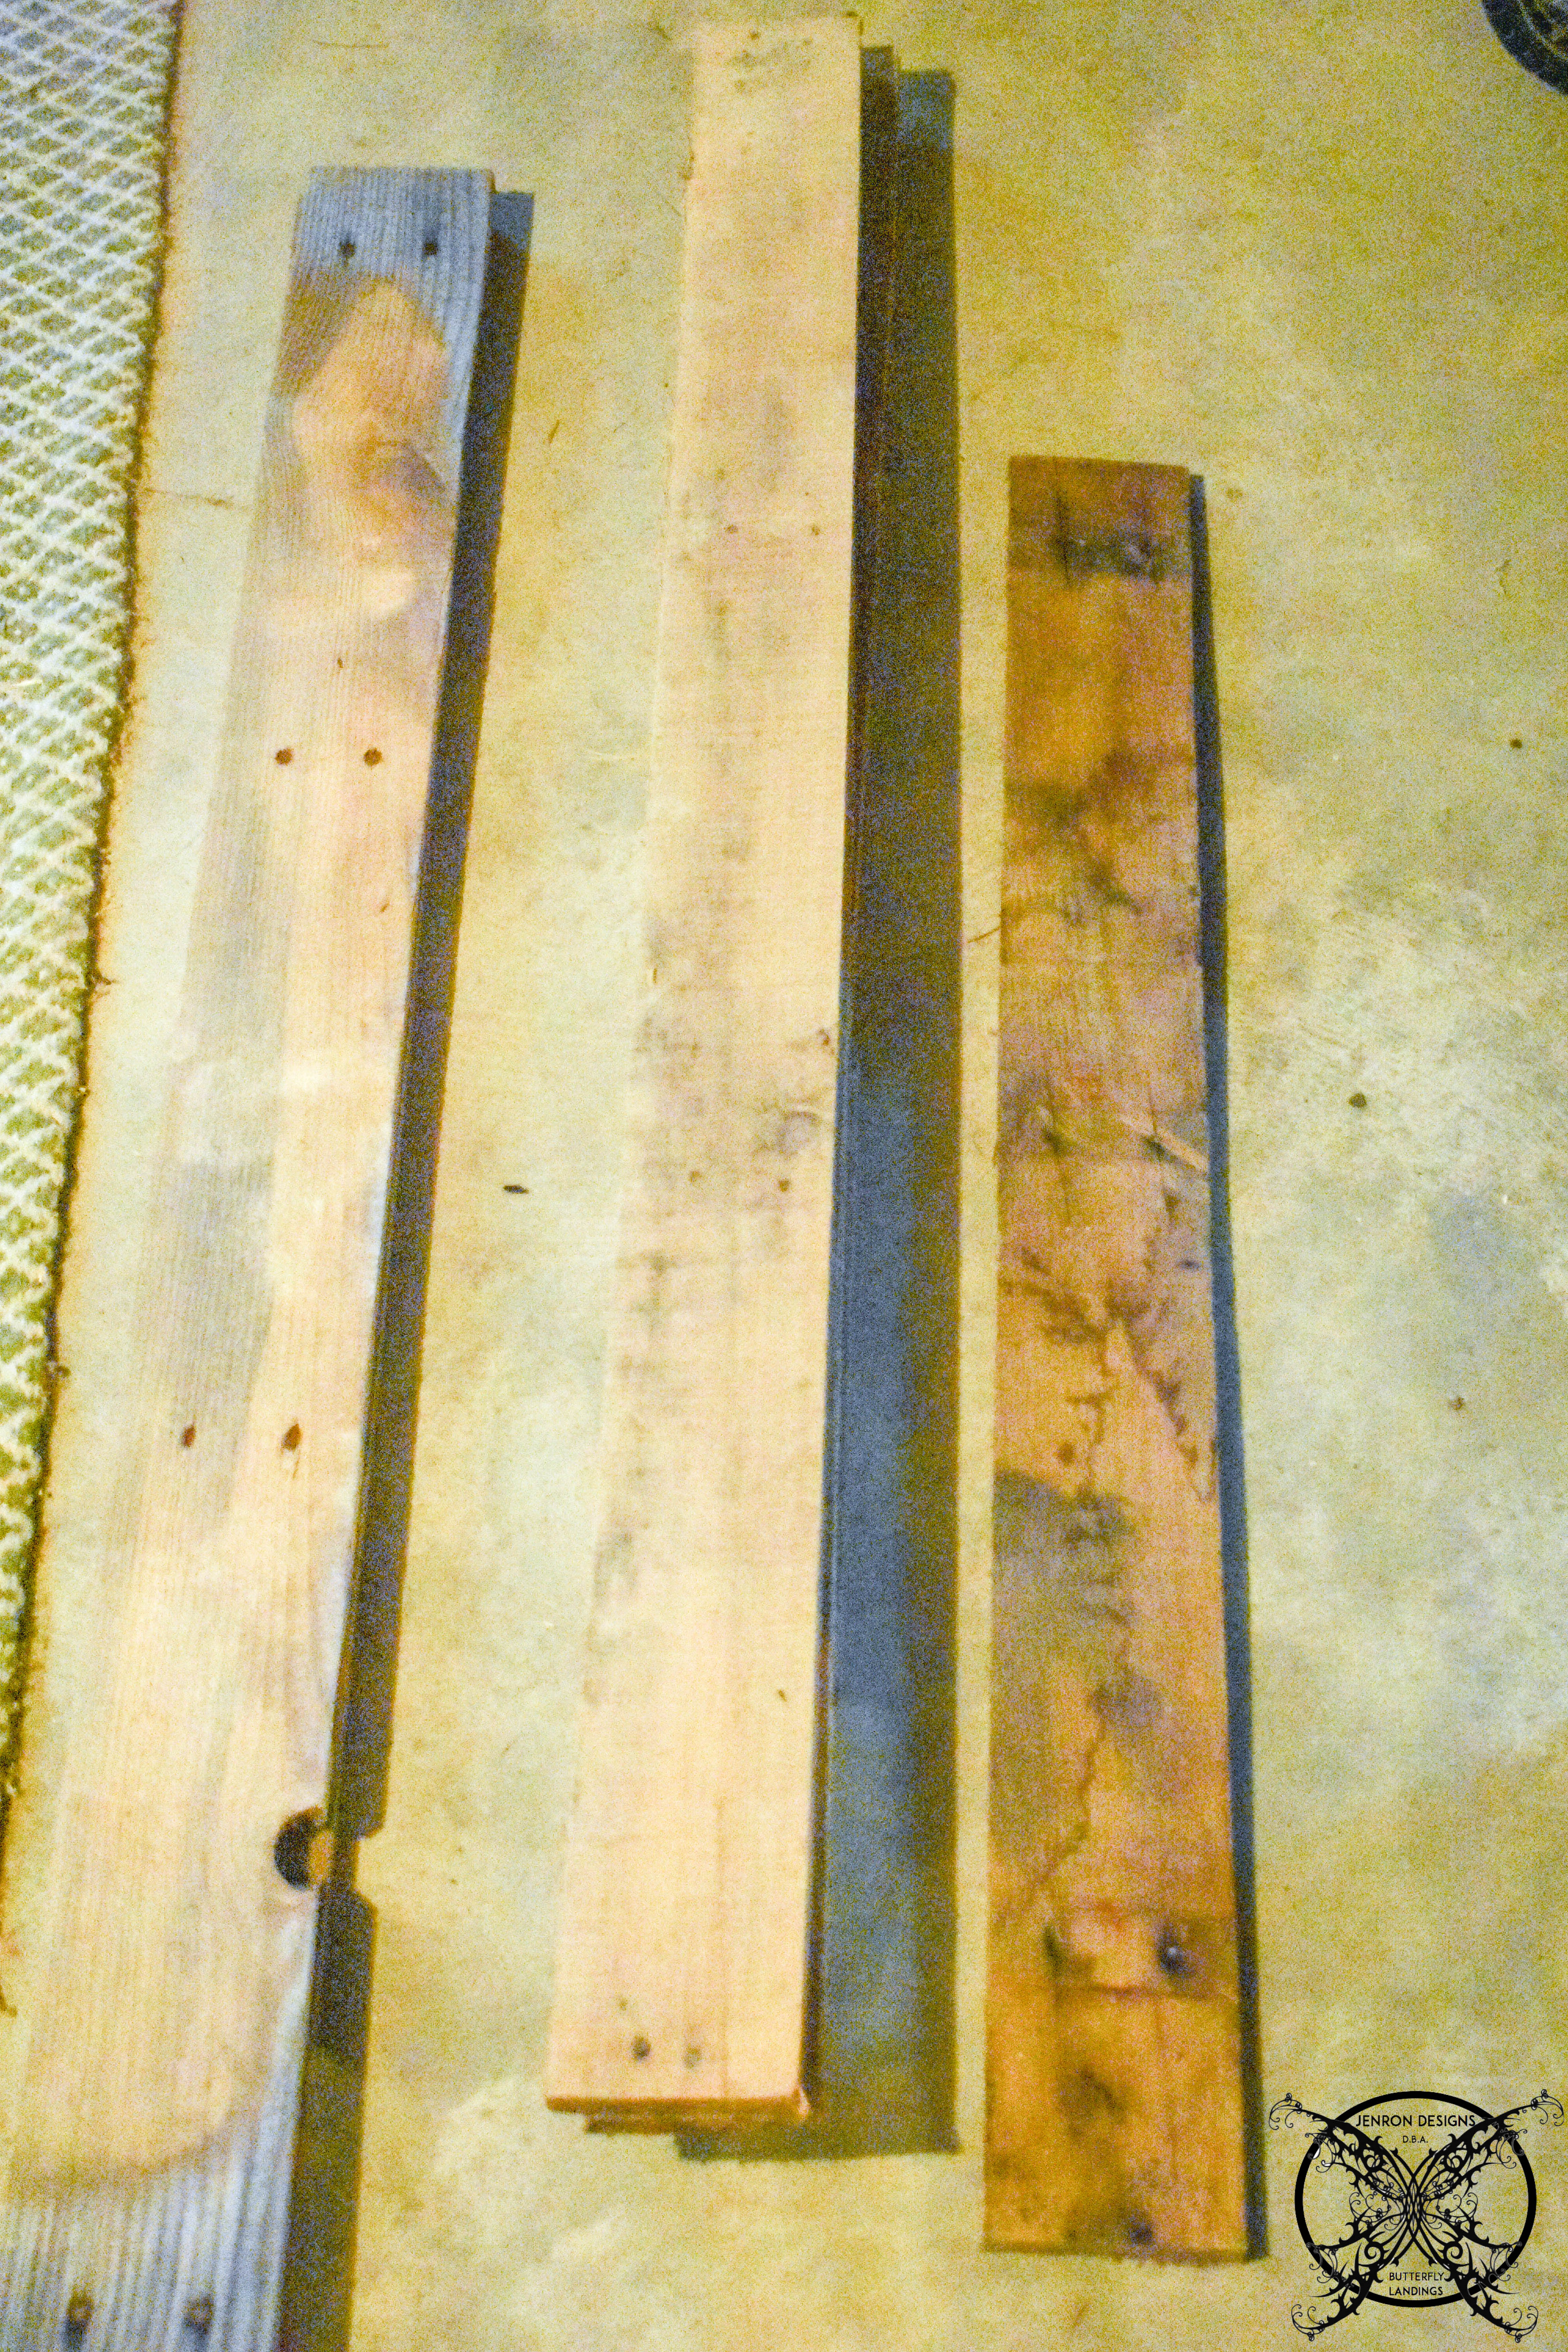 This tree was slated to have a DIY rustic style box or crate that would be made out of our leftover pallet pieces. We had a ton of bits and pieces left over from various projects, such as the DIY Pallet Bed for the Sleeping Porch or the Wheelbarrow O’Plenty Garden. This was a freebie project that literally cost us nothing to make but time and some nails for the trusty nail gun.
 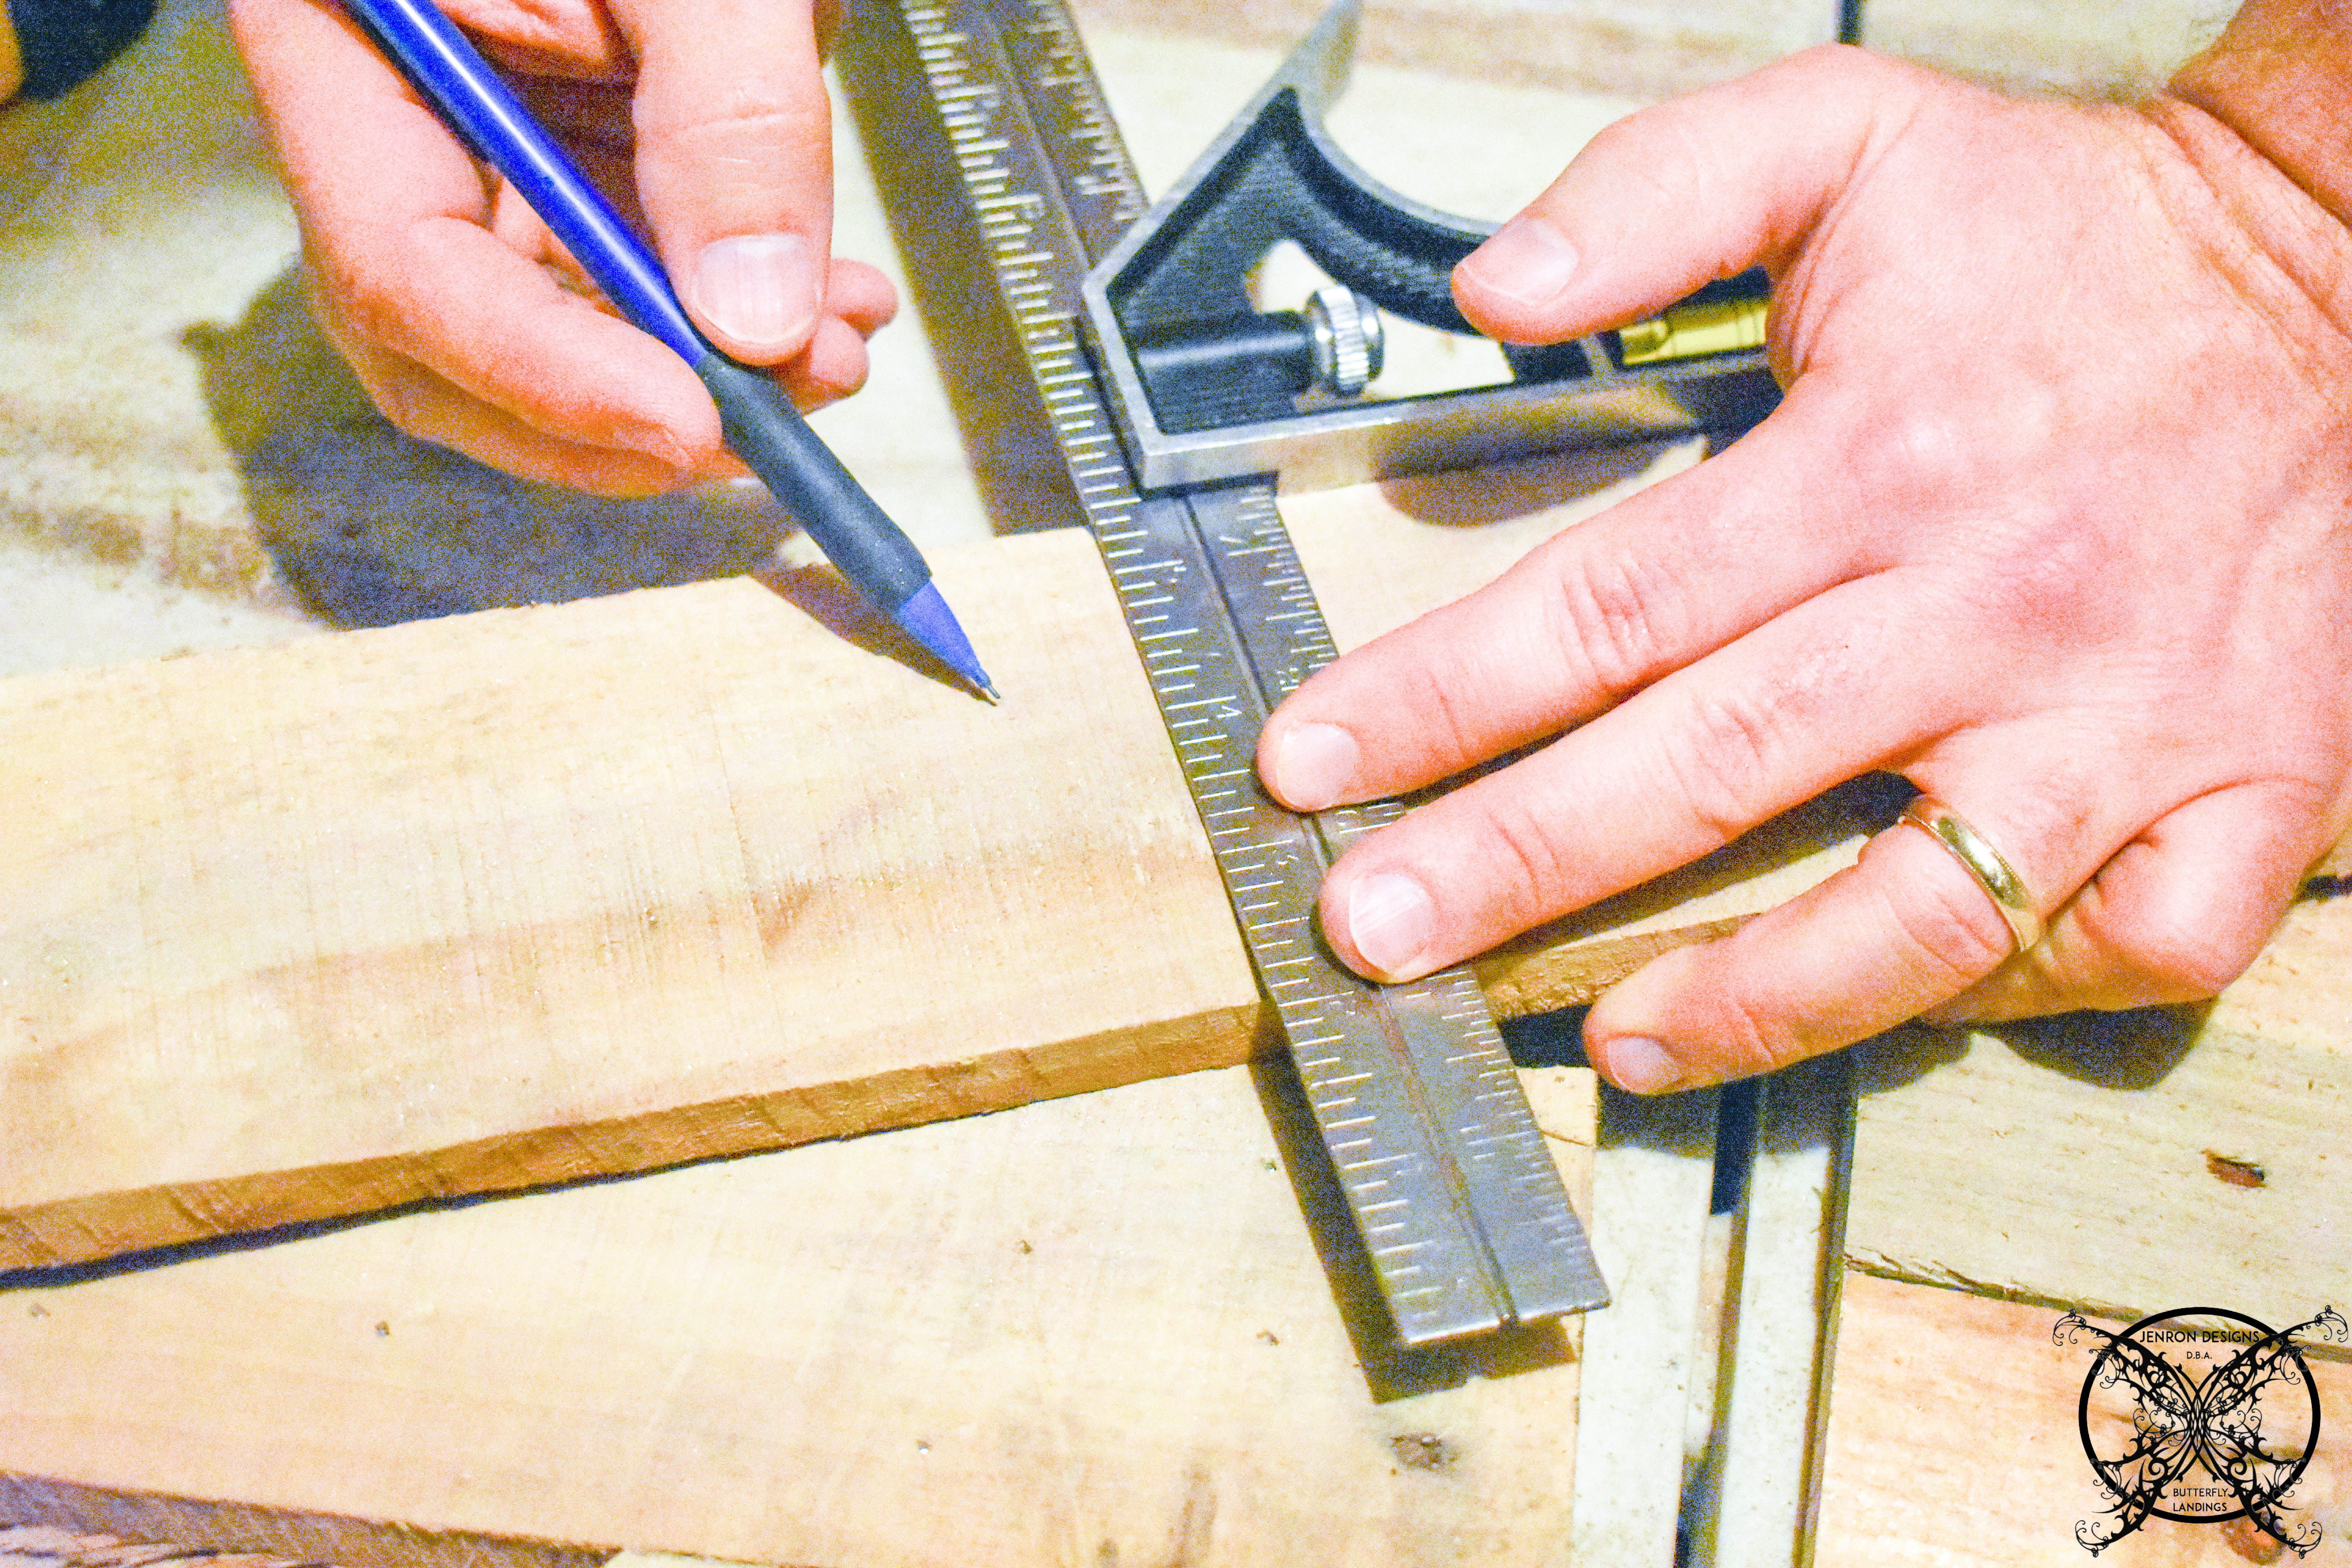 I decided that since the tree would be cornered it really only needed to be a 3 sided piece so it could be possible to collapsible for easy storage, when not in use for the off season.
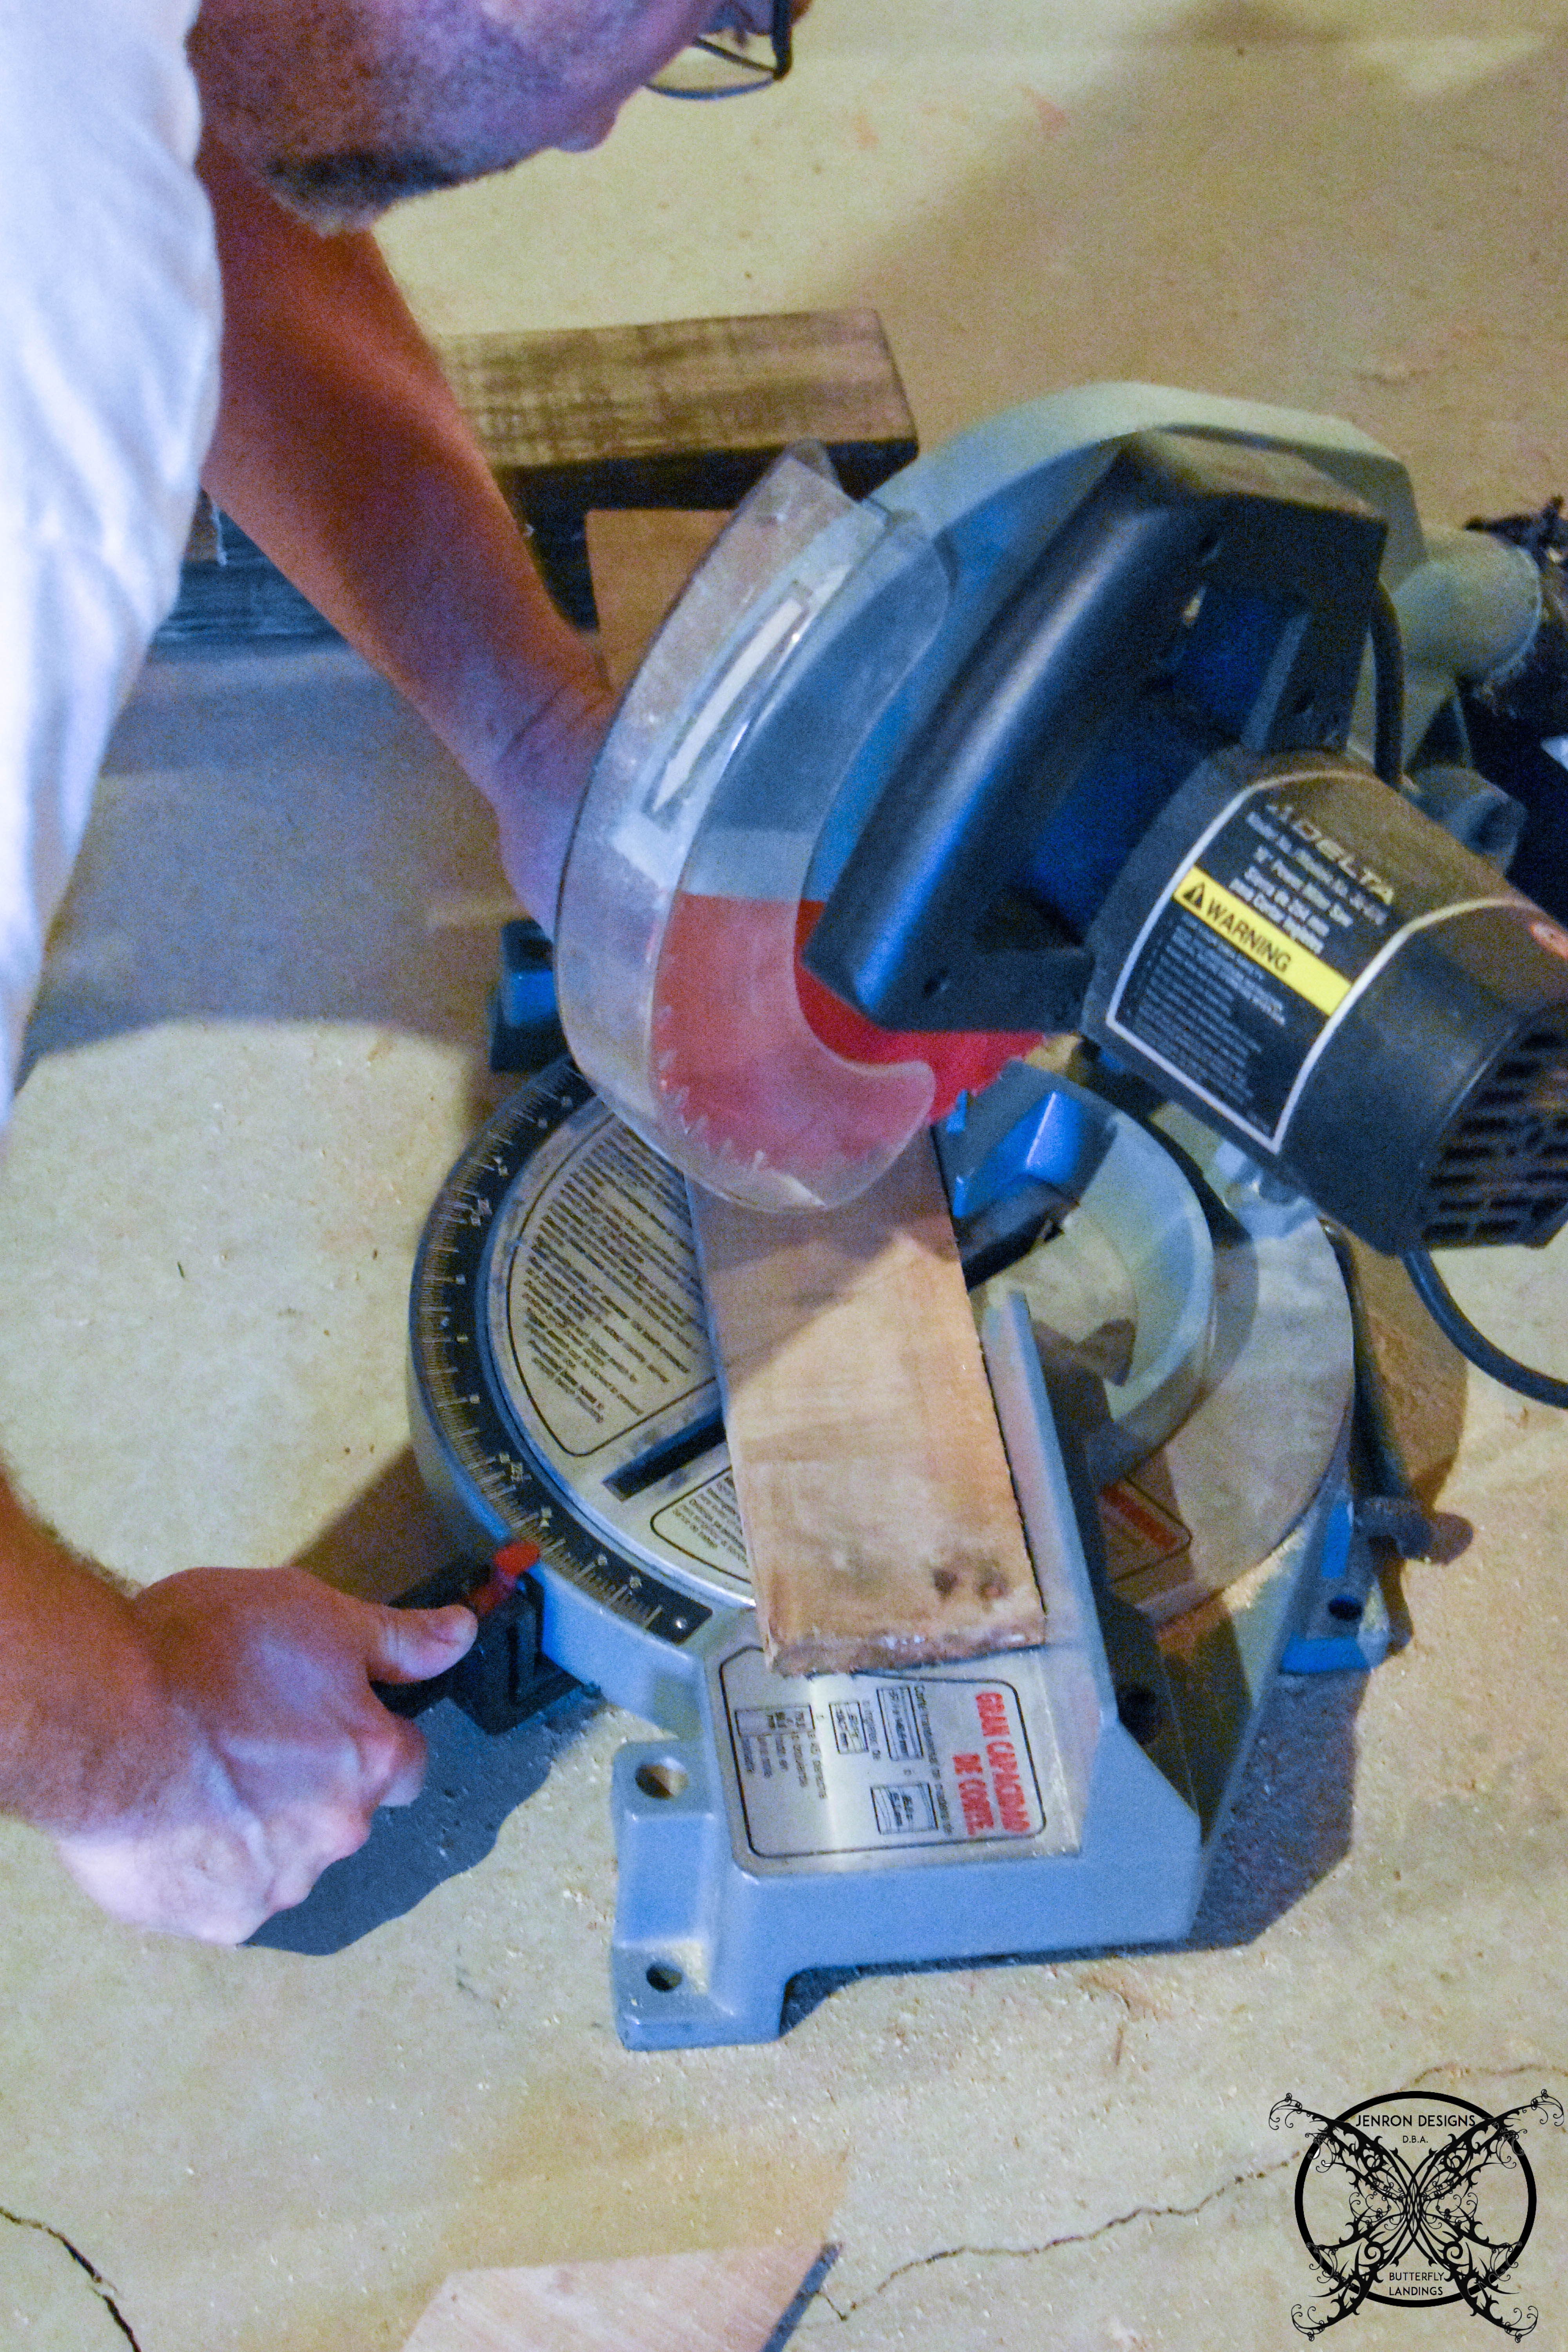 The panels were very simple to make; cute three boards the same length then create two side boards to hold them together.
 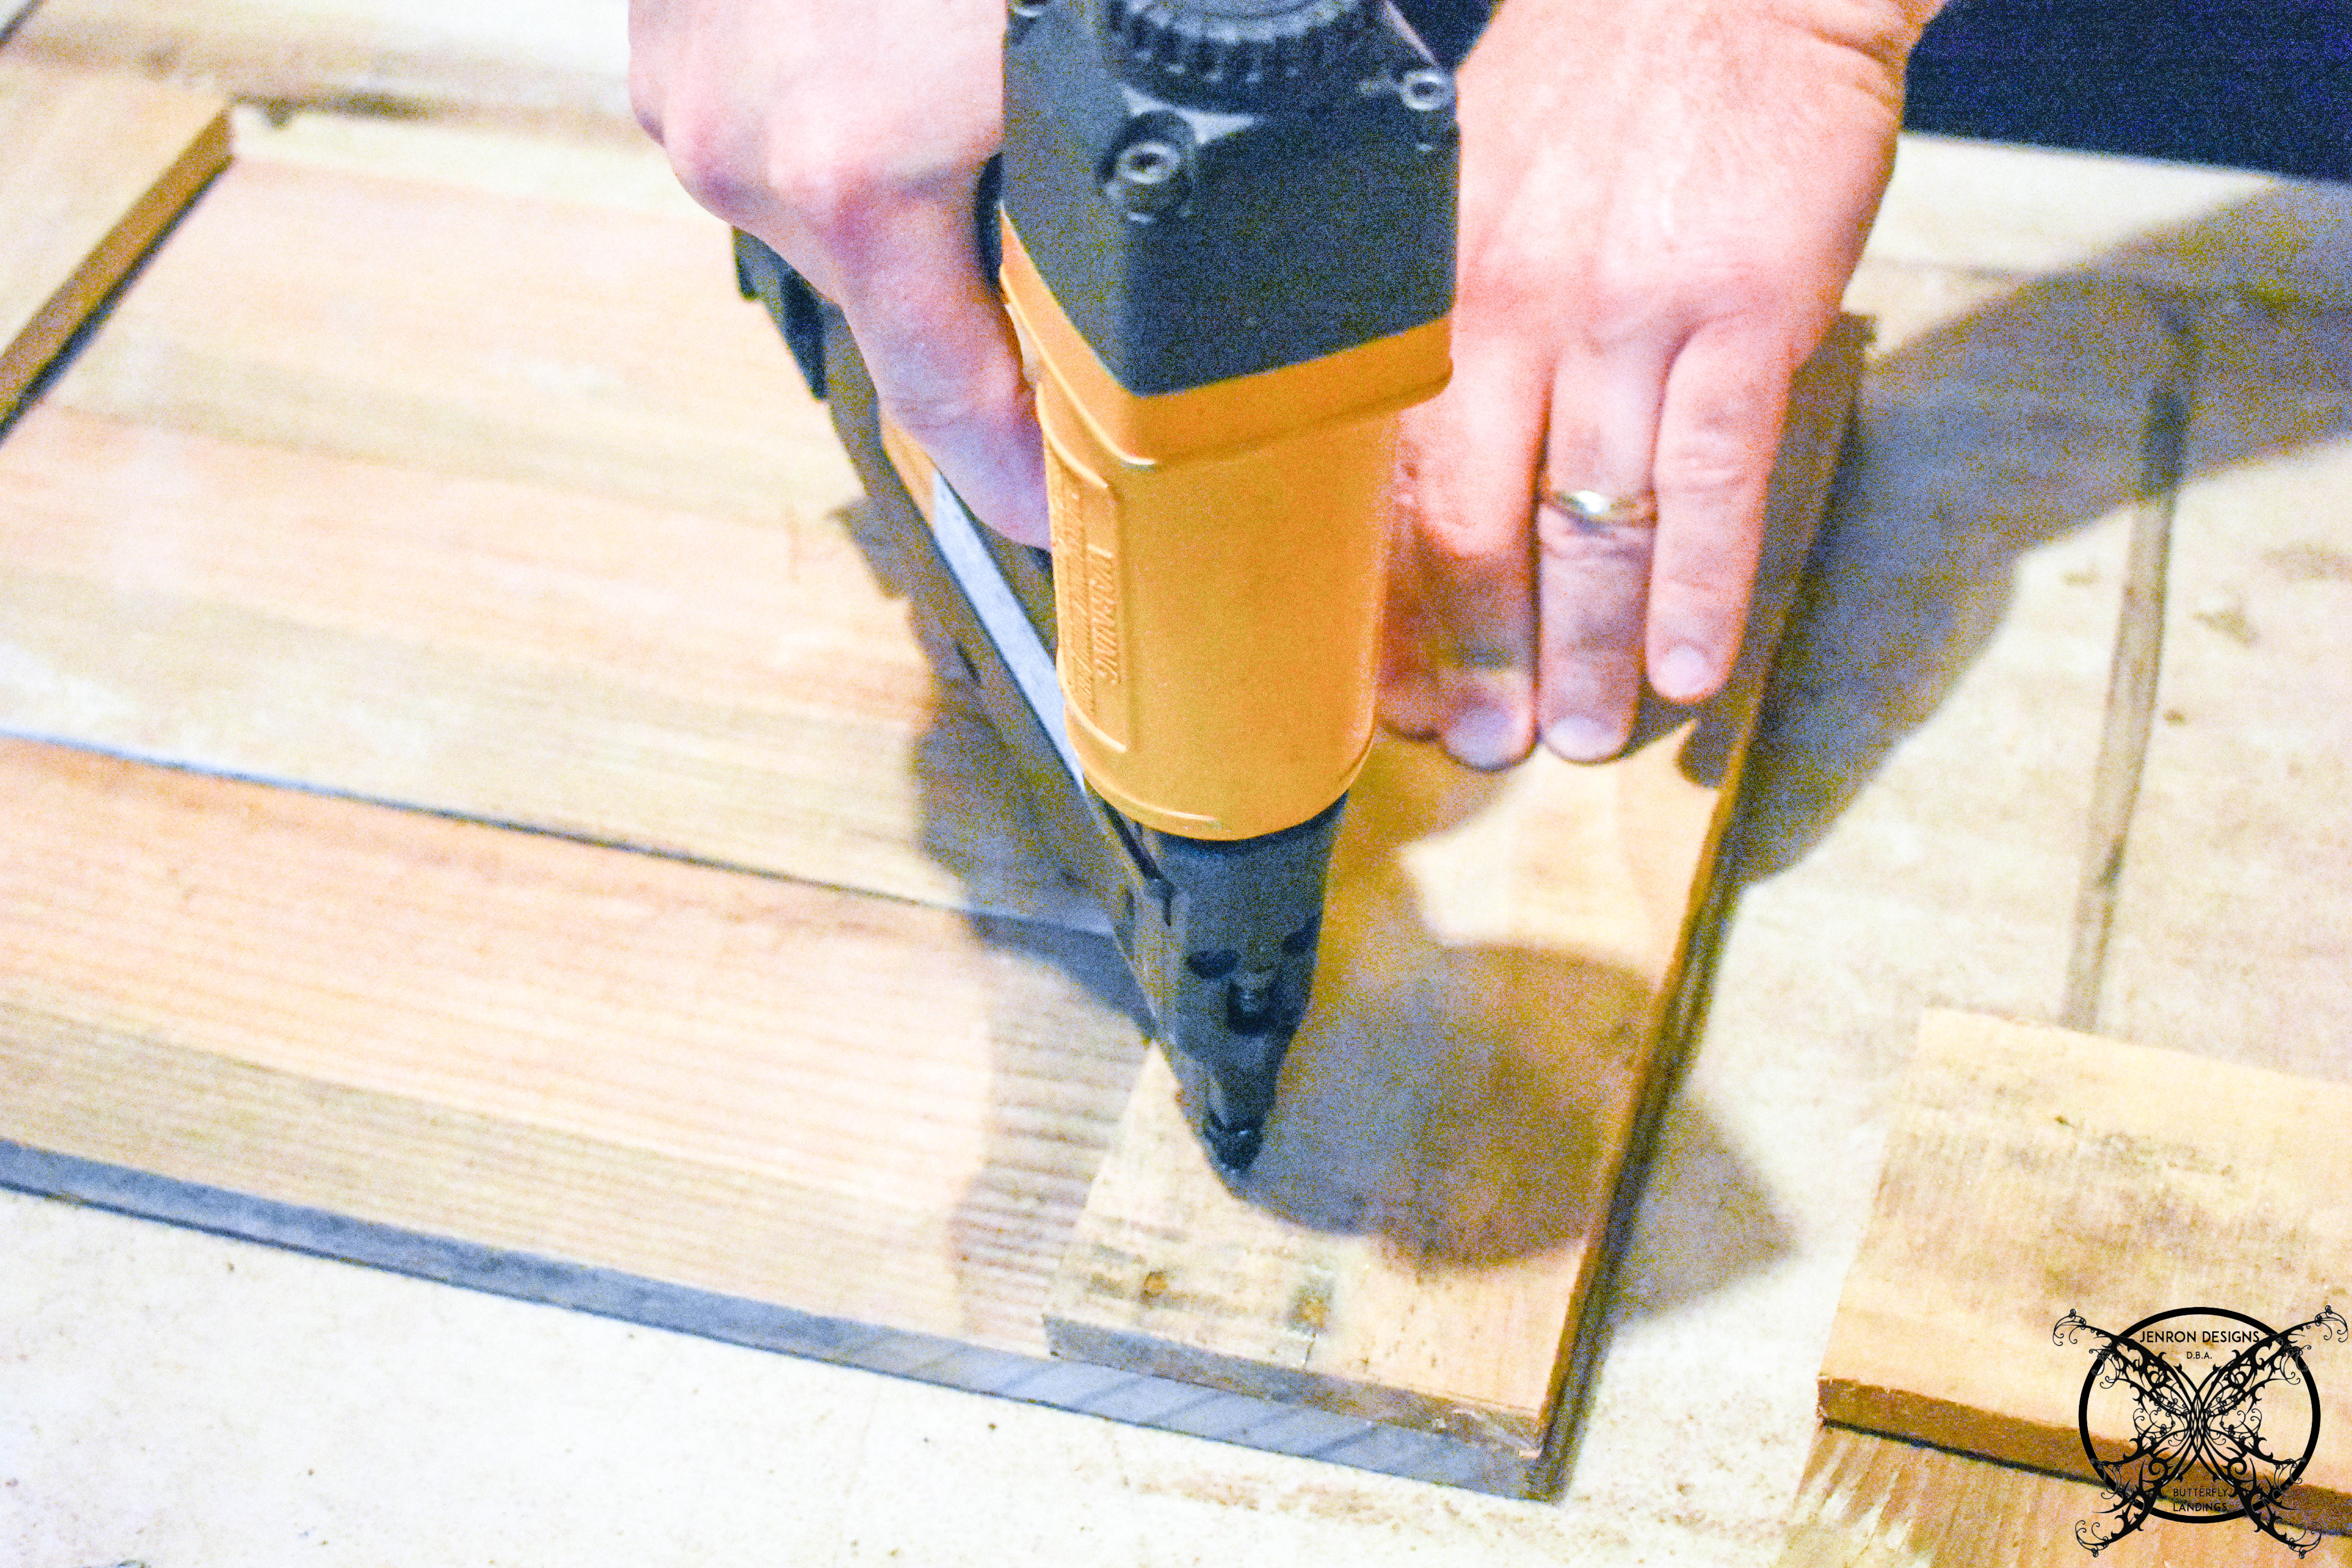 Then use a bevel to find the correct angle to cut the cross board for a decorative look on the box. You can do a single or make an X, it is completely up to you and your taste.
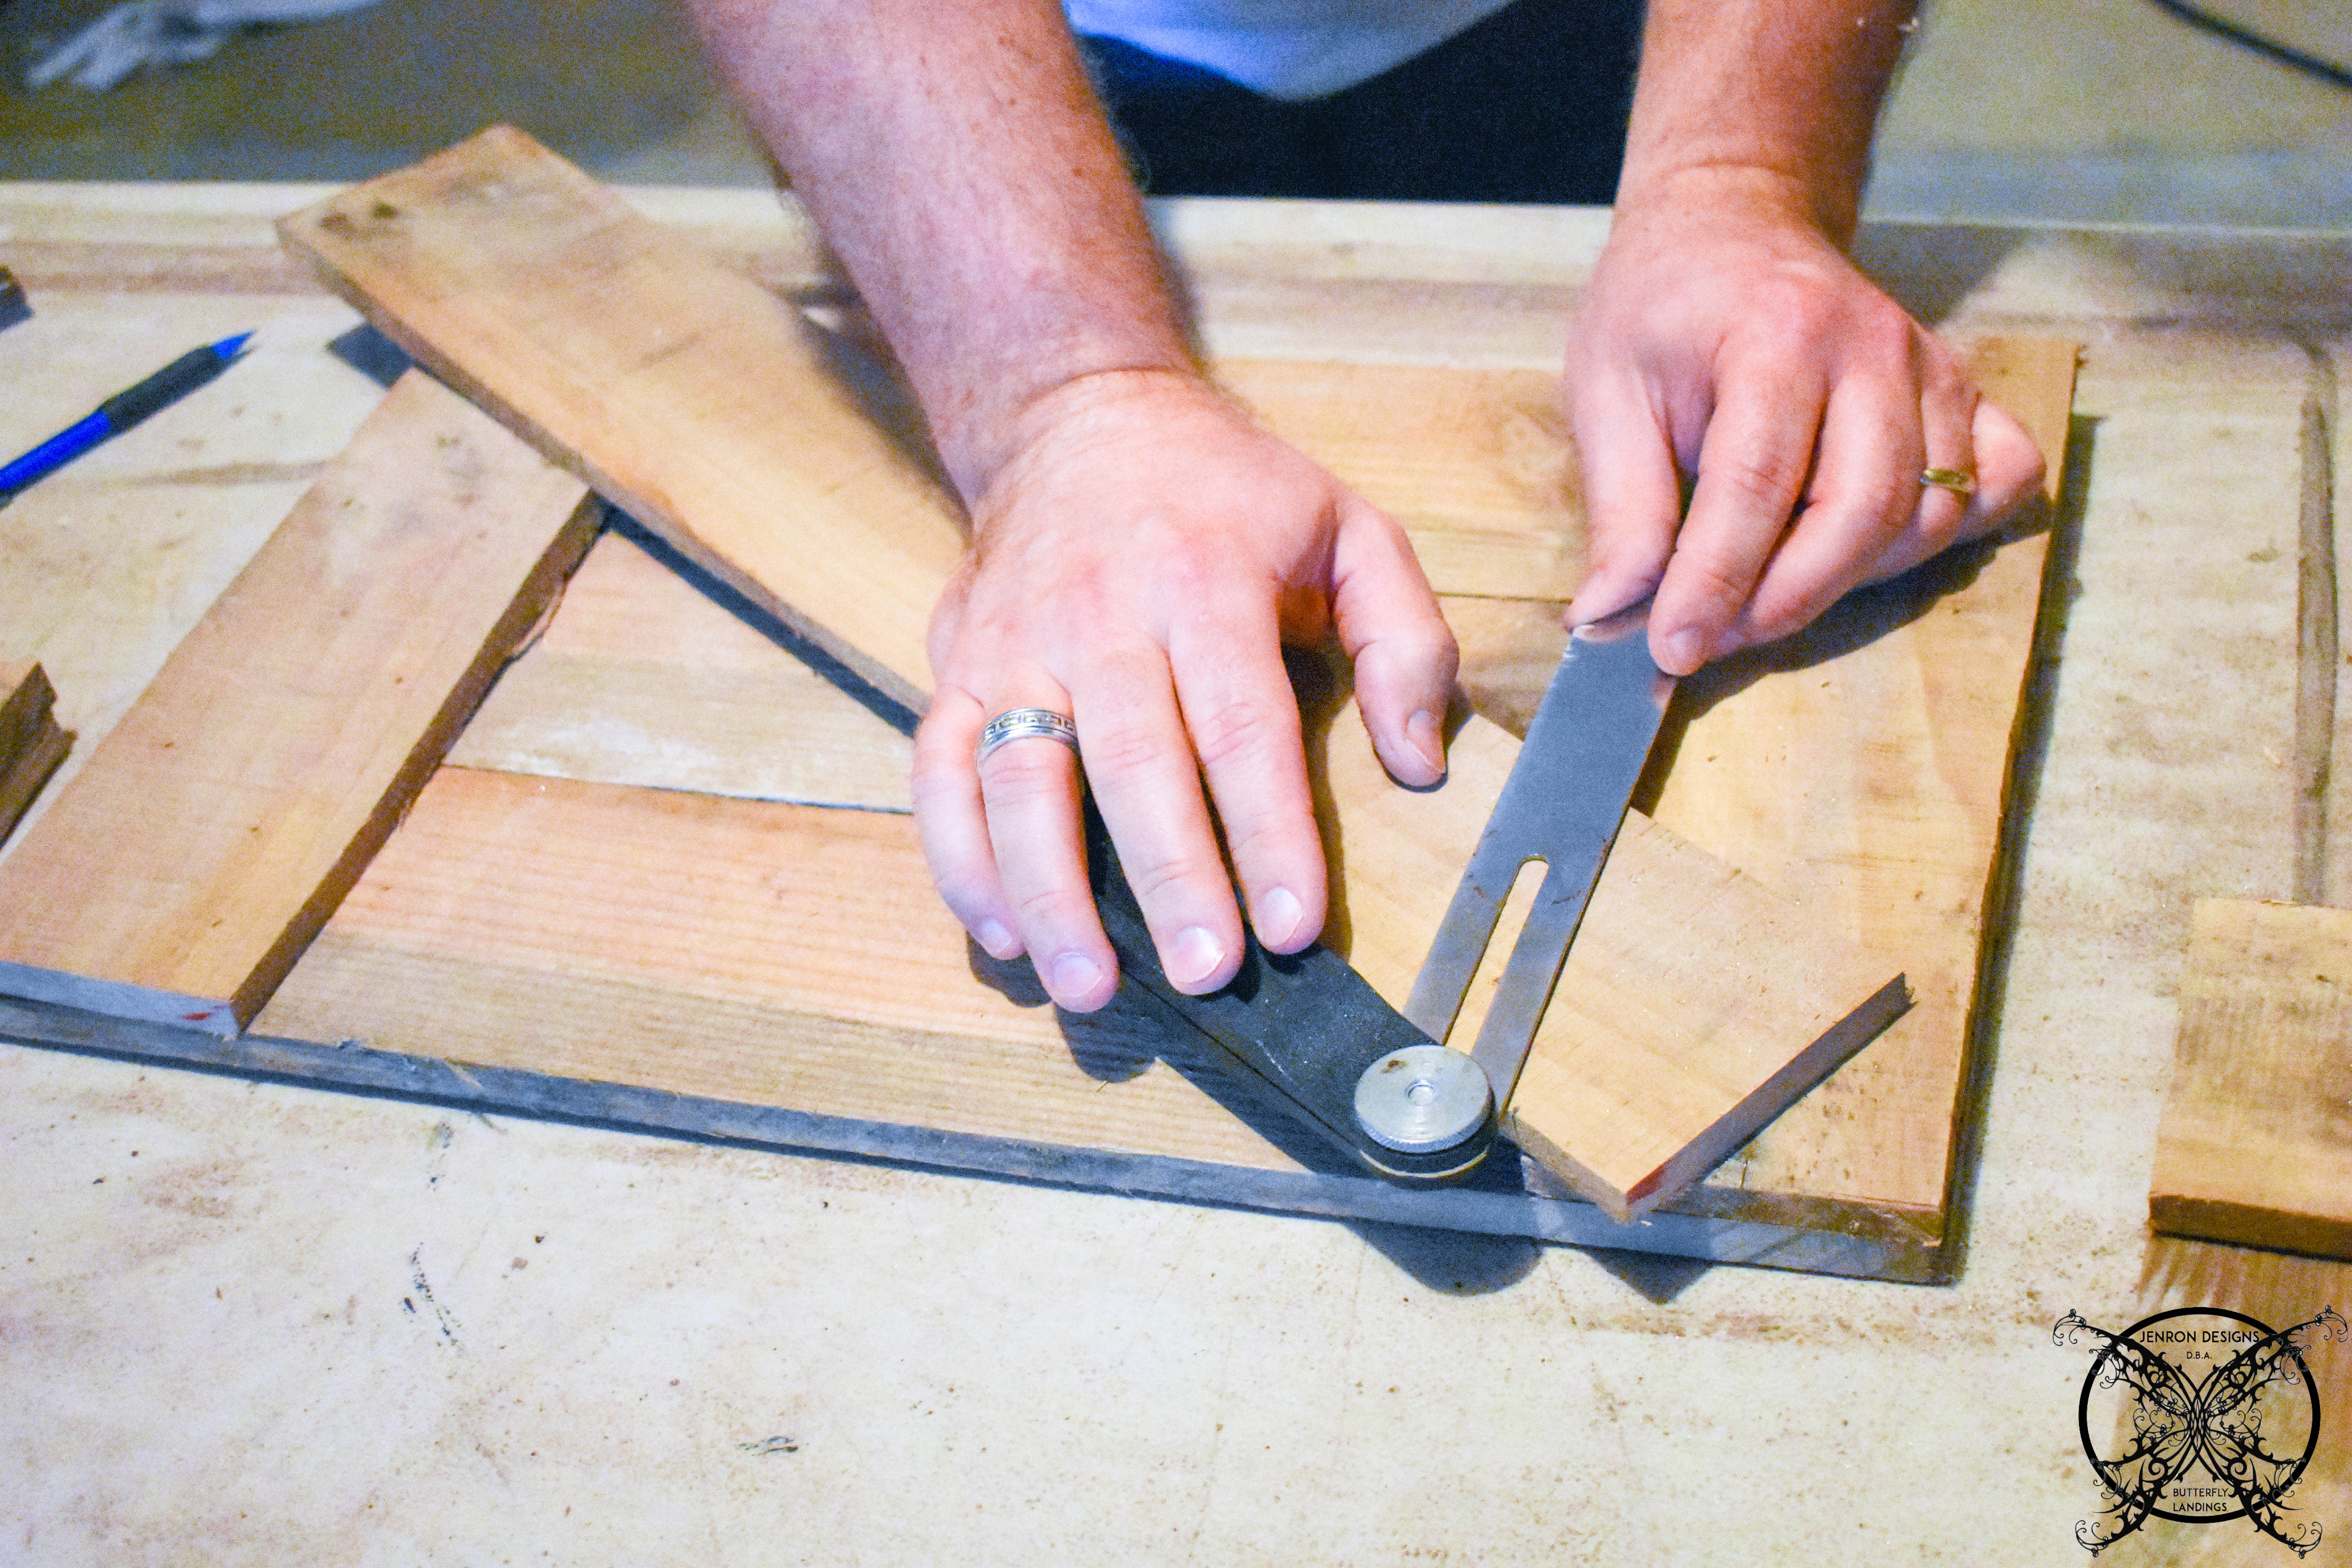 Then you just repeat the process for two more sets of panels or three if you want a full box. We decided to only make ours three sided fbox, for a collapsible base which makes it easy for storage, and takes up less space. Although you could use it for a flower box cover though the year if you decided on a four sided box.
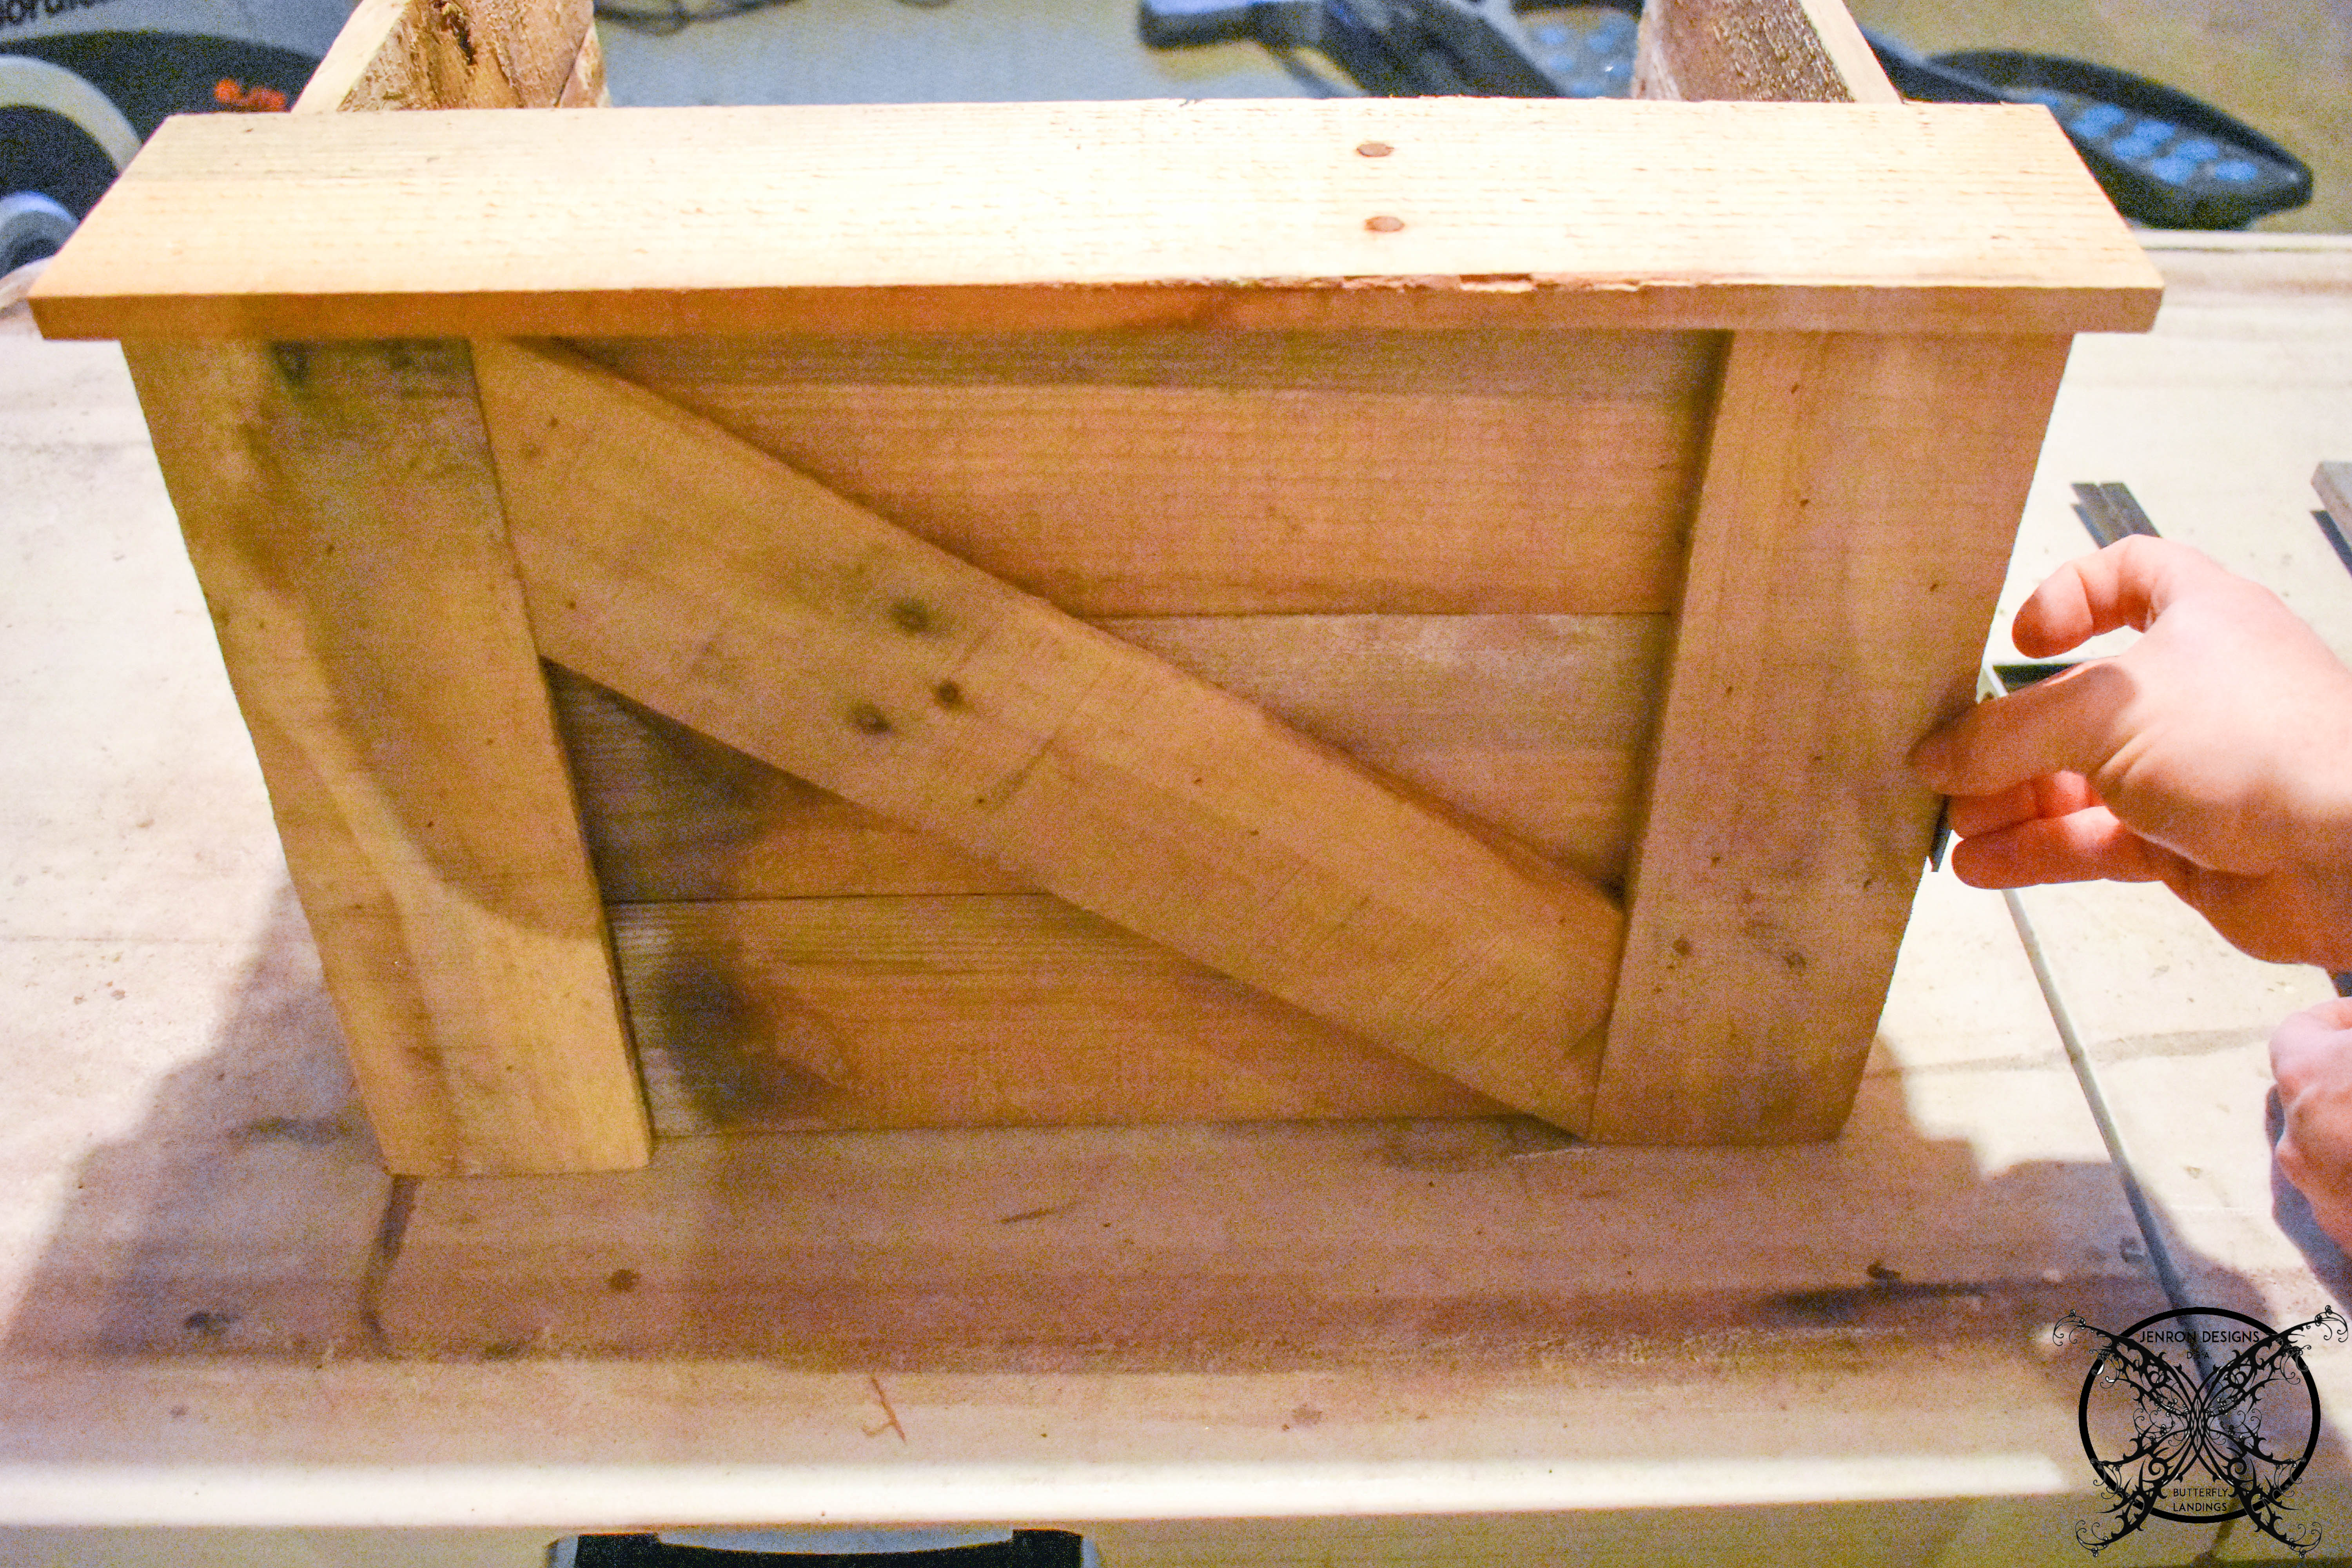
 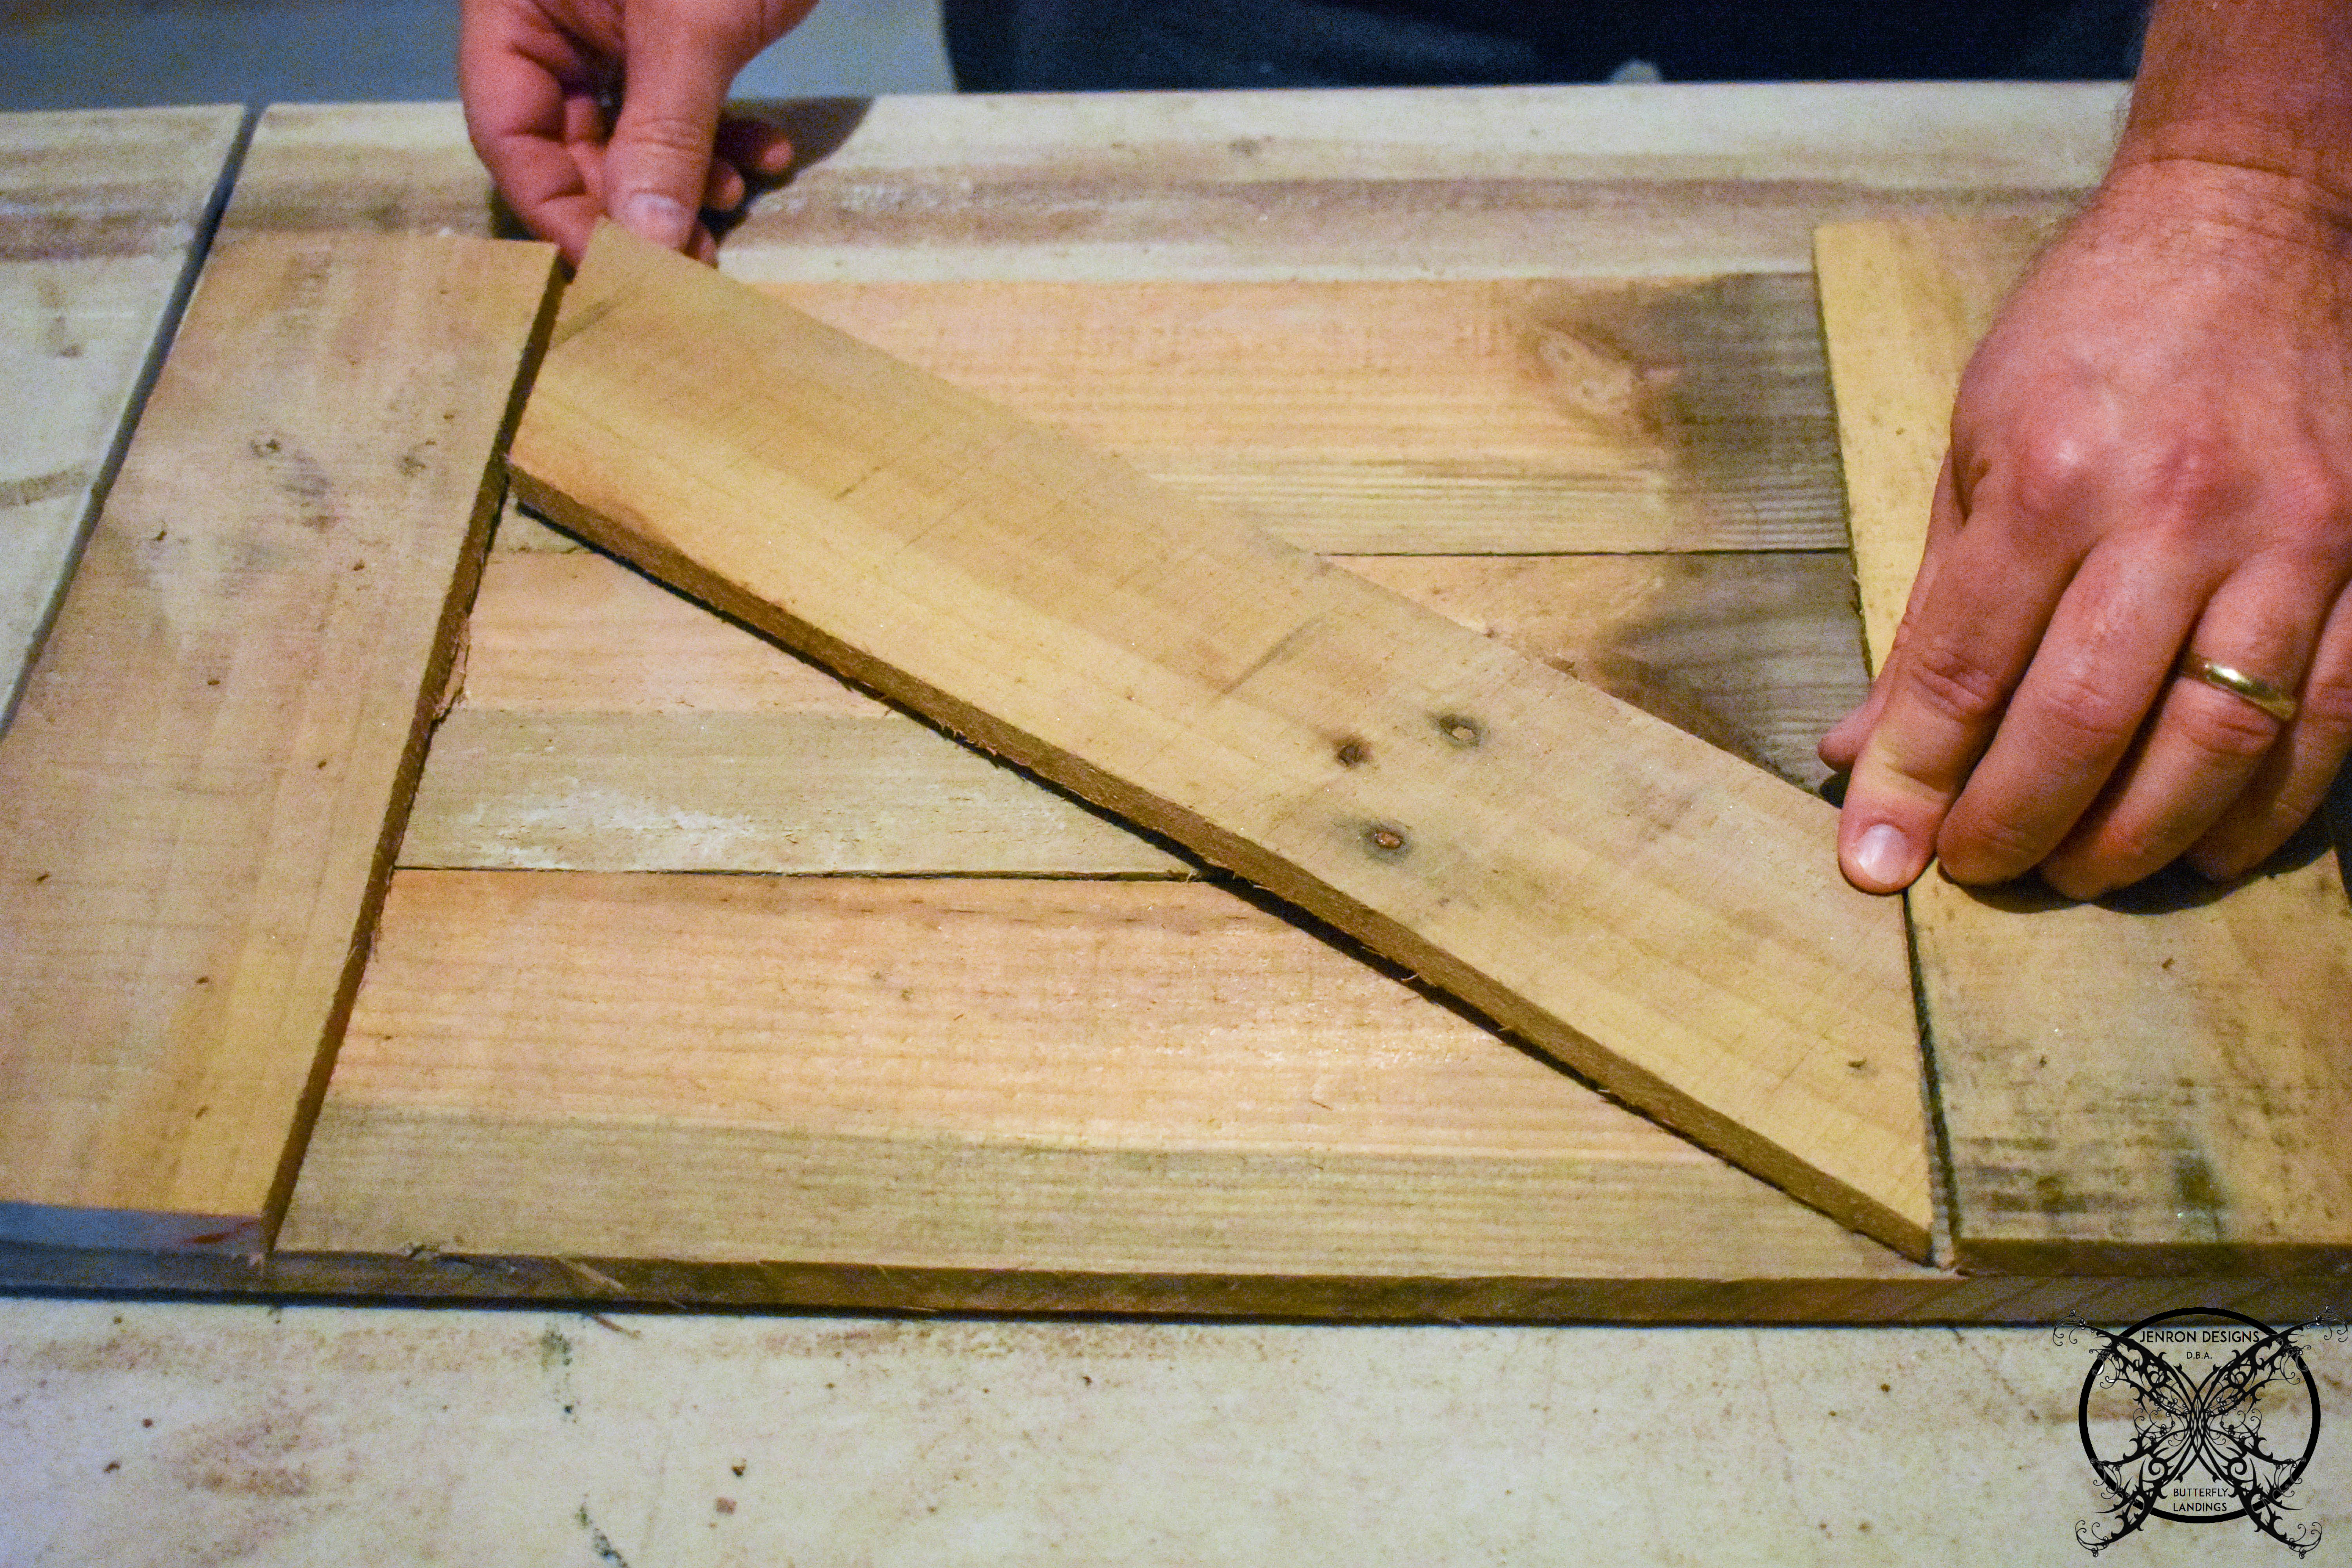 Next you will want to either hinge the three sides together for a collapsible box, or if you are like me this is where you change the design completely and drive your husband nuts!
 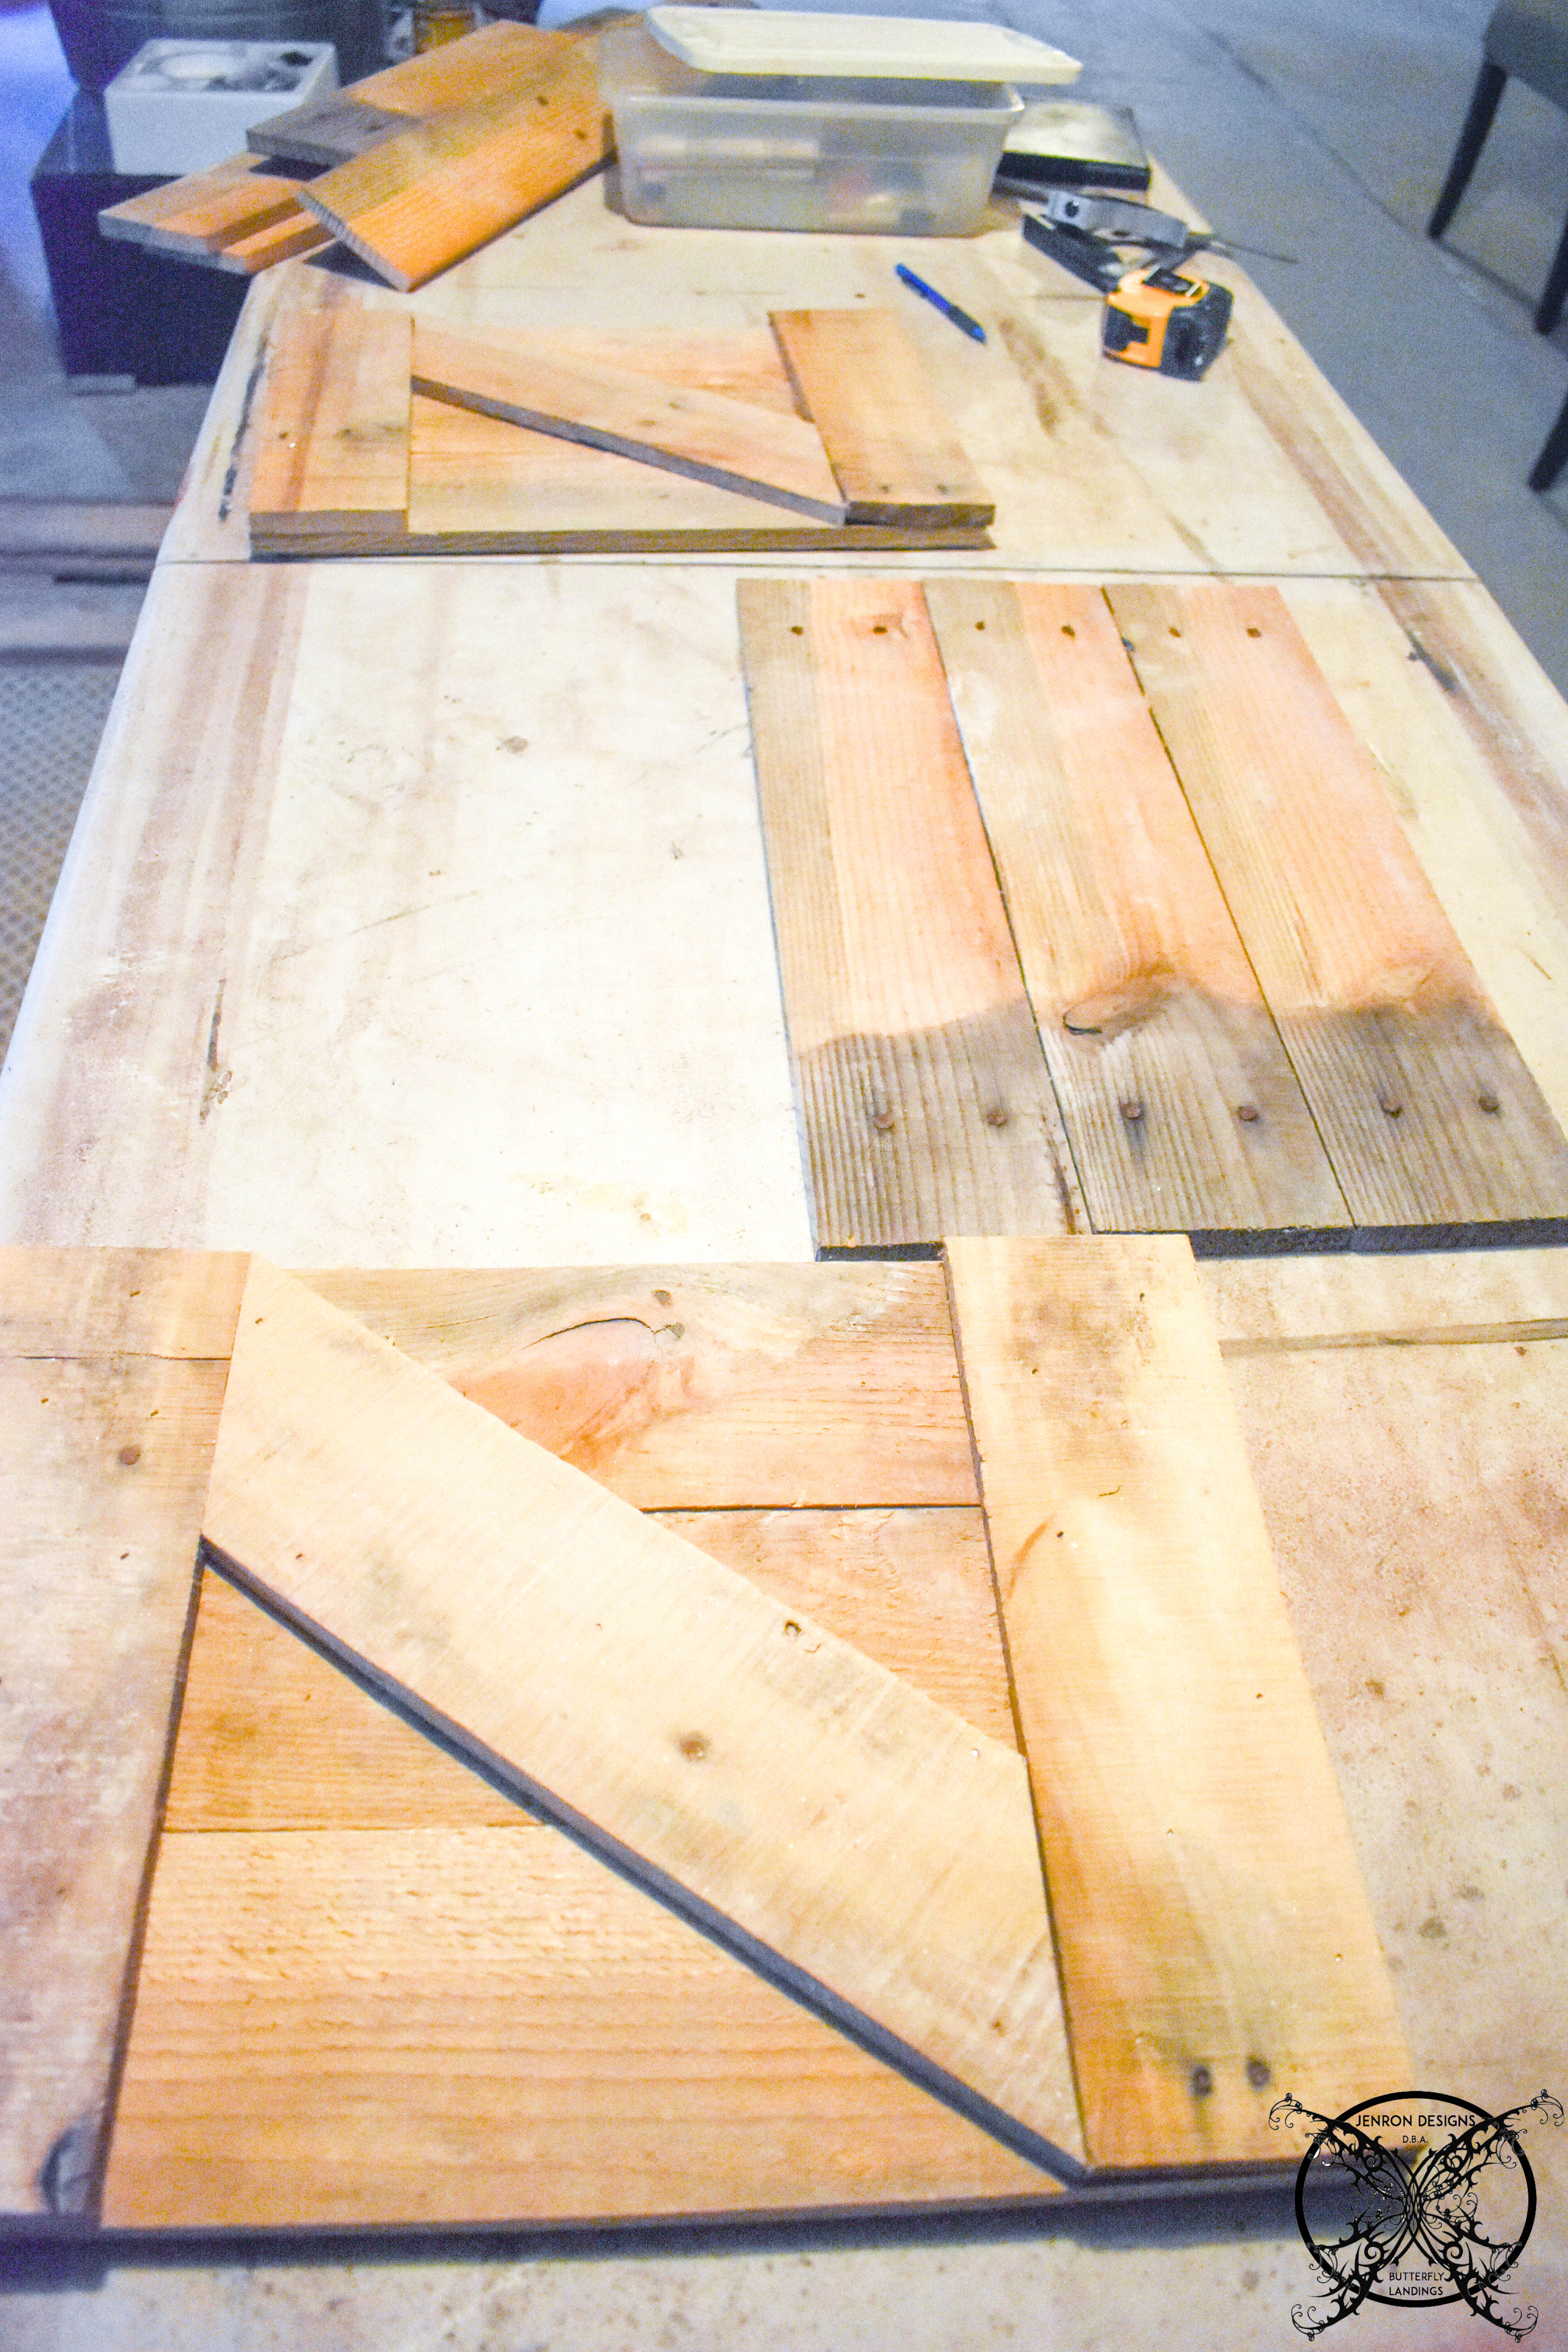 Since I decided that I liked the decorative edge across the top of the box, it is not actually collapsible anymore, and is now stationary. So you can totally make it four sided if you wish, but again since it is going in a corner we still opted to keep it three sided; which leaves a great place to hide all the cords.
 Then place under you tree and hide all your cords and plug strips behind the box and I promise, no Roomba will be gobbling them up this season. It also deters your pets from messing with the cords and tree skirts as well. Which having four mischievous cats at my house, someone is always romping in the tree skirts, this year problem solved.
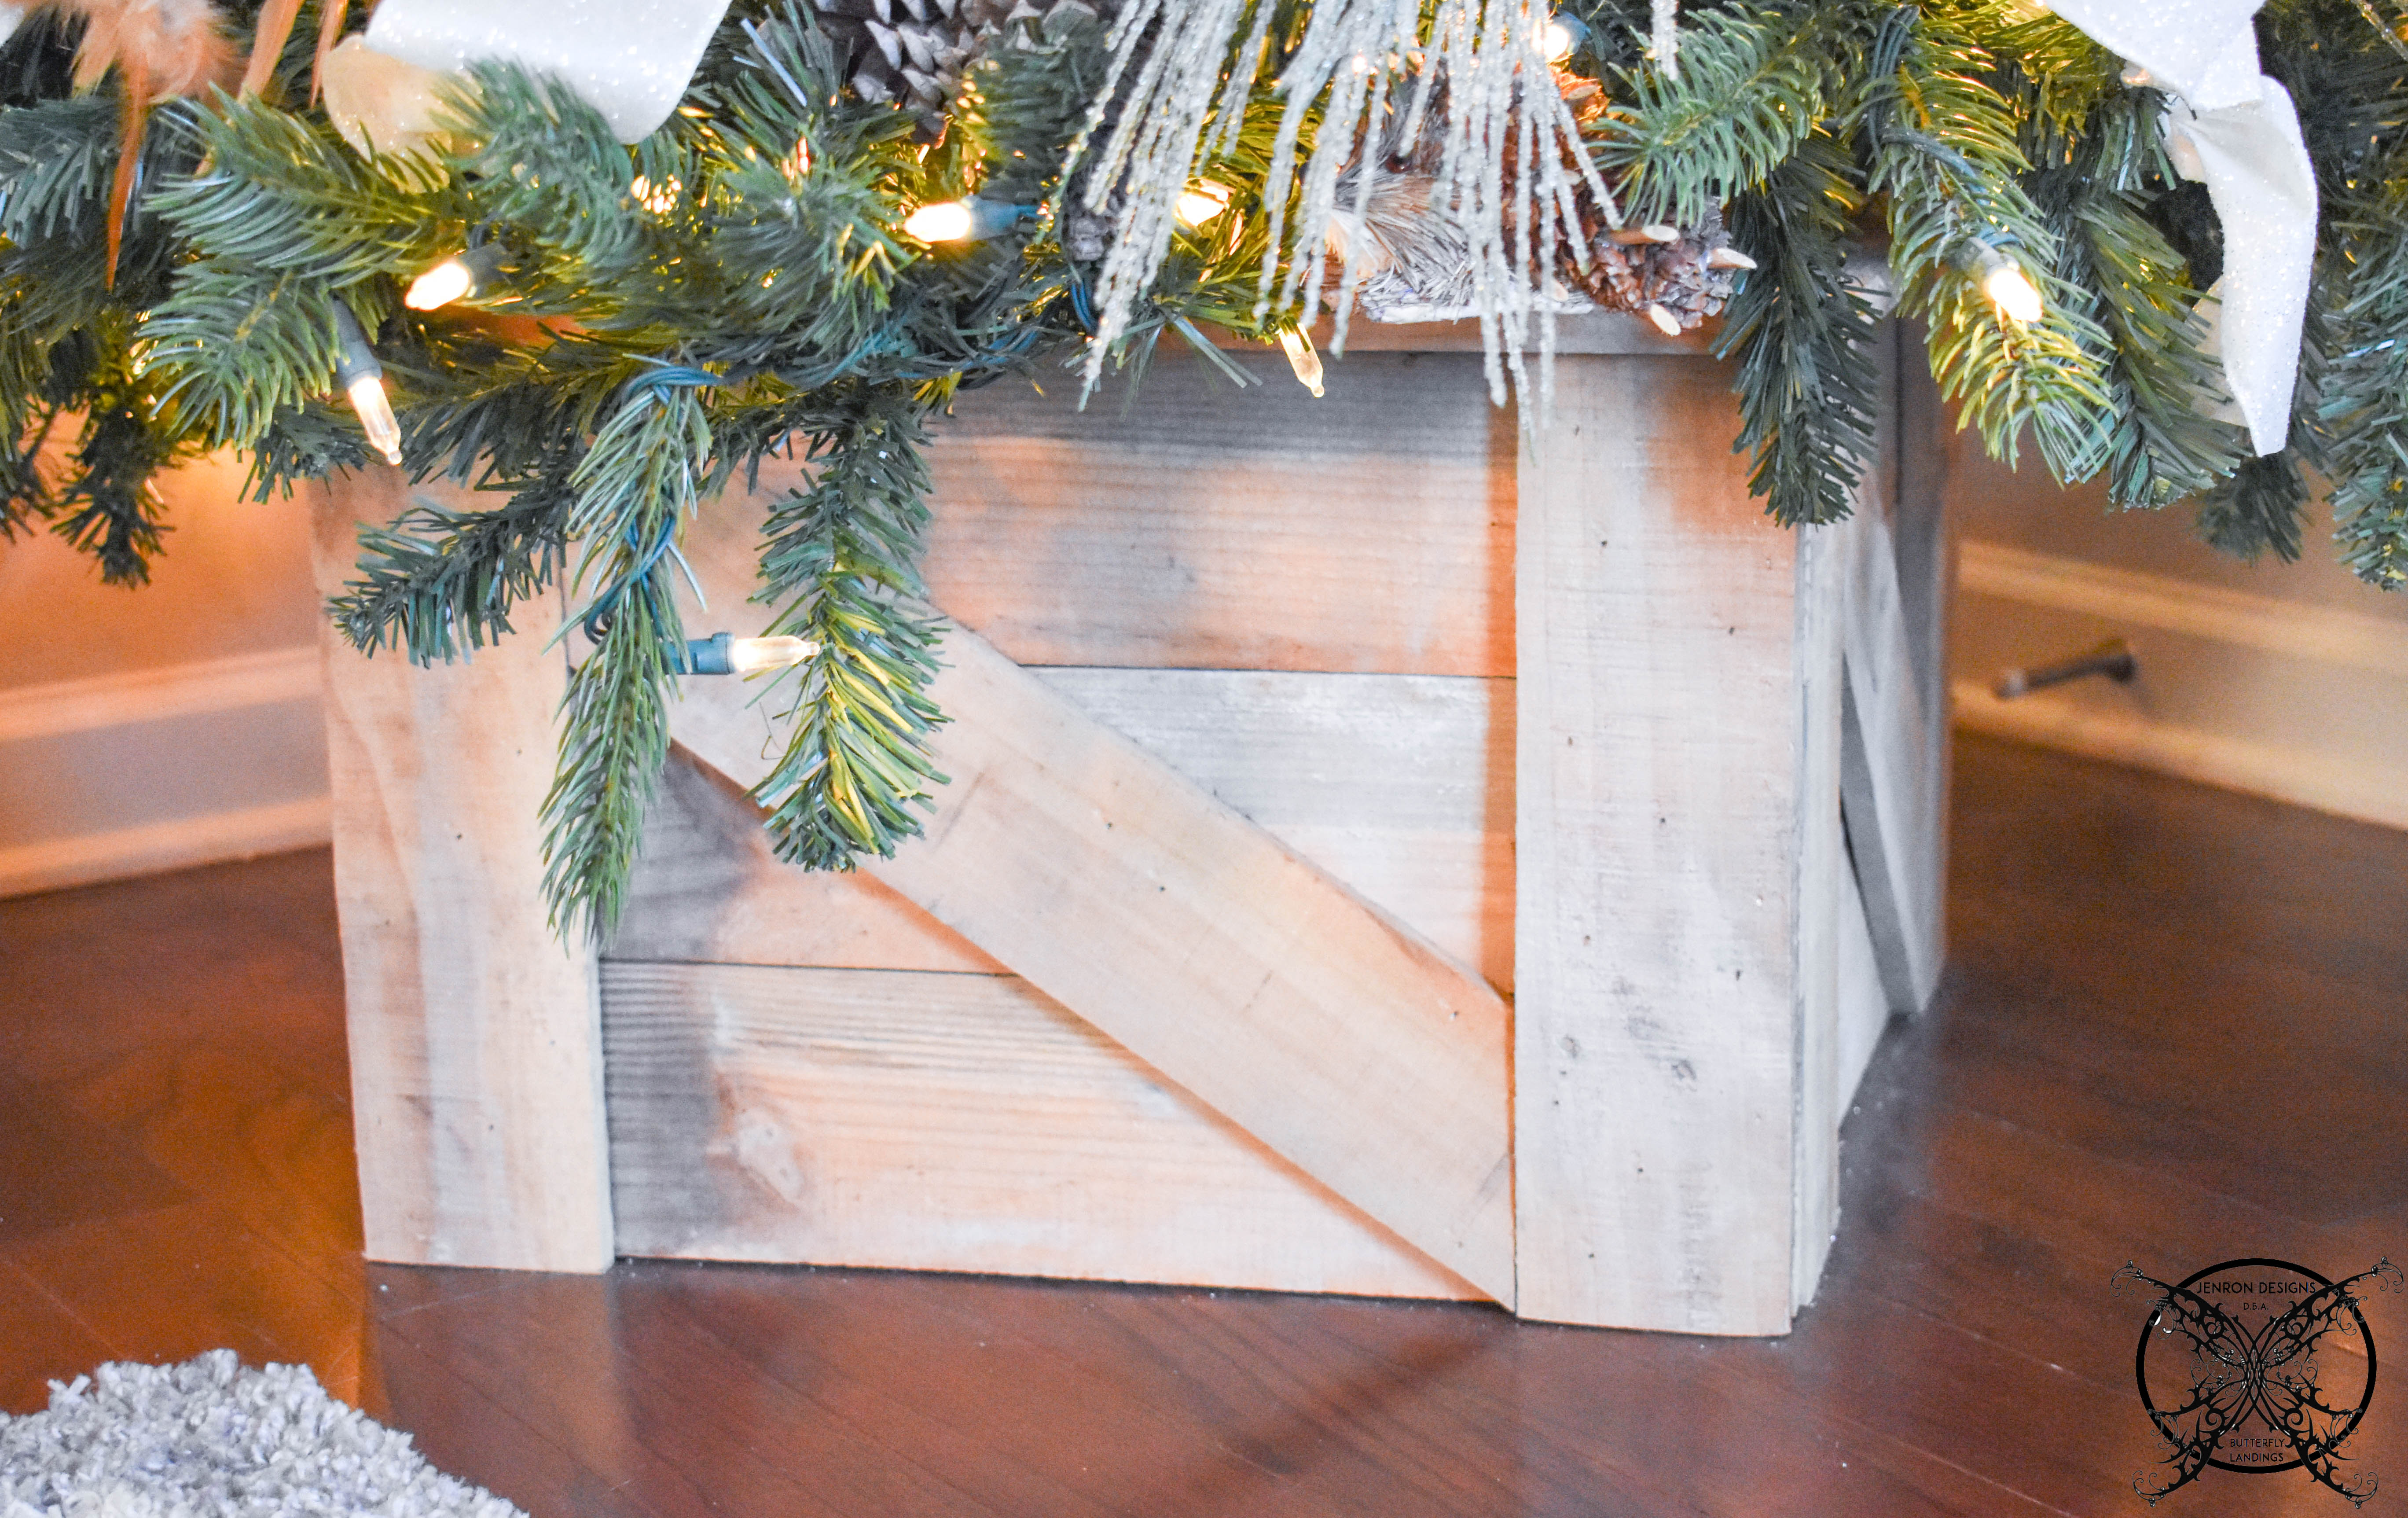 I hope you enjoyed this little DIY, be sure to sign up here for more inspirational projects for the season at our Email updates at this link!
PIN ME for later and be sure to follow us on Pinterest at Jen @ JENRON DESIGNS
I love the idea of a Dream Catcher Tree in the bedroom! I think I’m going to have to start putting one up!
Your tree and decor are beautiful. The tree box is such a nice accent to add.
You put so much thoughtful detail into all of your decorations! That tree stand turned out beautiful! I love seeing all of your decorations! It makes me so excited for Christmas!
-Madi xo
The dream catcher theme is so awesome. My dad loves dream catchers so he would adore this tree. I would definitely attempt this but I don’t do heavy equipment. 😉 I’d have to enlist the help of a friend to use a saw or I could search for a wooden box that would be sturdy to support the tree…very doable. Thank for the idea.
You are so talented! Thank you for sharing these projects and I cant wait to try the dream catcher!
Are you kidding! That tree box is perfection! Can I hire your husband to make me one?! 😉 love it!
Oh no now I will never the end of this! LOL just kidding I am sure he can be bought…. mister Gainer…. thoughts?
Your tree is gorgeous, and I love the box stand! It would work well with a small live (balled and burlapped) tree. Great idea!
Your tree is so beautiful, I love the soft colour palette and natural elements. The Dreamcatcher is such a unique decoration idea.
Eve | http://www.evemorganinteriors.com
I ADORE THIS TREE!! Wow I am actually obsessed with it! I love DIY and this is definitely my theme for my tree next year (we’ve already done it this year)! So beautiful! Thank you for the great inspiration!
We need to make one of these pronto, our Roomba eats our tree skirt every day, the struggle is real. Great DIY and so very cost friendly for this time of year too.
Good tutorial and beautiful tree, I really love that you used Dreamcatchers in for a bedroom tree, while is seems so obvious I do not think I have seen this done before and it is gorgeous.
As obvious as this design may seem I have never seen this done for a a bedroom and it looks great. Your trees are always beautiful, you can tell the you have been doing this for years.
Such a great idea, love this rustic look, and how it keep all the cords hidden. I also fight with my tree skirt as well.
Such a an easy DIY and great way to store away a tree base without taking up much room too.
Oh this is such a great idea, I just love all of your pallet projects. Especially since those are so easy to come by these days.
I love this rustic box base for your tree, I really want to build one for our too this year!