Building A Mantle
Welcome to the second week of the One Room Challenge where we are, Building A Mantle!
Welcome to week 2 the 2020 fall season of the One Room Challenge this week we are; Building A Mantle. This season we are designing our library space and this week we are currently building the mantle for our new electric wall mounted fireplace.
WEEKS AT A GLANCE:
WEEK 1 WEEK 2 WEEK 3 WEEK 4 WEEK 5 REVEAL

Just in case you maybe wondering exactly what The One Room Challenge is, here is the link, and the scoop. This event was originally started by Linda Weinstein @ Calling It Home. It is currently hosted twice a year, in April and October for the past 16 seasons. The ORC has hosted over 500 interior designers & home decor bloggers, that have joined together in this challenge to makeover one room in their own homes. The participants have a total of six weeks, from start to finish, to complete a full room transformation. Over 4,400 rooms have been transformed through the One Room Challenge to date, and many spaces have been recognized and featured by several prestigious sites, like Better Homes and Gardens the hosting media site this season.
THE LIBRARY BEFORE PICTURES:
 .
.
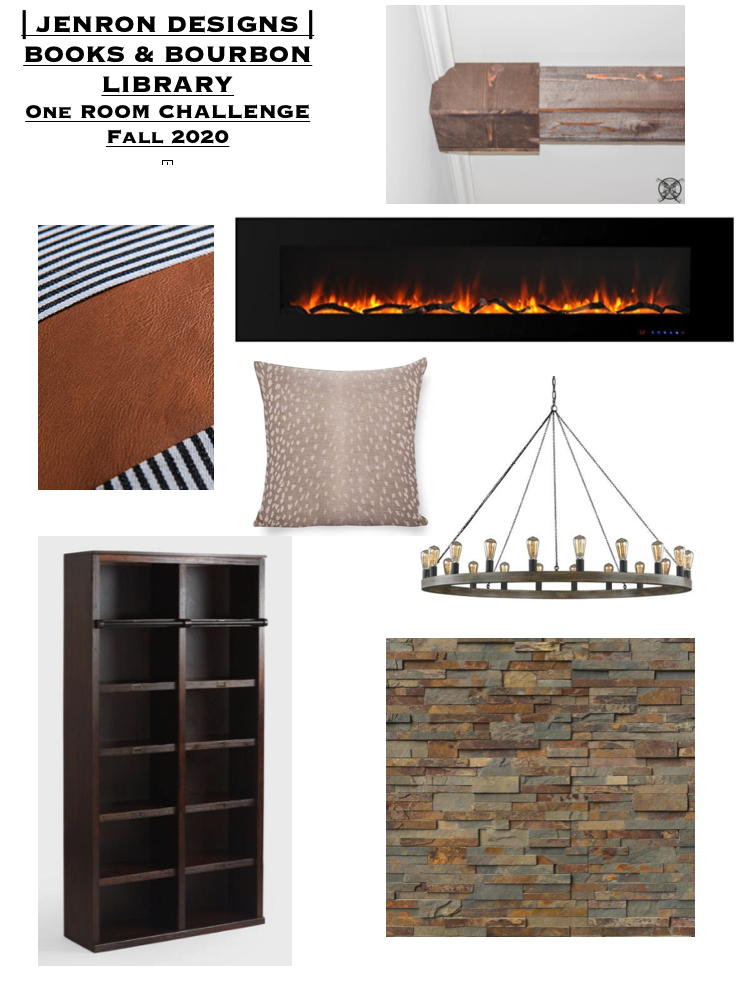
Inspiration Board: The Book & Bourbon Library
 This week we focused on building the mantle for our fireplace and installing the backer board for the stone tile. While this is mostly prep work, this all has to be done in order to move forward with the stone facade that will be installed next week. I also did a quick pre-run with a marble tile on another fireplace in the basement over the weekend to make sure I was fully ready to do this project. Since our basement floor is unfinished, I figured that was the best place to try my hand at doing the stone tiling first prior to going at the library on hardwood floors. You can see the full DIY on adding a Recessed Custom Wall Fireplace.
*Please note that I was graciously compensated for this post. This post may contain affiliate links for your convenience. These links involve no extra cost to you. You can view my full advertising disclosure statement here.
 As you can see we also did a bit of electrical work as well. We decided that in addition to running a switched light up to the ceiling, which was done behind this wall, we would also add in an electrical plug to the removable mantle. This will allow us to power the electric fireplace, unseen by adding in a pass through to the mantle cavity. This will also be great for holiday garland lights and honestly, I am not sure why this is not a common way of powering televisions and such over fireplaces. In fact, I should just paten this idea as the “Gainer Method” lol
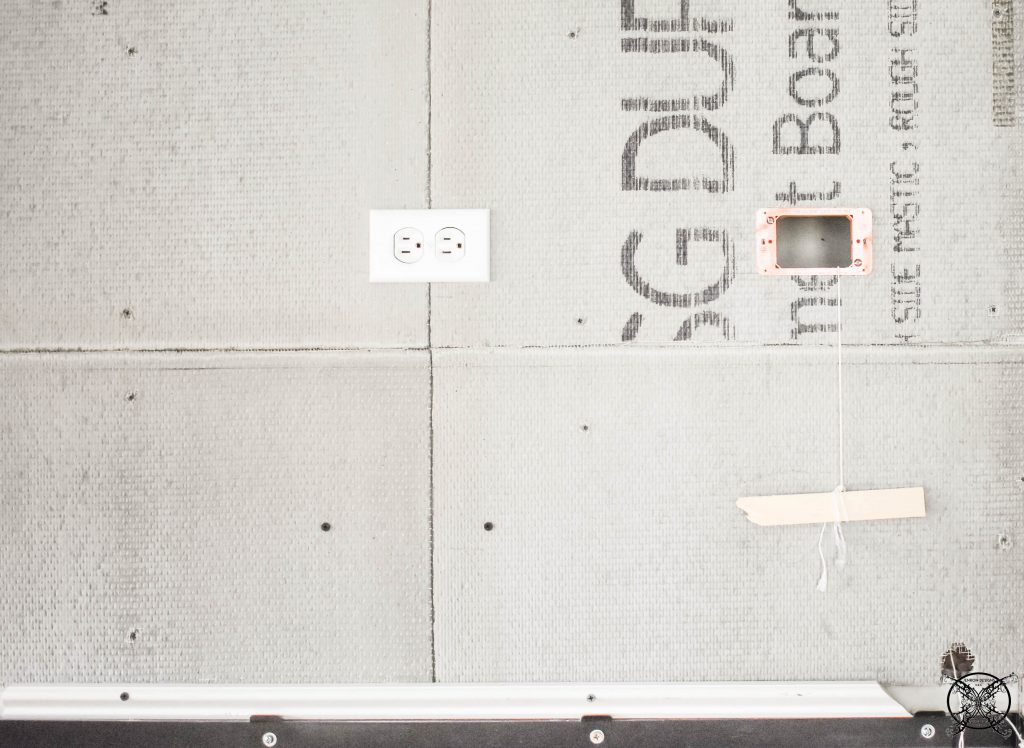
DIY A Mantle
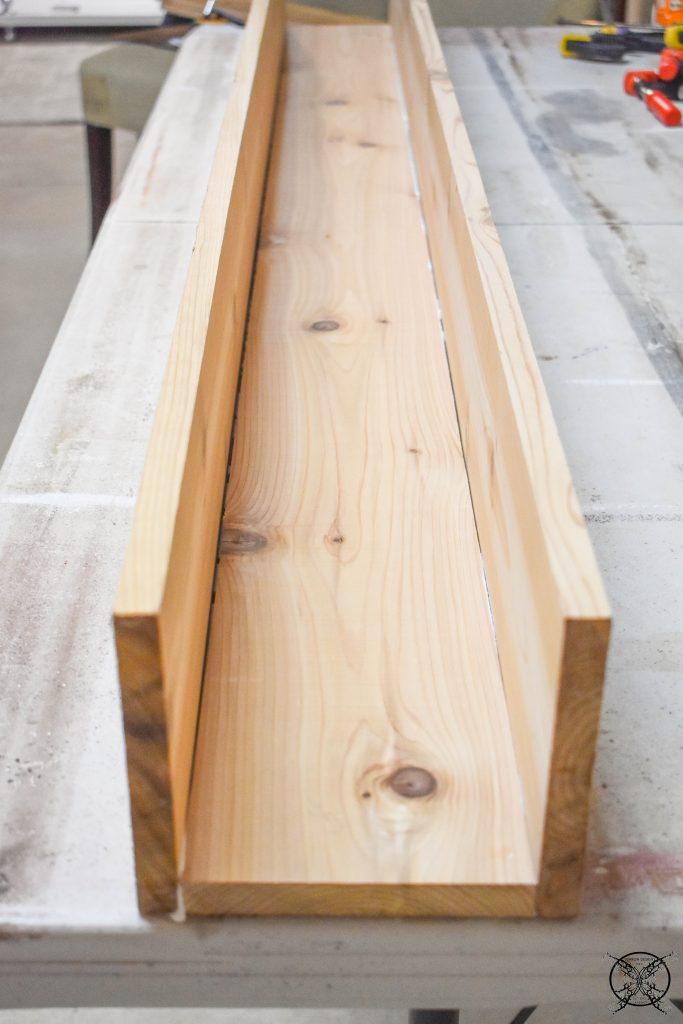
Now that we have the wallboard up and in place we decided to pre-build the mantle so we can get it stained, and it will be ready for installation when we get to the 5 foot mark of tiling. We are starting with the same rough cut cedar boards that we used for the architecture beams 3 years ago. We really wanted the mantle to match and feel as if it was installed at the same time, so we are using the same materials. 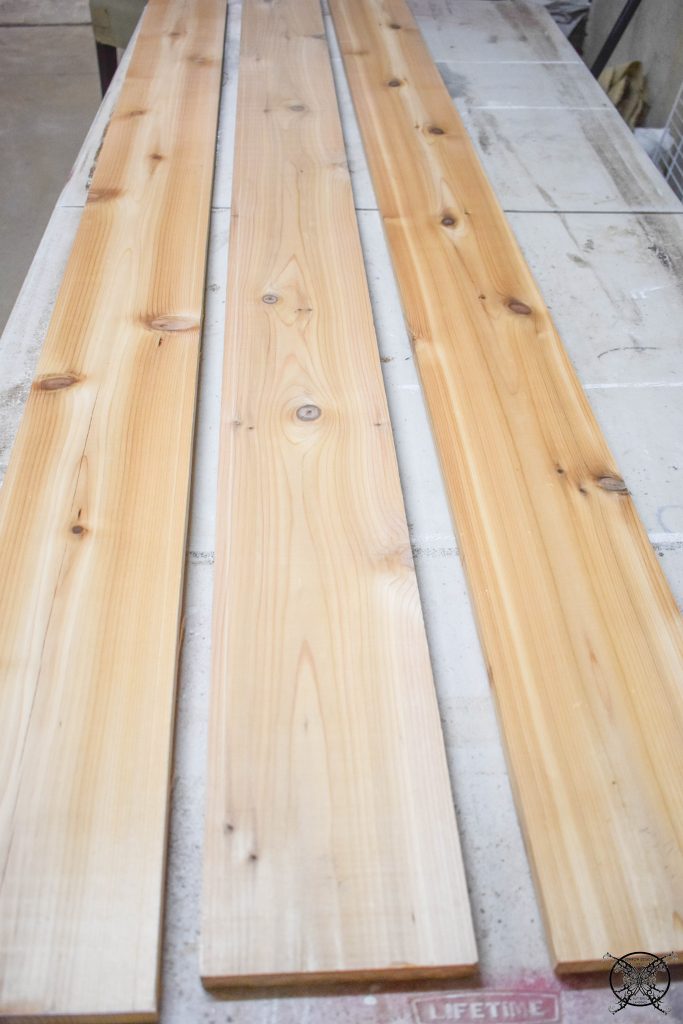 After making our length cuts of 70″ long, which is the exact space of the stone tile, which was set by the spacing of the cedar ceiling beams above on the ceiling, just in case you are wondering where that arbitrary measurement came from. You see none of my measurements are ever arbitrary at all, in fact they are all completely planned out, like all of our projects, from the get go. Like I always say prior, proper, planning, prevents, piss, poor, performance; better known as those seven p’s from my dear friend Karen, yes her name really is Karen 🙂 and we probably started that whole “Karen thing years ago, LOL.
 The next step was to add a bead of wood glue along the edges before we used the brad nailer to attach the the boards to make a U shape. You will want to measure your brads to make sure you will have enough depth to reach though both boards and of course alignment will be crucial.
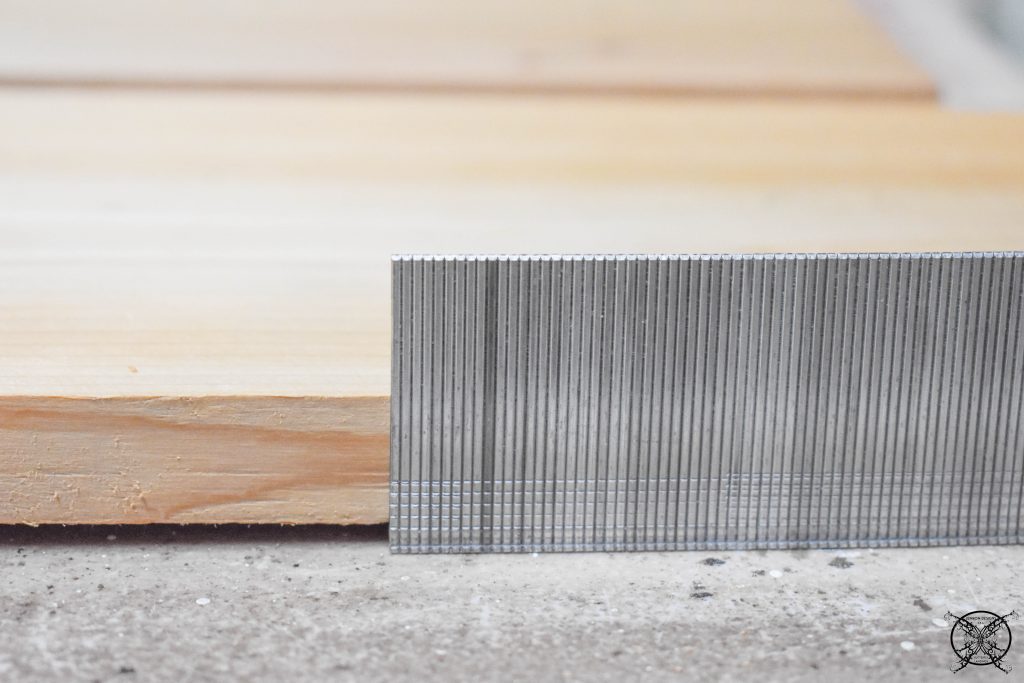
 Once the glue was in place we used a set of grips or clamps to hold the box in place with the set board as our spacer. The set board is the board that will be affixed directly into the wall to hold the removable mantle in place.
 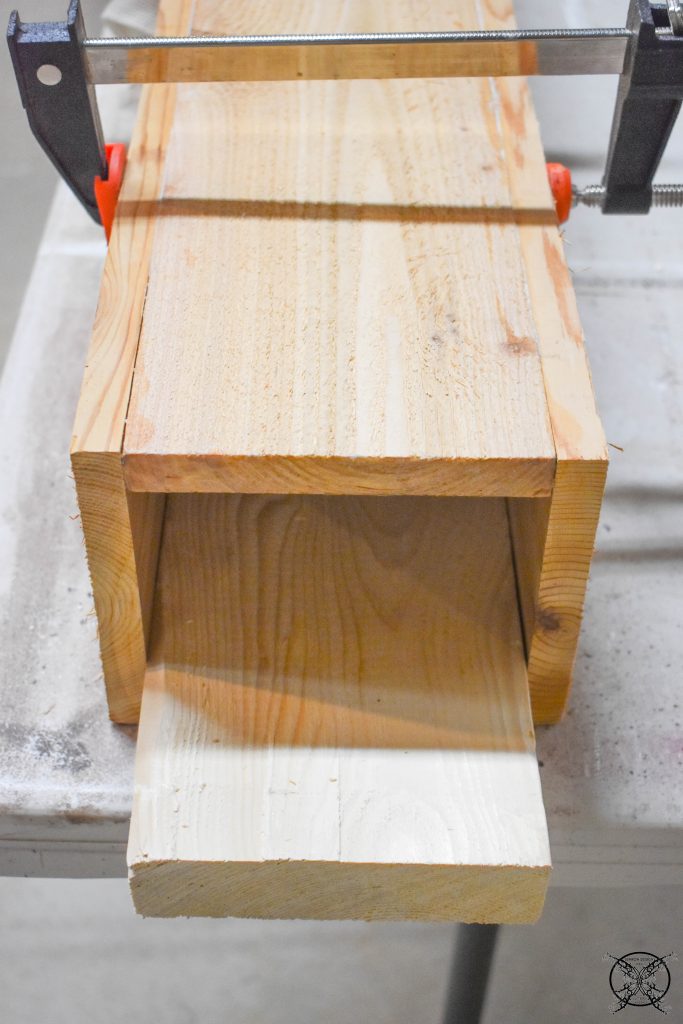 Once you have the clamps in place, wipe off your excess glue that oozes out and use the brad nailer to permanently attach the boards together. You will want to aim close to the edge to hit the perpendicular board and make sure to aim straight so the brad does not penetrate the sides. Allow your mantle to set up and dry over night prior to staining.
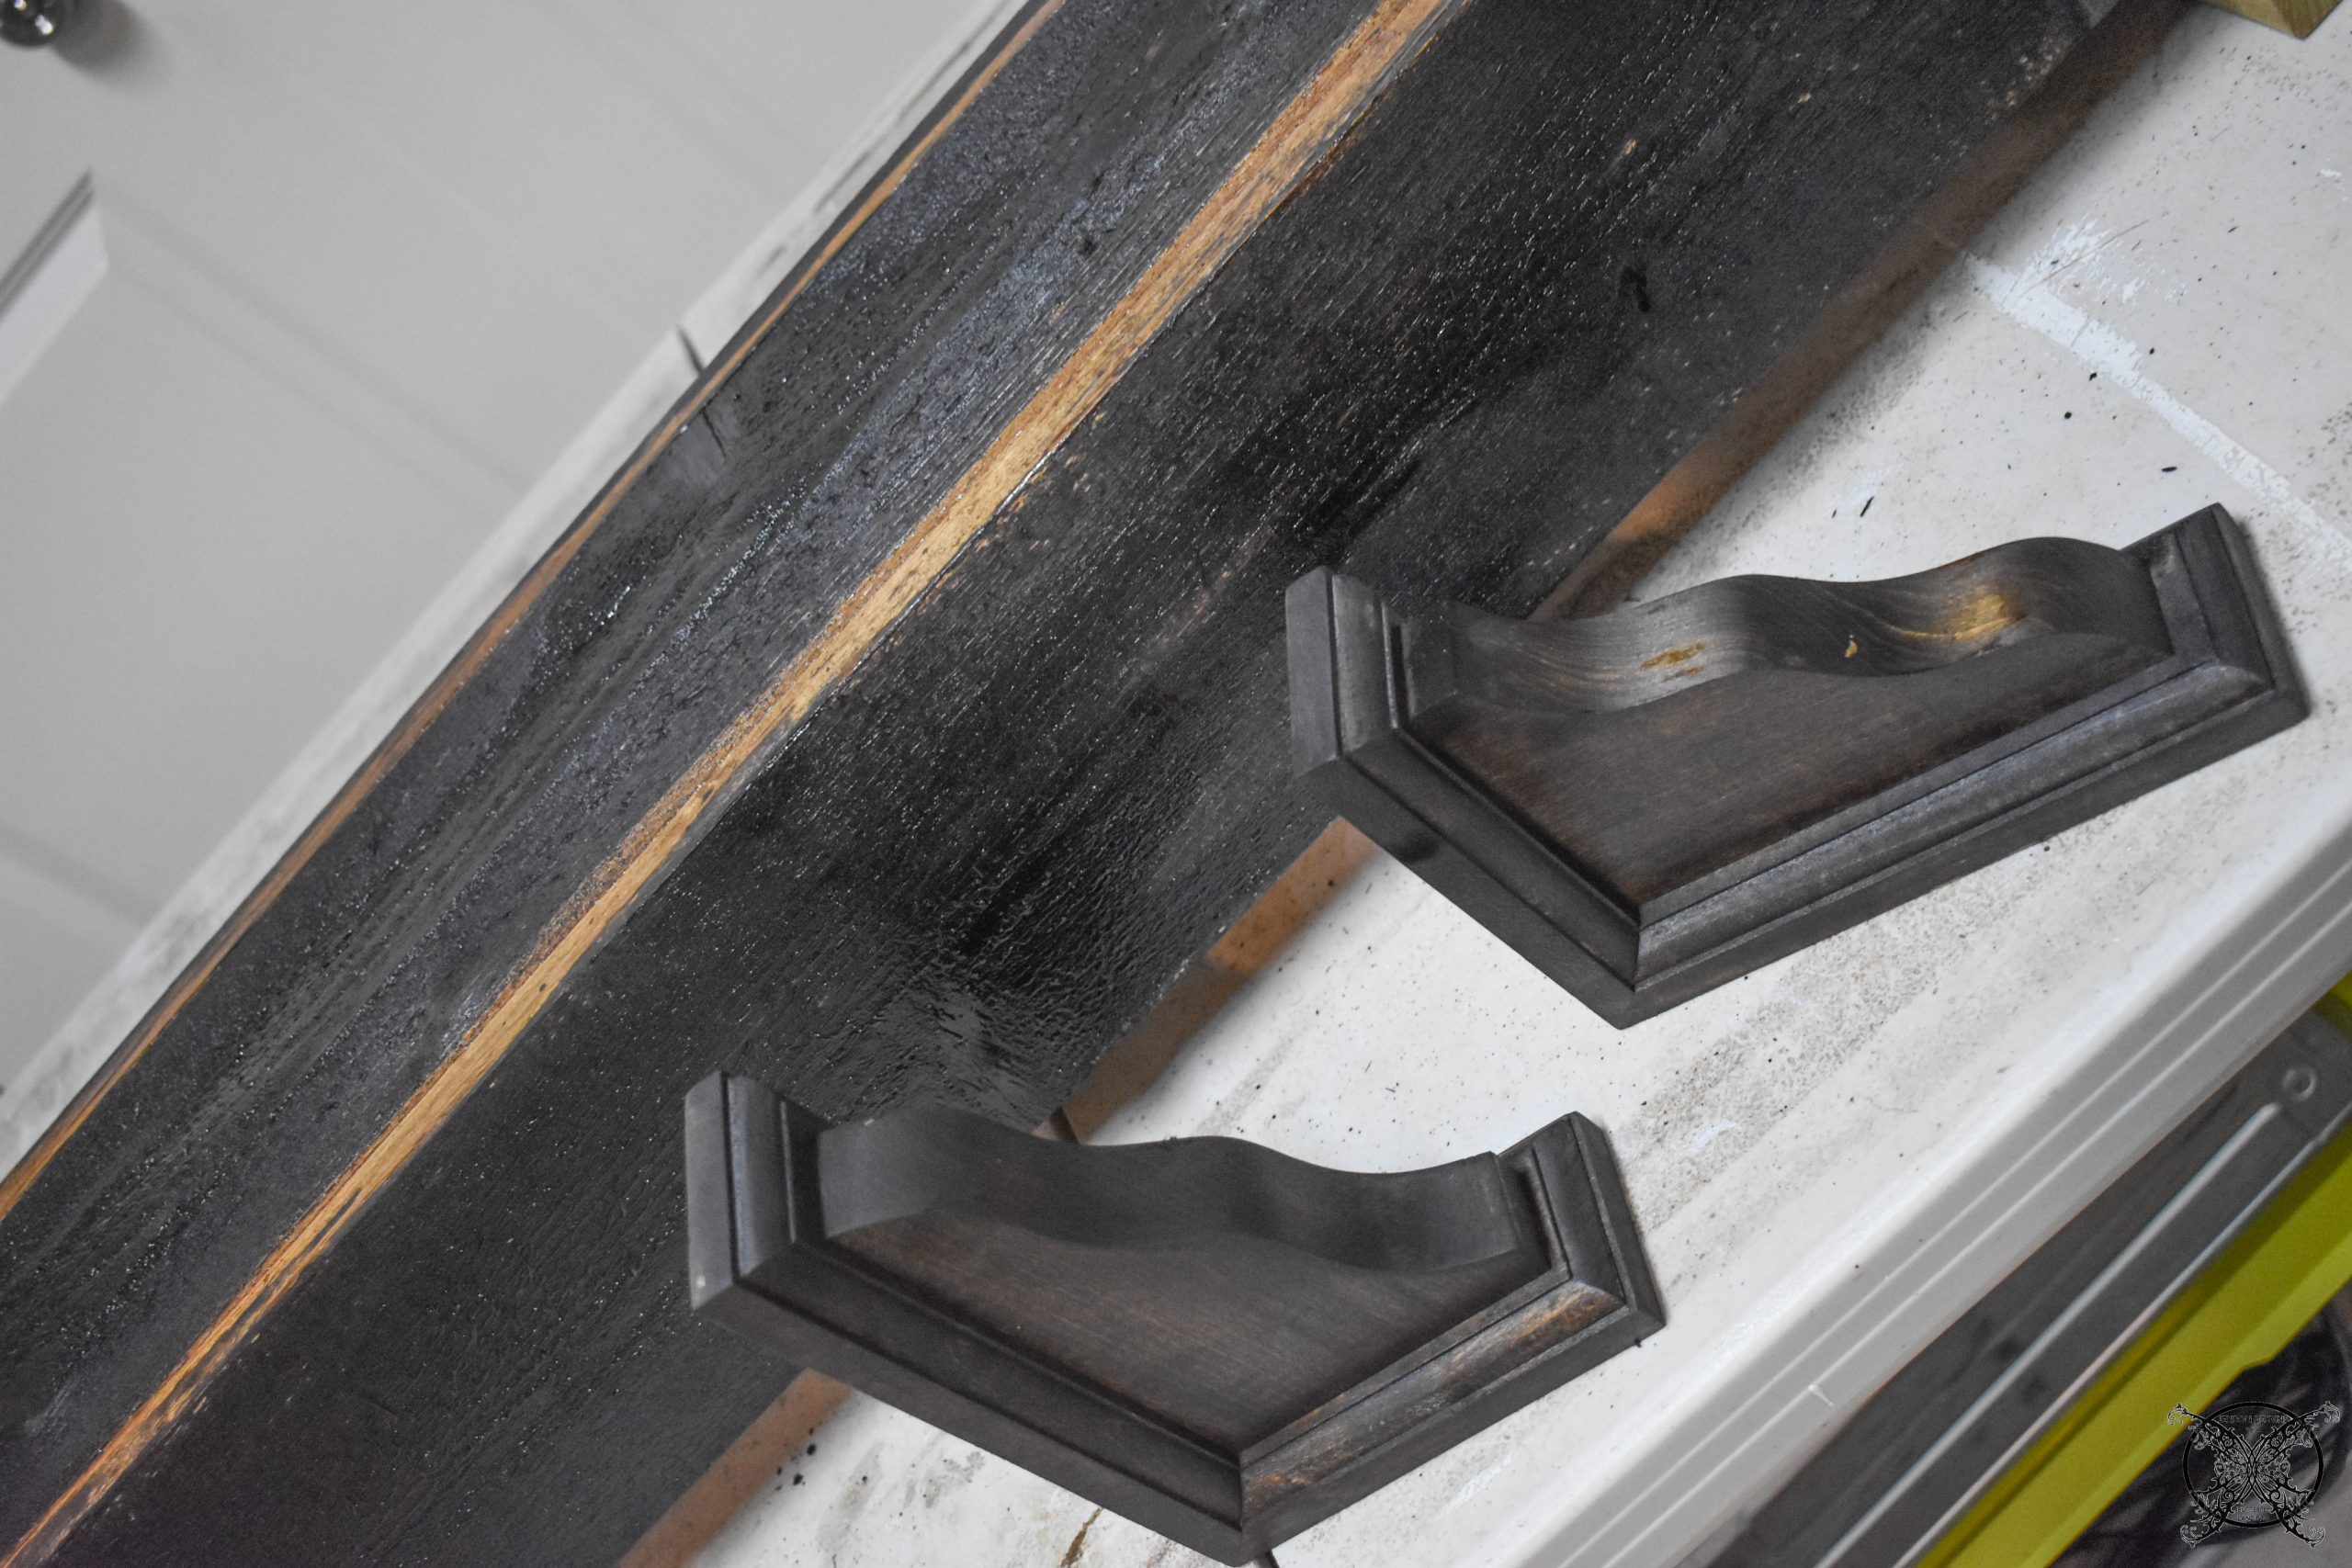
 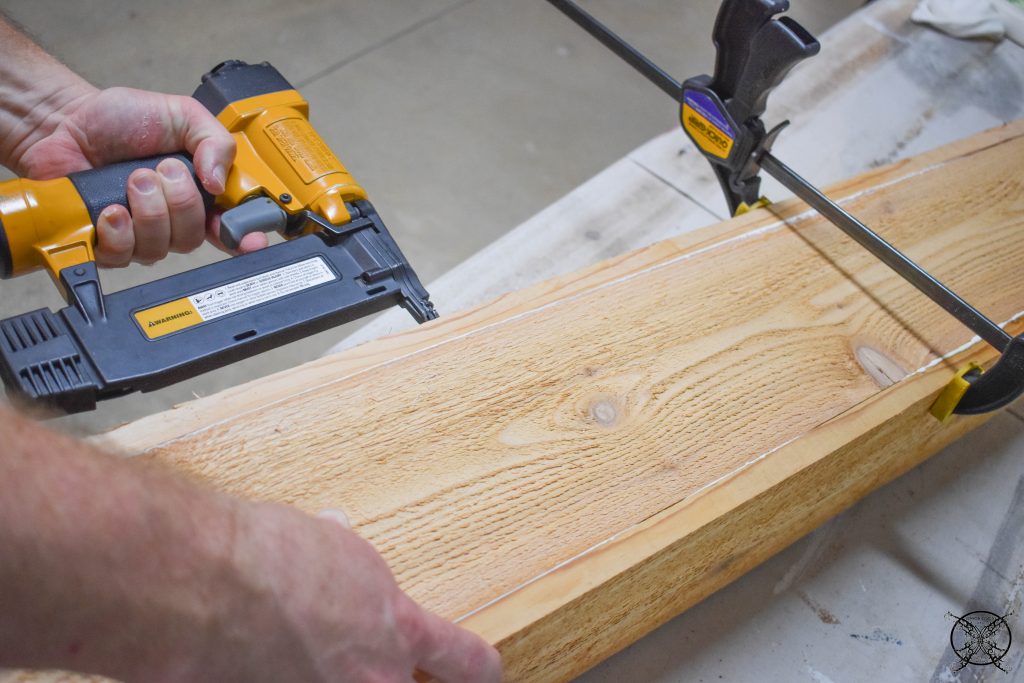 We have chosen the same stain we used for the cedar beams, Minwax Jacobean, which is still available at Sherwin Williams and online. However we did notice that in our local Sherwin Williams it is a designer signature color that they keep behind the counter, and it is not listed on the shelf or color charts. When we inquired the answer was because it was such a popular color, which seems weird, if it is popular shouldn’t it be on the shelf?
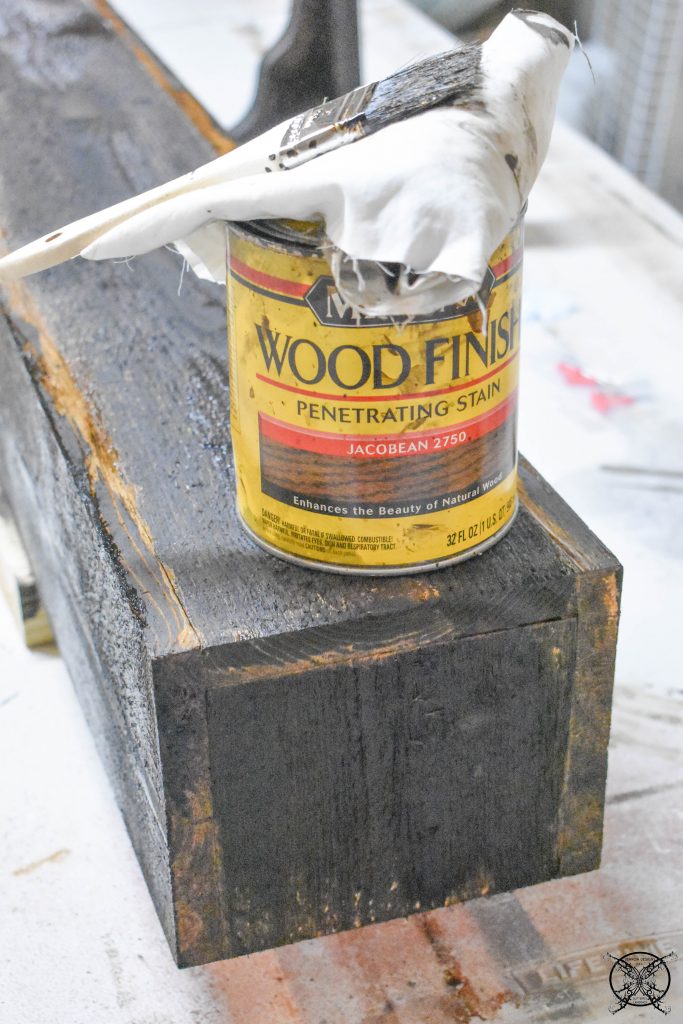 A single coat yields this rich beautiful color that matches our cedar architectural beams perfectly. Next week we will be installing the mantle after we have placeD the stone tile in place up to the bottom of edge of the mantle. Since it is always easier to work your way up a wall.
Fireplace Installation
You may remember a few weeks back that we installed a fireplace in this very room. This was also part of the deciding factor in creating the entire Books & Bourbon Library. Again since this portion of the project was already previously done I will just direct you to the original installation post for those details, at Adding a Wall Mounted Fireplace for Ambiance. However I would feel very remiss if I did not speak about the fireplace since it truly is the feature of the entire wall.
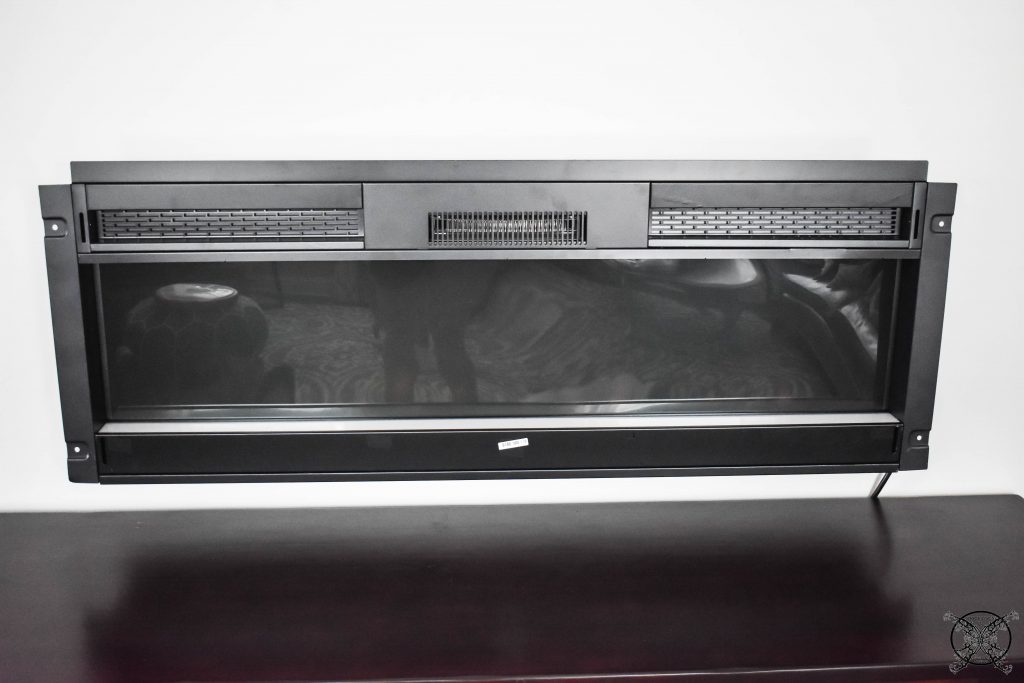 We installed the 48″ Doris electric fireplace because this room, which is located on the front of home, does not have a good location to add in a direct vent which would not been seen on our homes front elevation. Even though we do prefer wood burning fireplaces, and have one in our great room, most of the newer homes being built in our neighborhood and surrounding area are gas or electric these days. So adding in a high quality electric fireplace would not be out of character for the caliber of home we live in, if done correctly.
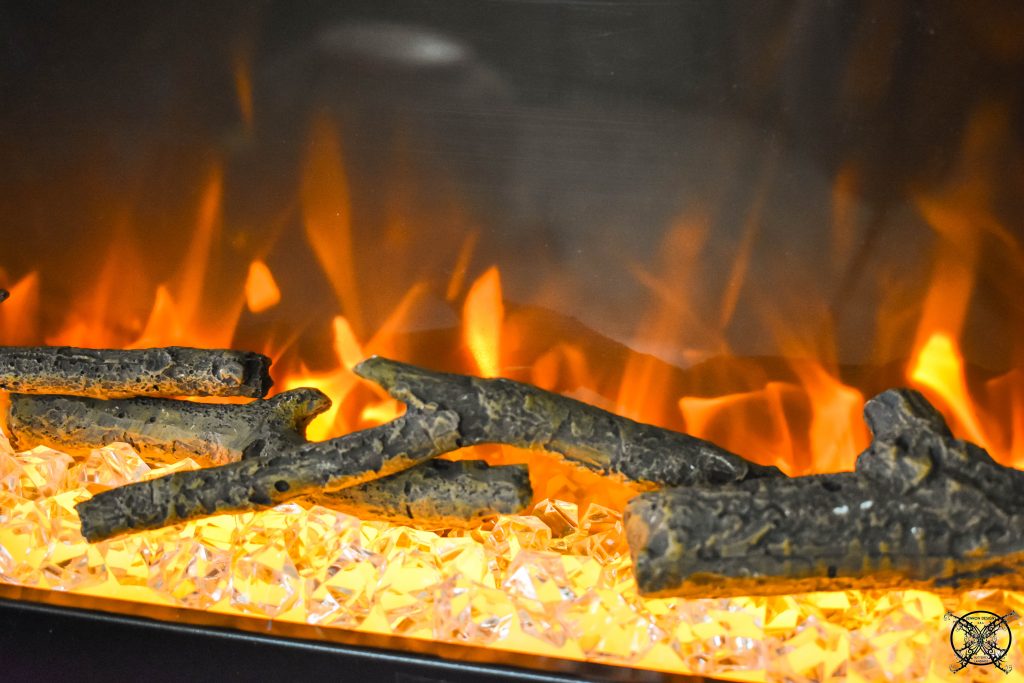
THE PROPOSED SCHEDULE:
WEEK 1: Introduction & Inspirations, Beams
WEEK 2: Fireplace Install & Mantle
WEEK 3: Stone Tile Install
WEEK 4: Bookcases
WEEK 5: Adding a Chandelier
WEEK 6: REVEAL
Wow, this came out so well! I can’t wait to see the final product!
You are really unstoppable on your design journey. Great post and great ideas! Would love to see more photos from your house:) must be awesome!
This is great! ORC sounds so interesting, you always have great ideas
I can’t wait to see how this turns out! Exciting!
This decor is fantastic and so put together. Saving these ideas for the long haul!!!
This is amazing !!!! You made it look so easy to spruce up a room !
That fireplace is going to be amazing!!!!
This is so lovely. Great attention to detail.
Oh loving the mantle! I can’t wait to see the stone go up!
This is a great little DIY for a guest room love those fun log slices, too cute!
Can you be more specific about measurement for mantle in the content of your article? After reading it, I still have some questions for my own, I hope you can help me.
Hi Biance the boards we used were a set size for cedar at 5″ wide and they come in several lengths to accommodate your size needs for either a ceiling beams or a mantle as seen in this article. I am not sure what measurements you would need help with, since everything would be based off of your fireplace to be custom to your home. This post was mostly about the process on how to create the box for either cedar beams or a mantle so avoid having heavy bulk weight attached to your ceiling or mantle.I hope this clears up any confusion you have, thanks for reading our post!