Adding A Basement Bathroom
Check out how we added a basement bathroom to our home gym, right next to the existing sauna.
As many of you may have previously read several years ago we created a luxury in home spa space with a home dry sauna (link here) and gym space (link here). We added a full bathroom to complete this area with a walk in Rain Tree shower, sink, toilet and linen closet. Since this space was a blank canvas in an unfinished basement of home, it very easy to design it anyway we wanted, meaning no existing plumbing to deal with, you can just run it however you wish. Making a ceiling mount Rain Tree Shower very easy to do verses an after market re plumbed shower which can be costly to move all the pipes to the ceiling verses the wall.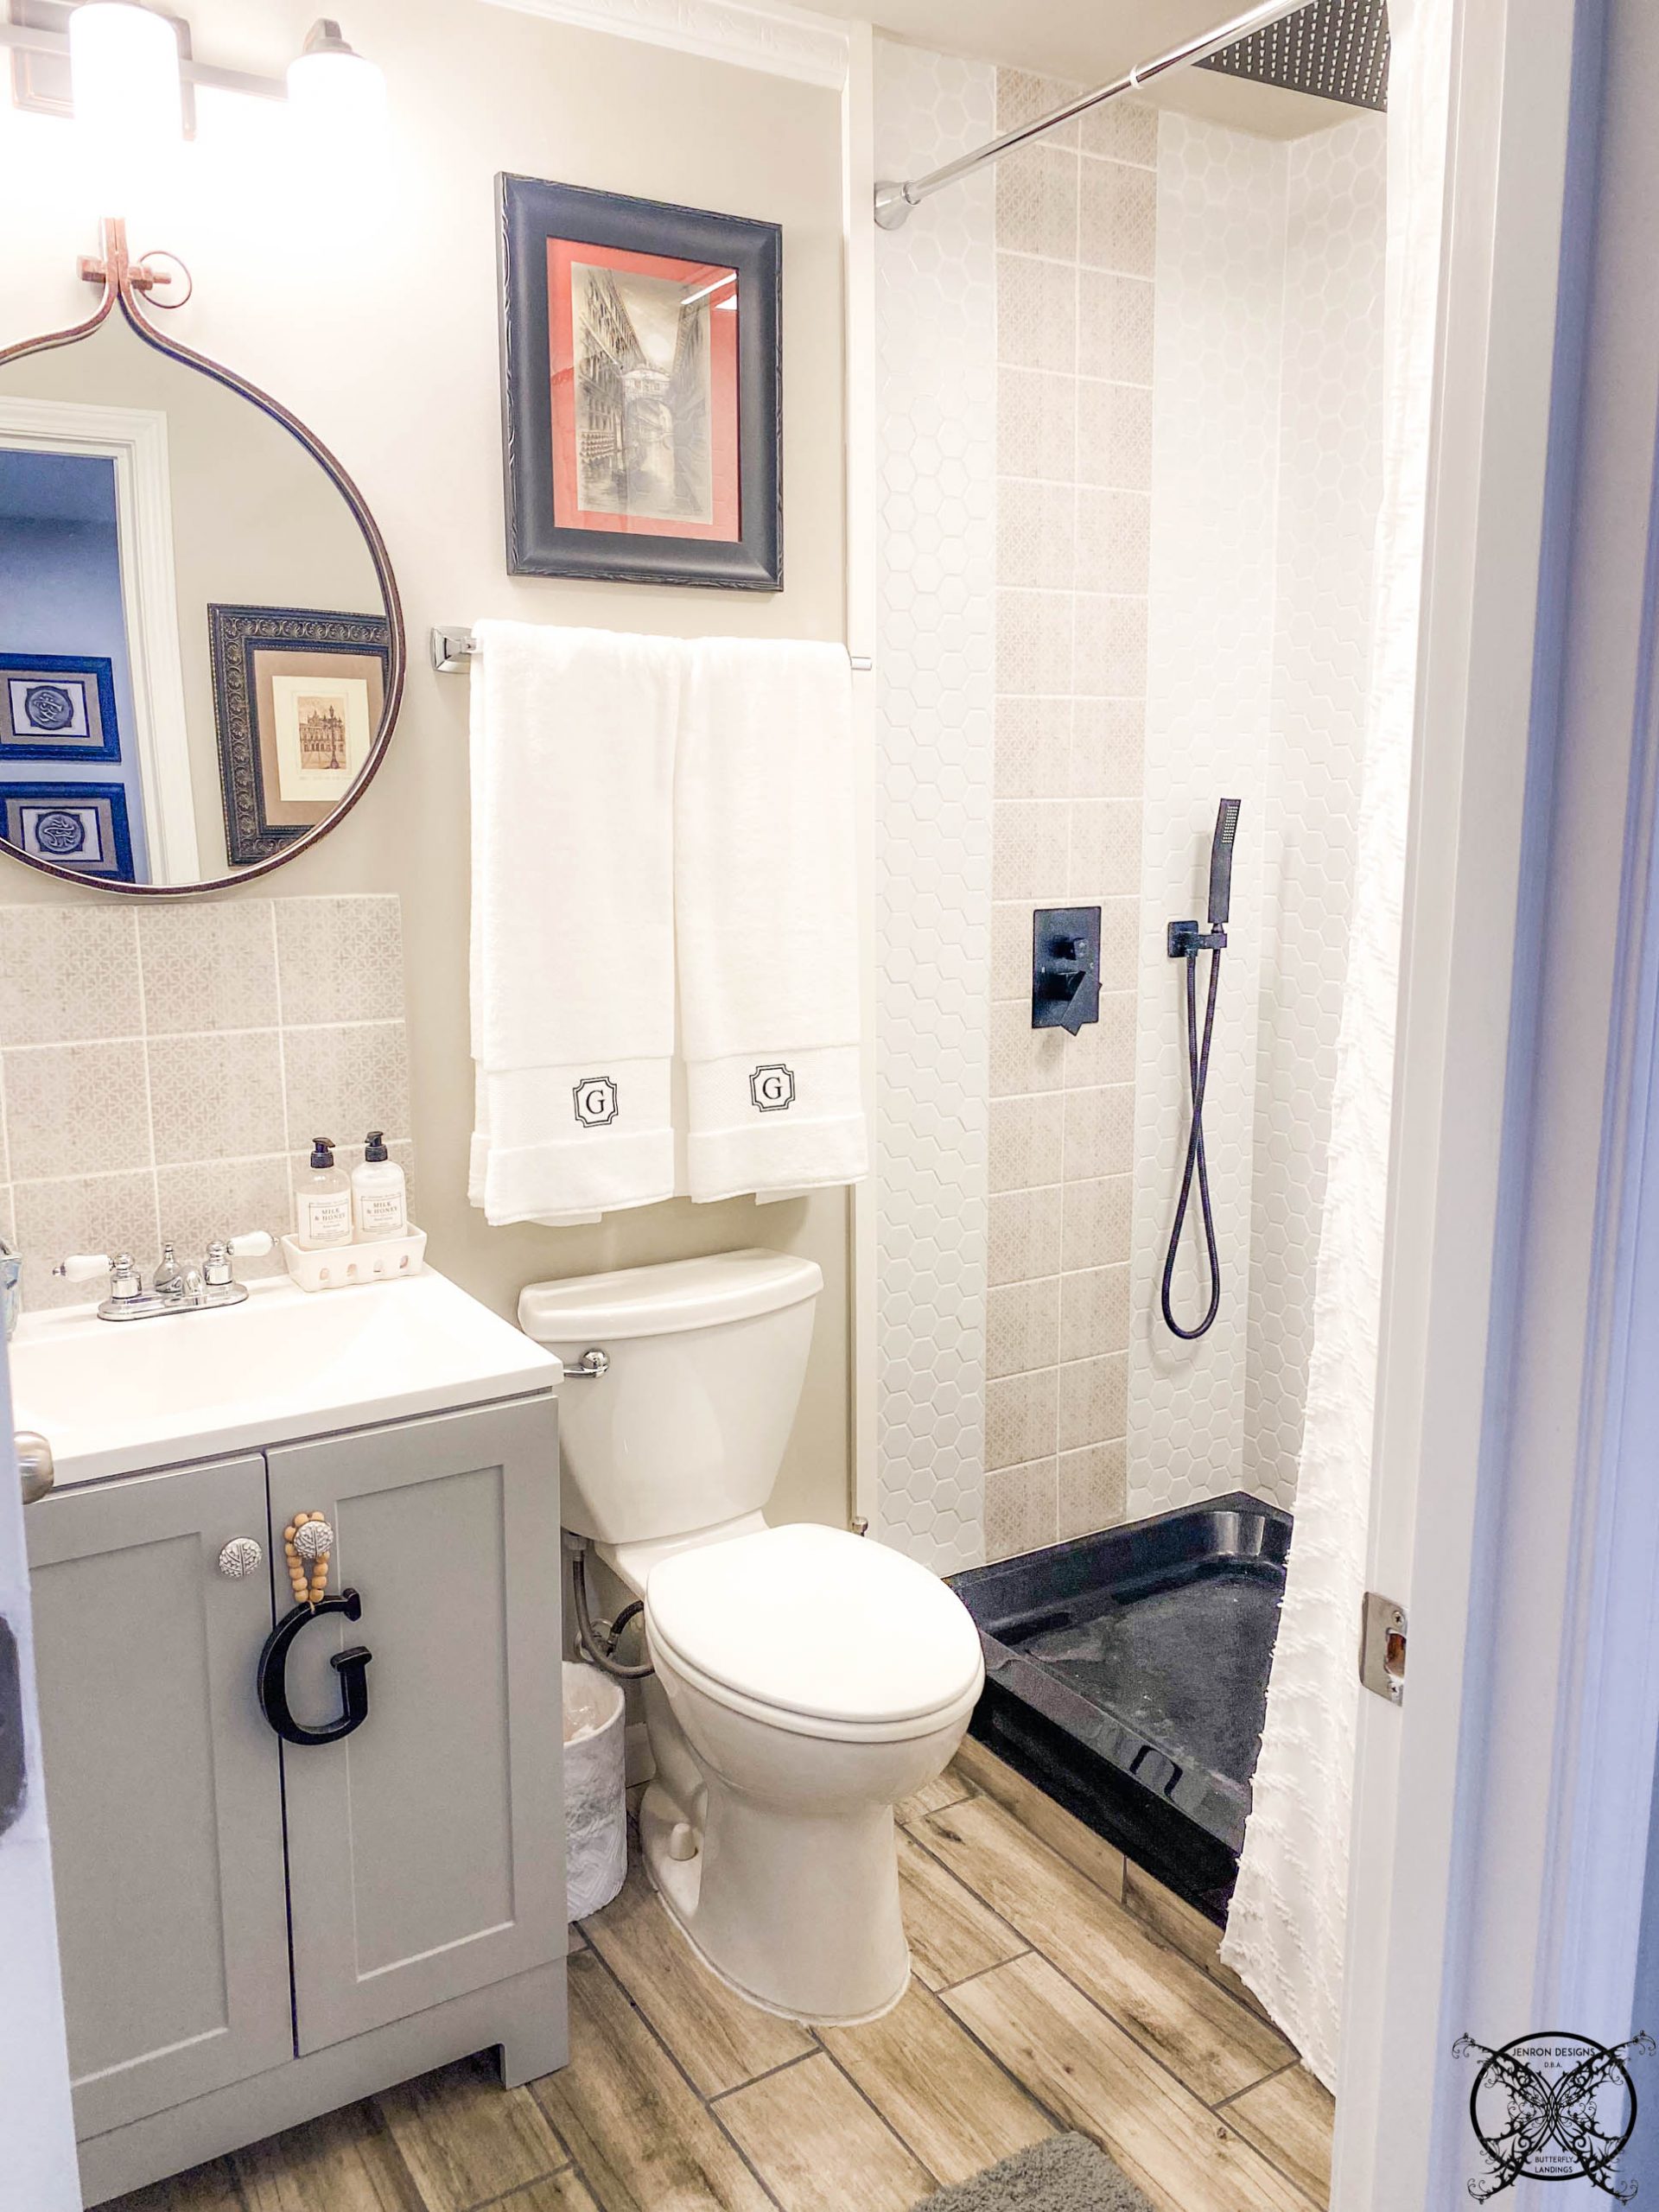 It also allowed me to add in a built in linen closet into the space as well adding additional storage with lighting inside as well. Another line item that is always overlooked when buying a stock home or basic builder home verses a custom home. These are the things they may not seem like much but will separate your home on the resell market. Why you might ask? Well because most buyers want it already done for them and see the value in it already being done. Move in ready can mean a lot of things, just think about it. These are just the extra perks,that I always think about when doing a project.
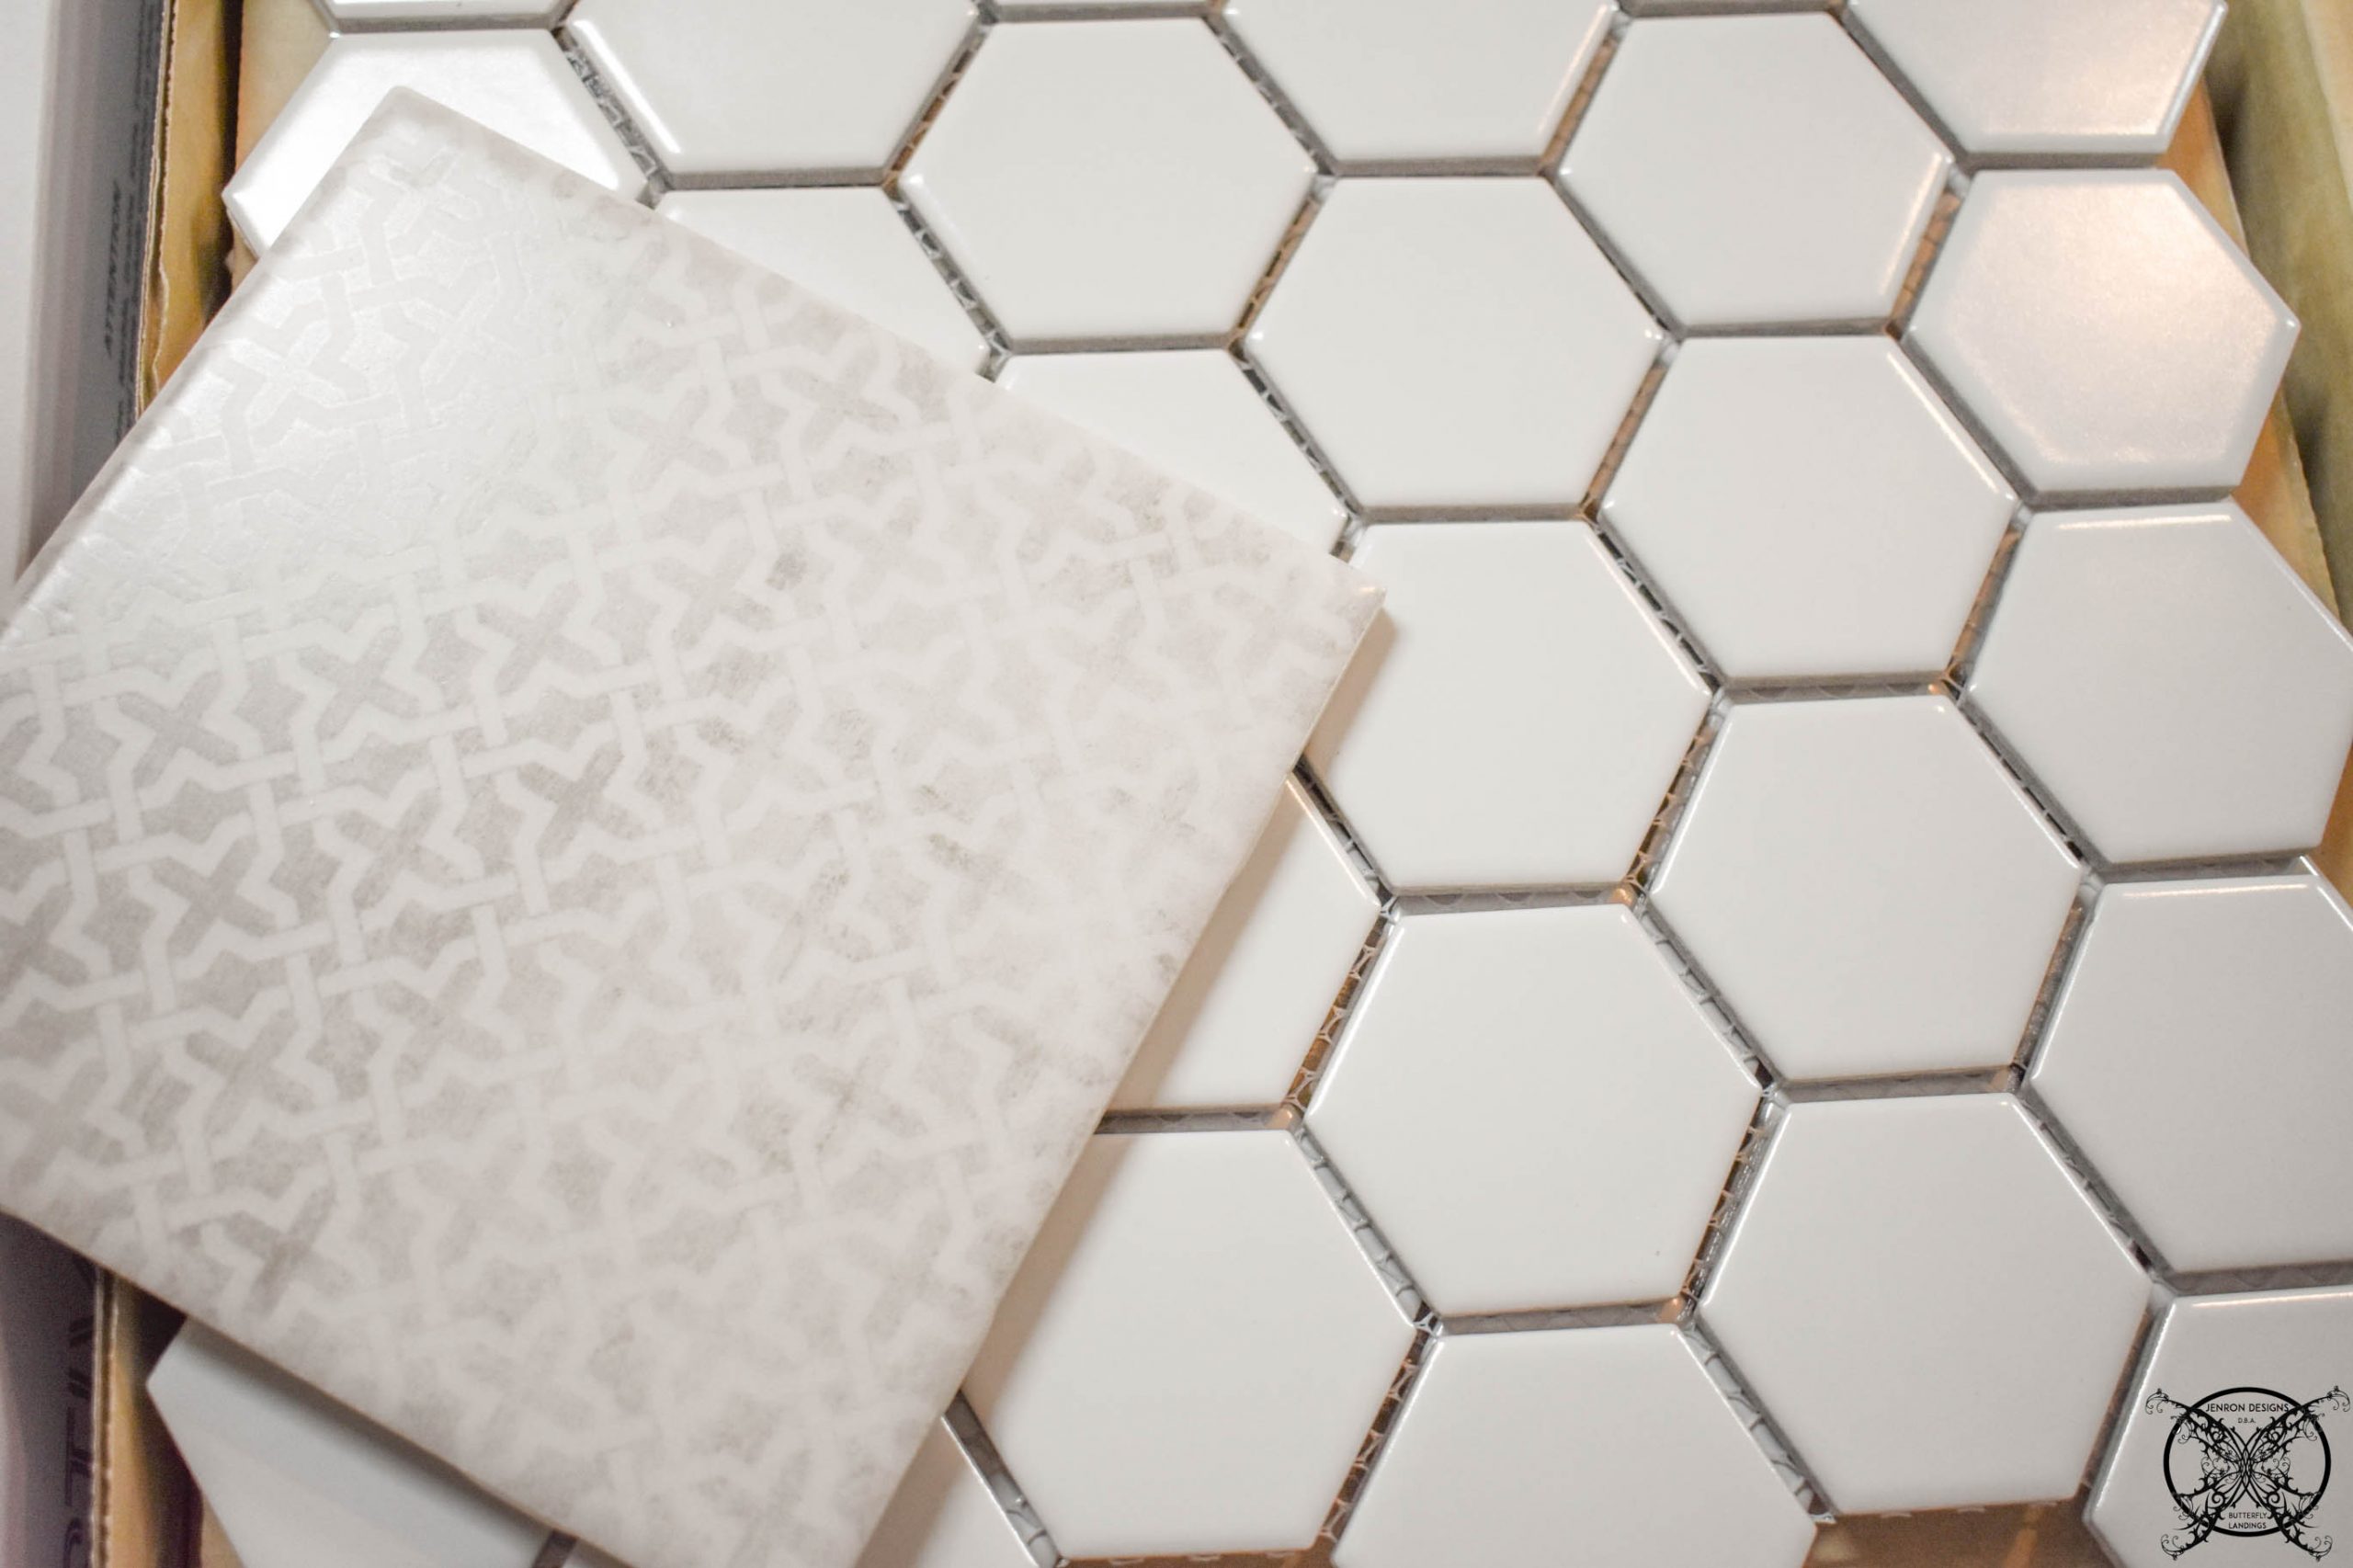
 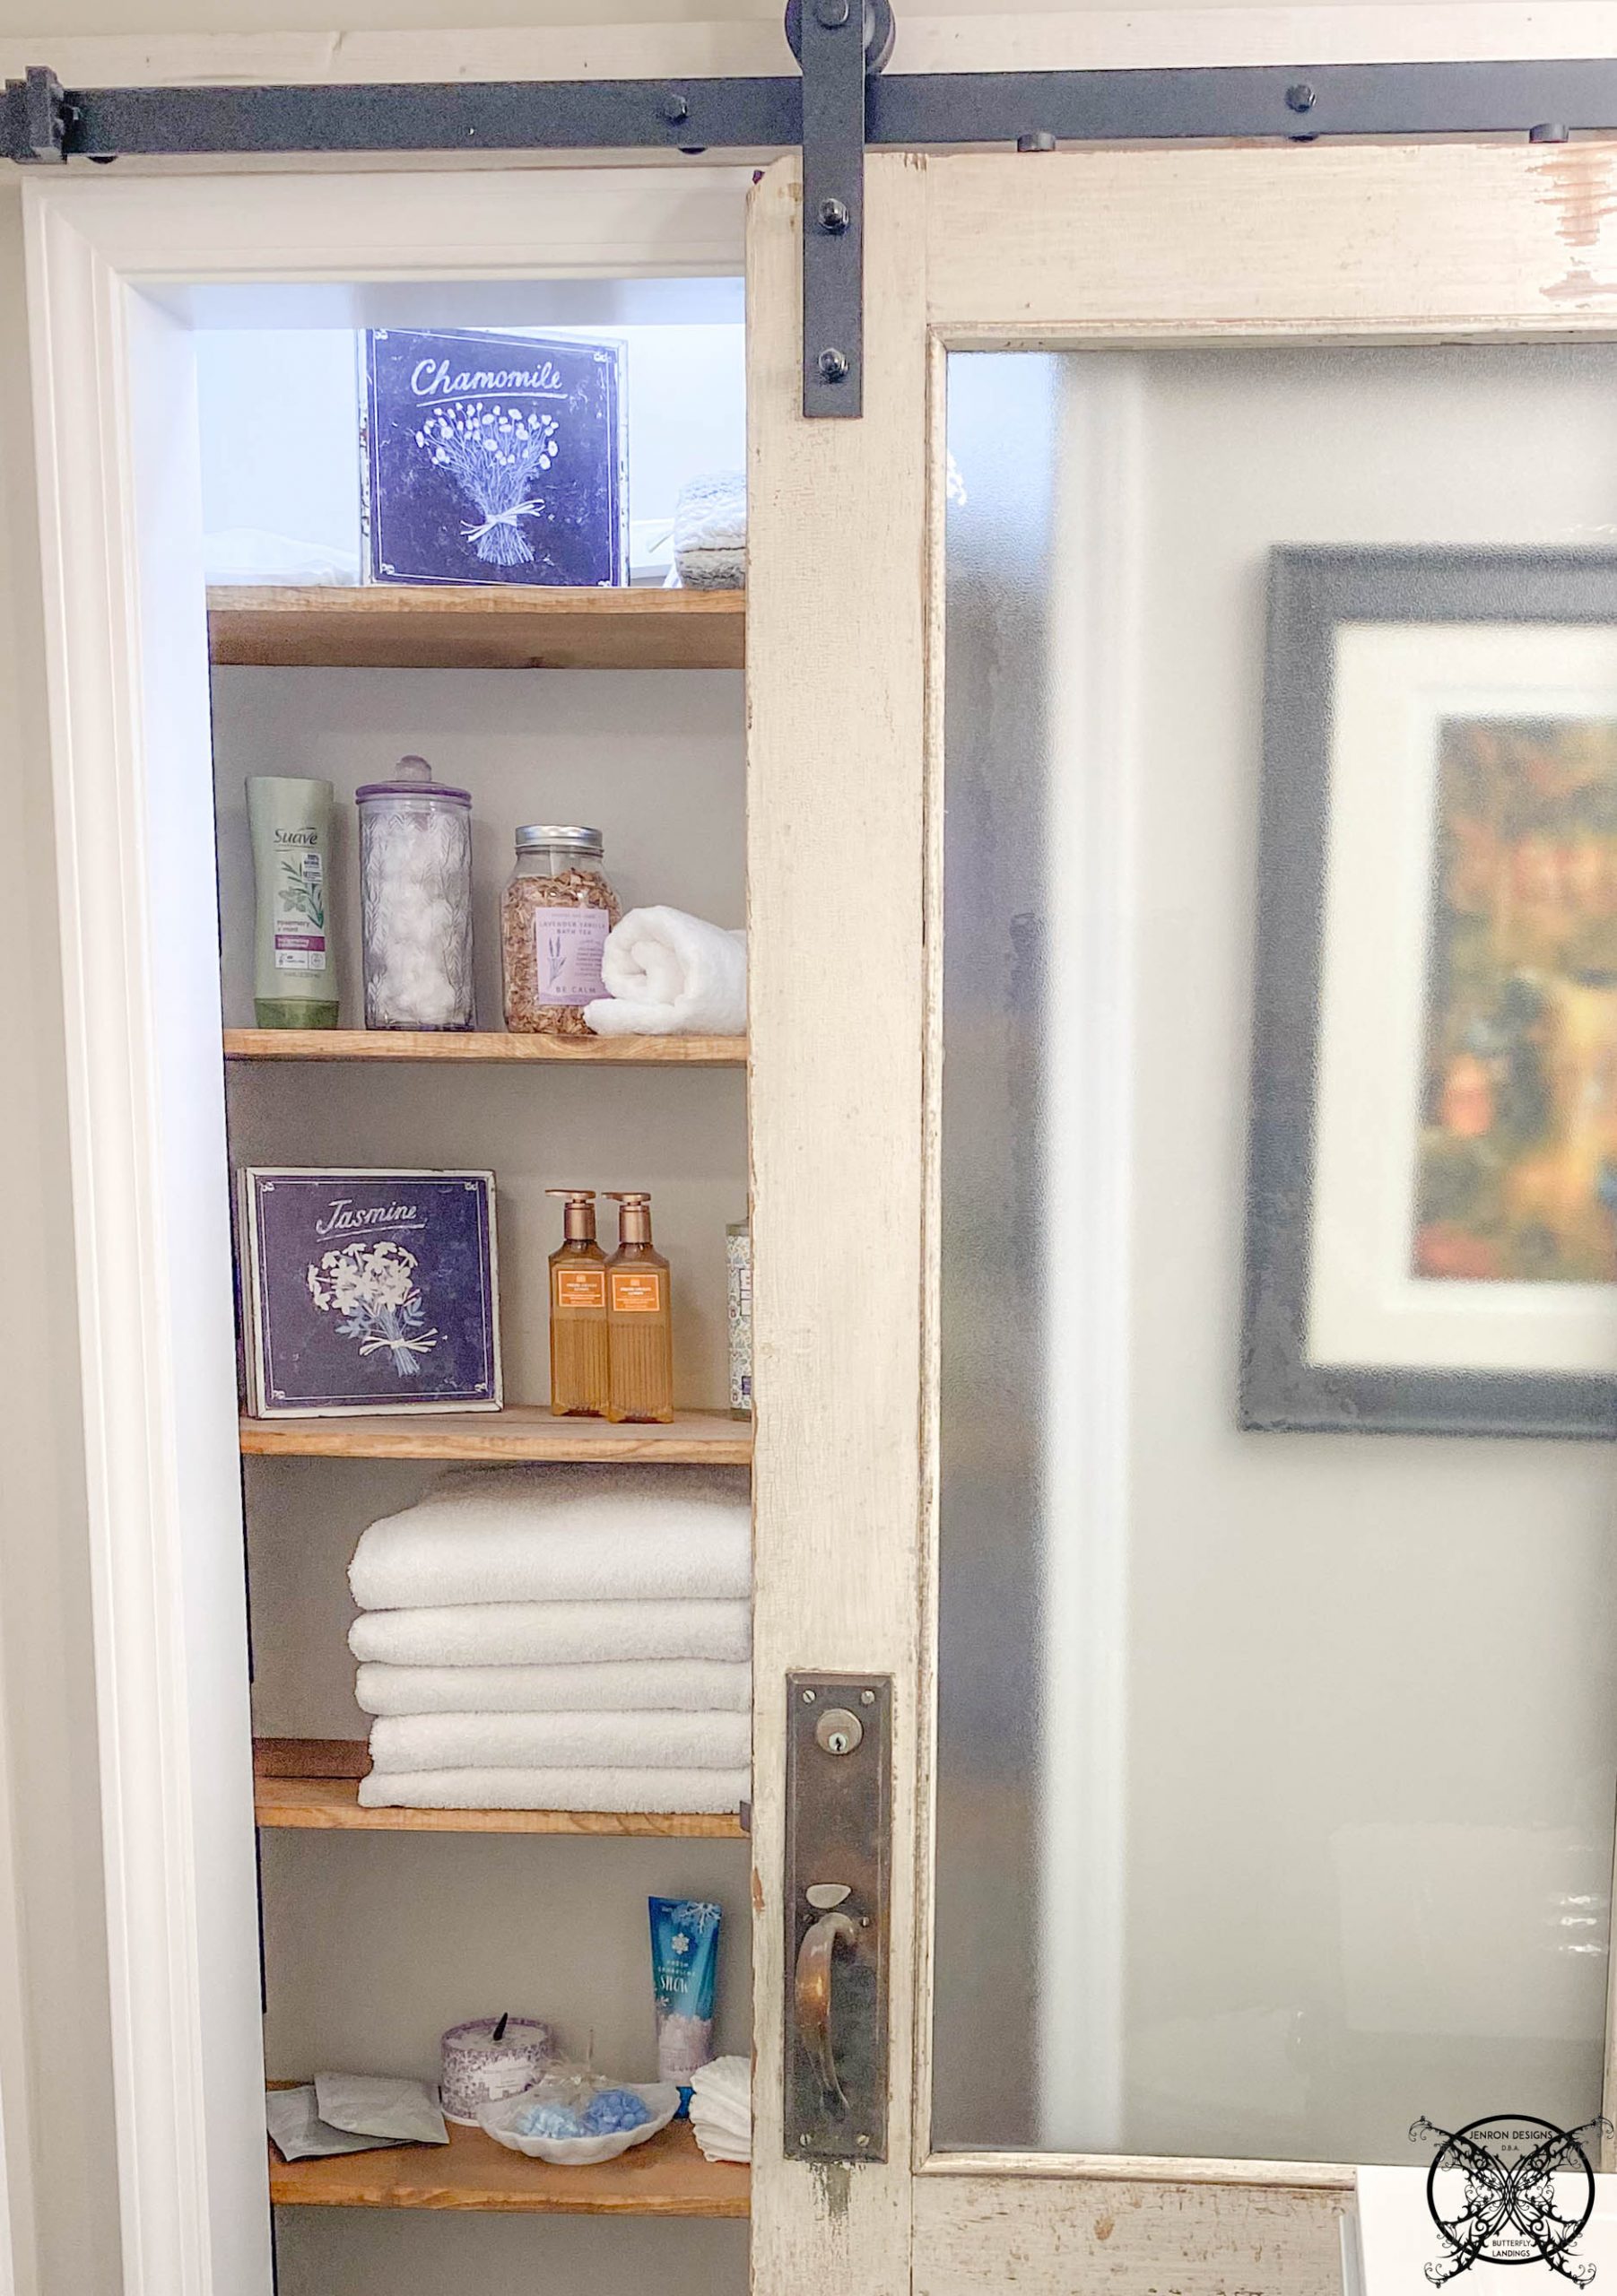 So where did this entire project start? Well we installed all the dry wall and tile ourselves. That is correct we are not semi professional tilers and dry wall installers, just let that be known LOL! I would never do this kind of work for anyone else but ourselves, as it is truly a labor of love. First step in the project, I found the tile below and I fell in love with it, then I devised a plan on the pattern and installation for the entire space, as you do.
 After installing the shower base pan we decided to start with floor and work our way up. Whether this is right or wrong way to do this project, I guess it water under the bridge but this is how it started. We added a layer of thin set to the concrete floor and leveled it out, then laid the planks with the spacers you see here below. The floor went down pretty quick so not many in between pictures to show, plus it was a tight space to work in, so once I was inside the room I was locked in not a lot of moving about to go get the camera for photos, it more of whew I am done here lets take a picture.
 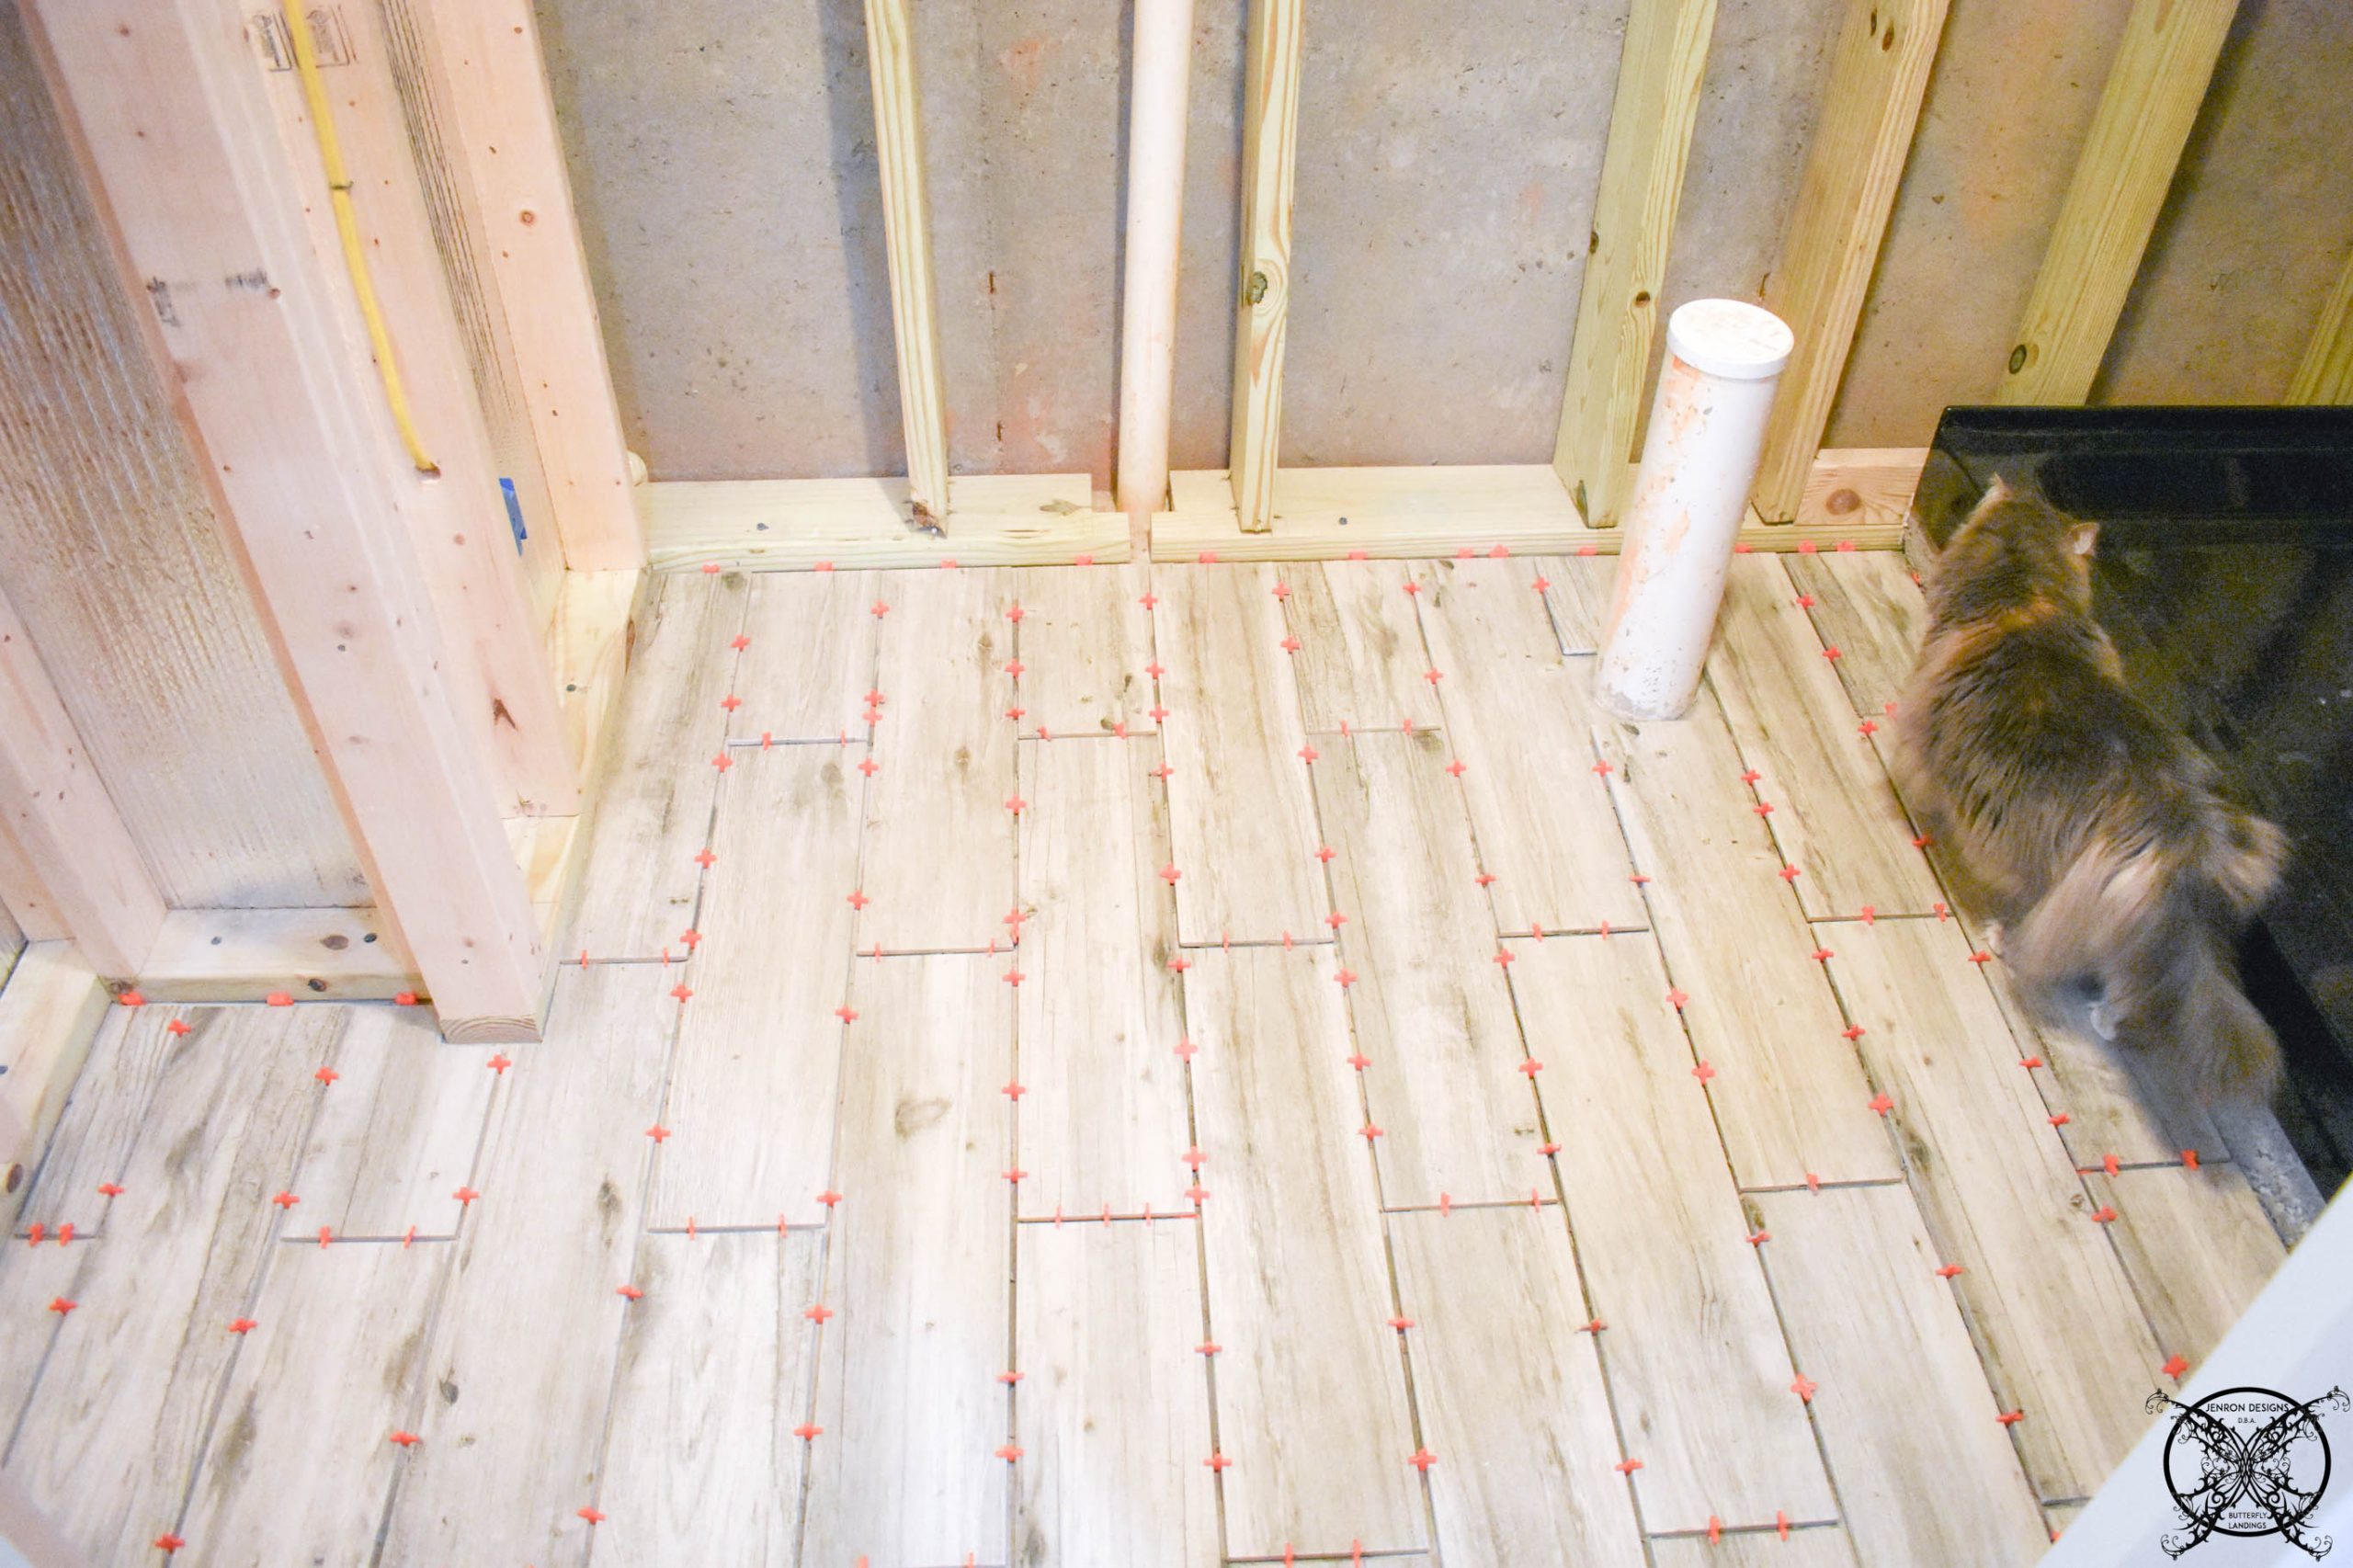 A day or two after the tile had set up it was time to grout it. I went with a dark gray charcoal which is beautiful, and will hide all the dirt and grim which could potentially live in the grout of a basement. Yes I absolutely thought this one through when deciding on the floor grout this time.
 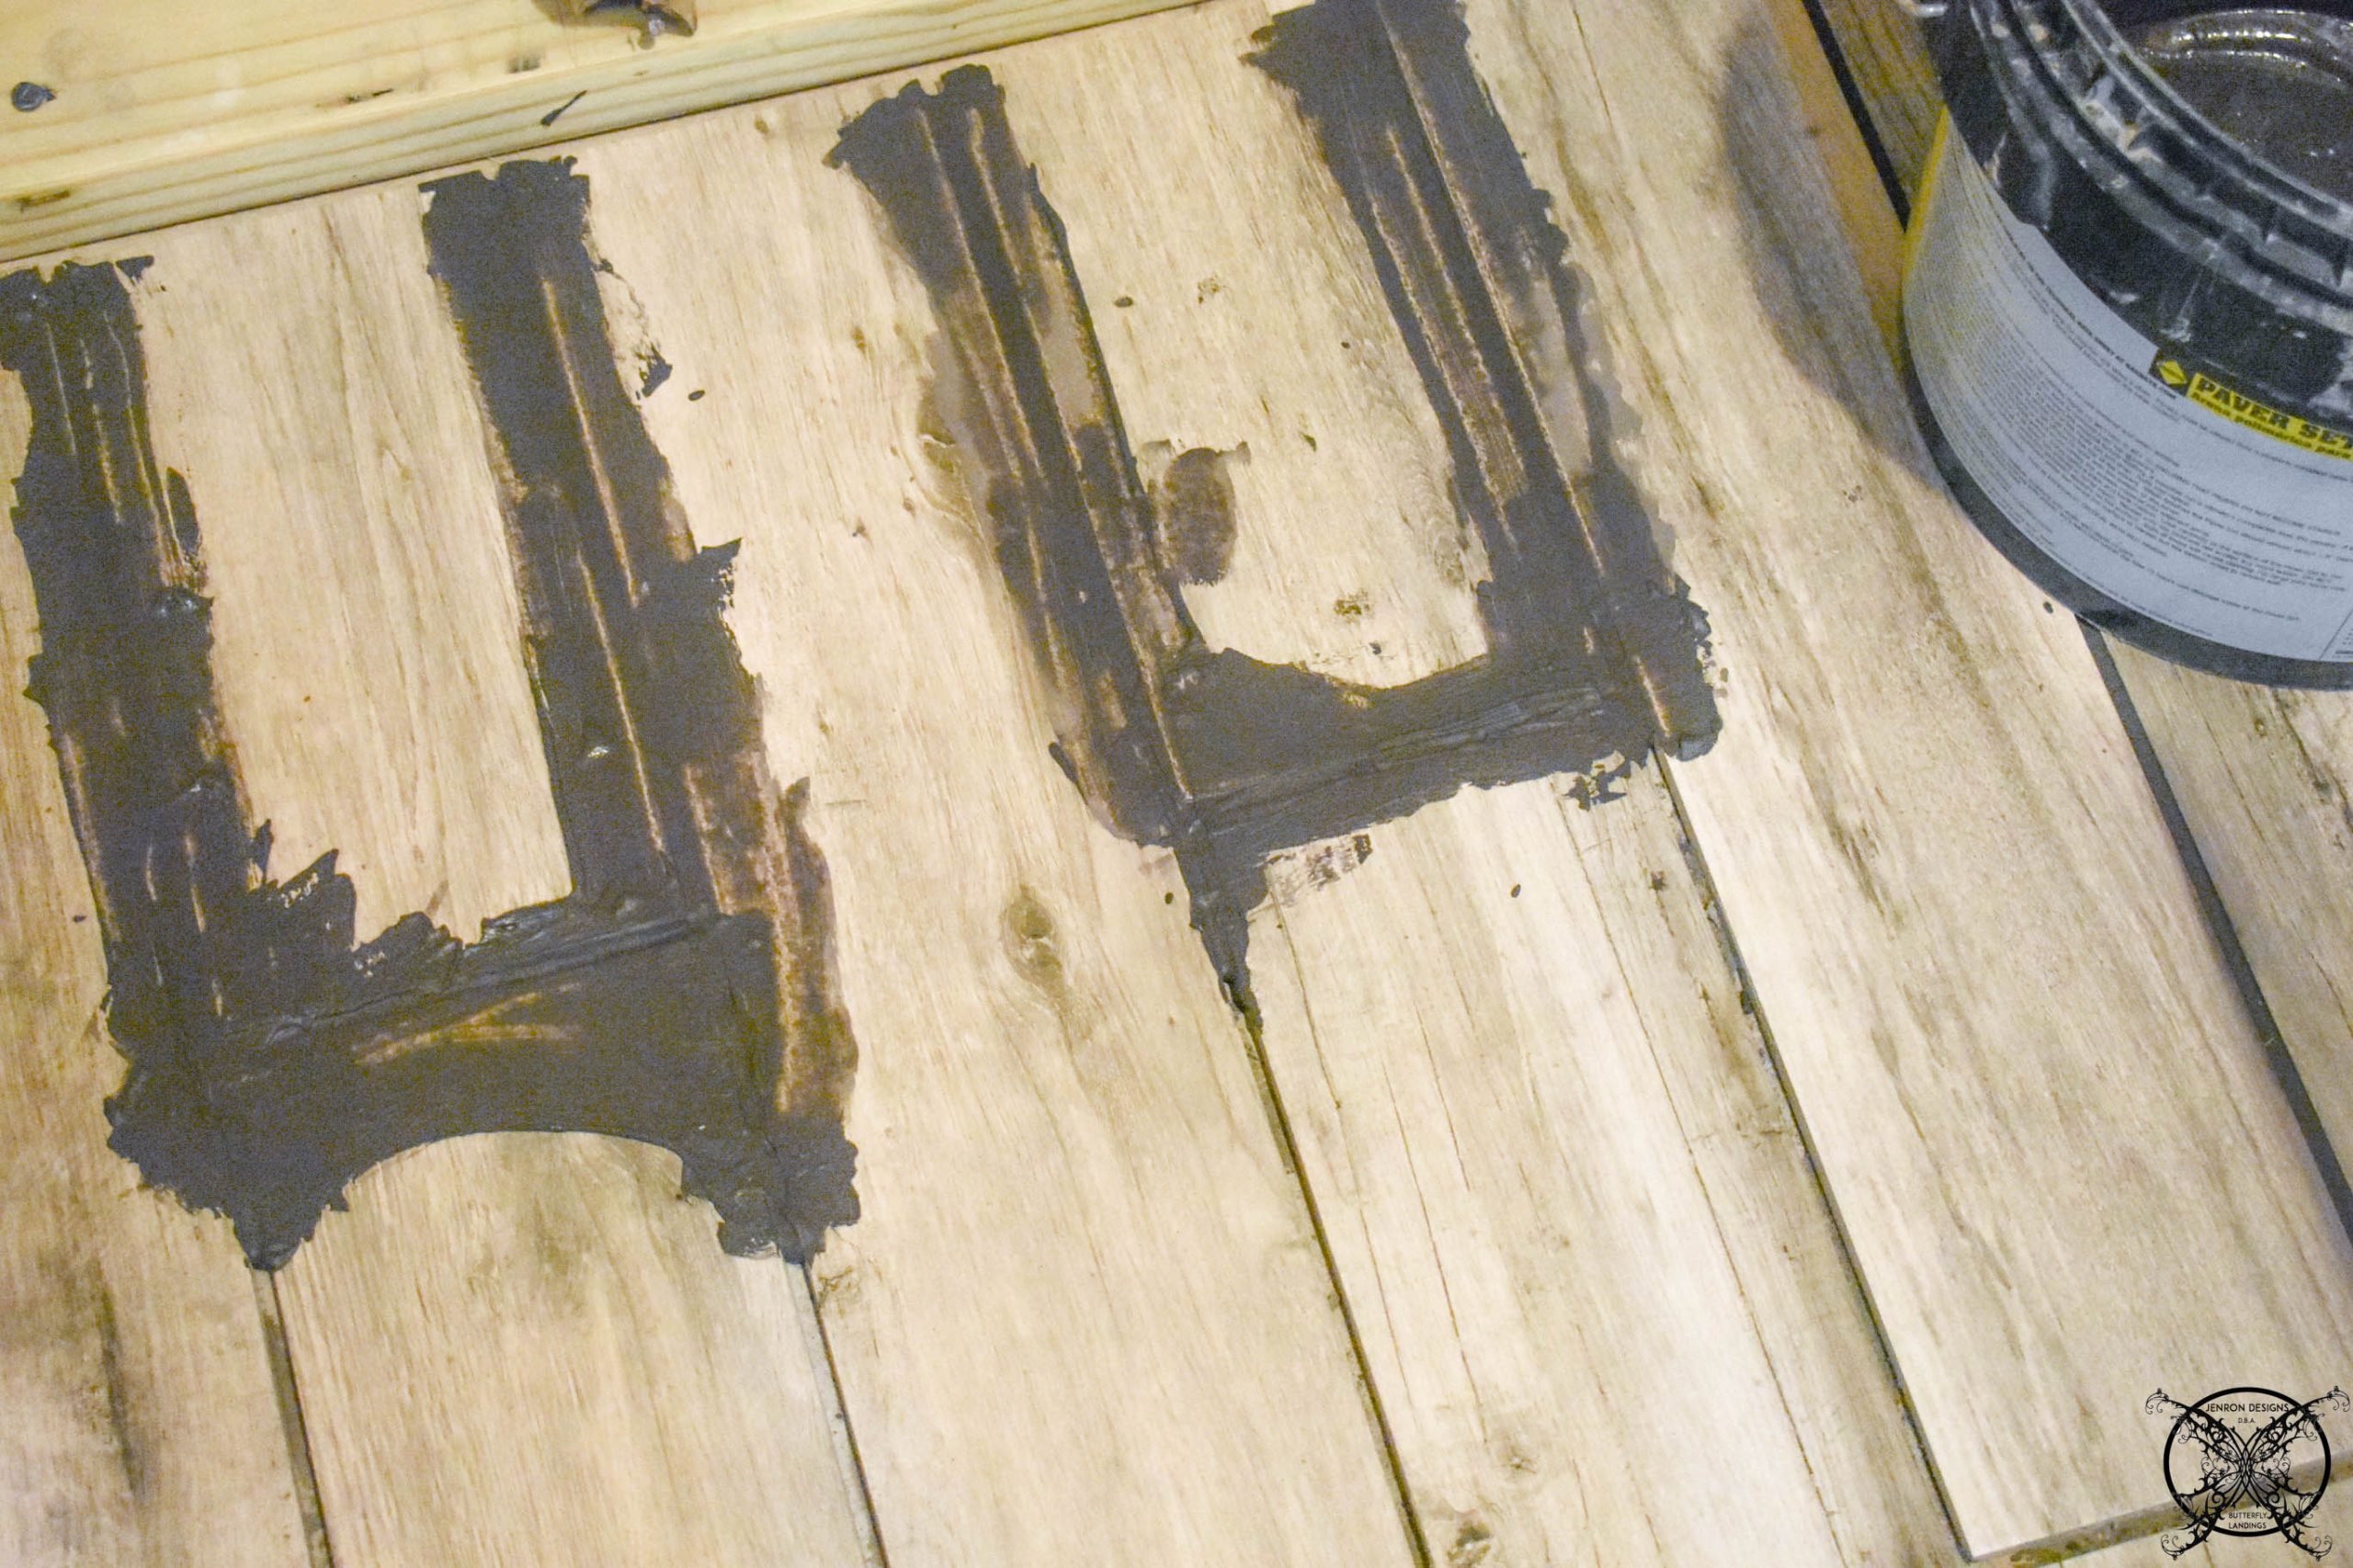 While I love the light gray in my bathrooms upstairs they still show more dirt than I would like, so darker grout for a basement seemed like the way to go. After all this is where Ron will shower after mowing the yard, gardening, or any messy DIY project much like this one.
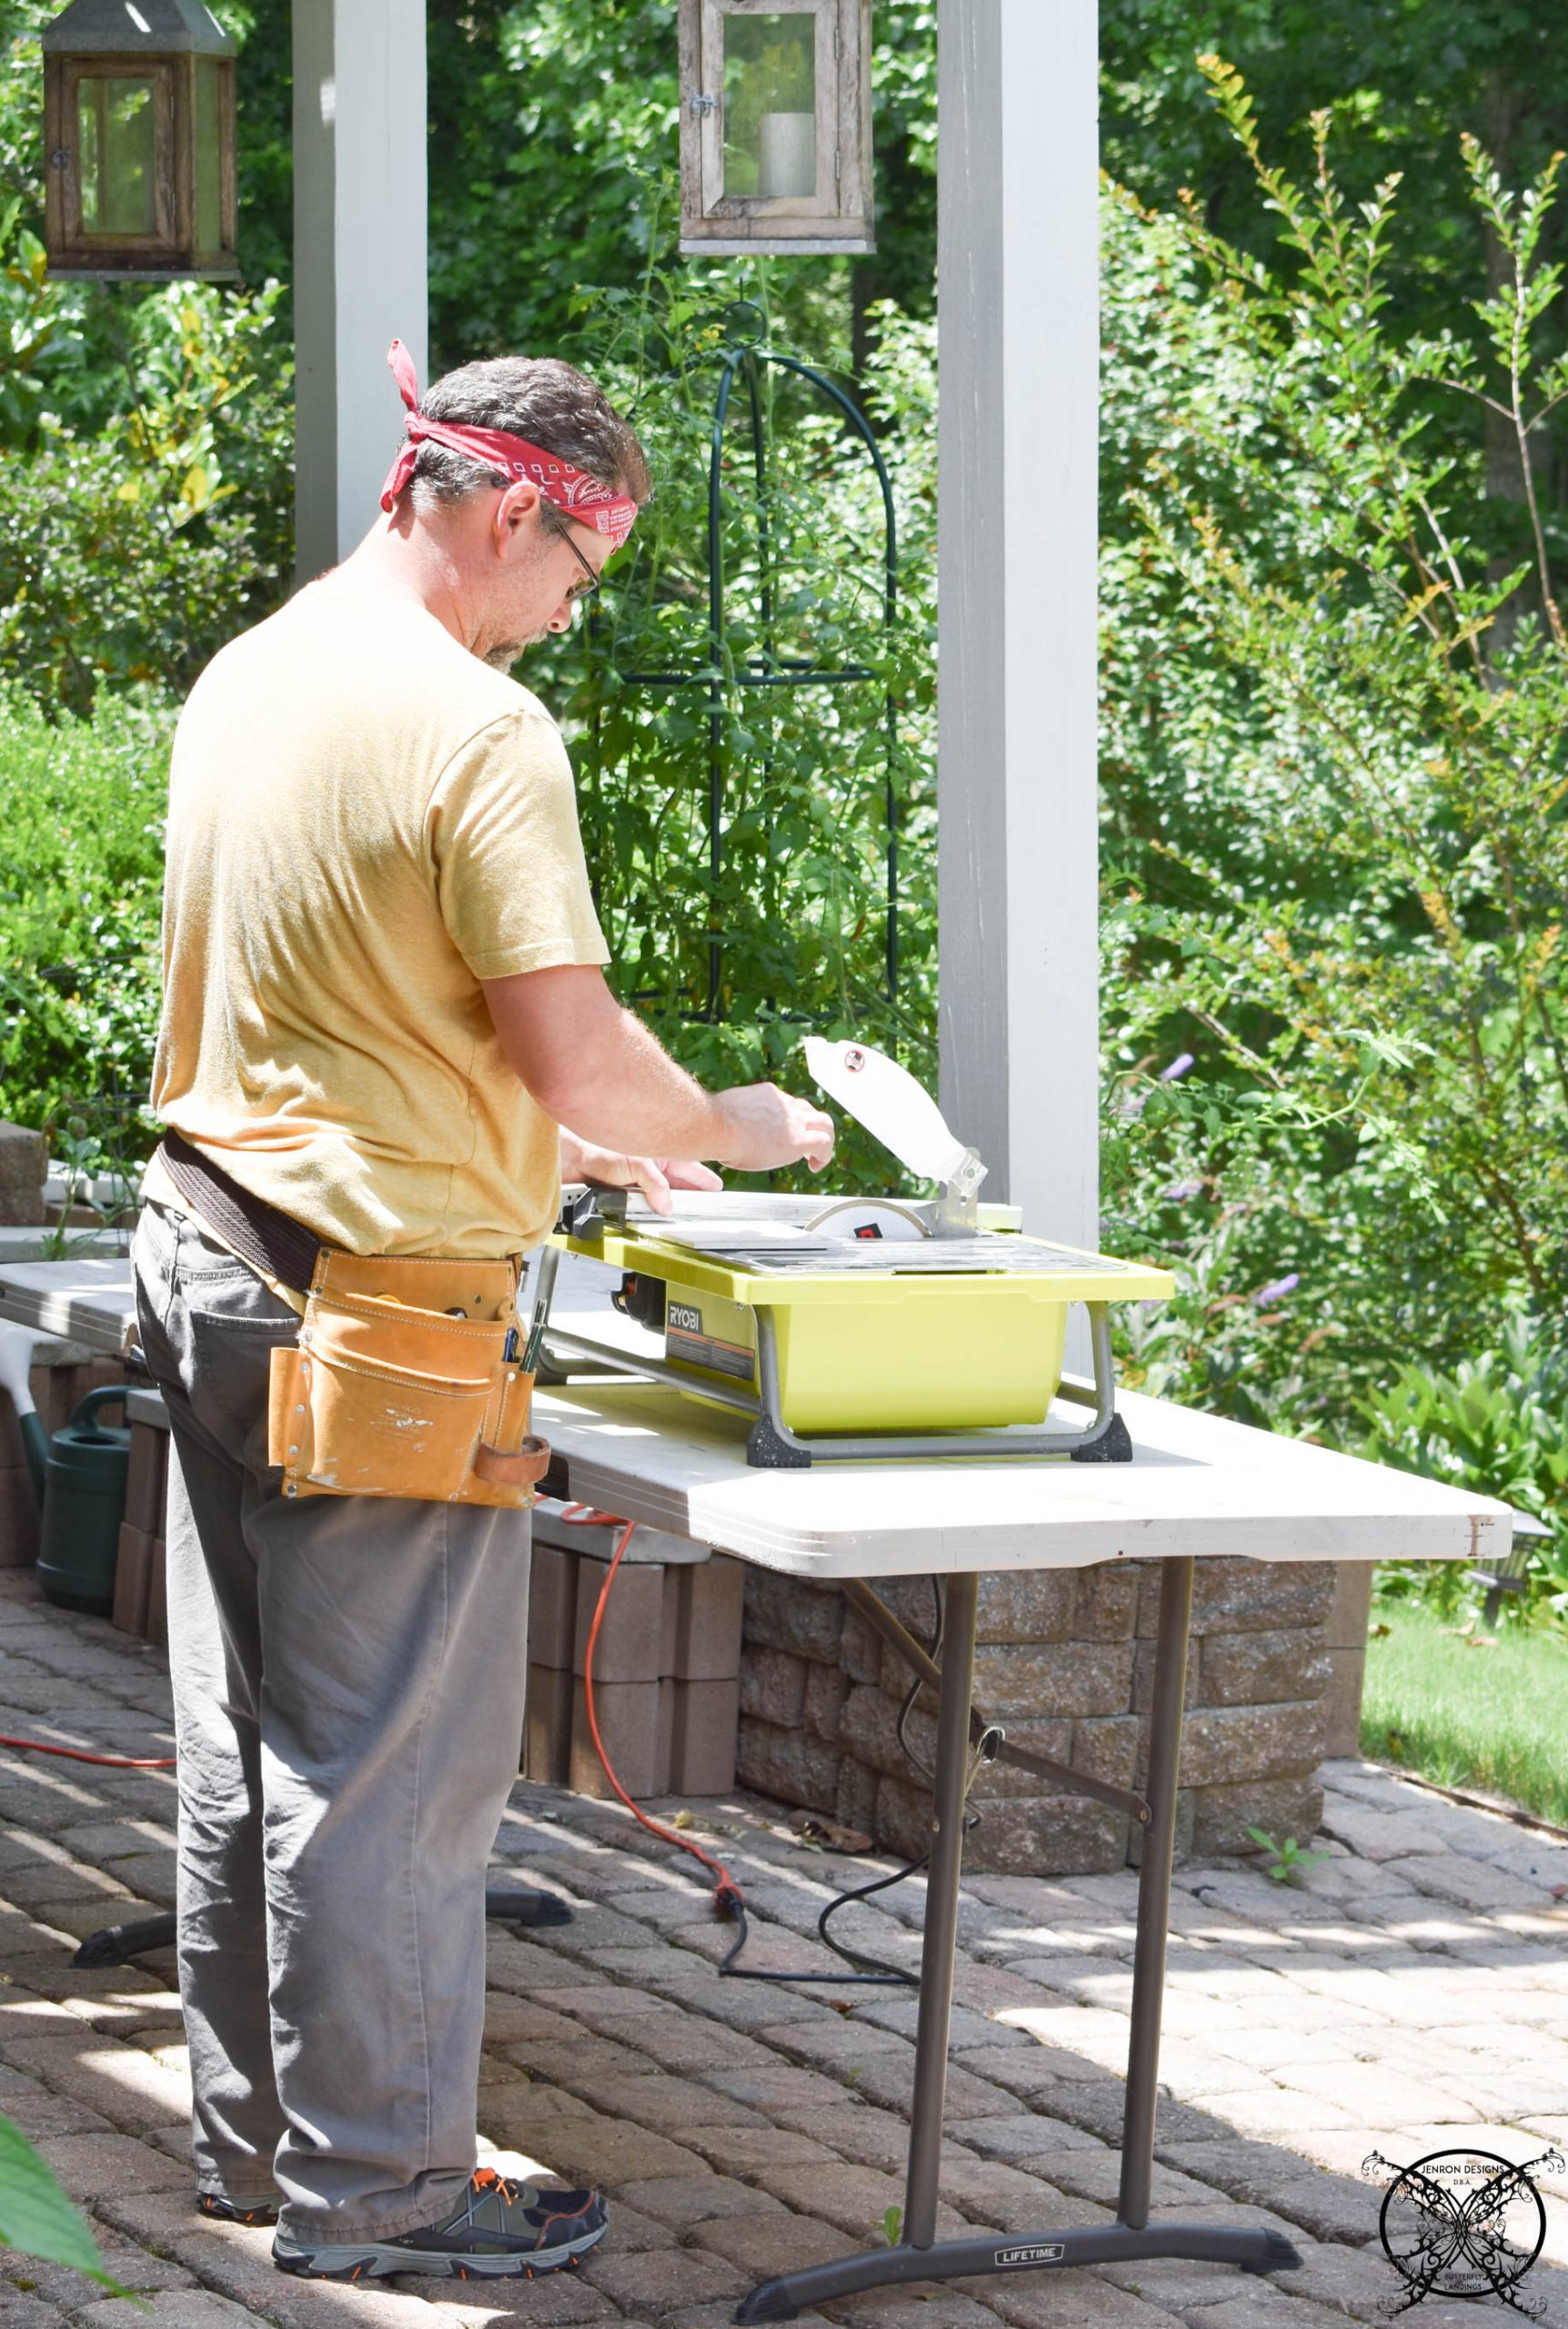
 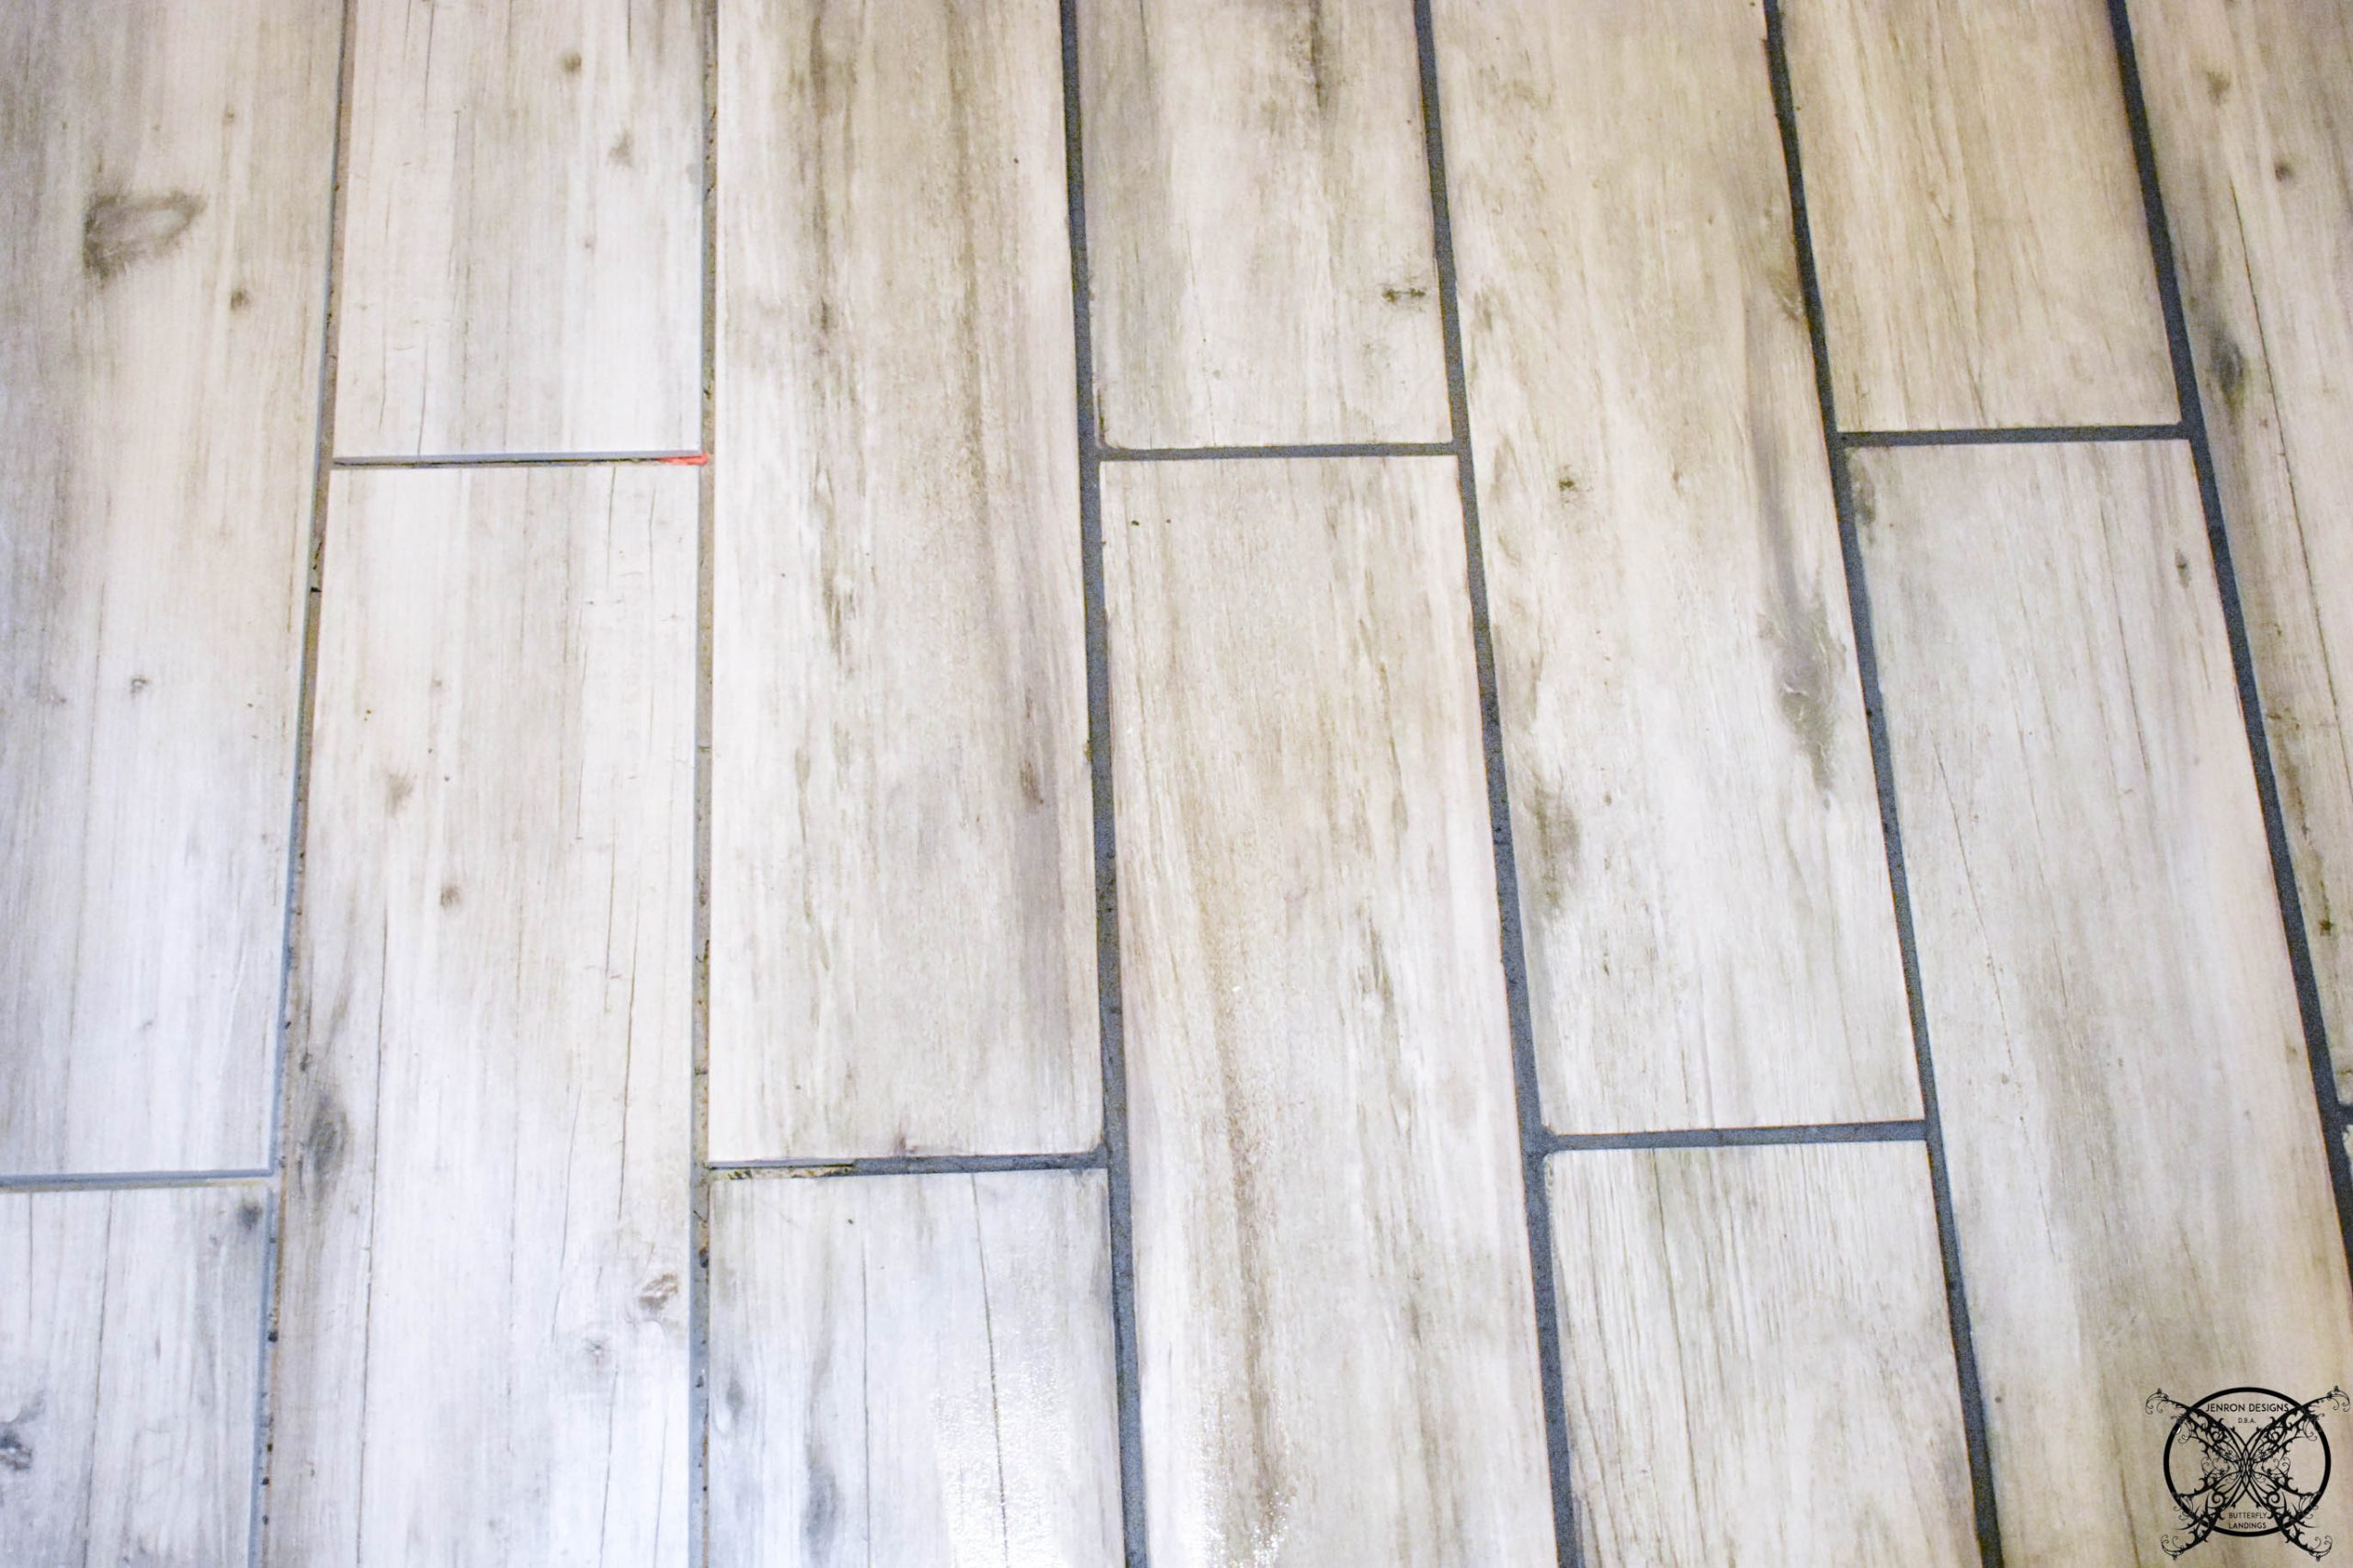 FYI- Ron was my tile cutter and made every cut for all the pieces floor and wall tiles. We found that purchasing a tile saw was the way to go, and it has paid for itself with all the numerous fireplaces and the stone work we have done, and now add in the new tile bathroom. You can see those projects here :
DIY a Sleeping Porch Fireplace
Installing A Recessed Custom Build Fireplace with Stone Harth
Building A Stone Fireplace Hearth
ORC: Adding Stone Tile to a Fireplace
 Next we hung up all the mold resistant sheet rock, which is why it is green in color. By code it is required for all wet areas like bathrooms and basements to prevent mold growth, so our entire basement is done with this stuff. Honestly, I wish the entire house was done with it due to the humidity in Georgia. After we had the sheet rock up and the Durock tile board it was time to start on the shower stall. I wanted to do a vertical accent boarder and matching backsplash behind the sink. To get the stripe centered this is where I started, centered the tile in the space and set the line first.
 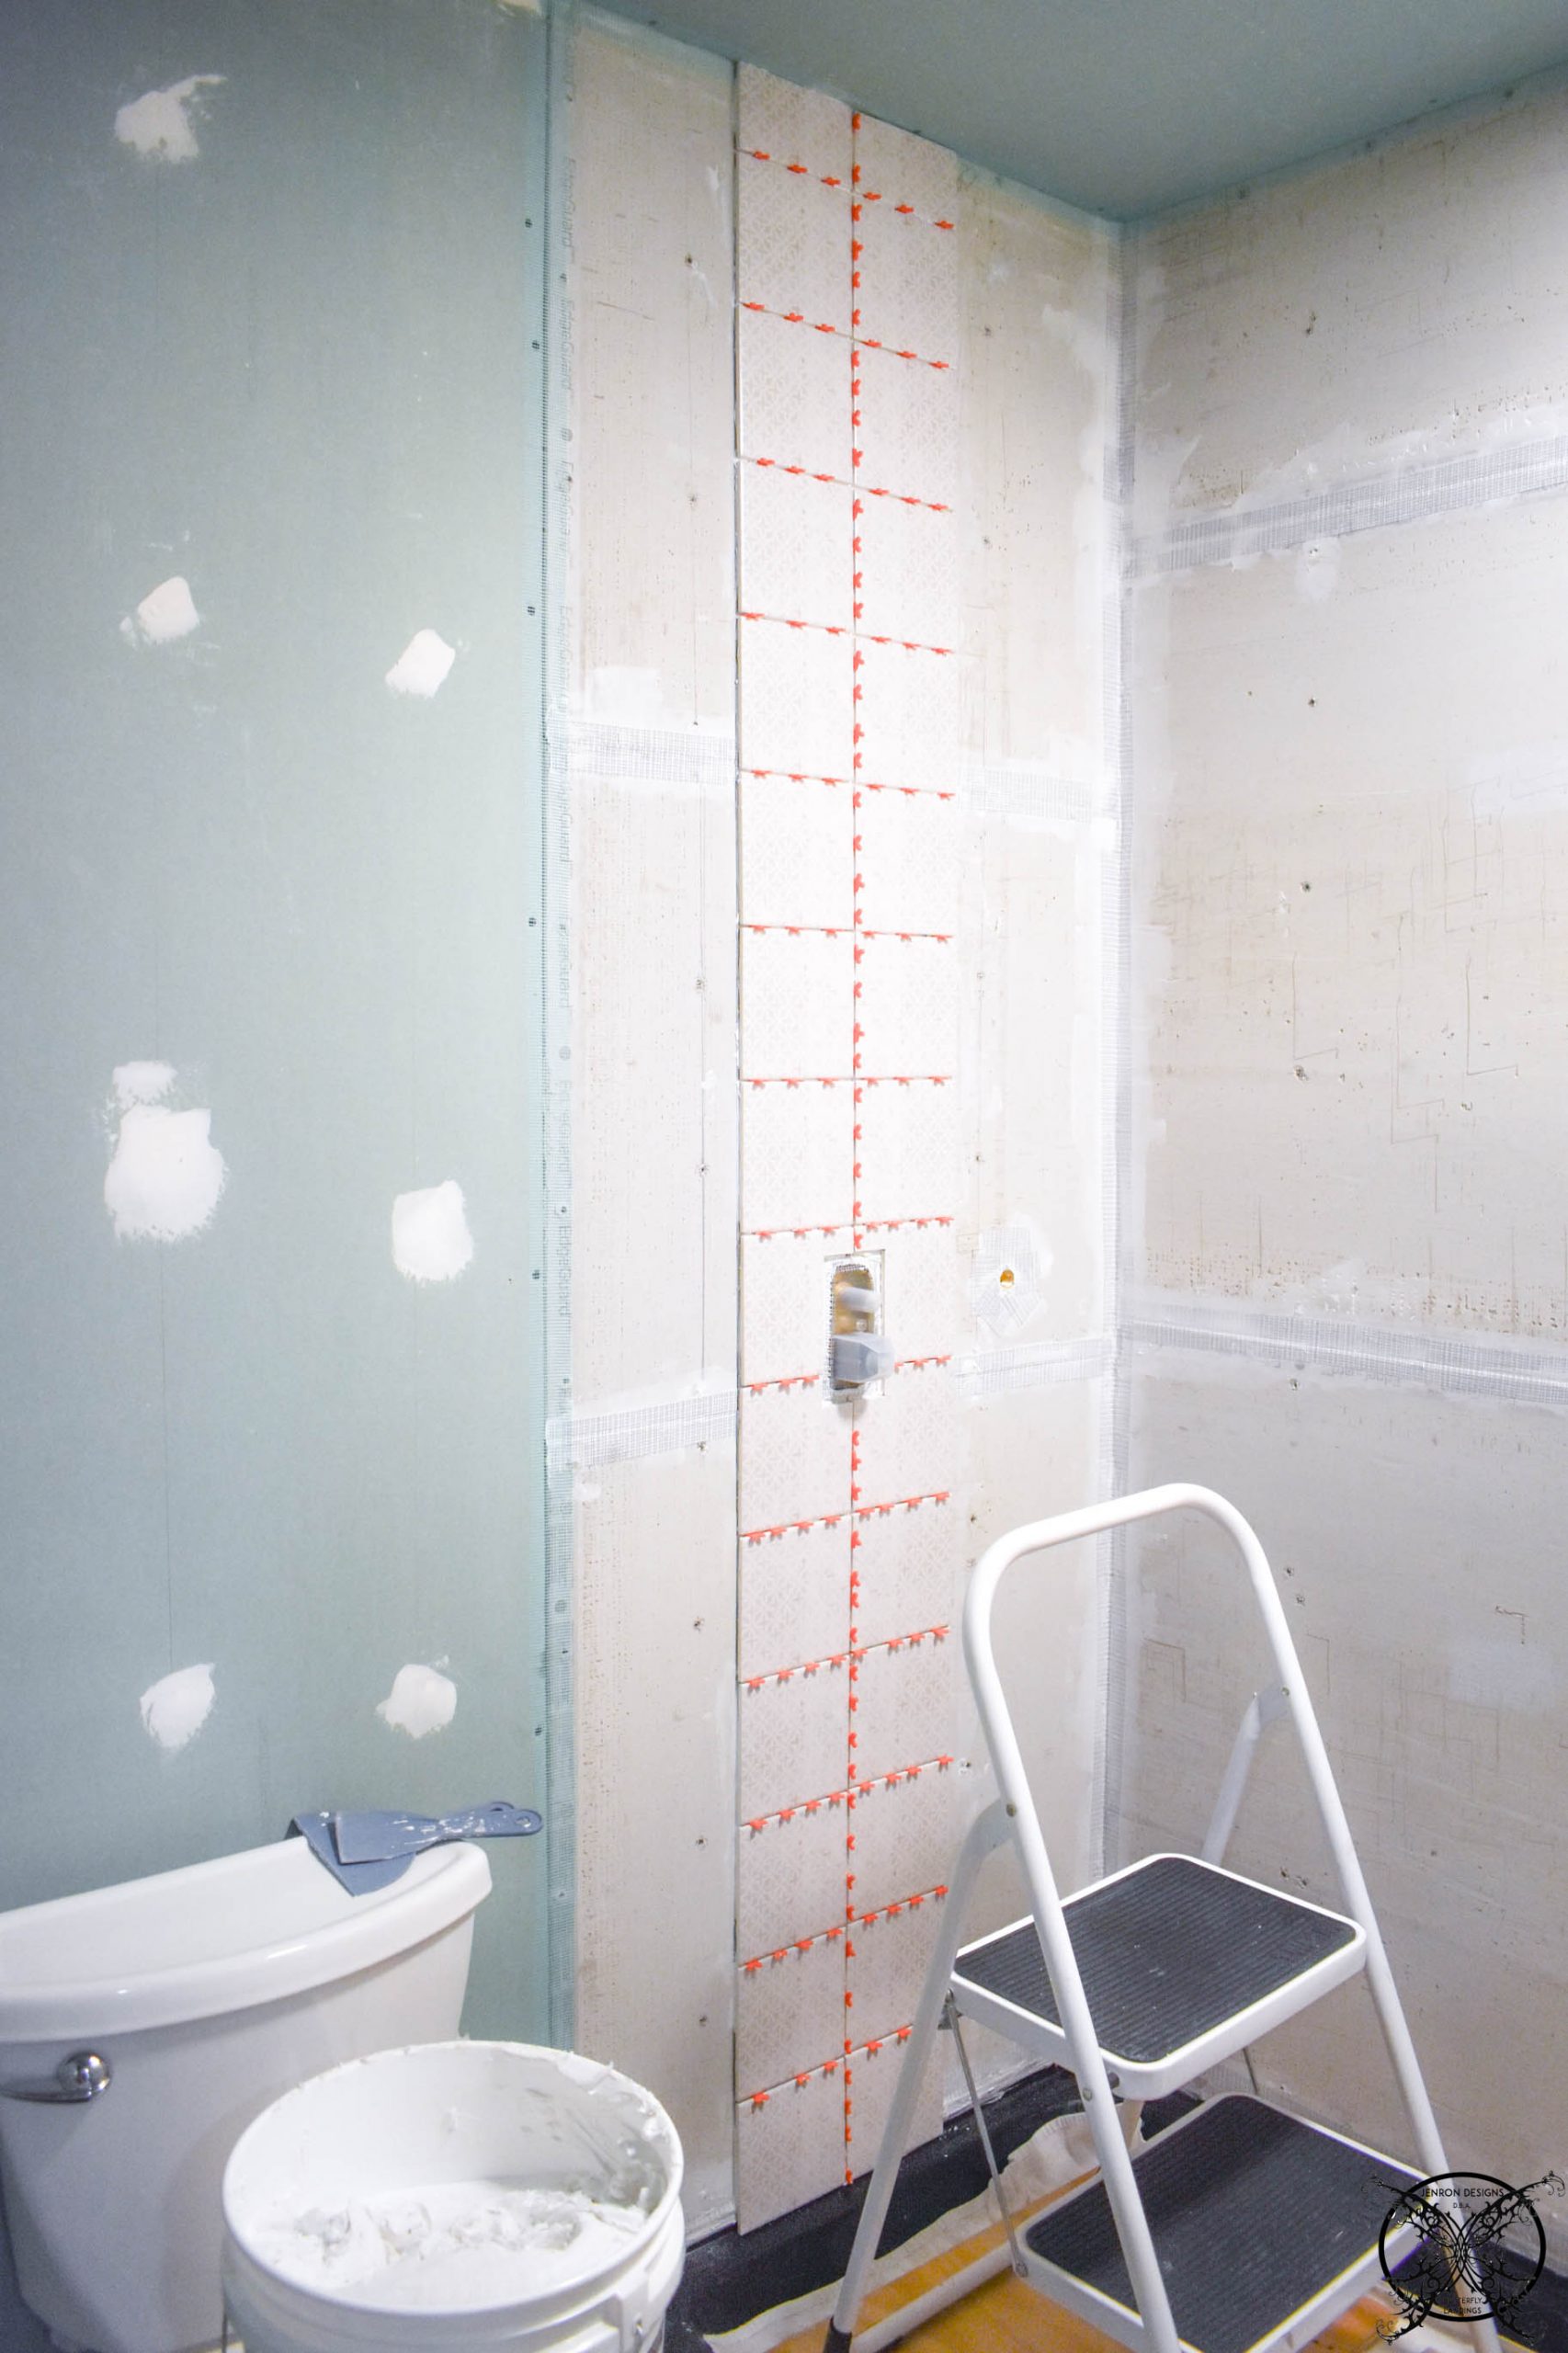 Next was adding the classic white hexagon tile for the remaining shower stall which was relatively easy. The tile sheets made quick work or laying the tie on to the wall in the thin set.
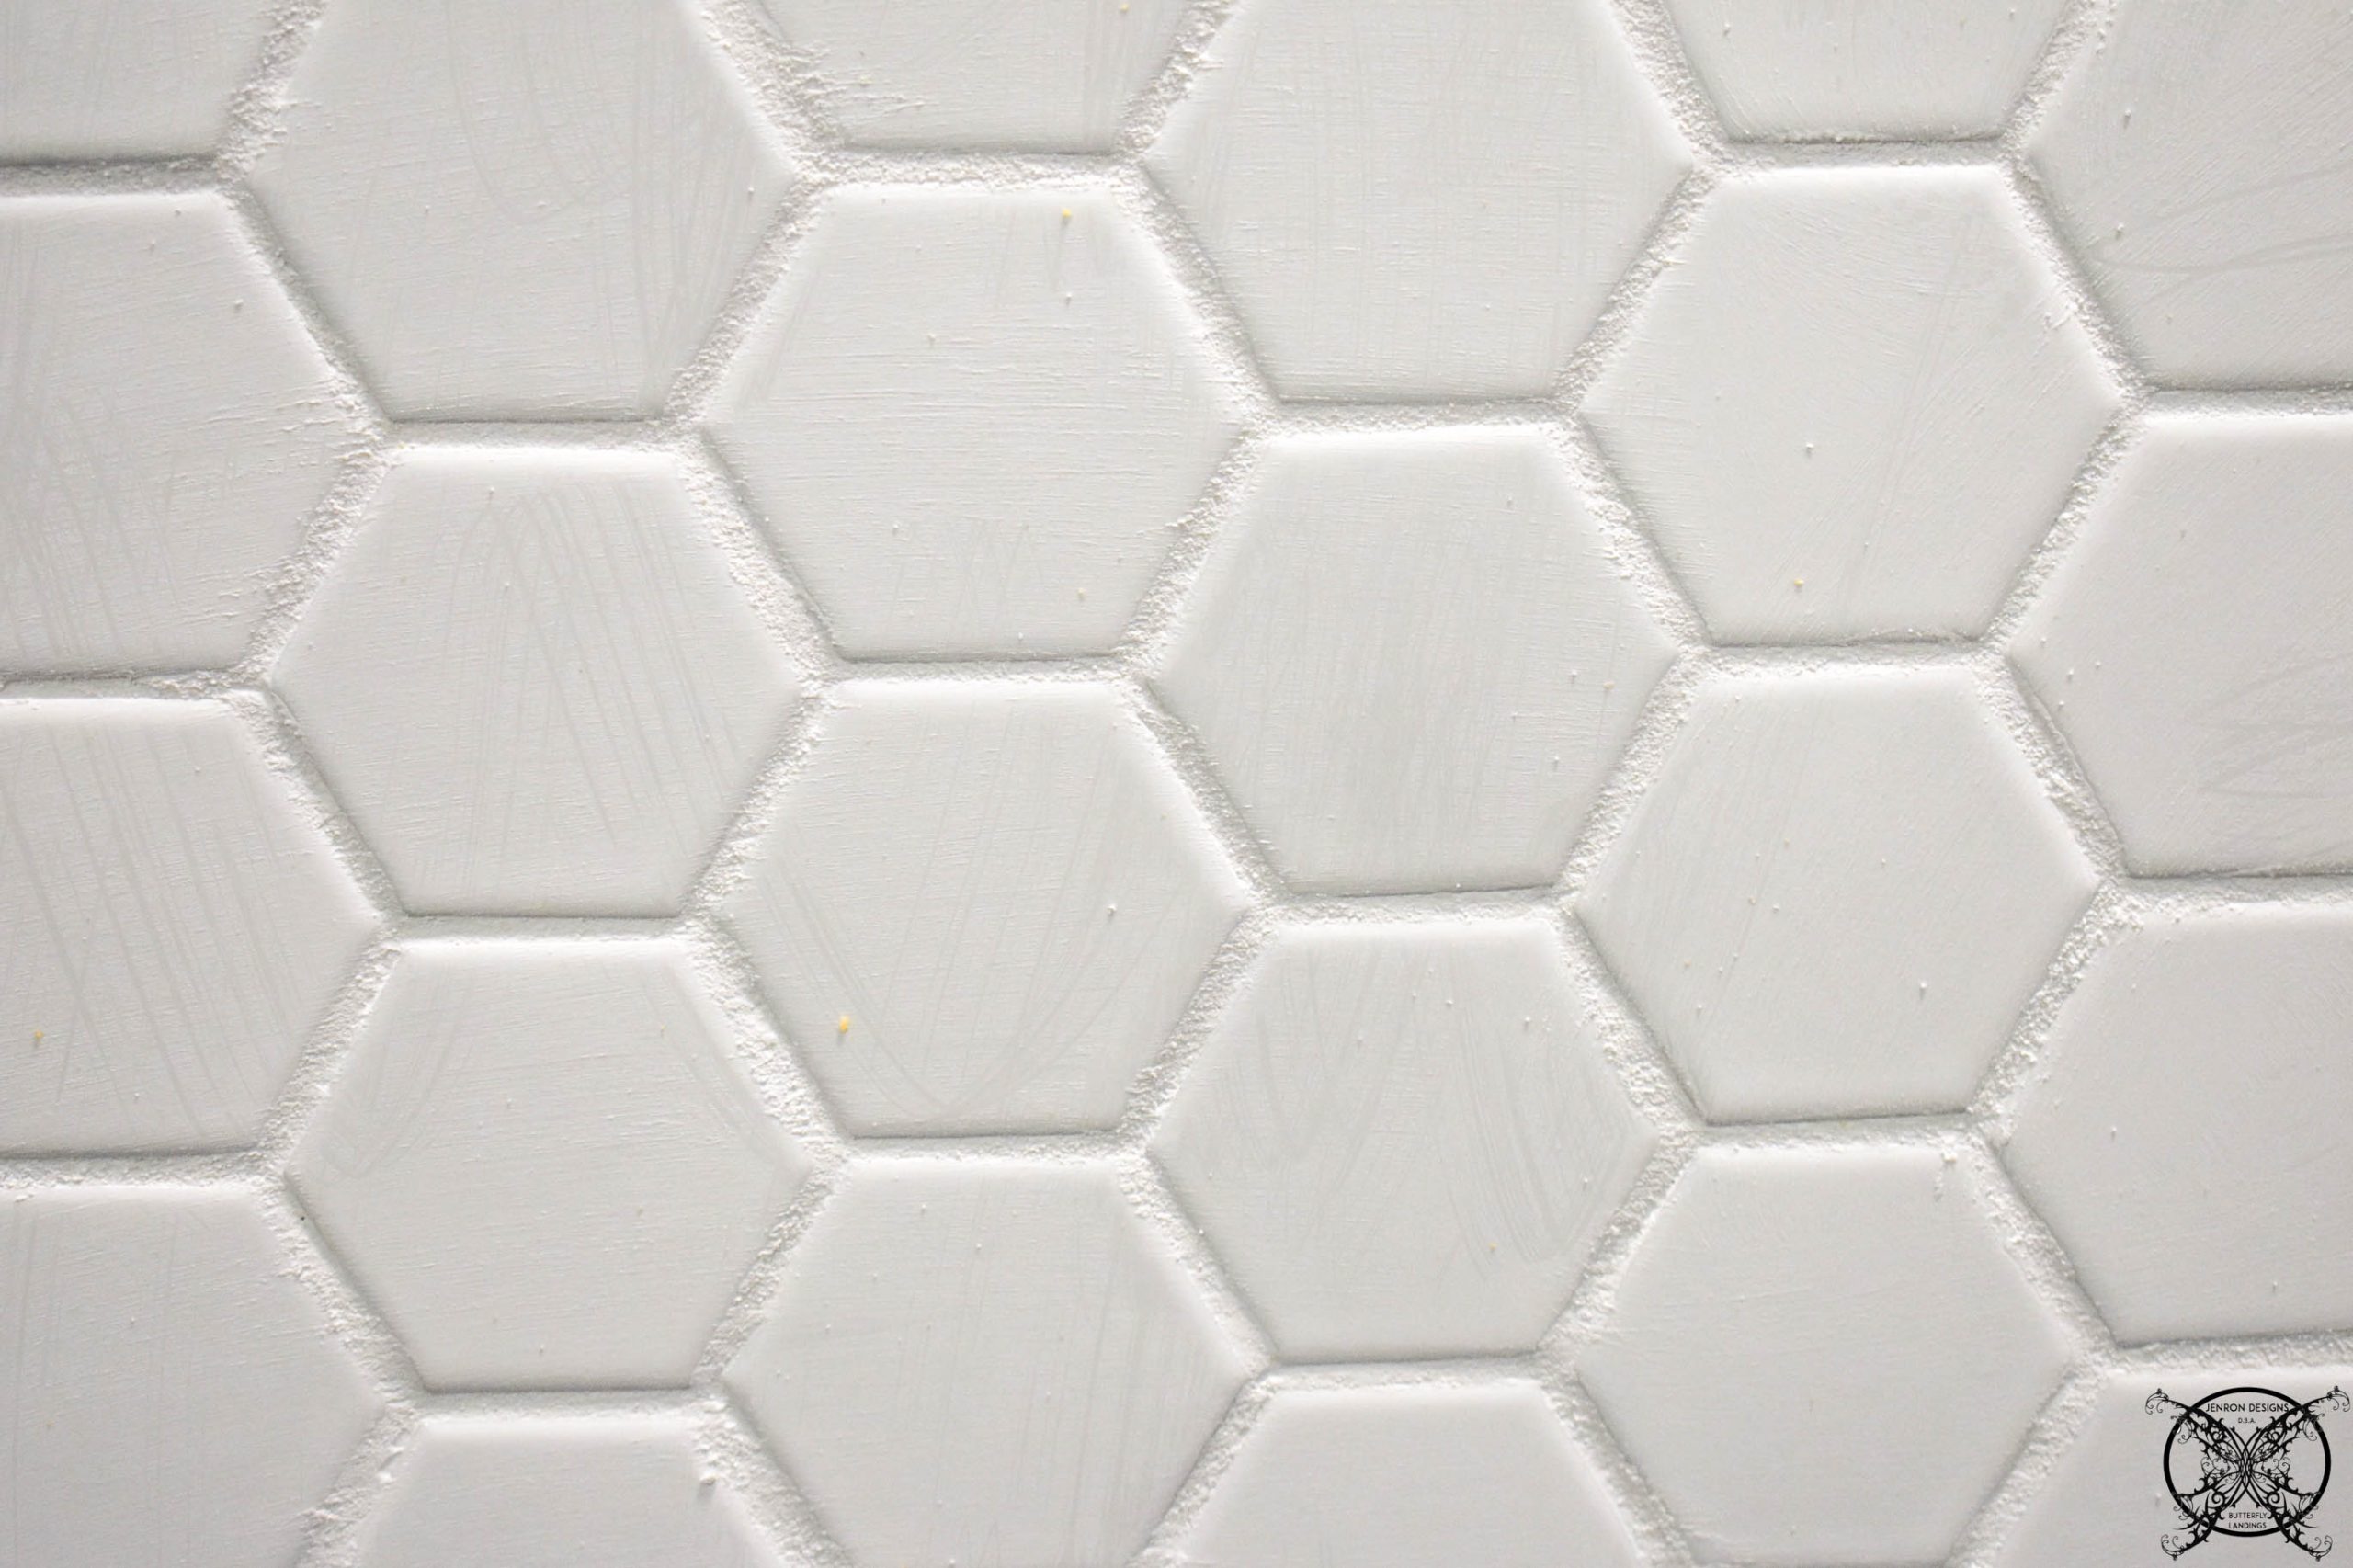
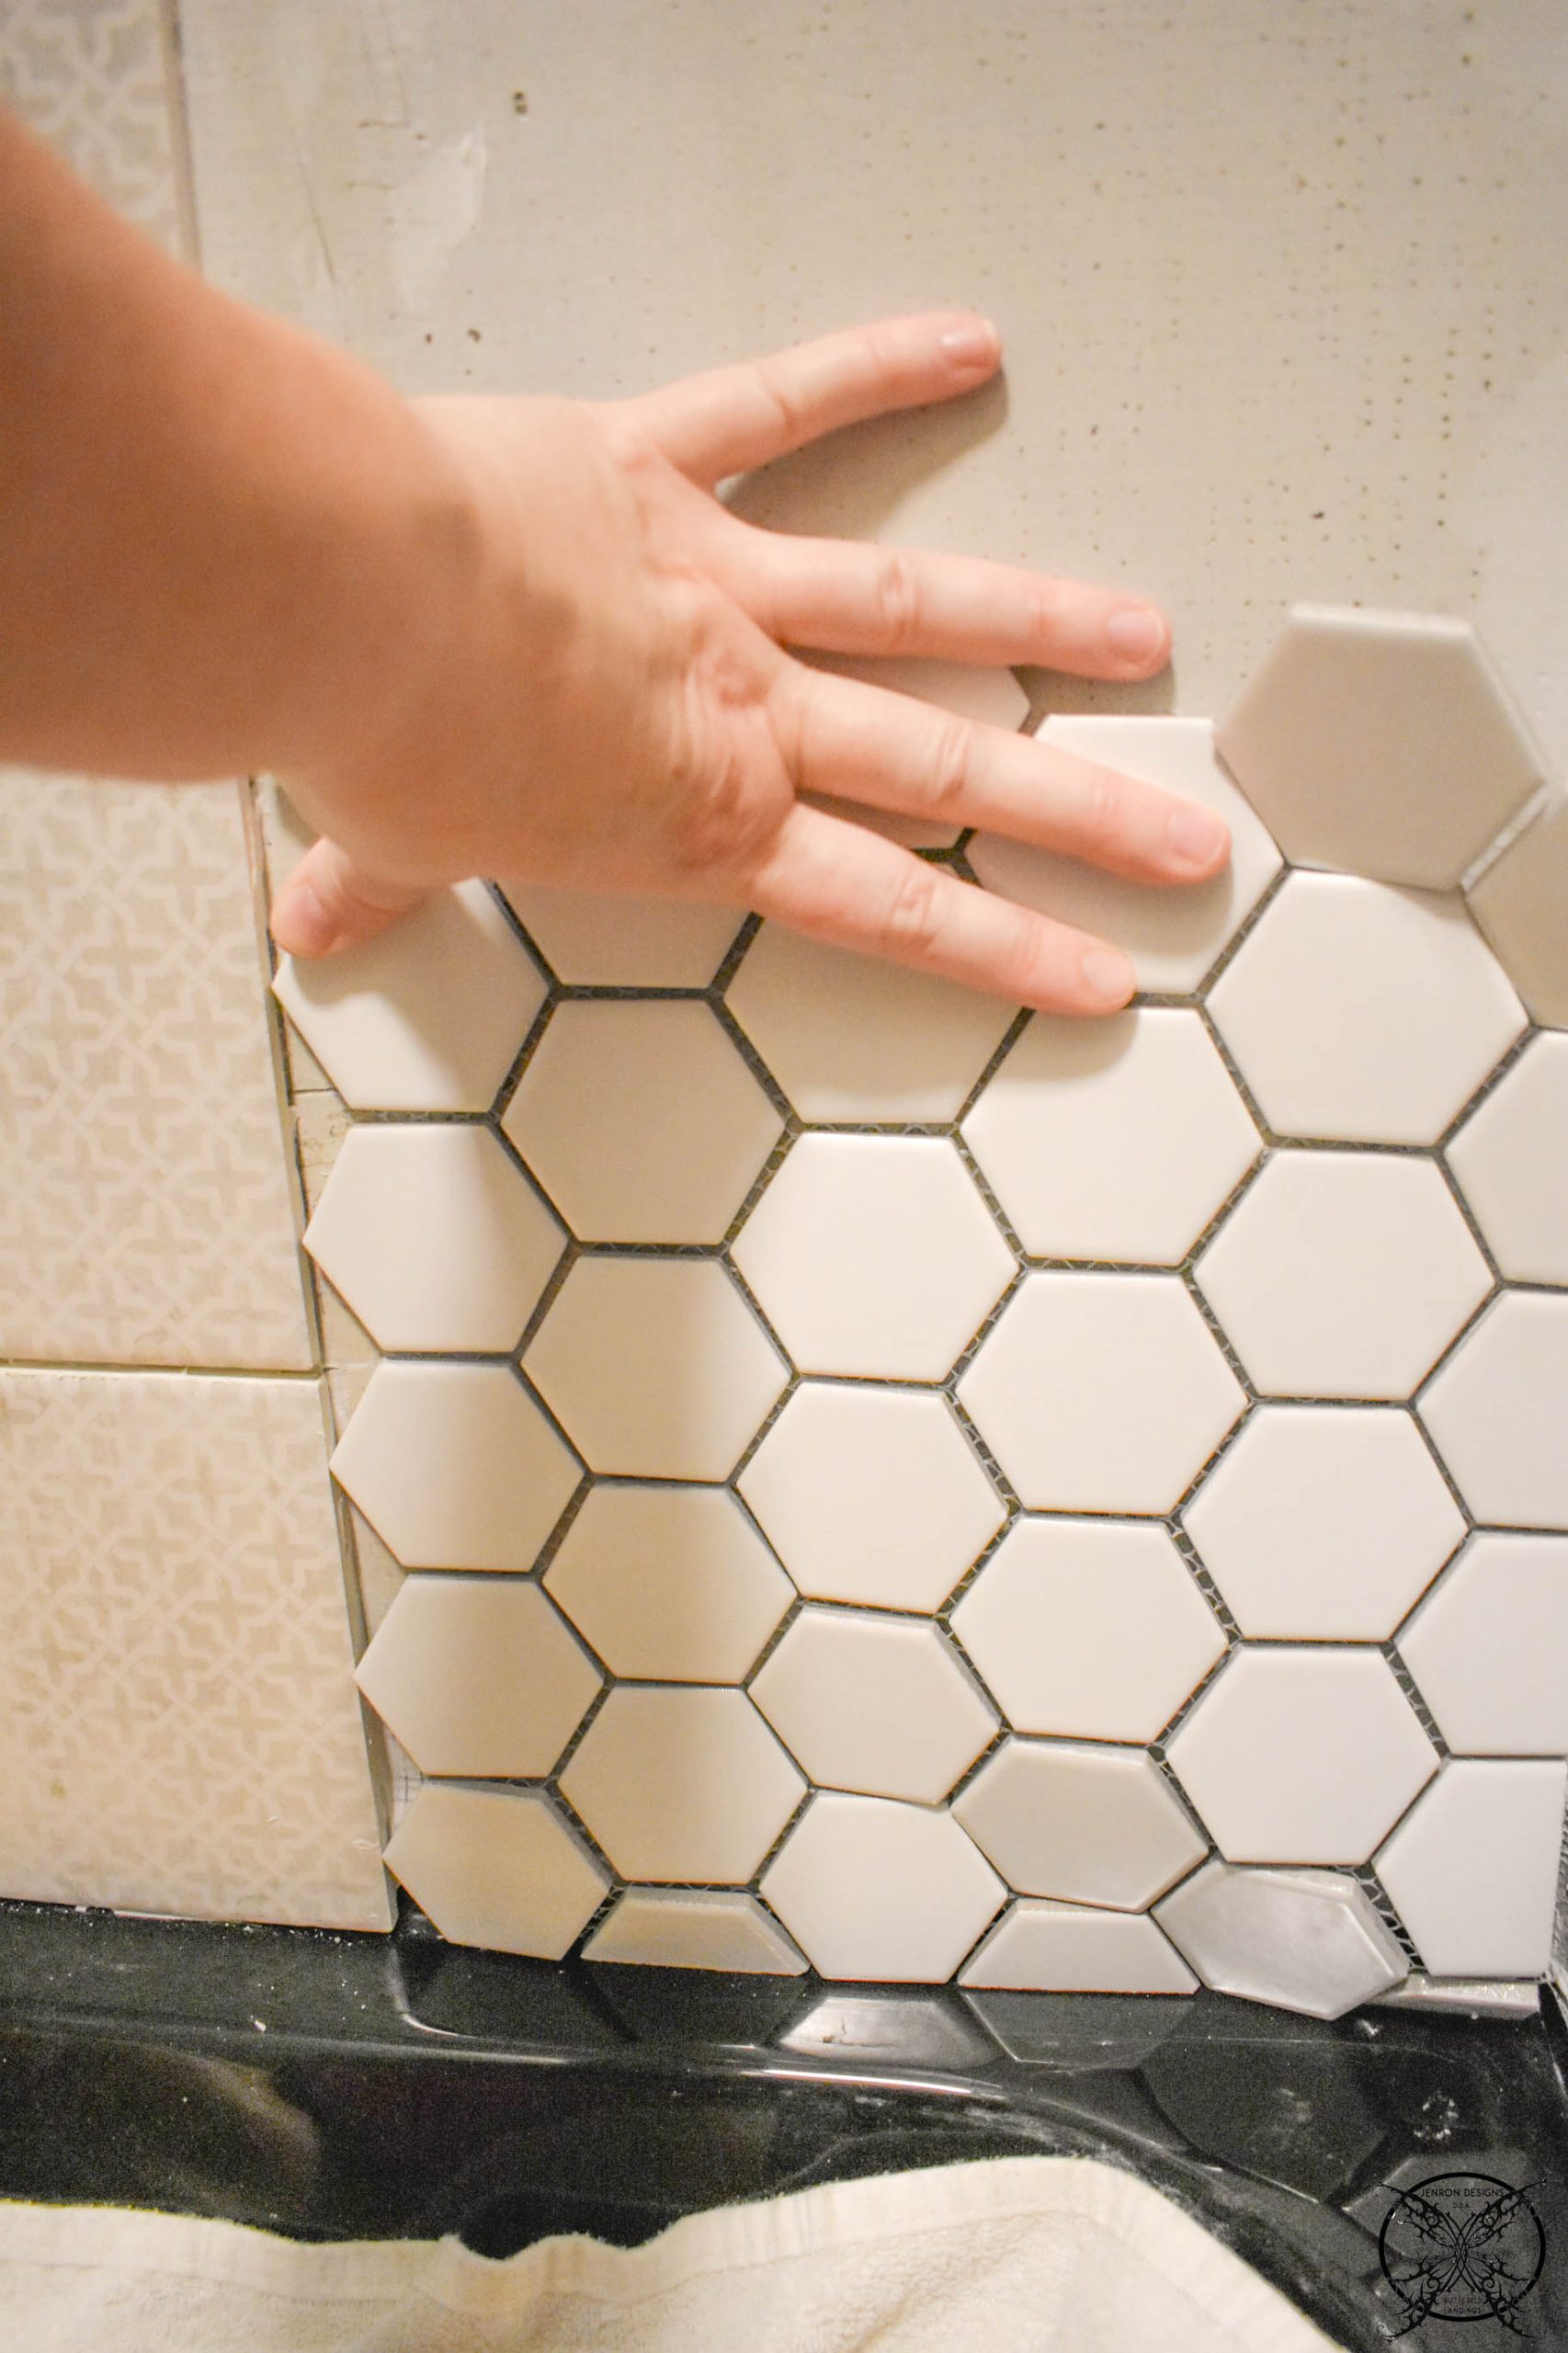 We only had a couple of cut outs around the thee plumbing fixtures which we pretty easy cuts for Ron to do with the tile saw. Punching out the tiles for the shower spray handle, and filling back in the the cut tiles to meet up to vertical stripe. Adding the spacers back into to make sure thee spacing was correct for the grout later.
 Then just make sure that the cut out for the soap niche was done properly so the shelves for fit after the tile was set. Again since we designed this entire space it was very easy to add in a built large built in niche with shelves upon framing the space. The same way wee added a water proof exhaust fan with a light inside the end of the shower stall so it would not be crazy dark and the room would not fill with steam. Work smarter not harder.
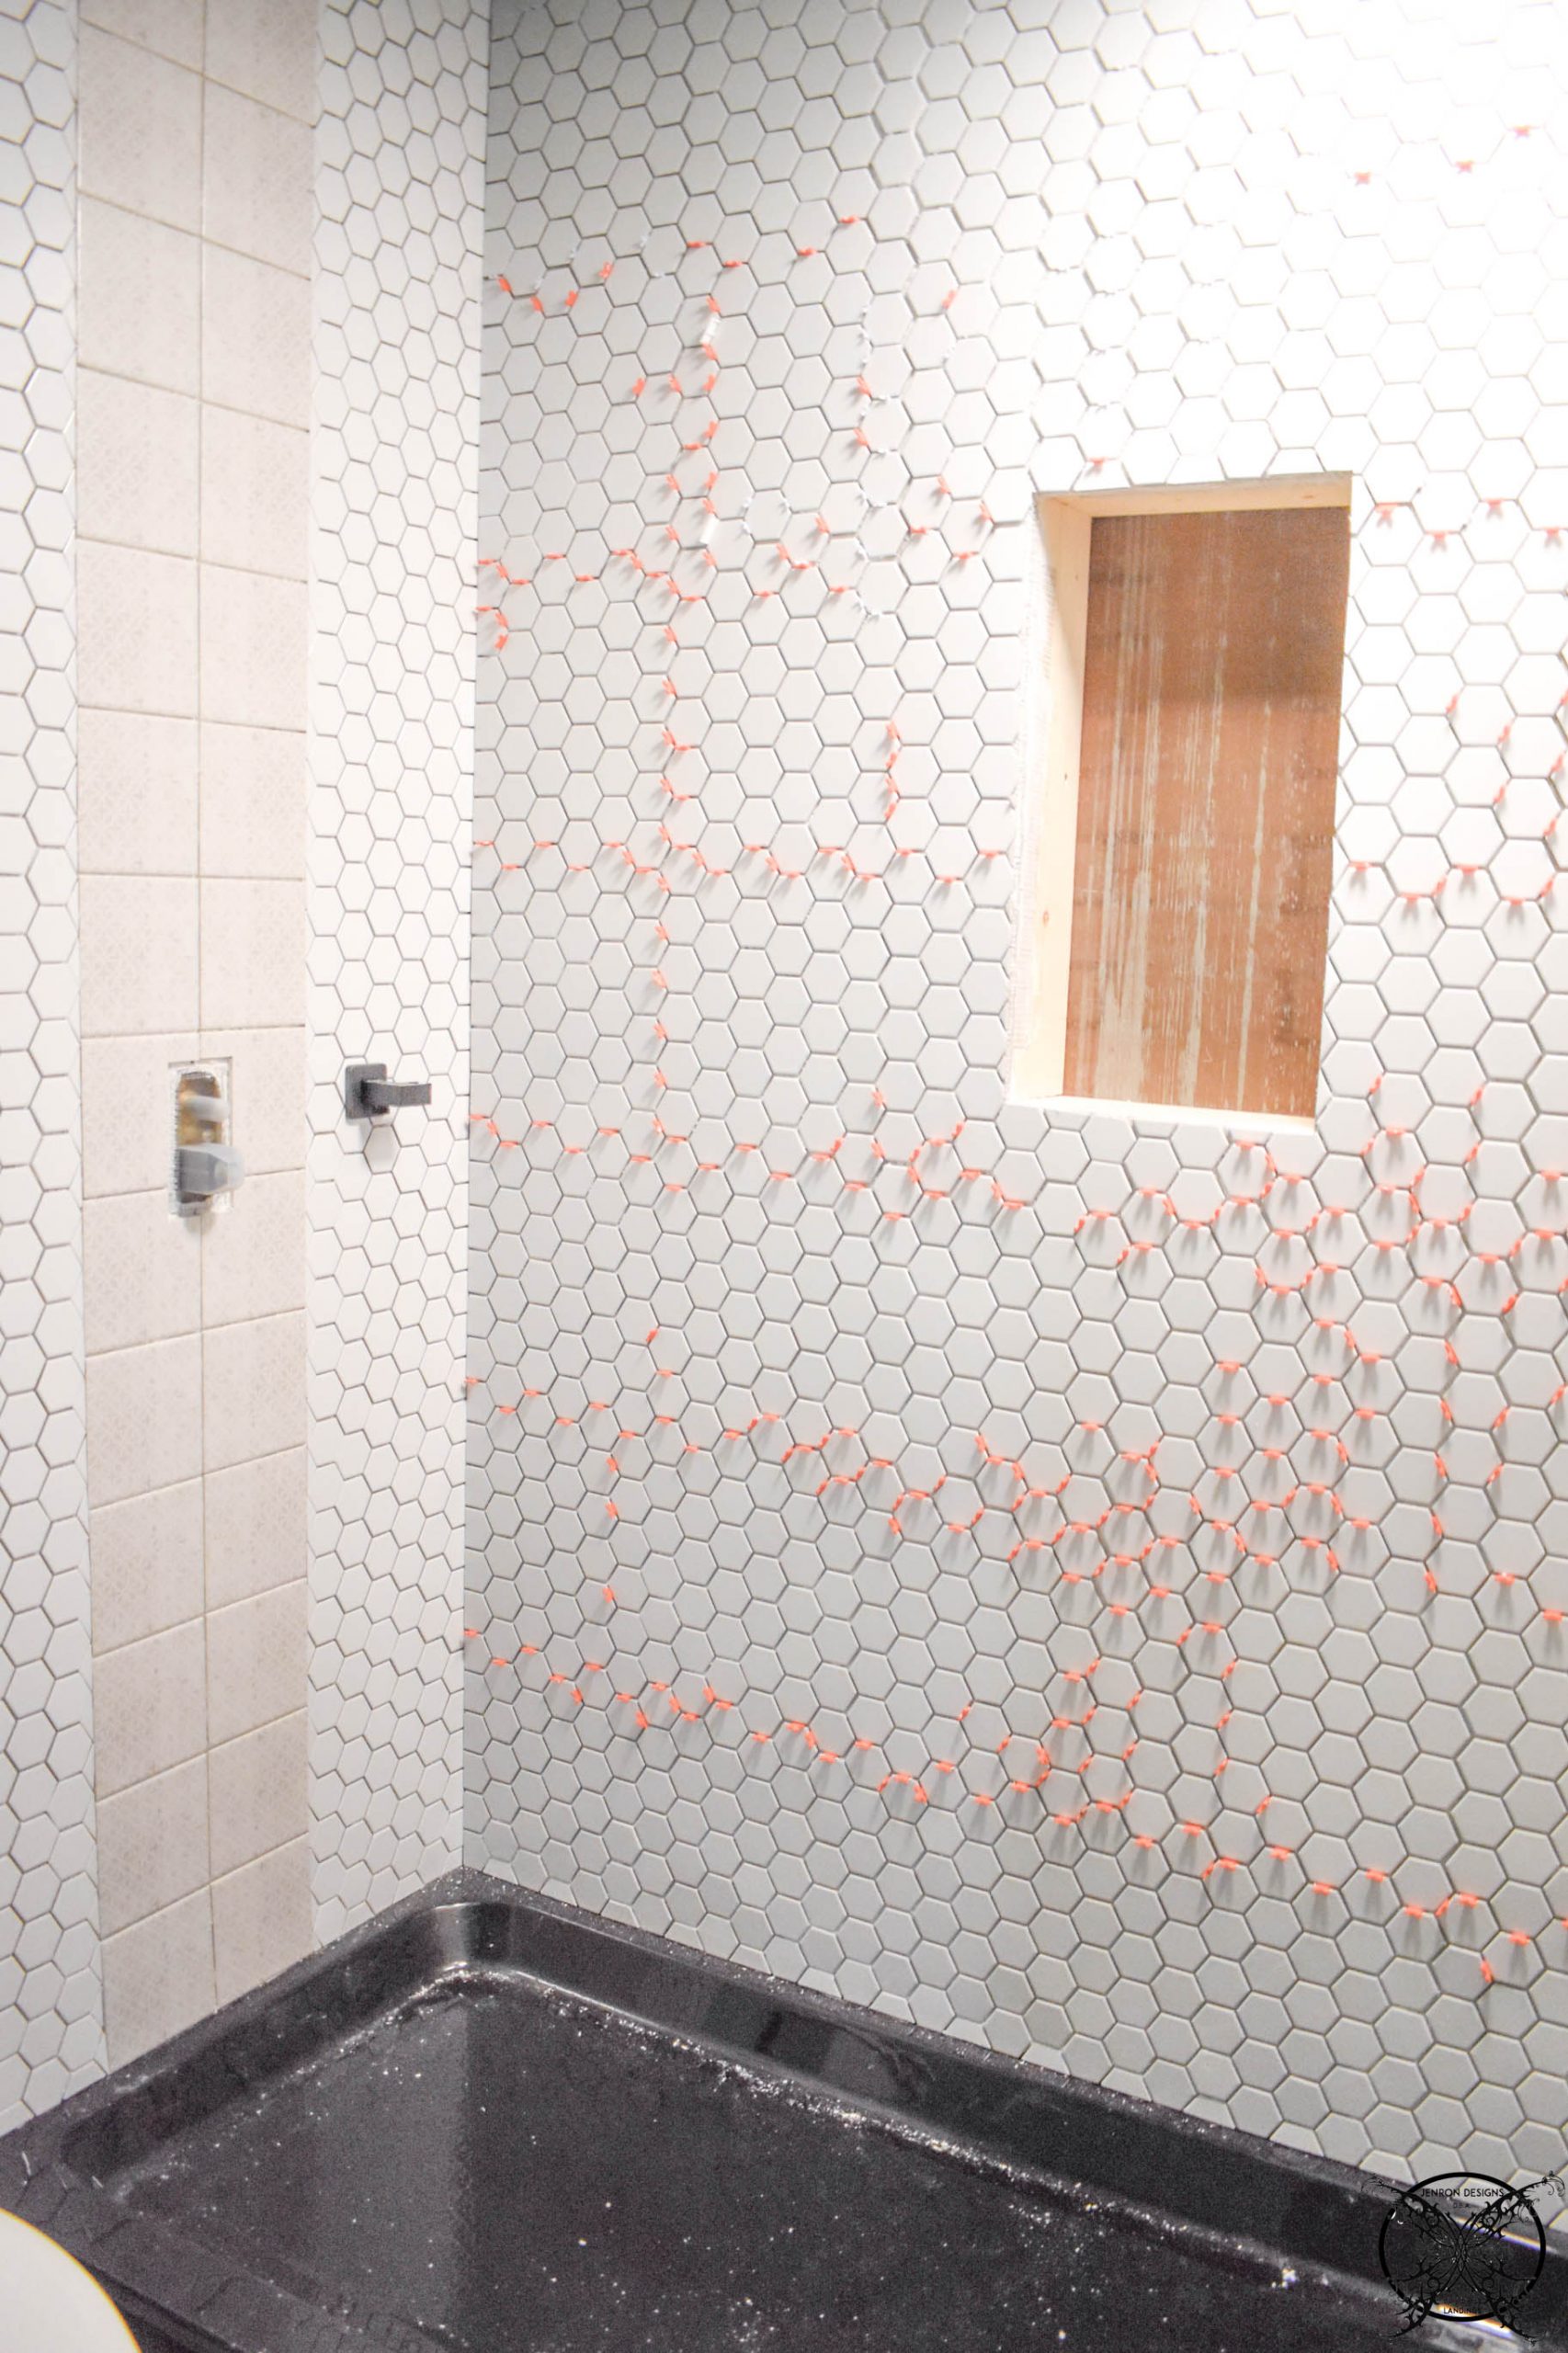
The shower walls once set in few days were grout with Arctic White grout to keep a nice white wall and for easy bleach cleaning. We want it to look oh so clean inside. This is a look a the grout prior to the final cleaning it off the tiles. Just a tip, we used a drill with a scrubber brush to buff off the extra unwanted grout and leave the tiles super clean since there were so many to polish. It was fast and quick.
 I love the end result of our new bathroom, and while it might have taken a hot minute to finish since we did do all the work ourselves the quality and outcome is more than I could have ever hoped for, plus we saved a bunch of money by doing DIY projects.
I scored the sink & cabinet combo on a HD closeout for $89.00. The accent tiles which were a really expensive tile at $5.00 each originally were a leftover closeout box @Floor & Decor for .50/per tile; which is why they had to be a accent tiles only, limited amount. Then I snagged that tile flooring for $4.99 a box on sale too, so the floor was less than $75. (Just wait until you see the $20.00 tile cat pet room floor I am doing LOL with tile that was $2.00 a box) I found the door at Rafe’s Rurpose & Salvage in a set of 2 for $300 the other door is located in my office (it has super cool original water glass with a 1960’s GMAC sticker still on the door.)

*Please note this post contains affiliate links for your convenience. These involve no extra cost to you. You can view my full advertising disclosure here.
Shop all my DIY & Home decor at my Amazon Shop.
PIN ME for later and be sure to follow us on Pinterest at Jen @ JENRON DESIGNS
I love this so much! It’s similar to what we want to do with our home.
I’m already jelly you have a sauna, now it looks even more beautiful!
A bathroom is the perfect touch for a gym & sauna. Your home sauna is so lovely!
Your bathroom looks perfect! I love it! Been wishing to have my own home sauna!!
It’s even more beautiful now 😍 I love these types of posts
Wow this is such a neat project! I’d love to do something like this in our bathroom!
Charlie, this would be a super easy way to upgrade a bathroom, and can be done exactly the same way we show in the the DIY. That is a perfect application.
Your article helped me a lot, is there any more related content? Thanks!
Wow this looks great, I always appreciate seeing how people finish out basement areas. Good tip on the drywall, I agree mold resistant is key in below grade line spaces. I also like the vertical tile it adds a nice touch.
What an amazing transformation you some deals on your tile. I have to say I slightly jelly on those prices, I figured up that floor and it really was as steal, plus you do it DIY. The results are great and the bathroom is beautiful, smart call on the overhead shower it will earn you big bucks down the road.
I love how you’ve transformed the basement into a stylish and functional bathroom. The clever use of space and lighting makes it feel bright and inviting instead of dark and cramped.
Your tile it spot on and looks great, even if it is not what you do, you do it well. This is a very nice upgrade for a unfinished space and will add monetary value to your home, bathrooms always do.
Your tile work is very good for a DIY I am surprised that it was all you and your husband. That is quite the undertaking, most people would just hire someone for this, bravo.
This is fabulous and really looks nice. I know how much a extra bathroom adds to a home, such a great choice to add one in and the shower is a great option to those outdated tub combos.
I really like the vertical tile stripe it make the hexagon tile feel very modern and that mirror is awesome. I also really love the salvaged door being a slider but not a barn door, which is so cool with the light behind it, so many great ideas. It shows that you are a designer with modern ideas to move forward in the industrial modern style with just a touch of the farmhouse still present but not overtly.
Jen this looks amazing, you have so much talent. I always love to see all of your DIY projects and that you do them yourself verses hiring a contractor it gives so much inspiration.
Hello, hello thank you so much! Please know that it took us a while to do this project in between many other things so it was not just a quick weekend project. However it is very satisfying to be able to stand back knowing, I did that 🙂
This is a really interesting blog site. You’re a very skilled blogger which is few and far between these days most are just on social media and viral videos. I’ve joined your feed and look forward to seeking more of your magnificent posts. Also, I’ve shared your site in my social networks!
You’re so awesome! I don’t believe I have read a single thing like that before. So great to find someone with some original thoughts on this topic. Really.. thank you for starting this up. This website is something that is needed on the internet, someone with a little originality!
I very delighted to find this internet site on bing, just what I was searching for; I saved to favs as well
I truly appreciate your technique of writing a blog. I added it to my bookmark site list and will also add the RSS feed as well I want to get the updates as you release new content.
Nice post. I learn something totally new and challenging on websites like this one. Thank you for all the good advice and inspiration.
This article makes me want to improve my business management.
I love the relaxation tips, easy to do at home.
Good post! We will be linking to this particularly great post on our site. Keep up the great writing!
Great information shared…really enjoyed reading this post thank you author for sharing this post..appreciated
Really well-written article!I enjoyed the way you broke down the topic—it feels very genuine and helpful, not just theory. The practical tips make it easy for readers like me to connect and actually take something useful away.That’s why I especially value content like yours, because it shows how sharing knowledge online can really create connections. Keep up the great work—I’ll definitely be following along for more insights! 🚀
Love how this project looks and that you guys do everything, it is very inspiring, in world of just hiring jobs out. DIY is really a lost art and so many younger generations do not know how to screw in a light bulb much tile a bathroom.