
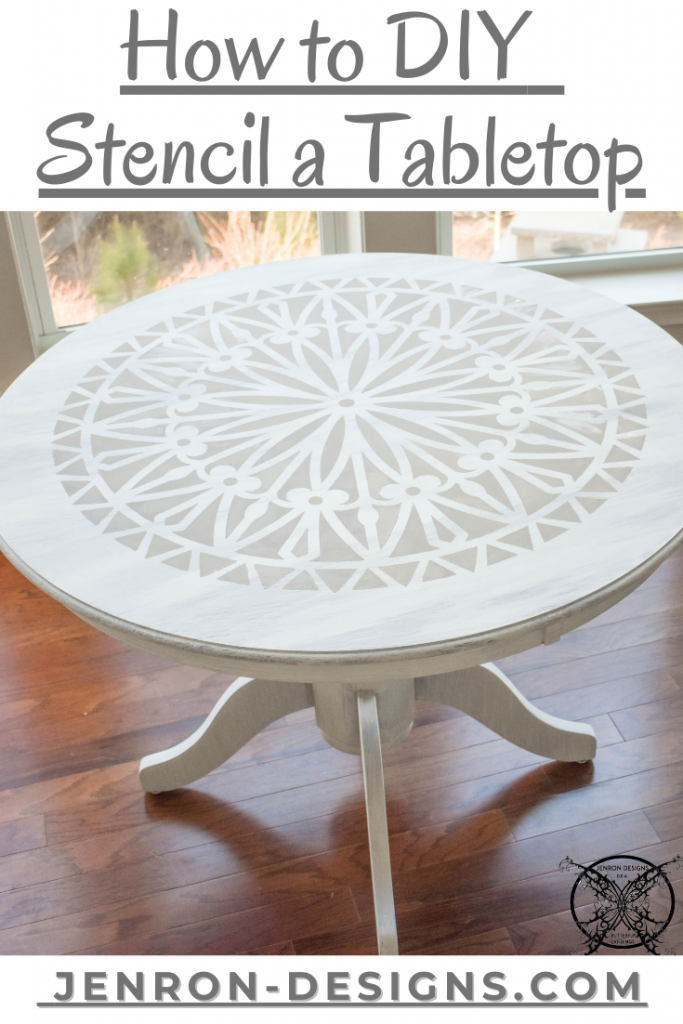
How to Stencil a Tabletop Step by Step DIY
Today I wanted to share a little weekend DIY project of how to stencil a tabletop with easy to follow step by step instructions.
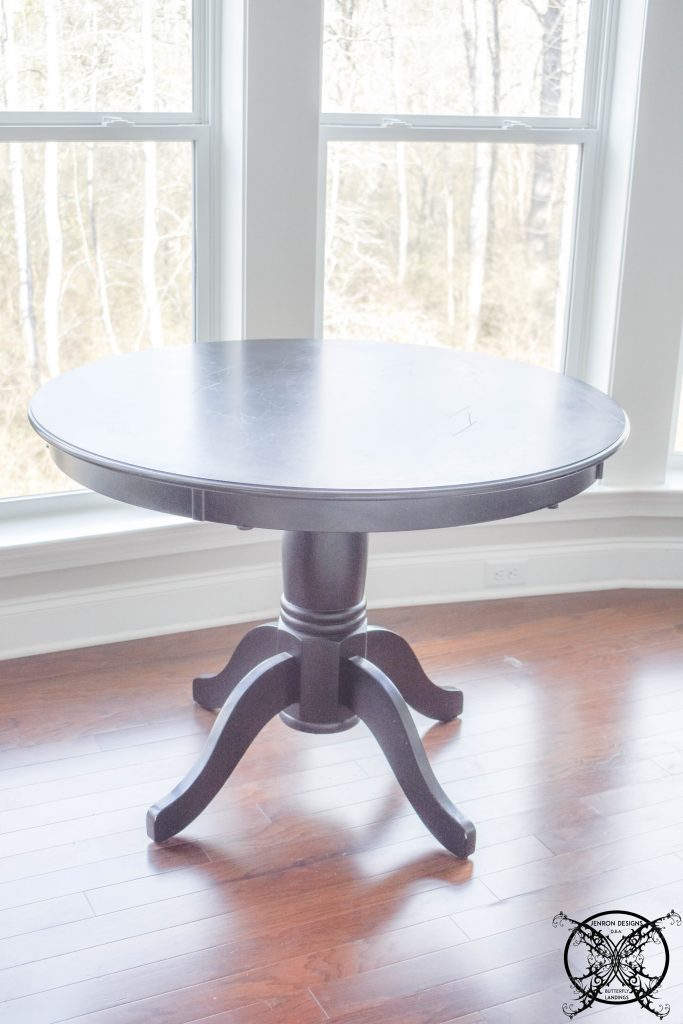
This was such an easy weekend DIY project that I felt like I just had to share the step by step instructions on how I stenciled this very plain everyday tabletop, and created a one of kind piece of art for my home. Check out these before pictures, this was a basic, nothing special, kitchen table we picked for $200 at Walmart, around 8 years ago while still living in our other home. The table was very small for this house, so we made it a coffee table in our great room between two revolving chairs; which is the perfect spot for morning coffee and wildlife gazing. Actually we had added a different top to the base, it was a little larger and gray and we picked it up at the Ballards Outlet near our home. Needless to say, I had grown tired of this table and felt like it no longer matched when we added our new Deconstructed Sofa that we just created for our living room. I felt like it needed a fresh look, so we reinstalled the original top back on to the table and I got to painting.
*Please note that I was compensated for this post. This post contains affiliate links for your convenience. These involve no extra cost to you, but may result in me receiving a small commission should you decide to purchase after clicking on my links – for which I am very grateful! You can view my full advertising disclosure here.
THE BEFORE PICTURES:
 The first step was to paint a base coat of white chalk paint on to the entire piece of furniture. I decided to try a new paint to market for this project by Behr, and I have to say I was relatively impressed with the results. I used a Farmhouse White color and lightly coated the entire table with the chalk paint. If you have never used chalk paint before, it is the most forgiving of furniture paints and you can pretty much slap it on any old way for a rustic look and do okay. It does not require a lot of pre-sanding or roughing of the furniture either which is such a timesaver.
 However, I was creating a wood grain pattern by leaving a little bit of the black below showing through. So, I was very aware of how I was applying the paint and creating the pattern. As you can see, I have left definite grain patterns with my brush when I applied the paint and almost dry brushed it out to make the feathered effect of wood, which you can see below.
 This will all look a whole lot better after I apply the final wax layer at the end, so you have to think ahead. This is my prior proper planning motto, that I love to preach so much, it really applies to everything.
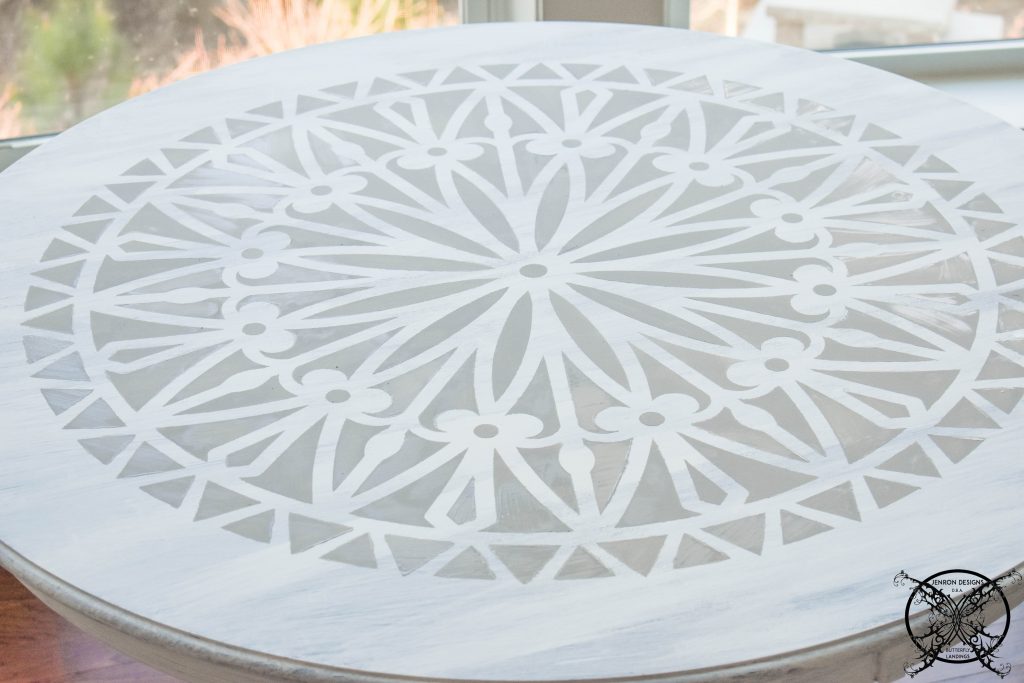
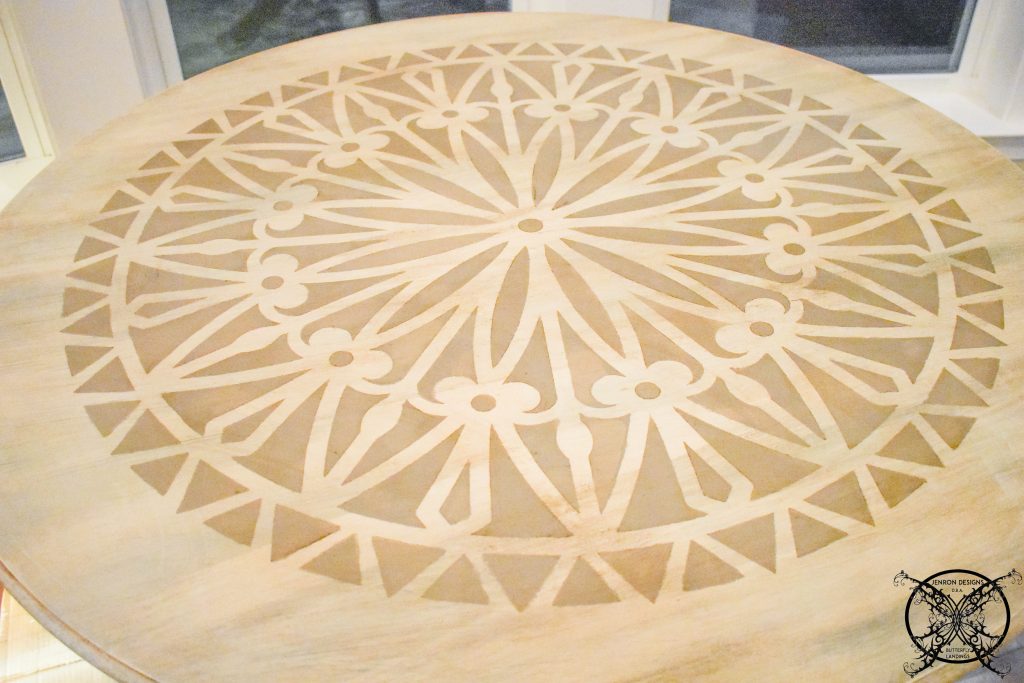
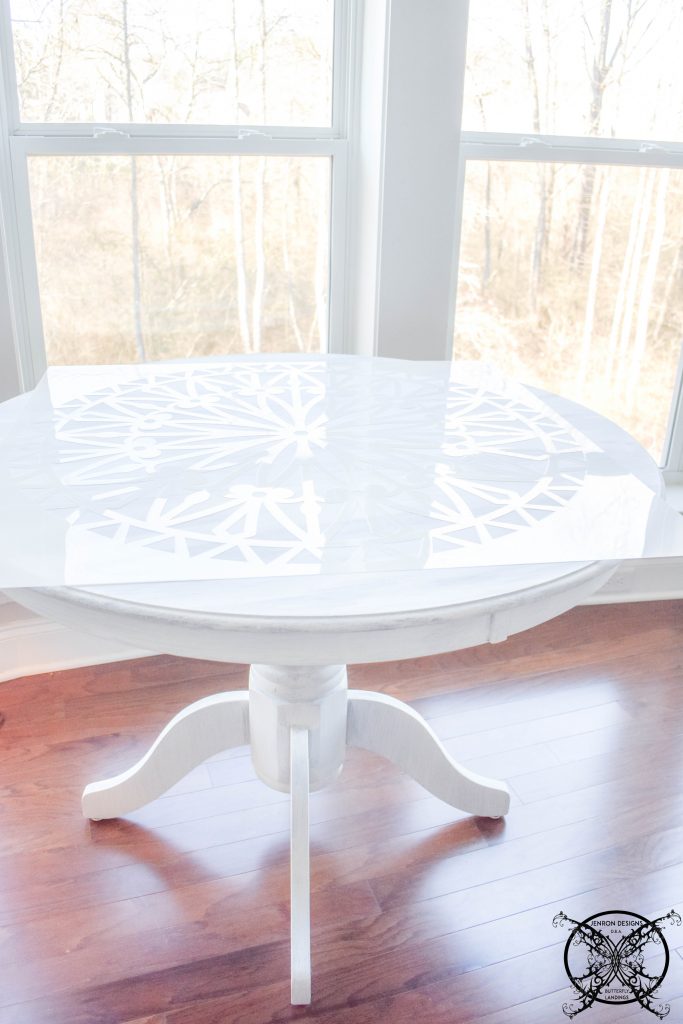 Once you have allowed the first layer to dry for several hours, or overnight, you can go on to your stencil layer. I got this amazing stencil from my friends at Cutting Edge Stencils. They have the best selection of Mandala Patterns hands down. This one is the Bellis 36×36 size, which is absolutely perfect for a kitchen table application.
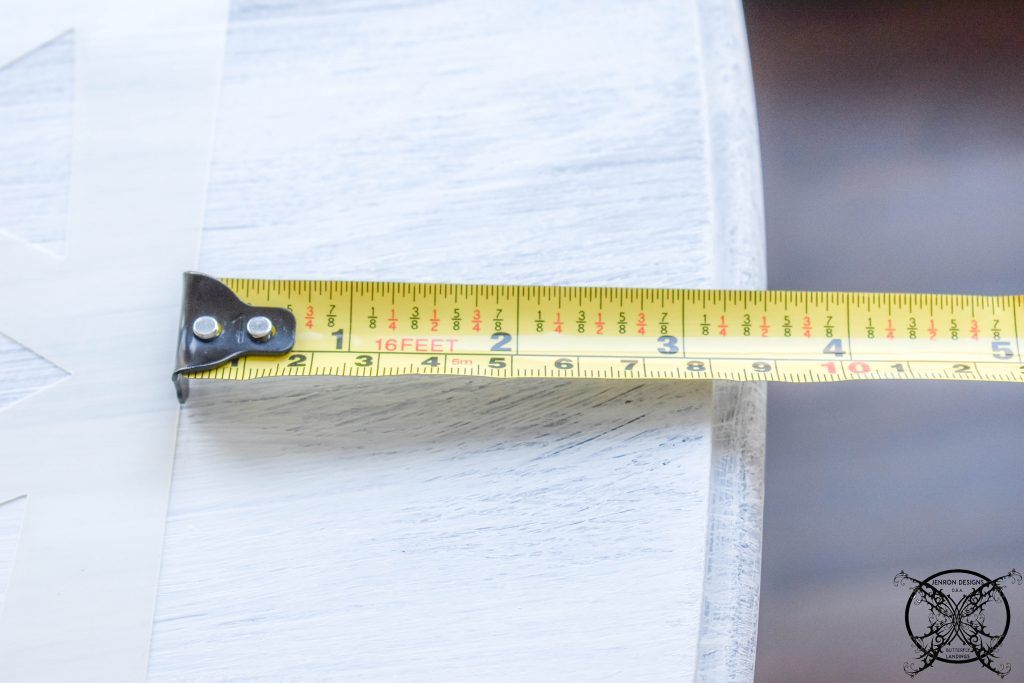
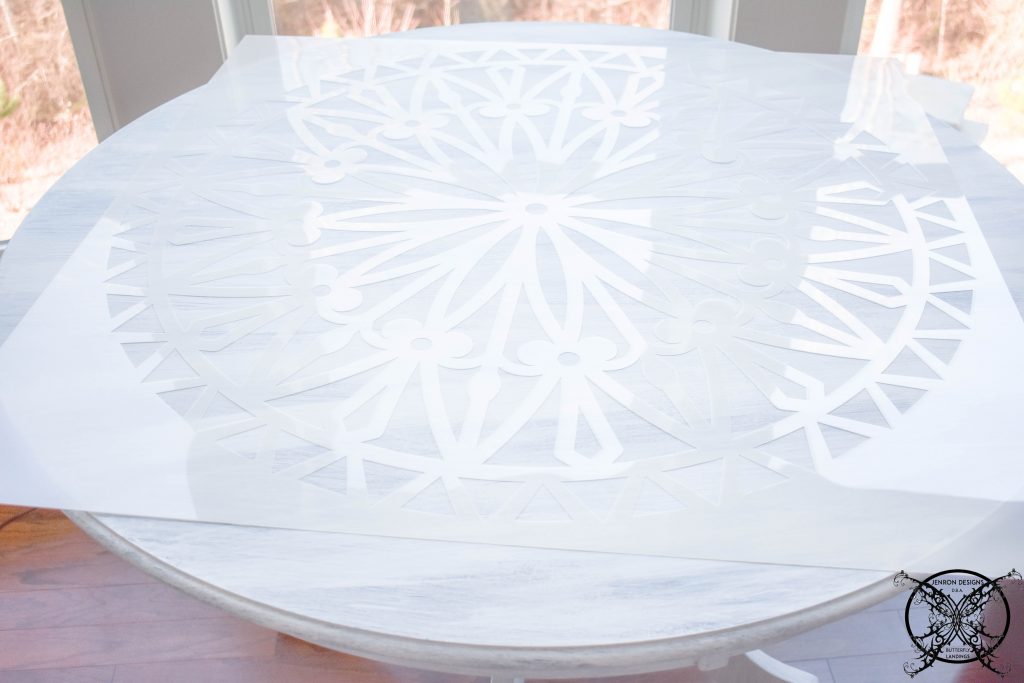 When adding a stencil to a round table, the first thing you will want to do is make sure that is is centered on the table. For this stencil, at 36”x36” we wanted to a have 3 1/4″ border all the way around the outside edge of the pattern.
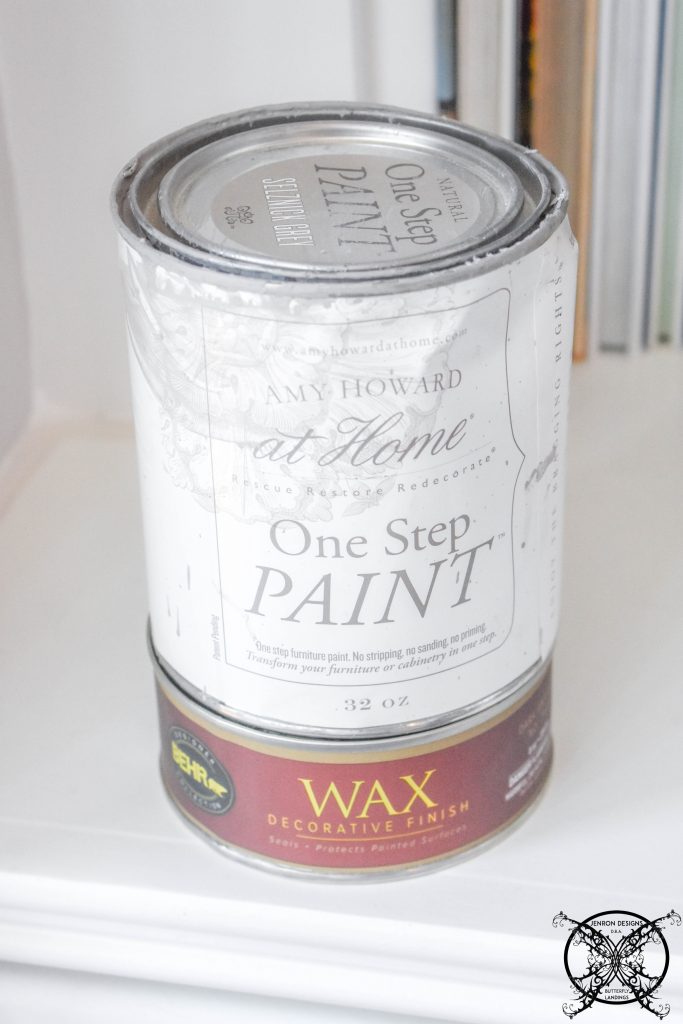
Make sure that you secure the stencil with an easy release paint tape, we all know which kind I like, the blue one, lol. Then assemble your supplies, I like to have a paper plate to off load my stencil brush of extra paint. For this part of the painting, I am using my old stand by and favorite Chalk Paint Amy Howard, thank goodness I will not need much, as I do not have much left and my poor can looks as if I have beaten it with in an inch of its life,lol. However, Selznick Grey is my absolute favorite and I will link it at the bottom for easy shop-ability.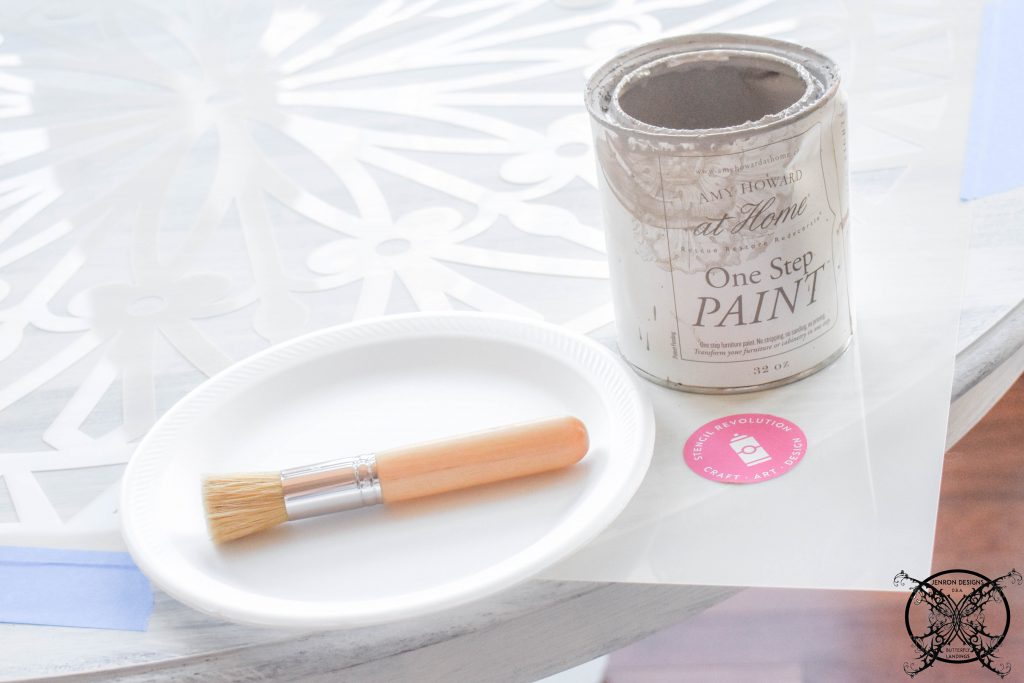 Once you get the stencil taped you can apply your paint. Make sure you are tamping the brush or pouncing; which keeps the paint from running under the edges of the stencil and prevents bleeding. You can also use a spray mount adhesive, but since this was a top table I did not want to leave any residue. However, I do find that if you allow your paint to get a little thicker it tends not to bleed as much as a looser, newer paint. That is just my experience.
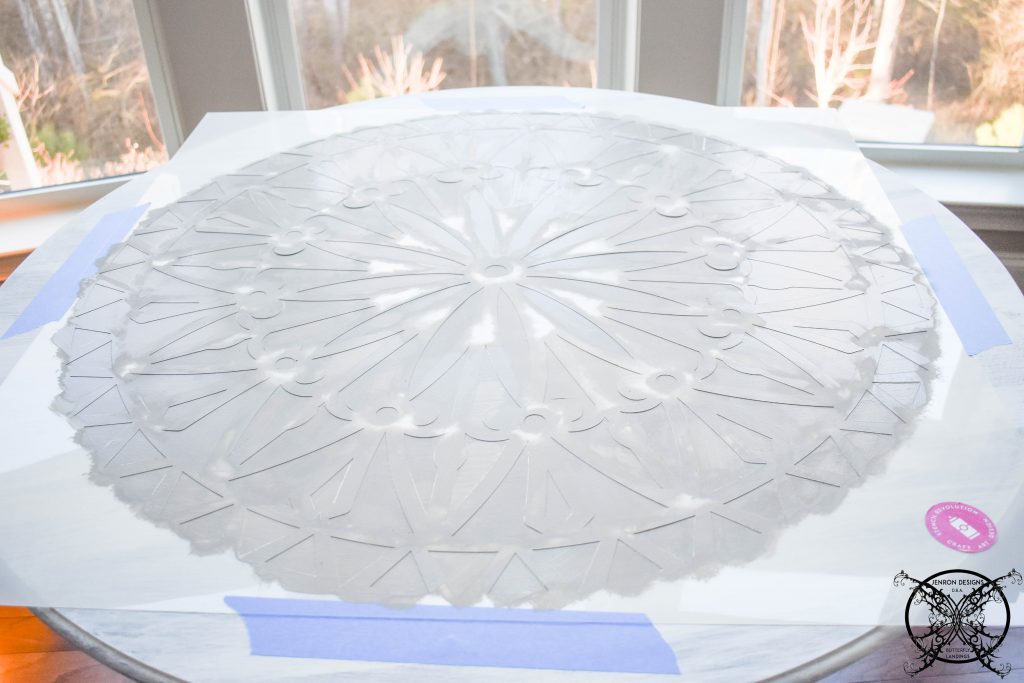 Once you have filled all the segments of the stencil, promptly remove the stencil to make sure there is not any line bleed. If you do this quickly, you can still catch the paint while it is wet and remove any unwanted lines, which is another tip. So you want to be quick, but accurate, not messy. Now I am starting to sound like Martha Stewart… I mean the woman has a point…lol.
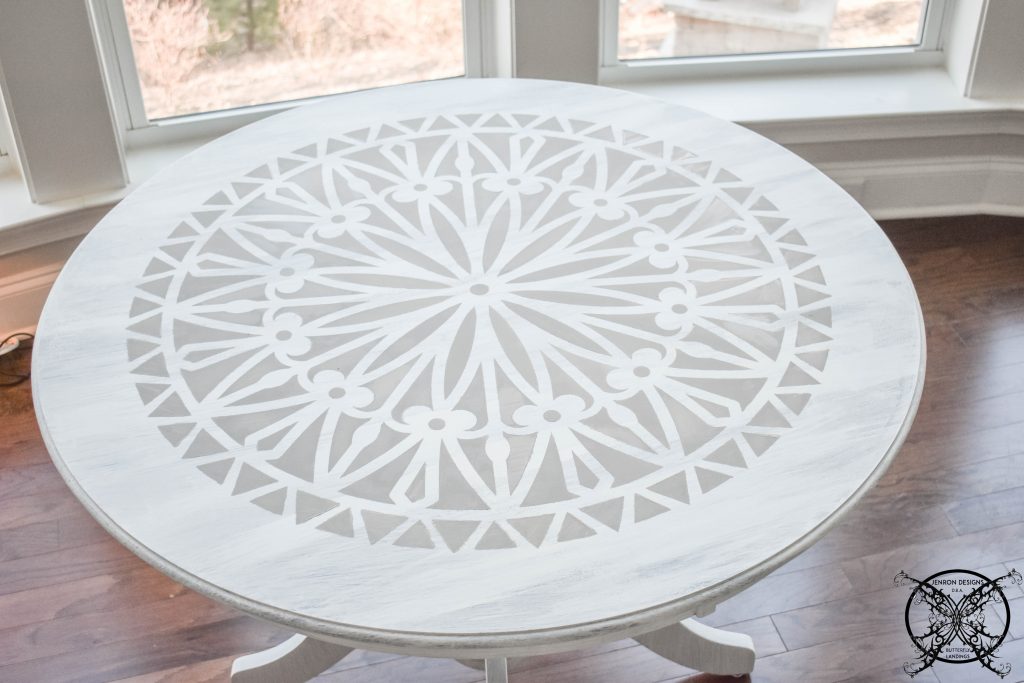
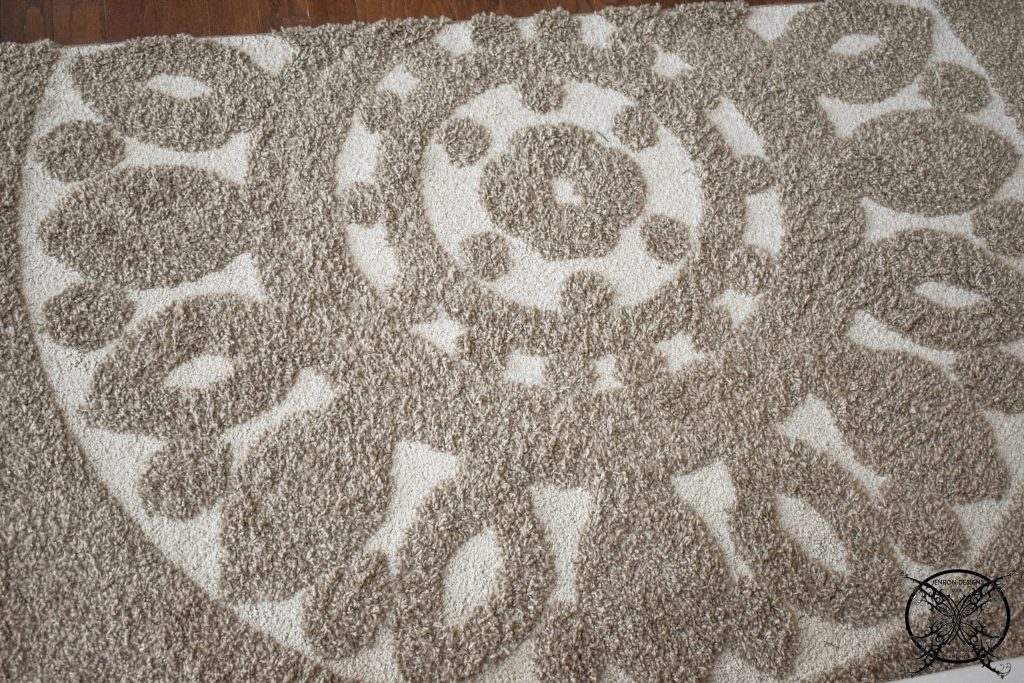
Now here is the cool part…. and why the variety of the Mandala’s were so important to me, look at how this looks with my living room rug. Yep I would say it is a match!
 So you are going to want to let the stencil paint completely dry for 2-5 hours prior to applying the antique sealing wax, which is going to change the color of this piece completely. So at this point, if you have never done this I recommend testing the wax on something other than your beautiful piece of furniture to make sure you like the color change. Also to see how long you want it sit or how thick to apply it.
 ![]()
 Okay so my five hours have gone by and I am now antiquing this piece. I am using the Walnut Wax from Behr. I am basically brushing it on and than buffing it off, you can see the base is still dark and has not been buffed yet while the top has already been buffed. Plus it is a little dark since it is now night time, so my pictures may appear a little bit darker as well.
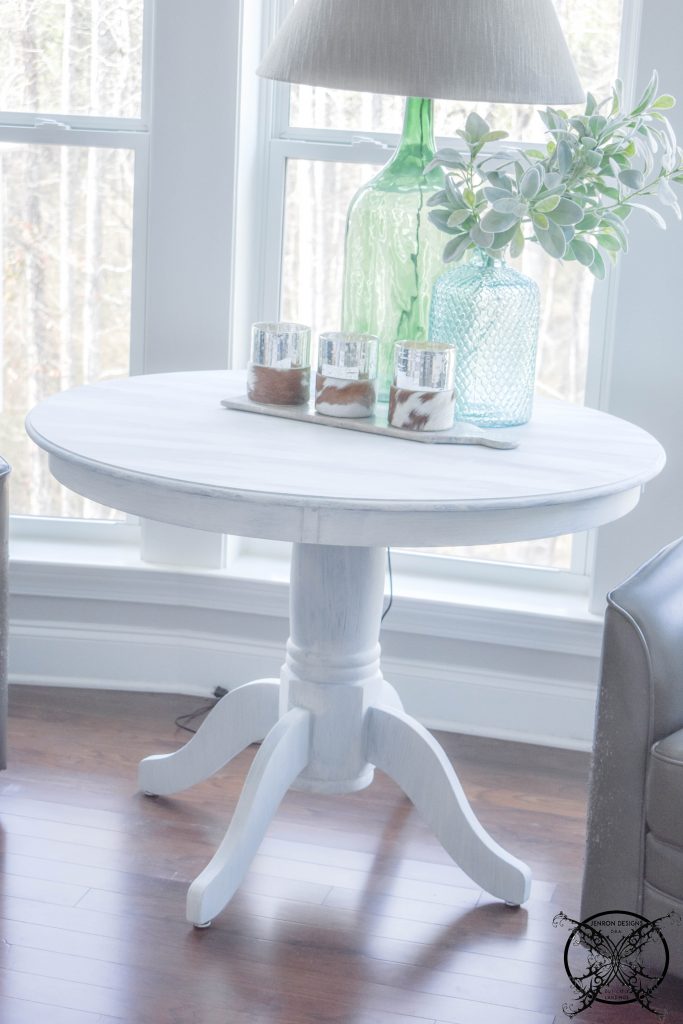
 Here is a look at the table the very next day in the light. You can see it is not as white as before, but it has a nice wood grain texture that appears to look more gray than black, which was the base color.
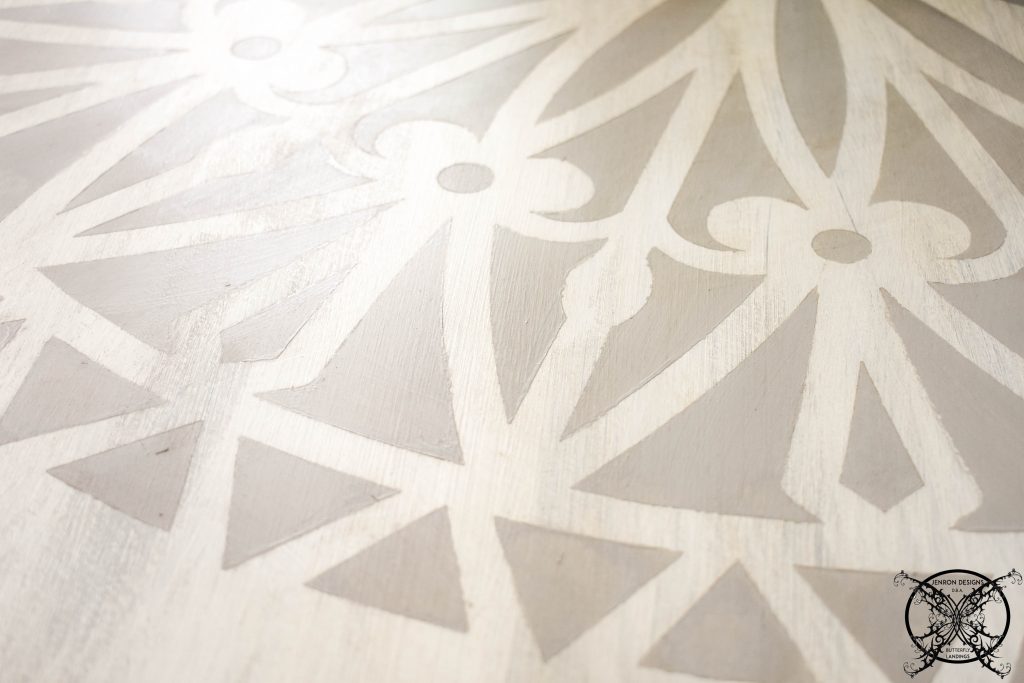
 I am so happy with the way this project turned out. Not only do I have a brand new table that I love, I did not have to go shopping and searching for something that I love, and that would fit the the space. Sometimes we already have the right piece, it just needs a little refresher, just like this piece, and in all honesty it is not like it was a high end expensive piece to begin with, but it was solid wood and could be painted.
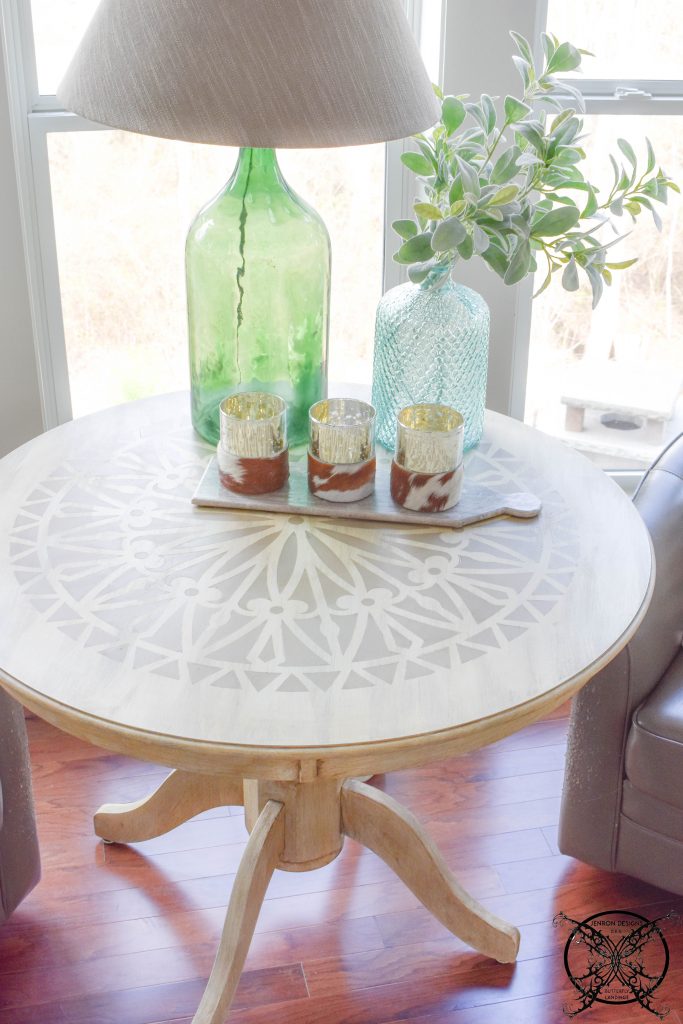 The shape is a classic shape that looks just like anything brand new out on the market right now, which goes with my original motto of good design never goes out of style it is a way of life. If you choose wisely when buying your furnishings they really can last you a lifetime, no matter how the trends and designs may change.
 Solid wood pieces are always investments, soft goods are not and never will be unfortunately, because they will always deteriorate over time and have a limited shelf life. Just a little food for thought as you decide on purchasing those really expensive custom drapes or designer rugs and pillows.
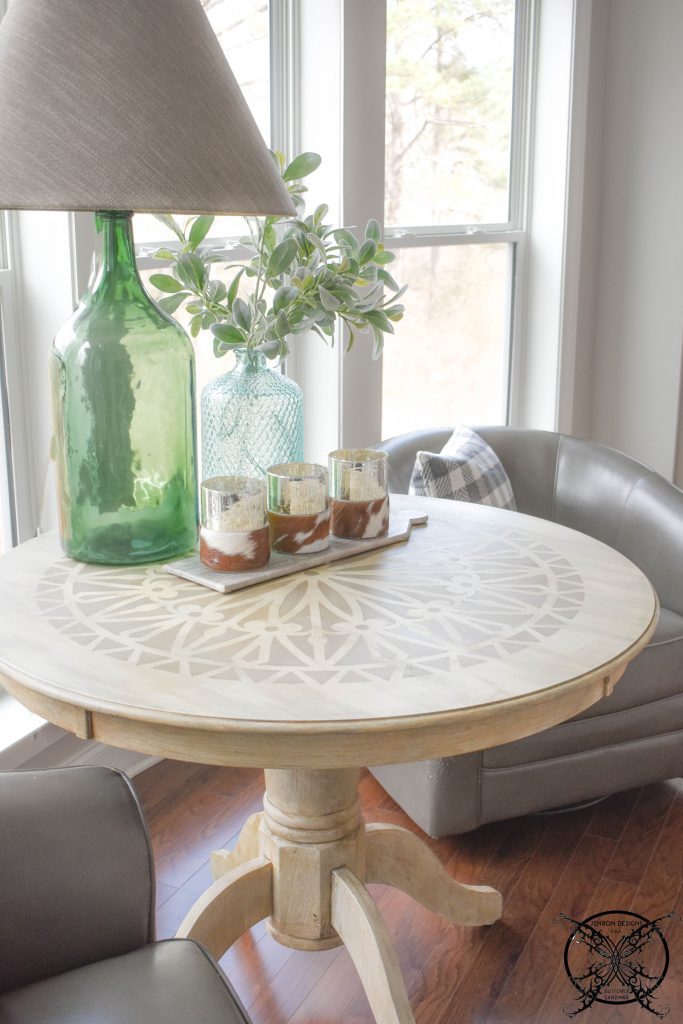
PIN ME for later and be sure to follow us on Pinterest at Jen @ JENRON DESIGNS
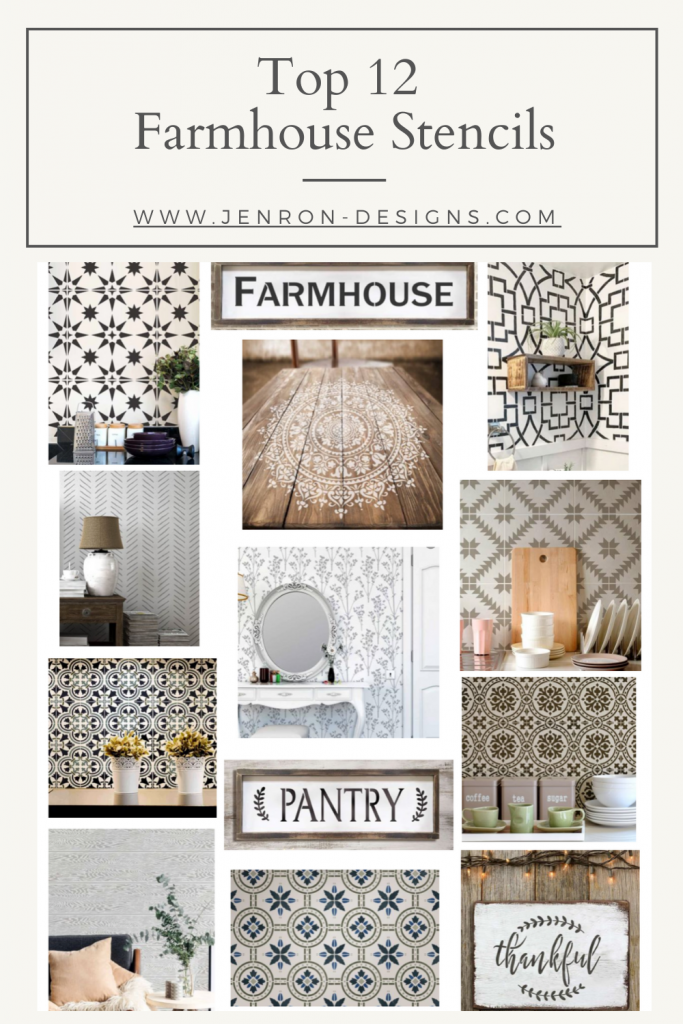
Check out my other favorite Farmhouse Stencils below perfect for tile floors or walls like I have created in this post. Also be sure check for the latest saving events always listed on my Shop My Style page, linked here.

* This post contains affiliate links for your convenience. These involve no extra cost to you, but may result in me receiving a small commission should you decide to purchase after clicking on my links – for which I am very grateful! You can view my full advertising disclosure here.
LOVE THIS PROJECT? Want to see more of my easy furniture refinishing projects check them out here:
Refinishing a Vintage Radio with Modern Technology
Refinishing A Rustic Side Table
Refinishing A Cast Iron Stove for An End Table
This looks incredible, and so simple too! I will have to check out Stencil Revolution if I need any stencils in the future.
Wow. I am really impressed. I can’t believe you did this. I love that you gave lots of good directions.
Hi Jenn-Its your neighbor Pam 🙂 Thank you for this idea! I am going to totally do this to my dining room table that is in need of some TLC. Question: my dining room table does have a leaf. So, I am wondering if you have any suggestions-stencil wise for if I should stencil the leaf and how to do that?
Hey Pam I think this is a great idea. This is an excellent question! It ultimately will really depend on the stencil that you choose, but I recommend would finding one that has an elaborate center pattern, so you select a selection to add to the leaf when in use. You would want to do the table as whole first then insert the leaf and rematch the pattern. It may require a bit free hand in a few spots but since the left is really only used on special occasions if would be better to focus on keeping the pattern whole for your everyday use, and altering it for the leaf. Since you are also my neighbor, I am around if you need a quick consult on this, just let me know my friend.
Hi Jenna thanks for stopping by, they really have a large selection when it comes to the mandala patterns so you can find exactly what you you are looking for whether it be Celtic, Moor, Gothic or Moroccan.
This is so beautiful! I might give this a try myself.
OH that turned out GORGEOUS! I am inspired!
Love it! I have really been wanting to do this with a kitchen table too. I love the color you used because it looks so expensive.
This looks so great! Thank you so much for sharing this information. This could be my future reference. Thanksss!
This table looks amazing! I’m in love with the colours you chose.
I have a kitchen table that I’ve been humming over painting with a stencil. I will definitely be using your post in the future for when I actually decided to complete it!
This tutorial is so incredibly helpful and detailed. The table looks beautiful and the step-by-step photographs will be a great help when I try to do this myself.
Wow I was just talking to husband about repainting our dining room table the other day, this post could not have come a better time. I love this pattern and the colors you have chosen. You taste is always right one the money lady. Thank you for tips and the guides to the DIY.
I love this idea. It’s a big transformation of that table and nice pattern to paint on it!
Oh la la this is so fancy! And surprisingly to create. Makes me want to redo our main table.
You make it look so easy! I love how you take an everyday item and make it into a one of a kind creation.
Amazing information. Kudos.
This is such a beautiful creation, Many thanks for the information, I value it.
Appreciate all the tips on this beautiful project it really is an abundance of great material. Thank you.
Many thanks for so many good tips. This is a project I have meaning to do for a while now, and you made it look so easy. Plus you results were astounding so now I am more inspired than ever.
Thank you! This is great content and I love the your new table, it really is beautiful. You have so much talent.
Thank you so much for all the helpful information! I love how your table turned out and can not wait to try this on my own.
You explained it exceptionally well! I actually think I could do this, and your is so gorgeous!
Such an amazing transformation and beautiful piece that you have create thank you for the great tips.
Incredible a good deal of helpful information I can not wait to try this on a few of my pieces.
Wonderful postings and great DIY. Thanks a lot!
This table is gorgeous! I can not believe that you just chalk painted and stenciled it, it really does look like a Antropologie piece of furniture.
Thanks for an abundance of material and information on this topic.
You have made your points here very clear and the step are so easy to follow thank you for all the help my friend.
Thanks, Great information in this amazing DIY please know that I value it!
You definitely made this piece into a treasure. I absolutely love it and you proved that just because the piece no longer fits your style does not mean it can not be saved or repurposed.
Thank you for all the valuable stuff you put on on your site. I always learn so much over my morning coffee.
You actually created this DIY exceptionally well. I am not creative but I feel like I could follow and do this on my own.
Effectively voiced without a doubt you are such a good teacher and so effective with your methods.
Great stuff and so much good information here on how to get the type of project going. Thank you!
Really a good deal of terrific information! You make these project look very easy.
Jen this looks so good thank you so much for all the excellent information I can not wait to try this on a couple of my pieces. You make me brave.
Effectively voiced and you genuinely do know what you are doing when it comes to furniture refinishing, this is very good work.
Beneficial post with a lot of great information, love that pretty Manadala too, Many thanks!
Helpful content, since you know how I love to recycle or upcycle my stuff, this really look great. VERY farmhouse.
Wow superb table and you covered a lot of material too! You have so many hidden talents I love seeing what you are up too.
Good write up, I really appreciate all the great tips and good information on this topic. Thank you.
Very good material and the perfect DIY because your table is gorgeous.
Thank you so much for sharing and keep your point in the post.
Nahid |