$100 Room Challenge: Adding Wainscot Trim Wall
This week on the $100 Room Challenge: Adding Wainscot Trim Wall, we will be showing how we are adding wainscot trim to our master toilet room, to change the entire look of the space. This is one DIY you won’t want to miss.
This week we are taking on the first steps in our $100 Room Challenge: Adding Wainscot Trim Wall. We will be adding in wainscot trim, about half way up the wall, which is a little higher than a standard chair rail height. We have purchased all of our material to do this portion of the challenge for $53.70 which is over half our budget just on the molding, eek. Check out the full DIY below and see the amazing before and after pictures. 
Weeks at a Glance:
WEEK 1 WEEK 2 WEEK 3 WEEK 4
BEFORE:
Here we have the before pictures that I posted last week in our launch post. As you can see the “throne room” is not anything grand, it is your basic white box. We have added a few shelves for storage, which we plan to keep, and the tile floor is beautiful but it lacks a certain amount of visual interest. 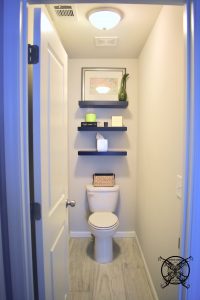 Today we will be adding visual interest by installing a basic set of wainscot trim; which we have done in previous projects like the Kitchen Island Upgrade last year. This is a super easy and inexpensive DIY, that pretty much any one can do with the proper tools. It can literally be completed in a weekend, and will add a ton visual interest and character to your home without breaking the bank, so perfect for a $100 Room Challenge.
*Please note that this post may contain affiliate links for your convenience. These involve no extra cost to you, but may result in me receiving a small commission – for which I am very grateful! You can view my full advertising disclosure here.
RON’S TOOL BOX:
 Our first step was to determine how high we wanted the wainscot panels to go up the wall. Now I am going to be completely honest here, when I say there is a bigger scope to the entire Master Bathroom project that entails another upgrade being done to this space, even after this $100 Room challenge is complete. So taking this into account for the next step of that project I know we wanted the height of the wainscot panel to be directly under the switch plate cover, and that is all I am going to say about the future project for now……lol, I know such a tease!
 We placed the top trim piece at the desired height, all the way around the bathroom. This was done with ultra thin finishing nails and a nail gun, for speed. I should also say, at this point that we pre-marked all the studs using a stud finder and a pencil, below the chair rail line, which allows you to make sure you are nailing directly into a stud and creates minimal holes to be filled later.
 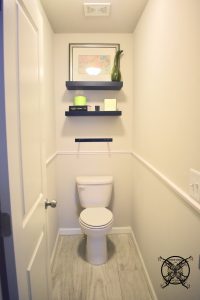 To make life a little easier we removed the lower shelf, because to create the panel behind the toilet we would need to remove the tank. Which is a simple process, you drain the tank and unbolt it from the seat portion, we sat the tank aside in our bathtub to prevent it from being accidentally knocked over during the project.
 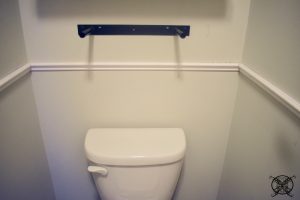 To make the wainscot boxes look visually correct within the space we decided it would be three panels on each of the side walls and one large panel on the back wall. Which is fine since they are separate walls, as long as you keep your spacing between the panels consistent, that is the key. To make this part of the project move quicker I recommend a laser level, you set it once and you are done.
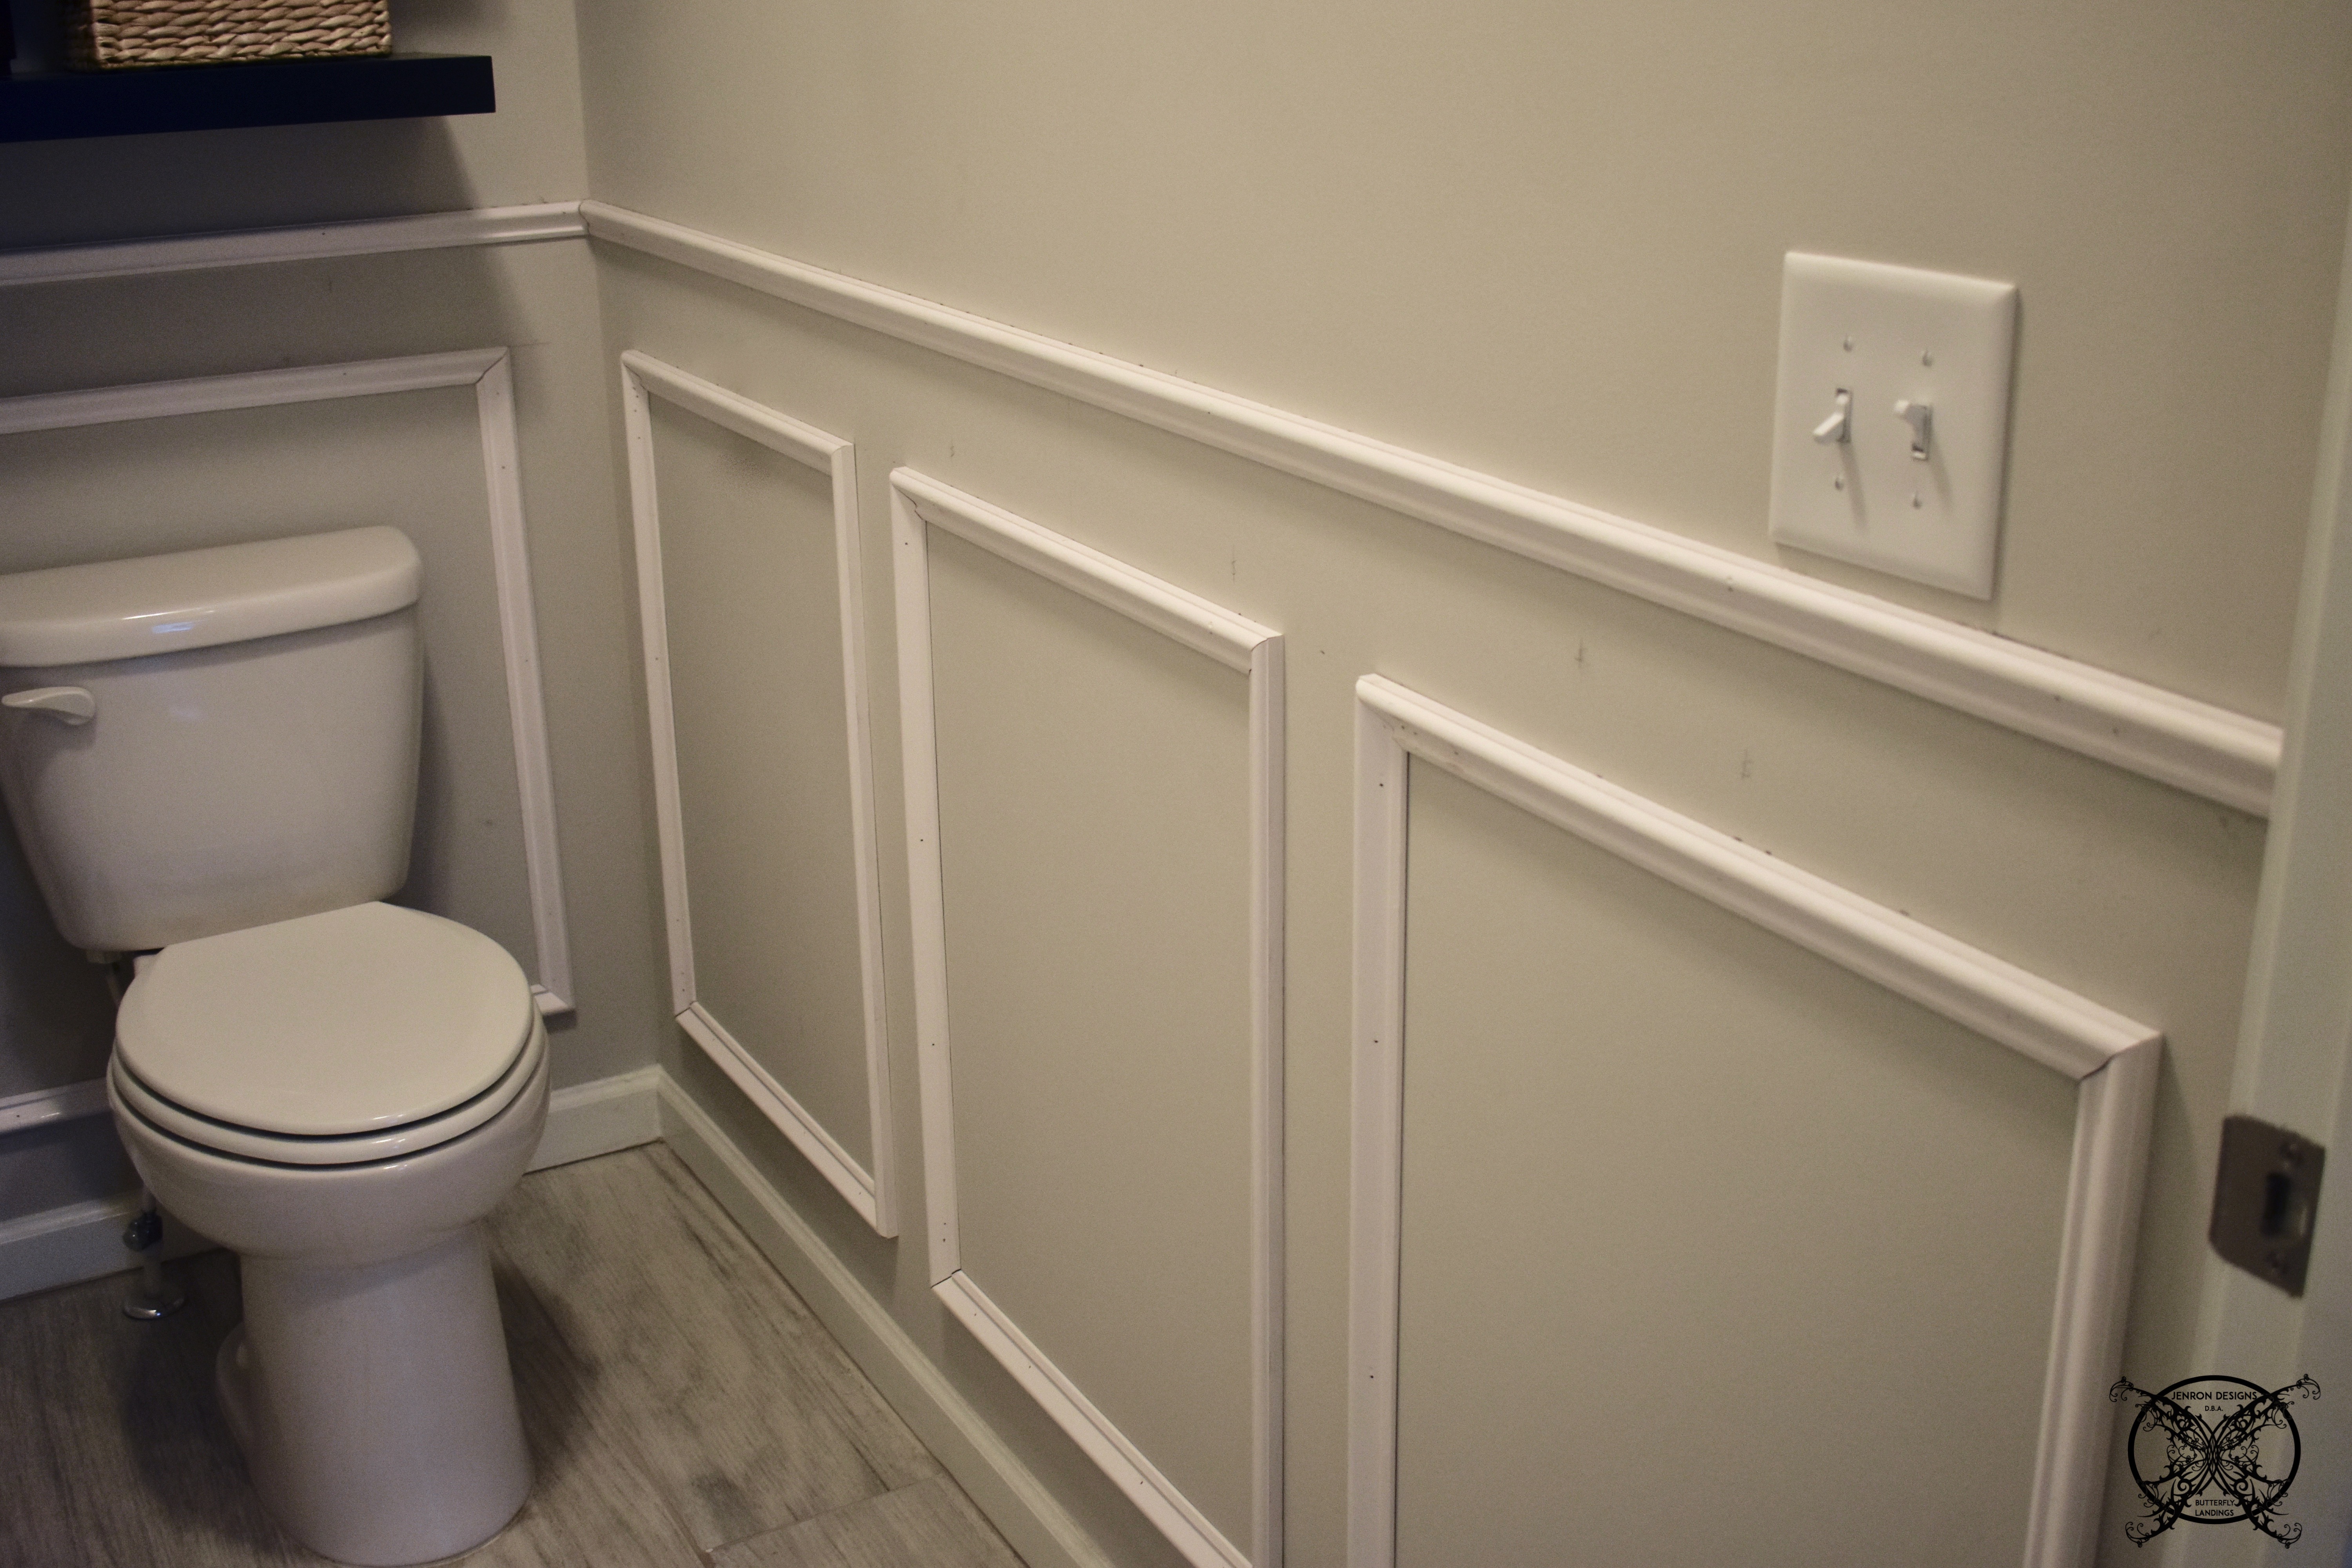
 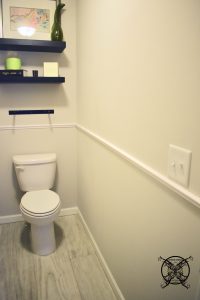 Ron made all the measurements and put light pencils marks on the walls designating the four corner of the wainscot boxes. Then since the 6 boxes (3 per wall) were exactly the same you could make all your cuts at the same time. The top and bottom pieces are the same measurements and the sides are also the same, so you are cutting 12 of each piece for the two side walls.
 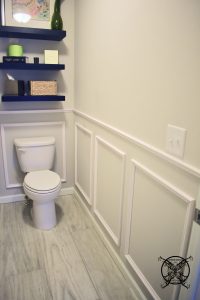 The back wall was the only set that was different and that was to fit the wall with the same 3 1/2” gap to the corners of the wall, to look consist with the other panels. Once you have all your cuts, it is just attaching the pieces up with the nail gun, which is super quick.
 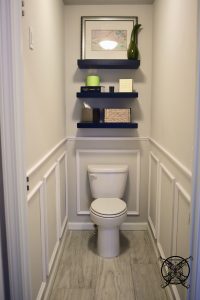 Once the pieces were in in place we filled all the gaps and nail holes with caulk. Then we allowed it to dry overnight before we started the painting process. So the entire first part of the process maybe took about a half a day, 3-4 hours tops. It is amazing at what a difference just the trim makes on the walls at this point.
 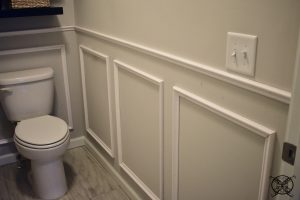 So the next morning we got up bright and early; we decided to go ahead and remove the shelves for the time being, since the next step will require full access to the back wall, seeing that I have decided that the back wall will be my accent wall for this room. Then we painted all of the wainscot panels the same color as our trim.
  I am not adding paint into the budget, since we already owned a 5 gallon bucket of trim paint for our entire home. I think most people will have touch up trim paint already, and most builders leave behind a 5 gallon bucket as they did for our home.
 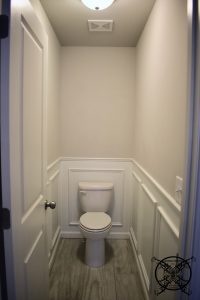 It is kind of like paint supplies, I will not be counting those either since I always reuse my favorite orange roller bucket, roller and my Purdy paint brushes are always cared for properly. This way I always get a nice long life out of them. Honestly, if you take care of your tools, that alone will save you a ton of money on recurring projects like painting.
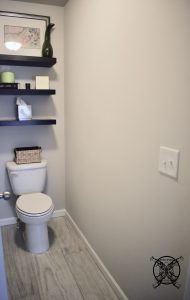
 As you can see the Wainscot is up and painted. I am absolutely loving the result so far! It really dresses up this little toilet room and I can not wait to expand on the concept for this project into the rest of the bathroom too, I got some big plans on the horizon. Next week for $100 Room Challenge, we will be adding in the hand stenciled accent wall, courtesy of Cutting Edge Stencils.
*I was compensated for this post. This post may contain affiliate links for your convenience. These involve no extra cost to you, but may result in me receiving a small commission – for which I am very grateful! You can view my full advertising disclosure here.

It is looking really nice, but you always do the nicest projects. I love to see your DIY’s. I really do love that you guys actaully do your own construction that it a true blogger talent and makes your blog more interesting!
Jen it looks amazing! I love this look, planning on doing something similar in my bedroom someday. I can’t wait to see it next week after the stencil!
This looks amazing!! It really adds so much more style to an otherwise plain toilet room.
Oh my goodness, now I want to do this to my bathroom! Thanks for the great tutorial, you make it seem totally do-able. It’s looking beautiful already!
Wow, looks so classy. You did a great job. It really dressed up the small space and looks professionally done.
Wow this looks so good, and really dresses up that space. I love how simple this project is and impactful.
Awesome way to add a little omfff to the bathroom. I also love the idea that you mentioned you did the same thing to your kitchen island. I think you may have inspired me to recreate a look like this for the kitchen. Thanks so much! ❤️
Such an amazing tutorial, I wish I had the knack for matching and decorating, as far as my expertise goes though; I am great at cleaning and organizing! Hahaha
Wonderful transformation and very creatively planned.
this is such a great idea, the bathroom looks lovely!
The bathroom looks amazing! It looks like you’ve spent a fortune on it. You’ve got some serious design skills! So impressed!
This is awesome! Your bathroom looks beautiful! It inspires me to think about what I could do, small changes we could make to some of our rooms to make them look better. Thanks for sharing!
I have always wanted to do this to our guest bathroom! It came out great!
This looks awesome!!! I love how it adds so much, and hardly costs anything! Can’t wait to see how the stencil goes for you.
Thank you Erin it has been a fun challenge so far and I am super excited to post all about the stencil next week. I am hoping to put sneak peeks in my instagram stories this week too.
That was one heck of a small but amazing improvement. Taking notes for future house. Thanks for this one!
Elisah we are only half way there 2 more weeks and 2 more projects in the tiny little room so stay tuned!!!
The wainscot looks great in this bath! I am looking forward to seeing the stencil.
Such a great idea I really like the way it dress up this simple space and makes it feel larger, I really can’t wait to see the stencil project! I have been wanting to try one so bad this may be the push I need.
I love how the wainscot trim adds detail to the room. It really draws your eye. Such a simple and inexpensive idea!
What a great transformation! Well done!
Wow! It makes a great effect! I can’t wait to see it with the stencil!
I’ve been talking about doing just this in our upstairs bathroom. You make it look so easy that I almost want to get started on it right now! Thanks for the tips – can’t wait to try it myself!
I love how adding the wainscoting gave your bathroom that custom look! Great job and can’t wait to see the finished space.
I love how the wainscoting gave your bathroom that custom look! Cannot wait to see the finished space!
Wow I absolutely love how it turned out! It makes such a difference in your bathroom!
Spot on with this write-up, І truly believe that your website needs so much more attention. I know that I will be returning to seek more great advice like this thanks!
Excellent blog post! This is a great way to add character and interest to a room.
Thanks for writing this awesome article. I’m a long time reader but I’ve never been compelled to leave a comment.
I subscribed to your blog and shared this on my Facebook. Thanks again for a great article!
Hello there,
My name is Aly and I would like to know if you would have any interest to have your website here at jenron-designs.com promoted as a resource on our blog alychidesign.com ?
We are in the midst of updating our broken link resources to include current and up to date resources for our readers. Our resource links are manually approved allowing us to mark a link as a do-follow link as well.
If you may be interested please in being included as a resource on our blog, please let me know.
Thanks,
Aly
Just a fast hello and also to thank you for discussing your great ideas on this web page. I totally lost track of what I had been searching for on pintrest because your blog is awesome! Anyway I’ll be back once once more inside the long term to examine out your blogposts down the road. Thanks!
Heya i am for the first time here. I came across this board and I find It truly useful & it helped me out a lot. I am hoping to give one thing again and aid others such as you helped me.
This post provides pleasant understanding of this type of project. Asking questions can be such a fastidious thing if you do not understanding something entirely, so thank you.
You’re really a good webmaster. The site loading pace is amazing. The contents are master works of art. You have information on this subject!
It’s hard to search out educated individuals on this subject, but you sound like you recognize what you’re speaking about! Thanks
Nice post. I study something more difficult on totally different blogs everyday. It is going to all the time be stimulating to learn content from different writers and practice just a little something from their store. I prefer to use some with the content material on my weblog whether you don’t mind. Naturally I provide you with a hyperlink in your net blog. Thanks for sharing.
Hi, I constantly used to check website posts here in the early hours in the morning, for the reason that like other I tend to find out more and more before everyone else.
Wow! After all my searching I finally got to a website where I be capable of genuinely obtain valuable information concerning my study filled with tons of knowledge.
Hello there, You’ve done an incredible job. I’ll definitely recommend it to my friends. I’m sure they’ll be benefited from this site aw well.
This is such a great idea and it really make you tolite room appear large. The white paint also brightens up that little space too. Looking good.
An outstanding share! I’ve just forwarded this onto a co-worker who had been doing a little work on his home. He says thanks for spending time to discuss this matter here on your web page.
Wow, amazing project I love that you keeping the same type of wall treatment thought out the home, it will help with your resell down the road. I know I would buy your place in heartbeat.
I really like what you guys are up too. Such clever work and coverage! Keep up the excellent works guys I’ve included you guys to my blogroll.
What’s up lady, it’s time I pay a quick visit at this website, and paragraph is really fruitful and layout is designed perfectly for me, keep up posting such articles.
I know I am getting familiarity with DIY home improvement everyday by reading these good articles by you.
Touche my friend Great design arguments. Keep up all the amazing work.
Excellent way of explaining this DIY and an overall pleasant article to get data about this subject. I am going to give it try in my own home someday!
Nice post. I always learn something new and challenging on these kind of blogs.It’s always interesting to read through articles from other authors and use something from other sites on my own.