Stencil A Farmhouse Tile Accent Wall
Glad you could join us for week 3 of the $100 Room Challenge. Today we will Stencil A Farmhouse Tile Accent Wall in our master toilet room.
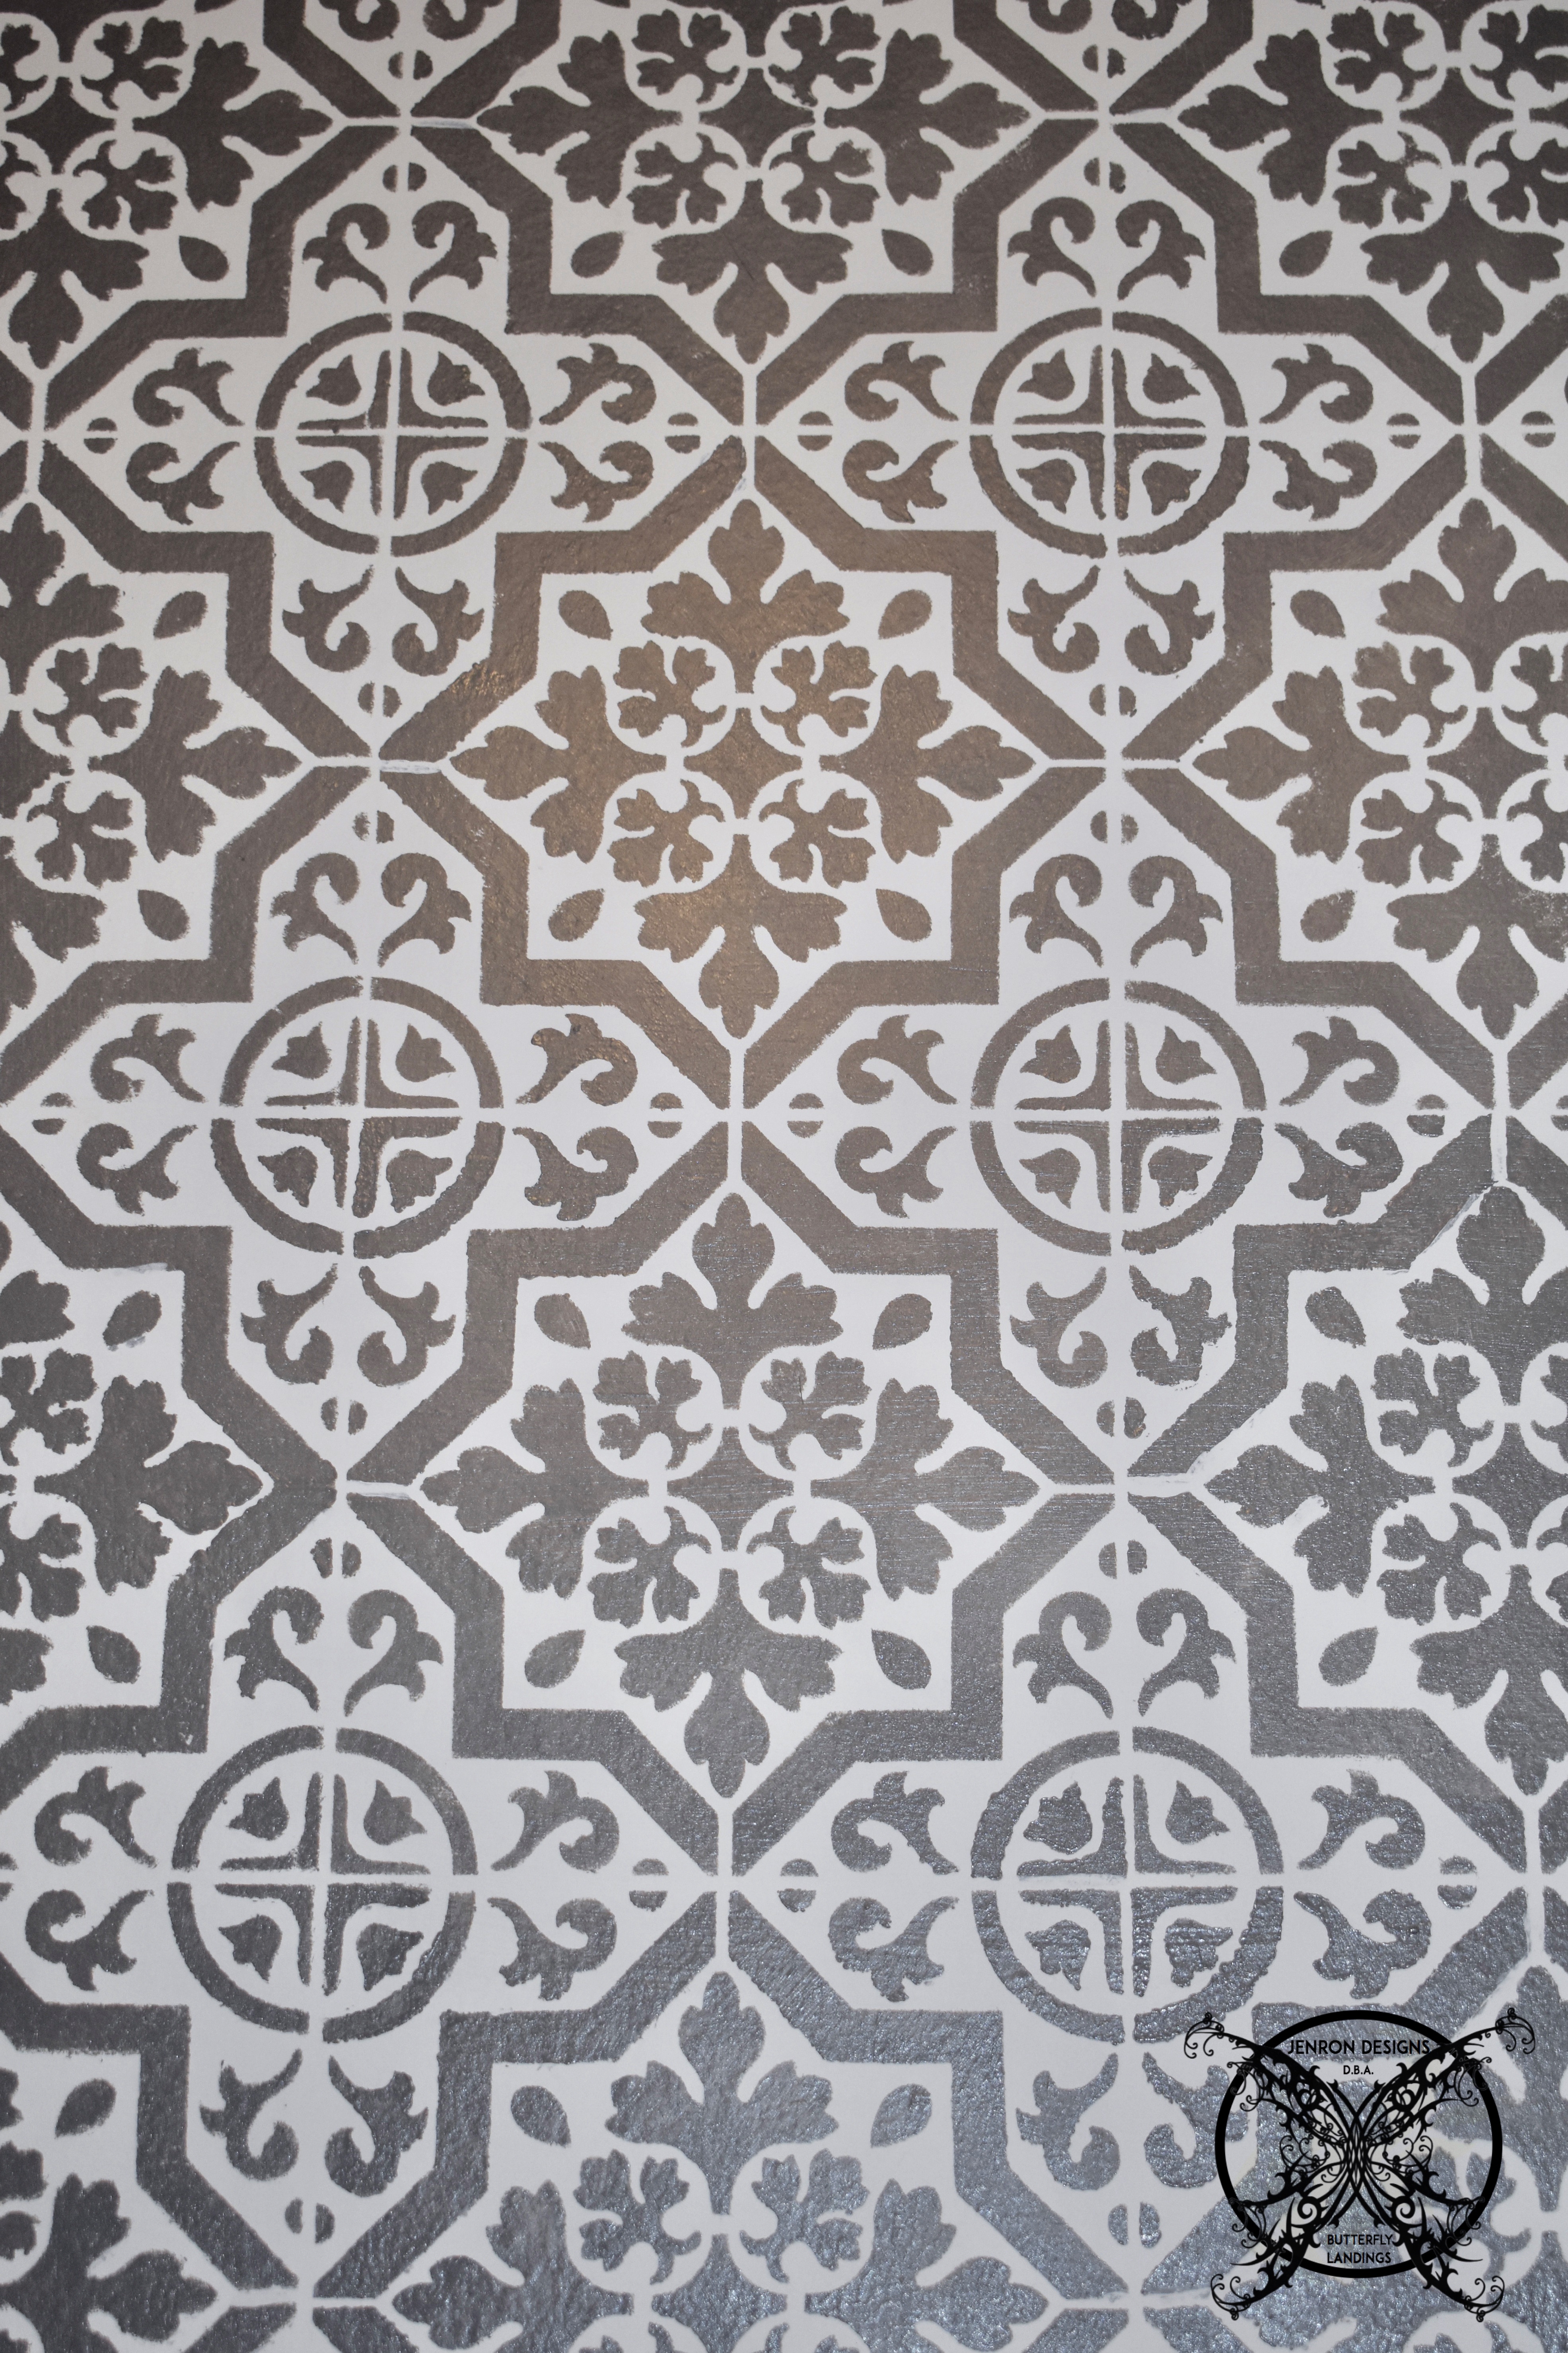
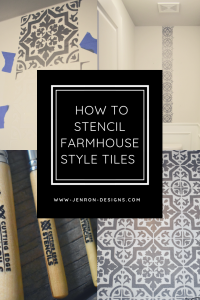
This week we are adding a stenciled accent wall to our master bathroom toilet room, for the $100 Room Challenge: Stencil A Farmhouse Tile Accent Wall. It will be going directly above the newly installed wainscot trim on the main focal wall as you enter the room. This will create visual interest and add that much needed wow factor to this otherwise ordinary space. Today we will be using a beautiful stencil set, Lyndhurst TL010, gifted to us courtesy of Cutting Edge Stencils. It is designed specifically to mimic the look of a old farmhouse floor or wall tiles.
*I was compensated for this post. This post may contain affiliate links for your convenience. These involve no extra cost to you, but may result in me receiving a small commission – for which I am very grateful! You can view my full advertising disclosure here.

Weeks at a Glance:
WEEK 1 WEEK 2 WEEK 3 WEEK 4
RECAP:
Here we have the before pictures that I posted in our Week 1 launch post. As you can see the “throne room” is not anything grand, it is your basic white box. We have added a few shelves for storage, which we plan to keep, and the tile floor is beautiful but it lacks a certain amount of visual interest. 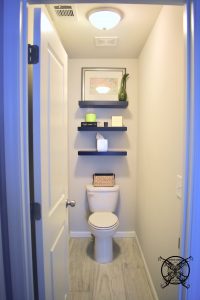 The when added visual interest by installing a basic set of wainscot trim; which we have done in previous projects like the Kitchen Island Upgrade last year. This is a super easy and inexpensive DIY, that pretty much anyone can do with the proper tools, and the results are very impactful in any space; but as you can see in our small toilet room it adds height and light.

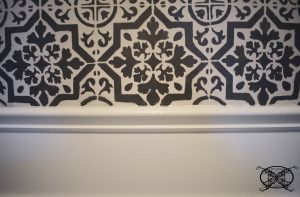
We decide to keep the wall our base color, which is Sherwin William Agreeable Gray, and for tile pattern we opted to use Sherwin Williams Gauntlet Gray, which is the gray we used on a previous project for our Kitchen Island Upgrade. Not only will this save us money, because we still have a half quart of paint left, but it also helps to keep a design continuity within your home. Although you may be choosing different styles and patterns; if you consistently choose and set a color palette for your upgrades, this will help you keep you design foolproof. 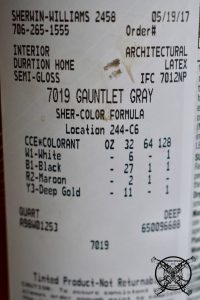 To start the stenciling process, we wanted to find the very center of the wall for the first tile to be placed. Once the center of wall had been located we placed the center of the tile stencil on that point and affixed it to the wall with blue painters tape for easy removal.
 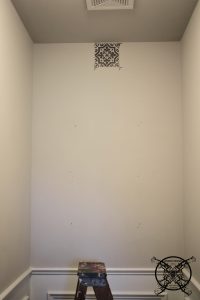 The process for the first row of tiles is to work you way down the center of the wall first, then move from side to side. So you can see, I got the first painted tile in place then lined up the next tile directly below using the easy guidelines and started the next tile directly under my starting point.
 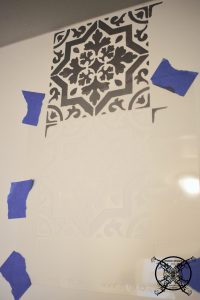 As you can see the stencil has very easy to line up with the grids that are just to the right hand side and bottom of these tiles. These help to keep everything lined up and centered as you move down and across the wall. So the entire process is so easy.
 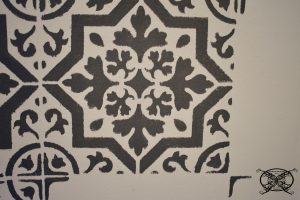 I had the first column done in no time flat. I will say, you want to allow a little bit of dry time between tiles. I did this as I would wipe off the excess paint between each stencil set. Plus being a toilet room, I turned on the exhaust fan for a little added air circulation and ventilation which helped in this area too.
 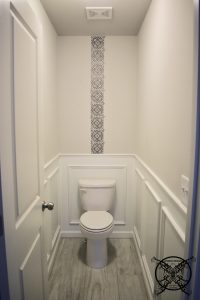 So this picture will give you a better idea of how I did the top ceiling stencil. I might have been a little excited to start with the first one and forgot to take an actual picture, until I stood back to look at it. So here was the before on the second row. We used the grout line guide that comes with every stencil, as a ceiling guide just to make sure I did not bump the ceiling with my pouncer brush. You can also use blue tape, or even a paint guide if you have one.
 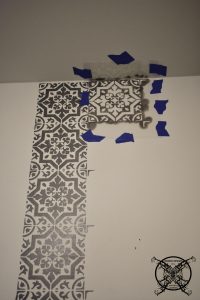 When pouncing the paint into the stencil, you want to make sure that you do not use to much paint. A dry brush is almost always a better choice to prevent paint bleed under the stencil. To do this I use a paper plate to load and off load my brush. I dab the tip of the brush into the paint and off load in a circle motion on the plate, then head to the wall.
  You also want to make sure that you completely fill all the spaces in the stencil to prevent having to go back and touch up you patterns after the fact. Once the stencil is filled you carefully remove the stencil from the wall. Always clean the back between each tile.
 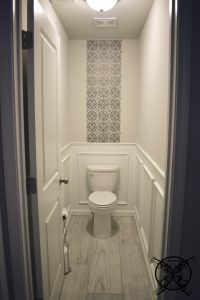 So once you have completed the left and right side of your center column, you continue to work you way to the next column over. I choose to alternate between which ever side was currently wet to get myself a little extra dry time.
  When I reached the corners, this is where things got a little tricky. Cutting Edge Stencils does offer ceiling cut and corner cut stencils, but since I am trying to save every penny for the budget for this room, I opted to try the binding method, which in my case actually worked pretty well. As you can see below I bent the stencil into the corner and taped it into place.
  I did have a few little areas in the corner that needed to have a little bit of free hand touch up, which is the same thing I had to do at the bottom where the tile ended into the molding. I used a small artist brush and simply connected the areas of the stencil that might not and made a complete bold line due to the corner or edge. Again it was very easy and straightforward, but you can always order those additional pieces to make your life a little bit easier, if you know you are not artsy.
 This is the finished product, which I am so pleased with, I think it looks amazing! It really adds a ton of visual interest to the focal wall as you walk in. Of course it is a very on trend look with current farmhouse design, and it really makes the tile wood floors pop even more now. So the next decision is whether or not to paint the shelves or leave them black, which I will have to look at as soon as the paint is completely dry. My first thought is leave them black and let the gray paint pop, but we will see.
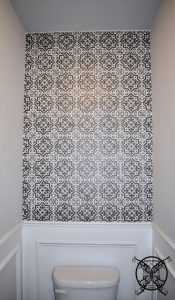 This week the stencil set was gifted to us, however I am still adding the cost of the stencil into our budget to be fair, so I would have only spent $9.95 for the stencil plus tax, since I already owned all the paint, and paint supplies, that brings our total so far to $64.24. So we are still far enough under budget that I am going to be able to get that much needed over head light replacement, so that will happening next week, along with shopping our house to re-decorate the shelves for the big reveal.
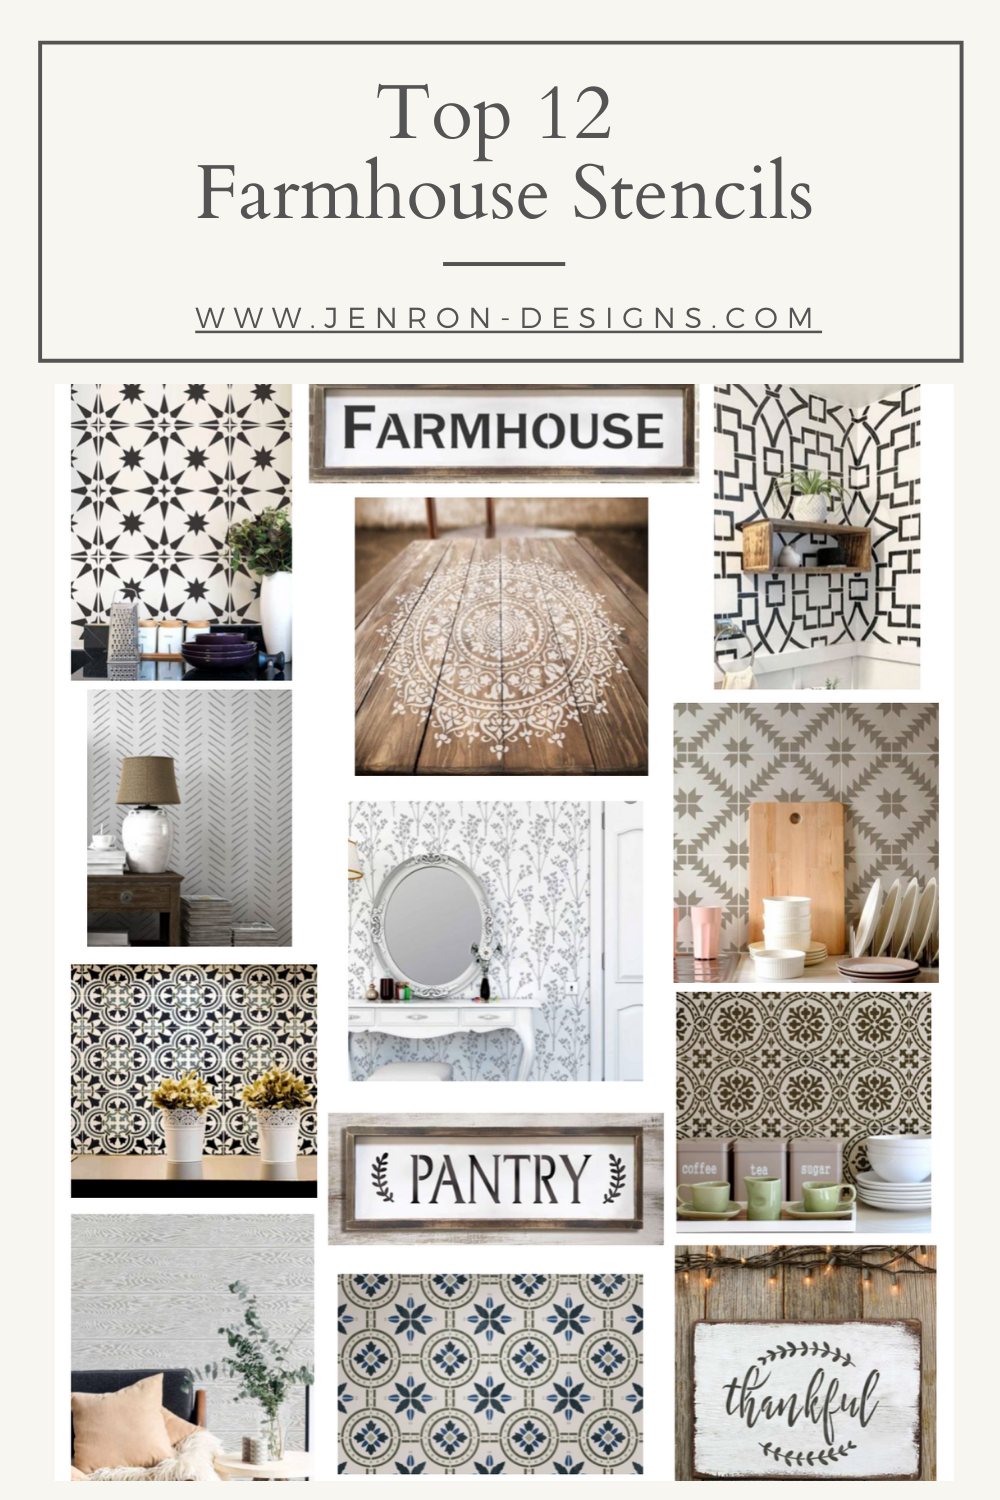
Check out my other favorite Farmhouse Stencils below perfect for tile floors or walls like I have created in this post. Also be sure check for the latest saving events always listed on my Shop My Style page, linked here. 1. Star Tile Stencil 2.Vintage Farmhouse Sign Stencil 3. Tea House Trellis Wall Stencil 4. Prosperity Mandala Stencil 5. Hand Drawn Chevron Wall Stencil 6. Maestro Tile Stencil 7. Sprigs Allover Stencil 8. Augusta Tile Stencil 9. Pantry Sign Stencil 10. Calista Tile Stencil 11. Shiplap Wall Stencil 12. Polanka Tile Stencil 13. Thankful Sign Stencil
PIN ME for later and be sure to follow us on Pinterest at Jen @ JENRON DESIGNS

Jen I have anxiously been waiting to see this stencil post all week, and it did not disappoint at all. I LOVE, LOVE, LOVE, how it turned out great job my friend. I am super excited to see how it all comes together next week for you.
Love how the stencil turned out! The bathroom is looking absolutely amazing already, can’t wait to see it all complete next week!
This wall looks beautiful and I love the stencil that you chose. The wall and the wainscotting have totally changed your space.
This project turned out exactly how I had hoped and I love the pattern on the wall. It really does look like tiles, and for the cost of a can of paint, that is crazy. Love your projects and all that your do, muah!
Good afternoon, my friend I have to tell you that I am totally in love with this project. I am going to be ordering a stencil now, so keep me posted on all the deals and sales. I will never wallpaper again…. message heard and received 🙂
It looks AMAZING! Great job!
Oh my now I feel bad about my wallpaper rant, LOL. I should really just say it has probably come a long way since I was working with years ago, but any time you stick anything the wallboard the outcome will never be pretty when you go to remove it, LOL. Time makes sure of that, it like a bumper sticker I feel the same way about those….anyways, I will let you know about the sales. 🙂
I loooove coming to your blog! Everything you do inspires me to get to trying new things in my own home. Looks beautiful!!
Wow! I adore your creativity. No budget will limit it on your journey to spice up interiors! 😉
I was so excited when I saw this on your Instagram stories, I had no idea this challenge had already started, but I am all caught up now. This farmhouse tile stencil is EVERYTHING, love that pattern, and the application.
It really does look amazing! This is the perfect place for a stencil like that. I love it! Can’t wait to see everything put back together!
Yep this stencil is pretty darn fabulous and really does look like tile. You have done it again, Bravo.
Woohoo I love how this turned out, I may just have to get me some stencils now!
The stencil on the wall looks so amazing – it really adds something to the room (looks expensive 😉 ). We have a really little bathroom too, and we chose glass tiles to do and accent wall – much more expensive lol (good thing the wall was small!) Can’t wait to see your next project!
What a gorgeous design! Your bathroom really is shaping up to look amazing. I wish I was as talented as you! 🙂
Wow! Your bathroom looks so changed after these painted tiles. Good work! Love to see the final look and I must say you are very talented and creative.
Wow that looks amazing. So simple but really effective. I love it 💗
Awesome! I love your bathroom. I would love to use stencil now. But I don’t think I can do as wonderful as this one. Anyways, I can give it a try on our new home. Wish me luck! 🙂
Staying on budget for the $100 Room Challenge with new side tables and shopping my home to accessorize!
Wow–that looks like a lot of work, but it’s absolutely gorgeous!
This is one of a kind blog post for me! I have seen exquisite farmhouses and farm stays in India notably Peepal Kothi, however the way you have shown the transition of your bathroom is simply amazing. I am gonna suggest the farmstay owners to have a look at how to redesign their accommodations.
Jennifer, you have such a gift for creating beautiful simplicity. I would never had thought how to use stenciling but you’ve inspired me today – lovely!! love what you’ve done.
There are no words to perfectly describe these designs. You’re so gifted. Great work here on your project.
This is so gorgeous! I’d love to do something similar in my powder room too.