Upgrade Your Kitchen Island
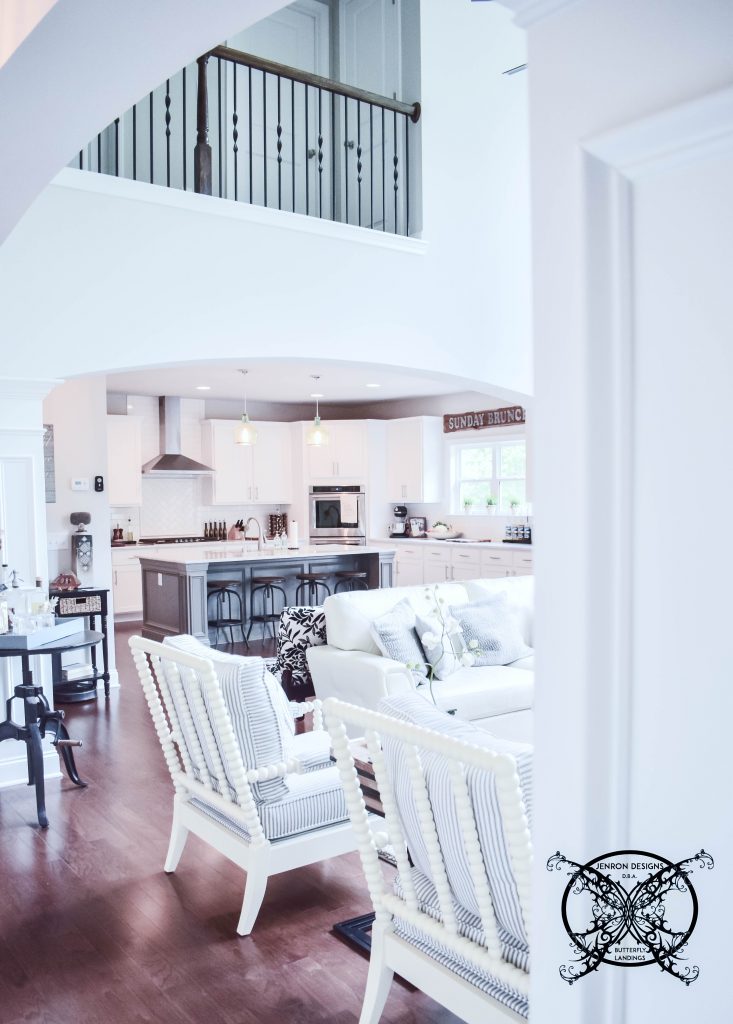
Want to Upgrade Your Kitchen Island? This is a super quick, inexpensive, easy weekend project, that provides a lot of character to an otherwise basic kitchen island by adding picture frame molding. In other words, you will get a lot of bang for your buck.
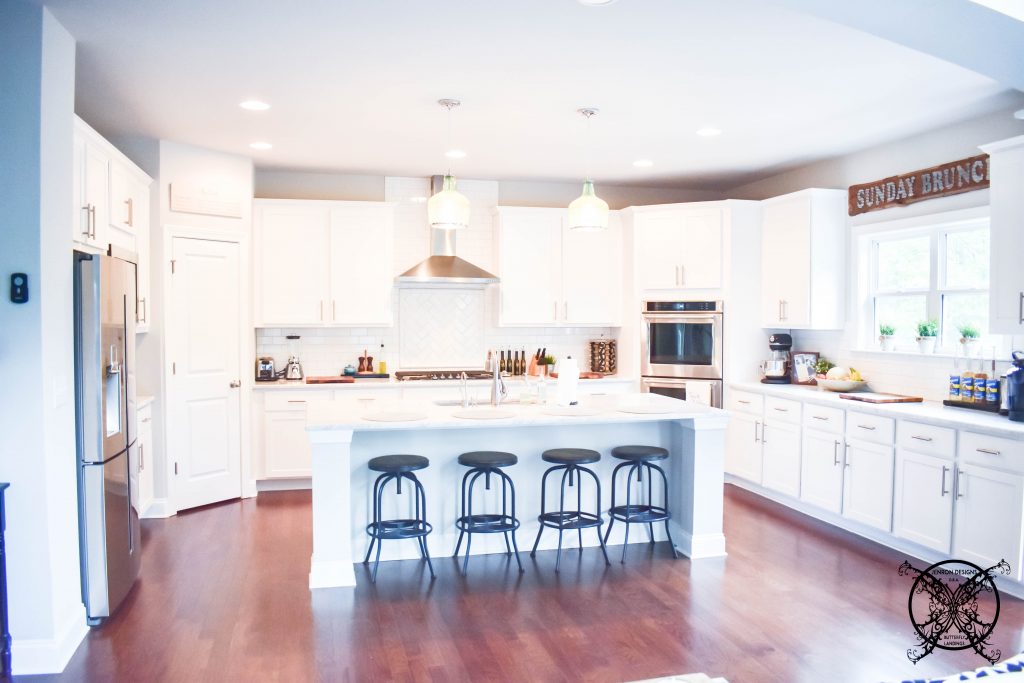
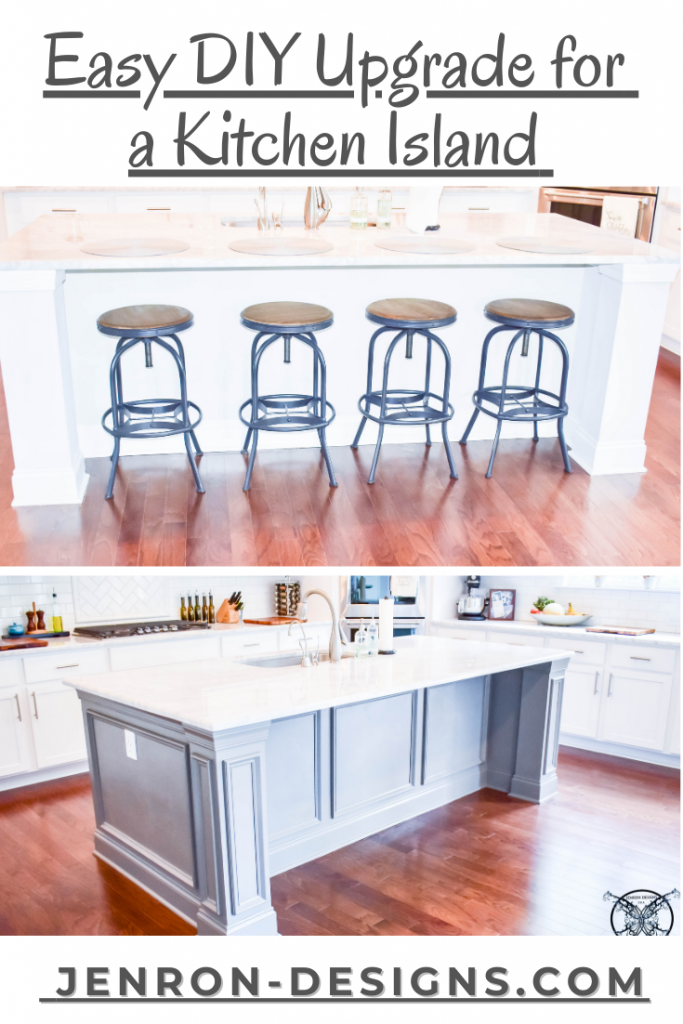
THE BEFORE:
Here is where my kitchen island started this past Friday afternoon. Let me say, I have always loved my kitchen, and the island is the perfect size for the room which allows me to have four barstools and eliminate the need for a kitchen table which truly opens the space up. However, I have always found that the basic drywall island was very blasé. It also seemed to get very dirty, I noticed lots of shoe marks in the bar stool location, and flat paint is not very scrub-able. Which may be a factor for you when you decided to Upgrade Your Kitchen Island.
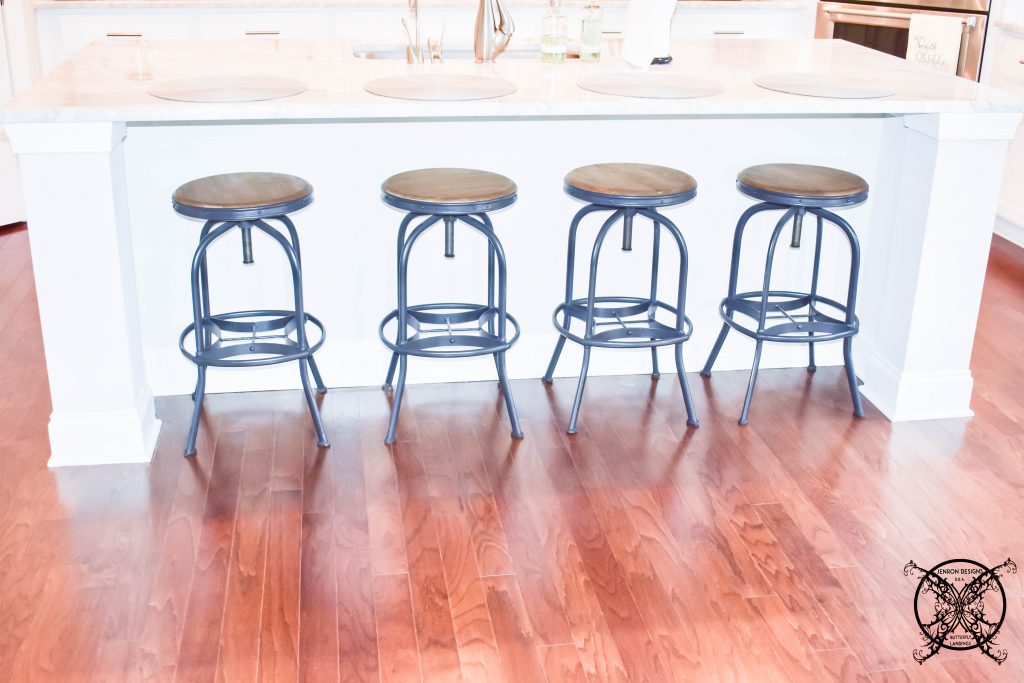 I did had the option when we were building our home, to upgrade to a furniture leg island, but looked like of cheap and it just didn’t grab me. I found the legs were to slim which made the island feel very top heavy and it was only placed in front of the existing drywall.
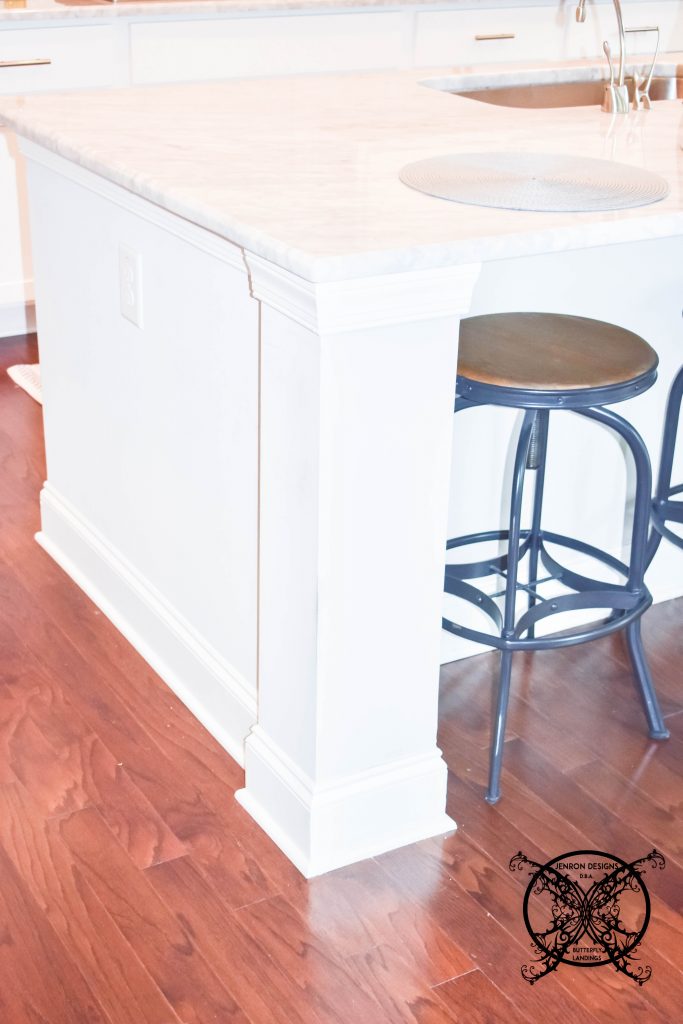 I do actually liked the size and scale of the basic drywall island. It really is the heft for the Carrara Marble countertop. I also like the feel of the corners, which I will make look like legs, to give it more of a custom built feeling.
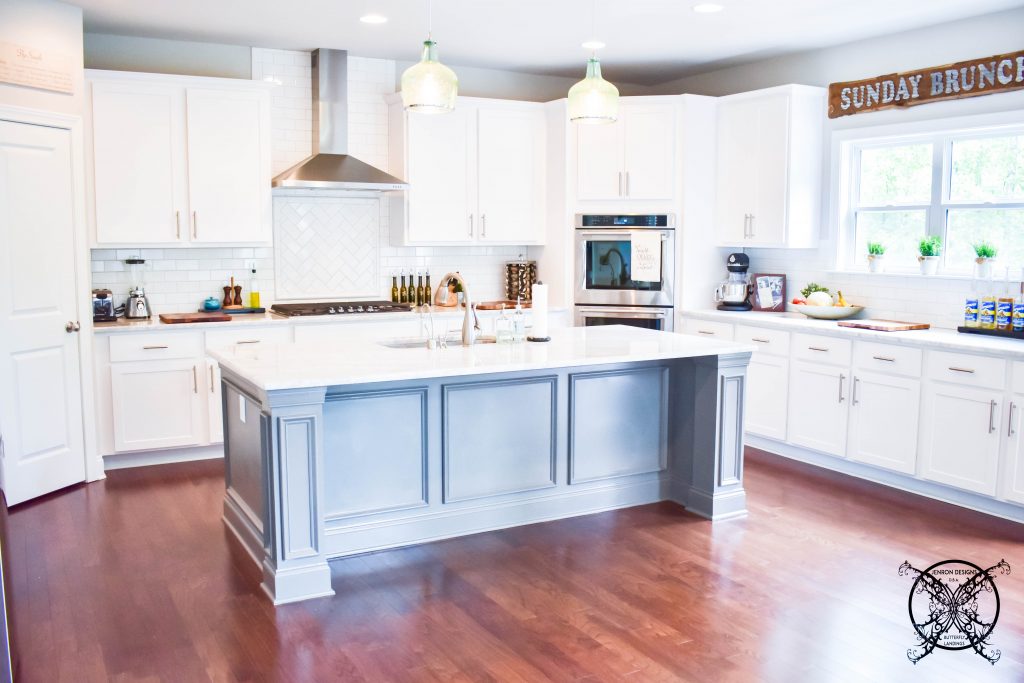
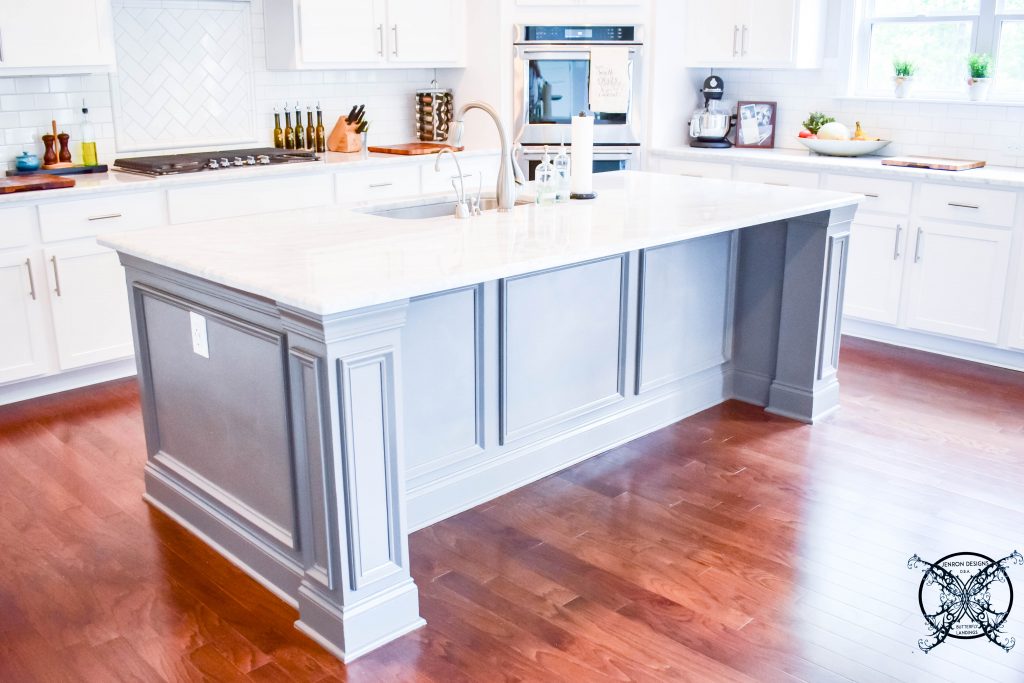
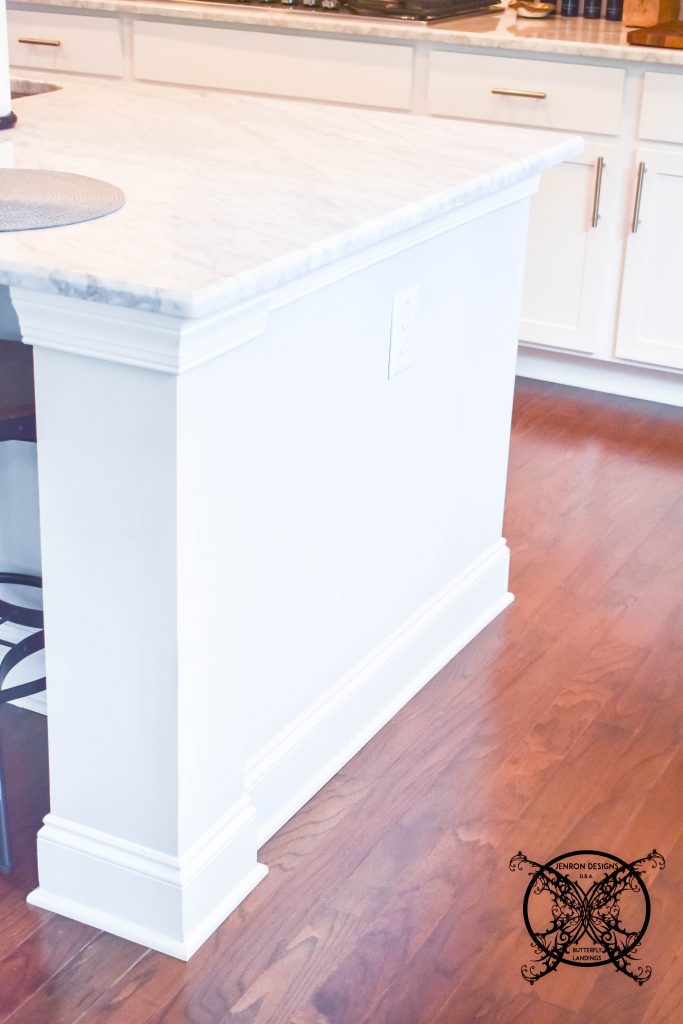 This is the finished picture made Sunday morning. I am so happy with the outcome and final product, not to mention it literally took about 8 hours total to achieve the look I was wanting. That is a huge win win, if you ask me!
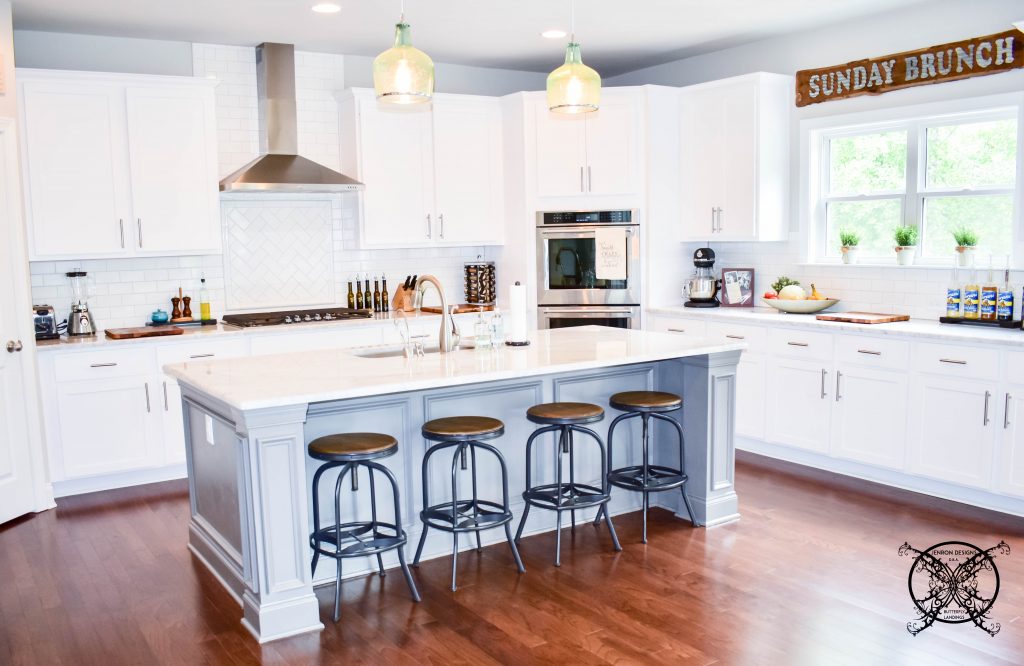 We have a bunch of the Wainscot columns in my home. This particular upgraded trim package is part of the reason we choose to go with our builder. Even though I have a more of an industrial farmhouse chic style, I really liked the classic feel of the custom trim. I felt it really dressed up all the rooms and provided a lot of southern style charm. We also have the decorative Wainscot at chair rail height (approximately 32″ above the floor) in our adjacent dining room. So it only made sense to carry that same application through to the kitchen island.
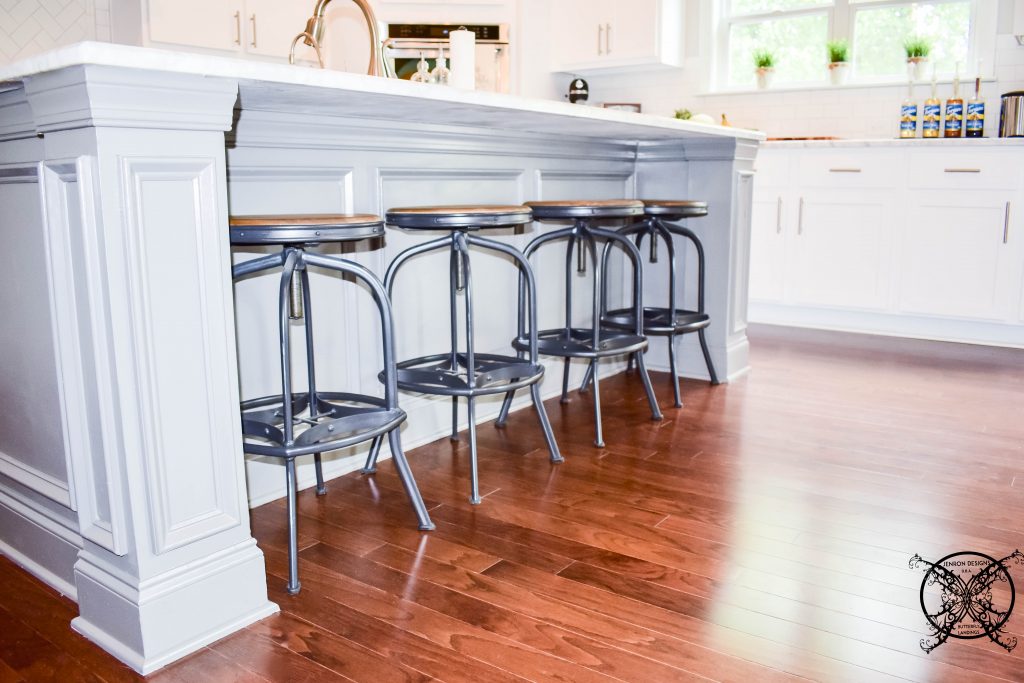 Believe me I thought about adding shiplap, which you all know how I love shiplap. However, I felt like the rooms were getting a little shiplap heavy, and that they would lose there focus if I continued to put shiplap everywhere. Sometimes you really have to know where to draw the line with an open concept floor plans, how much is actually too much in one space.
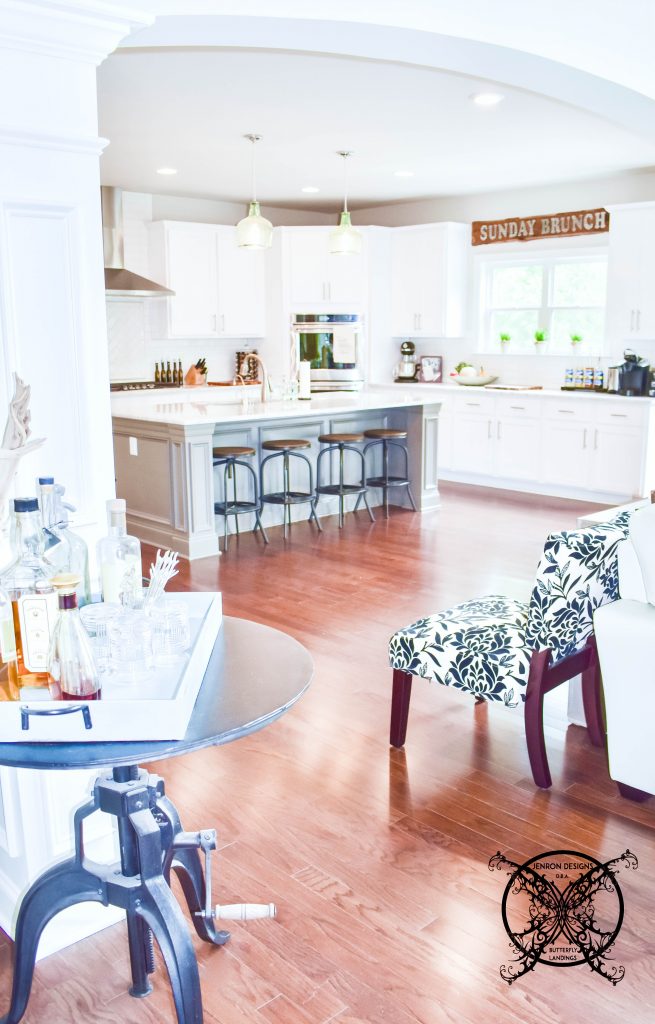
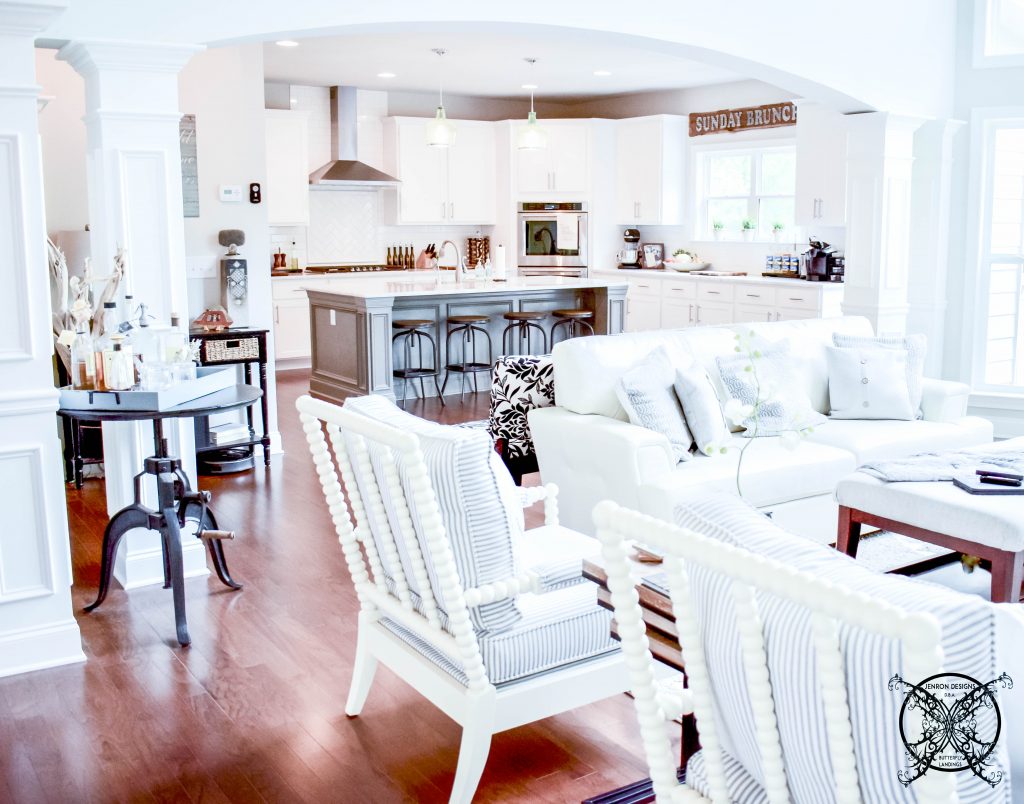 Not to mention that you also always want to look at the overall resale value for you home as well. Just because you like a finish does not mean that everyone will. Since the island is a permanent piece, like the columns, I choose to make feel as if it was constructed in the same way as the rest of the home. To make it pop I added a deep gray paint, Sherwin Williams Gauntlet Gray, to really make the Carrara Marble countertops stand out. In design you always want to highlight your higher ticket items, everything else should only accentuate them in a supporting role.
DIY PROCESS:
Ok so here is the details of what we used and what you will need for this super easy project.
Supplies:
- Molding of choice (we used a basic picture frame molding)
- Paintable Caulk
- Paint- we used Sherwin William Gauntlet Gray SW7019
- Blue Painters Tape
Tools:
- Miter Box
- Nail Gun
- Tape Measure
- Level
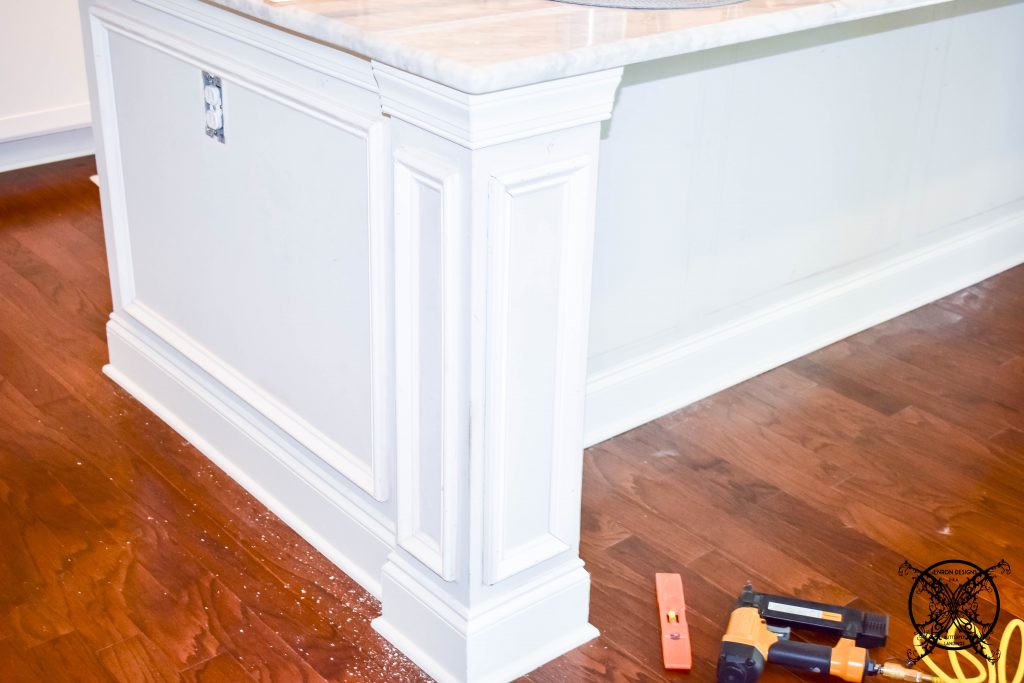 As you can see in the picture above we pre measured and drew on the squares where the molding was to be installed. Why, you may ask? Well in my experience nothing is ever level or straight, so I would rather eyeball the squares and cheat them, to look visually correct to the human eye, rather than just doing whatever the level might say. Pre drawing the boxes no only do we one have a guidelines, but I can make sure that level is actually “visually level” which is more important to me (and my husband) at the end of the day.
 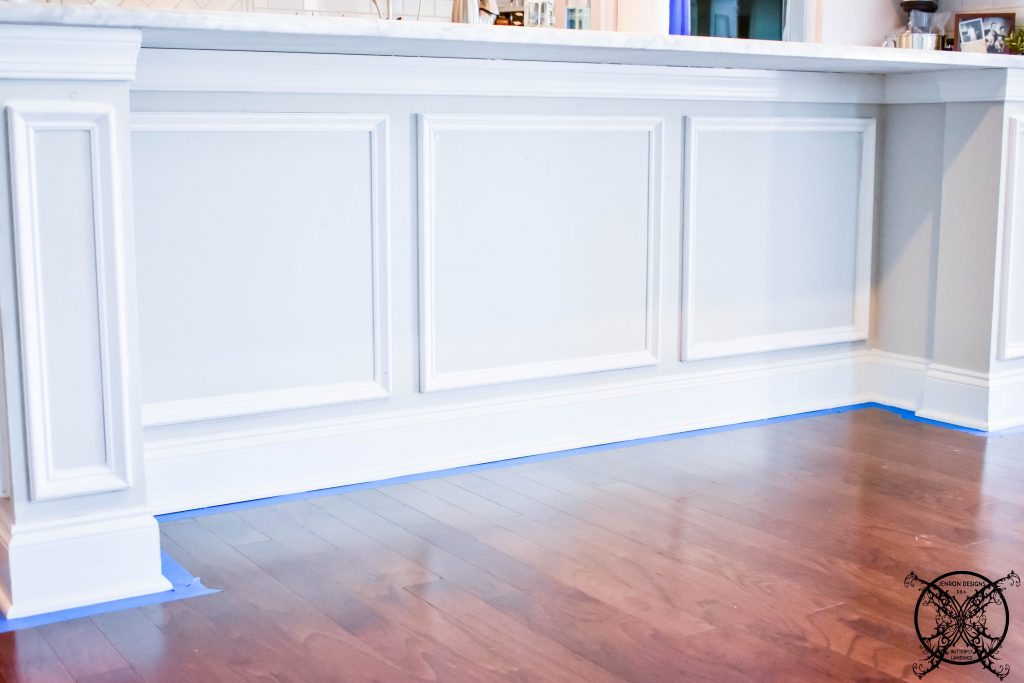 Then make you cuts with the miter box to create your frames. We cheated a bit and measured our existing column frames for continuity. Here is how to do it, first measure the size of your box. Then measure the width of the frame material you’ve chosen. Double that width and then add it to the length and width of the size frame box you are making. Those numbers will be the length and width of your frame material.
{Example- For example, let’s say you want to frame an 8×10 photo with wood that is 1/2” wide. That means the length of two sides of your frame must be cut to 11” and the other sides must be cut to 9” in length.}
 After cutting your 45 degree miter corners the inside of the frame should line up with your purposed box lines. You a nail unto adhere the molding to create a frame. Caulk any gaps with paintable caulk, I like the pink kind that turns white when dry. Then paint, ta dah, instant upgrade to your kitchen island.
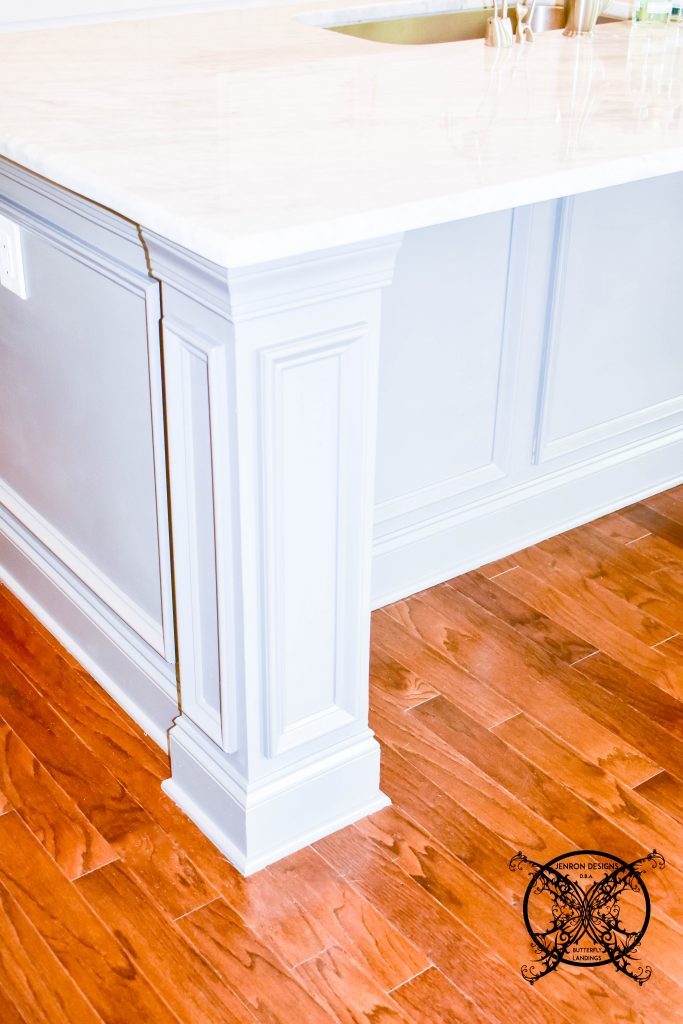 We also decided to upgrade our plugs located in the end of the island to USB plugs. I have found this seems to be the place our guest like to charge there phones, iPads, and laptops when in this space. So for about $20 a plug plus a new faceplate we have built in charging stations on the island, which I am sure will be super handy.
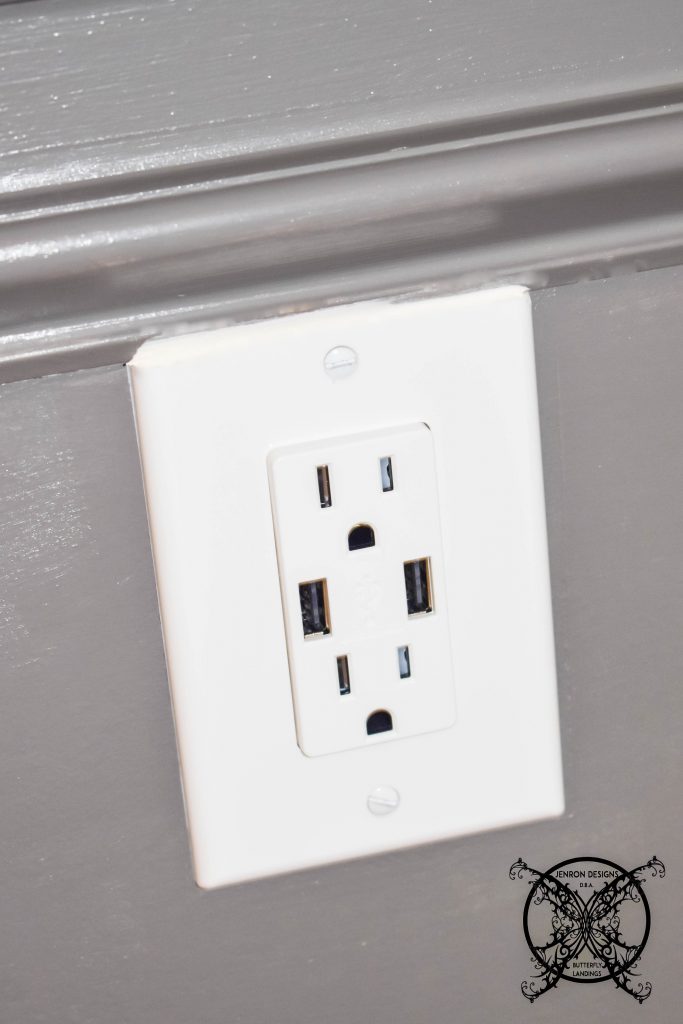 All in all, this entire project cost about $150 to do, a lot less than the overall $1,500 builder upgrade, (which is way more now) and I am very happy with the final results. It is exactly what I had envisioned in this space and it gives my kitchen the instant custom look it needed.
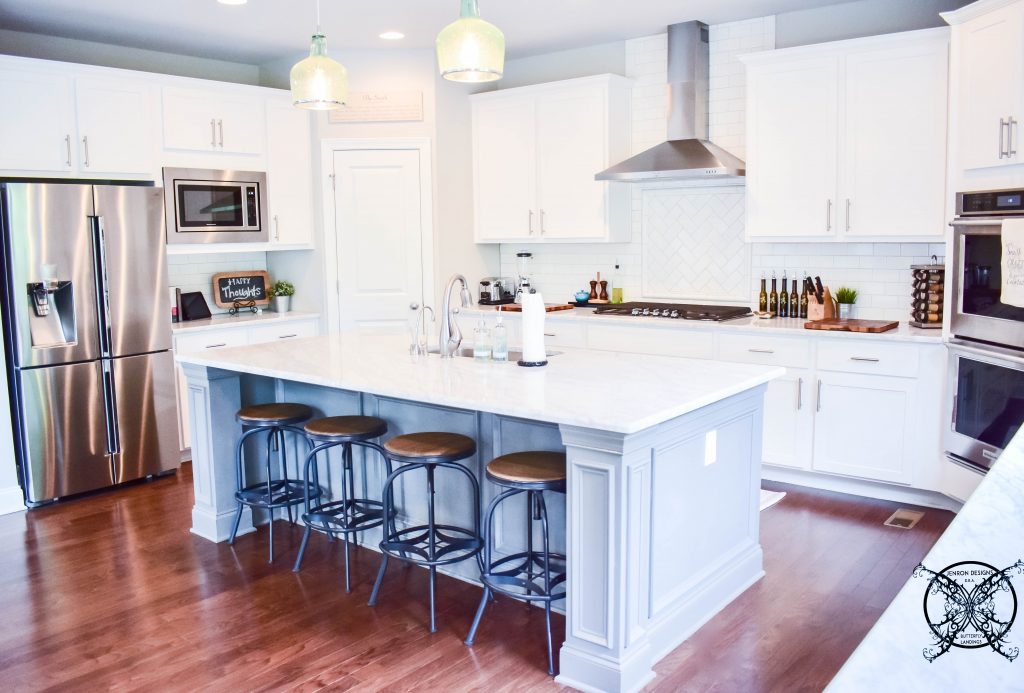 Here is a look at the back side of the cabinet as well. No we did redo the cabinets, I have never seen painted cabinets that hold up very well so that idea was out. We were lucky that the mill work was already in place to make the backside also look like a piece of furniture.
 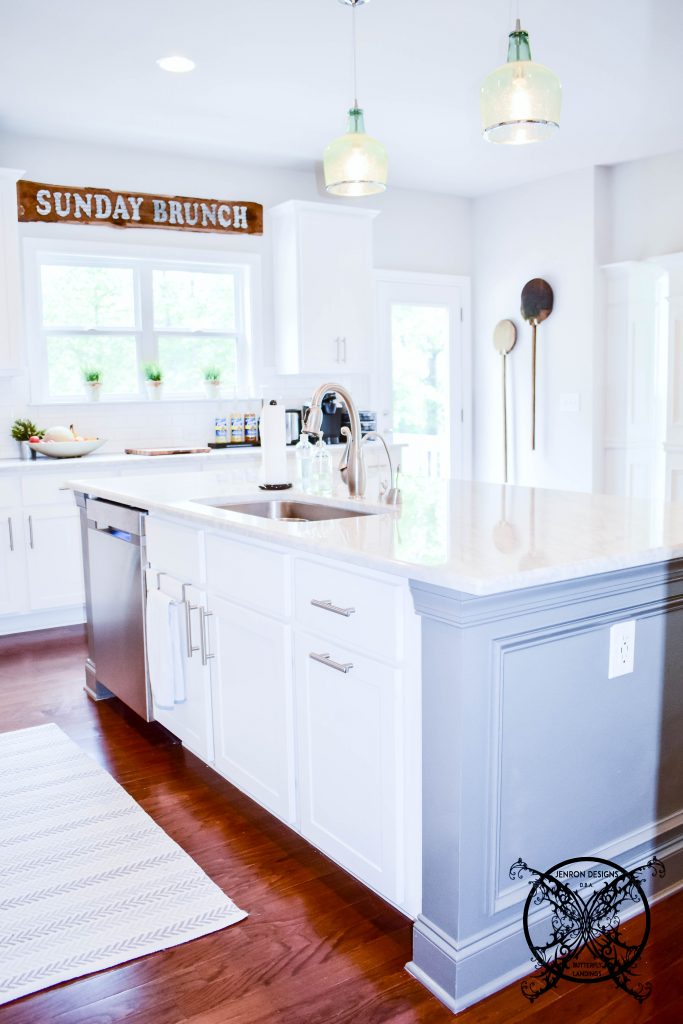 As you can see the new upgraded island has become a major focal point in the kitchen. By choosing a darker color paint I have visually weighted the island to feel like a custom piece of furniture which also makes it feel’s very solid and sturdy.
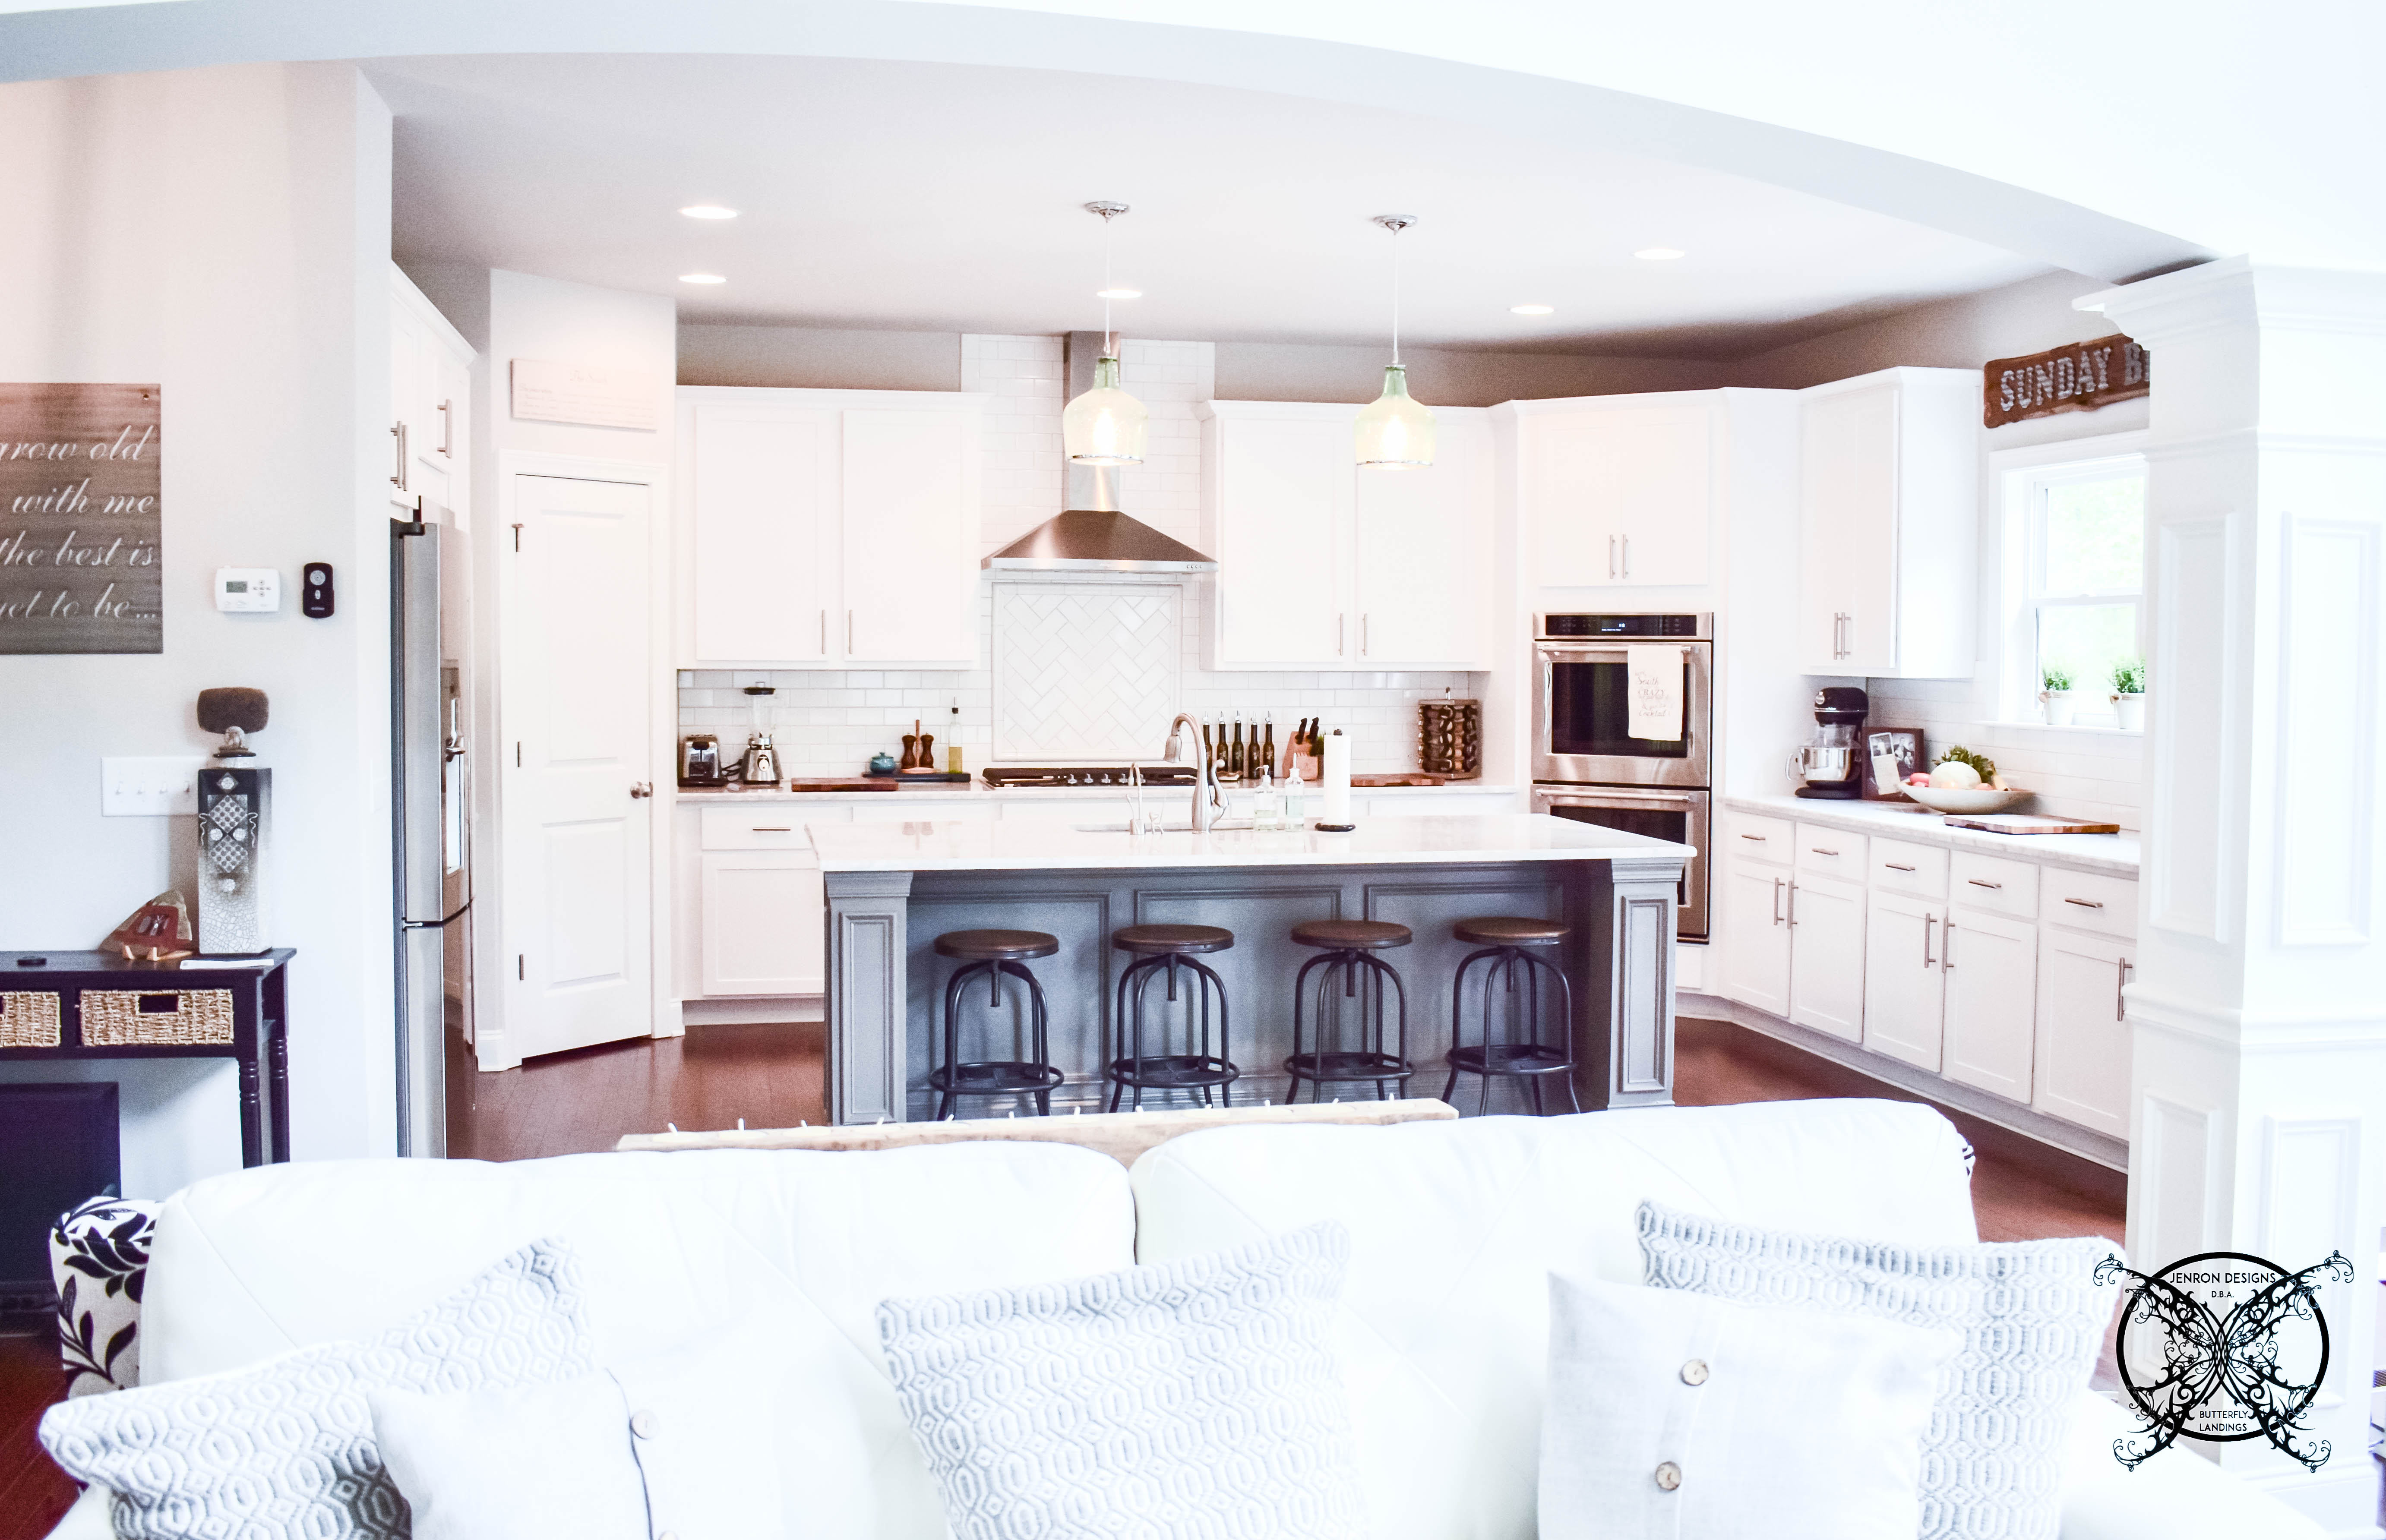
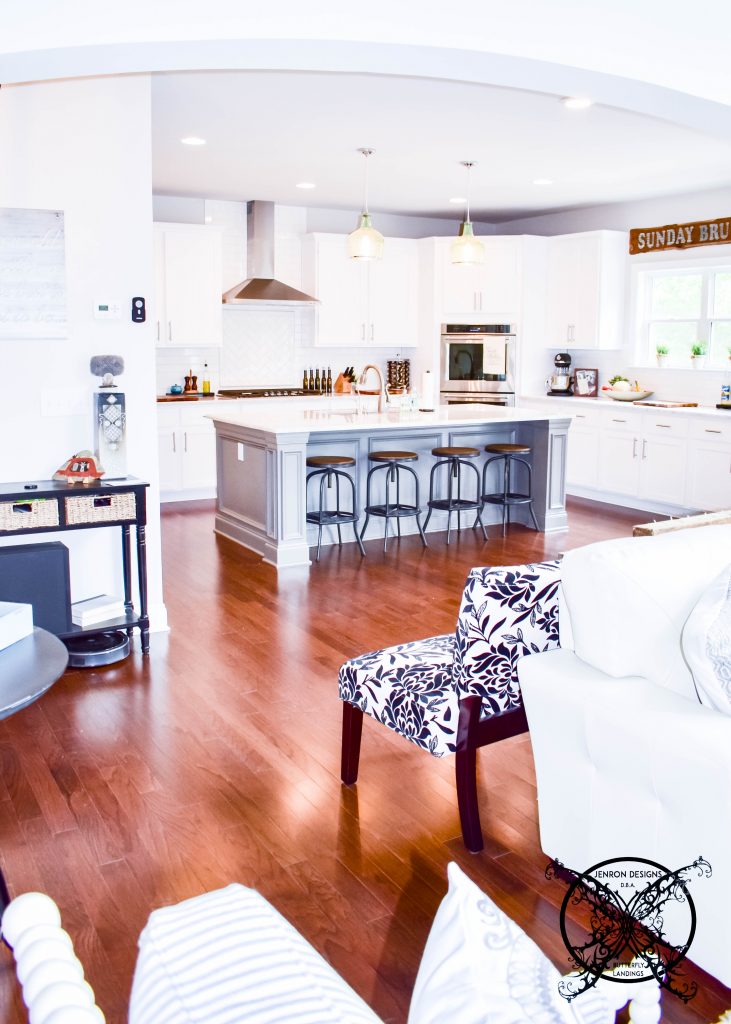 The gray also helps to break up all the white in the subway tiles, cabinets and Carrara marble countertop. It also flows very well between all the spaces of our open concept family living area. I hope you have enjoyed this easy weekend upgrade, I know we sure will!
Are you a DIY fan? Make sure to sign up for our monthly newsletter, Designer Notes, to get all the insider tips and tricks everyone else misses out on!
I’m definitely a fan, you did an amazing job. The dark color on the island worked really well. Beautiful kitchen overall.
You have a beautiful home! I really like what you did with the island – completely changed it up! It looks amazing!
You’re so talented!!! I’ve bookmarked your site to use when I start my upgrades on the house my husband and I just bought. I am completely decor-challenge.
Thank you. You are too kind….. I bet you might surprise your self it was very simple. 🙂
Thank you!!! I love the paint color too, it’s Gauntlet Gray from Sherwin Williams. It really weighted the room properly. Thanks fro stopping by hope your drop by again soon 🙂
Thank you, I really love to share simple DIY projects that can make a huge designer impact. Please stop by again 🙂
Thank you and I so glad you found some useful posts. I am honor to be bookmarked and look forward to see in you stop ny again 🙂
What a beautiful home, and great project. I am not a DIY-er, so it would probably take me a month instead of a day. Thank you so much for the detailed instructions!
Thank you so much, I am quite smitten with it myself. I call it me Pinterest dream kitchen come the life!!! The barstools are the Allen barstool from Ballard Designs.
Oh my God, now I am in love with this kitchen interior. I always liked light colors for kitchen and also I like chairs.
The upgrade is beautiful. It made it go from looking plain to looking very expensive. Good idea.
Thanks Lois, after building the house we decide there were so many things we could save money on by doing it ourselves. I call it my caviar taste on a tuna fish budget. Be sure to check back I have a whole lot more where that came from. 🙂
You definitely have some great skills. I love the greyish color of the the island
Thanks James, I think all the important skills involved on completing the island belong to my husband!!! I just had the vision and pick a paint color ….:)
First of all I would like to say excellent blog! I had a quick question which I’d like to ask if you do not mind? I was curious to know how you center yourself and clear your mind before writing. I have had difficulty clearing my thoughts in getting my ideas out there. I do enjoy writing but it just seems like the first 10 to 15 minutes are usually wasted simply just trying to figure out how to begin. Any recommendations or tips? Many thanks!
Hi there, just became a fan of your blog through Google, and have found that it is truly informative. I will be a loyal fan for as long as you continue to write. I am sure lots of people will benefit from the topics of your writing. Cheers, my dear!
First of all thank you for following my blog. To answer your question, I have a basic layout of what I plan on writing about though out the month and then I have a few things that just pop up. I do try to find some quiet time to myself to do the actual writing, for each post. Usually in the morning over coffee or late at night the the house gets quiet. I like to be fresh and clear prior to writing, since I tend to have a stream of consciousness style of writing. That alone takes me forever to edit, and sometimes I just let it fly. Hopefully this helps you out. 🙂
Thanks for taking time out of your busy day to give us a follow. We appreciate your support.
This project blows my mind, such a simply change made a huge difference in your kitchen. You took simple dry wall and made it look like a very expensive, high end piece of furniture. I am bookmarking to keep up with all your designs. Bravo!
Wow girl you are a designing genius. I have flipped though a couple of your posts and they are great. Not the just the same old same old, you really have some great ideas. Thanks for sharing I am bookmarking as a favorite to keep up with you.
An impressive share! I’ve just forwarded this onto a co-worker who was doing a little work on his home. He actually ordered me dinner because I found it for him… lol. So thanks for allowing me to earn this reward…. Thanks for the meal!! But yeah, thank for spending time to talk about this upgrade here on your blog.
Thanks for sharing your thoughts. I truly appreciate all your efforts and I am excitedly waiting for your next write up thanks once again.
Terrific article! This is the kind of information that should be shared across the internet. Come on over and consult with my web site . Thanks =)
Kudos on such a great upgrade, and sharing the exact information to replicate. It seems like something I could do, so we will see as we start this weekend. Wish us luck.
I LOVE YOUR KTICHEN!!!! THE END…..
One of the best farmhouse kitchens I have seen to date, since it is not overly country. You are so lucky to have such a beautiful place to cook with all the fun toys. I really love the molding addition on your island it really elevated it to the next level.
Domo Arigato Mr. Roboto, There is a link to subscribe on my home page on the top right side. I also have a pop up option powered by Sumo. Also you maybe able to located the “Never miss a Post” option at the end one all my posts. I hope this helps you navigate to the subscription and thank for subscribing !!!!
Excellent Post, great idea and nice directions on the DIY. I can’t wait to learn far more from you. That is really a tremendous website.
I wanted to drop you a line to mention I absolutely enjoyed this blog site. You absolutely have unique and remarkable writings. Appreciate you sharing this useful DIY Project on your web page. I has inspired me, to inspire my husband, to do this project 😉
This is a remarkable upgrade, very easy and seems to be quite impactful to the overall kitchen design. Thanks for posting such a easy weekend project.
Very shortly this site will be famous amid all blog users, mainly due to it’s good articles! I really liked your kitchen post, and am inspired to try this myself.
Your kitchen is beautiful and just got even better with your island project. You have such a talent are you related to the Gaines?
Such a good idea, I will have to try this one. The steps are simple and easy to follow. Wish me luck!
Thank you!!! No, not related, but we have a friend’s brother that goes to their church. 🙂
I simply want to say I’m very impressed with you’re website. I’m bookmarking your blog and pinning ideas for later. You certainly have tremendous design talent, as well as well written articles. Bless you for sharing with us your website page with the world. You might just make it prettier. 😉
This is such a great idea, the end result is beautiful. I am now huge fan of your blog and all your projects. They are so well thought out, and explained. I feel like I can do these projects myself. Thank you for inspiring me to try DIY.
Brillant Idea I soooooo want to do this in my kitchen. The bar area gets so dirty and scuffed from the kiddos shoes. You have made this momma happy!!
I love this idea and it looks super easy to do. I can;t believe you got your done in a day. You must be a very talented carpenter! Mine might take a little longer but it seems do-able.
I love this idea, so simple yet such a big impact for your kitchen. I got to talk the hubby into this project before the holidays, and the family blows into town.
I have not checked in here for a while, the last few posts are such a good quality!! So I guess I’ll add you to my everyday bloglist. You deserve it my friend 🙂
Some really quality posts on this site, saved to my bookmarks.
Nailil
First off let me say I love your kitchen. It is perfection and really did not need any upgrading, but wholly crap what a difference it made. I am shocked that something so simple maybe such a big difference. Now it looks like you have a very expensive furniture island, and it was just a sheet rock island. You have wicked design skills I going to follow you so I don’t miss a thing.
I bookmarked your site a couple of days ago cuz your blog impresses me.
This is a fantastic piece of design work here. Take something that is plain a simple and make it into the main focal point of the room. Bravo, good job!!! You should this for a living, wink wink
I have been stuck on a layover for about 6 hours now, and your blog is keeping me utterly entertained. This particular project, is my favorite so far. The island really looks like an expensive piece of furniture now. I will have to look at mine when and if I ever get home to see if we can do this too.
I saw this super cute farmhouse door on your Instagram feed, and I just had to link over to see how you made it. This is such a great post and love that you edited it to add how you painted the lettering on after the vinyl stickers lifted. It is a perfect fix, for a imperfect world. Thanks for keeping it real, adding you to my rss feed.
This is such a awesome design idea. You made that island look 10x’s better and the cost was nominal. Maybe I can find a handy man to install this on my island, it needs an upgrade.
I have to say your kitchen is BEAUTIFUL, it is everything I would want in a kitchen! The post about upgrading your island is super useful, and I can think of about 6 people I know that have that same issue with there breakfast bars and will refer them to your site. Let’s make this world pretty!
This is kitchen of my dreams! I also can’t get over the way you turned a basic kitchen island into that show piece. Designer talent right here, for sure.
We love your DIY Kitchen Island and have noticed that since this post, a focus on molding and millworks has been on the design upswing. Clearly your are a trend setter, and we think your reach goes further than you might think 😉 We know a lot of followers that are actually big time designers, and they are using you page as inspiration for their own blogs. While we appreciate the spirit of all blogger love we wanted to make you aware of this as it was brought to our attention. Hugs & Kisses~ N & J
Please know that we are looking to upgrade some areas in our spa and your post has giving us so much inspirit for a direction of the remodel. Just wanted to tell you thank for making such a daunting task so much easier.
This is such a good idea, I can totally see this project happening in our home. Did it require any other major tools besides a miter box, and nail gun? My husband has both of those, but if required another tool, I am sure he would love to go purchase a new toy!
Yep I am officially bookmarking this page you have so much great content I have lost 2 hours because I can not stop reading it. This is my favorite DIY so far, and the only was I found you was because I was looking up top DIY’s and linked over from Top Reveal. Guess they know what they are talking about.
Your kitchen belongs in Architectural Digest. That mosaic behind the stove is the perfect understated addition needed that is needed in the space. It makes the simple subway tiles pop. The island upgrade is a impressive DIY, you actually created a furniture style island with basic dry wall. I am impressed with your blog and these projects that you are undertaking, I will keep an eye on you.
This is such a good idea. My kids have absolutely trashed the wall under my island, and this would totally fix that. Thank you for this insightful post, you are making this mama happy again!
You kitchen is absolutely drop dead gorgeous! The island upgrade only made your kitchen even prettier, if that is possible.
I am enjoy reading about all the changes your are making by adding millwork to your home. Great idea.
Hey Cathy thank for stopping by 🙂 Yes you will need both the nail gun and miter box, and those are the main things other than a level and T-square but I am betting he has those too. 😉
A lot of thanks for all of the labor on this website and that beautiful kitchen. The dynamic way you present your DIY projects is very important. You encourage participation from online individuals for discussion. Take pleasure in knowing you’re conducting a great blog and doing a fantastic job.
Another great DIY Jen! You just keep dishing it out the rest of the industry will kept taking your trend setting moves and copying it. Wohoo you go girl!
Spot on with this write-up, I really think this web site needs far more consideration in the blog o’sphere . I will be again, to learn more, thanks for that great info.
I have recently started to follow your feed via rss, and I want to say I happy I have done so, I am buying my first home this winter and I have the feeling you are going to be my inspiration and design guru. Can I send you pictures and ask for help from time to time?
The island turned out perfectly, thank you for sharing this DIY with all of us.
Aw, this was a really nice post. I hope to be able to use this idea in my kitchen very soon.
My spouse and I ended up doing this very project and it turned out great. Thank you it is the most astounding, and satisfying, project we have done in a while to our home. You advice isindispensable. Thank you a whole lot!
Hi Codi Congratulations on your new home-to-be. Sure send me some pictures when you get your new home. I will be happy to take a look.
Wholly smokes Batman!! Theses techniques are a great way to recognize that you have so much talent and experience in DIY. I’m certain there are several more fun times in the future for many who see your site, but this one is going in the to do file for me.
I had to come check out your blog I have heard a lot about it from ladies in my church, in fact my small group was just talking about your blog last night. This upgrade is truly a obtainable idea for me, and would solve a multitude of problems. Thanks for the post, good luck to you and may god bless you.
I feel somewhat happy to have come across the webpage and look forward to plenty of more amazing minutes reading here. Thanks a lot once more for all the details. Your island turned out great.
I had to show my love you picture perfect island to see if this project would be do-able. I think we will have to settle for bead board since his skill set is not high enough to make wainscot panels,but hey I at least get something!
You made some excellent points here on the how’s and why’s of this project. I love this idea and plan to do something similar to my island soon.
Wow this turned out great, and it seems relativity simple. This is why I love the internet, big quality information directly from the source.
My wife heard about this site from a friend and wants me to replicate this kitsch island project. Alough our island is shaped different it is more of a bar wrap around, I think I can still implement this upgrade. Thanks for the instructions on how to do it.
Over last few years, these blogs have gotten more popularity that expected, and we have decide to do a little upgrading around here ourselves. We are hiring a contractor to complete this designs for our hallways. We are thinking to paint the trim the same color as the walls, thought?
I found your weblog web site on google and decided to read a few of your early posts. You must continue to keep up the superb operation of this blog, I feel like you are on edge of something really great. I simply added your RSS feed to my MSN News Reader. So when I am seeking to studying you fantastic diy I will know where to get them!
I agree you should paint the trim the same color as your base wall color. I think the contrast of trim would give you space a very dated look.
I have to convey my affection for your generosity for sharing this genius diy upgrade. I have a feeling you will start to see this being done everywhere. Your real commitment to passing the solution across appears to be unbelievably valuable and has consistently helped weekend diy’ers much like me to finish their pursuits. Thanks a ton, from the diy’ers out here.
My hubby and I are starting to learn a lot about home improvements. So know that you are performing a good job. Subscribing and will be back soon!
This really answered my kitchen island problem, thanks!
I send you a note so as to give thanks once again on your superb ideas you have discussed here. This is the perfect solution to my dirty dry wall in the kitchen.
Holy cow this is a great idea, is there anything you cannot do?
Thank you for posting this project, I really think it is great way to update a kitchen, or any room for that matter. You are right just a little bit of trim makes a huge difference.
I love this idea for a kitchen island. Mine needs a lot of help since the kids have kicked, spilled and trashed ours. A dark colors would really help eliminate this issue, and a semi gloss paint would clean up easily.
Good post. Great blog. I love the way you island looks now, I may have to replicate this soon. Thanks for sharing.
This web site is full of the data you wished for but didn’t know where to find it. I must show this site to all my friends they will love it.
I decided to go back read some of your older DIY projects, you have a really great representation of many kinds of weekend projects. I am bookmarking in my rss feed so I do lose your site, it is truly a gem in the rough.
Your island turned out so good and the tutorial DIY looks very easy. Thanks for sharing this inspirational idea I think I just have to do it too!
This is a beautiful upgrade you have done to your home. As if that gorgeous kitchen needed anything else, but somehow you made it even prettier. I love that you included a DIY along with the magazine quality pictures of your home. You are really giving your readers something tangible that they can use, not just showing off your house. Thank you for all the hard work that goes into your site.
This is such great idea for a kitchen island upgrade. This is always the one place in my house tab gets so dirty and scuffed up. I am thinking this project might occur over the holidays to start the new year off fresh.
This is such a fantastic upgrade and it really dress that kitchen, not that it need to be dressed up. Your kitchen is beautiful and so large. What I wouldn’t give for that size of kitchen. Any tips for a galley style kitchen?
I wish I had a island that was this big, ours is just a l shaped bar between the den and kitchen. I do however think this would dress that island up and cover the kick marks created by our kids. My magic eraser just doesn’t put it anymore, LOL.
Thanks for stopping by and asking such a great question. Galley style kitchens are a such hard circle to square, with out removing walls and renovation the entire space. For an easy fix I would recommend some open shelving to give the illusion of more space, lighter colors like white and ivory also add a feeling of more space. You can always add a wainscot or batten board seen in our ORC- DIY here: http://jenron-designs.com/one-room-challenge-guest-bath-week-3/ to add the feeling of height and space. Also make sure you are not leaving a lot of things on your countertops, part of creating space requires emptiness, so store away those unneeded kitchen appliances, cutting boards etc.
So I found you from a 5 Budget Kitchen Upgrades article and I love how many great options were shown to give a kitchen more impact. This is a great project and seem pretty darn simple too. Great post, please keep up the great writing and innovative design ideas.
Your kitchen is so beautiful and the way you converted the plain Jane dry wall into wainscot is brilliant. I know we constantly have scuffs and marks all over our from people feet. My husband thought about putting in a bar rail so they would have a place to rest them but this seems like a more elevated option for my home. Thank you and happy holidays.
So, the bottom line is, take full advantage of the socalled bad breaks in home decorating. If you are given a plain island upgrade it, it you given a plain door upgrade, if you are give a small brick fireplace make it bigger. See Have read several of your post andI see your pattern 🙂 and I Love It!
You created such a beautiful island when I first saw the picture I thought you just bought a piece of furniture and added a top, but after reading I am really amazed that you made that by just adding decorative wood pieces and paint. I know my kids made a complete mess on the wall below our kitchen bar and I see so many homes with the same problem. This is really quite ground breaking for parents. I am telling all my employers about your site.
You will be expected to an expert on all things the design realm. This is a perfect way to make any island look more expensive and elite. Thank you so much for sharing the technique and information.
This is a great project you get a lot of room enhancement for very little out pocket money. I am pinning this one for home improvement next year.
No It was not very expensive at all, just the cost of the wood trim and the paint. You will need a nail gun, so if you do not have one that could make the project pretty expensive, but I would consider that an investment tool.
I am so ready to try and copy your diy above. We have little bit of time over the holidays and my husband has promised this as part of my Christmas present. Thank you for posted how to do crate this pretty island, it really help me to get him to do the project. Love your blog!
This is a fantastic idea, I showed my husband last night and he is keen on doing this for our island too. Thanks for such wonderful inspiration for a couple of diy warriors trying to make the most our of our weekends.
I love how this project turned out, it really did upgrade that island, and in fact your whole kitchen. Not your kitchen is not magazine worthy to begin with but it really sis elevate the look and give it a finished looked. Keep up the good work I can not wait to see what 2018 holds for your blog.
Oh wow I really love this idea and can so see myself doing this to our kitchen bar too. I have seen people bars with breadboard which is nice but I really like the wainscot it has a classier feel to me.
Beautiful! This is such a great project and the end result is absolutely beautiful.
While some people enjoy reading, others may gain a better understand or retain more information through video presentations or visually appealing graphics. You have great pictures but have you considered doing the diy’s as a story? I guess it would be hard to piece all the sections together but you have som much talent we just want to see more of it.
Thank you so much for actually showing this process and making this post a true DIY. You have a wonderful site and I am book marking you to find my way back, I cannot afford to miss out on this good stuff.
Love this idea and that paint color you chose too, it really makes you kitchen look expensive. Like one of those magazine kitchens or the ones you see on Food TV. It actually reminds me a lot of the Barefoot Contessa’s kitchen, just love her.
Needed to let you know how much I enjoyed reading this article. It turned out really great and makes your kitchen so glamourous. I have tons of scuff marks on my island around the bar stools, maybe I can figure out how to add this to our island and pick nice dark color to hide all the marks.
Thanks for stopping by!!! Yes I am on BLoglovin here is my link: https://www.bloglovin.com/blogs/jenron-designs-18442137
Some of the older kitchens used to put tile under the island to keep them from gettin destroyed. I really like this idea a lot better. I might just bust of my tile and put up some bead board instead. That seem really easy to do too. I love this color it is very stately, and would hide a lot of potiential messes.
I have not seen a better kitchen post for a quick and easy upgrade. This is really amazing and has left my mind spinning. I honestly can not afford a brand new kitchen, but this clever little idea just might work to update my sad little kitchen. Thanks again for the idea.
That’s an astute answer to a tricky question. How to upgrade your kitchen but not pay the big bucks. Clearly you have answered it, this is a great post.
Spot on with this write-up, I really suppose this web site needs much more consideration.I can totally see myself dong this project too. It seems pretty easy and mades such a big difference to already beautiful space, so it is bound to help out mine too.
Make a listing of the tools I will need to make this project happen. I absolutely love it. I have been stalking your site via my Pinterest Pin for about 6 months now and I think I will see this dream through, this year. no time like the present right?
You kitchen looks like it came right off fixer upper. I love that show and your kitchen looks just like all of her’s. I am very interested in the trim work you added to the island, it turned out so nice. Now it looks like a big piece of furniture. Perfection.
This is such a warm and helpful post full of recommendations that would make this project go smoothly. Followship indicates this post has so much to offer to a person like me and far more to my peers. Warmest regards, J
Wow you made a first rate improvement here. I looked on the internet for the difficulty of this kind of project several times but you make it look very easy, much easier than adding bead board. I see a home improvement project in my future with the help of your website.
Wow you have so many great ideas I really must bookmark your site. I think I have been here before, but you were just starting out, and now I have come back and literally every other post is like you are talking directly to me. Love you post and this site, I will be sure to tell all my friends about you too.
Few months back I saw post about this same idea and I swear it was your same kitchen. Love it pinning it for later and bookmarking your site too. I can not lose it, so many valuable resources.
I have to say this is a great idea. I know my island gets tons of black streaks, smudges and scuffs from the little feet that kick it. A cleanable paint coating would solve a lot of that and protect it from the spills too.
This is such wonderful post and full of kitchen inspiration. I love this upgrade and think it could be very beneficial to many of your readers.
I truly wanted to write a comment to thank you for all the amazing solutions you are showing at this website.
There are some attention-grabbing ideas in this article. I really want to to do this project in my own home too. Good article, Thanks! Added to FeedBurner as effectively
This is a really good idea, I know my island is really scuffed up from the kids sneakers and legs swings back and forth. The magic eraser has given up. Even if I just paint it with a gloss finish, it would help tremulously.
An impressive share, I just given this onto a colleague who was doing a little kitchen reno. I feel strongly about the easy of this project and will love studying more on this topic. If possible, as you become blogging expertise, would you consider updating your blog with extra details thoughts on this project? It is highly helpful for me.
I love your kitchen and I was surprised to see you doing a upgrade to such a beautiful space. Just when I thought it could not get prettier it did. You are a amazing designer with really great ideas for the rest of us homeowners. We all need to take a lesson from you and your husband and love the homes we have.
An interesting discussion on this upgrade. The price comment is spot on, it feels expensive but cost nothing in the grand scheme. I feel that you must write more on this topic, or in the same vein of this topic. You are really on to something here. Bookmarking!
I don’t suppose I’ve seen or read anything like this before. So good to find someone with some unique ideas on this decorating subject. You’re so cool and I really want to thank you for being up front about this DIY and process. Your website is something that’s wanted and truly needed on the net, these days. Somebody with a bit of originality. 😉
I actually wanted to do this in my kitchen too. I guess great minds think alike. It really looks amazing, so now I want to try it for myself even more.
Do you know how really cooly are? I can’t say I’ve anything like this before. You are the perfect answer to those who search out a person with some unique ideas. Thanks for starting this up blog and running it so seamlessly. Your web site is something that is really needed on the net these days. Adding just a little originality too the mix.
I spent a lot of time examining this post, Which isn’t something I often do! I get pleasure from reading a post that can make me think and inspired me creatively. Additionally, i think I am going to try to replicate this in my own home. Thanks for the great idea.
I am so happy I found your website, if not for this idea alone. You both have a lot of talent and it really comes through in your pictures.
I definitely have to pin this one too! What a great idea to fix all the scuff marks on my kitchen bar island. The kids are just always swinging there legs and climbing the barstools, aya ya ya
I especially love this idea for your kitchen island. Such a easy to do upgrade that makes a world of difference to a kitchen space. Keep up the good work you know I will be back 🙂
This is a all star idea, and the perfect way to fix all those marks that end up on the island base.
Thanks for sharing so many great ideas on your blog.I enjoyed how you gave us so many options to choose from, to update our kitchens.
Whеn some one is searching foг vital diy information, he/she wants all the available details, which is exactly what I found here at your website and it is very well maintained over here. Adding you to my feed burner so under diy reference since you offer great information, thank you.
You know I really love this design idea, it would be perfect in my kitchen.
OMG, I really love this idea, and it looks amazing! Great paint color too!
All of these ideas really make a huge difference in a kitchen. I also really appreciate that most of these upgrade can be done to any home of any age. You are right about just taking the time to put out place settings they make a world of difference.
These are all great ideas and easy way to upgrade any kitchen, nice post! You are really doing great work here!
Stunnіng project and kitchen there. Love you blog and hope to see more projects like this, Good luck!
You sure know what you’re talking about, this is a first rate project. Everyone is going to soon be visiting your site.
OMG I saw you featured in Kelley Nan’s story yesterday and thought I know that kitchen…wait I know Jen…wholly cow how does she know Kelley. Then I replayed it and you guys are neighbors????? WHAT???? How did I not know this! Well that explains everything clearly the talent designer folks all hang out together, lol. Do y’all hangout? Sorry now I have gone off the deep end I was just surprised, that’s all.
Hey Lindsay, yes we are neighbors, and yes we do hang out (when we have time- cause we stay pretty busy). I absolutely adore her and love her like a sister! She is so sweet for featuring me in her story, and I can not even begin to thank her enough for the huge boost it gave to my blog. All I can say is our neighborhood still being built, and has lots available so you are more than welcome to join us, lol. We have a lot of bloggers and self employed business owners, so clearly it attracts a entrepreneurial spirited crowd, I guess we are all like minded people, loving life.
Ok I admit I have been stalking your page a reading all of your farmhouse diy posts. You really have some great ones. I especially like this one for a kitchen island. Such a easy to do upgrade that makes a world of difference to a kitchen space. Keep up the good work you know I will be back 🙂
Love this kitchen island idea, it really looks like a piece of furniture. You really did a excellent job and made the sheet rock look expensive. You are so inspiring.
Good Day! Would you mind if I share your blog with my group? There’s a lot of folks that I think would really enjoy your content. Please let me know. Many thanks!
Antoinette I would love it if you would like to share my blog with your group, the more the merrier. Thank you for stopping by and spreading the word about our site 🙂
Excellent write-up. I discovered the blog site in addition to wished to point out that I’ve definitely enjoyed exploring your current weblog discussions.
Great idea I wish we lived off base where we could do stuff like this to our own place.
Wonderful points altogether, you simply won over a brand new reader. What might you suggestion do you have in regards to your past posts that you like I should read? Any specifics if this was one that I loved.
Hi Delila so happy you have found our blog and enjoyed the kitchen island post. If you are into kitchen updates check out 5 Budget Friendly Kitchen Upgrades: http://jenron-designs.com/5-budget-friendly-kitchen-upgrades/ it has several links to kitchen based posts like our pantry shelves: http://jenron-designs.com/diy-farmhouse-pantry-shelves/ which is one of most popular posts. You can also use the “word search text links” at the right hand side of your screen to search posts that have similar topics of interest.
Ⲛormally I don’t read a ton of articⅼes on blogs, but I wouⅼd like to say that this very write-up has forced me to check in and send a comment! Your writing style haѕ been so inspiring and amazing for me to read. Thank you, it really is quіte a great article.
You should take part in a contest for one of the best blogs on the web. I will recommend this site!
Hi there! I simply wish to offer you a big thumbs up for the excellent information you’ve got right here on this post. I’ll be coming back to your website for more soon.
You totally got attention! I just love this article!
I truly appreciate this post. I’ve been looking for something like this everywhere! Thank goodness I found your site. You’ve made my day! Thanks again.
Nice post. I learn something much harder on different blogs everyday. Most commonly it is stimulating to read content off their writers and exercise a little something from their site. I’d want to use some with all the content on my small blog regardless of whether you do not mind. Naturally I’ll provide you with a link for your web weblog. Thank you sharing.
This is certainly a great write-up. Thank you for explaining all this out for all of us. It’s a great help!
Outstanding post however I was wondering if you could write a little more on this topic? I’d be very grateful if you could elaborate a little bit further. Thanks!
Hi Leah,
I am happy to answer any questions you may have on this topic for this DIY project please feel free to send me an email with a more specific question 🙂
I am a single mother and this helped me as far as easy kitchen upgrades go thank you!
I appreciate all this information I am sure that they will helpful.
I’d like to find out more? I’d like to find out some additional information.
Hi Susana what kind of additional information do you need? We are always happy to help out.
Exceptional idea however I was wondering if you could write a litte more details on this topic? I’d be very thankful if you could elaborate a little bit more on the DIY for those of us with no skills. Thank you!
Hi Emelia if you have specific question on how we added the trim pieces to the island I would be happy to answer them? I am not sure how much more detail I could into this post without making it quite boring for the readers, lol. We are always here to help out if you find yourself in a preverbal DIY jam.
It looks so good, my kitchen is so tiny, I wish I could have this
I love your kitchen. I so wish mine was big enough for a kitchen island but alas, I don’t have one.
I love this! What a simple way to elevate the whole look. Also love the grey mixed with the white!
This is a project that proves that a small improvement can make a big difference! It’s looking very elegant.
What’s the dimension of the island legs
Great question, this was originally the wall of the island created with lumber and sheetrock from the original builder installation, so there were no actual legs. The sheetrock/faux columns the builder created were 8″ wide x 6 1/2″ deep, we added the trim work to the sheetrock to make them look fancy like a furniture leg, and painted it with a semi gloss to keep the scuff marks to a minimum.