
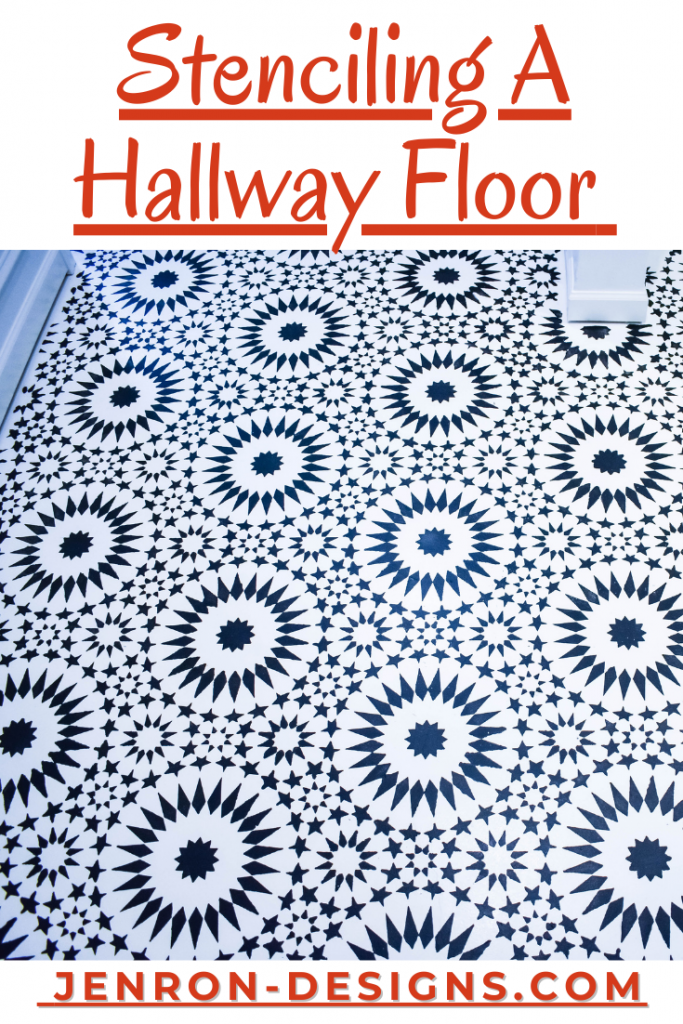
Stenciling a Hallway Floor
Today I am sharing a fun little project we added to our basement of Stenciling a Hallway Floor to make an impactful design statement.
Hi everyone this season I have decided to opt out of the all of the usual designs challenges that I have normally participated in this time of year, in order to truly enjoy the holidays. Honestly I just did not want to feel so rushed this time of year and feel like I was juggling so many things, so I may decided to revisit them in the spring, or not, we shall just have to see if I find happiness in the JOMO.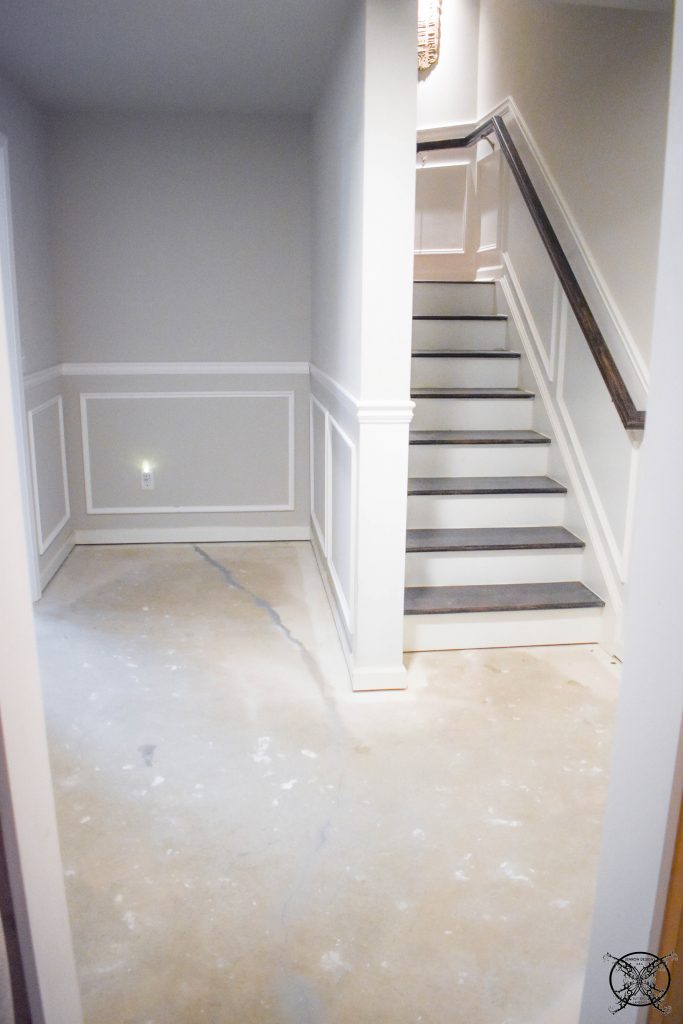 Well with that being said, it is not going to stop us from continuing to do DIY projects, like this great stenciling of a hallway floor, it just means we will be doing it our way and on our time frame. So we started this hallway a few months ago and here are the before pictures of the floor, bare unsealed concrete like any basement.You may also notice that we added in Wainscot Paneling as well to this space to finish out the walls. If you would like to see our DIY on those check out a previous link above.
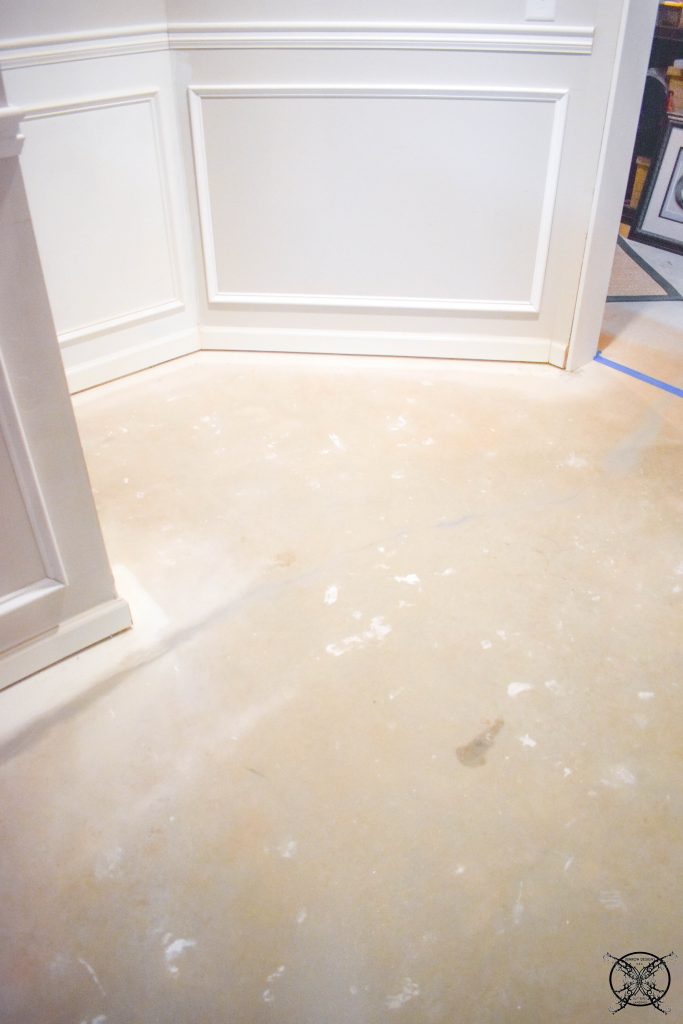 To paint the base coat on the floors I used my standard Porch and Patio paint that I have used previously in other rooms of our basement for a similar use.
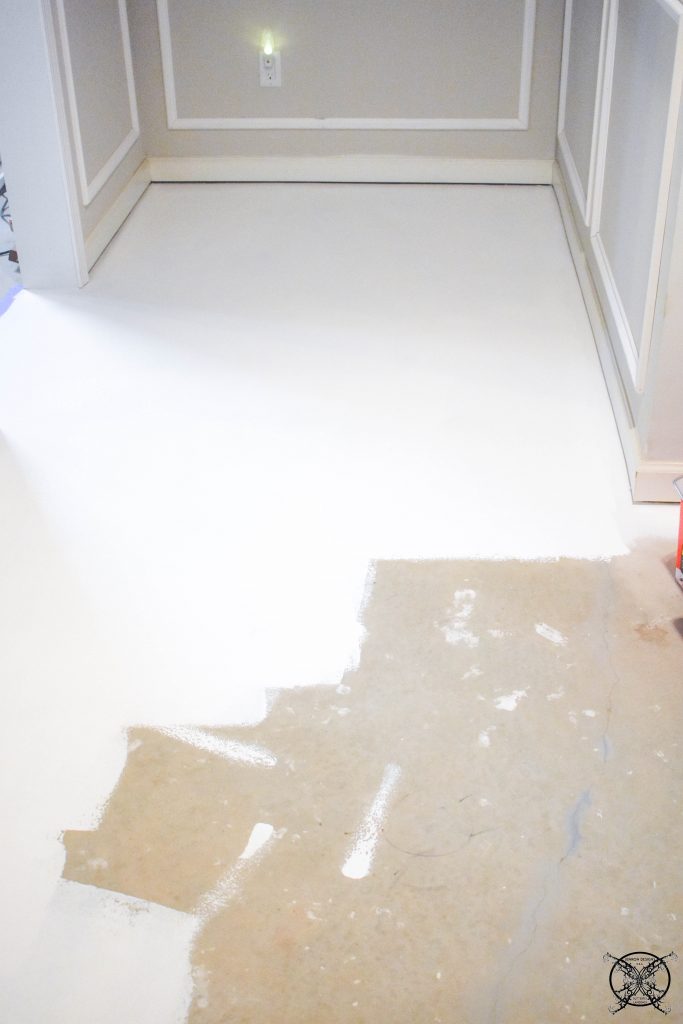
 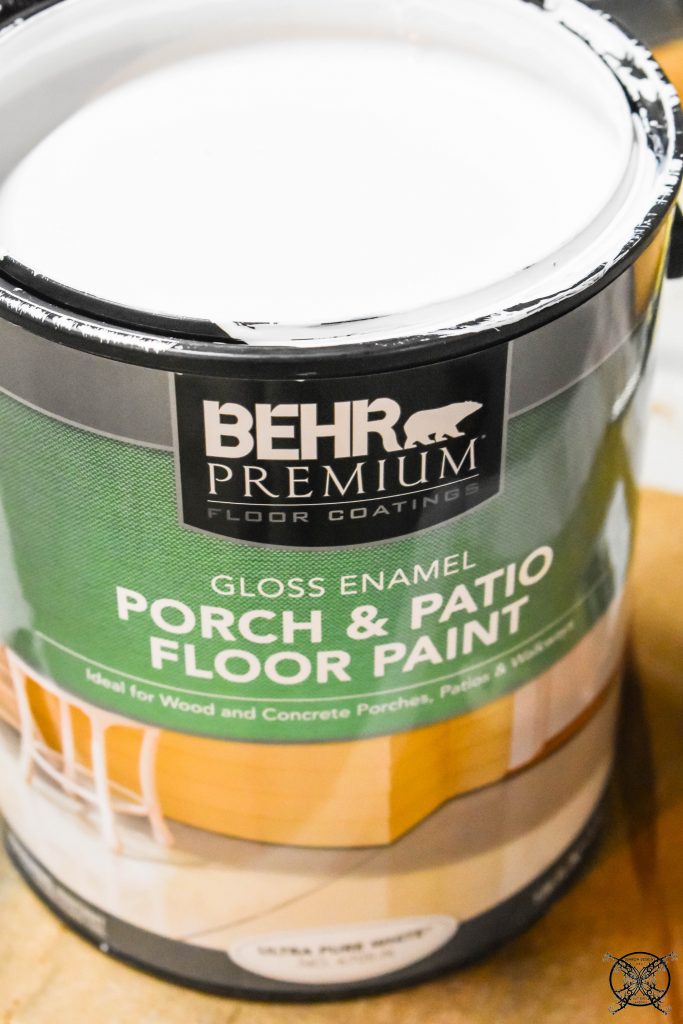 The gloss white seals up the concrete nicely and makes the surface very easy to clean and mop. You may also notice that we had a few small stress cracks in the concrete which is a standard thing, I have been told by a structural engineer, as long as you do not have lifting you are golden, which we do not. So a simple fill with concrete filler prior to painting will take care of those.
 I allowed the white paint to dry thoroughly over a couple of weeks while I ordered my stencil from my friends at Cutting Edge Stencils and waited for it to arrive.
 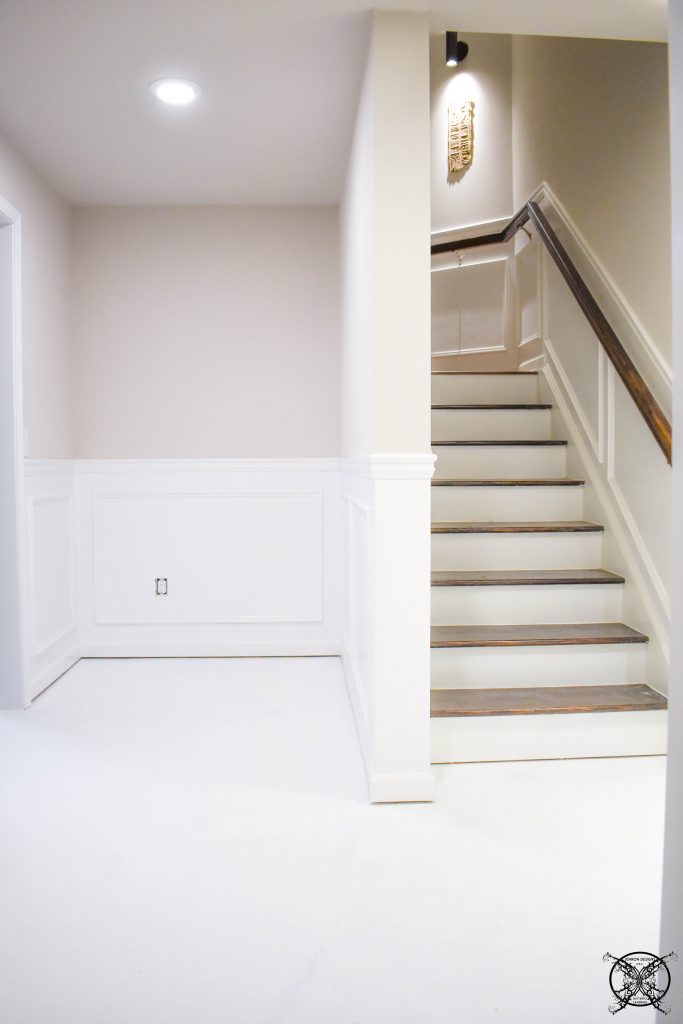 You can see what a difference just the bright white paint has made in this area. It has truly lighten up the space immensely. Although we did add in a few extra light fixtures as well during this time. An overhead can style light and the wall sconce seen here, to match the one in the stairwell.
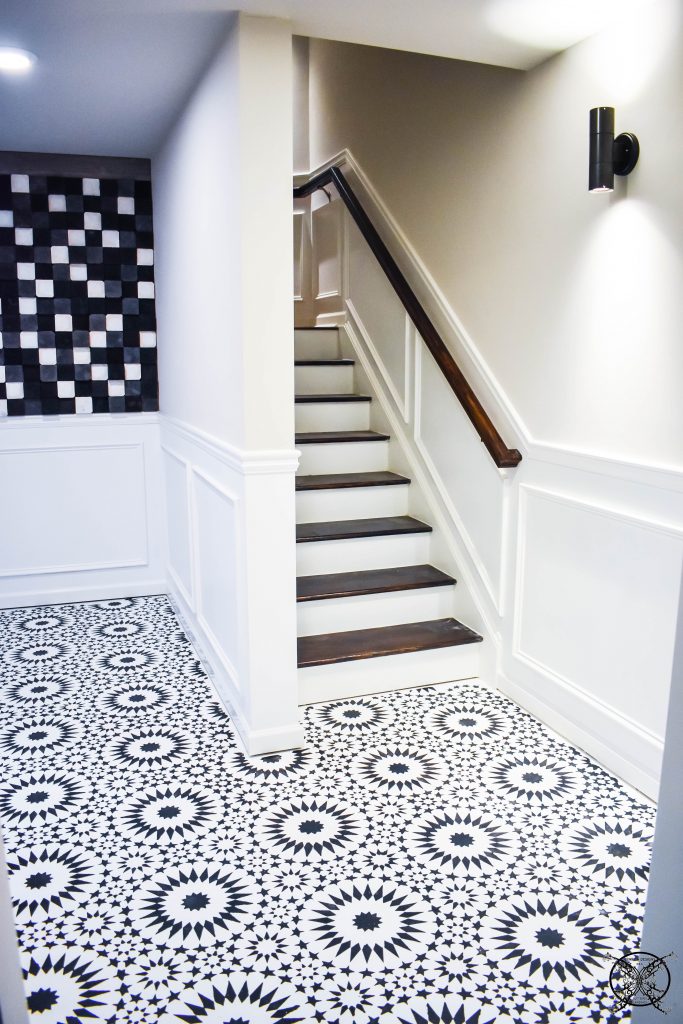
  Once my stencil arrived from Cutting Edge Stencils it was time to get to work on creating the floor pattern. This pattern is called the Ambrosia Moroccan Tile Pattern and runs $39.95. It is a great pattern for a large space such as a floor or wall.
 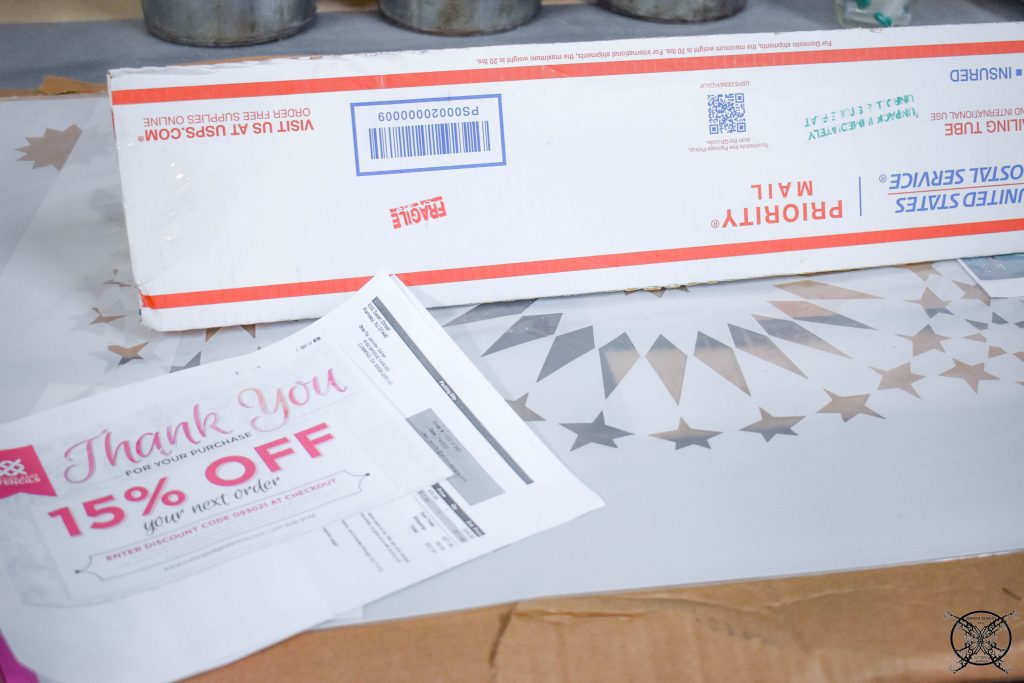 The stencil will come with a ton of instruction on how to start your specific pattern and attach the stencil for good adhesion. I used blue tape at the corners and a low nap roller to apply my concrete paint.
 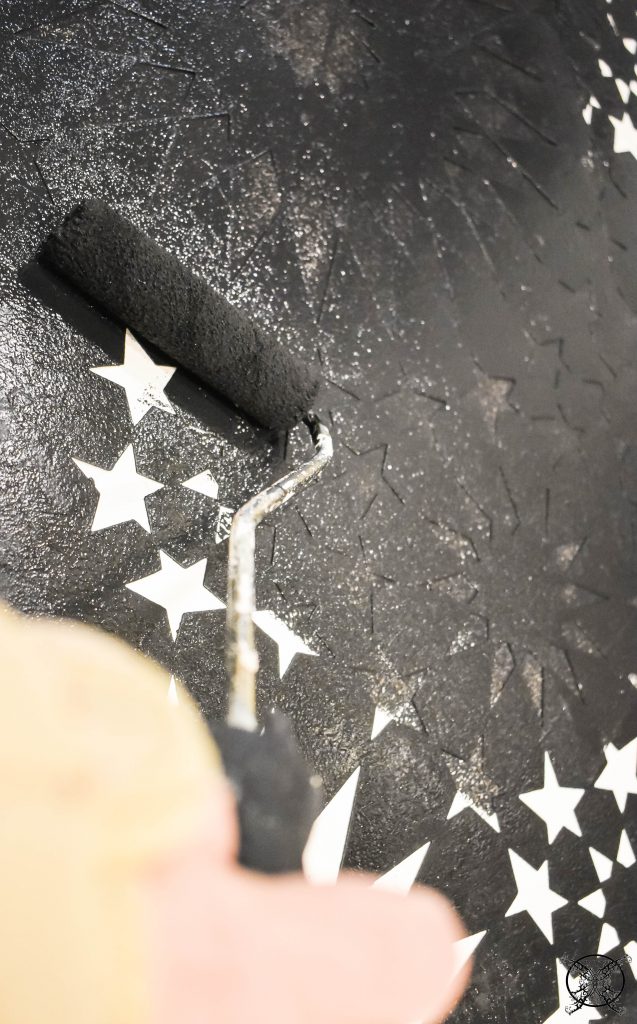 Using just a small amount of paint and my HANDy paint roller cup made this job super easy. As you can see this particular cup gets a lot of use around my house.
 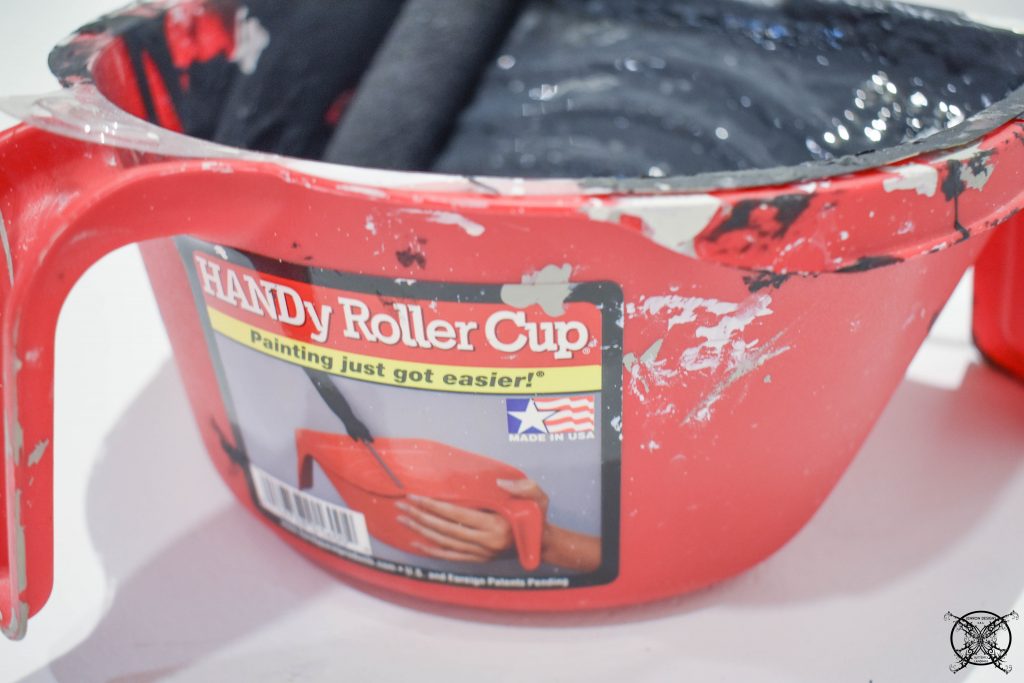 Volia the first stencil was set and now I steadily worked my way down the center of the room until I reached the end.
 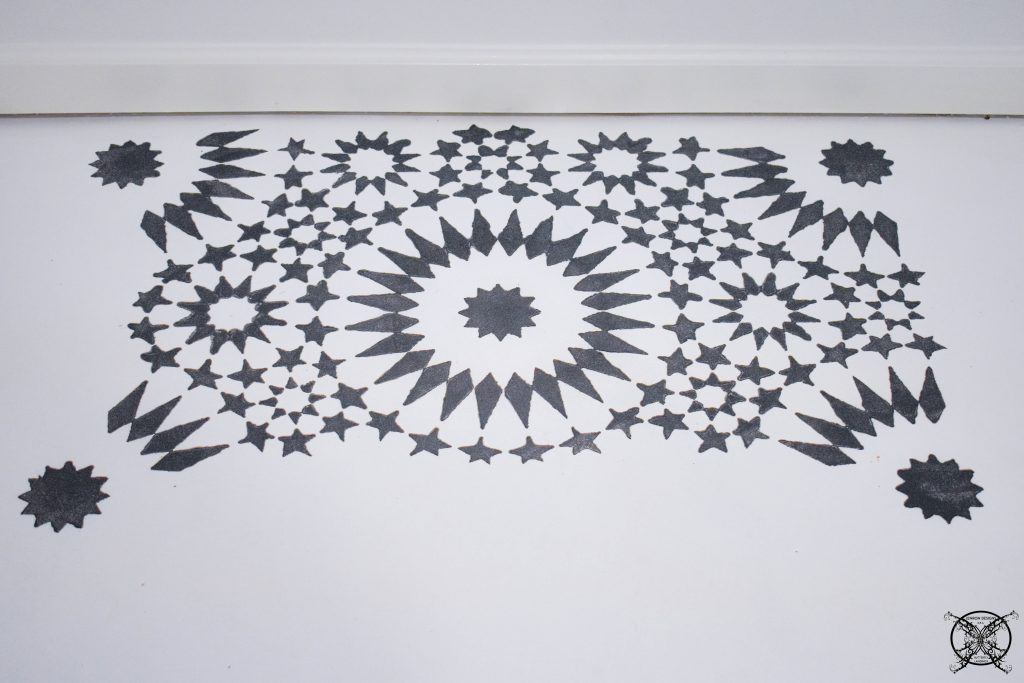 Now it kind of looks as if I have a rug runner in the middle of the hallway. You can see I added a box fan to speed up the drying process, since it is a floor, and we do have a few cats that might be wandering about. Talk about a huge mess, right? No seriously we put them upstairs, the fan was really just for us.
 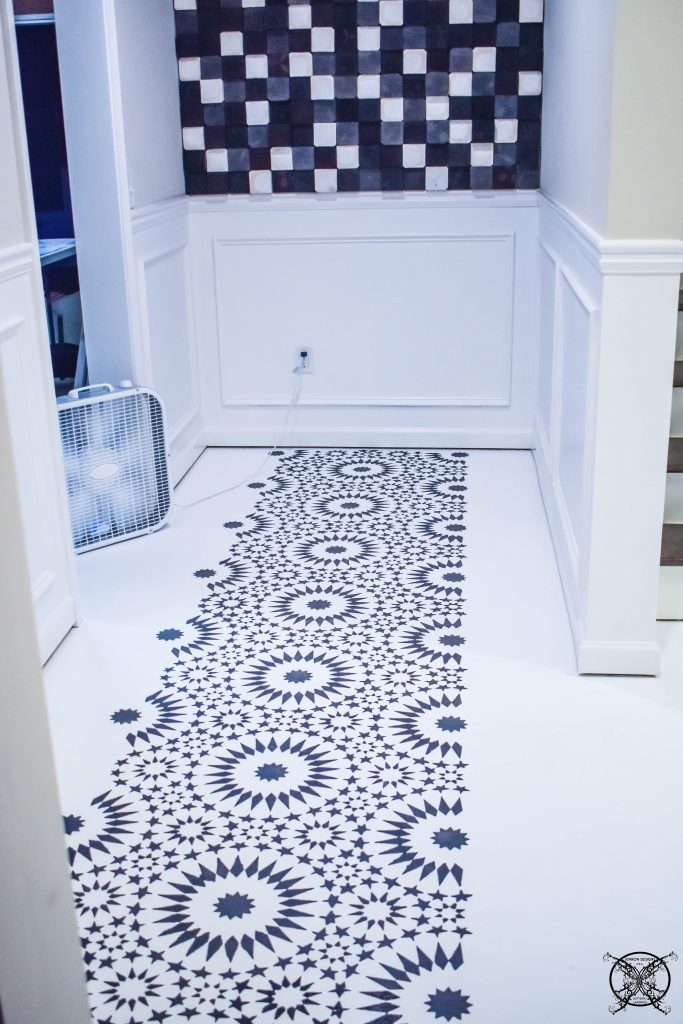 However you might notice that we did install a sculptural art wall in that two week break as well. Here is the link to my Sculptural Art wall in case you missed that fun DIY post.
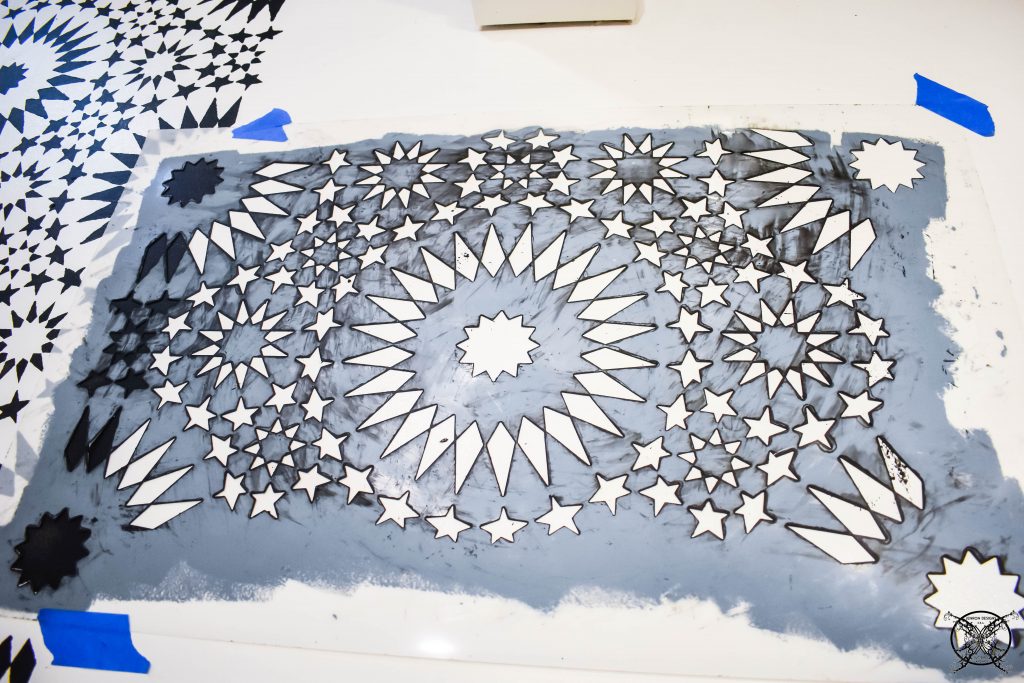 As we make our way around the corner into the rest of the hallway you will notice how the stencil lines up on the previous parts of the painted floor to create the pattern. As a tip, make sure to wipe off the back of your stencil each time you use it to prevent any accidental transferring of unwanted paint.
 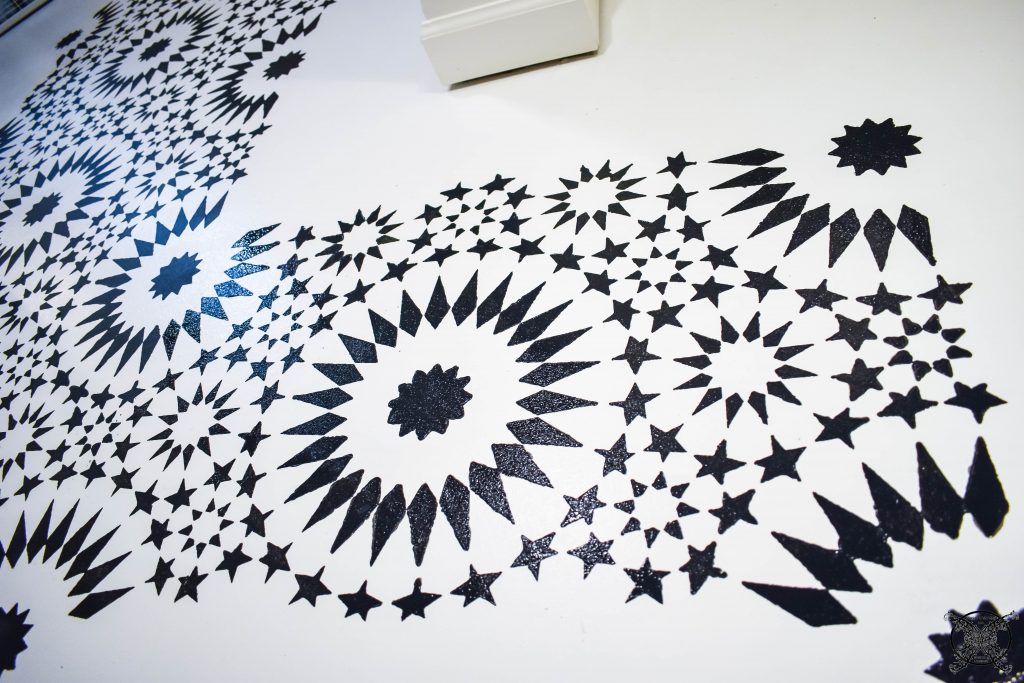 Also each stencil set comes with an edge and ceiling border to get close to the edges and ceiling areas once the main surface area is dry.
  You can also go back after the fact with your base color and clean up and edges that might have slight feathering or bleeding. This will give you a very stark finish look for your space.
 The the last steps will be installing some quarter round and staging this space with some fun artwork and furniture that does not overcrowd this pass though area, because at the end of day the floor and wall are really the statement pieces here.
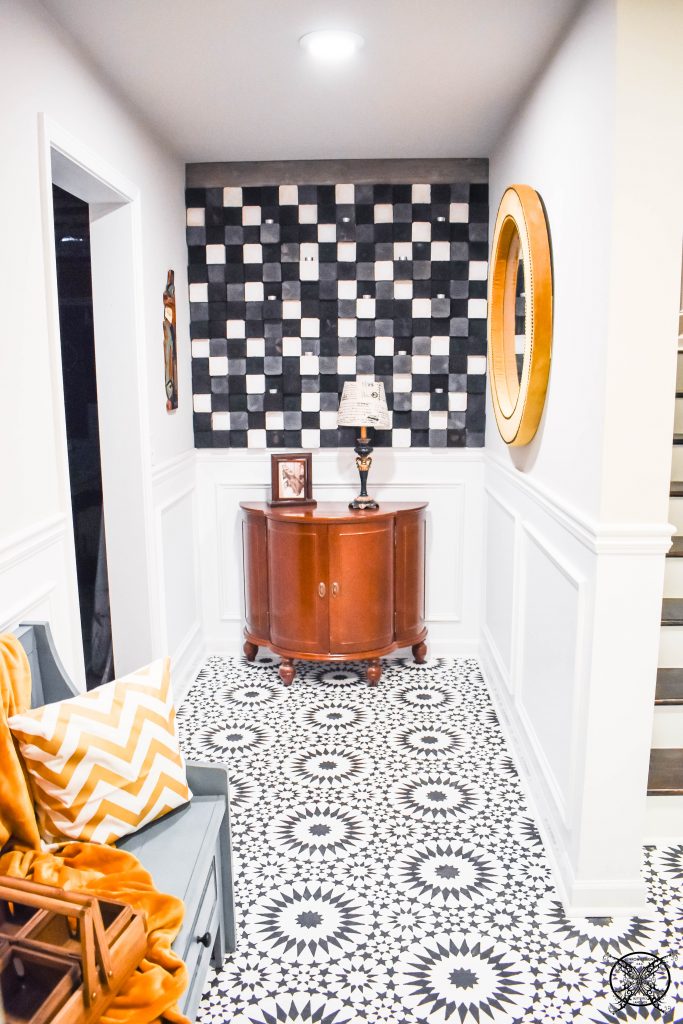 The final reveal is everything I had hoped for in this space. The quarter round really finishes off the floor and all of the projects have come together to make this a nice pass through space filled with visual interest.
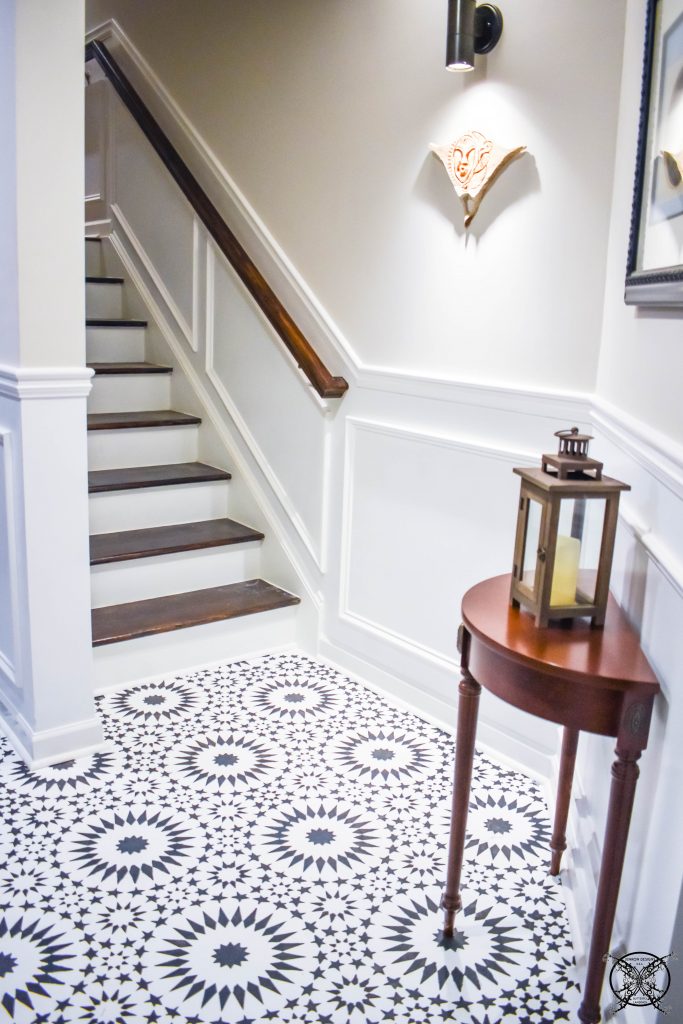
Check out my other favorite Farmhouse Stencils below perfect for tile floors or walls like I have created in this post. Also be sure check for the latest saving events always listed on my Shop My Style page, linked here.

PIN ME for later and be sure to follow us on Pinterest at Jen @ JENRON DESIGNS
Wow this looks amazing! I thought it was some super fancy tile but it looks so doable by yourself.
OMG the result is gorgeous! I cant’ even believe is a stencil, love it
Wow I am seeing this floor stenciling everywhere and yours is one of the best yet!! I am so not brave enough to try though, lol.
That pattern looks so cool!
This is perfect. I couldn’t imagine how much money can you save by just doing a DIY stencil floor project. And I like how white/color brightens the room, then matched with dark accent floor. Love it.
I absolutely love the final look, the floor design is amazing! it’s very elegant and fun!
It is perfect for a basement with concrete floors, which the builders suggested that we not tile ever since they would crack eventually due to settling. We plan to do hardwood floors eventually but since the rest of the basement is not finished yet it makes sense to paint the floor in the interim then install the hardwood all at the same time for dye lot matching.
This is such an effective technique! I have really boring floor tiles in my kitchen at the moment, so I might try stenciling them. Thank you for the inspiration.
This technique is perfect for a tile floor, just select a stencil that is a similar tile size and voila a whole new look!
Oh my gosh, gorgeous. I so need to do this. I love the different designs.
I love how easy this looks to recreate on any floor. The stencil trend is beautiful.
I love this look so much! So much easier than laying tile for sure. Thank you for this DIY tutorial.
Oh wow this is amazing! I cannot believe your stenciled this in. Looks like fancy tile work.