ORC Building A Barn Door & Reveal
Welcome to the ORC Building A Barn Door & Reveal. I have to say it has been a long 8 weeks, and wow what a ride it has been, but we have arrived. This week follow along as we build a barn door DIY style and finish up this space.
Welcome to week 8, the ORC Building A Barn Door & Reveal. This season not only did we build an entire room from scratch, we also finished it out completely in this One Room Challenge, with the exception the ceiling and HVAC. These items will be a part of the bigger picture of the basement completion, all coming soon. I have to say this season has been one of the most challenging seasons to date, as far a schedules go. This is why we are super proud of the fact that we finished strong, even though this project was actually completed back in May by our original One Room Challenge timeline. It is so hard for me to keep secrets like this one, so there were a few slips on my Instagram account that show the completion and peeks back then.
WEEKS AT A GLANCE:
WEEK 1 WEEK 2 WEEK 3 WEEK 4 WEEK 5/6 WEEK 7 REVEAL
Just in case you maybe wondering exactly what The One Room Challenge is, here is the link, and the scoop. This event was started by Linda Weinstein @ Calling It Home and is hosted twice a year, in April and October for the past 15 seasons. The ORC has hosted over 500 interior designers & home decor bloggers, that have joined together in this challenge to makeover one room in their own homes. The participants normally have a total of six weeks, from start to finish, this season will be eight weeks to complete a full room transformation. Over 3,800 rooms have been transformed through the One Room Challenge to date, and many spaces have been recognized and featured by several prestigious sites, such as Better Homes and Gardens.

THE PROPOSED SCHEDULE:
WEEK 1: Introduction & Inspirations
WEEK 2: BLUEPRINTS: Figuring up the amount of supplies needed for all DIY builds
WEEK 3: Building Walls Pulling Wire & Running Electrical
WEEK 4: Insulating & Adding Brick Panels
WEEK 5: Cancelled by ORC
WEEK 6: The German Schmear
WEEK 7:Painting the Floor
WEEK 8: Casing Trim Out, Barn Door & REVEAL
THE BEFORE PICTURES:
Just a quick look back at where we started, which was a complete blank slate. No wall, and a wide open space with no divisions or spaces for rooms. Keep in mind this is one section of our basement, it continues directly to the left of this photo which is Ron’s wood shop area and our holiday storage space.
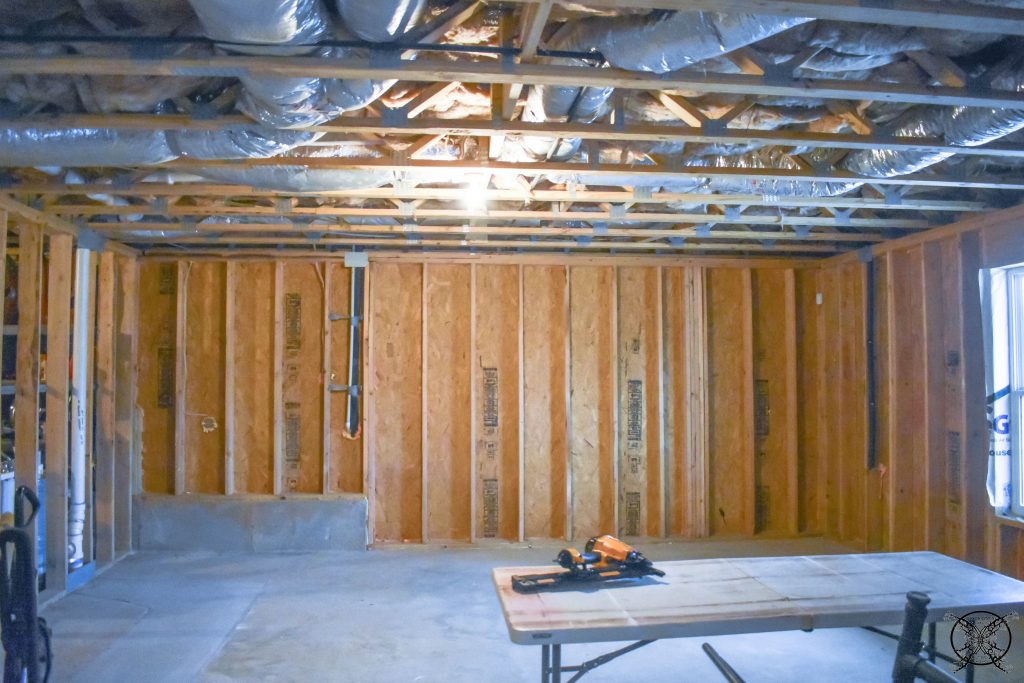 It also extends about 3 times further along this back wall as well, meaning we have 3 more sections just like this with windows, that are still waiting to be finished out. So this project is just the tip of the iceberg, so to speak.
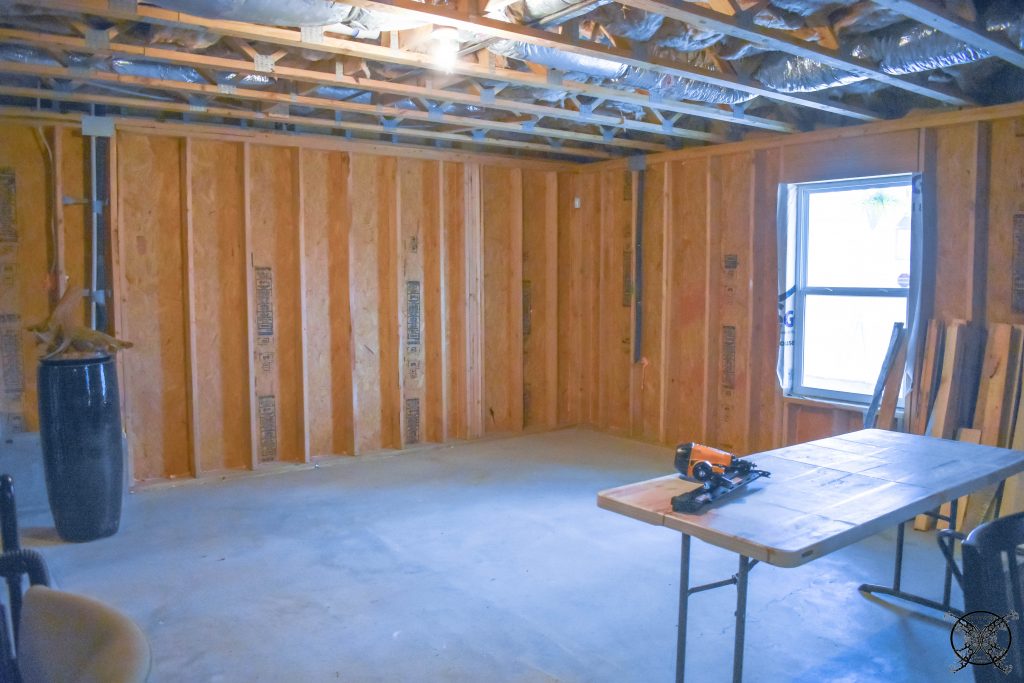
Parts of The Process:
For this space we added walls, faux brick panels and German Schmear technique. Then we sealed and painted the concrete floor and decided to a fun stencil pattern for esthetic purposes. 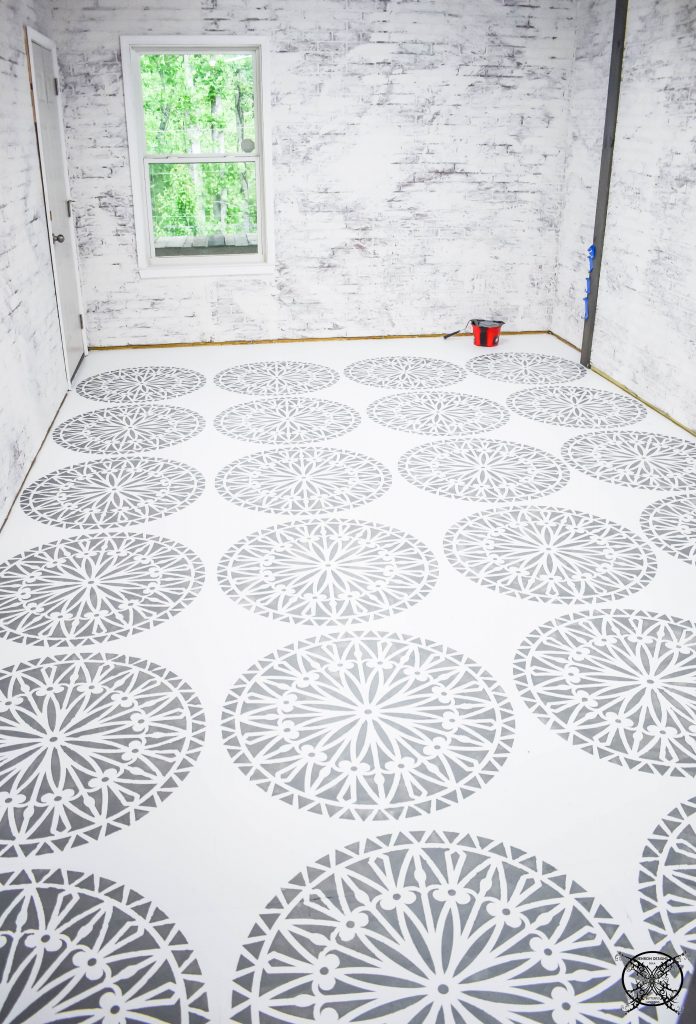
This week of the ORC Building A Barn Door we are showing the full DIY on how to build a sliding barn door from scratch. Follow along as we show you how to build a double wide barn door completely DIY style. It is hard to believe that we only have one more week left before the grand reveal, but these 8 weeks have really flown by.
Building a Barn Wood Door:
I think we have decided that we will always build our our barn doors or sliding doors going forward. This epiphany came to use after building siding window shutters for our master bedroom last year, which were similar to a barn door. Once we realized how easy they were to build from any kind of lumber, we knew that we would never go back to pre-built or purchased barn doors.
 Here we have literally laid out leftover shiplap from a ceiling project provided by UFP EDGE, on the floor to determine if we had enough to make a double wide barn door for this space. We ended up putting the boards on the vertical to make a picket fence style of back, then used the traditional V cross members to stabilize the pieces.
 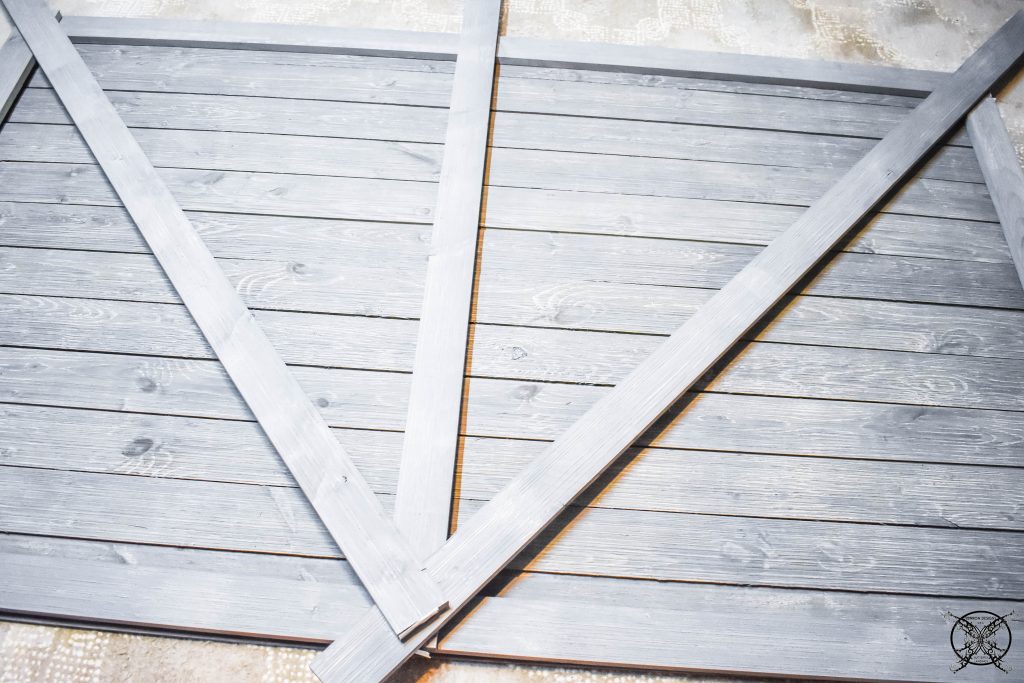 For fun, as it was laying on the floor I took a picture this direction as well since it would also make a pretty nifty headboard, for a King sized bed as well, just saying. You may or may not see this again somewhere, or maybe it will inspire you to make a head board instead of a door, either way, you are welcome!
 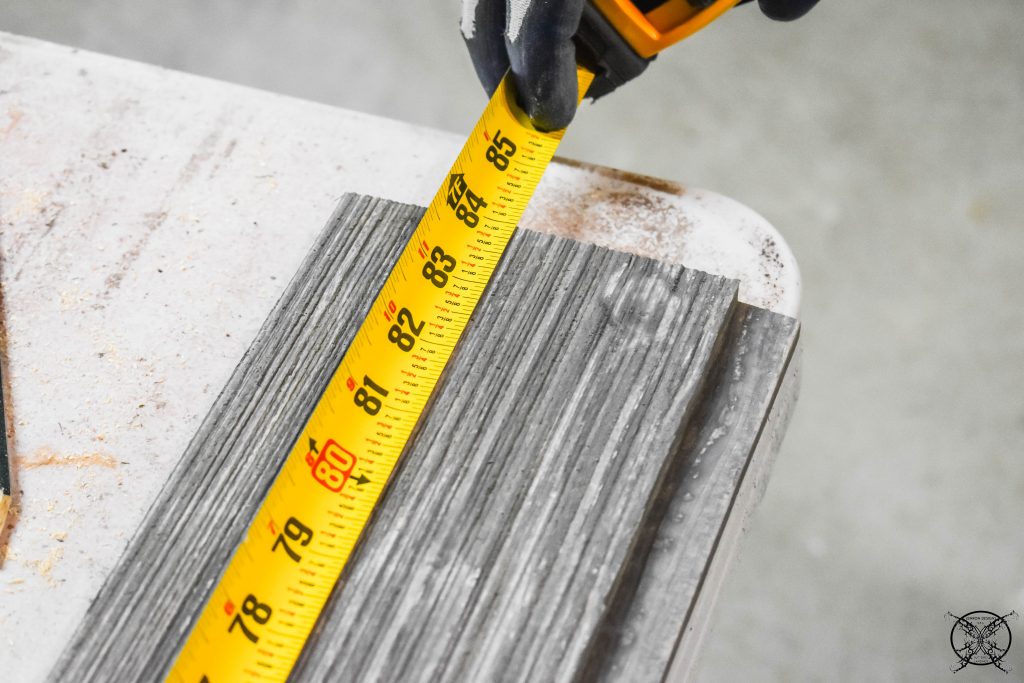 We need to trim the length of the board down to our overall finished height of 84″ tall. This is the height the door will be hung at when mounted to the slide rail.
 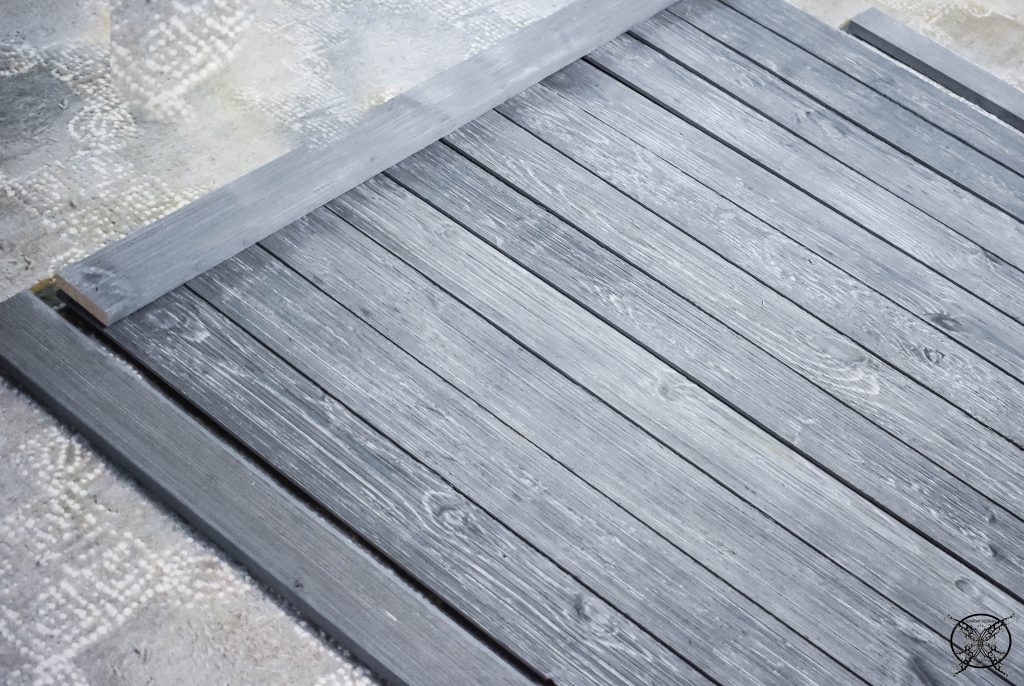 Then we attached the frame work to the pickets, to make the shiplap boards a solid piece. We also used cross beams to hold the pickets in place through the middle as well. This was done with a brad nailer attachment for our nail gun.
 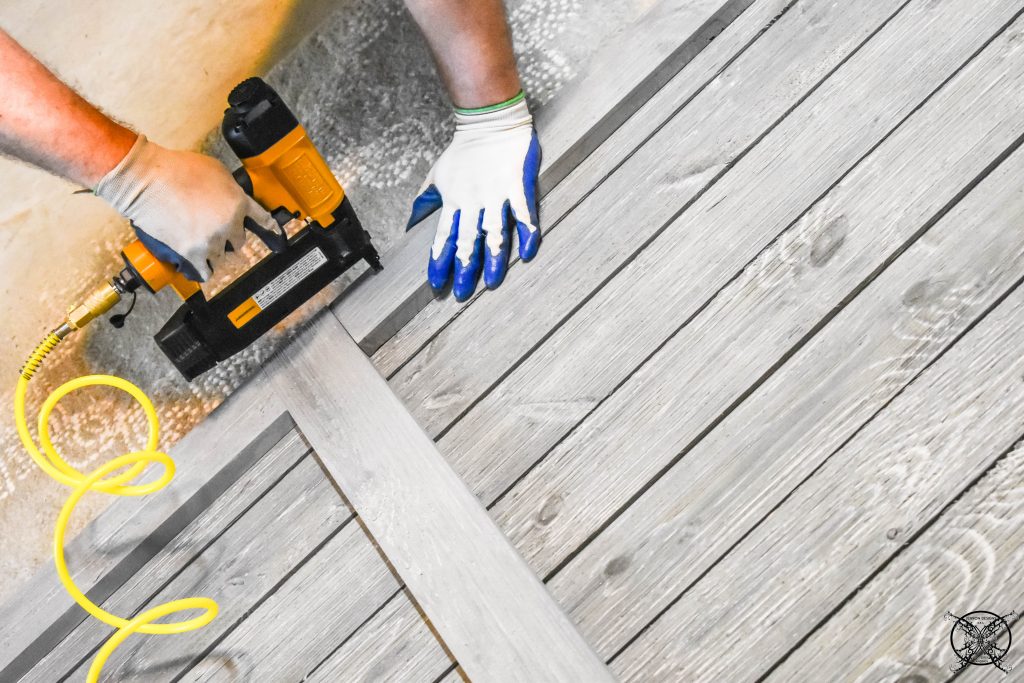 To find the angles of the cross beams on the V we laid the boards on top of the frames and lightly sketched the angle of the corners to be cut. This was done with a handheld circular saw, mainly for ease in cutting the odd angles. Then these boards were attached with the brad nailer.
  Voila, the finished barn door, now we just are waiting for the slide rail and hardware, which was ordered online as a kit. Basically you can turn any kind of door into a sliding barn door style door with a slider kit.
 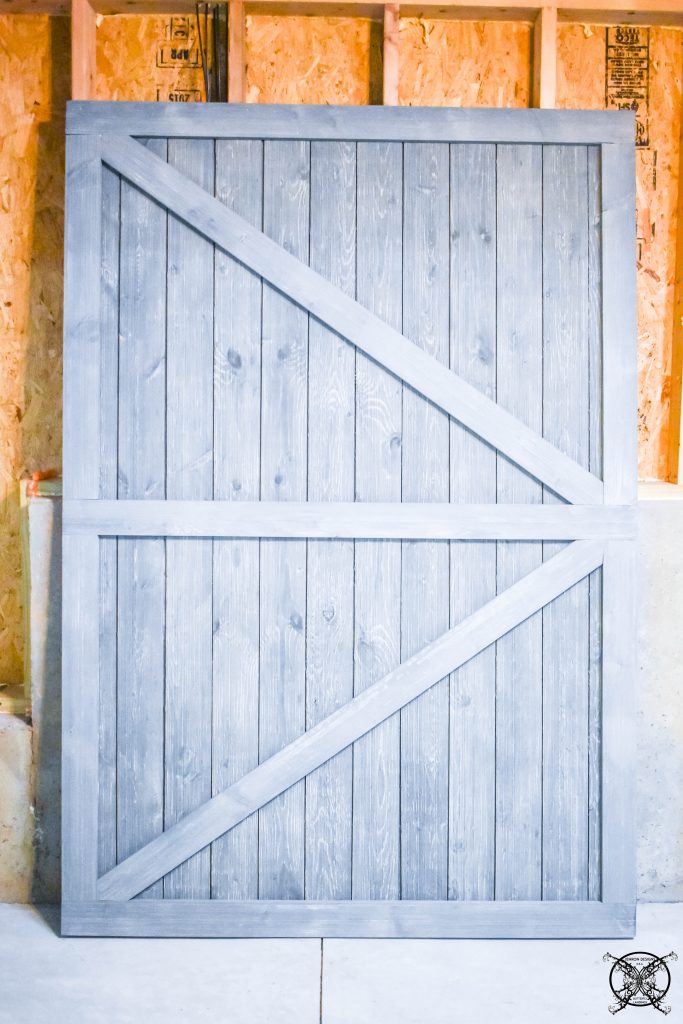 Once the rail kit arrived we installed the mounting hardware to the door and the wall. We used one extra piece of shiplap which we removed the lipped edge from to make a mounting board. Then sistered the two boards together to get the right length for the 110″ rail.
 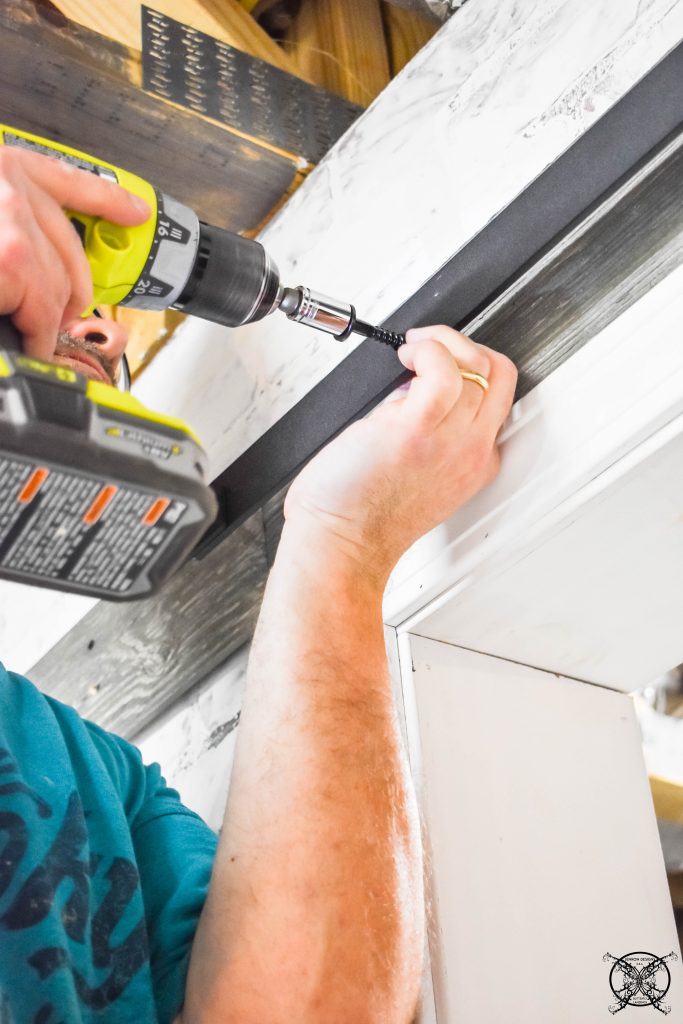 The rail was an easy mount system, and was very quick to install. The only thing you want to make sure that you do is that you are are drilling into the studs, since it will be holding the weigh of your door. Once the track is in place you just simply set you door onto the rail and it is done. Then you can set you stop point sliders for soft close points at doorways and your open points.
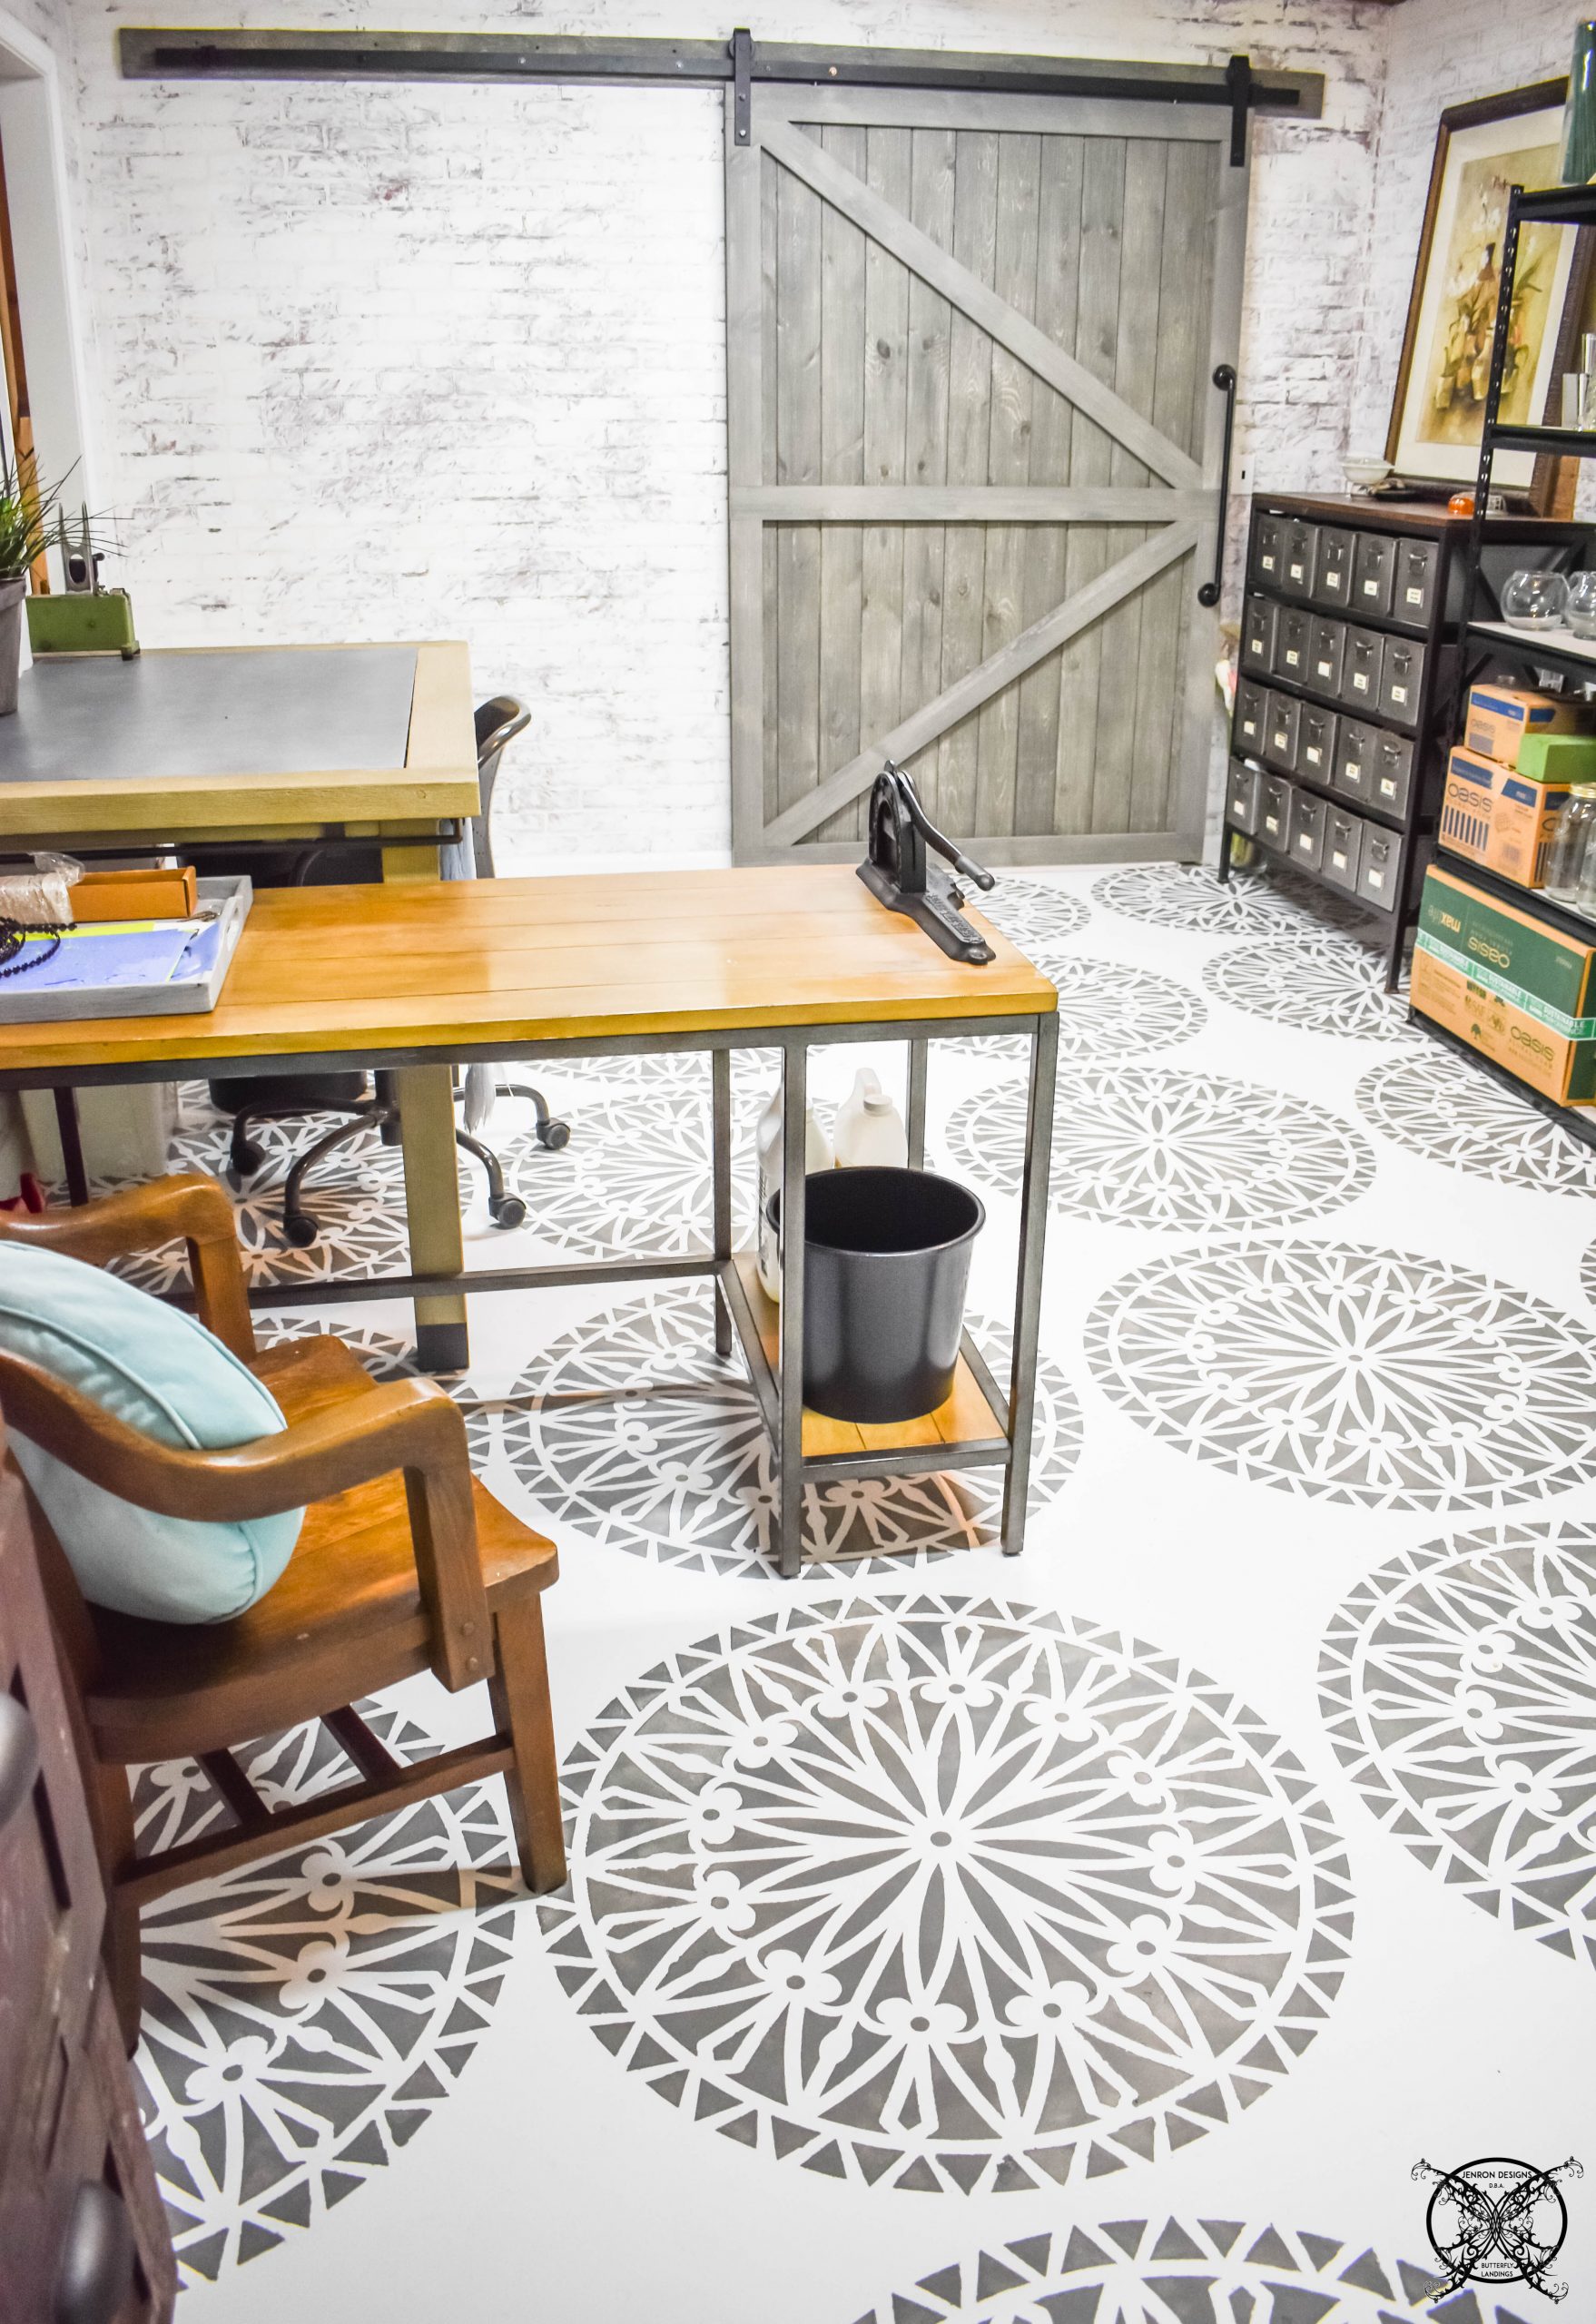
 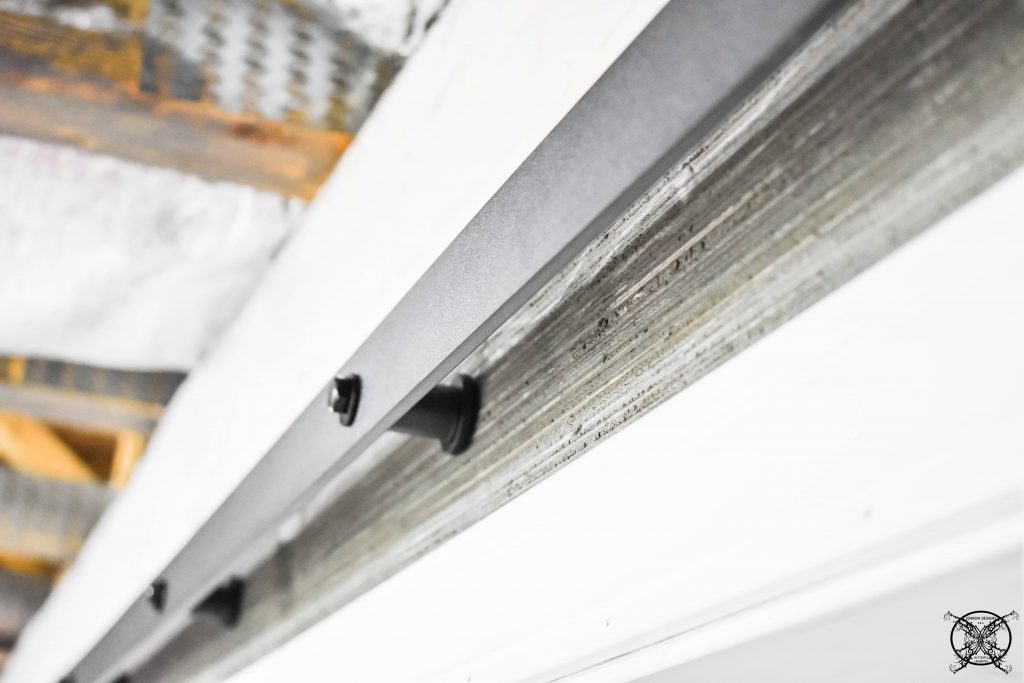 This is what the finishes product looks like completely hung in the room. However a quick note, we added the door pull ourselves. I wanted a handle with a little more heft like iron pipe, but I did not want to use the weight of iron pipe, so I found a towel bar made to replicate iron pipe in a 24″ size. We mounted it on the vertical to create a door pull. Since it is a towel bar it is waterproof and will not rust like the real iron pipe has a tendency to do, because I learned this on my screened porches.
 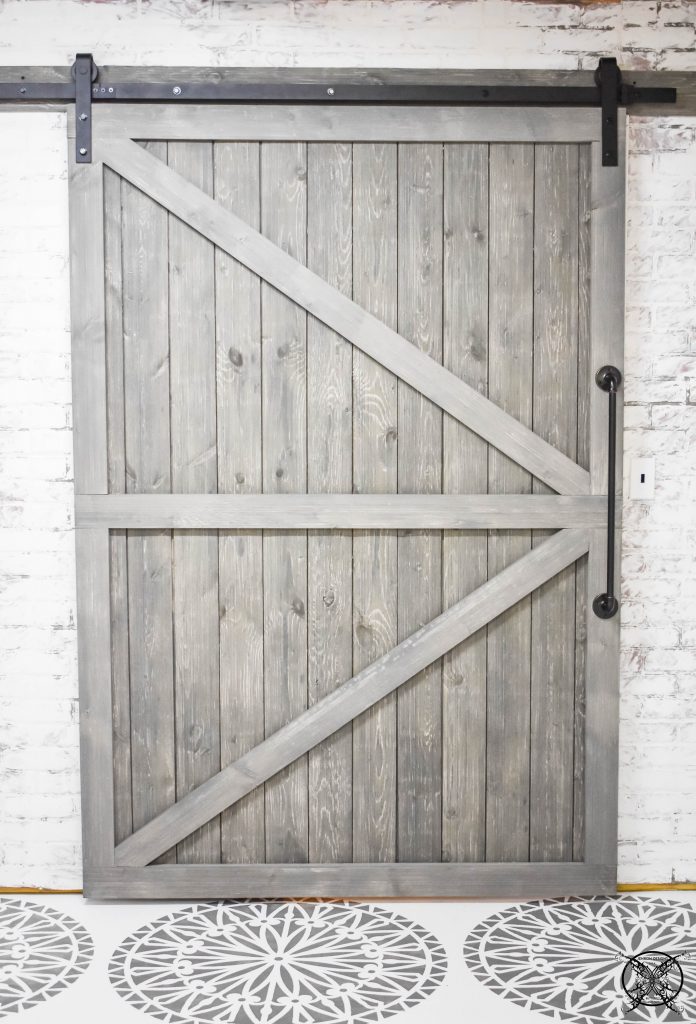 Well, we got everything on the to-do-list done. So now it is time to show you the entire room now that it is finished. Since I did have to combine two weeks together, I decided the DIY tutorial was way more important than how I accessorized the space, because let’s face it we all know how to shop. As long as I call out my sources, which I always do to make it easy for you guys, I do not really feel like I need to explain my particular design choices for this space in depth at this point.
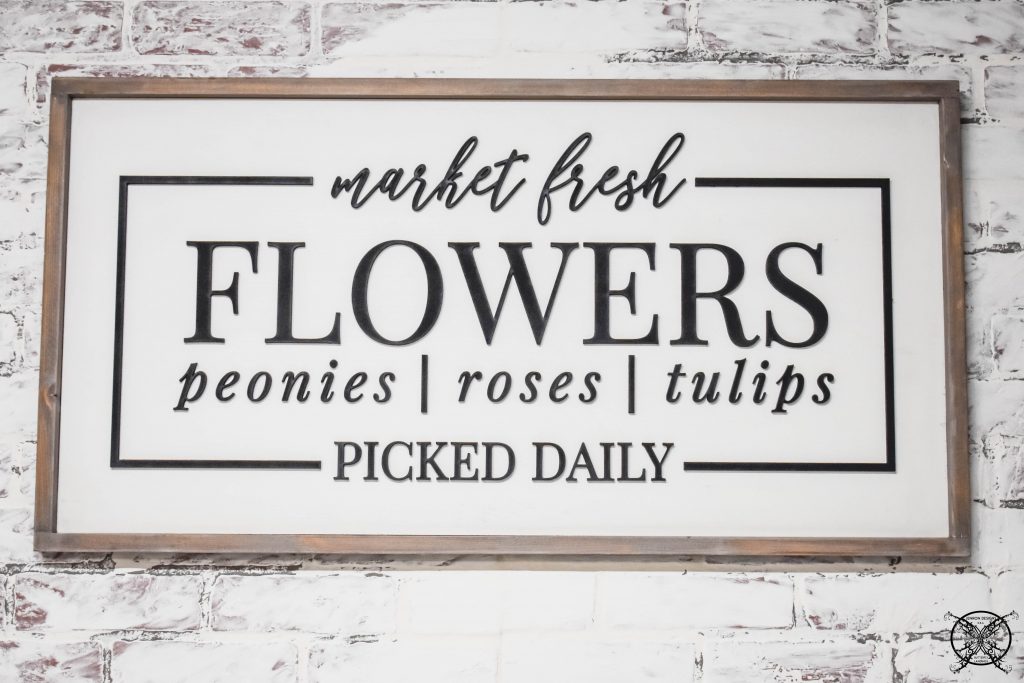 So without further a due, here is the reveal of my new Flower Shop & Craft Room, located in a section of our basement. Since this area houses all of my glassware, ribbon and supplies for events and weddings I needed a lot of storage space.
  This found Industrial Cabinet from Arhuas has been with me for almost 8 years, and is one of my treasured pieces. You will notice that I have a tendency toward older upcycled pieces in my space.
 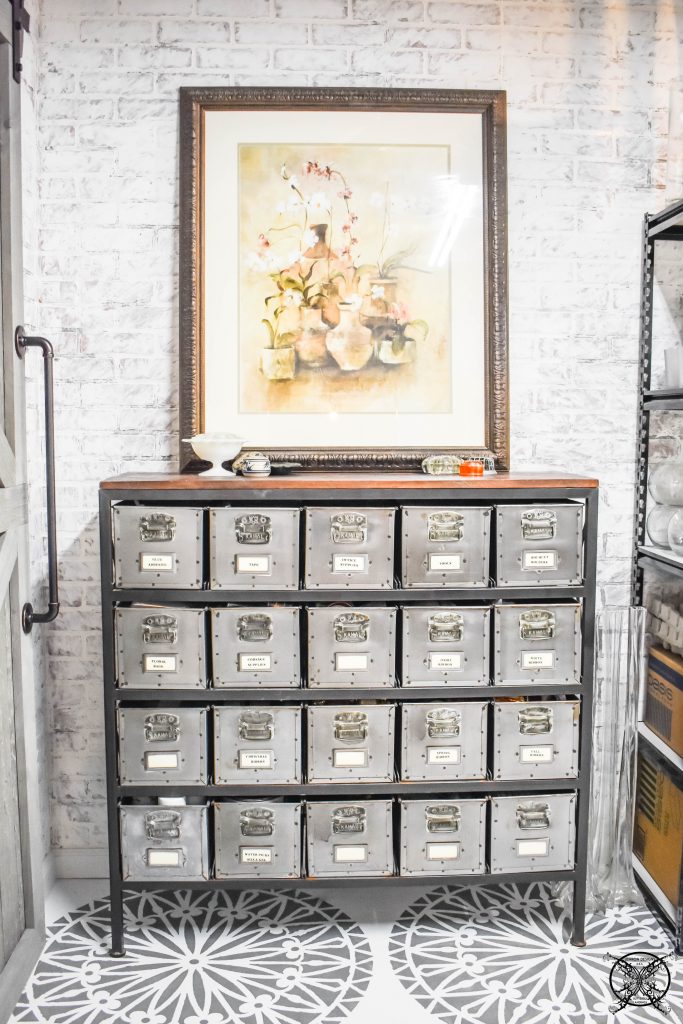 This piece gives me a ton of storage for all the smaller pieces and the ability to label each of the drawers. It reminds me very much of the card catalogues, but it has the durability of metal drawers giving the industrial look that I just love.
This old file cabinet is another example of found pieces that we upcycled. We obtained these pretty file drawers last fall at Seventh Street Salvage. By looking at them we could tell that they used to be stacked, maybe as an old doctors office file cabinet during the 1800’s. They just need some love, so we added a new base with legs and handles. This allowed us to turn these pretty $35 boxes into my ribbon cabinet.
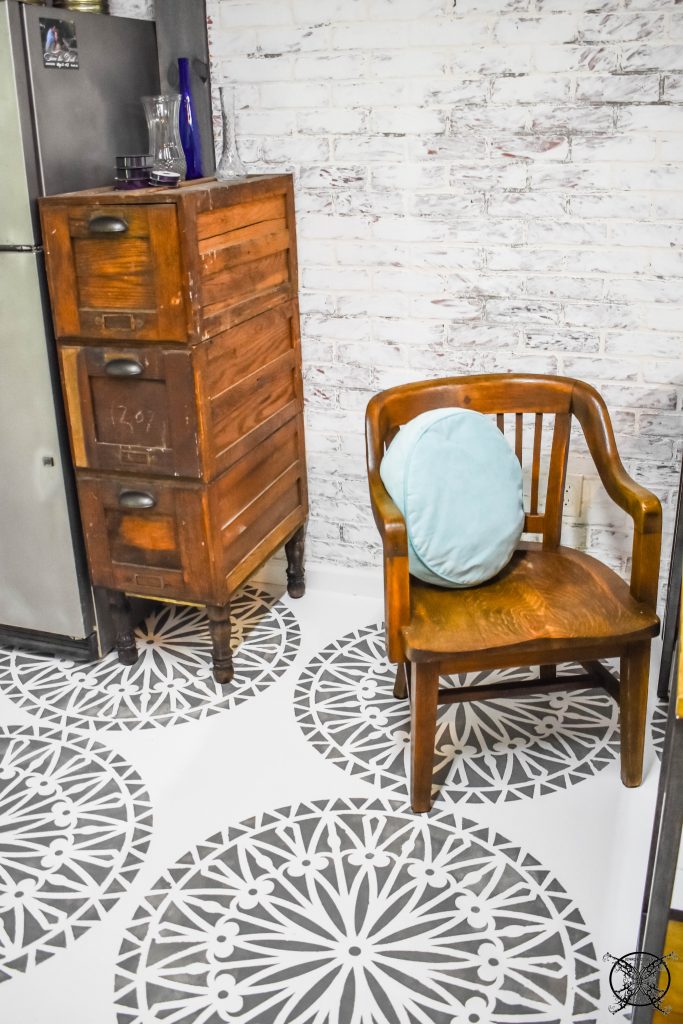 The chair was a $10 antiquing find and made by Globe Wernicke around the early 1900’s. It appears to be a jury chair with the Georgia state emblem removed from the back, since you can clearly see the shape of the state and where it was originally mounted. I did do a little light refinishing to this piece just to clean it up a bit, since it was sitting outside when I found it, but over all it is in great shape.
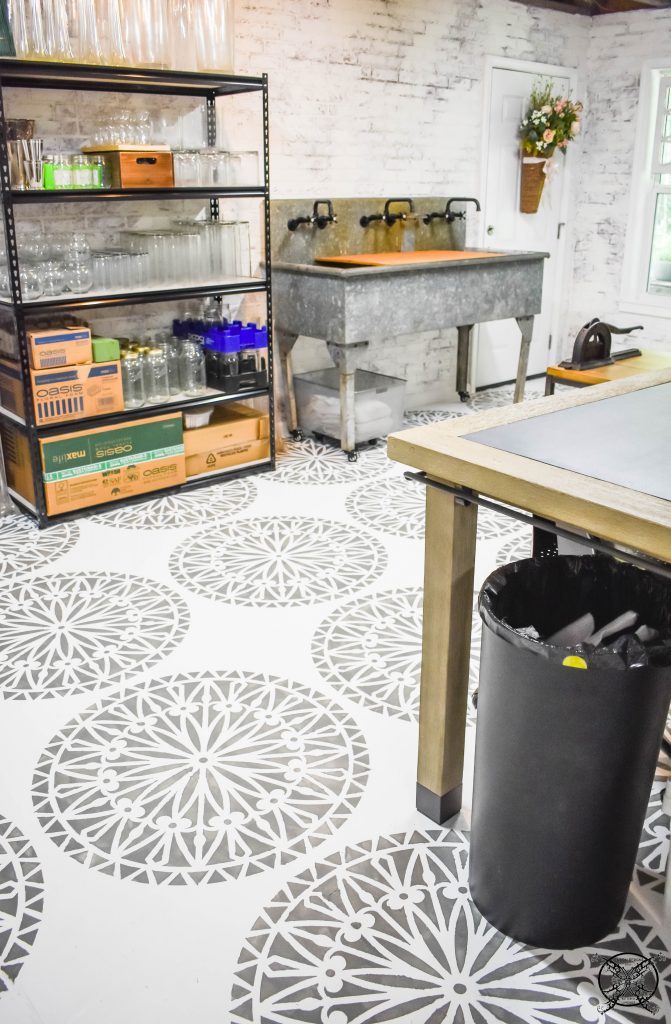 One of the other large pieces that has finally been given a proper home is my antique farmhouse sink. This was a find at the ScreenDoor in Asheville, NC several years ago. This is as sturdy as they come and weighs a ton, literally. For that reason we reinforced the legs and added castors for easy moving, along with a quick release plumbing set up similar to that of a washing machine connection on the back, for added versatility.
 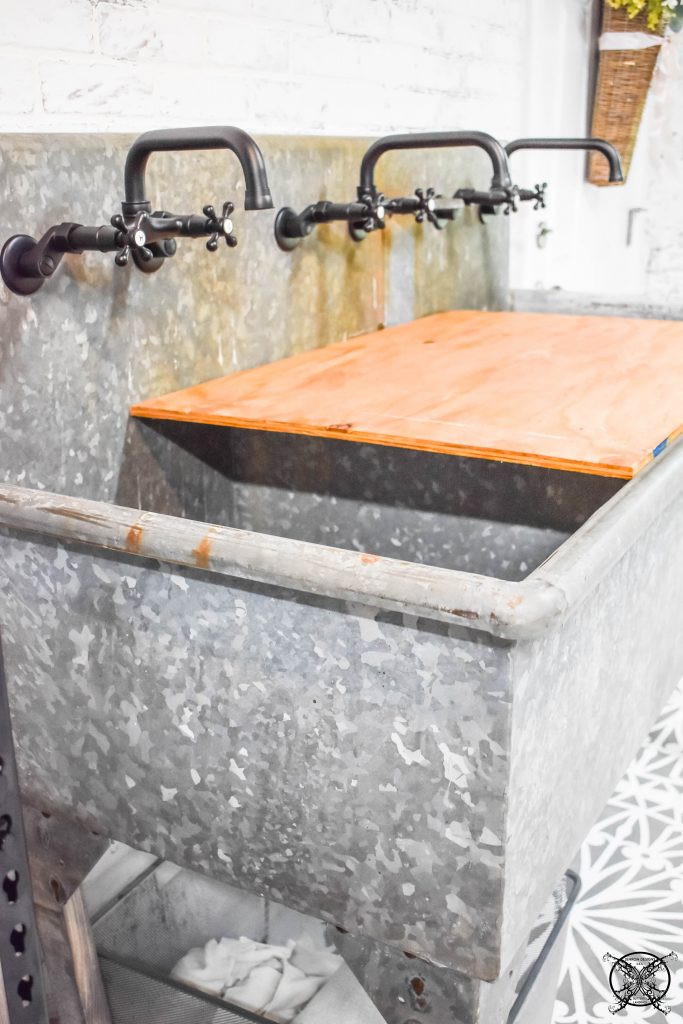 We also added on these great new facets along with this removable rustic cutting board for flower or craft work over the sink. This cutting board allows me to have a removable work surface on two bays of the sink and still have a faucet in use. When I work with flowers I can fill all 3 bays up and let my flowers hydrate and drink for 24 hours prior to working with them.
 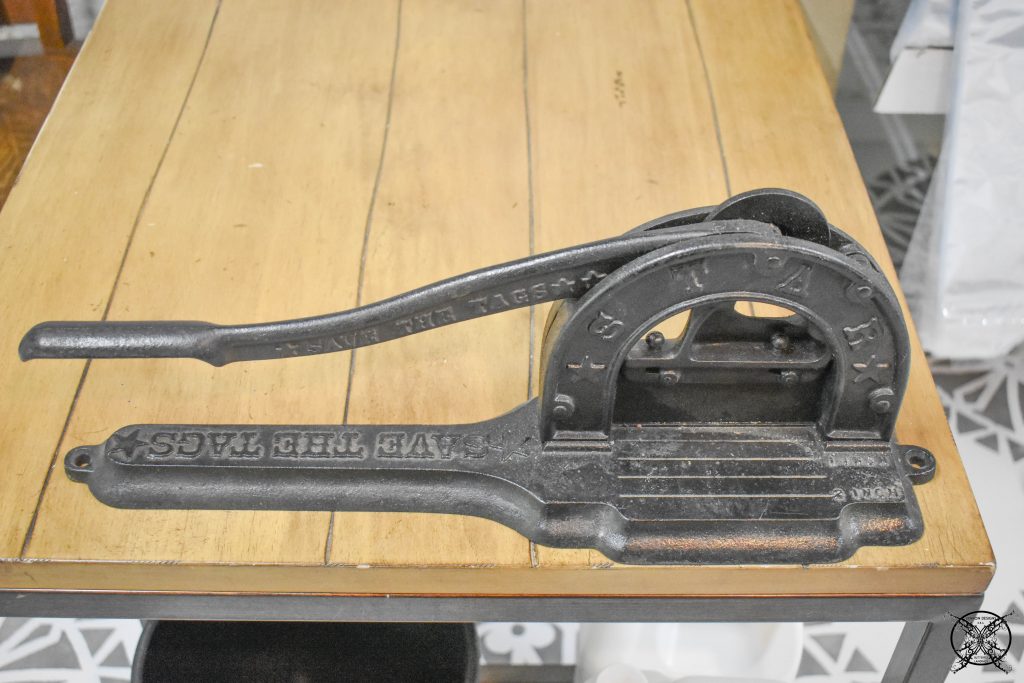 Just a few more fun antiques that are still useable today, above is a stem cutter. I found this antique cast iron gem while in Texas last fall for Silobrations and knew it was perfect for my flower shop, it just needed the blade to be sharpened. Below you can see my antique pick machine, which I have had for almost 20 years. It was one the first things I bought when I started my company. It was clearly second hand, but I love it, and it feels like it belongs in an old school flower shop.
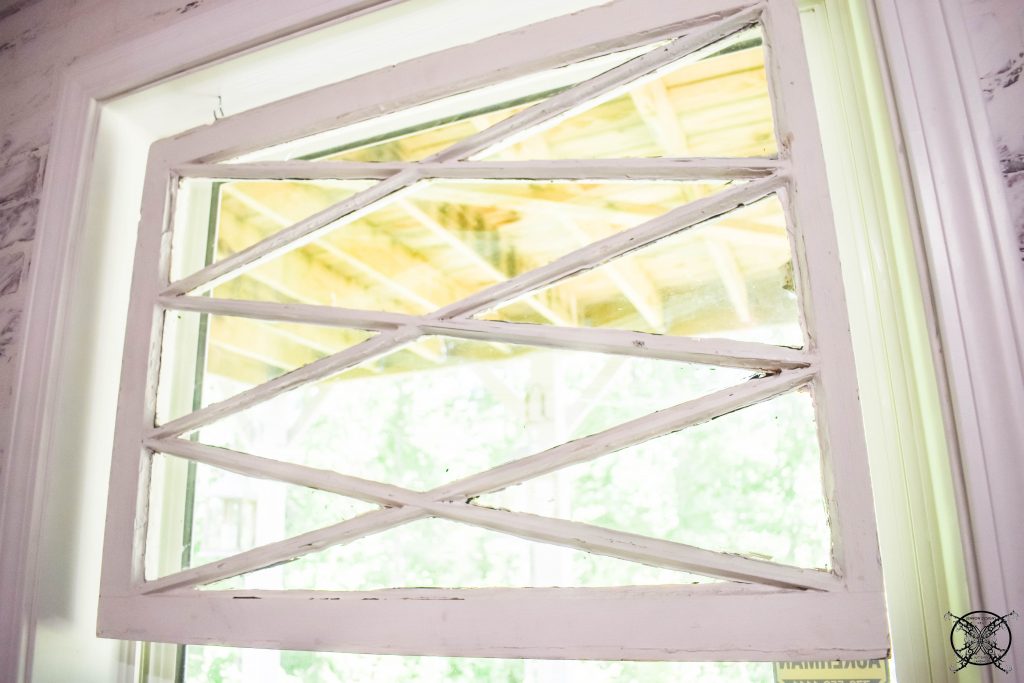
 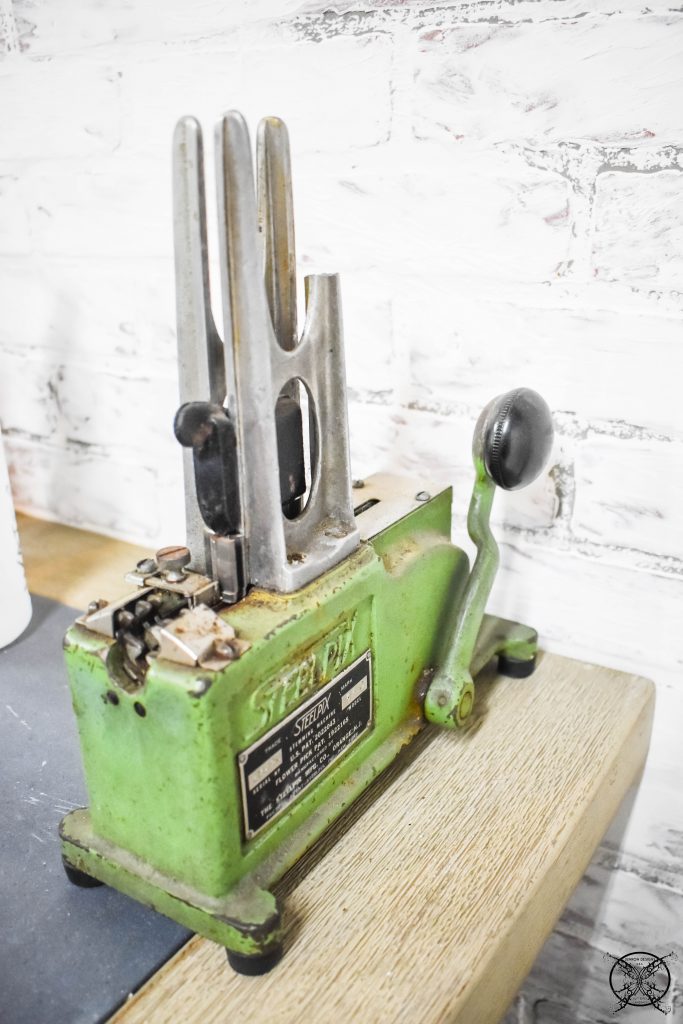 Finally, I can share this pretty antique water glass window that I picked up last fall while antiquing around Peachtree City. I knew that I loved this old window and it would hang somewhere in my home, at the time I just did not know where. My shop is the perfect spot since the windows always stay open to allow natural light into the room. This has become the new window treatment for this window.
How beautiful, how wonderful, I really like the end result and the effect it makes. ^_^
Omg, the transformation is incredible. I need to renovate my studio apartment and I didn’t have a style but I guess finding this blog is great help as it is a starting point. Thanks for this great post
This is amazing work! You have worked so far & put so much efforts and time! Thank you for sharing the details and the pictures! WTG
Beautiful work! I am always baffled at the creativity and craftsmanship in this kind of work.
The transformation is just wonderful and I am in love with the pattern on the floor. Great job
Absolutely gorgeous (as usual) … love your style!
Awesome transformation….keep it up.
Gorgeous finished product for all of your planning and execution! I love how congruently vintage and rustic it looks!
The before and after is incredible. I love this room.
I’ve loved the other rooms you’ve done, but this one is my absolute favorite. I can just see it with flowers in vases all around. It’s an amazing transformation of the space. Can you please come and work on my house?
Oh my gosh I just love this! Great job! The wall and floor treatment to those wonderful antiques, everything is just perfect!
What a fantastic space….so bright and beautiful! I especially love your ribbon cabinet and the farmhouse sink. I’m sure you will put this space to good use! I’ve enjoyed following along with your progress:)
Great design..very well done
Looks so aesthetic and I love those drawers.
The barn door came out so nice and the floor is amazing!
Oh, I so much like the floor design, so appealing. I must comment you are doing an awesome job, you made a plan and you are working on it.
I just adore how this turned out! The floors, that door and all the finishing touches are amazing! Congrats my friend!
Wow Jen! What a fantastic space! The stenciled floor, the barn door, the german schmear…incredible job!
Thanks for sharing this precious information with us, this is really helpful for me and also for my upcoming project as well. I hope you add some more things like this in future as well. Thank you once again for sharing your valuable knowledge.
I read many of your cool blog posts, this one is very good. Totally useful a great DIY. Thanks for sharing.