Creating a Textural Wood Art Wall
Today we are sharing a fun DIY on Creating a Textural Wood Art Wall for our hallway.
As many of you know we have been working on the basement and finishing out many of the areas that were not currently finished. The hallway which leads into our basement area was semi finished when we moved in, meaning it had some sheet rock. Although, not the best looking sheet rock I have ever seen in my lifetime, so it was going to need a lot of love to get it anywhere near being a finished space. We decided on adding Wainscot panels below a common chair rail and Creating a Textural Wood Art Wall at the top of the end wall would be a nice focal piece in this area.
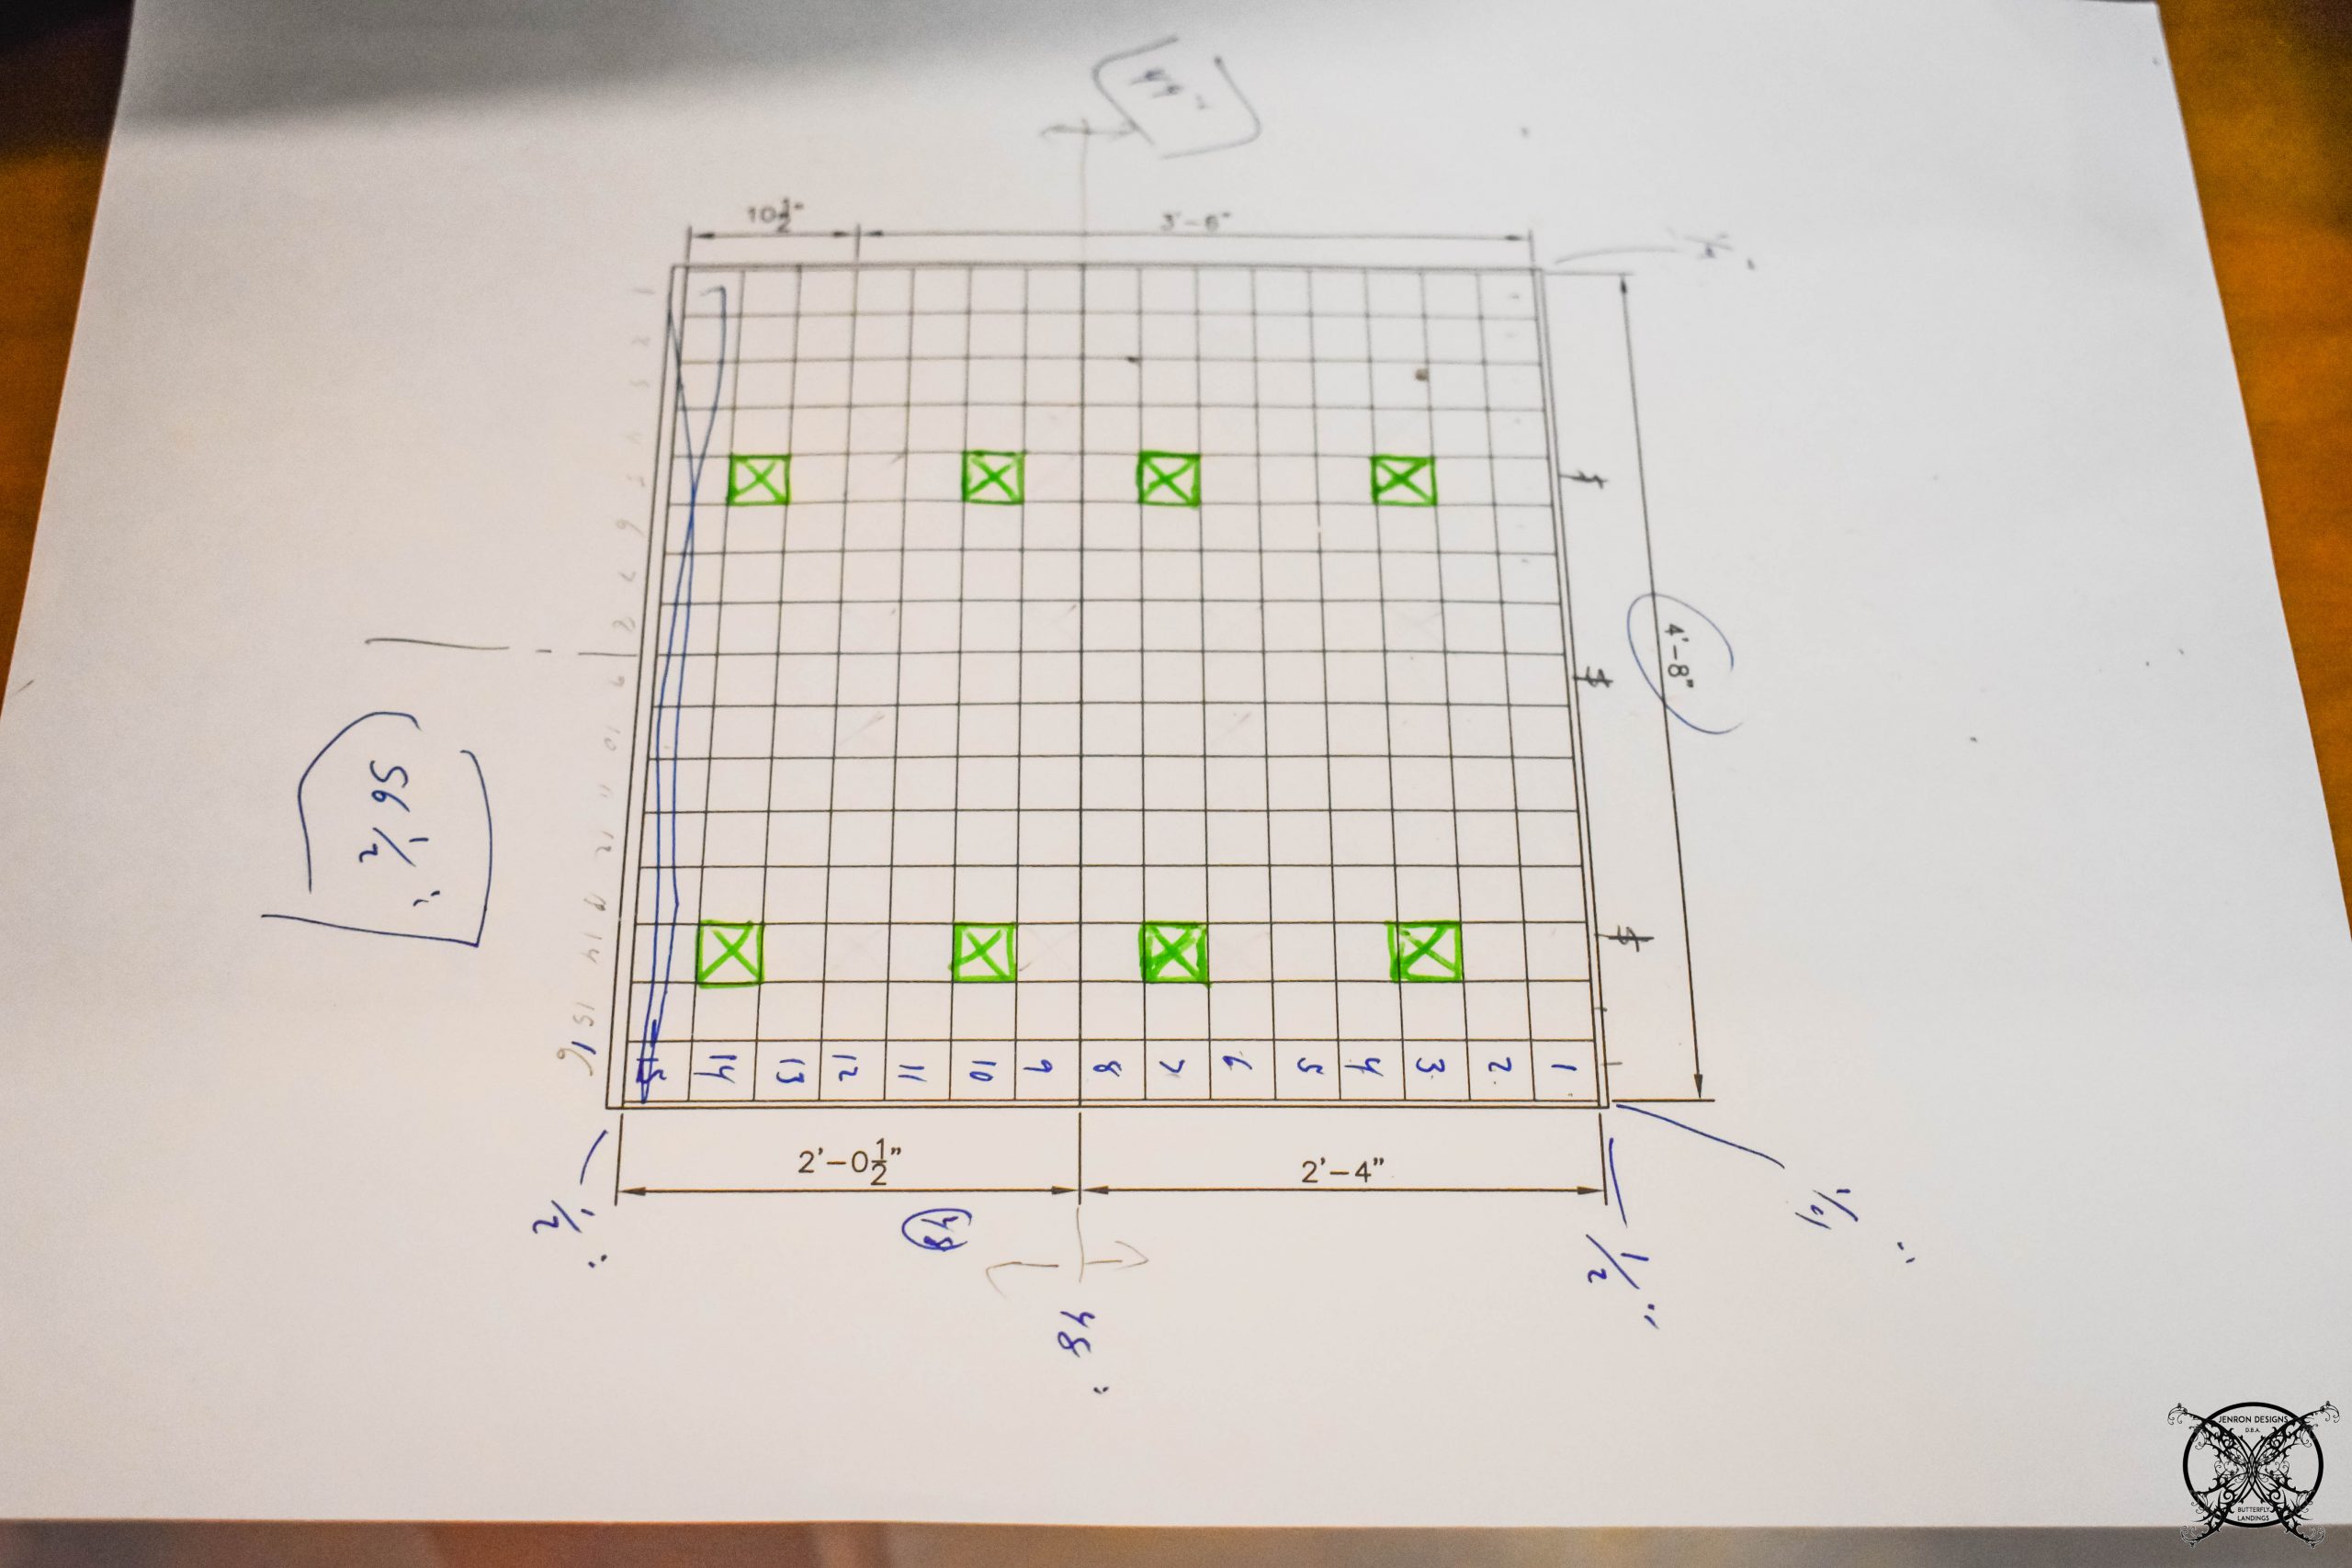 As with any good design it is always good to start with a blueprint. This project is no exception considering we have 4 sizes of blocks and 4 colors to create a randomized pattern in a specific space.
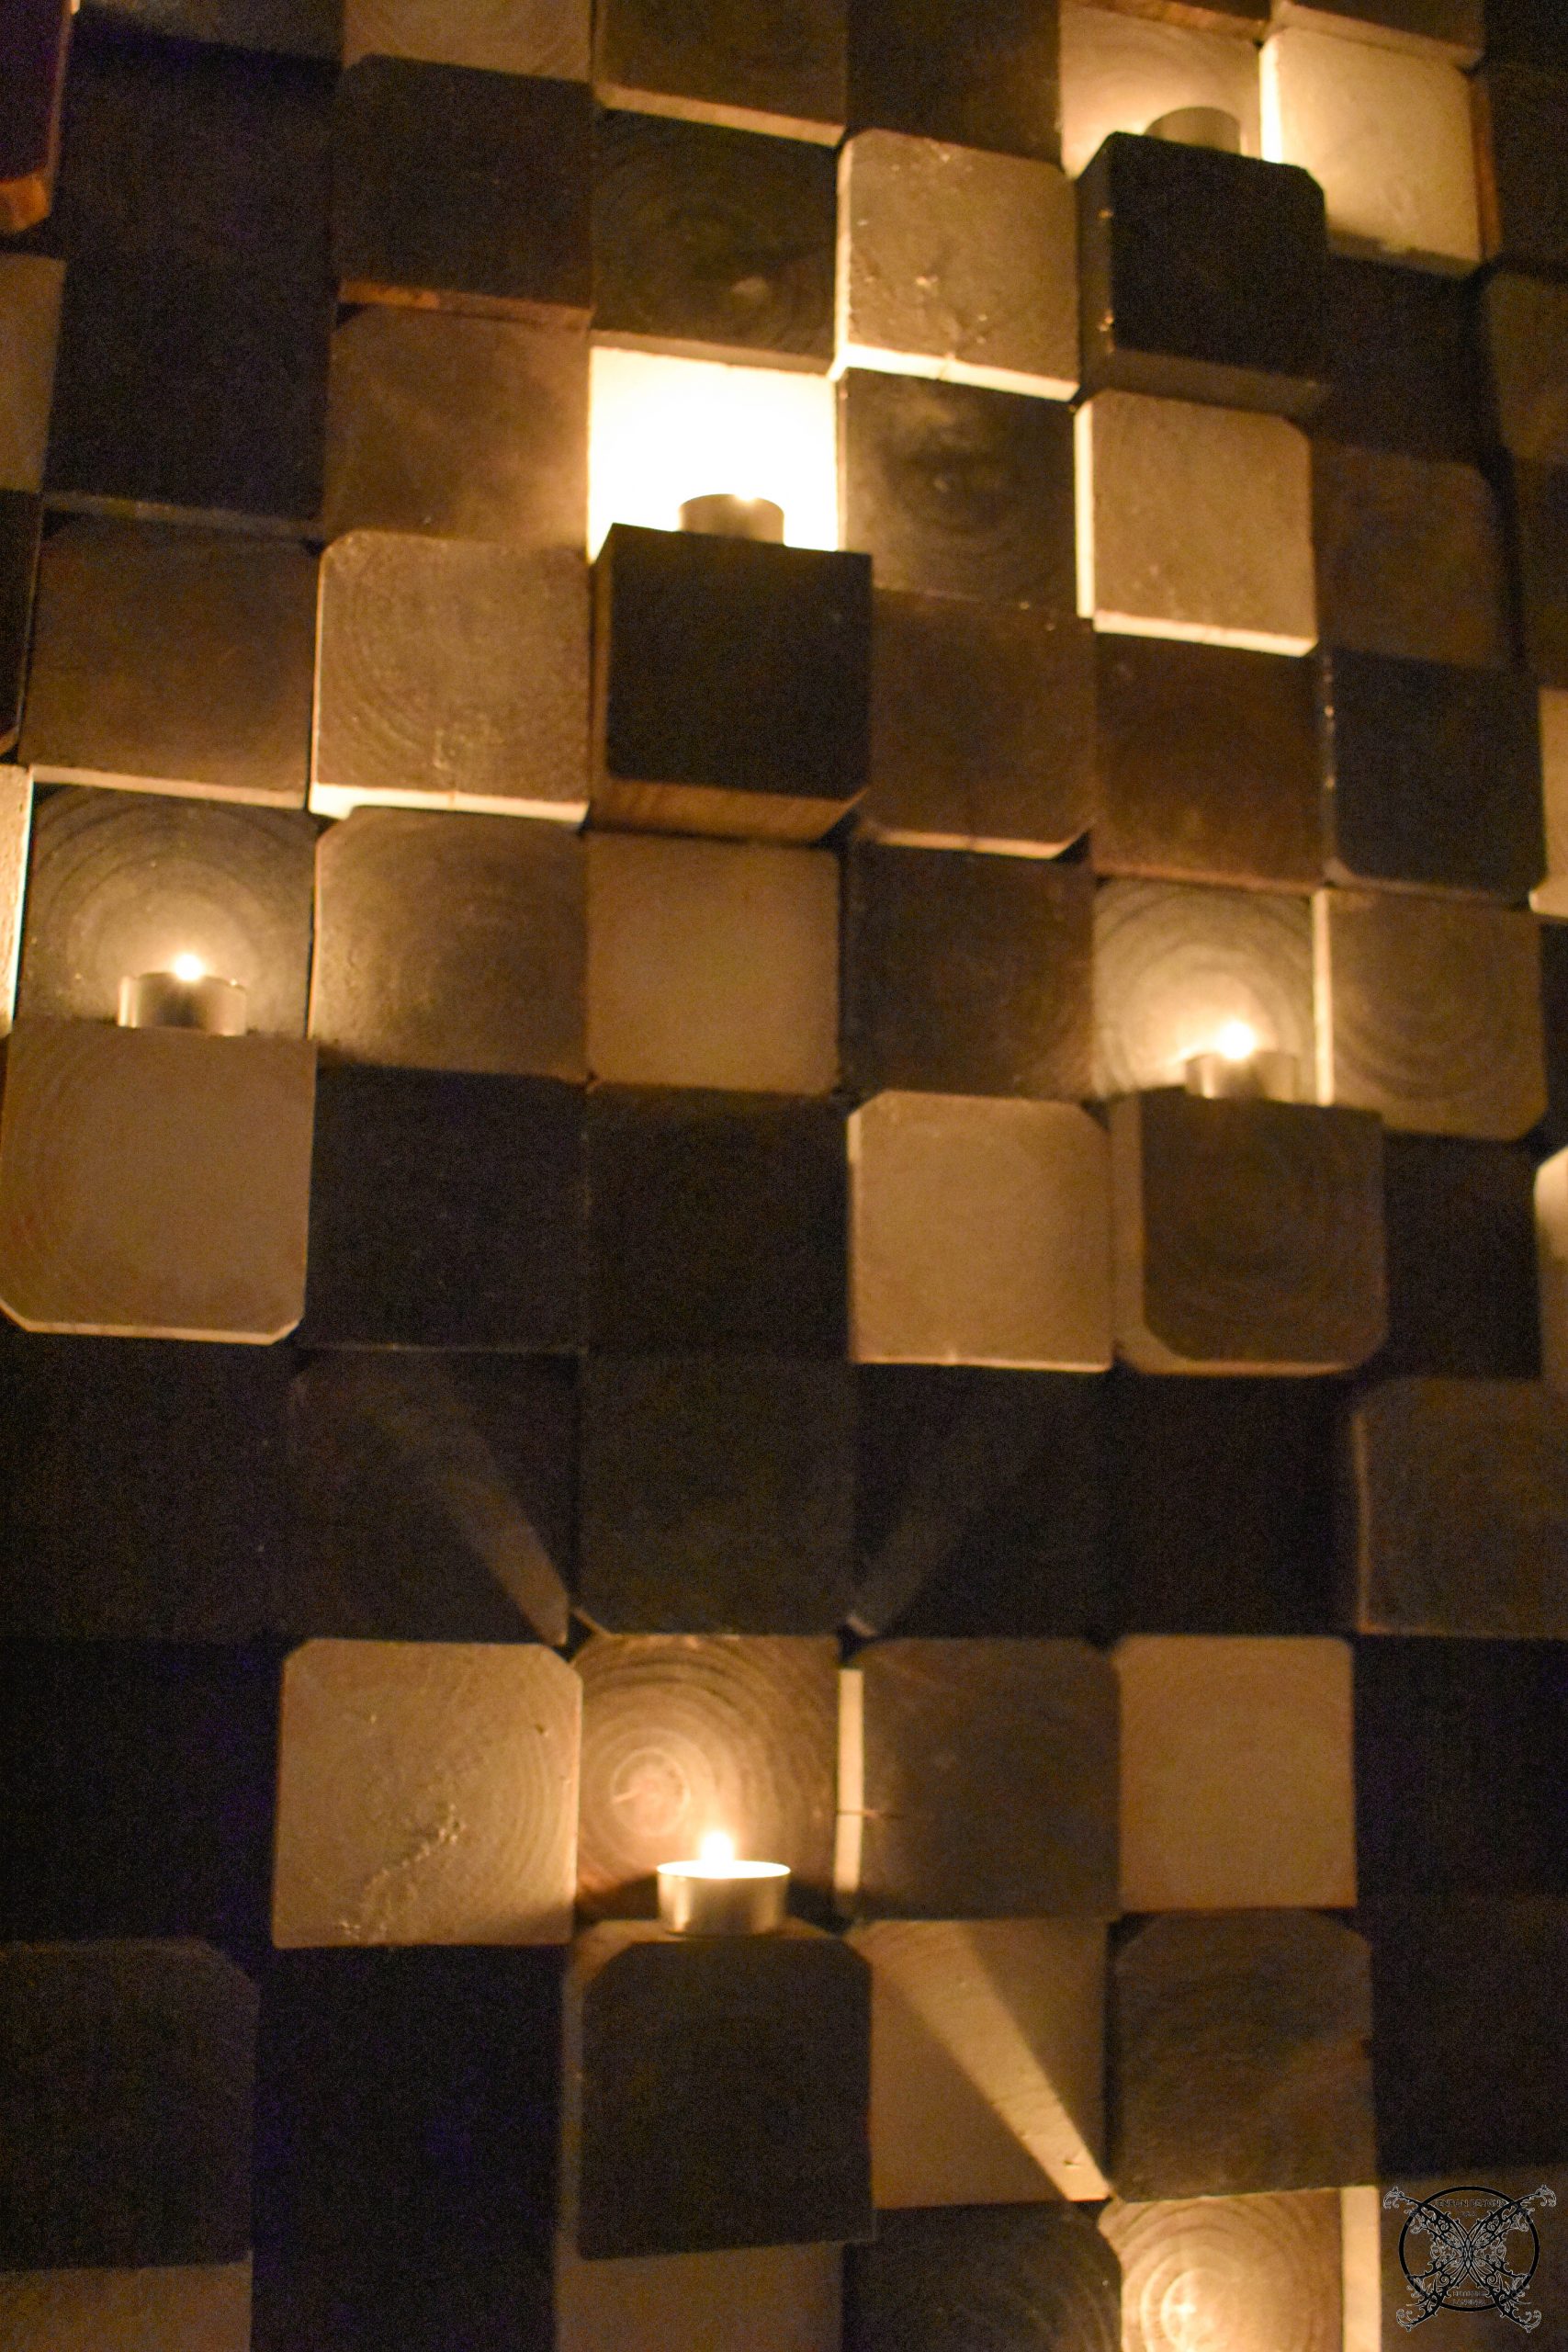 Plus I wanted to add in candle ledges with extra long blocks; which meant very shallow blocks need to go directly above them. They also needed to be in specific places as well, and are marked in green.
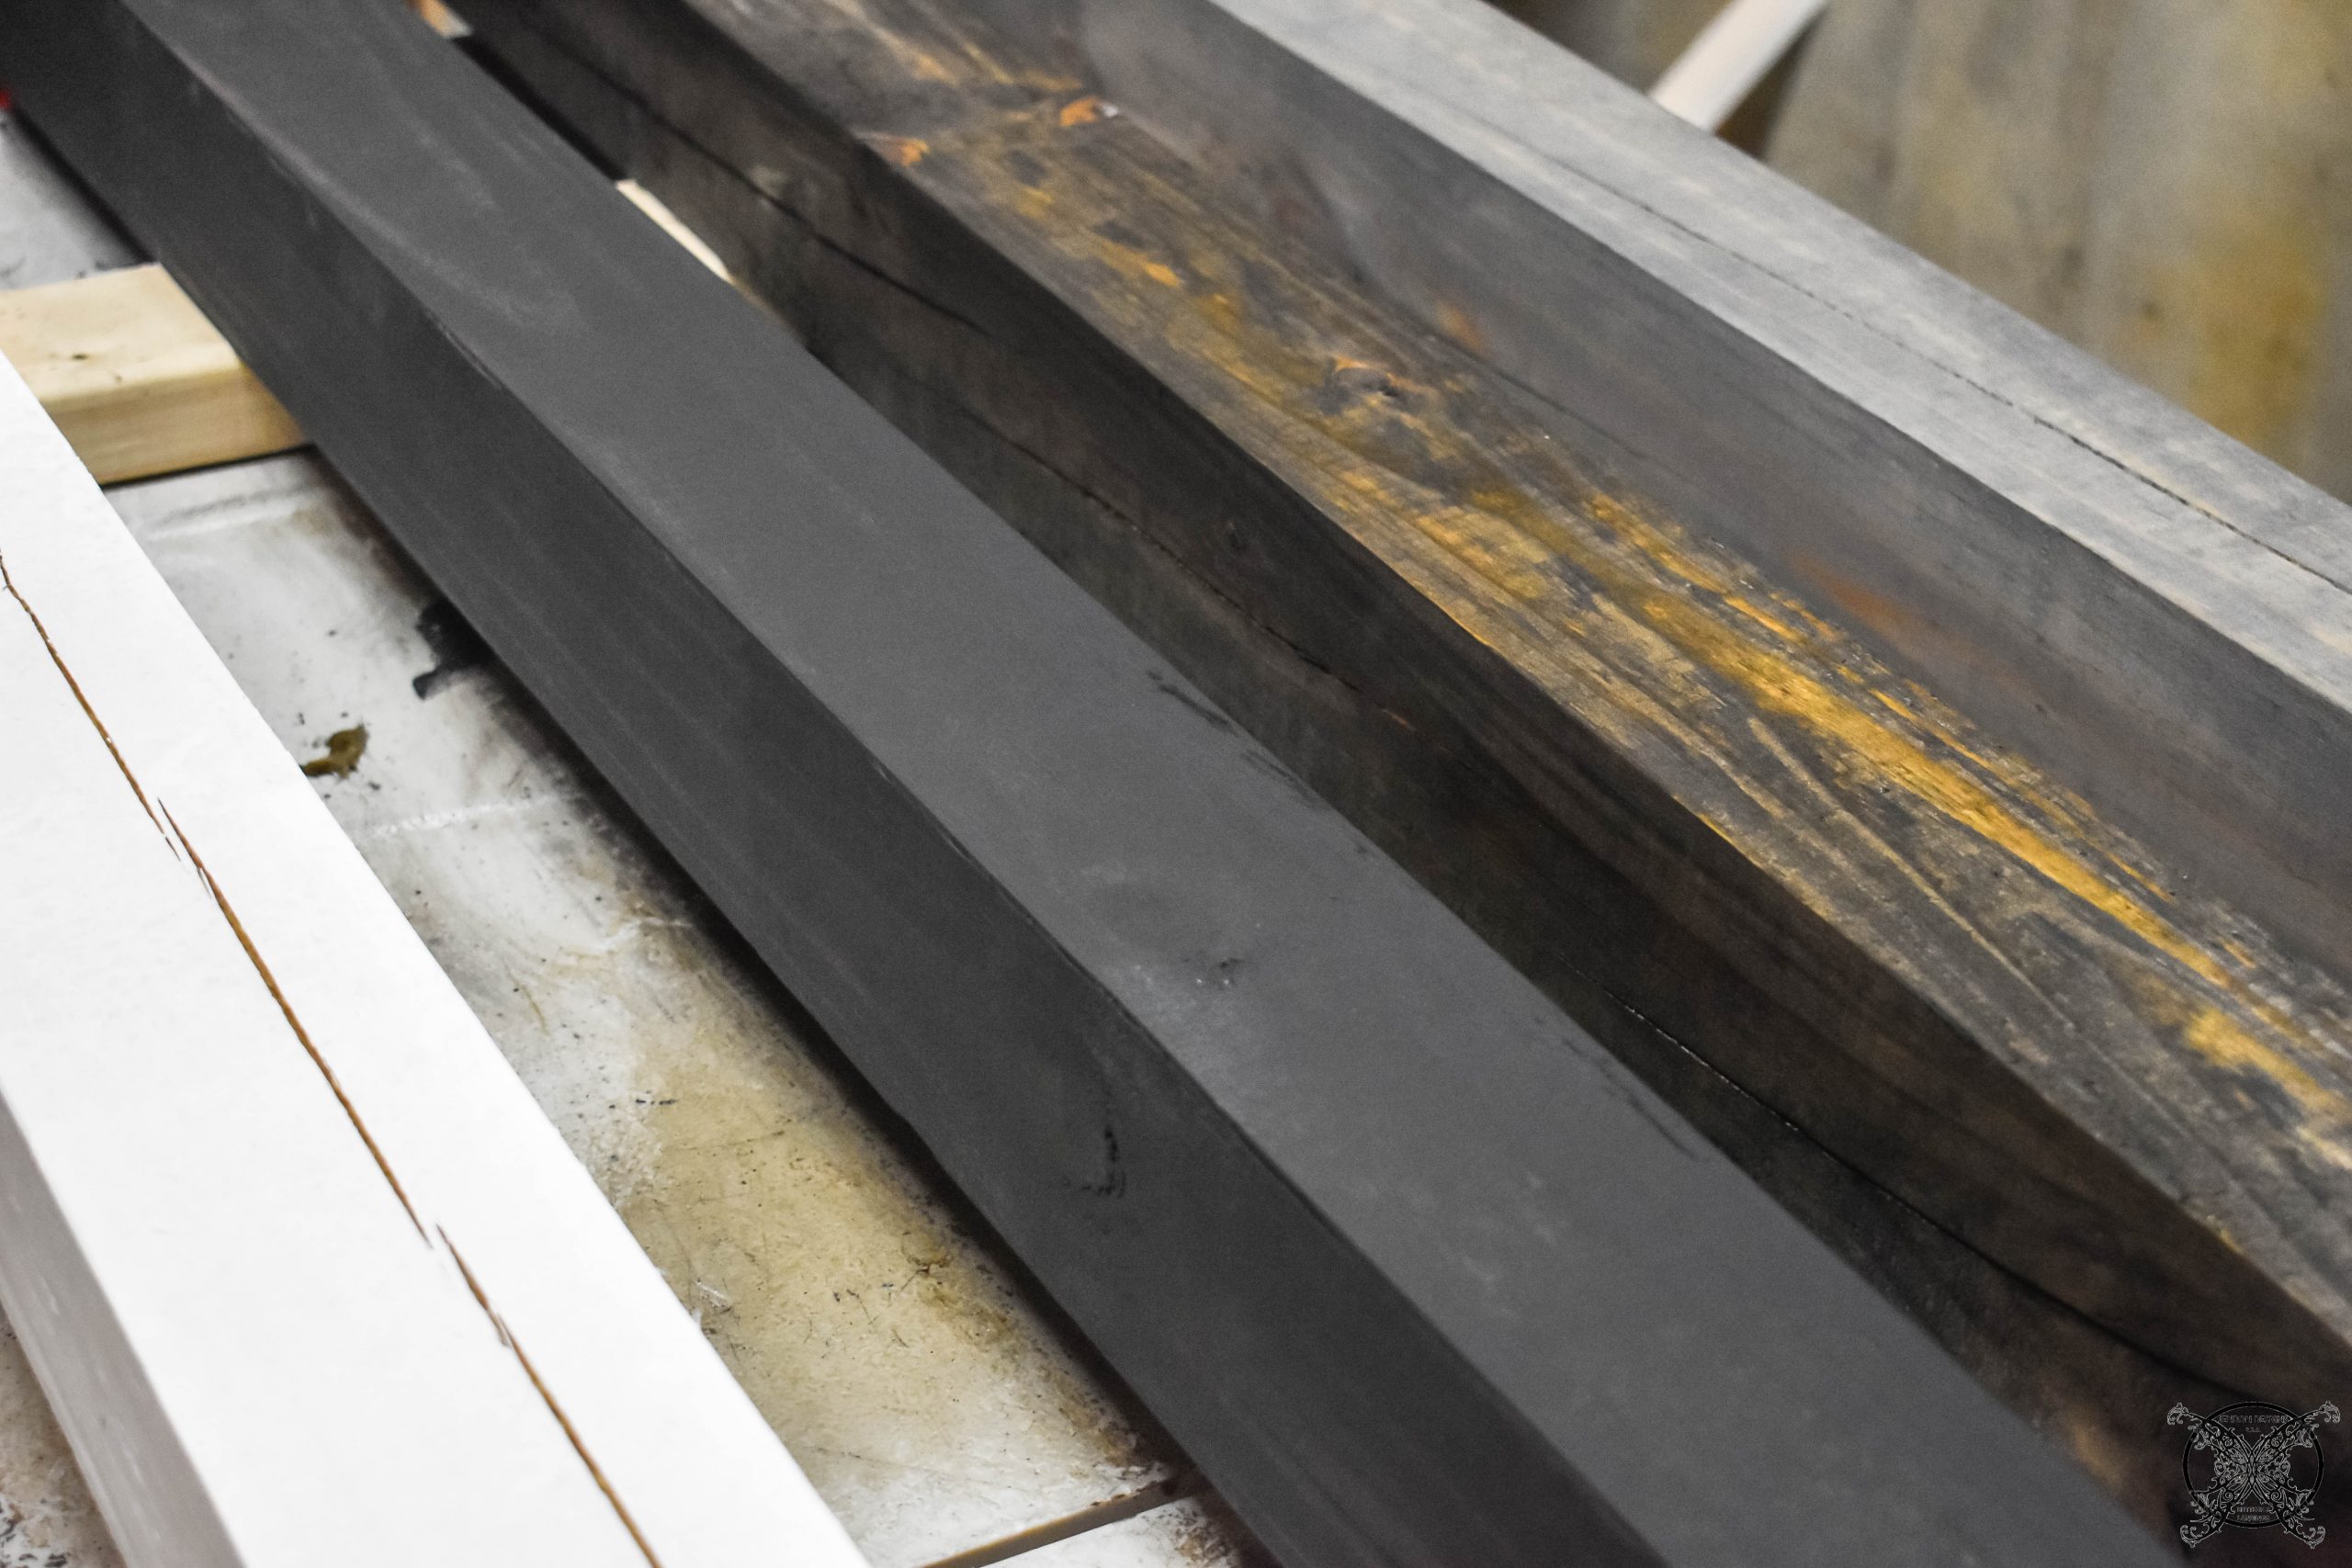 I stained and painted the exterior of the 4×4 posts first in the four colors that we planned on using prior to making the cuts. These posts would need to dry over night and cure before we went any further. Then we made an assembly line where Ron would cut two sizes of each color and I would paint or stain the ends.
 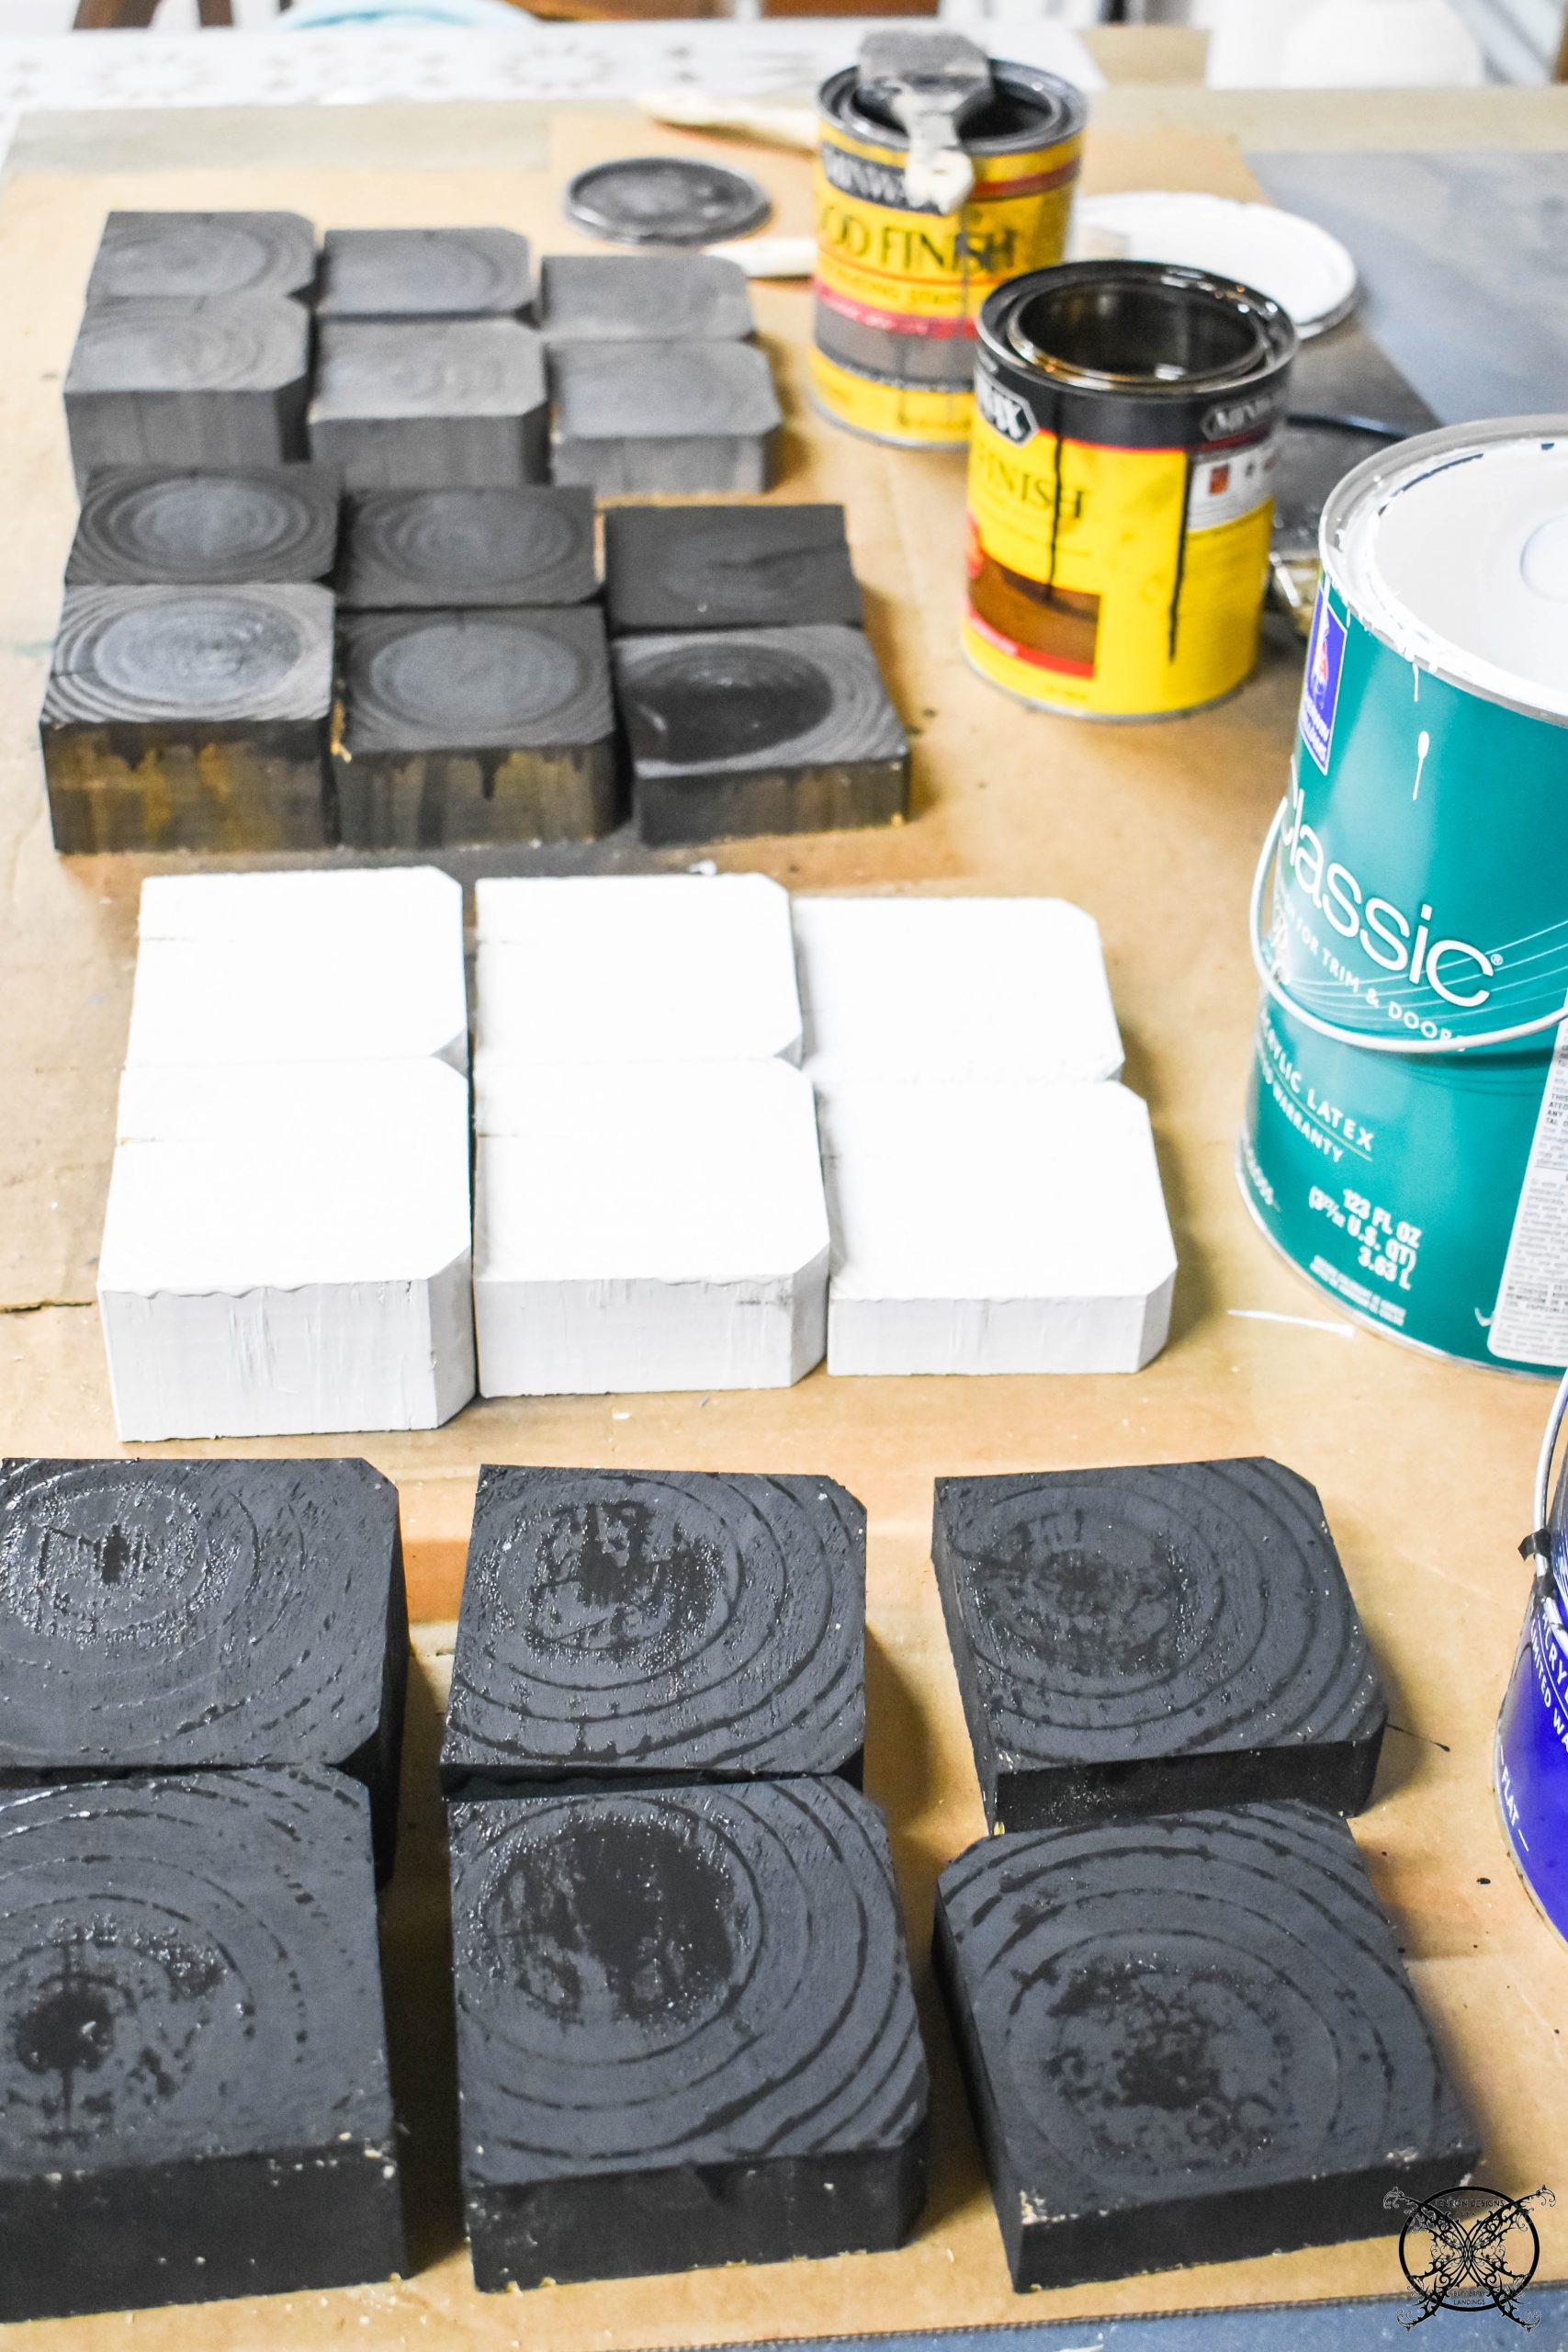 We had four colors, two paints: Sherwin Williams Pure White and Tricorn Black to match existing trim and mantles which we have in the basement currently. Then we used Minwax Jacobean which is our primary stain color and Classic Gray seen on our barn doors and barn wood ceilings.
 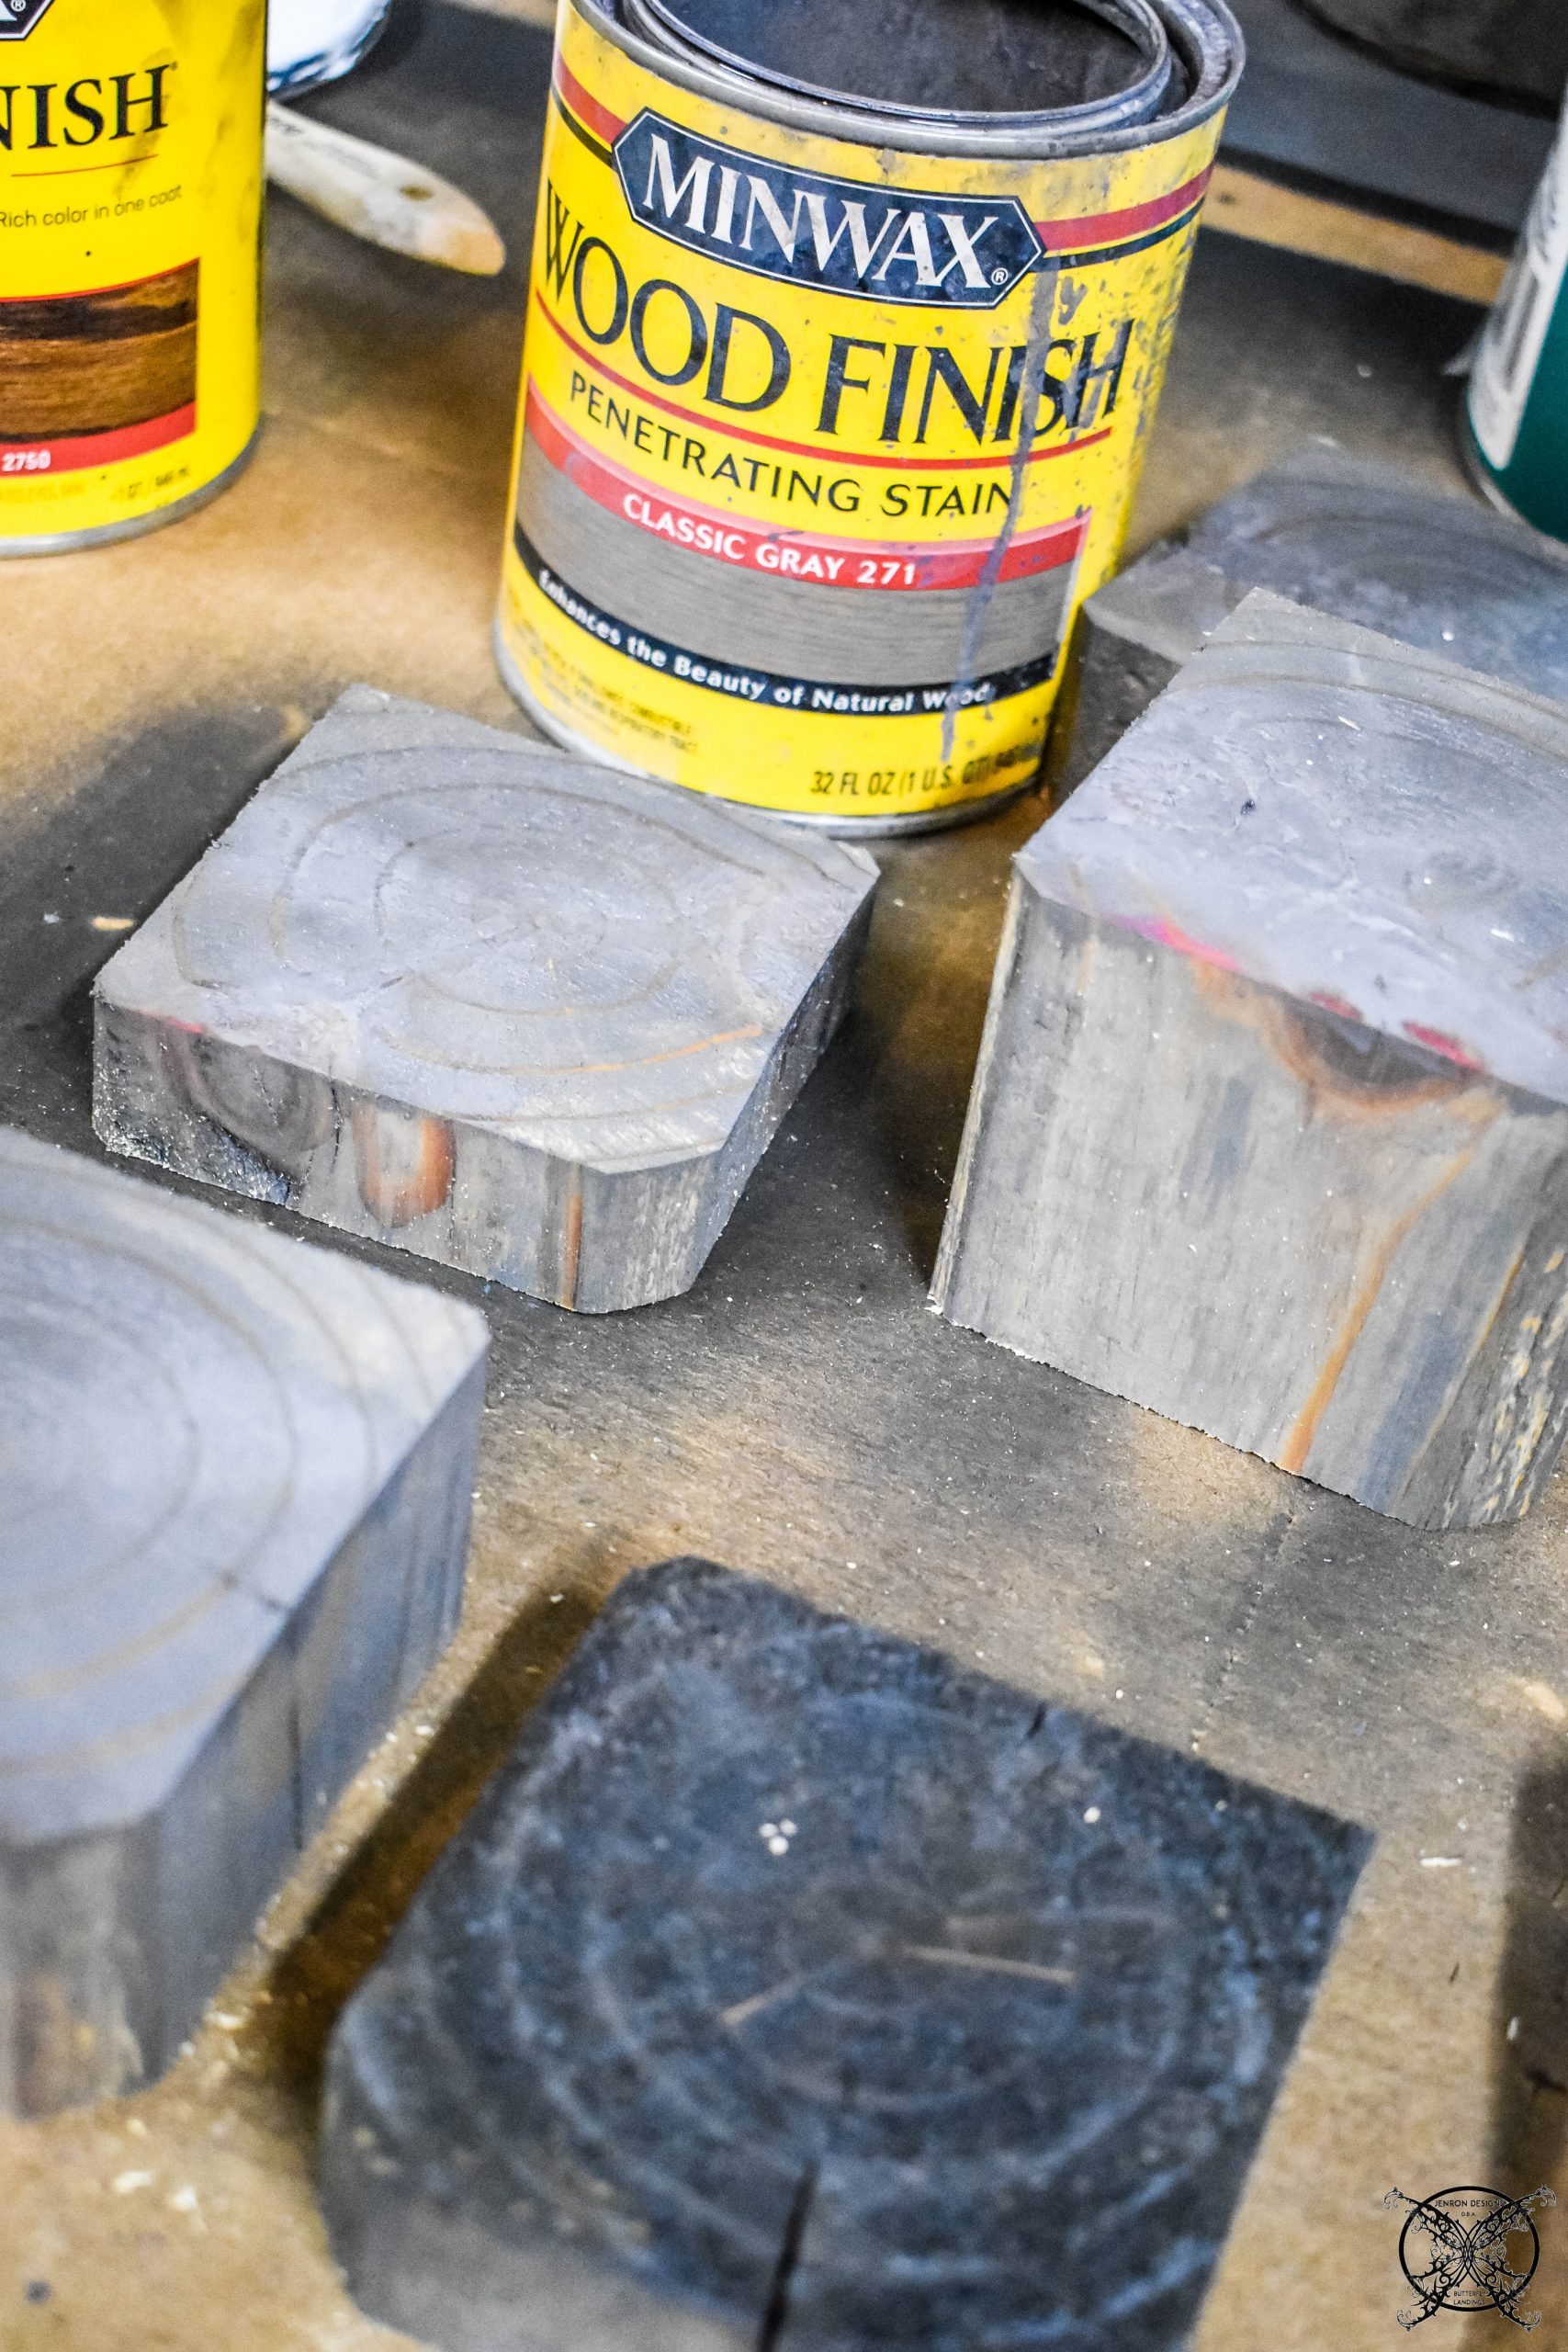 Continue and repeat for each line of the wall art which was a total of 14 rows; each with 15 blocks, so a total of 210 blocks. Once the blocks were semi dry, we started to build the pattern on the floor prior to placing on the wall. This will allow you to see the finished product before you attach the blocks to wall, and makes shifting pieces so much easier.
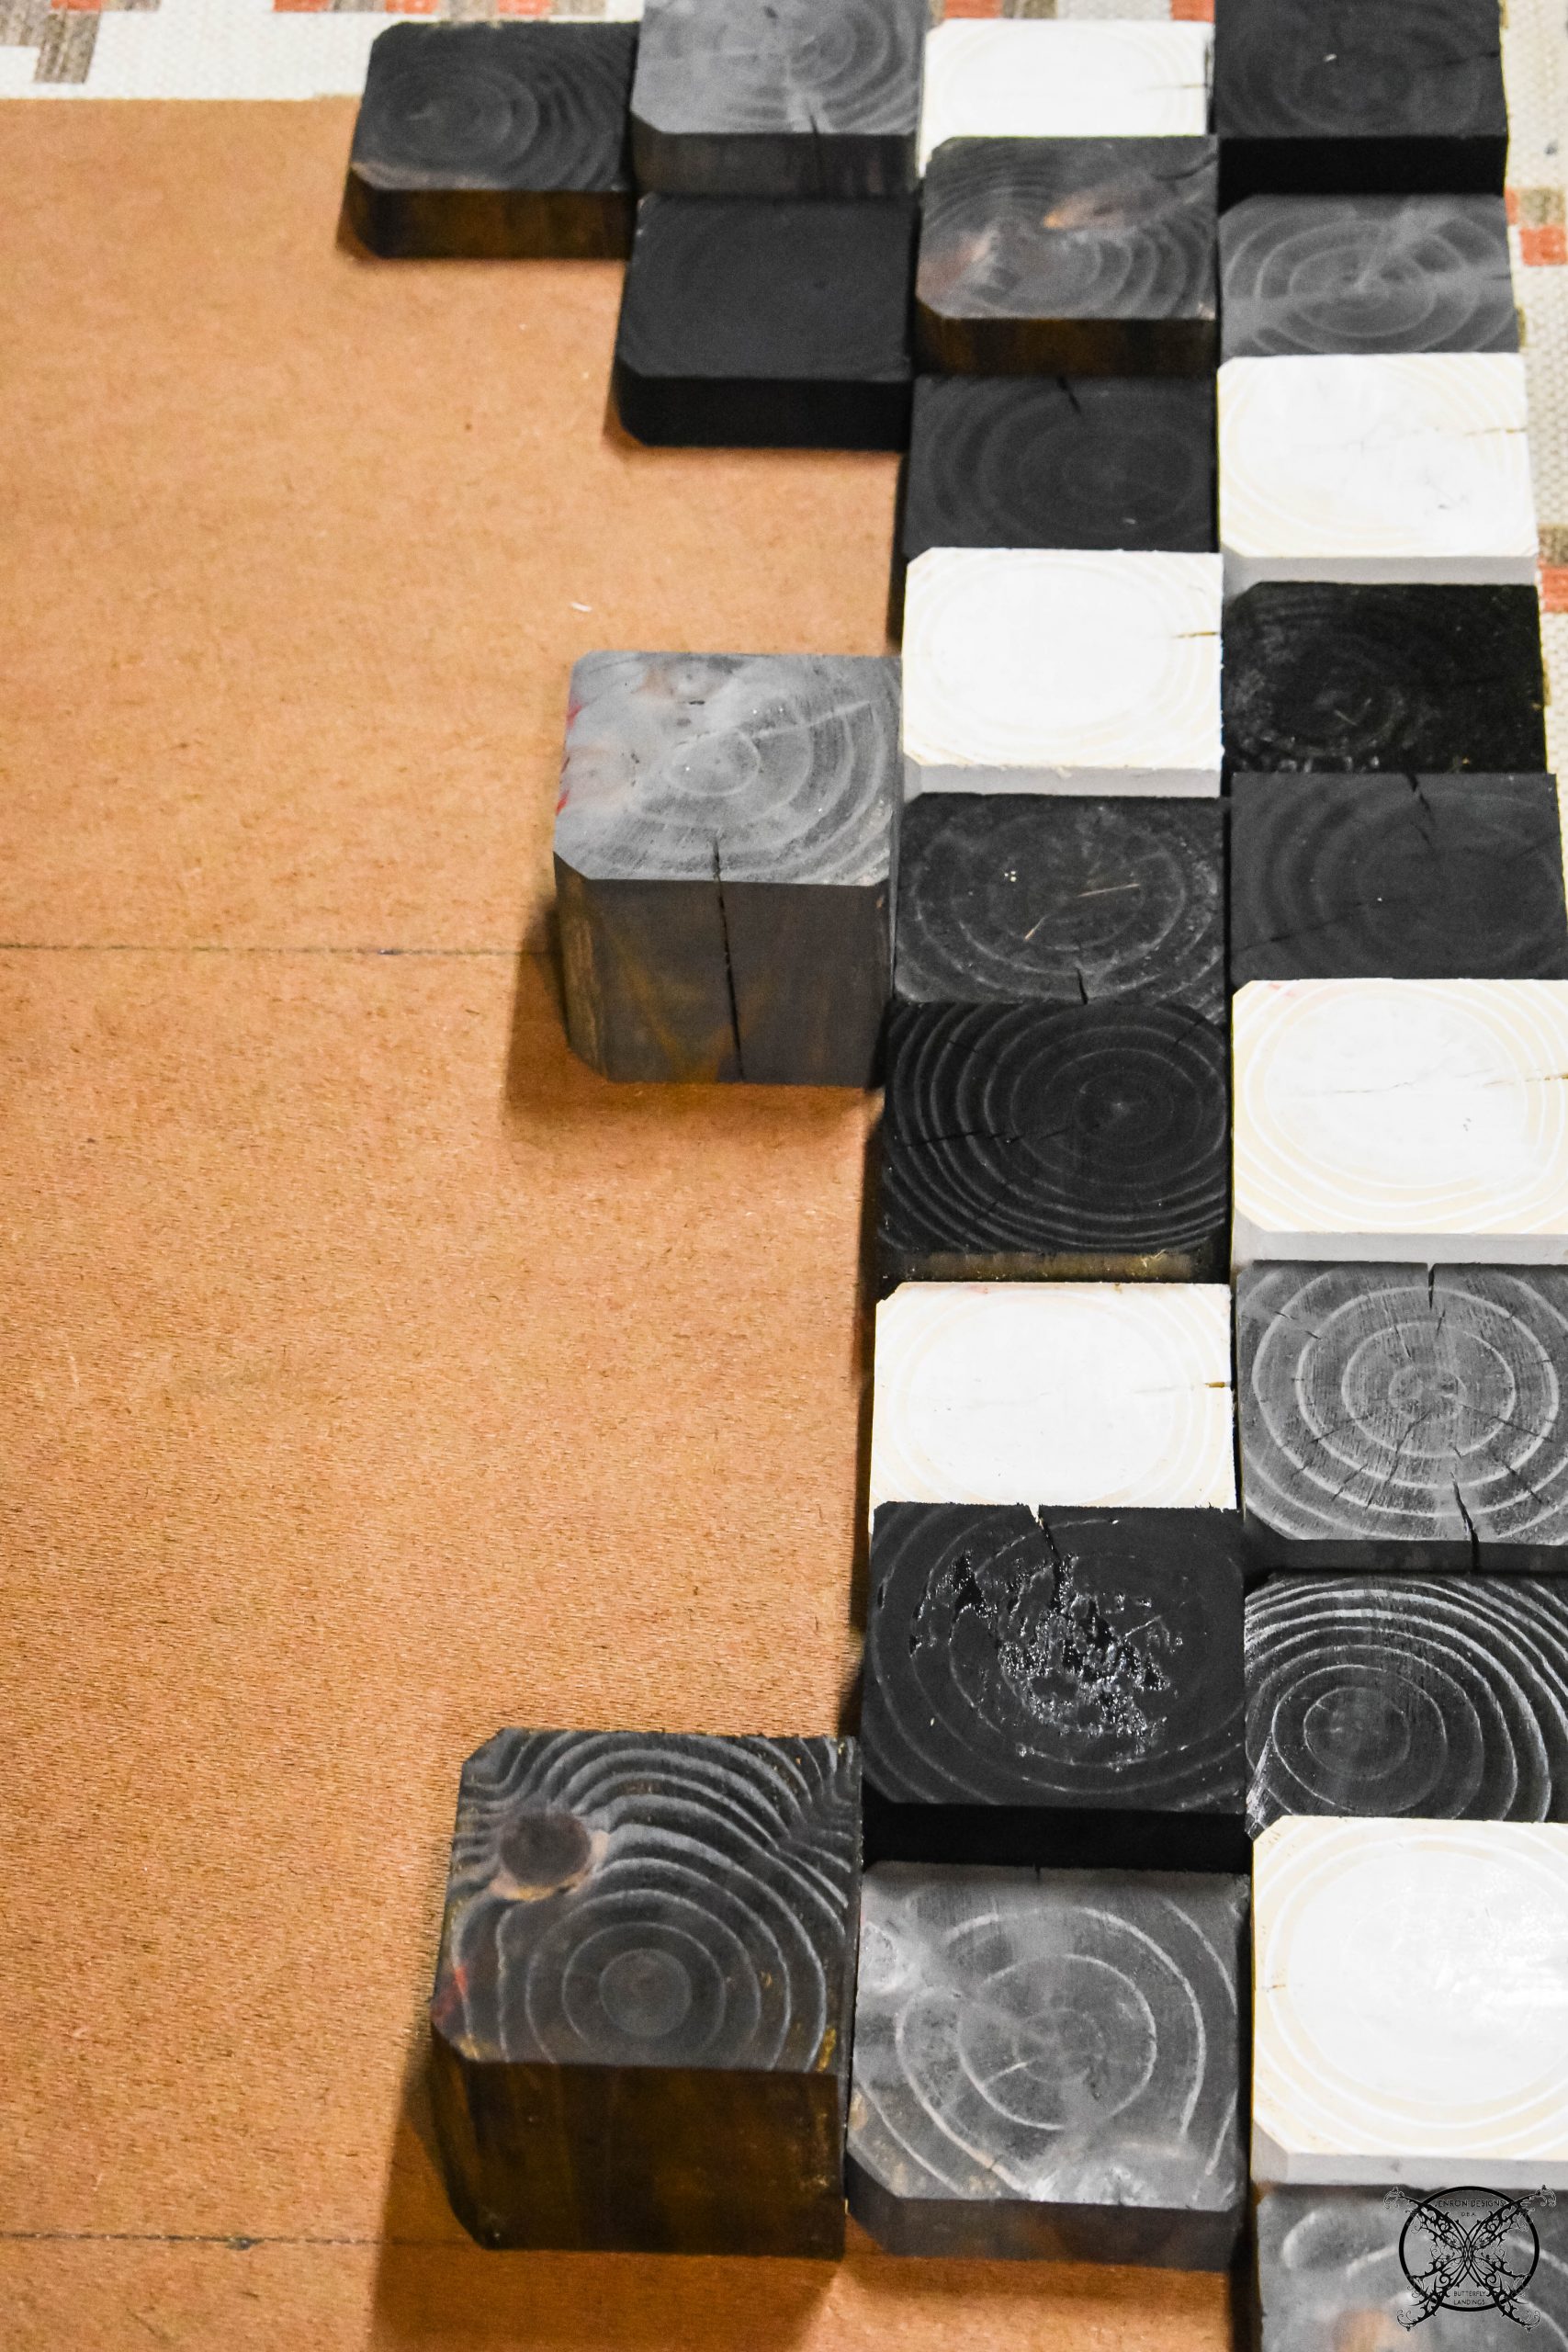 Once we had the full pattern completely laid out and were happy with the overall pattern and the random heights of the blocks, it was them time to attach the blocks to the wall.
 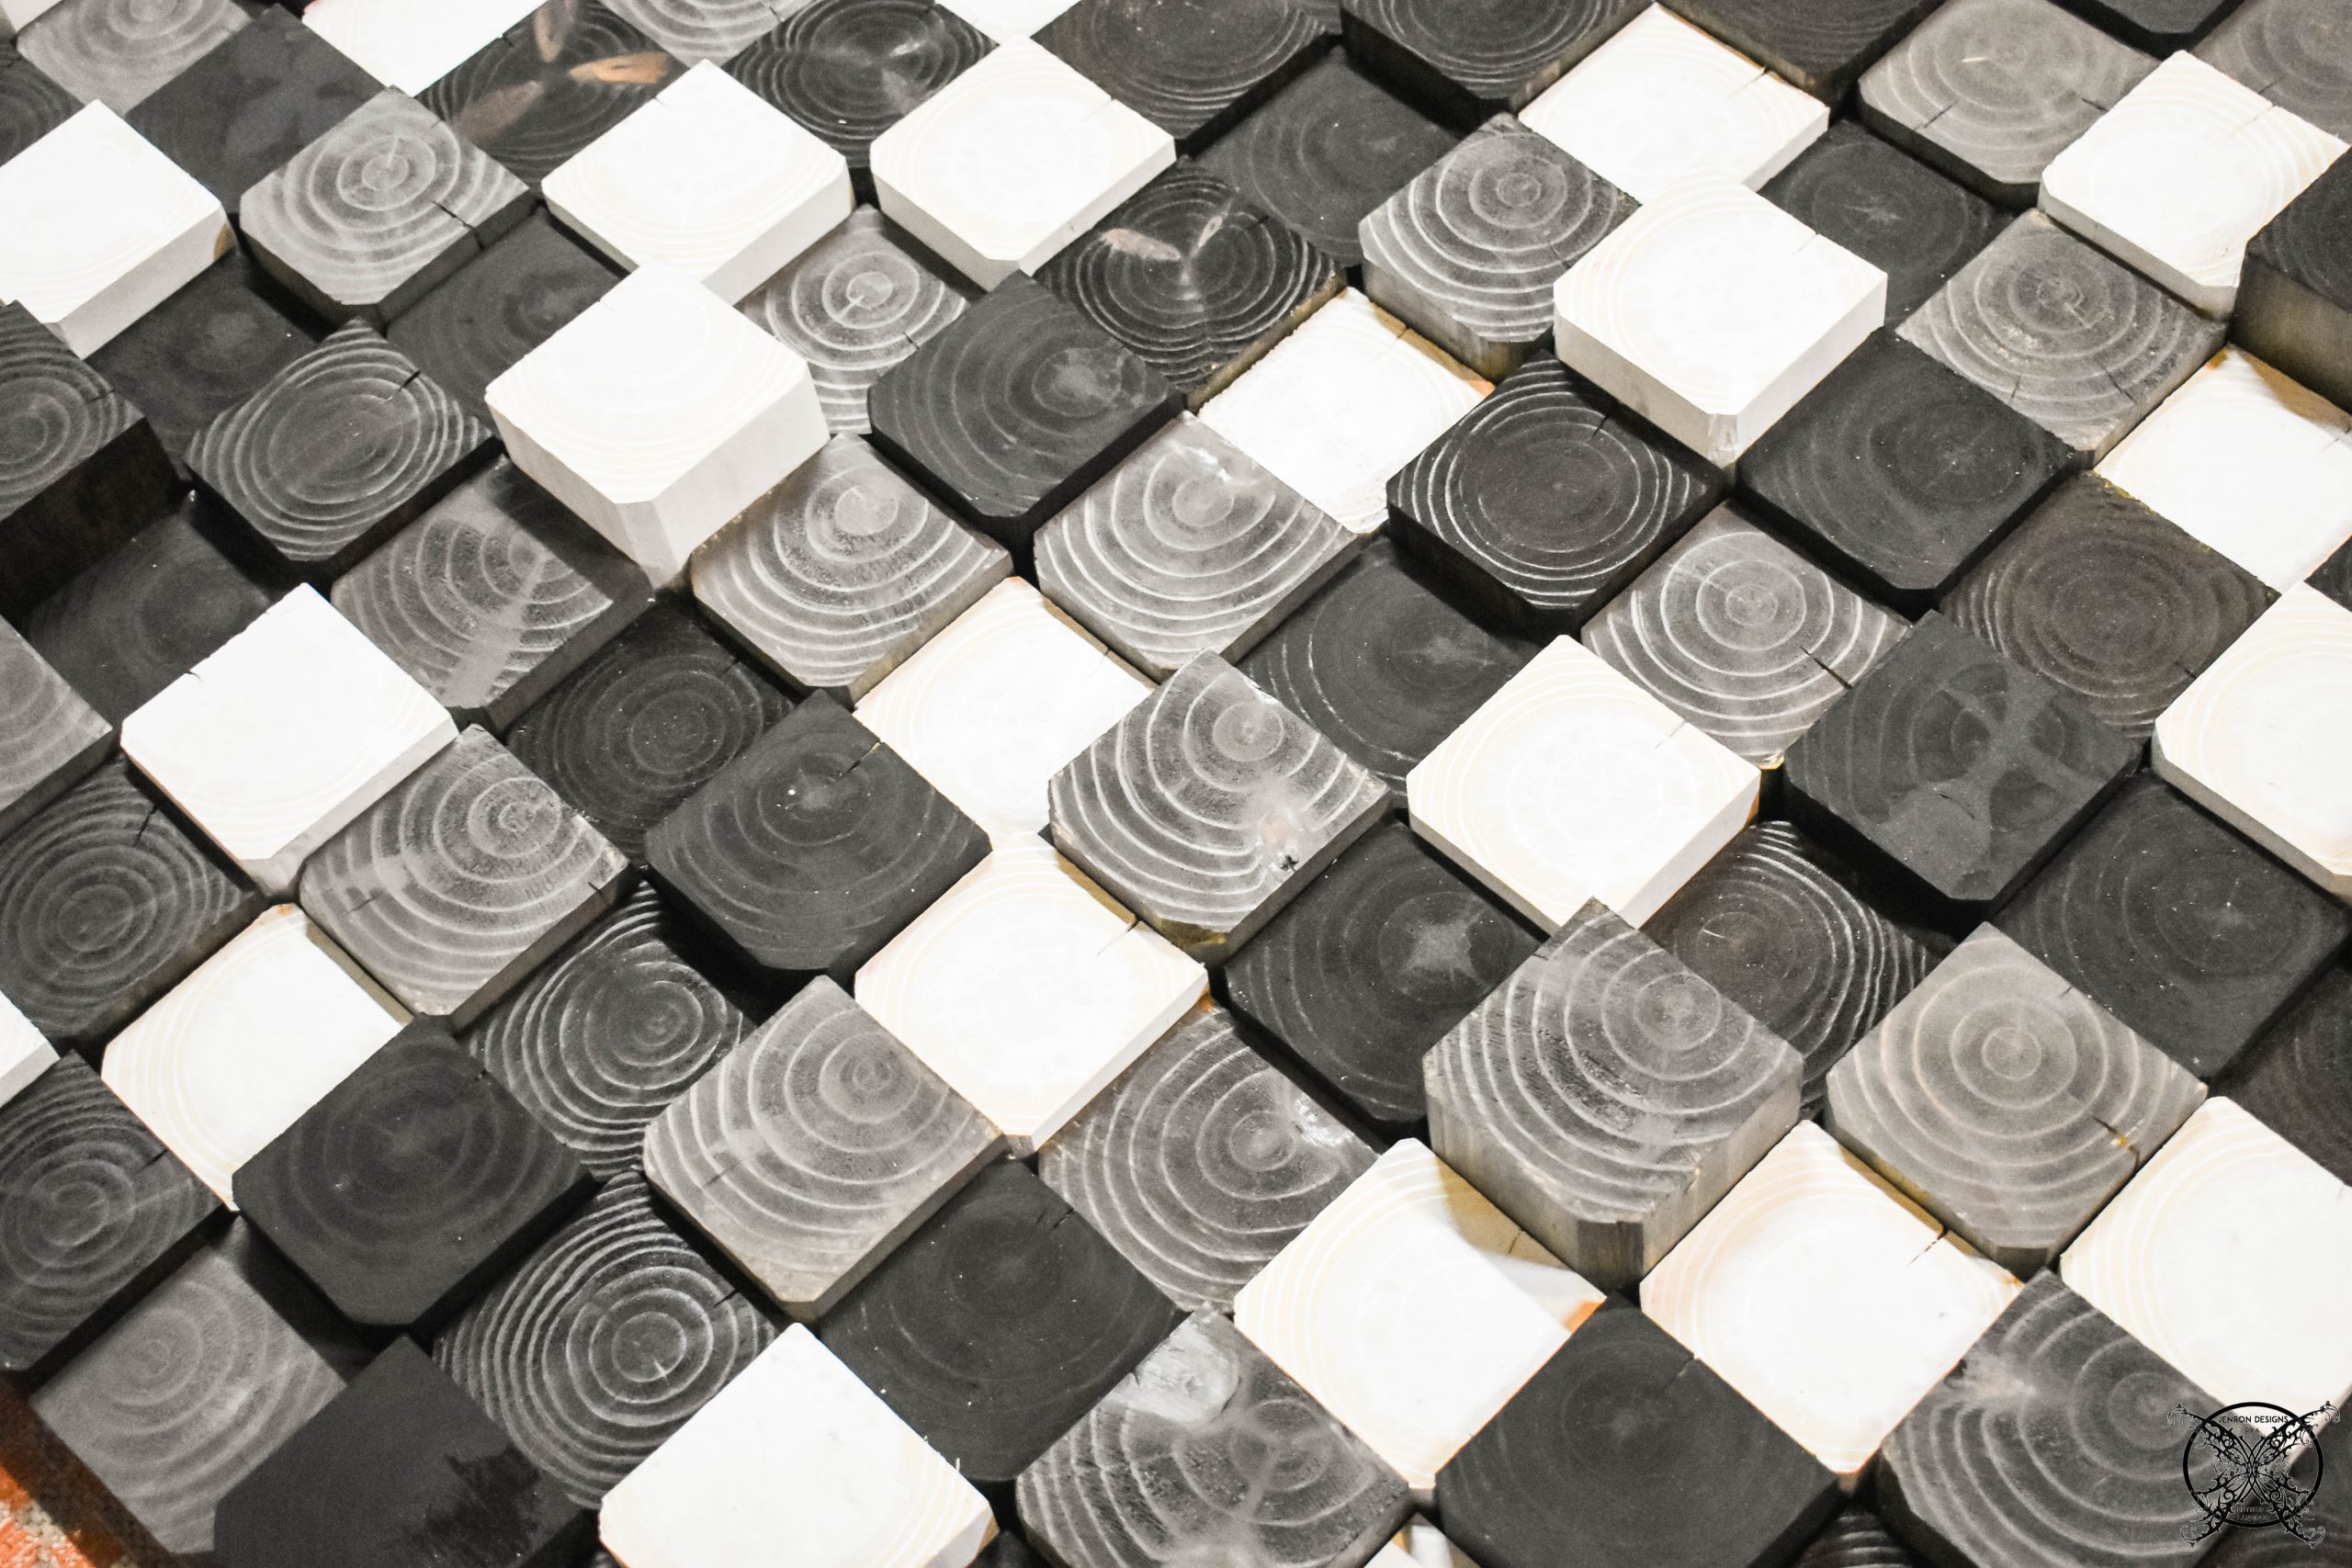 We started at the bottom and worked our way up to the top since we have a wood crown molding piece, which will be installed at the top as a boarder. This also insured that the blocks were level with our newly installed Wainscots paneling that we added to base of these walls to continue the stairwell finish into this space.
 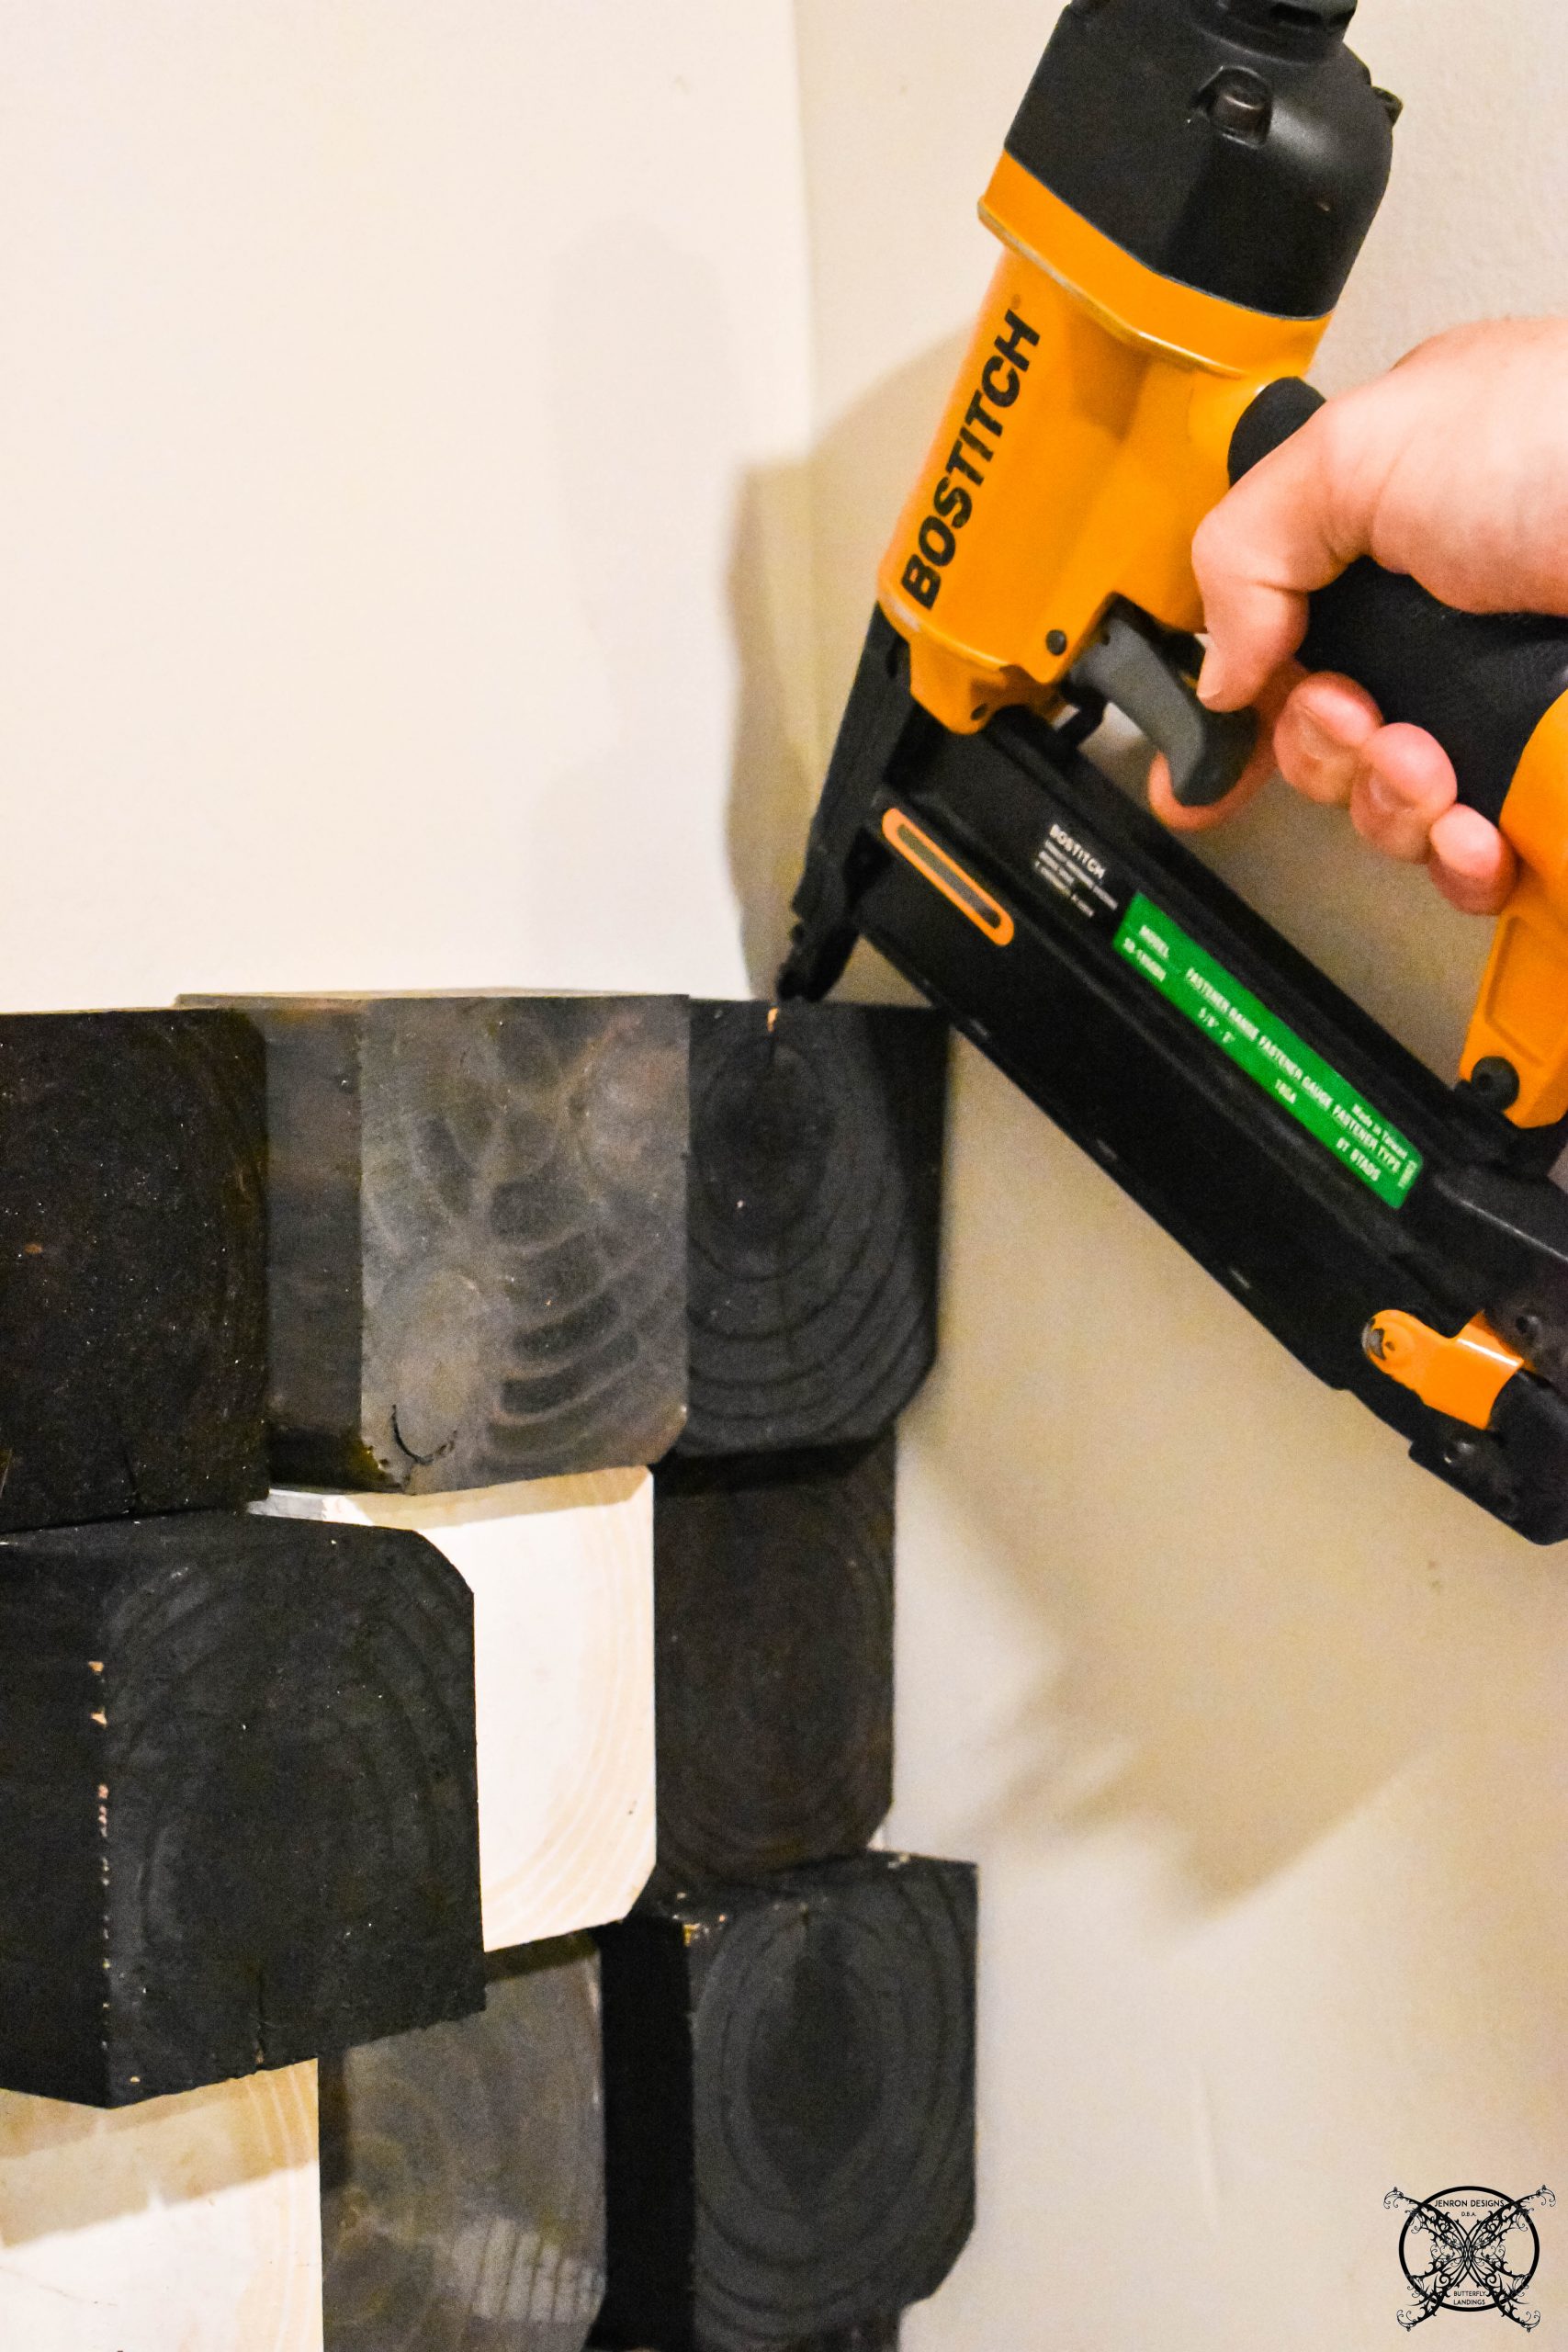 The actual installation was very easy just a few hits with the brad nail gun and each block was installed directly to the wall. Since the fit it very tight they hold each other into place as you stack them up.
 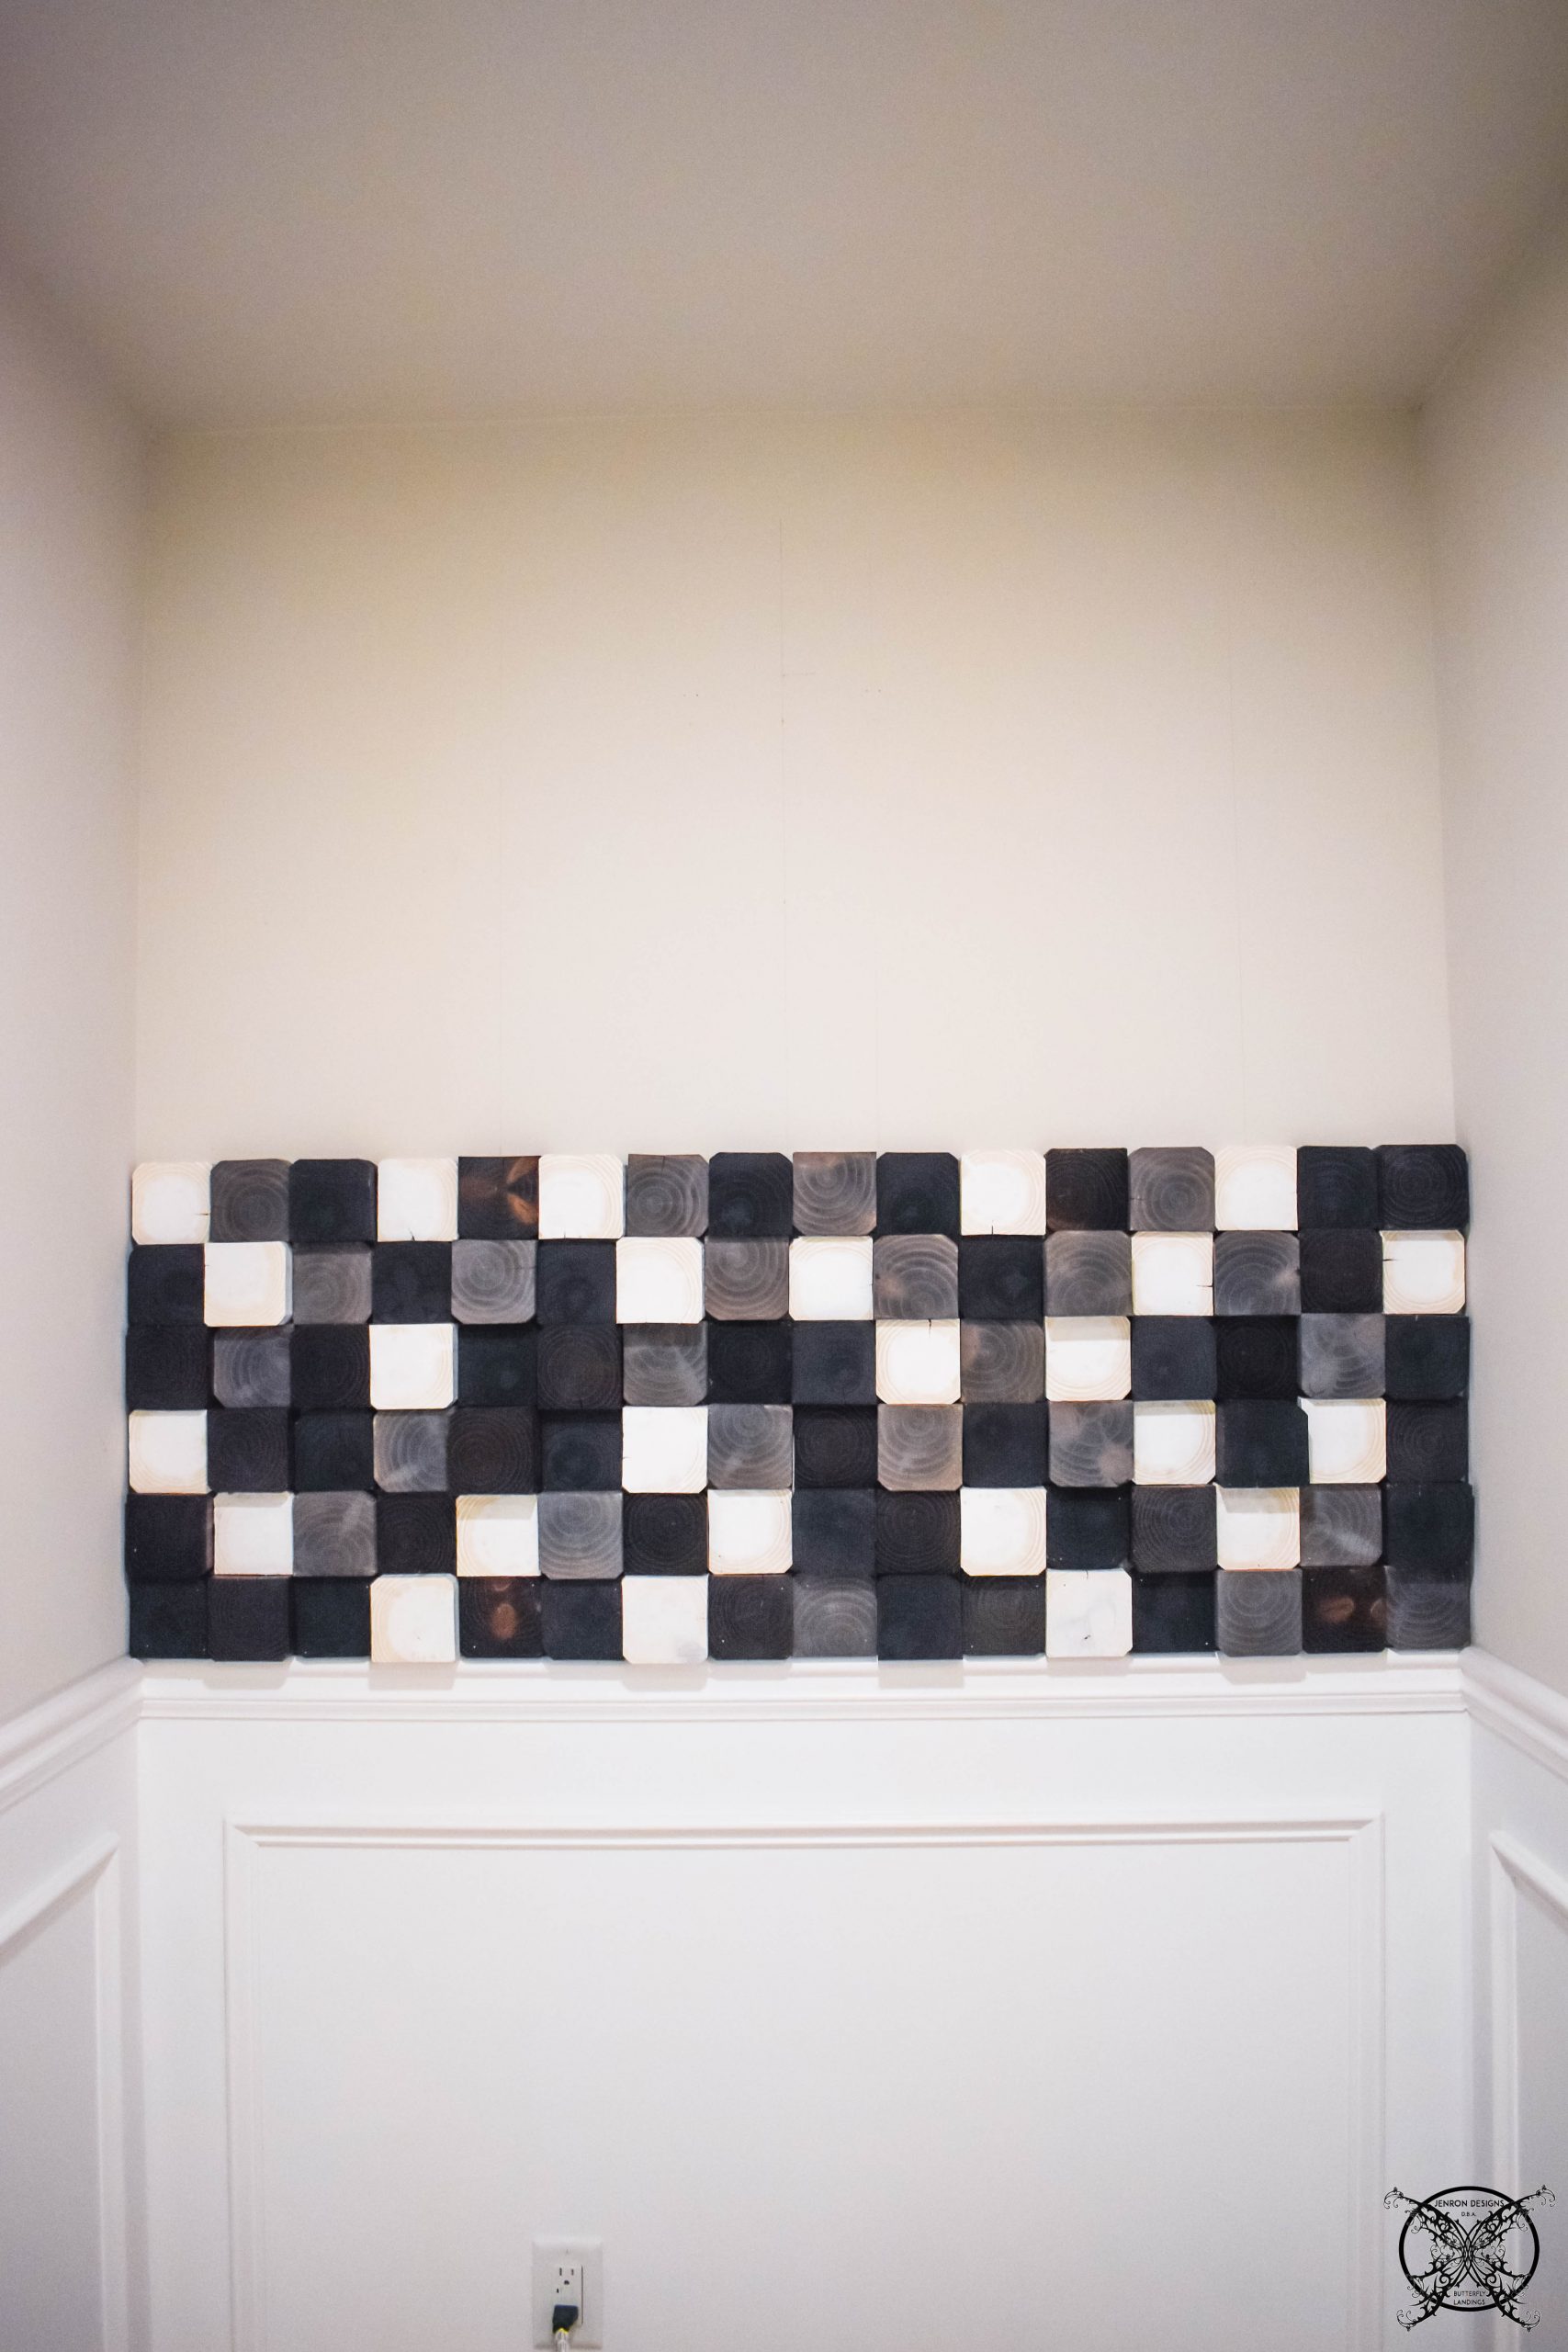 Here is a look at the wall half way done as we installed the blacks, one by one, from our layout that was just in the other room. This part of the project went very quickly and only took a couple of hours to finish up. The prep work to get here was the longest part of this project.
 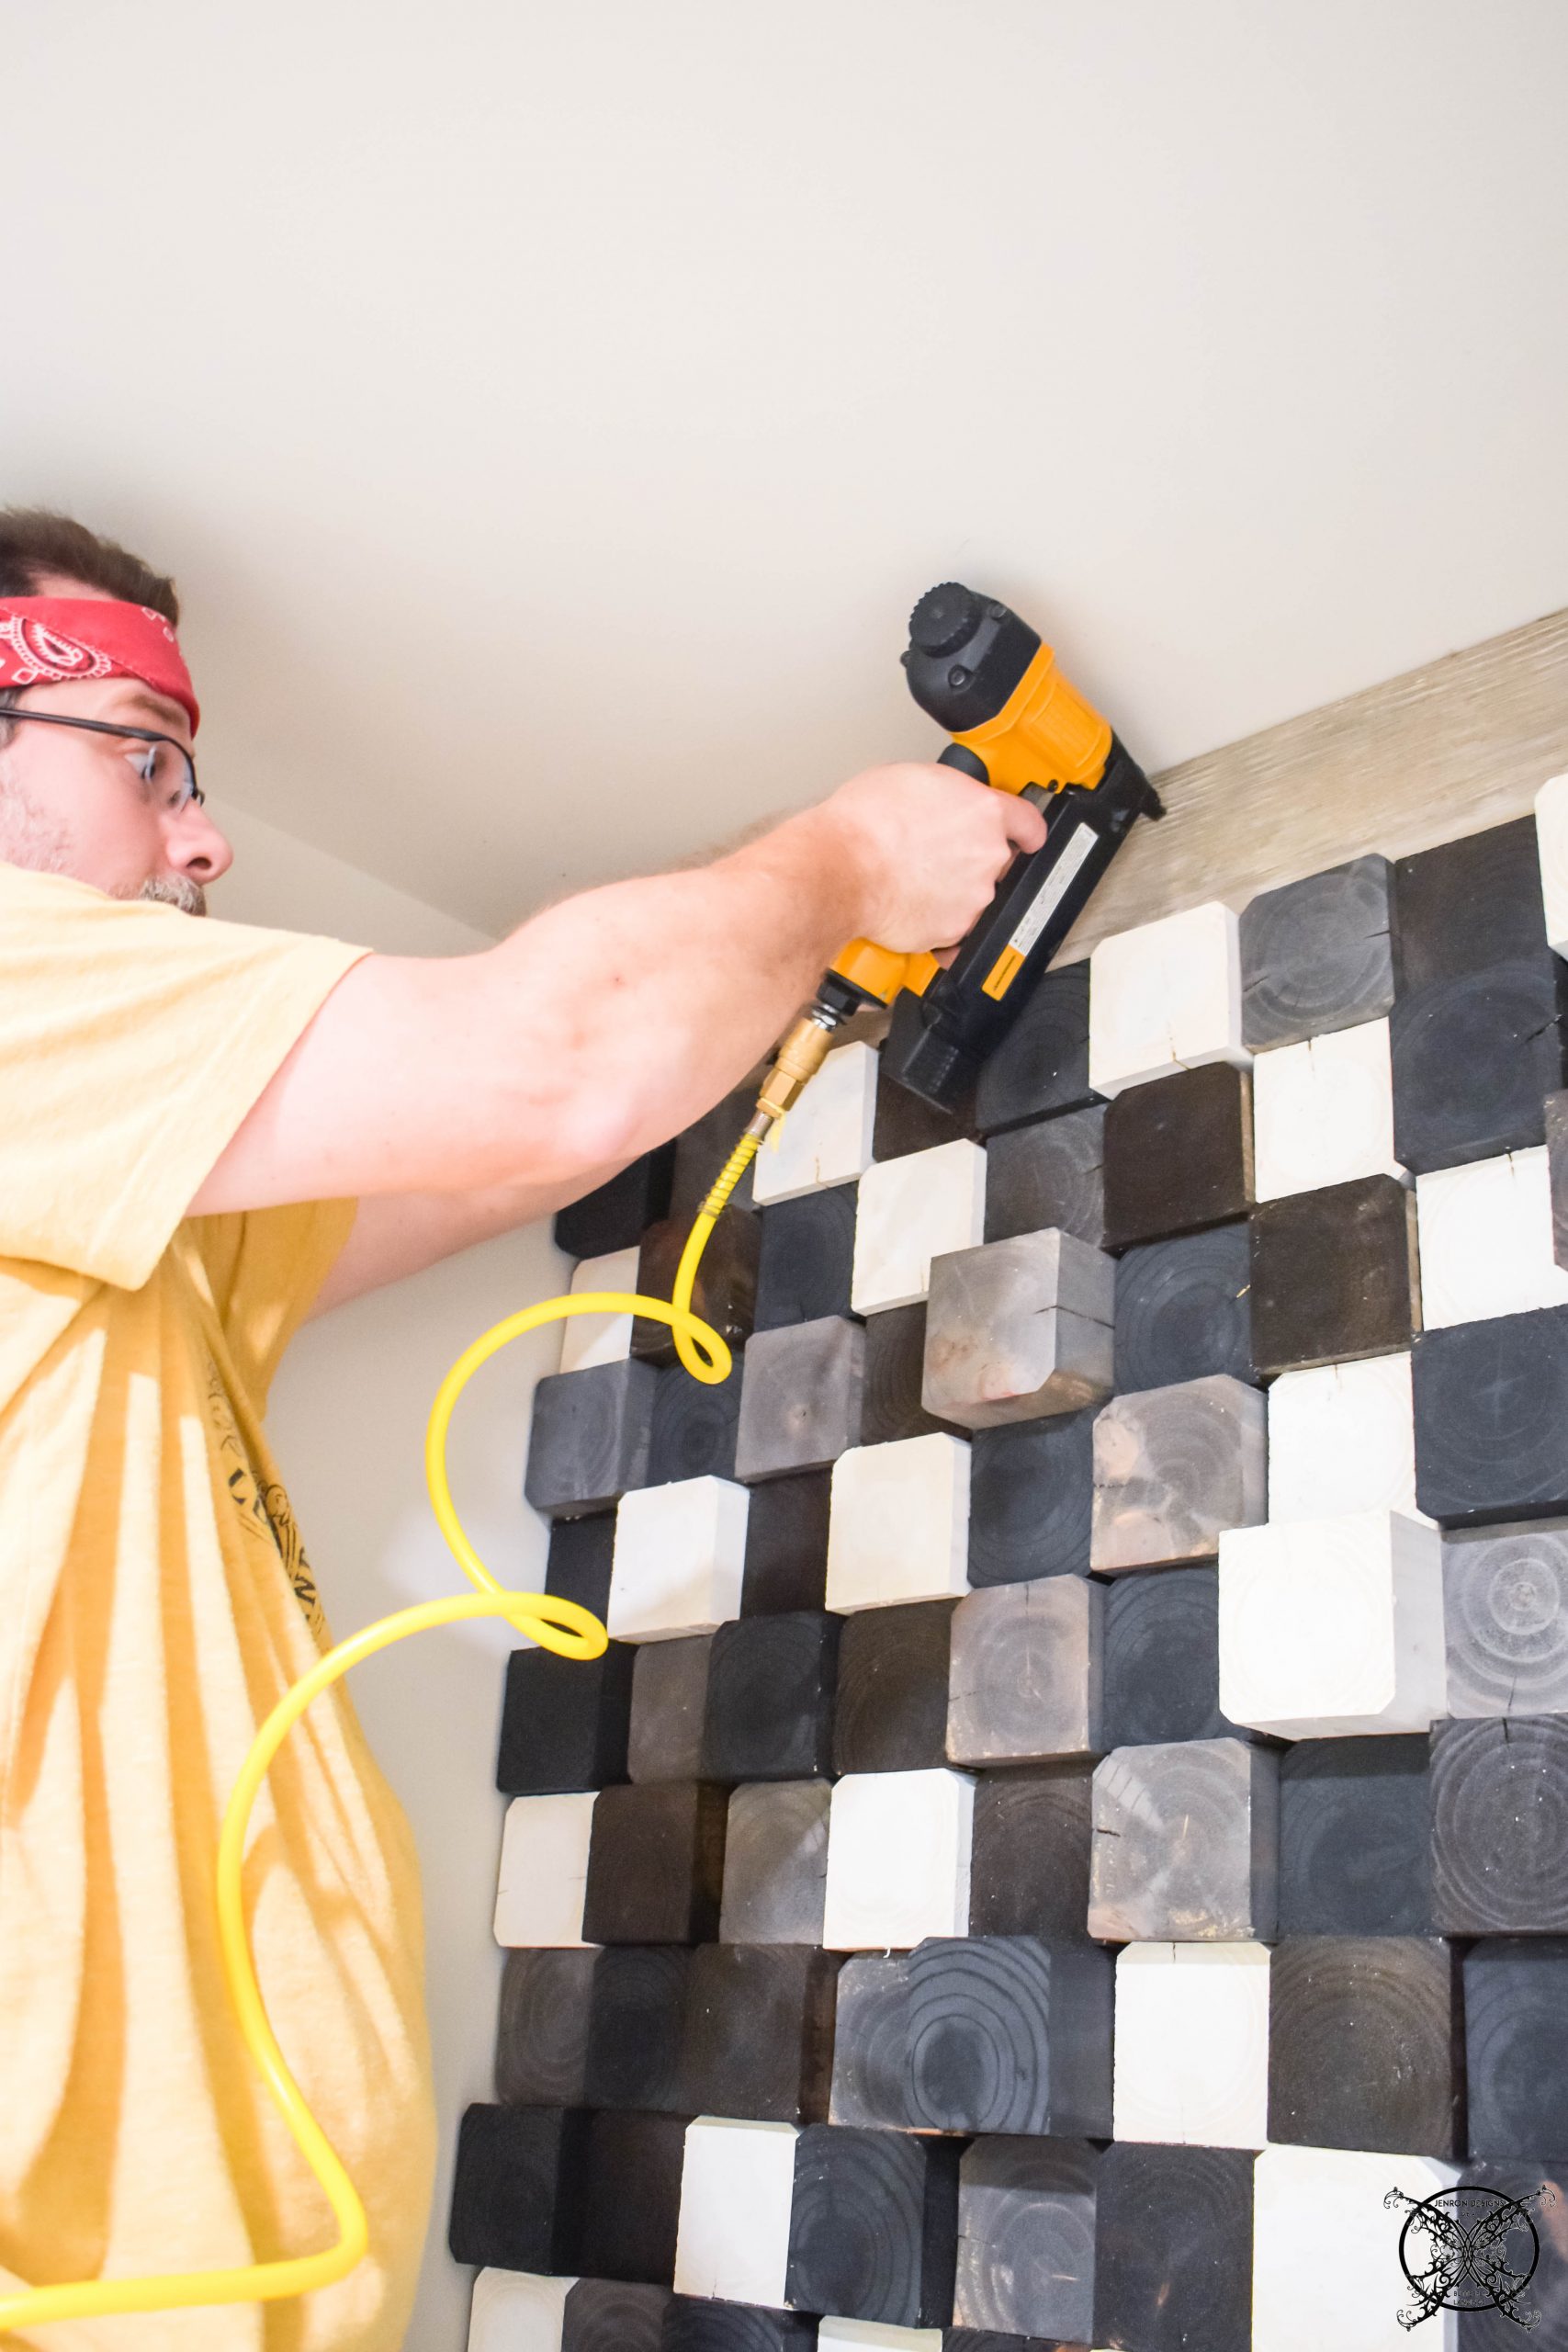 Once we reached the top Ron installed the top board which slid right into place, then affixed it with a few brad nails to hold it secure. Just like that, this project was done.
 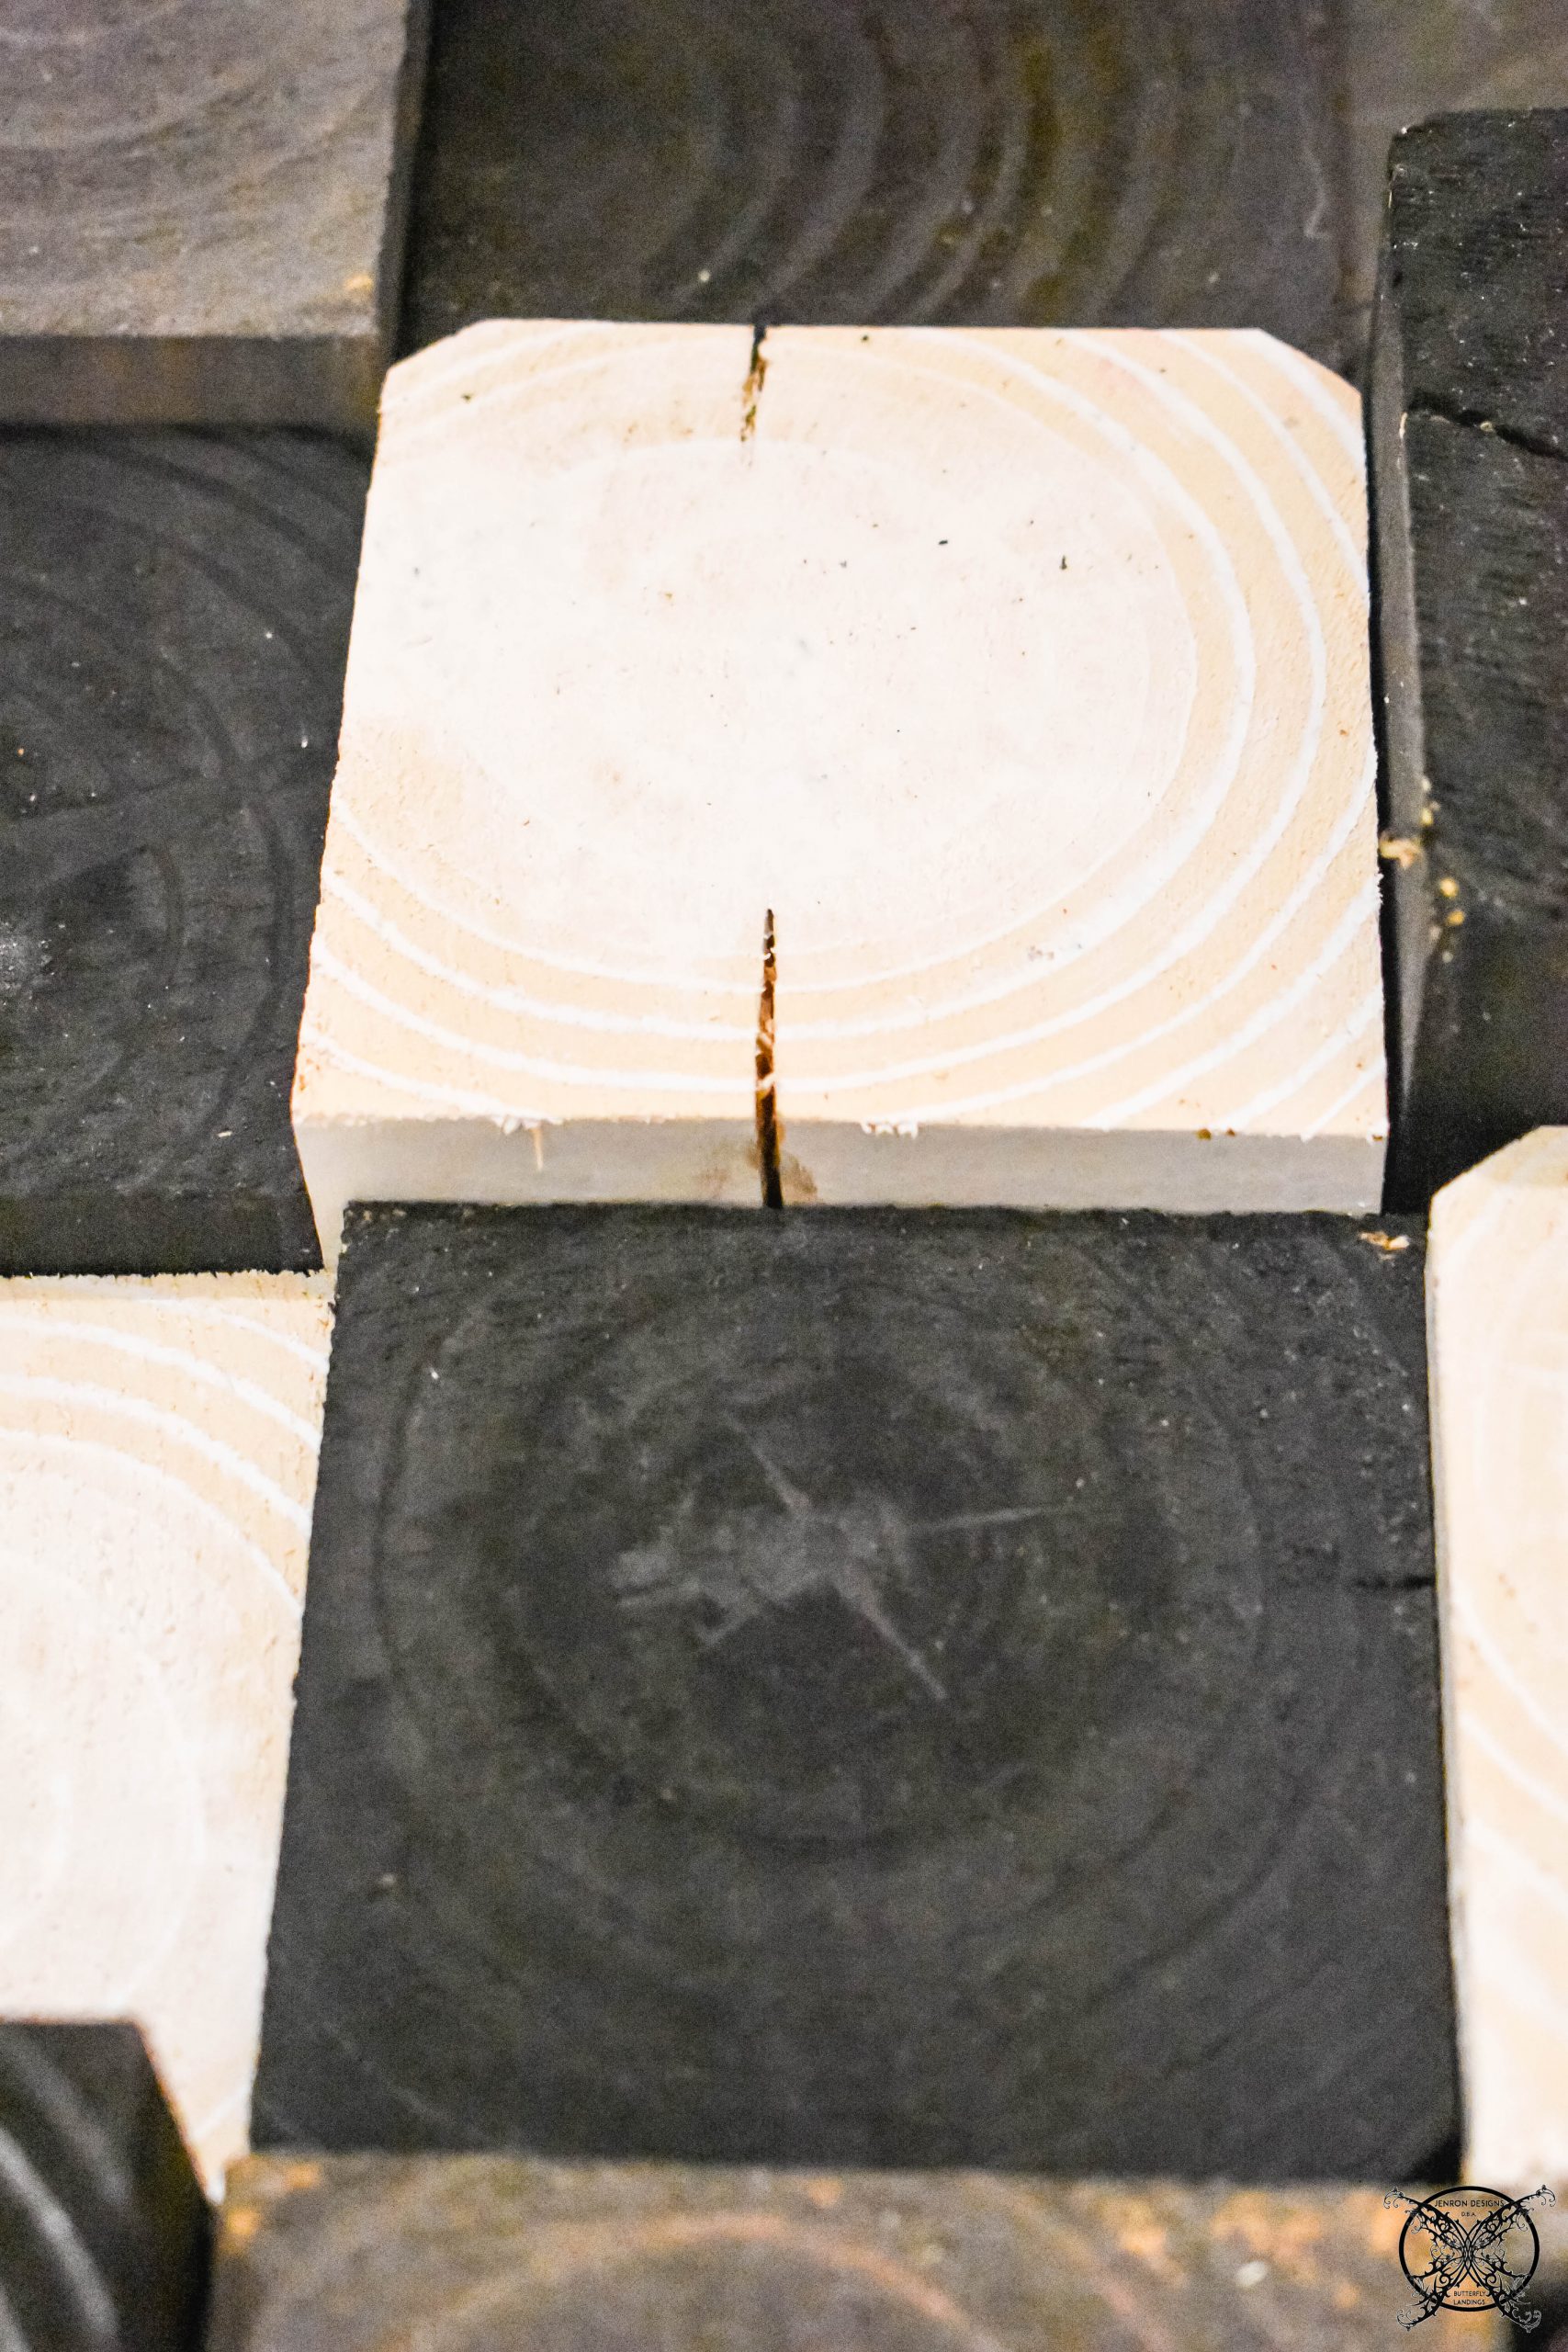 I did decided that I would go back and fill the white blocks with some drywall putty on the ends since the cracks really were distracting to me. I felt like they showed up more than any of the other color blocks, so just blame my O.C.D on this little random touch up.
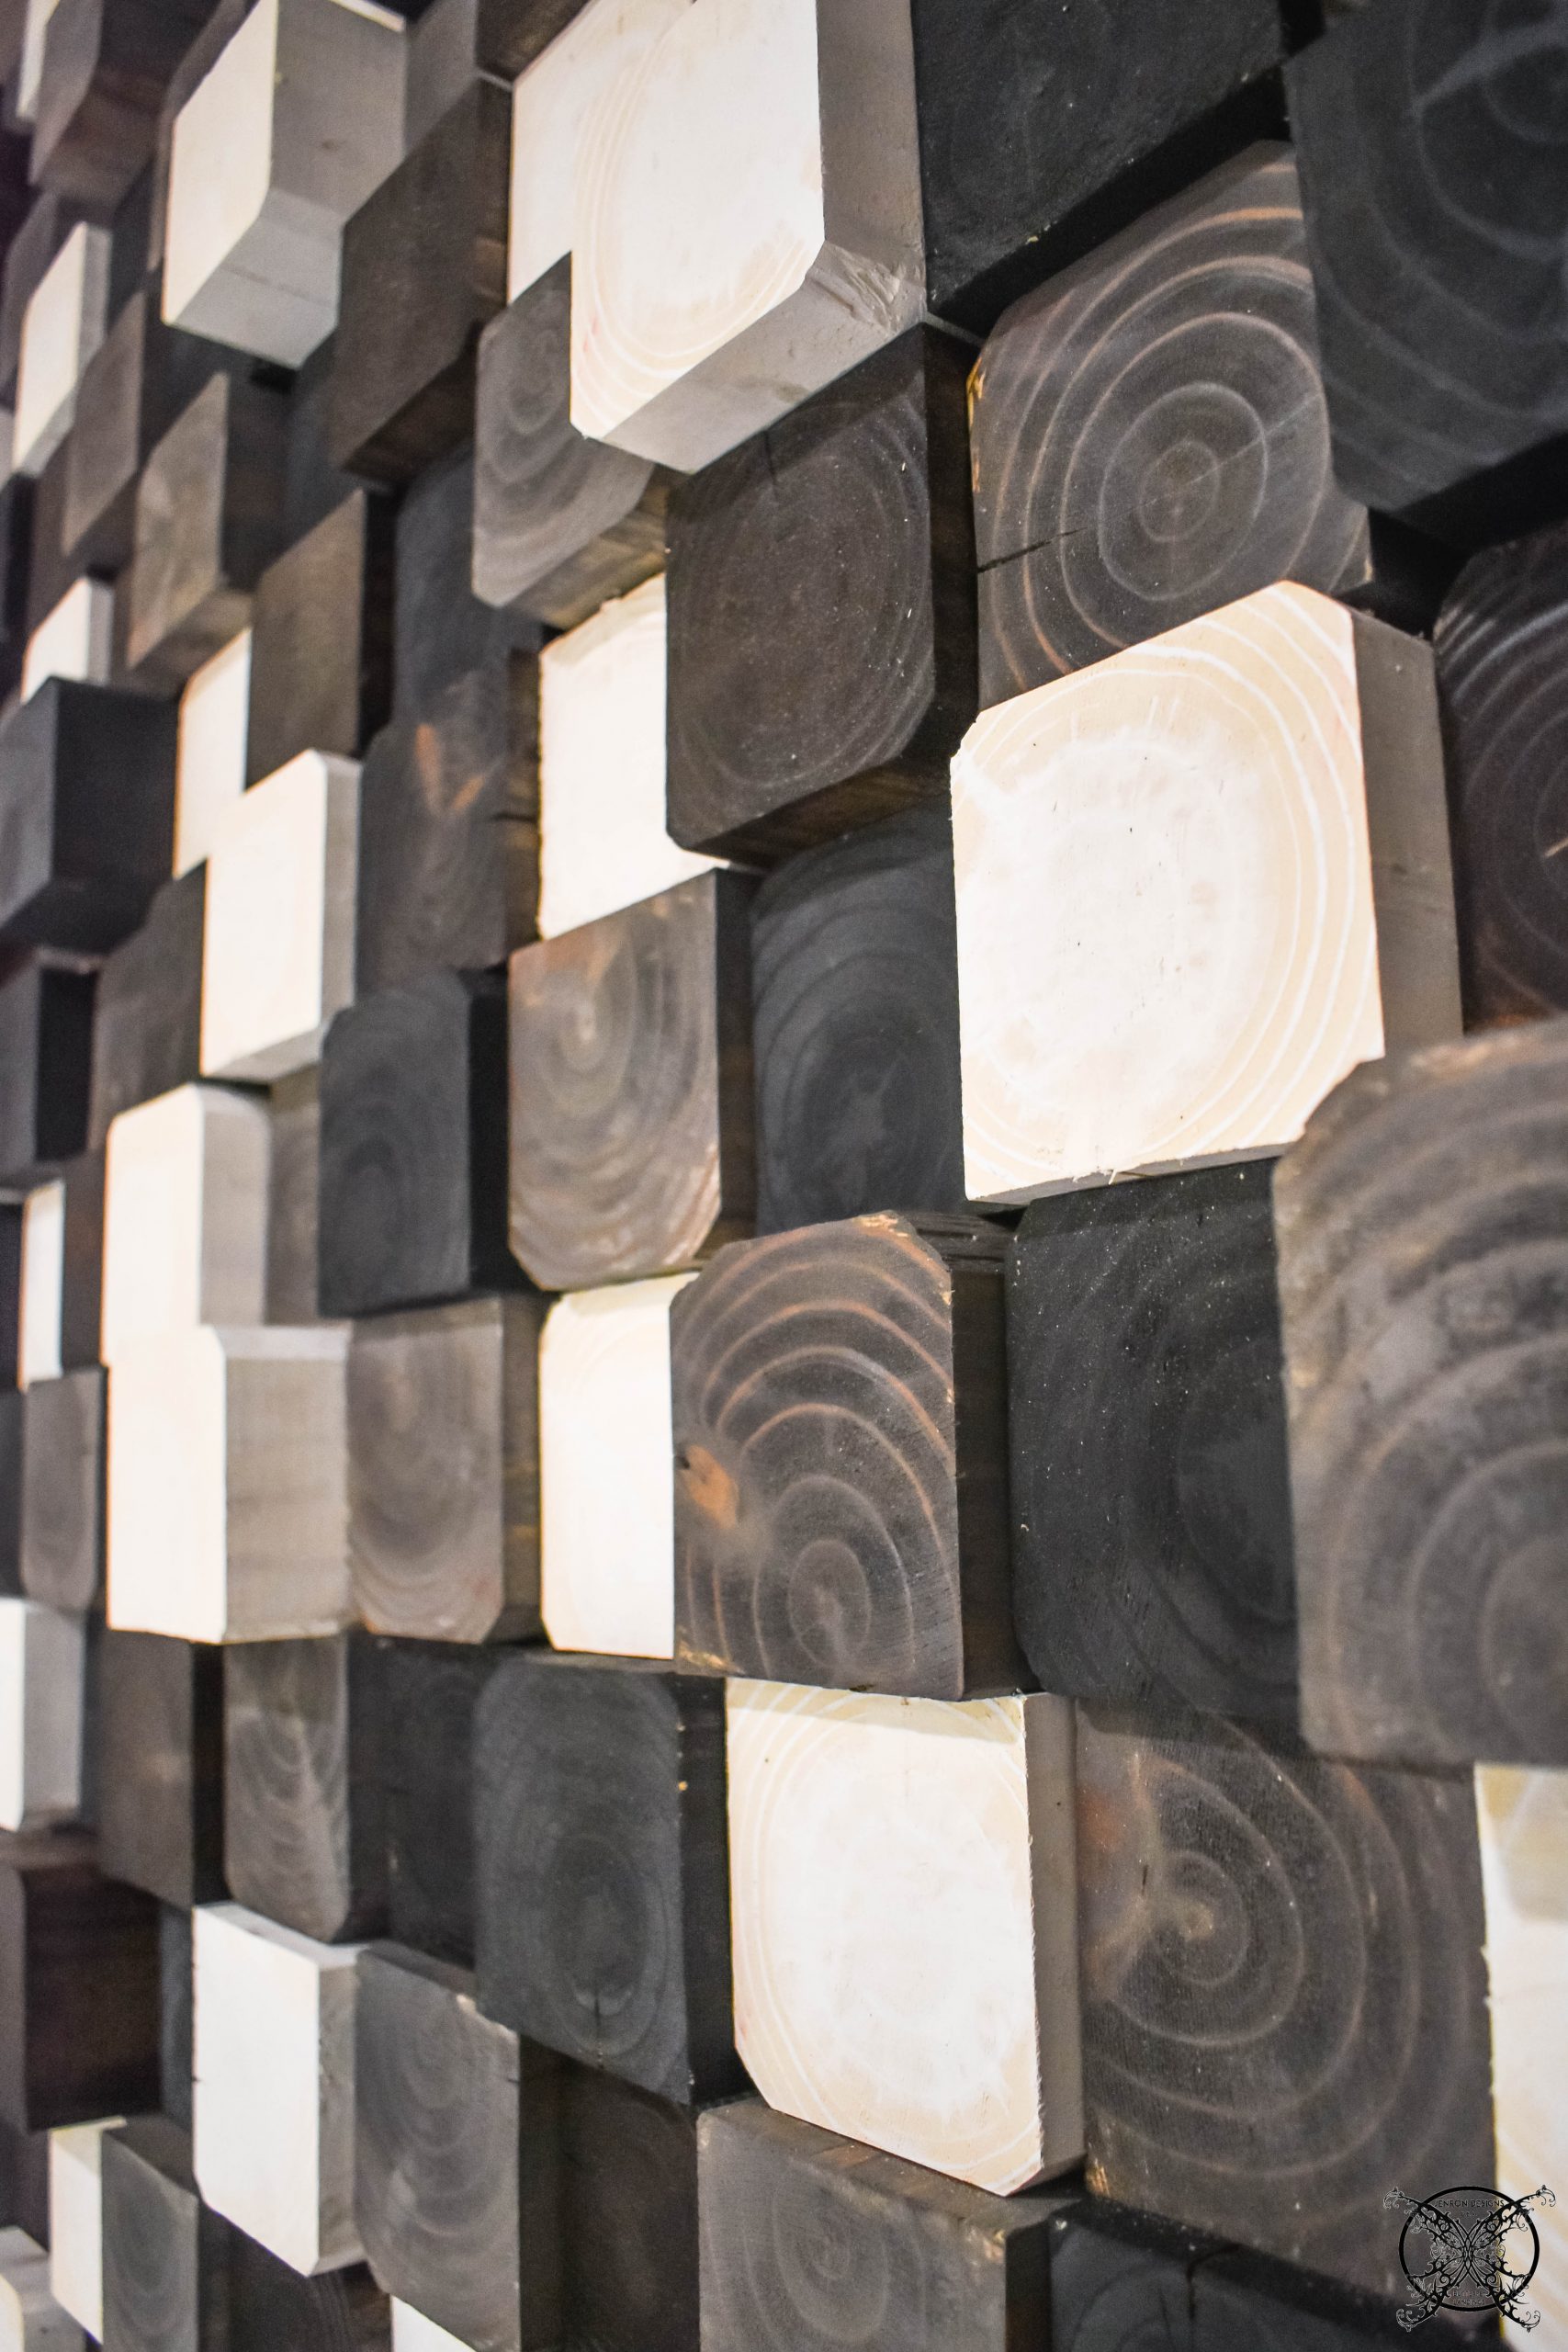 As you can see, you do not even see the cracks after the drywall putty was completely dry, and it removed the dark cracks which I found to be very distracting in this art piece.
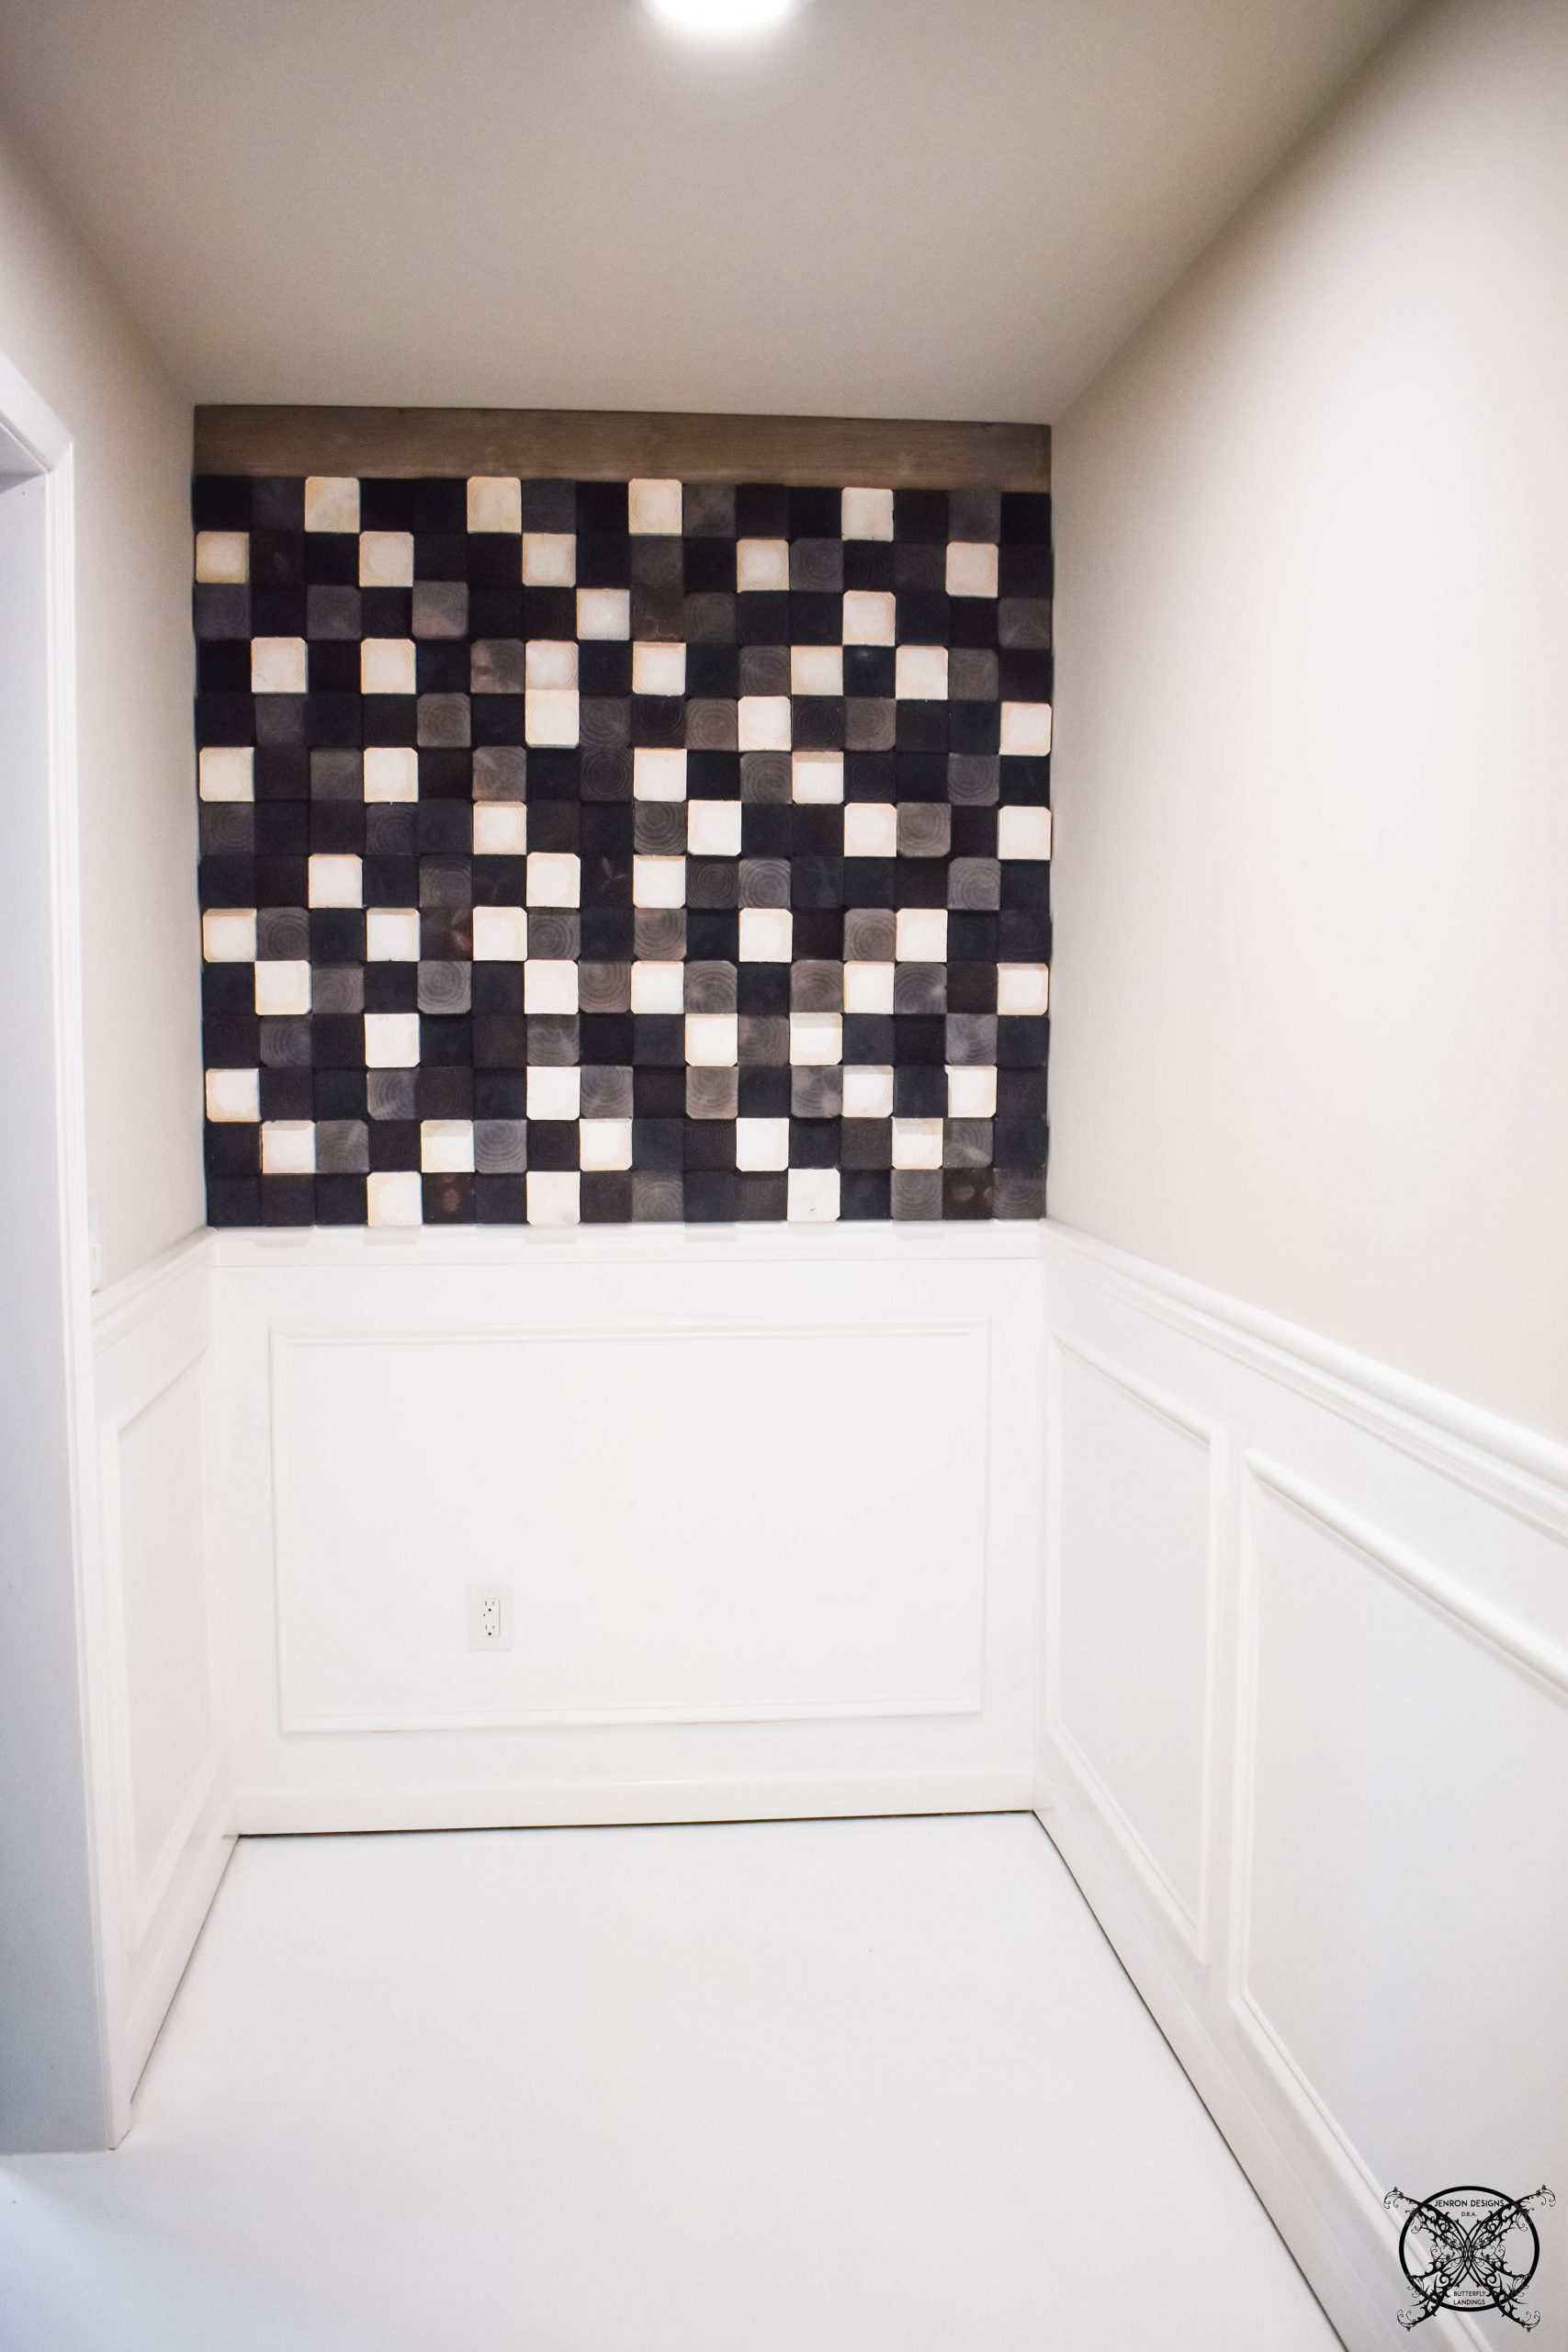 I am very happy with the way this accent wall has turned out in this little hallway. I have always thought that this space needed a fun focal piece, and now it has a custom made one of kind piece of art that matches our home.
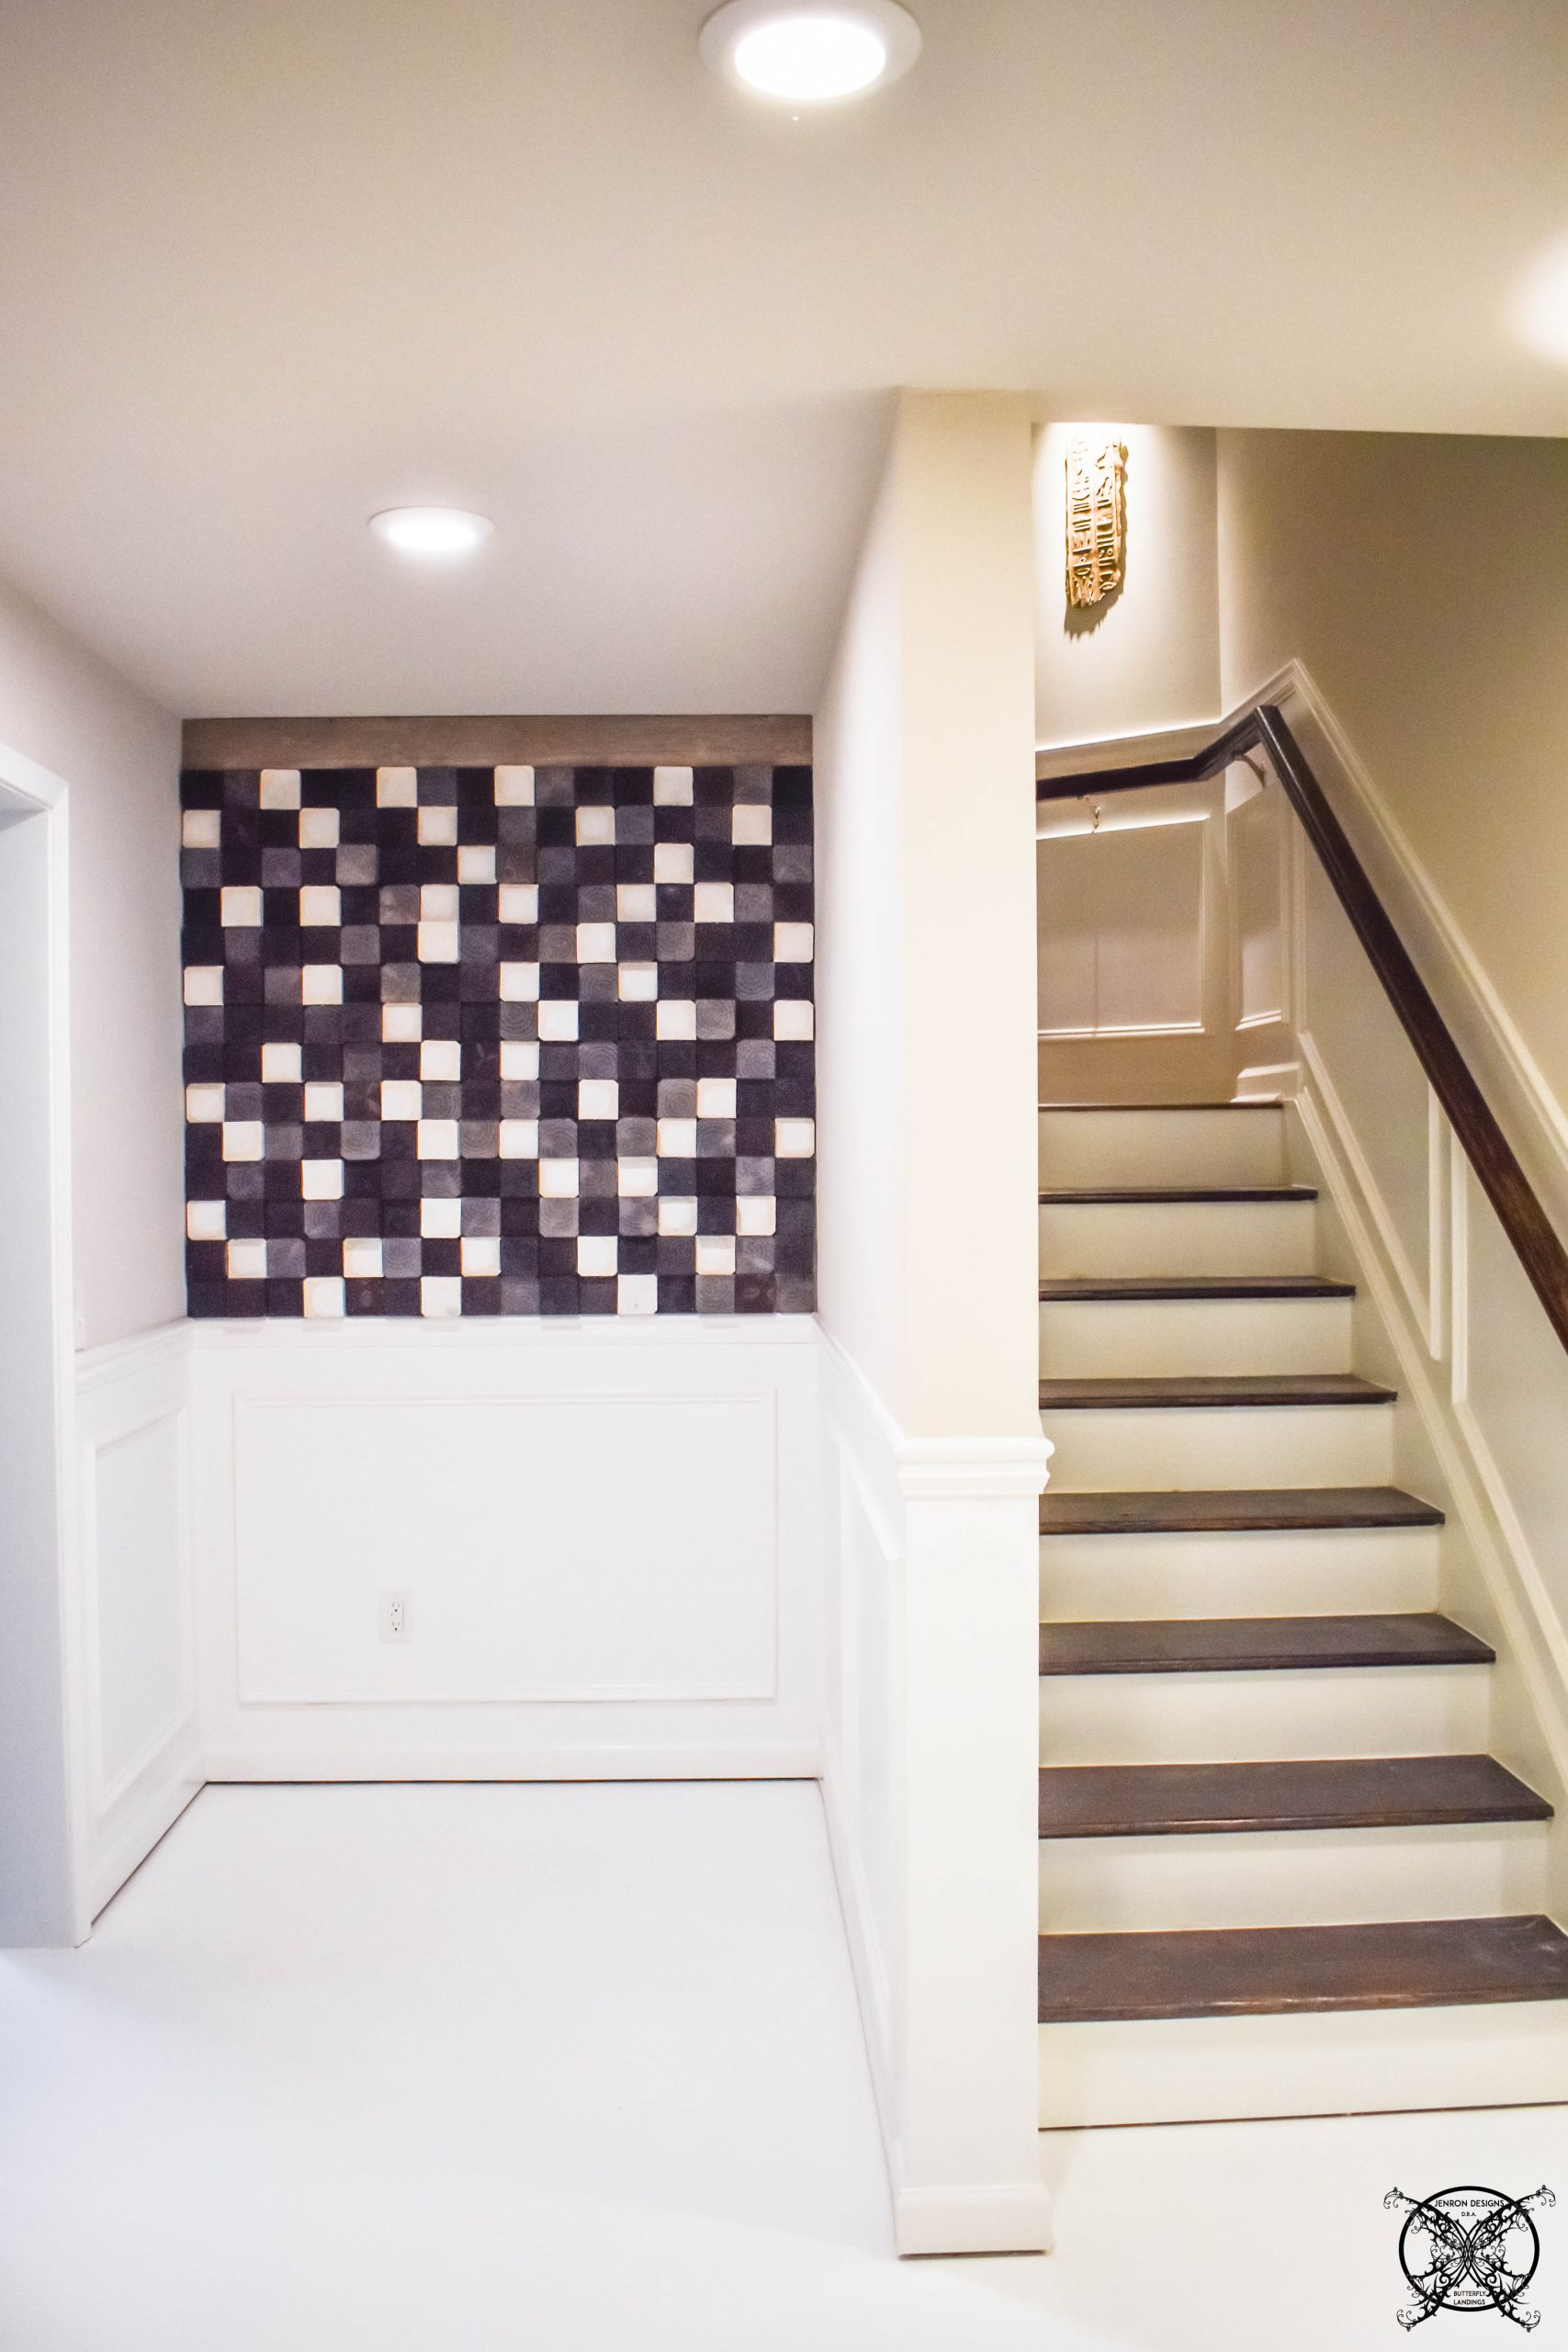 We are not done quite with this area yet, I have a few more things I am doing before I do a full reveal, so stay tuned as the DIY projects keep coming this season!
Updated: Here are a few pictures from the completed space with the candles all lit up! 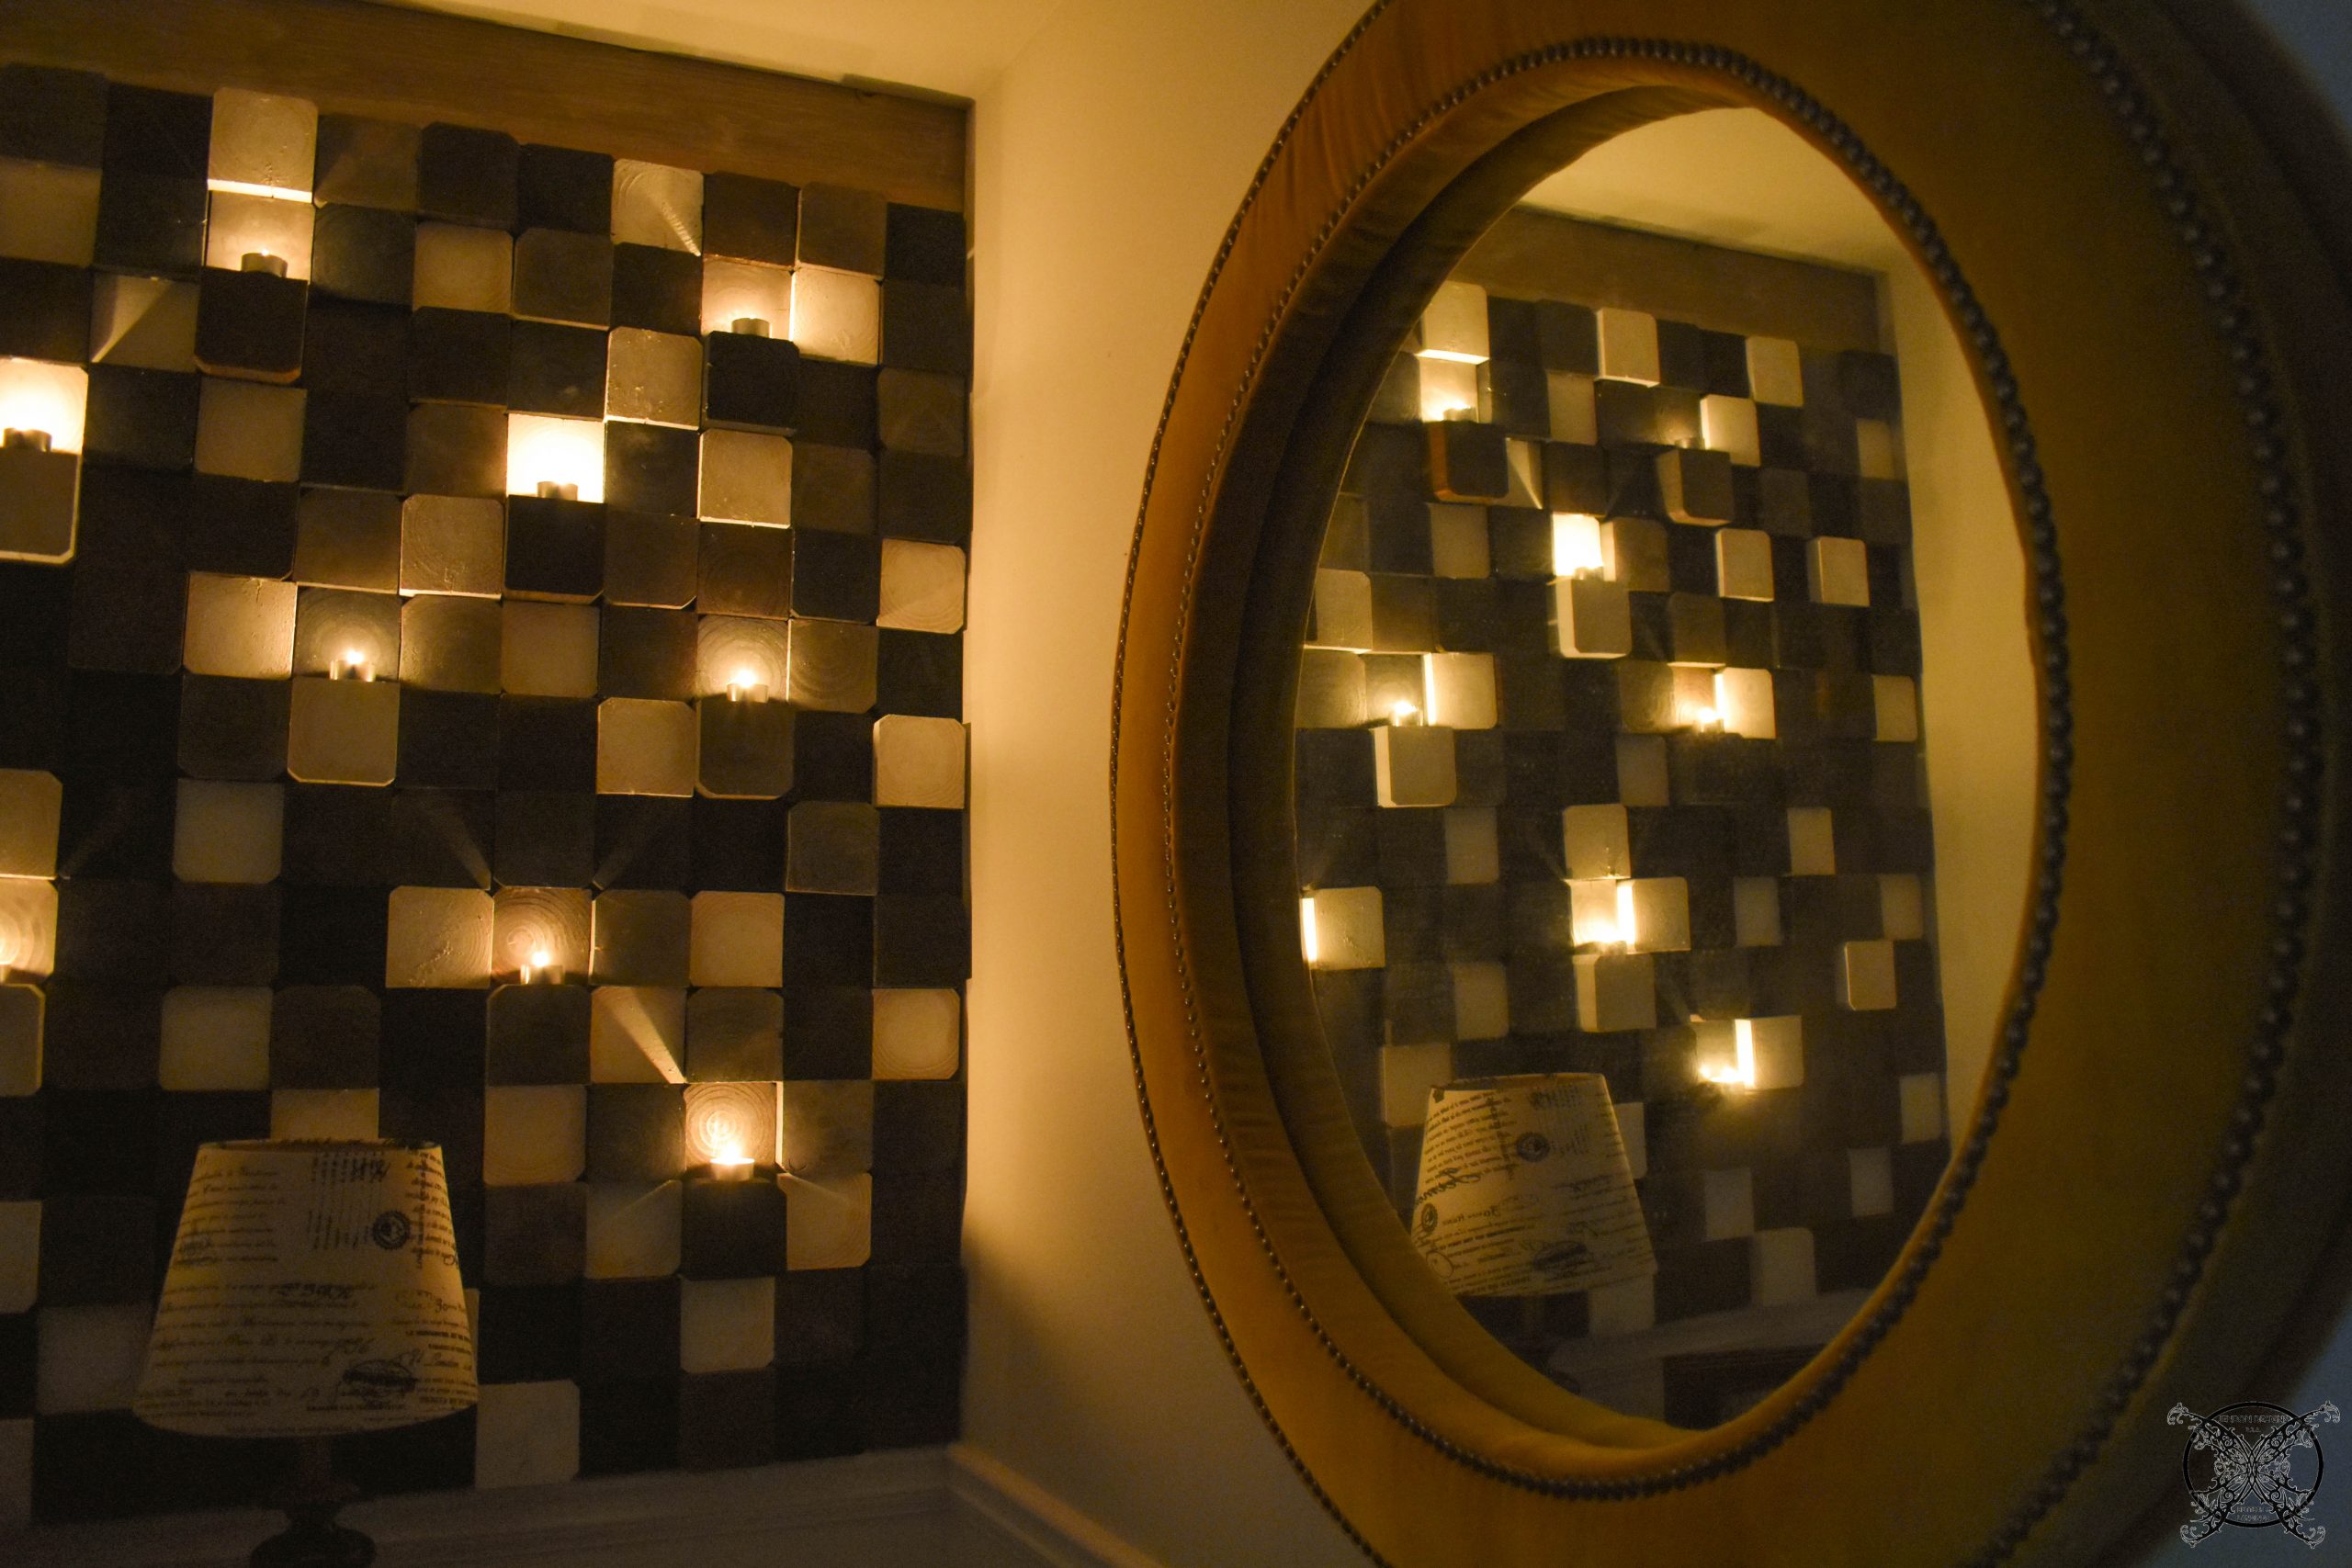 Which creates such a beautiful ambient glow, however for safety you want to consider a battery operated LED for long term burning, they do heat up the wood.
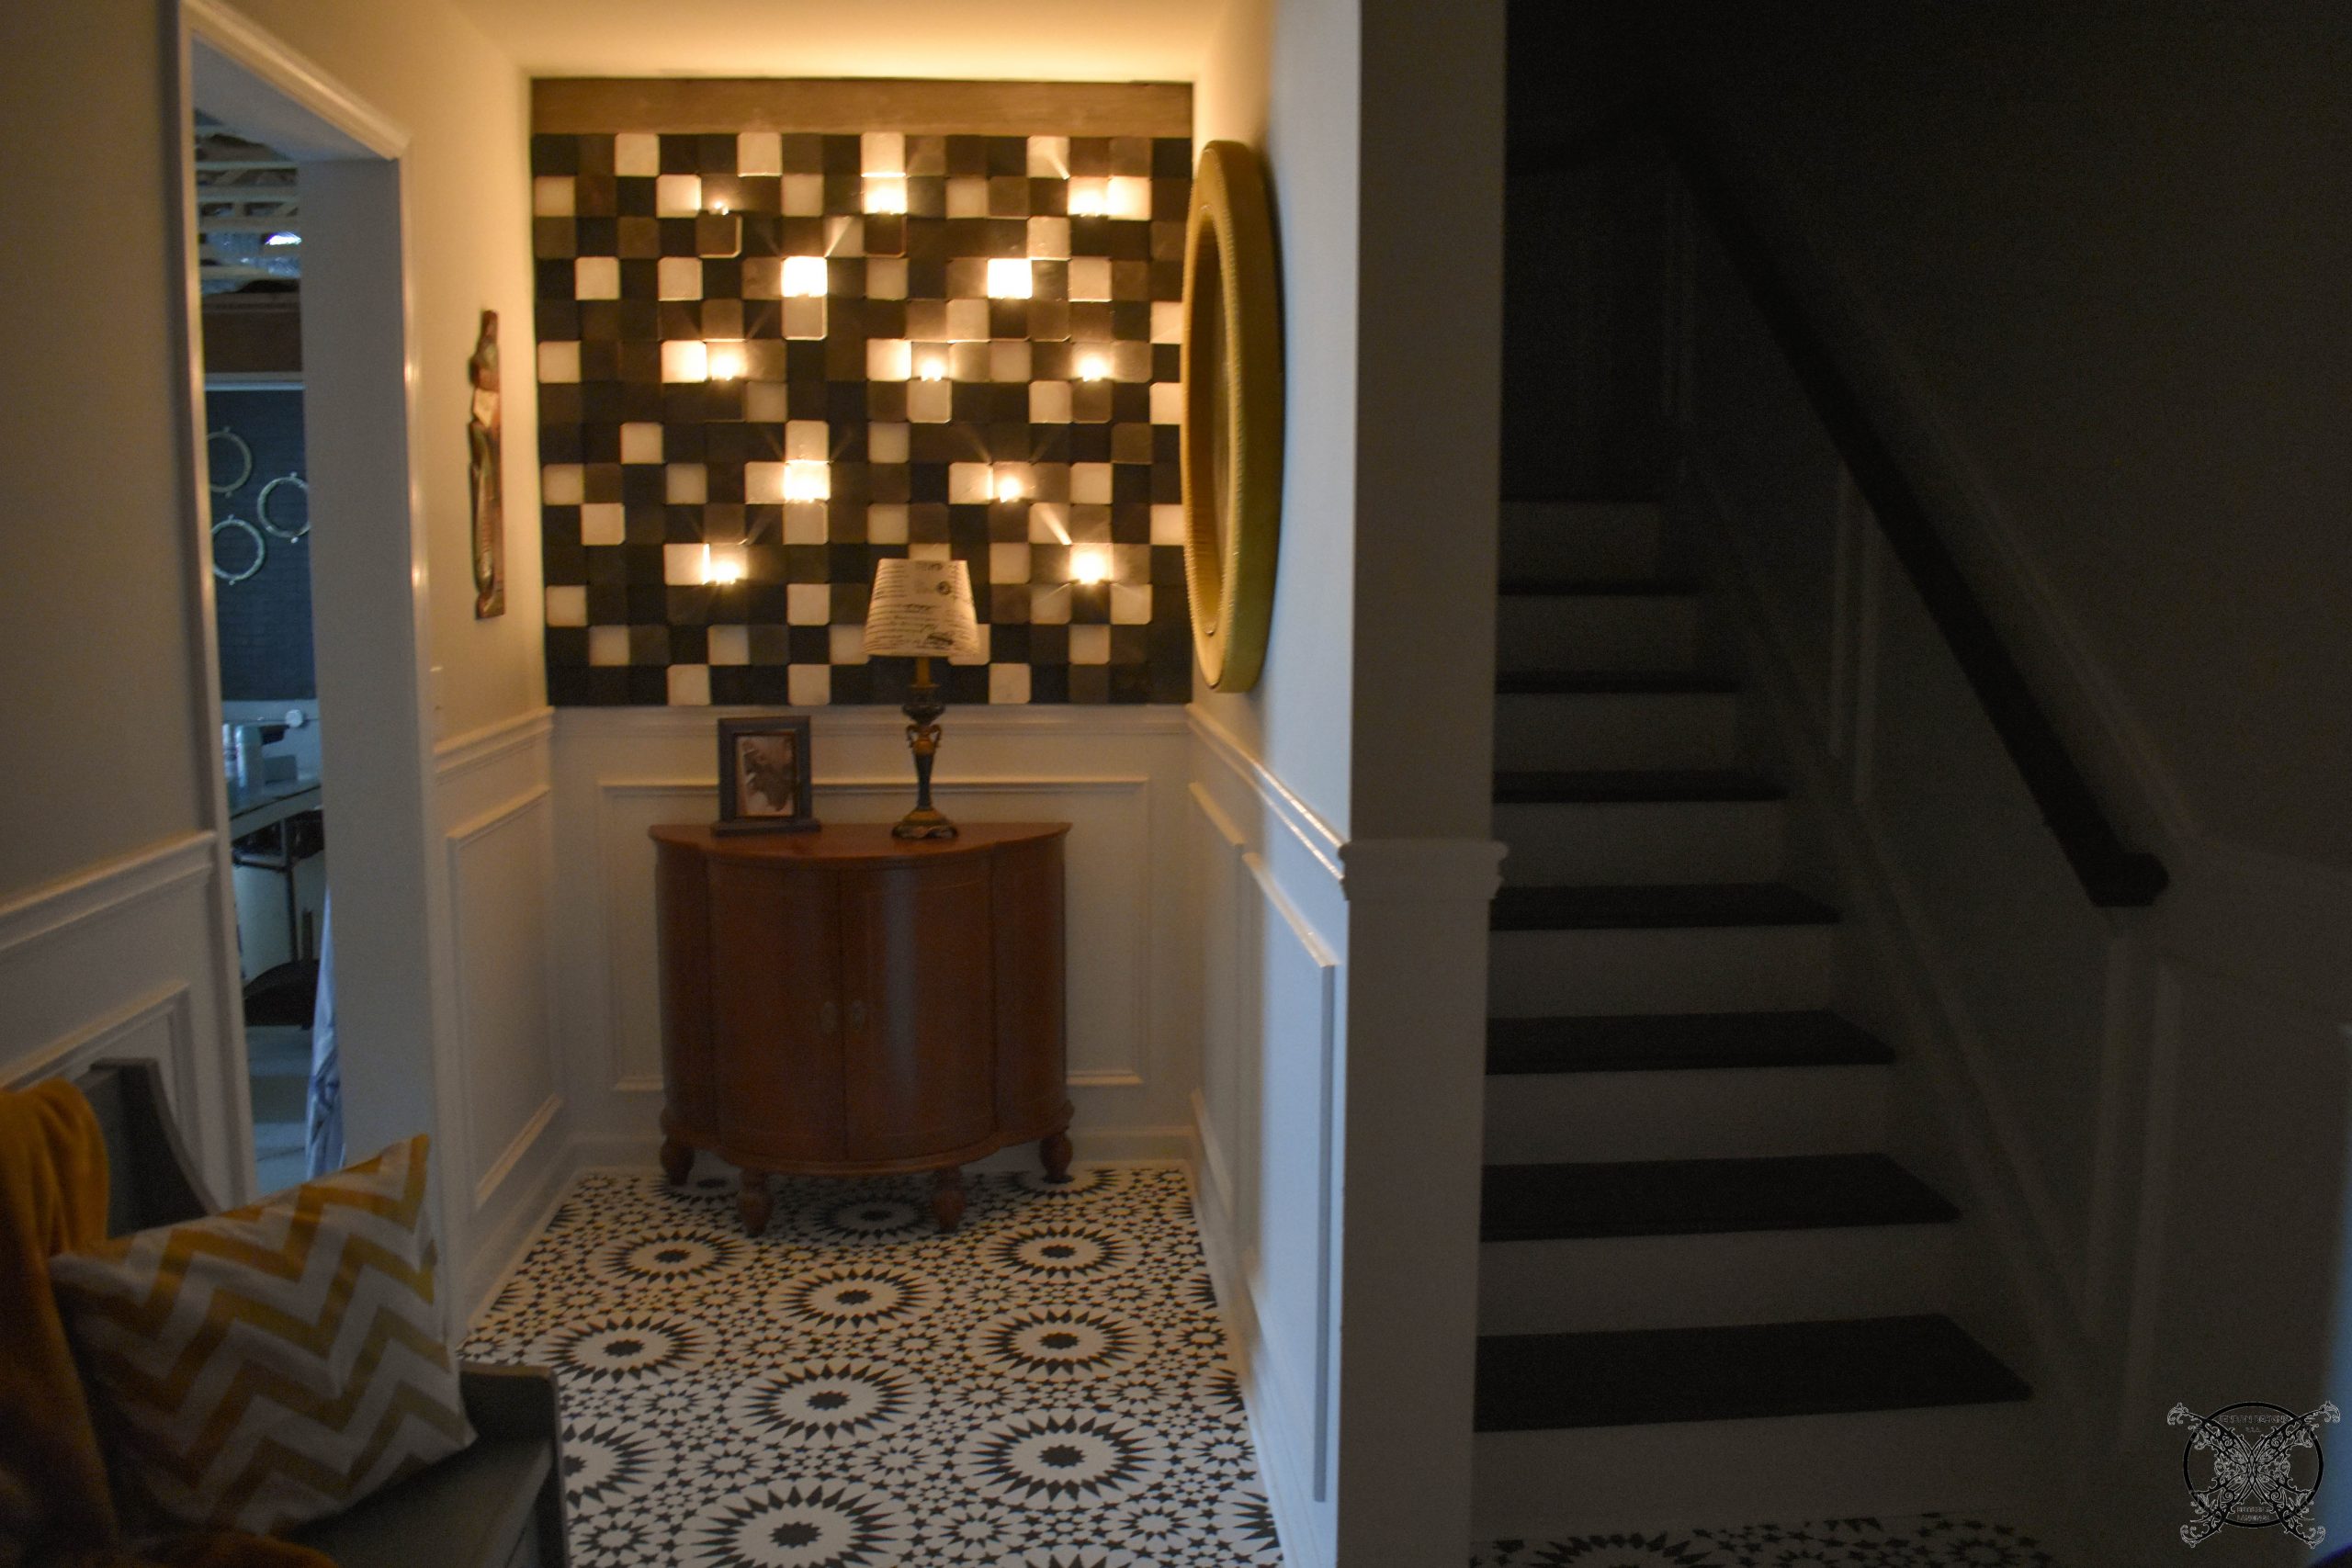
PIN ME for later and be sure to follow us on Pinterest at Jen @ JENRON DESIGNS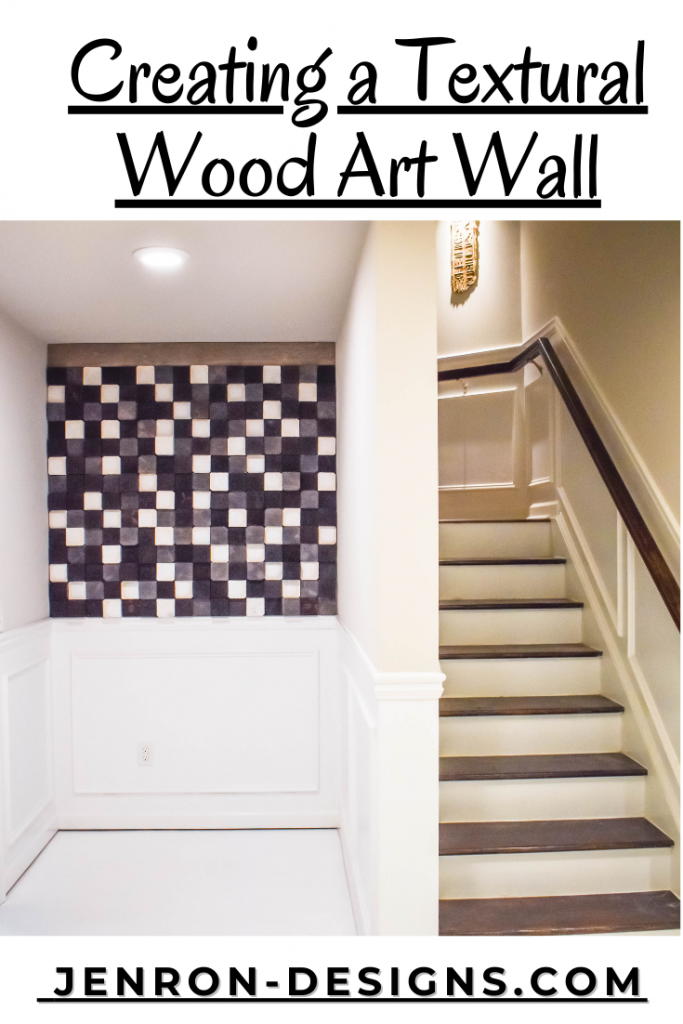
You are so creative Jennifer. This is genius! I am picturing how fun this would also be to use a similiar idea for a nursery making the wood pieces look like building blocks….oh fun!
Very cool statement piece! I love how the pieces are all different sizes so it’s not flat.
What a gorgeous art wall! I love the textures in this and the perfect instructions to do it myself.
How cool! I am always so interested in design in my home and this is so unique.
That is a fun idea, and it could have removable pieces too if it was in a kids room. Mine has candle ledges so I can light it up at night with votives and make a statement wall.
I am loving this!!! Such a gorgeous way to add texture!
Wow, this is so cool! What a great idea for a decorative wall!
This is such a cute DIY project
Such a gorgeous DIY idea, it looks so chic
This wall is everything! I love this idea and the execution of this DIY, so very creative and a beautiful project.
Hello there got to tell ya I really like what you guys are creating and doing over here. These projects look good and are easy to replicate at home, thanks for the ideas.
I’ve been exploring for a little for any high-quality articles or weblog posts on this kind of space. Reading this information I’m so glad that I’ve found out just what I needed and I will make certain to do not forget this web site and give it a look regularly.
Such a cool idea and it turned out beautiful. I love the artistic visions you have and how you just make them come life. That is the major thing I love to see you do here at your blog. It is not boring or basic like you hired a contractor and just paid for the project to be done, you can tell this is a true DIY from an artist.
Such a unique idea for a textural wall, and I love the colors you choose to make the statement. It looks great.
Hello there this is one of the single most unique walls applications I have seen in a while. I do really like the color choices and textural interest you have crested for this accent wall. It is not just so basic like all the other wood wall walls out there with 2×2 in weird patterns and black paint, thank you.
What an interesting idea for a accent wall. I have seen lots of wood wall ideas lately but this one has such textural interest and colors are great. I really like that you left place to add on tea lites for ambient candle light.