$100 Room Challenge: Wainscot Angled Panels
Welcome to week 3 of the $100 Room Challenge:Wainscot Angled Panels.
Welcome to week 3 of the $100 Room Challenge: Wainscot Angled Panels. If this is your first time seeing the $100 Room Challenge, let me give you some background, it is a bi-annual challenge sponsored by my friend Erin, from Lemons, Lavender, & Laundry. What is the $100 Room Challenge all about? This challenge takes place twice a year, January and September. Erin invites us to redo a room in our home using a budget of only $100. As you can see the premise of this challenge is real simple: one month, one space, and $100. If you want to know more about the $100 Room Challenge, check out Erin’s post to see how the concept was inspired, and it’s colossal growth since she decided to start it!
Weeks at a Glance:
WEEK 1 WEEK 2 WEEK 3 WEEK 4 REVEAL

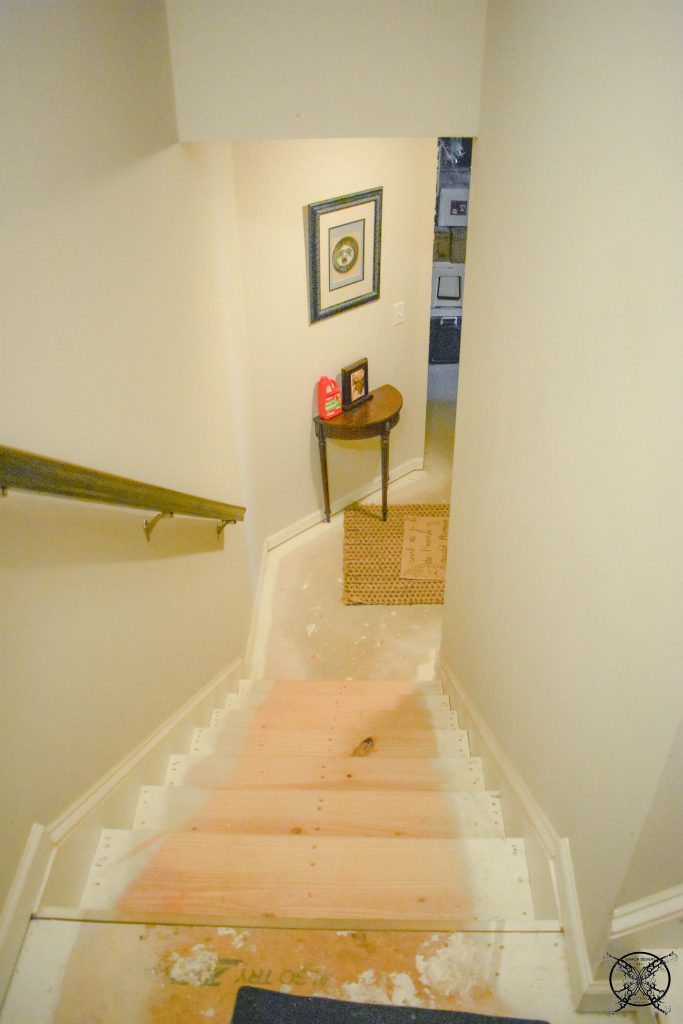
This week we are excited to be starting the wainscot panels. We are currently at the mid way point of the $100 Room Challenge: Wainscot Angled Panels and working my way forward into the space. So this is our before look at the steps we finished last week as we start on the wainscot staircase panels to the basement let’s take a quick look back at our starting point. 
Wainscot Angled Panels
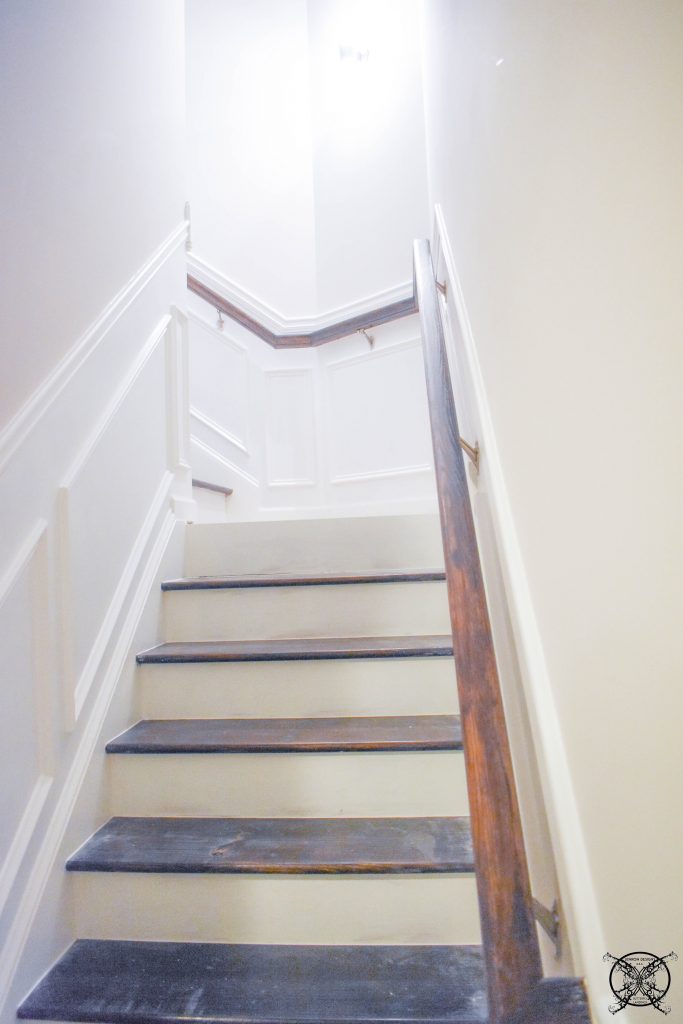
This week as we started $100 Room Challenge:Wainscot Angled Panels, it is important for me to say that a lot of time and calculations went into this part of the challenge. Mainly because we had a ton of leftover trim pieces from previous Wainscot projects like the ORC Master Bathroom and ORC Master Closet Challenges that we wanted to utilize to save us some money. First, of all let me say it is really important to never just toss scrap wood, anything over 3-4″ can be of value in carpentry, even if you just use it to make a template or jig for other cuts. 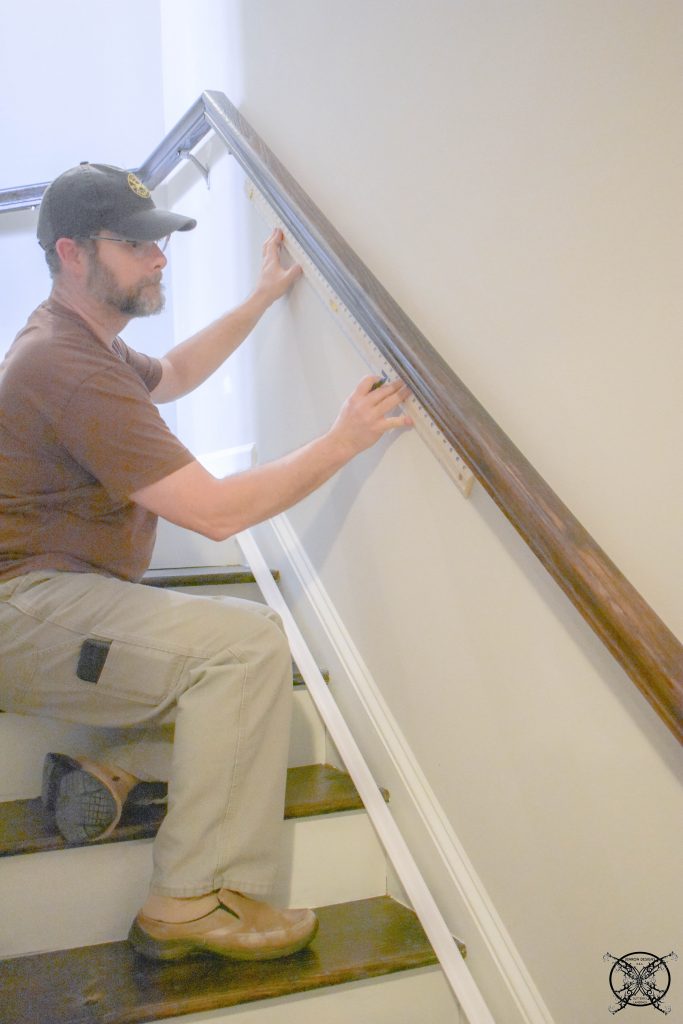 This project was a little different from our previous projects since everything would be cut on an angle to match the incline of the steps and the handrail. So a little prior proper planning was required for a seamless execution of this project. You want to figure up where the boxes would go. Since we already have standard spacing throughout the house we wanted to keep with those measurements so it does not look piece milled or too hodge podge, which is a dead giveaway of a DIY.
 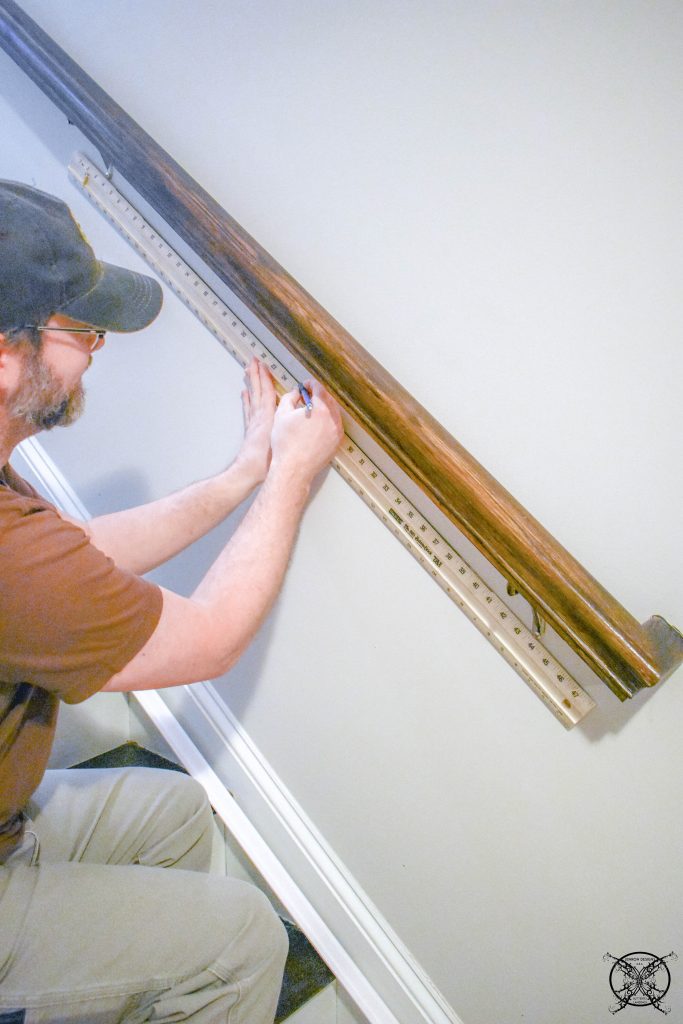 Also we had to account for the handrail, which would be where a chair rail would have normally been placed, which meant the chair rail would either need to go above, below or behind the handrail. Below looked weird and behind seemed like a waste, so we opted to go slightly higher than the standard chair rail height of 36″.
 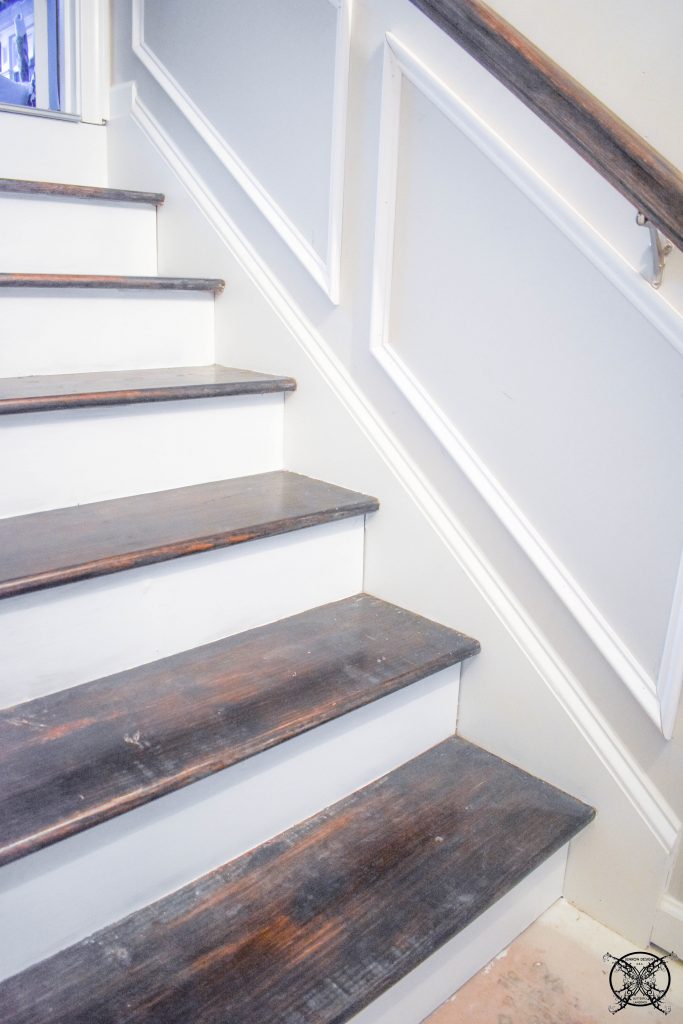 To create the angular boxes your vertical pieces will both be the same length and mounted at different heights to accommodate the the incline of the steps. To find the proper angles of the the miter cuts, since they will not be a a simple 45 degrees as in most wainscot applications, you will need to use a compass to find the angle and then divide that angle in half to find the magical number for your miter cut.
 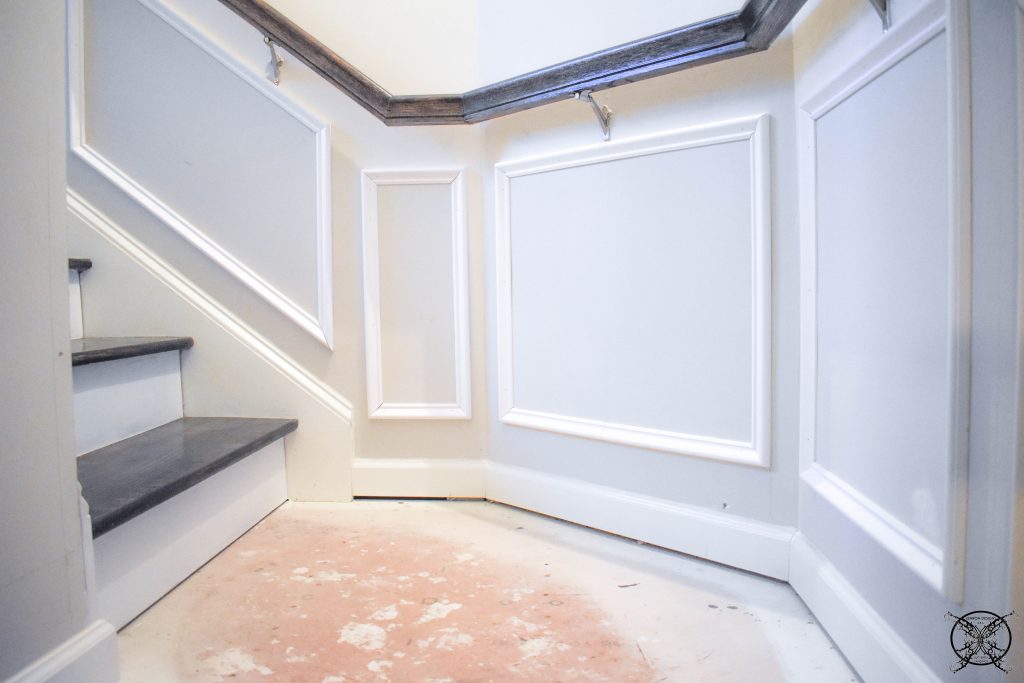 As you can see the landing area was again just the simple boxes with basic 45 degree angle cuts. However since the wall is faceted with a chamfered edge we did create a smaller box in between to mirror that of the base molding already in place.
 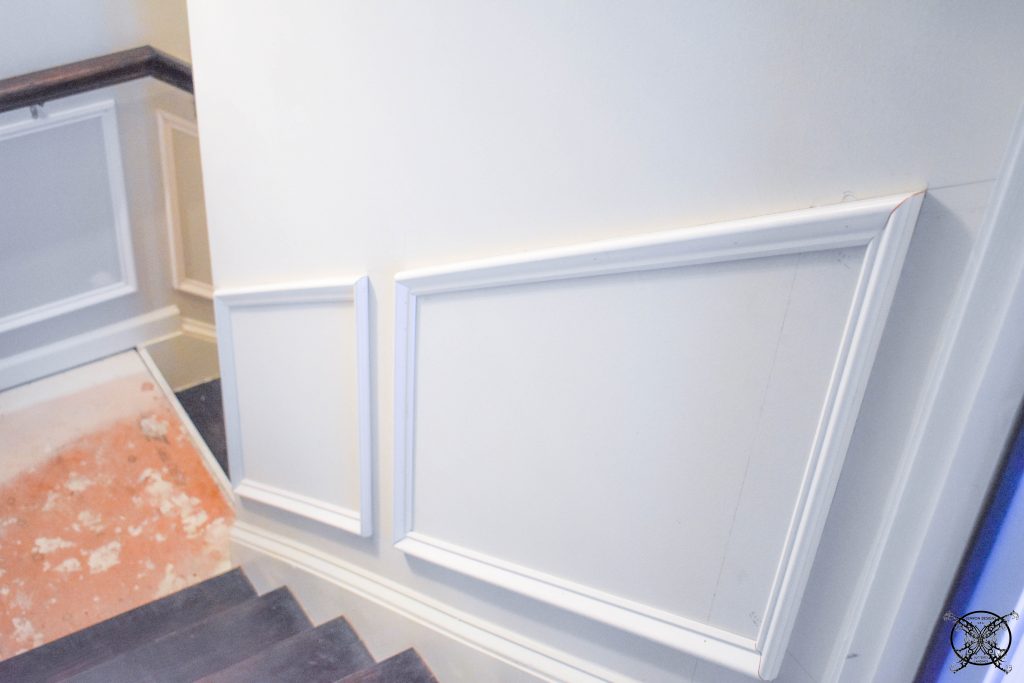 We then replicated the same angles and heights on the adjacent wall. Which worked perfectly for everything except the chair rail meeting up in the same location. Since no house is ever square, try as you may your heights by a tape measure can be off, and you may need to eyeball the proper heights to make sure that things actually look level.
 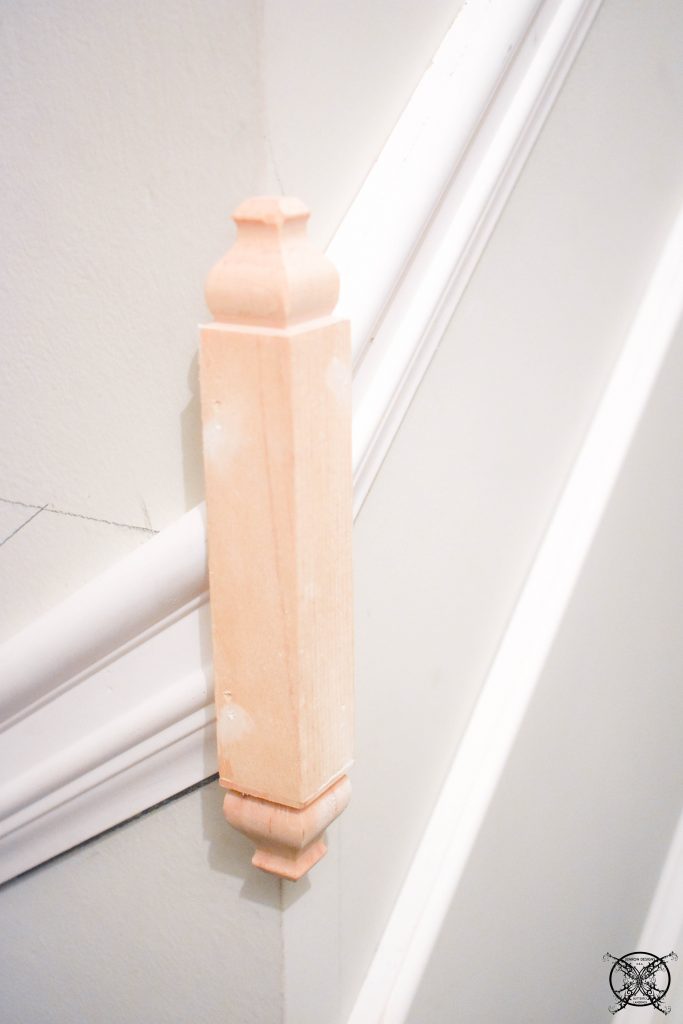 The only way around this way purchasing a $1.20 wooden corner corbel to wrap the edge. These are decorative pieces sold in the trim aisle for this purpose or for crown molding. By adding this one little piece, once it is all painted you will never know that the chair rail does not properly meet at the corner, even though it will be at the proper heights at the door frame and the floor level.
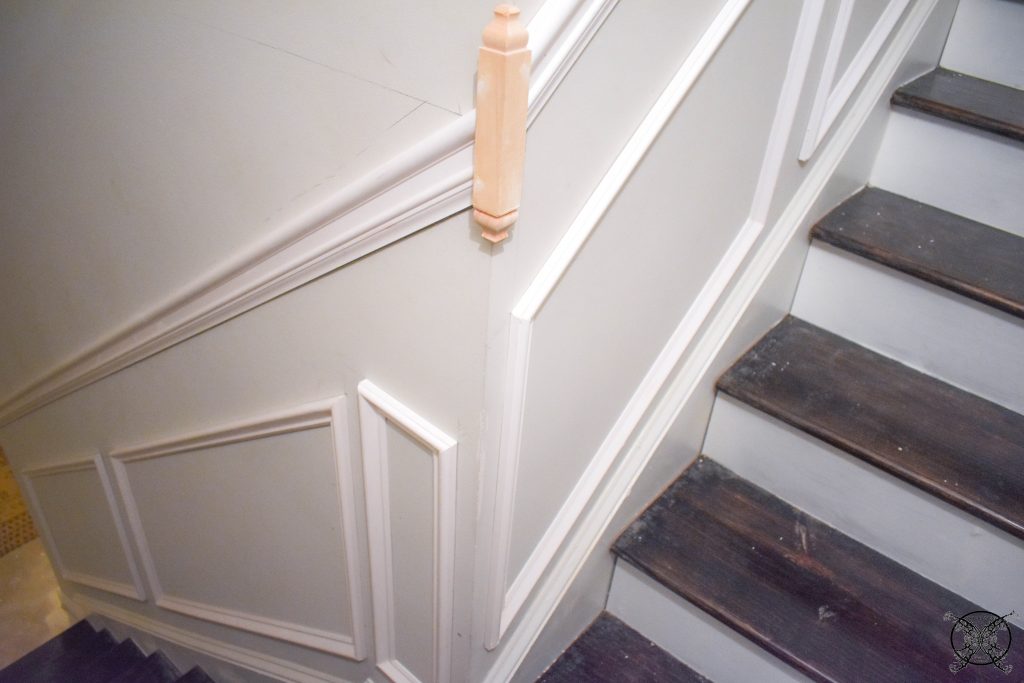 You will also notice that spacing is a little higher on this side as well, that is because there is not a handrail on this side of the wall, as there is on the opposite side. These are all things that make a stairwell a little trickier than a basic room.
 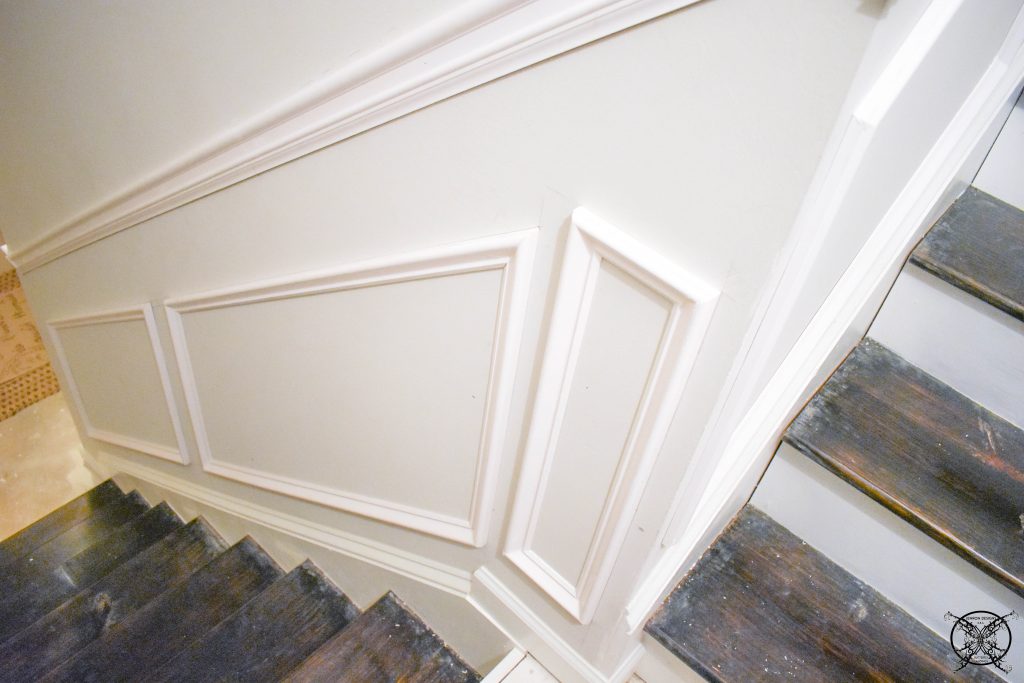 After we got all the trim installed it was time to caulk and paint. I will be the first to tell you that not all of our pieces were perfectly flush, but given the trim work I have seen by professionals building houses these days I am not losing any sleep over it. I took good notes a little caulk in all the joints and paint, you will never notice it again.
 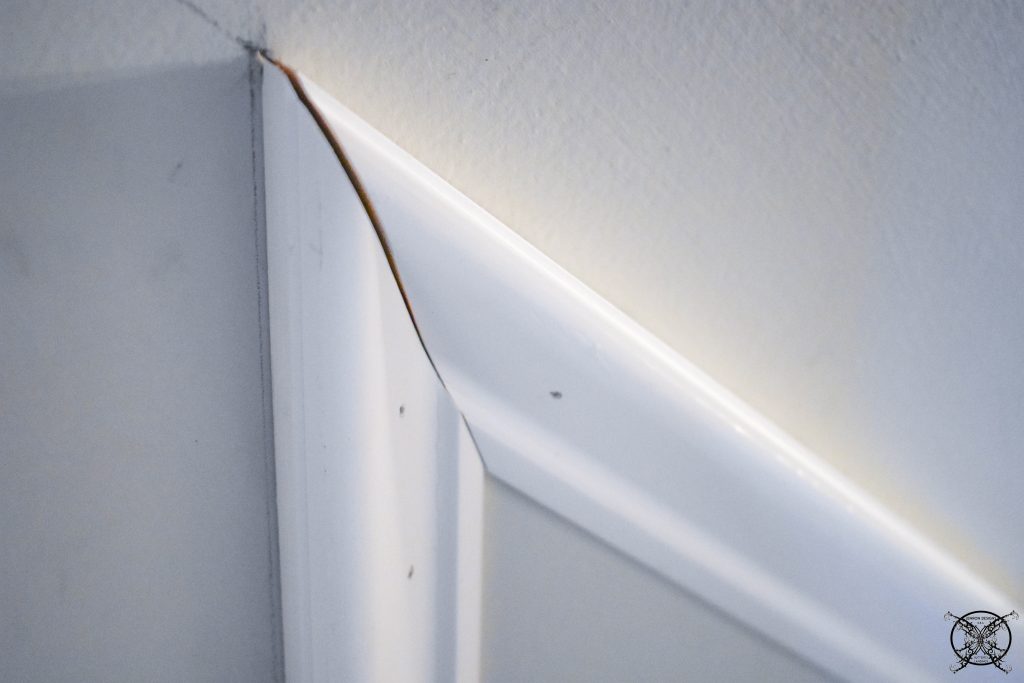 There were even a few places we had to miter the chair rail together since the sticks come in 8 foot sections. So we would have to caulk those joints anyway. You would probably think that things like this would bother me, but I have learned over the years as long as the final outcome looks good it really does not matter how you get there on the cosmetic stuff.
 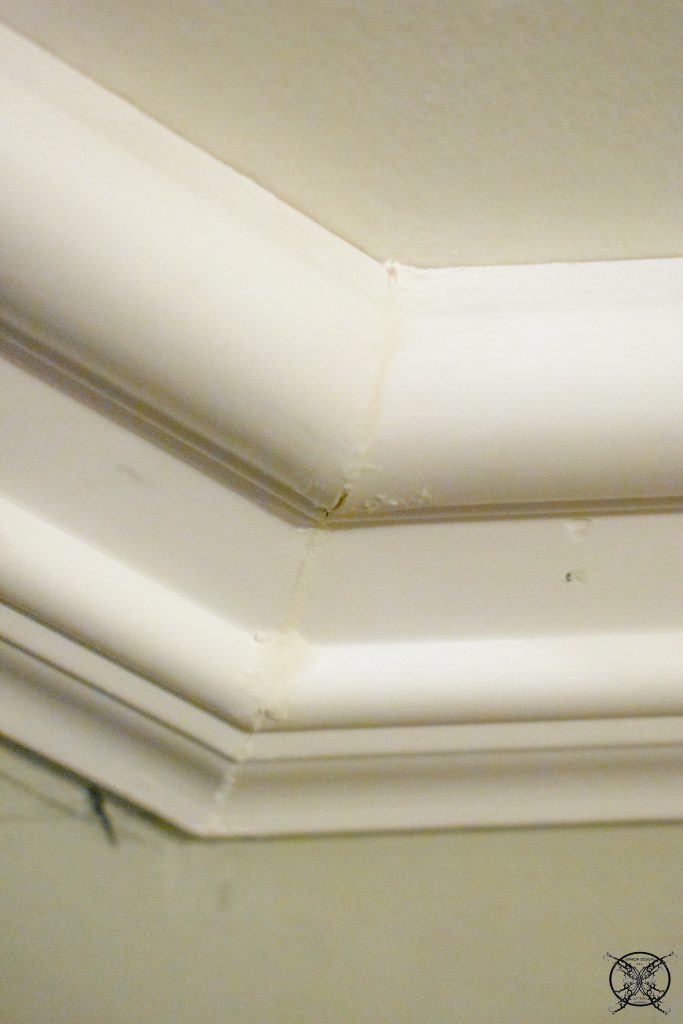 So for the paint we have several half used gallons of paint, again from both of our ORC projects last year that we need to use. So there is no cost for the paint.
*Please note that I was compensated for this post. This post contains affiliate links for your convenience. These involve no extra cost to you, but may result in me receiving a small commission should you decide to purchase after clicking on my links – for which I am very grateful! You can view my full advertising disclosure here. 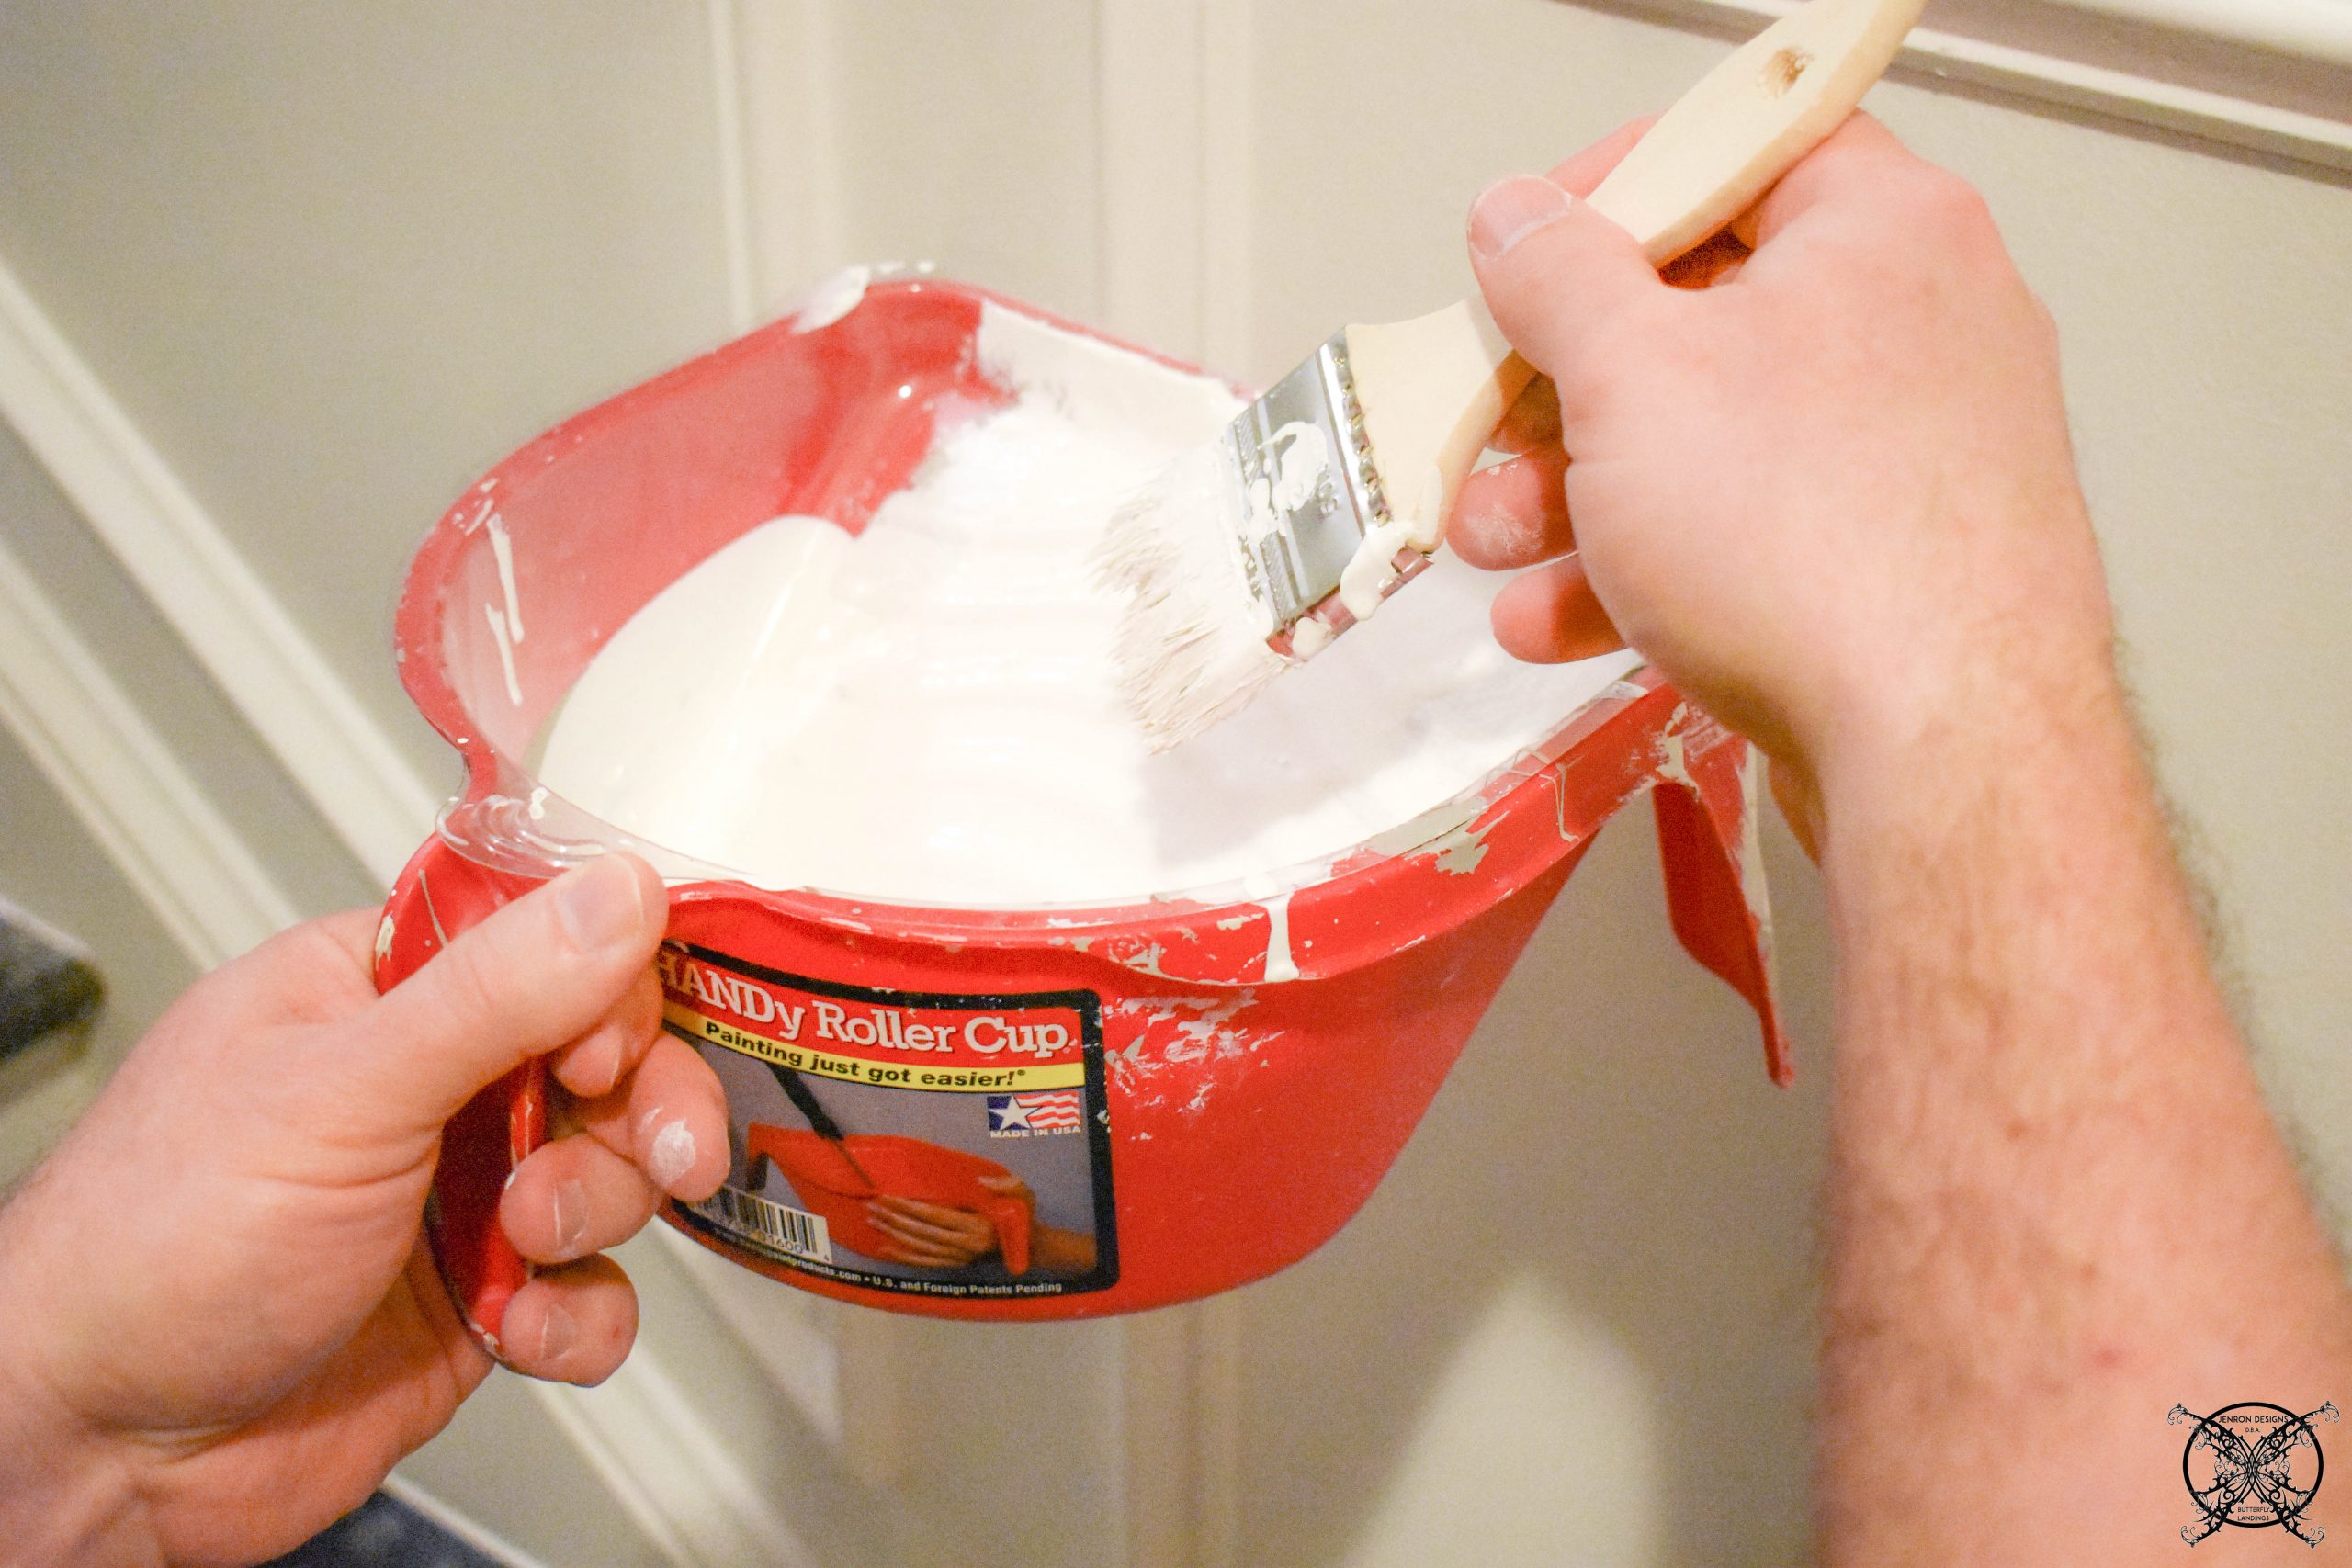 We also reused a bunch of our existing paint supplies from those projects as well. I find that if you keep your paint supplies in relatively good condition by rinsing and cleaning your rollers and brushes, you can get a lot more life out of them than a single use. I have to say thank you again to my friends at HANDy Paint supplies, because this roller pan was exactly the right size for this type of project. We just added a new liner that we had on hand and started the next phase of our project.
 So this is a look at our stairwell with the first coat of paint on everything. We will be going back and doing a second coat and touch up. As you can see the stair tread risers clearly need an additional coat.
 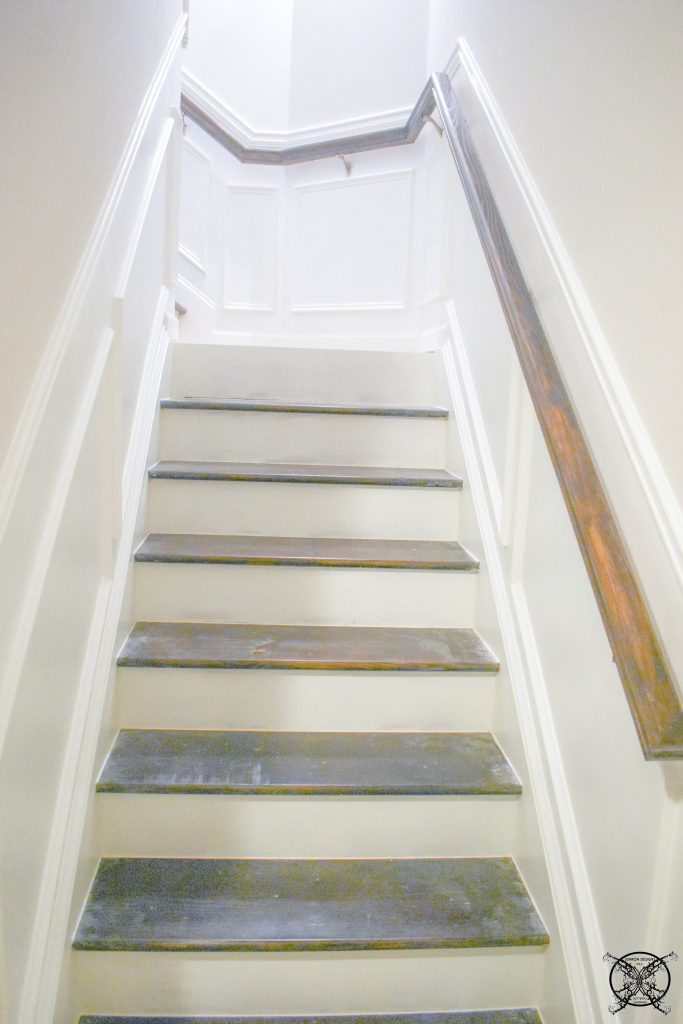 All in all I am loving the the way the new wainscot panels have brightened up this dark little hallway and added a touch of elegance to this space.
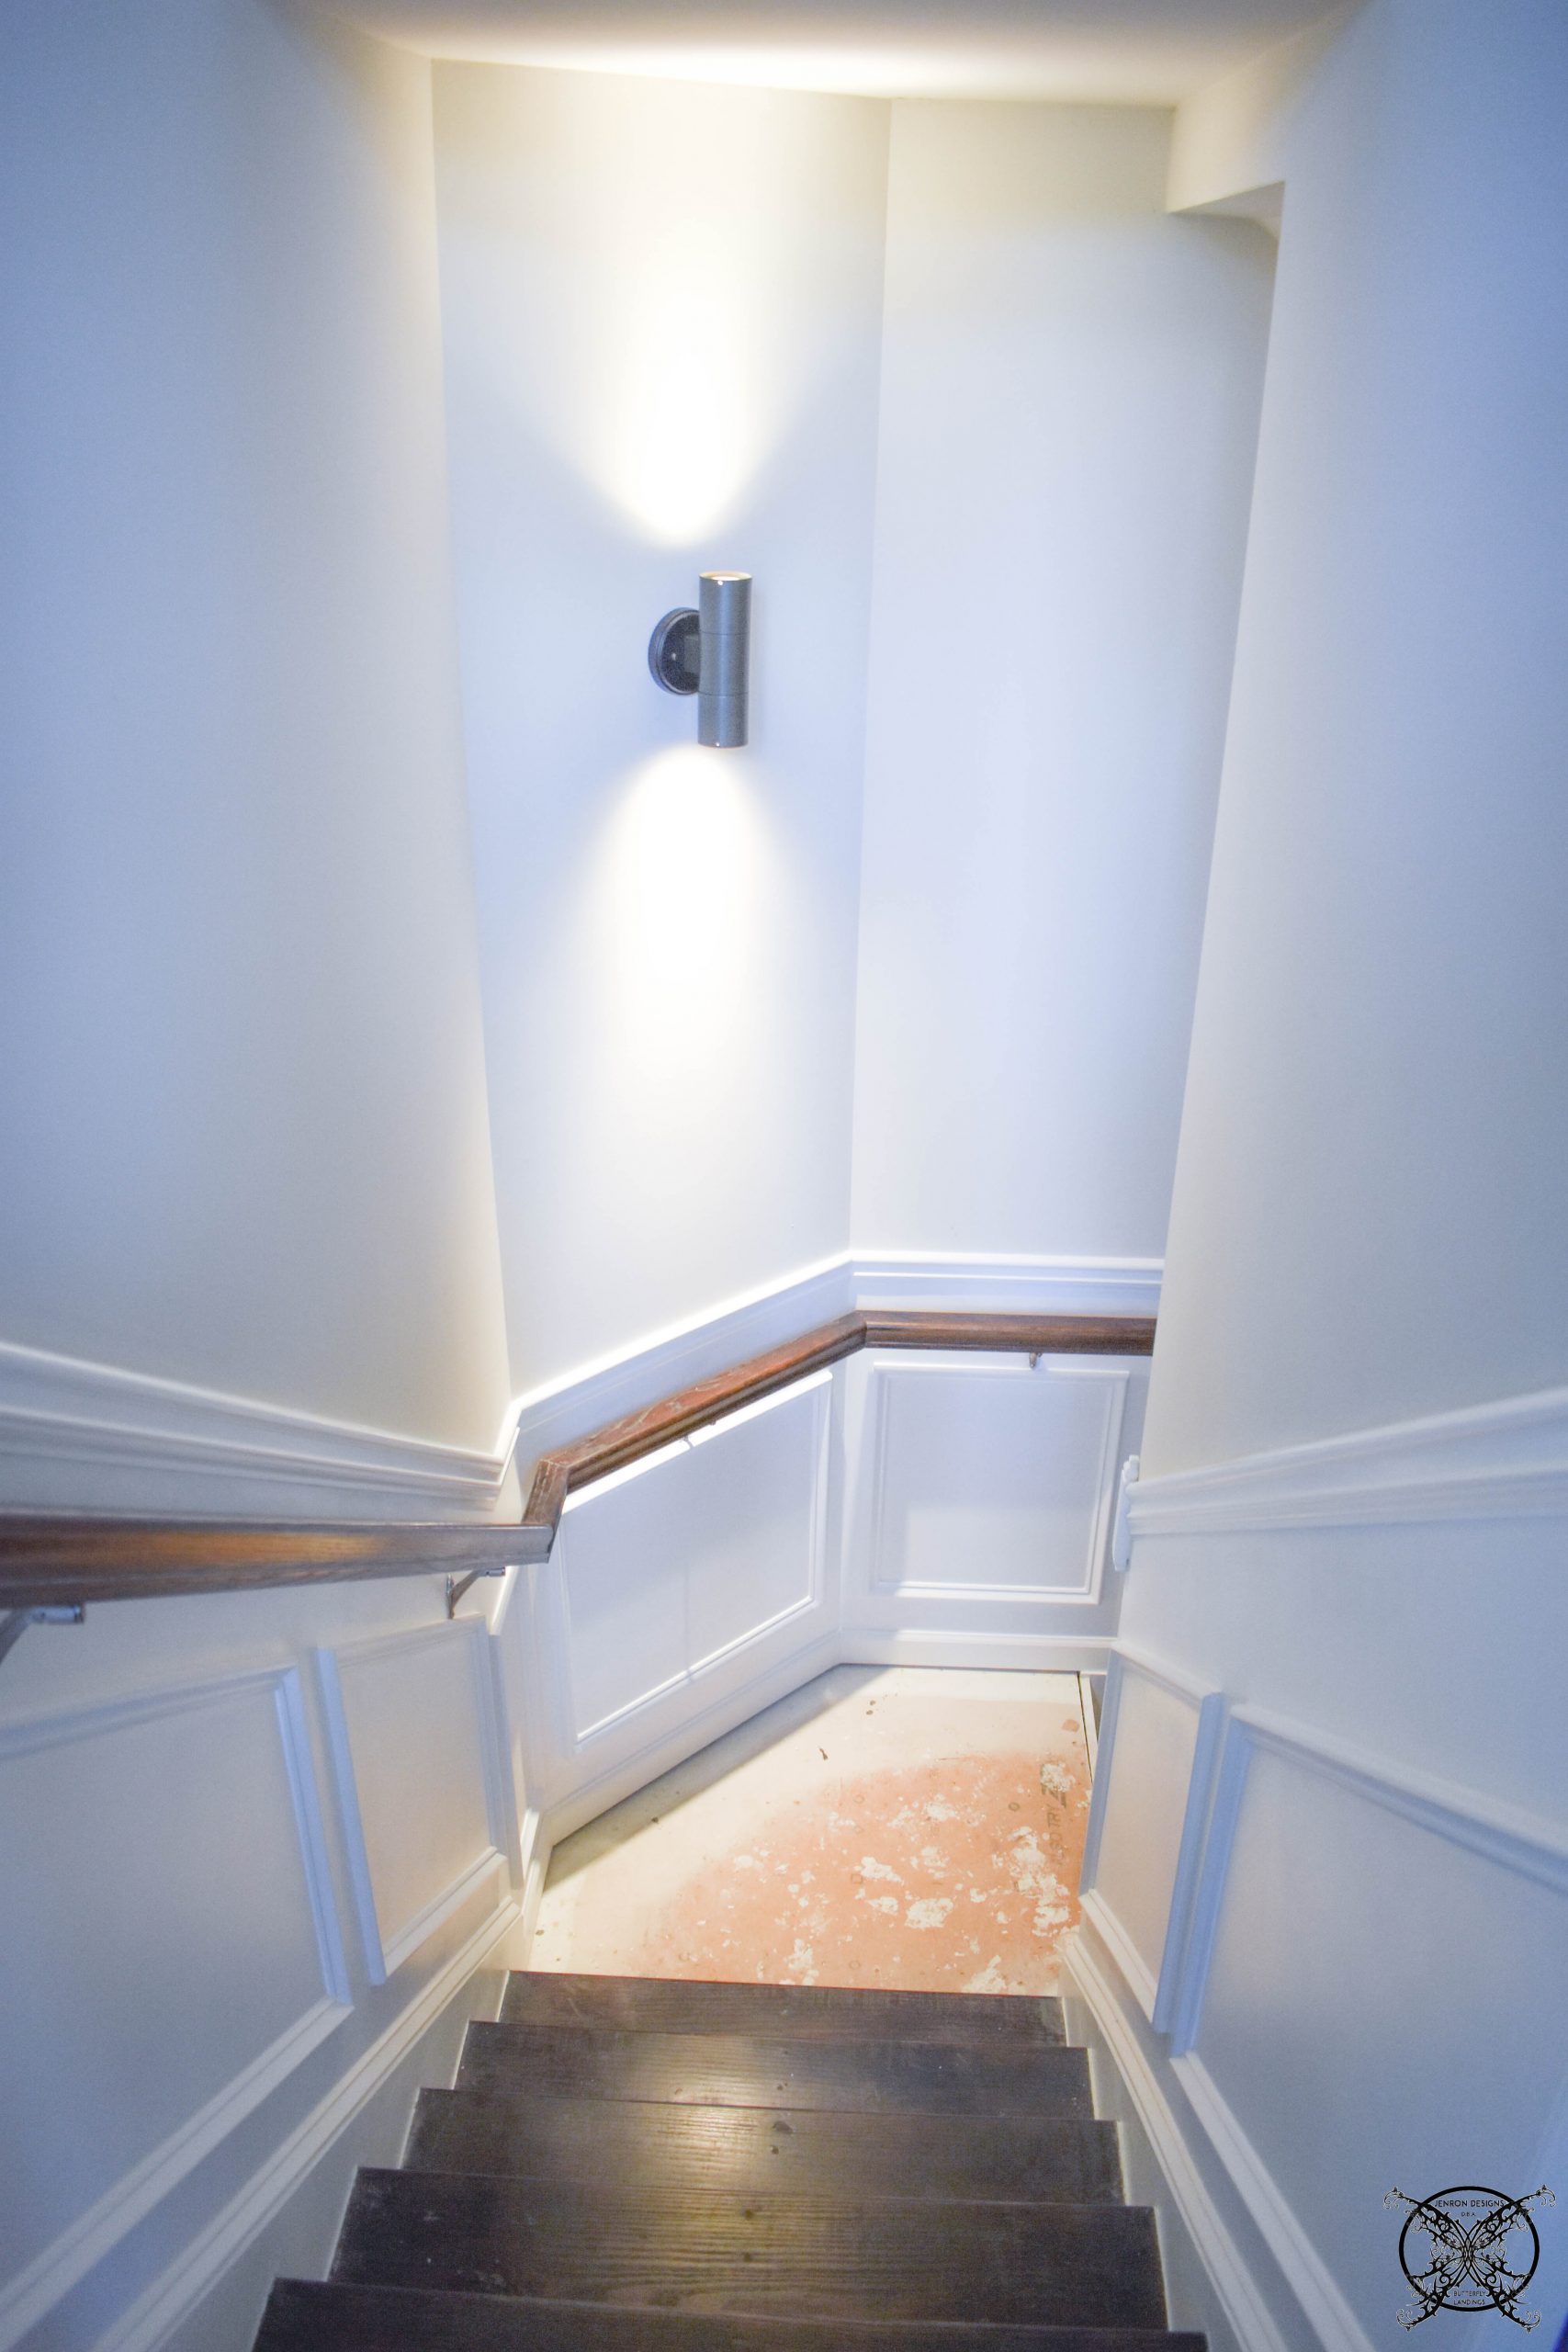
THE NEW, OLD LIGHT FIXTURE
So you may have notice in the picture above that we also installed a new light fixture this week as well. So here is the skinny on this light fixture, I have 3 of them total and have been saving them back for an outdoor project, since they are actually a high profile outdoor fixture. However I really like the sleek lines for this stairway to the basement, and it looks like I may only need two outside now, so I decided to dedicate one to this project.  The only issue was that the base plate did not work for the box that was installed by our builder and it was going to take a little wall resurfacing. So we ended up using the base place from the old fixture with the front of the new fixture and basically built a new light fixture. Lucky for us they were the same finish.
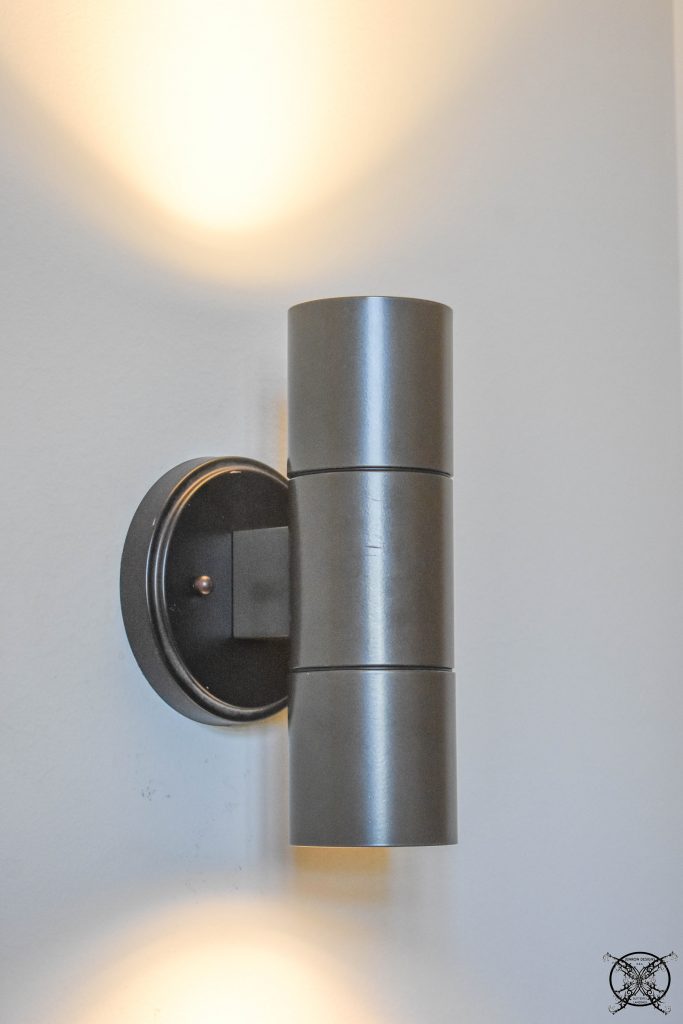 So now we have an up and down light with LED bulbs installed in this hallway which throws so much more light in both directions. It is less watts but more light than we had before and still only using one fixture.
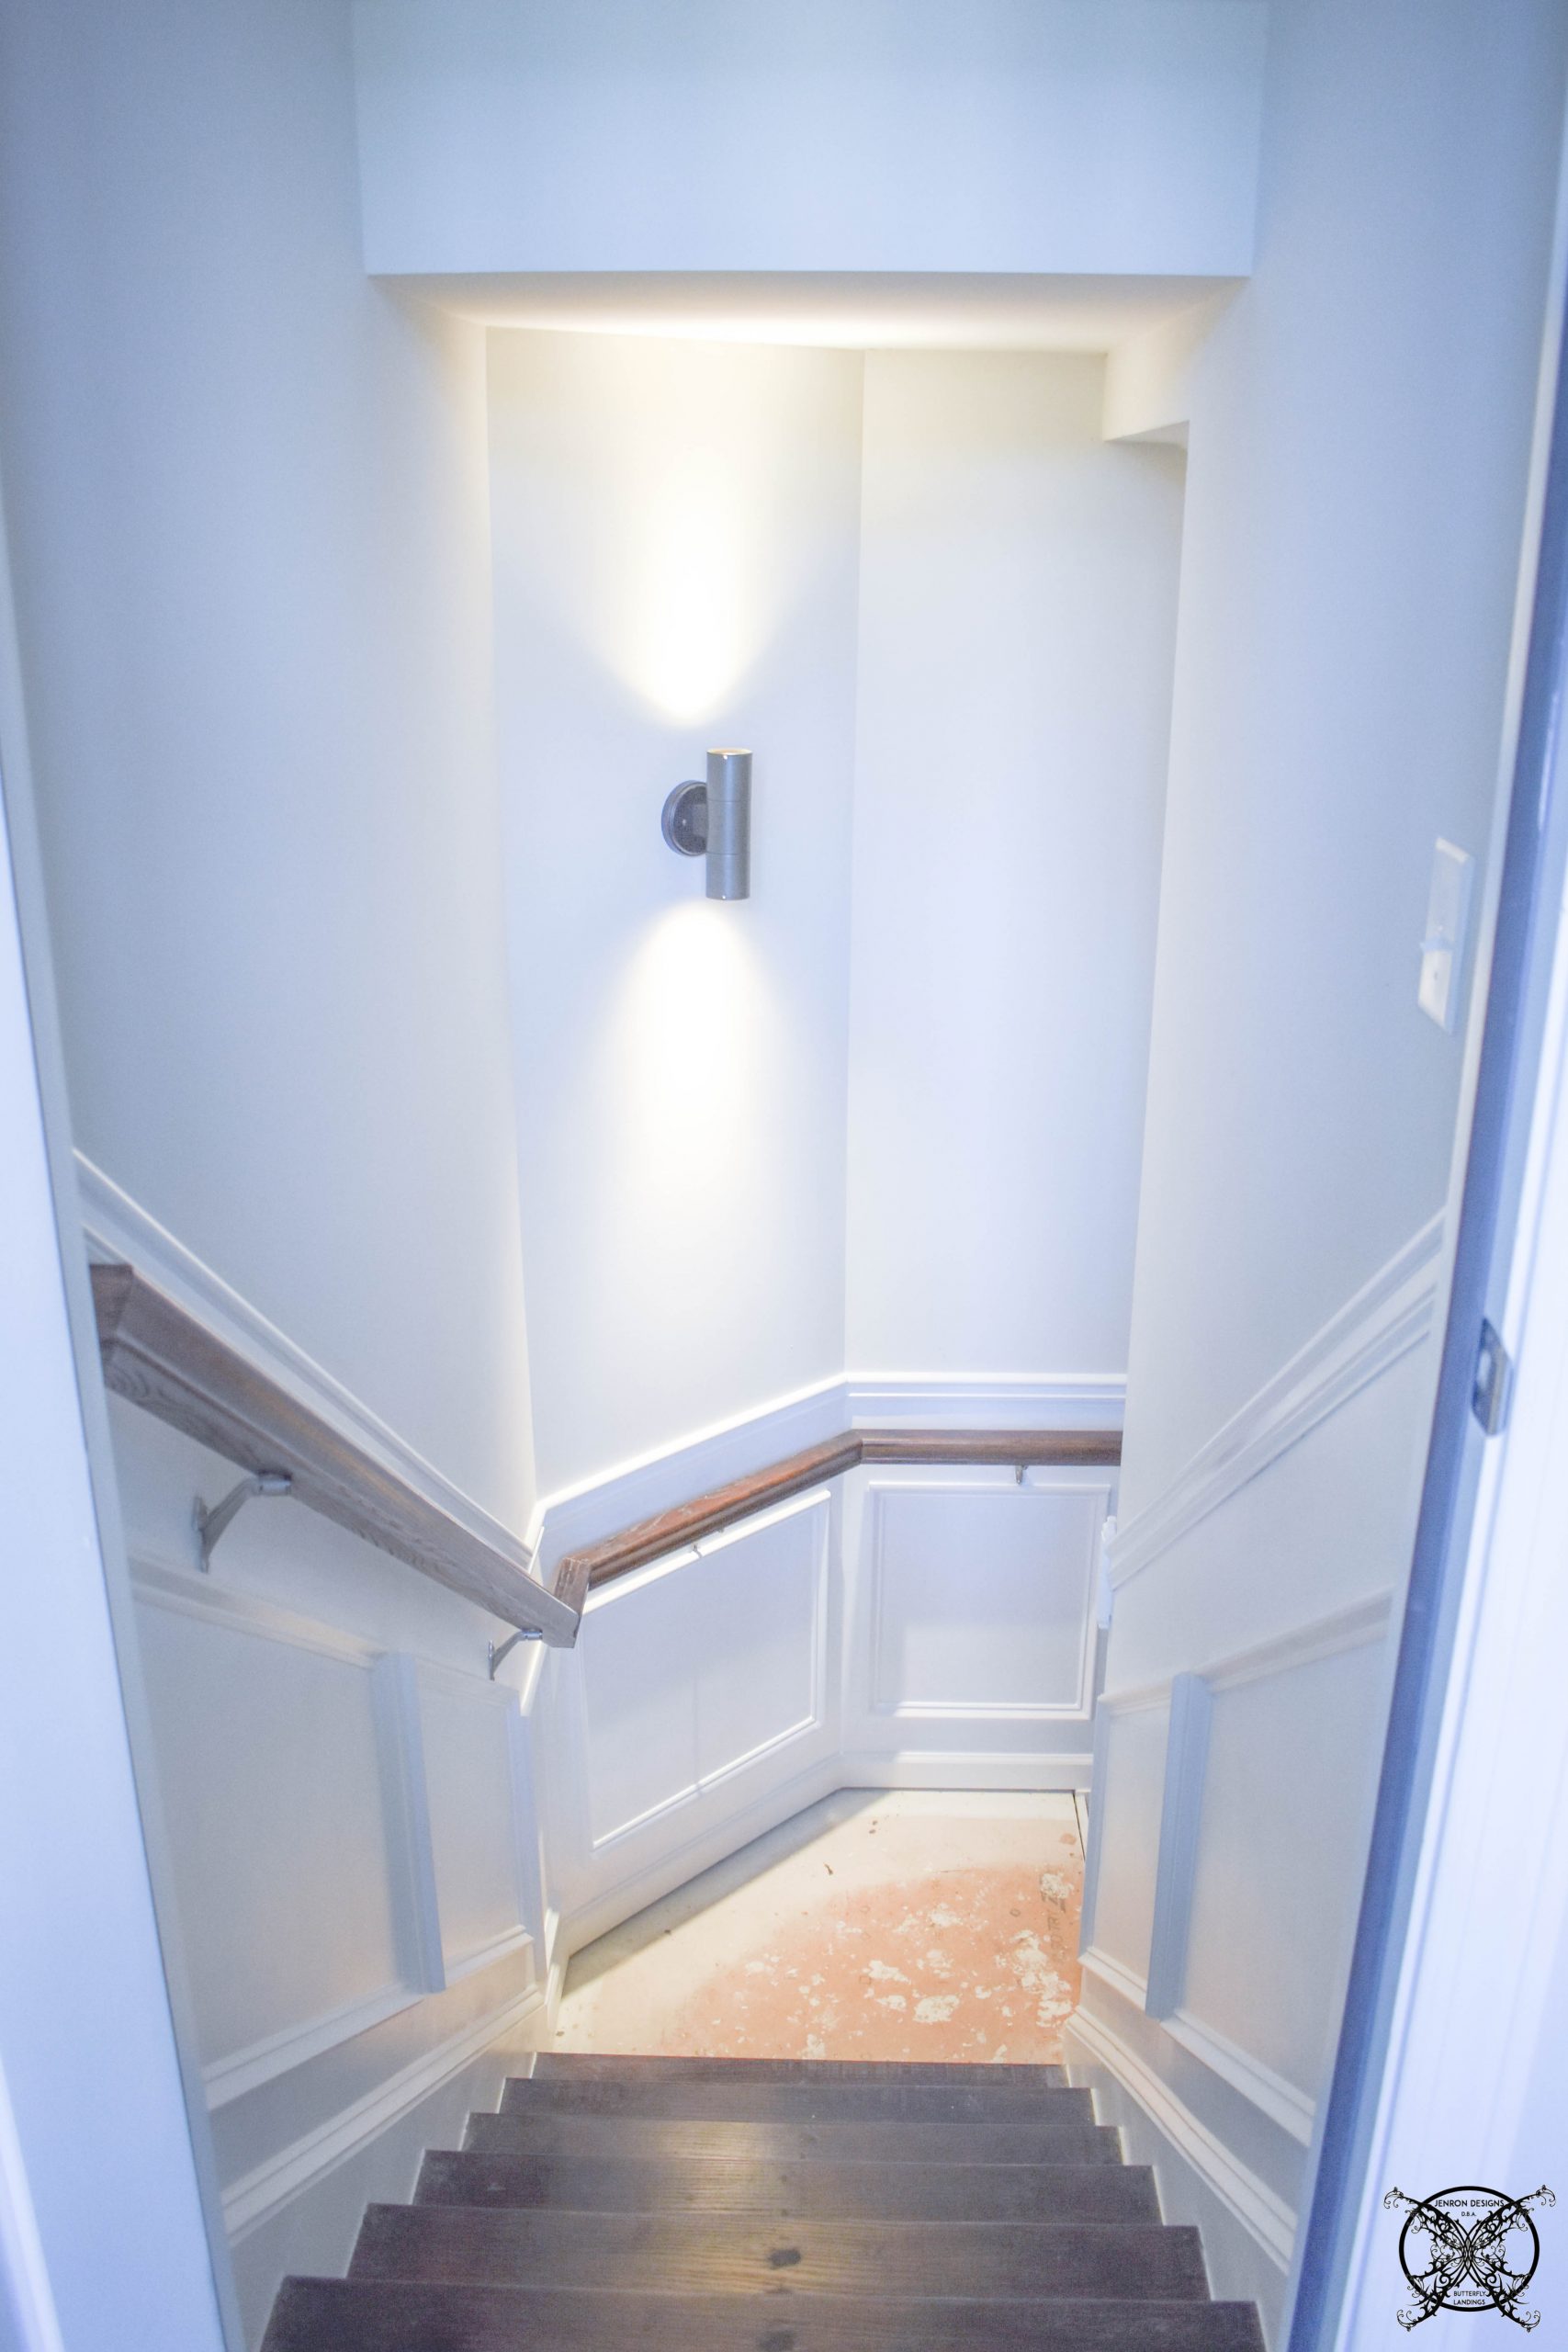
The Proposed Schedule:
Week 1: The Plan
Week 2: Clean/Prep Steps Remove Over Spray Paint, Sand Treads, Putty Nail Holes/ Stain to Match upstairs steps
Week 3: Wainscot Chair Rail & Re Paint/ Touch up Walls, Add New Light (fixtures we already own, gathering dust for 3 years for another project)
Week 4: Install matching Hardwood on Landing (Leftover boxes found in attic from Building) Maybe Add Artwork?
Week 5: REVEAL
BUDGET:
Week 1: $0
Week 2: $3.68 Stainable Wood Putty
Week 3: We owned a majority of leftover wood pieces from previous projects that we were able to use, but we did have to buy some additional pieces we did not own like the actual chair rail, and a few additional pieces of wainscot trim for the panels.
8- 8′ Chair Rail Pieces $7.02/ea= $56.16
4- 8′ Wainscot Trim $6.84/ea= $27.36
1 Corner Cap $1.20
THIS WEEK’S TOTAL: $ 84.72
PROJECT TOTAL: $88.40
Wow, that’s a lot of work but it looks so amazing. Love the cute light fixture too. It works well with the wainscotting and is a perfect size and so slick.
It’s crazy how just a little bit of wood can totally change a space! It looks so great!
WOW! I can’t believe the transformation that the wainscot pieces make. Truly beautiful!
These stairs look fabulous with that moulding! I’m in love!
Wow! This is an incredible and thrifty DIY. We rent right now but when we buy a house I will be looking this up again to use in our new home.
Amazing. Loved the transformation. Very interesting challenge, will keep on coming back to your blog to check all the future transformations.
Wow, so much math. Who knew when we were crunching numbers in school how we would really use those skills. But the end results are just amazing. It adds so much panache. Can’t wait to see how you finish this up!
OMG – we are super impressed! Angle cuts are so difficult and you made them look beautiful! All of the trim work is wonderful. Well done!
From the choice of colour to designs and fixture, this is lovely. Great job.
I had to go back to see what it originally looked like. Boy Jen you have really made a huge difference and it’s not even finished. I can’t wait to see it all together. Looks beautiful.
It looks wonderful! I don’t know if I have the nerve to attempt wainscoting! But you pulled it of beautifully! I can’t wait to see the final reveal!
Wow that wainscoting really makes it look like an entirely different stairway!! Definitely doesn’t look like a basement anymore
A very fantastic post of information, Thanks for sharing these great ideas. Keep posting.
Thanks for bringing this topic up. I was looking for up to date information on this theme for a couple of days. I like how you present and argue all the details in addition to your general writing style. Sometimes, there is too little time to read long pieces, but yours is brief and concise, I spent just a few minutes to read the entire article. It is essential, since nobody has enough time to read.