$100 Room Challenge: Garden Shed REVEAL
Welcome to the $100 Room Challenge: Garden Shed edition.
Hi everyone, welcome to the final week of the 2021 spring $100 Room Challenge: Garden Shed REVEAL. If this is your first time viewing the $100 Room Challenge let me take the time to give you some background. This is a bi-annual challenge sponsored by my friend Erin, over at Lemons, Lavender, & Laundry. What is the $100 Room Challenge is all about? The challenge takes place twice a year, January and September, and Erin invites us to redo a room in our home using a budget of only $100. As you can see the premise of this challenge is real simple: one month, one space, and $100. If you want to know more about the $100 Room Challenge, check out Erin’s post to see how the concept was inspired, and it’s colossal growth since she decided to start it!
Weeks at a Glance:
WEEK 1 WEEK 2 WEEK 3 REVEAL

*Please note that I was graciously compensated for this post. This post may contain affiliate links for your convenience. These links involve no extra cost to you. You can view my full advertising disclosure statement here.
THE GARDEN SHED BEFORE:
This season we have been so excited to create and organize our newest space for the spring, our garden shed. This little area was set aside when we were planning our basement to allow for storage of all of our garden tools and equipment.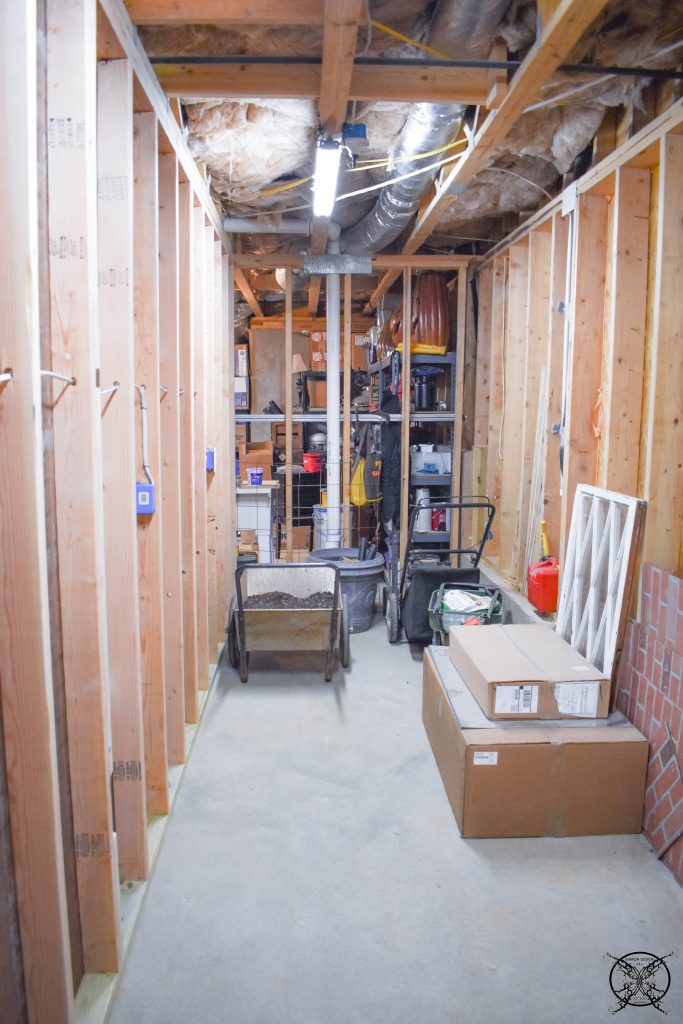
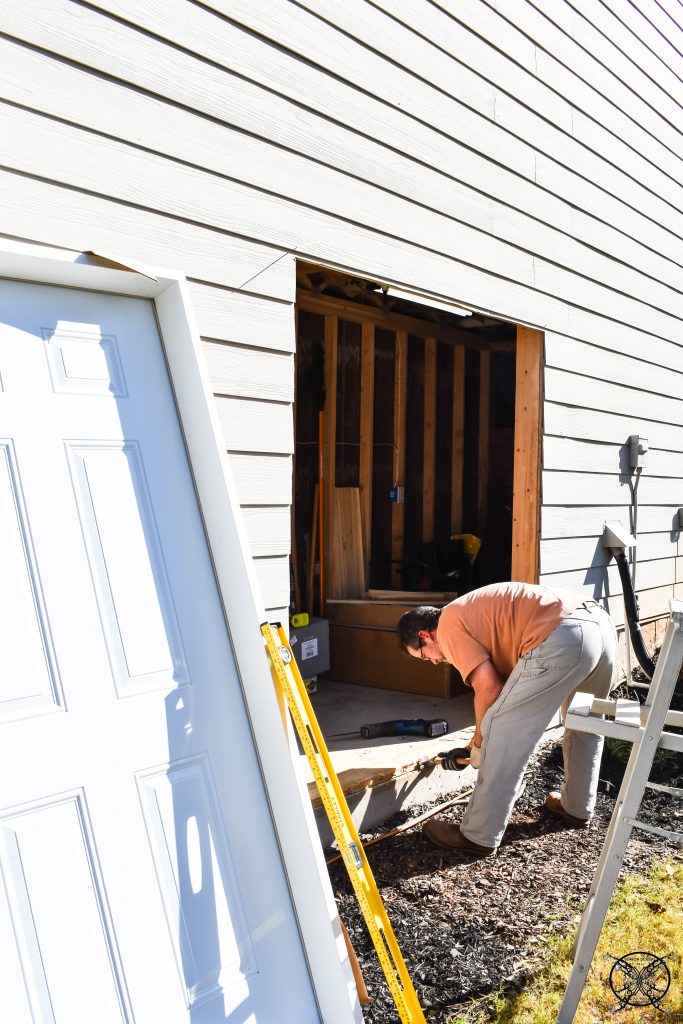
We added in a set of double doors, for a couple of reason one is that we are not getting any younger so the possibility of future storage of a riding lawn mower is eminent, so we might as well be prepared for that, or even a lawn service that utilizes our equipment. Which is why we set up the ability to have a new side entry with separate locks and a separate locking door to the main basement area, just like an outdoor shed would have. You can see our full video Highlight Stories Link here: https://www.instagram.com/stories/highlights/17898429169726517/
 So why not just get a shed? Well our neighborhood has a no shed policy in the HOA covenants, plus our backyard is not really conducive to one, being on a hillside. Keeping these ideas in mind and not wanting to “crap up” our garage, lol, I just added this space into the design, plus it will also be housing our new HVAC unit for the basement finish out as well, so over all it is a win win for us, and a good use of space on a whole.
The Proposed Schedule:
Week 1: The Plan, Paint Concrete Floor, Repurpose Building Supplies Brick Panel Wall & Plywood from Doors
Week 2: Add PegBoard & Add Pallet Walls
Week 3: Create Wall Cabinets, Paint Walls, & Add Wire Repurposed Shelves
Week 4: REVEAL
$100 Room Challenge: Garden Shed REVEAL:
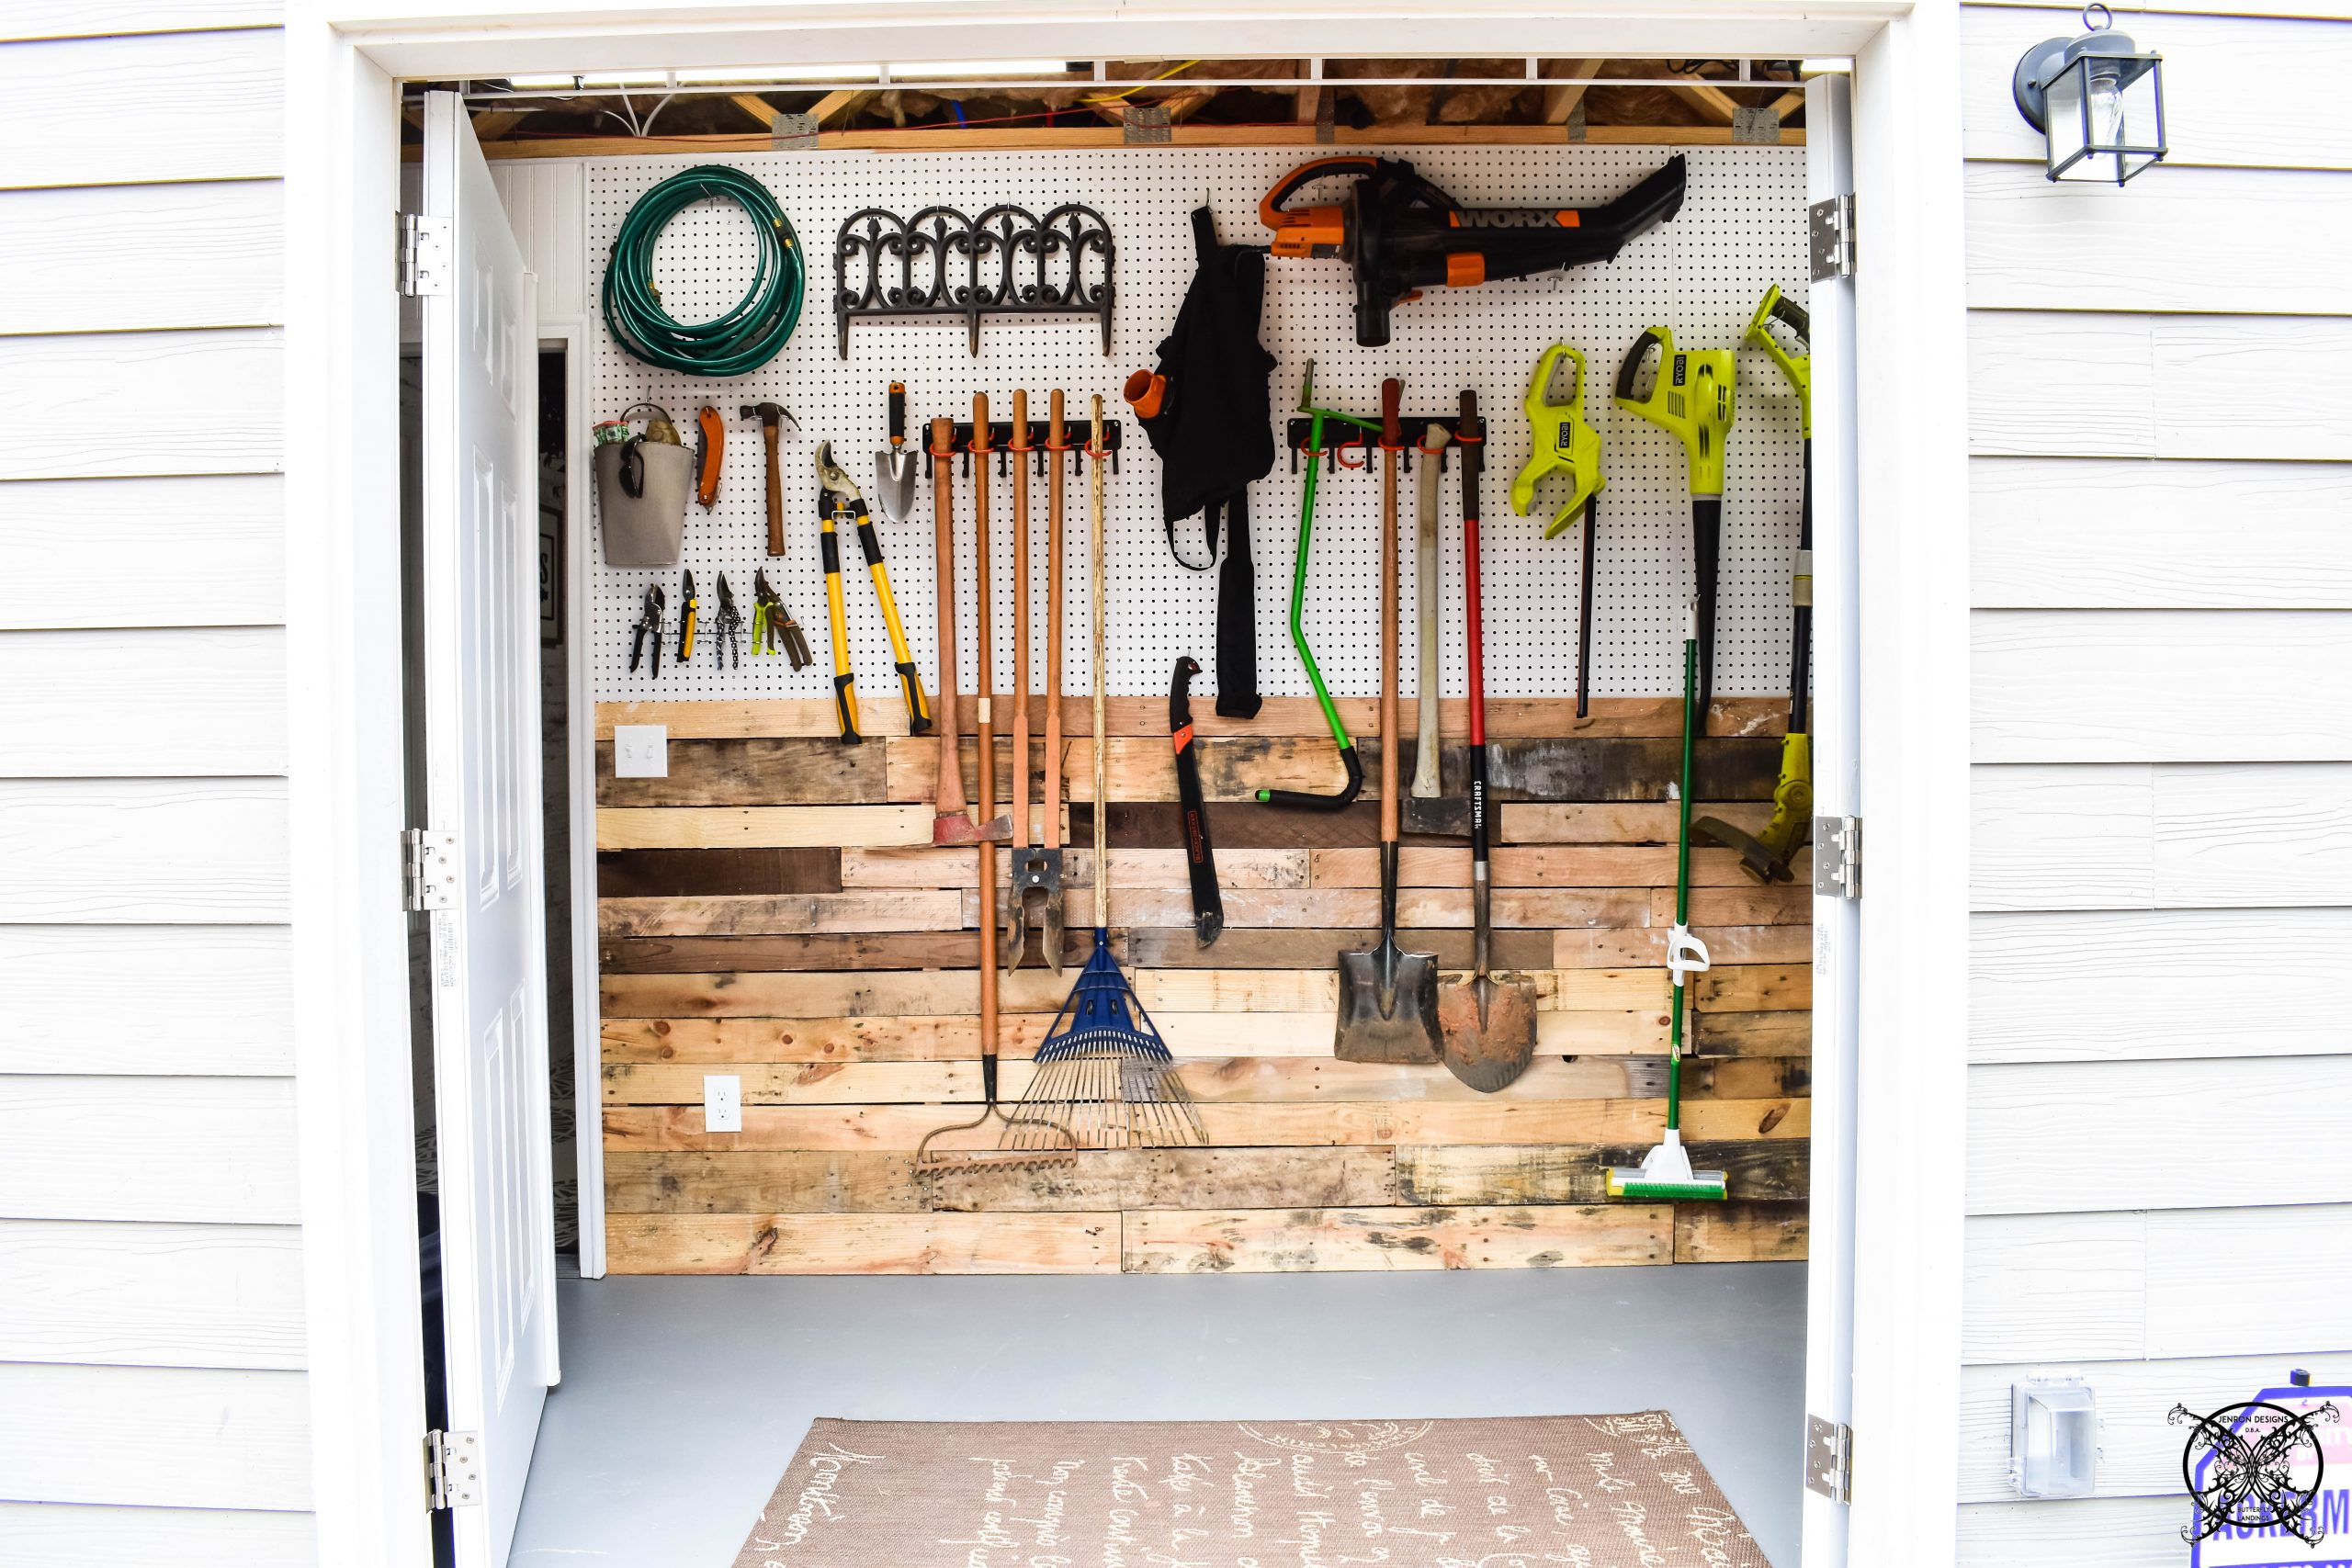
So we did add these All Metal Garden Tool Hooks for organization of the larger hand tools, like the rakes, shovels, and post hole diggers. 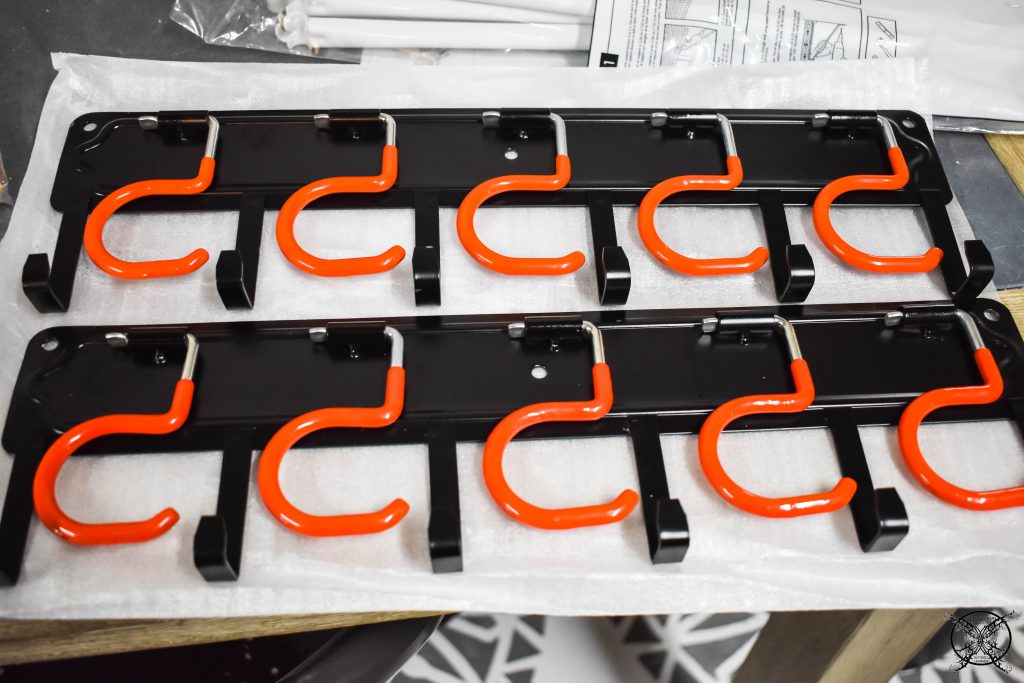 We also order a set of 142 pc. Pegboard hooks for all the other items that needed to be hung and organized onto the new pegboard walls. Trust me this was such a fun part of the process.
 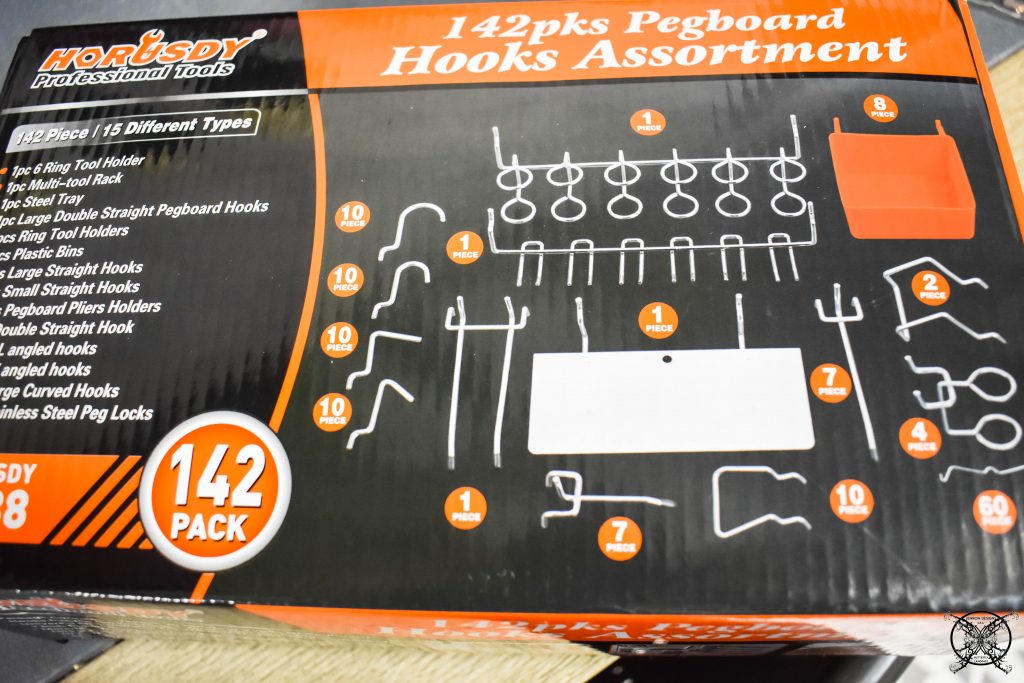 We were also able to put some the tools that we do not use on a regular basis up a little bit higher on the wall to conserve space for the items we use all the time. For example, our leaf hog, which is essentially a vacuum that sucks up leaves and mulches them up, only gets used in the fall, so it is housed up high for seasonal use.
 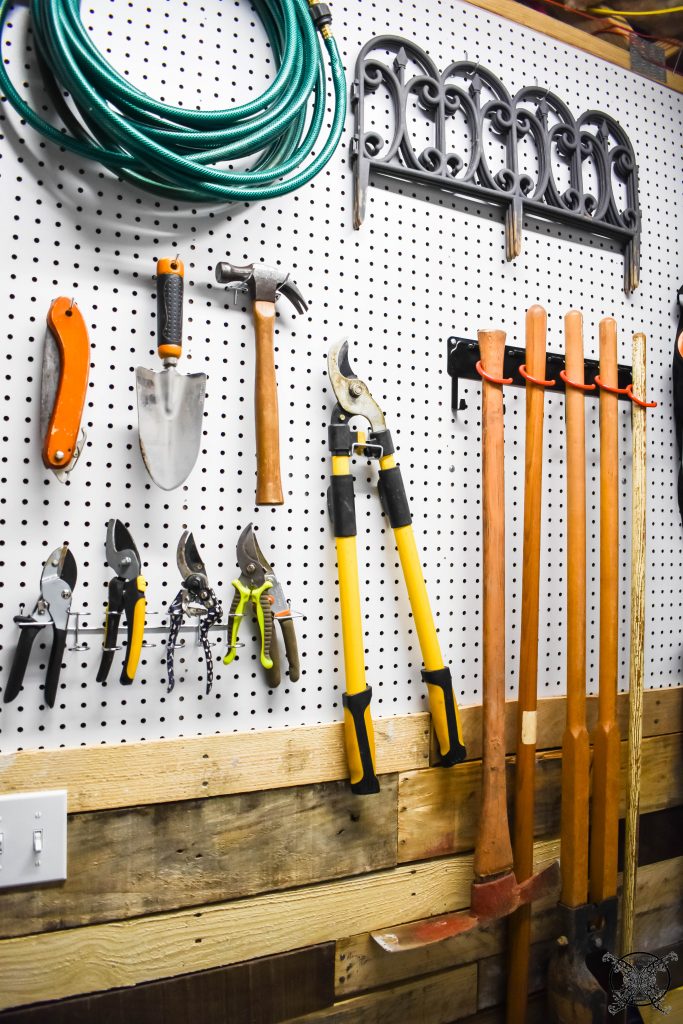 You can see in these two pictures how we laid out our tool organization. There is now a lot of space for all our yard tools now, and everything has a home. It is also all very easy to find and see, so no more searching for the proper tool while you are in middle of a project.
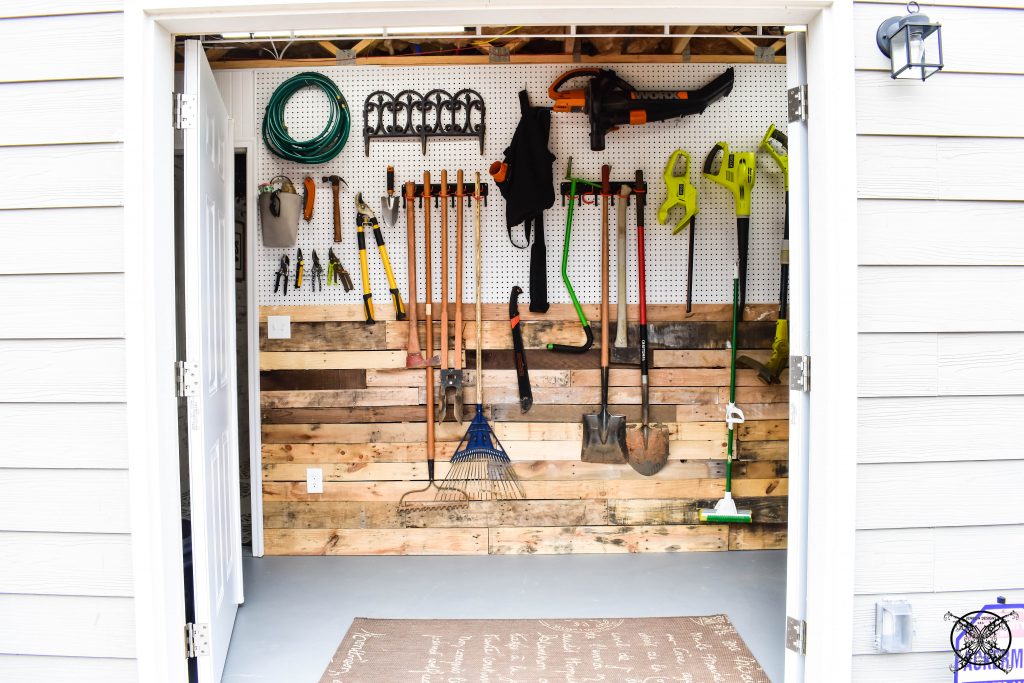 It also keeps us accountable for making sure that all the tools make it back inside at the end of the day as well. If you have a large piece of land, or a wooded lot sometimes tools have a way of getting left outside accidentally, which can ruin them over time. Now at a quick glance we can see if we have inadvertently left something outside as we have run out of daylight.
 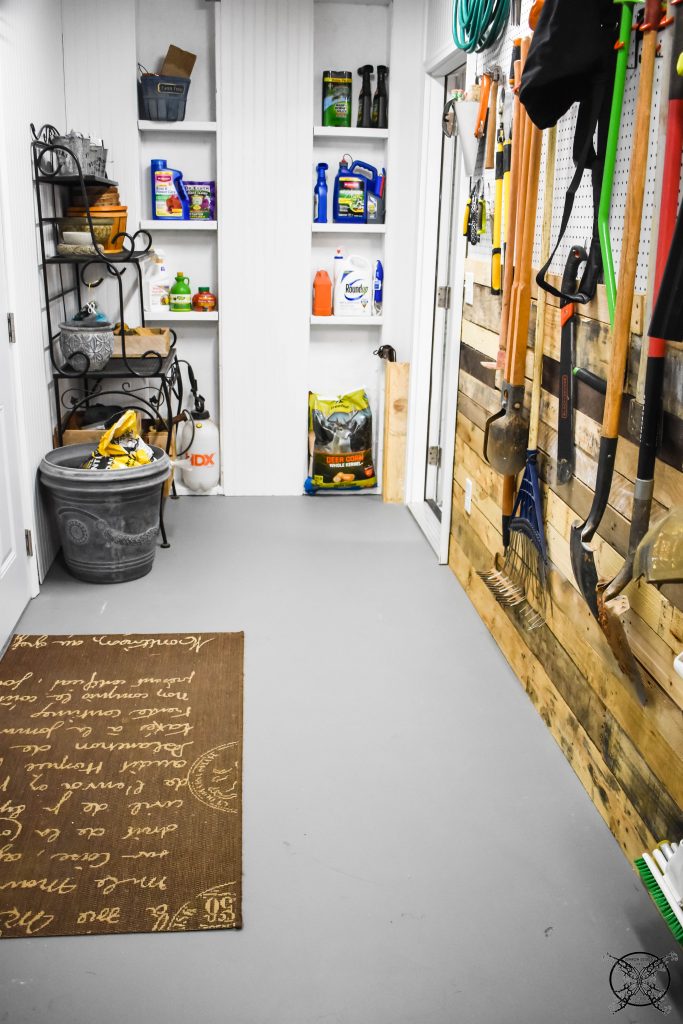 As you take a long view toward the end of the room where we created the built in cabinet you will see this space houses most of our chemicals and sprays for the yard and garden. You may also spy a pallet corner container we added to hold yard stakes specifically in the corner, which ties in the adjacent pallet wall.
 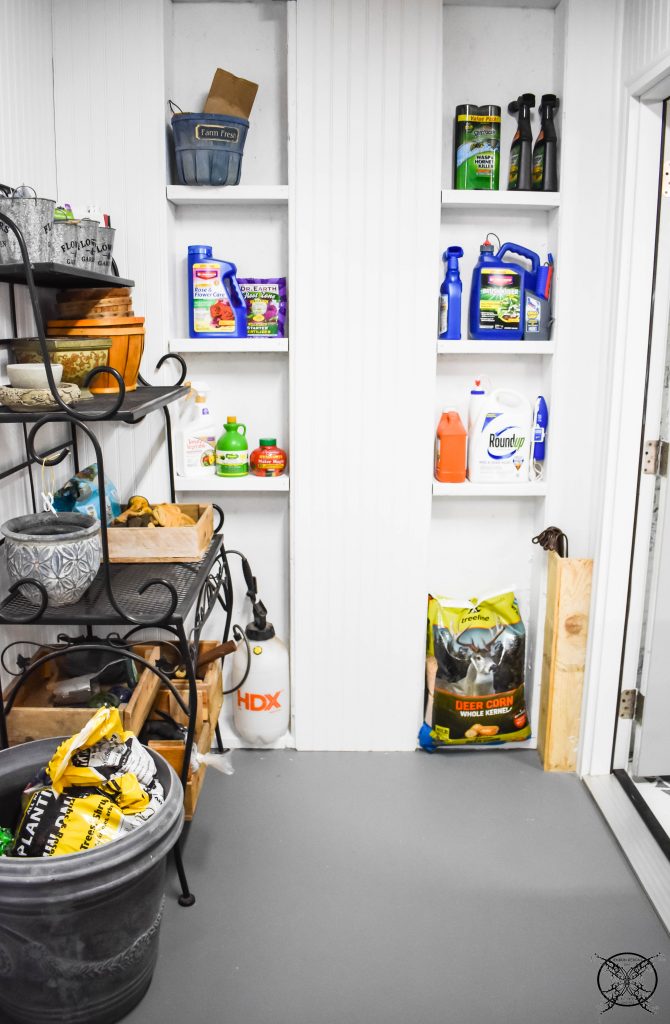 I also added in my repurposed bakers rack that I use as a makeshift potting bench for indoor use. It is great during the winter months and also holds a lot of my smaller garden supplies, such a garden label stakes, twine, hose nozzles and weed barrier supplies.
 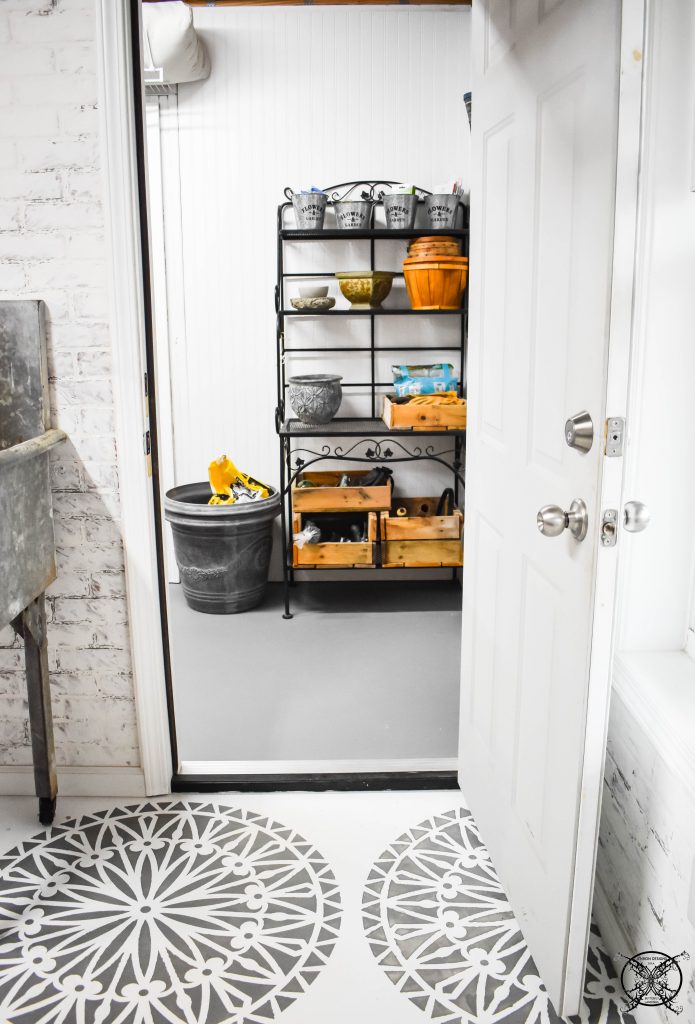 We made a few extra DIY pallet boxes for storage out of some the scarp pallet wood we had remaining. These were just based on an apple crate style box and we popped them together with the brad nailer in an afternoon. It is great because it used up the left over pieces without having to toss them out, it also provided extra storage which matches the rest of the space.
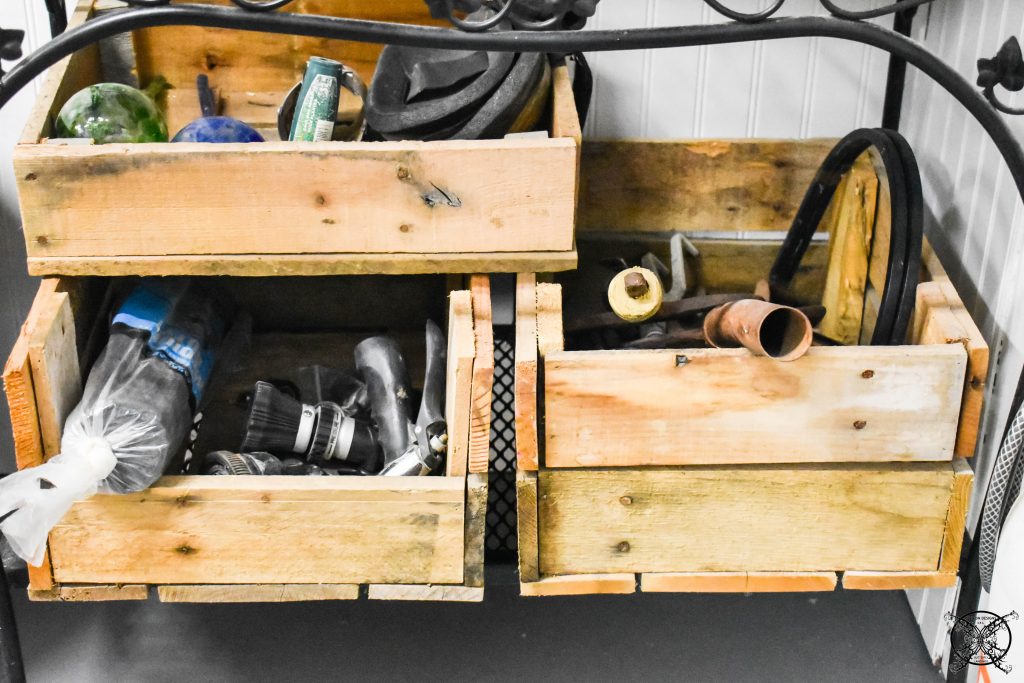 As you take a glance back at the far end of the garden shed you can see we housed large urns and additional outdoor cushions on the wire racks at the end of the room. Currently we still have a ton of floor space so even when the HVAC unit goes against the brickwall, our lawn mower, pressure washer, and wheelbarrow will all still have homes.
 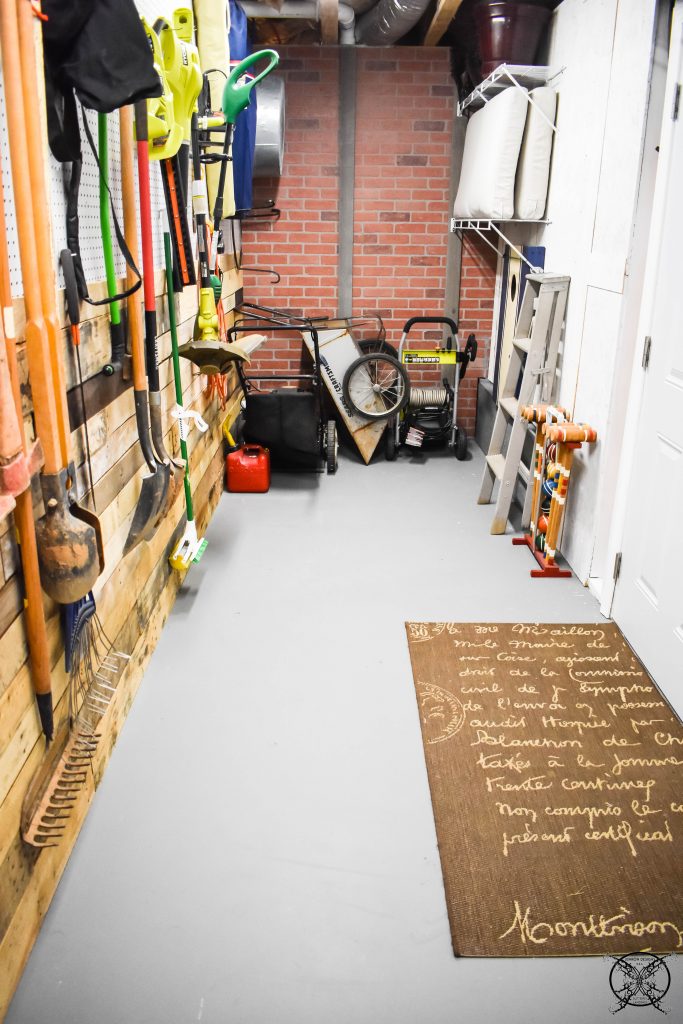 We have literally used every piece of space in the garden shed, even above the door houses more of our outdoor cushions, which are lightweight and perfect for that space.
A good DIY tip to keep in mind when mounting shelves above doors is to turn your hardware upside down (mount to your ceiling) like we did here, to allow doors to fully open. 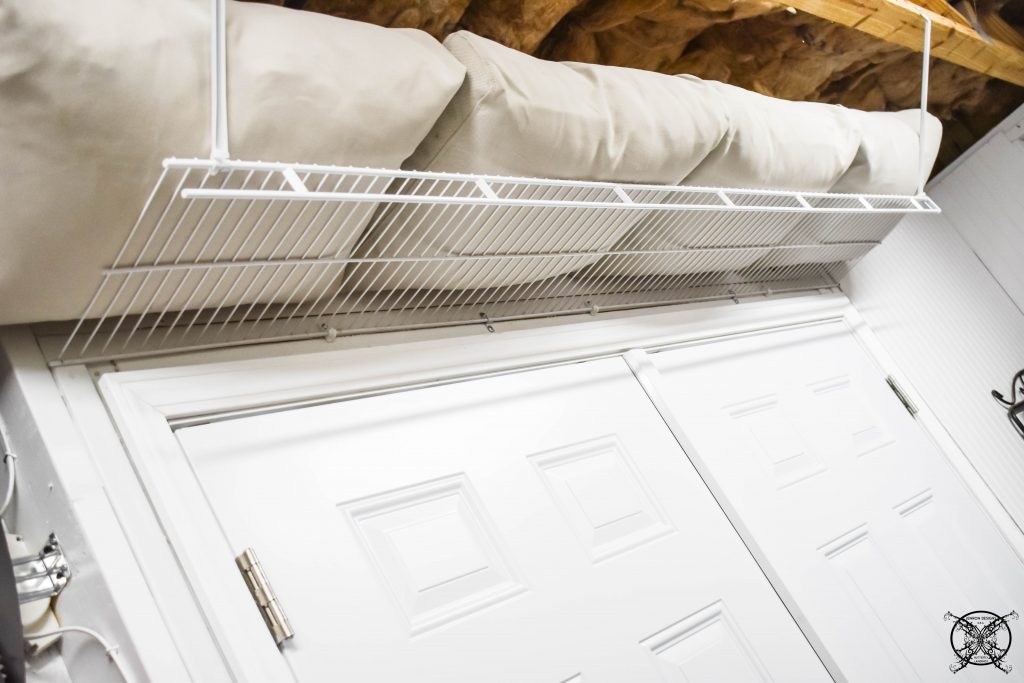 So how did we fair on the budget this season? It was close, but we came in just barely under $100 at $99.26, can you believe it? Well you can see the full budget below, with literally 74 cents to spare! Which just goes to show keeping all of those spare pieces of lumber and leftover building materials can really payoff in the long run for your furgal projects. Which will allow you to go all out on other projects.
Budget:
Week 1: Repurposed- Brick Panels, Leftover Concrete Paint, Repurposed Paint Supplies, Screws/Brads Leftover from previous projects & Plywood Board from Doors- Free
Week 2: Pallet Wood from door removal- Free, Brads/Screws leftover box from previous projects, Pegboard Panels- $19.86 x 2 = $39.72
Week 3: Reclaimed Beadboard pieces from garage- Free, New Beadboard 4×8 Panel- $19.57 x 1 = $19.57, Paint leftover 5 gallon house trim paint, washed/reused roller and all paint supplies.
Week 4: Pegboard Hardware- 142 Pc Hooks $18.99, All Metal Garden Hooks 2 pc Set $20.98
TOTAL: $99.26
PIN This Project for Later and be sure to follow us on Pinterest at Jen @ JENRON DESIGNS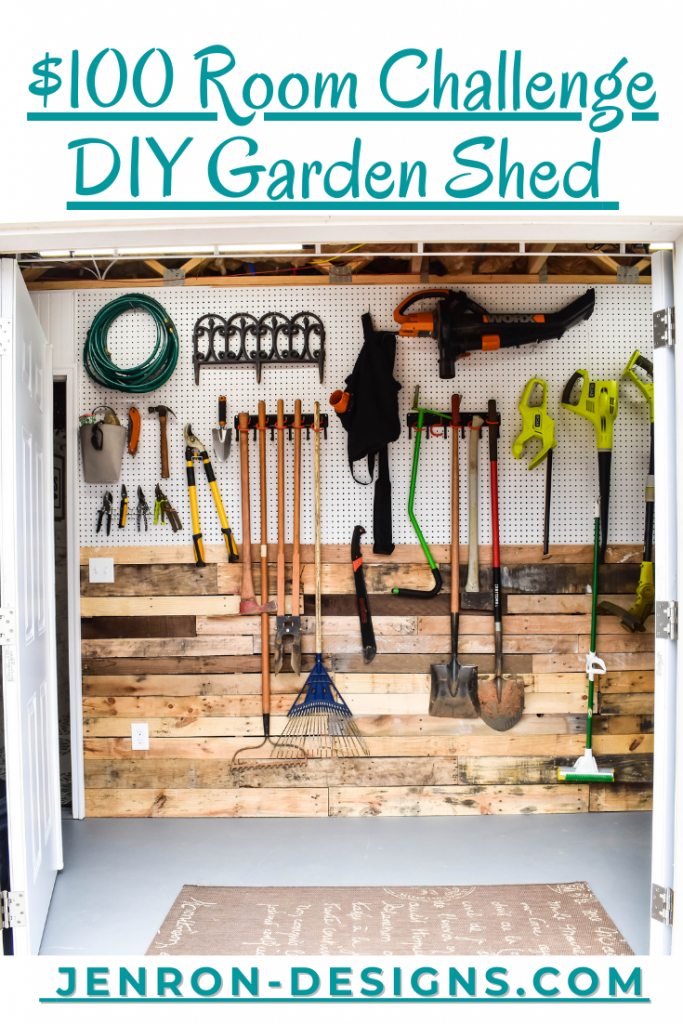
I love how this came together and all the materials you used! Adding my shed to my makeover list now!
I always like to discover and see how in a very economical way you manage to suggest big and really useful changes! It’s so amazing!
This is a great use of space. I know that you are going to enjoy this. It is amazing!
I love how organized it is in there, great job Jen!
Wow, I am so impressed with what you did for this space! My favorite is either the built-in shelves in the wall or the repurposed wire shelves! People tend to forget to go up with storage! Great space Jen and I am sure it will serve you well.
I am in awe of this space! It wasn’t until this week that I got the full effect with the doors to the outside being open… It is amazing!!! So organized, and your use of extra material was incredible! I kinda want to makeover our garage now! We live on 5+ acres and our tools get left out ALL THE TIME (because… kids). Thank you for your inspiration. I’ll be pinning this makeover for sure. I am so glad you participated in another round of this challenge. You do incredible things with $100!
Oh love this. Going to share these tips and ideas with my parents who have a garden shed!
Love seeing your posts, so much organization and style!!!! Makes me want to go to container store now.
What a beautiful space! Who wouldn’t love to spend time in the garden when they can store all of their things in such a great space!! I love it <3
Wow, this might be the best looking garden shed I’ve ever seen! I love how you used the different materials together to add interest and texture (and save money!) and all the organizing tools you used. I might do more yardwork if my shed looked like this!
Oh wow, what a change! I love how you managed to build in great systems for staying organized, and it’s beautiful too. It’s hard to believe it only cost you $100!
This turned out amazing, Jen! I have to admit that I’m a little jealous… 🙂
Jen this came together so beautifully! I am so impressed with how you reused materials and still gave the space so much style. Just lovely! Congrats!!
It’s a perfect use of space! You did a great job and right on budget too!
Love this! I always love organized spaces, even “outdoor” ones! They’re so much more pleasant to look at and easier to find things. Good job! =)
What a wonderful space! I’m making many notes for when we bet to our garage!!
Thanks a lot for giving us all such a helpful information and inspiration for garden sheds. We just love your site!