$100 Room Challenge: Built In Cabinets
Welcome week 3 of the $100 Room Challenge: Built In Cabinets
Hi everyone, welcome to week 3 of the 2021 spring $100 Room Challenge: Built In Cabinets. If this is your first time viewing the $100 Room Challenge let me take the time to give you some background. This is a bi-annual challenge sponsored by my friend Erin, over at Lemons, Lavender, & Laundry. What is the $100 Room Challenge all about? The challenge takes place twice a year, January and September, and Erin invites us to redo a room in our home using a budget of only $100. As you can see the premise of this challenge is real simple: one month, one space, and $100. If you want to know more about the $100 Room Challenge, check out Erin’s post to see how the concept was inspired, and it’s colossal growth since she decided to start it!
Weeks at a Glance:
WEEK 1 WEEK 2 WEEK 3 REVEAL

*Please note that I was graciously compensated for this post. This post may contain affiliate links for your convenience. These links involve no extra cost to you. You can view my full advertising disclosure statement here.
THE GARDEN SHED BEFORE:
This season we were so excited to be creating and organizing our newest space, the garden shed. This little area was set aside when we were planning our basement to allow for storage of all of our garden tools and equipment. Last week we installed the 16 foot pegboard and pallet wall in our Garden Shed Space and we have only spent under $40 so far on the project. This has been achieved by using up a lot of our left of wood scraps and pieces we have saved from previous projects. Which has been a total win win, since we also plan to clean up Ron’s woodshop as well while finishing out the basement spaces, so we might as well utilize these large building materials instead of storing them.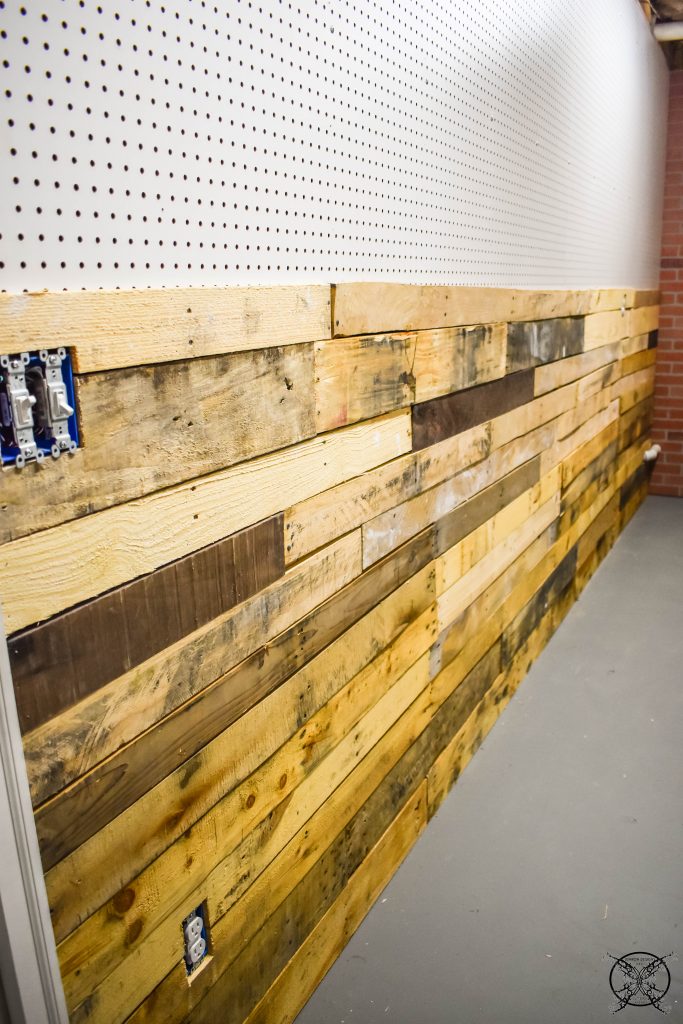 This weeks project is no exception to the reclaiming of building materials and we will be utilizing those large pieces of beadboard that can be seen in the woodshop area. Those boards were left over from various project one being our $100 Room Challenge last season, on the garage.
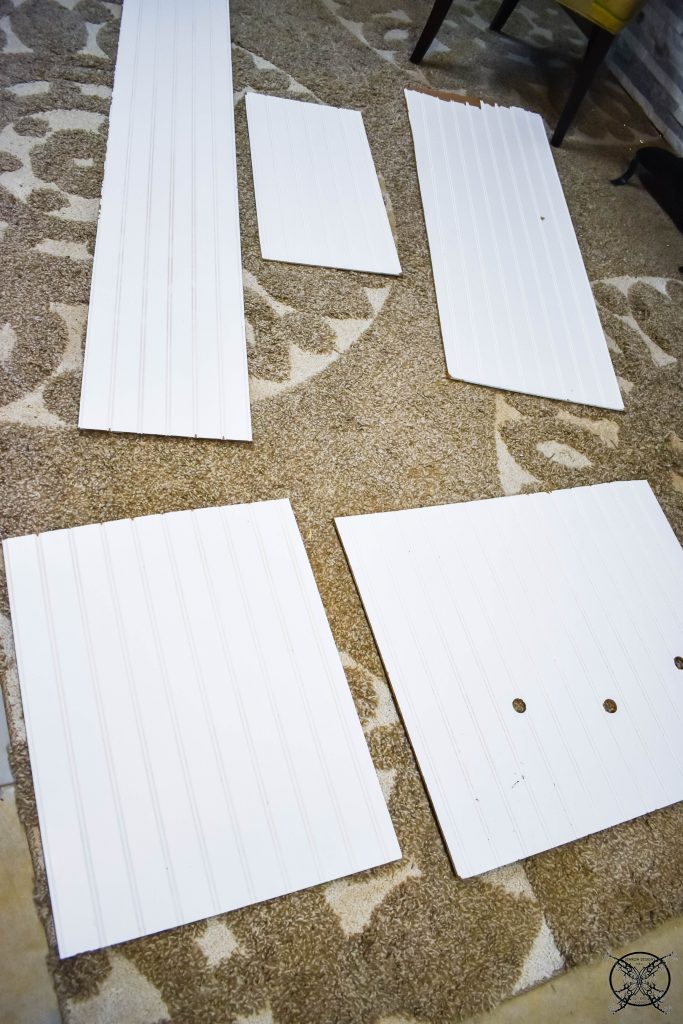 This week we are going to be adding some built in storage, by using the cavities already in the walls. We decided on two spaces that would not have insulation, and added basic cut 2 x 6 studs to create a rustic style shelf.
 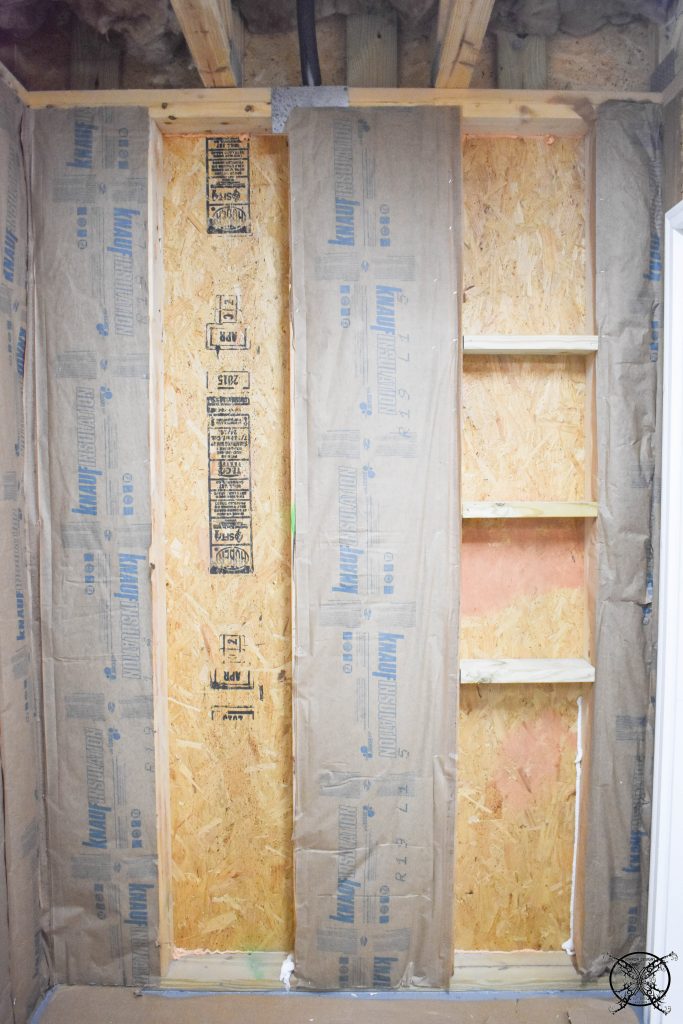 Since this space has been insulated everywhere except for these two spaces the amount heat or temp loss is not really significant in the over all design. Plus this is not meant to be a completely finished space, as a garden storage shed, even though we have taken measures to insulate the area and seal it up properly, on the front end.
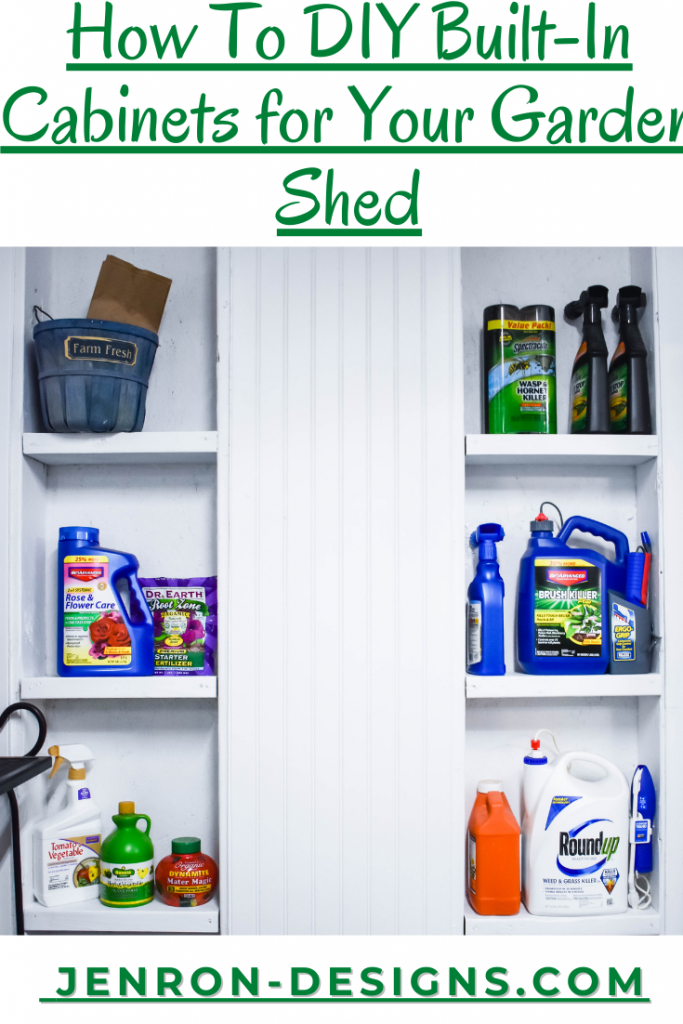
  As you can see, the shelves are just nailed into the adjacent studs, since it is just a rough shed look this will be the finished product, so make sure you get the cuts pretty close to perfect, with no large gaps. As you can see below the idea is that is will house basic supplies, to give extra wall storage.
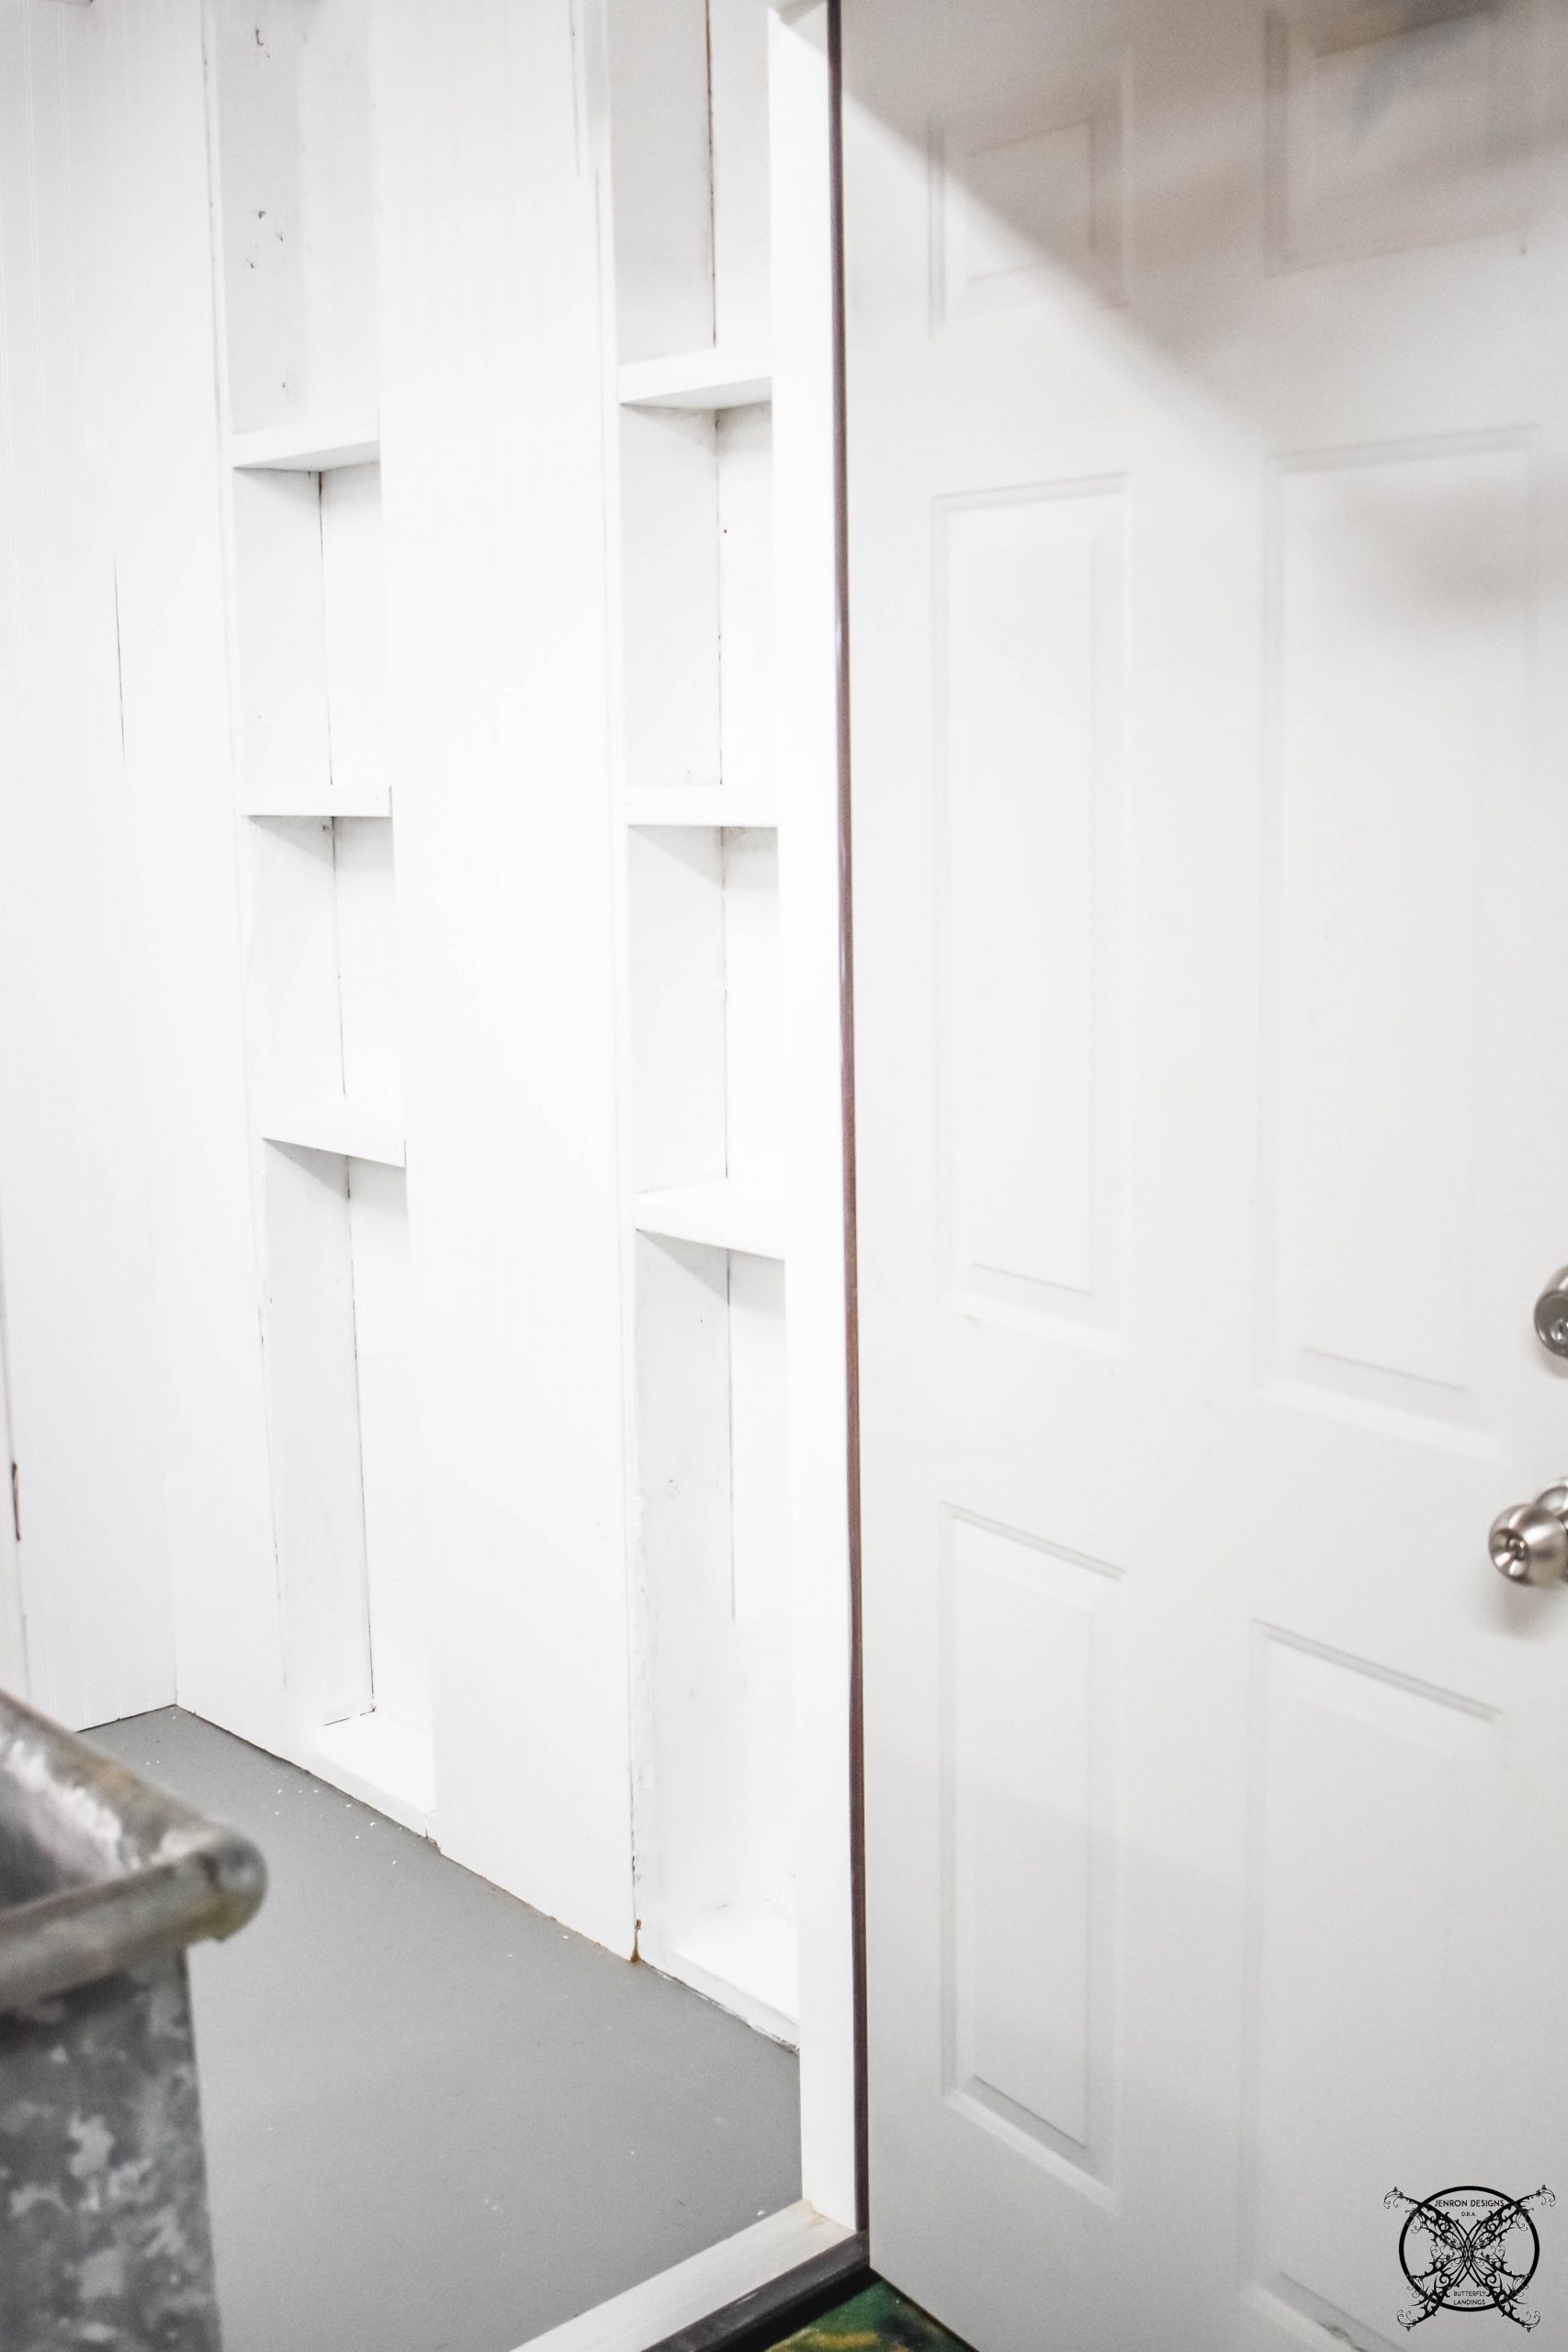
 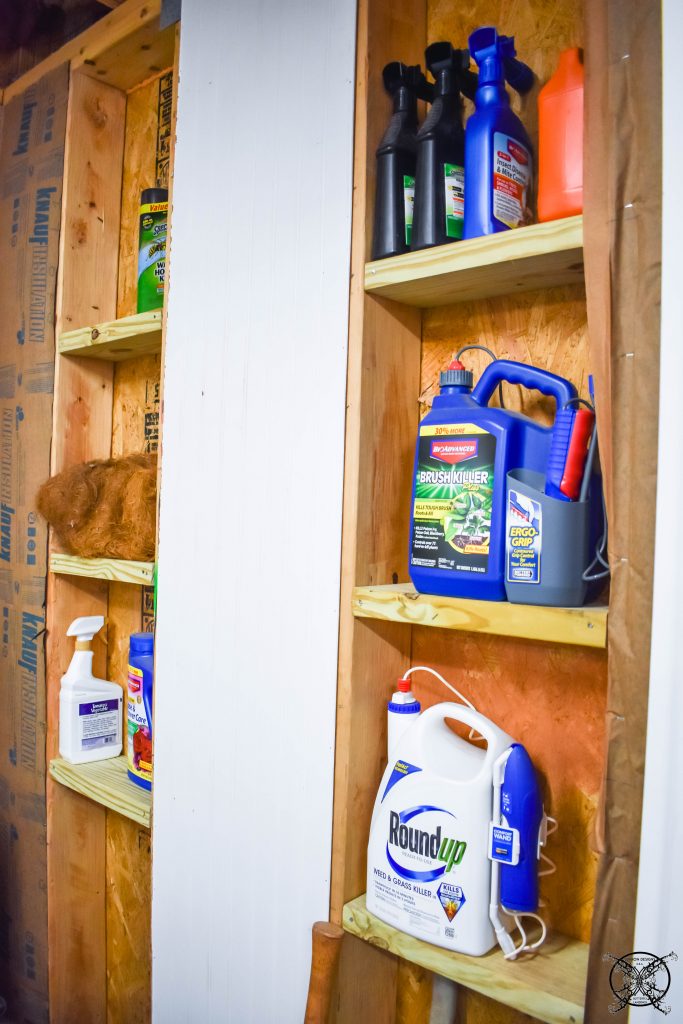 The next step was to add our leftover pieces of beadboard, which we had two long pieces that measured out perfectly to cover the insulated sections. Which created a built in cabinet look to this wall. We did have to purchase one brand new full sheet of beadboard for the full 4 x 8 wall, but the rest of this space, and above the door, was all completed with leftover pieces.
 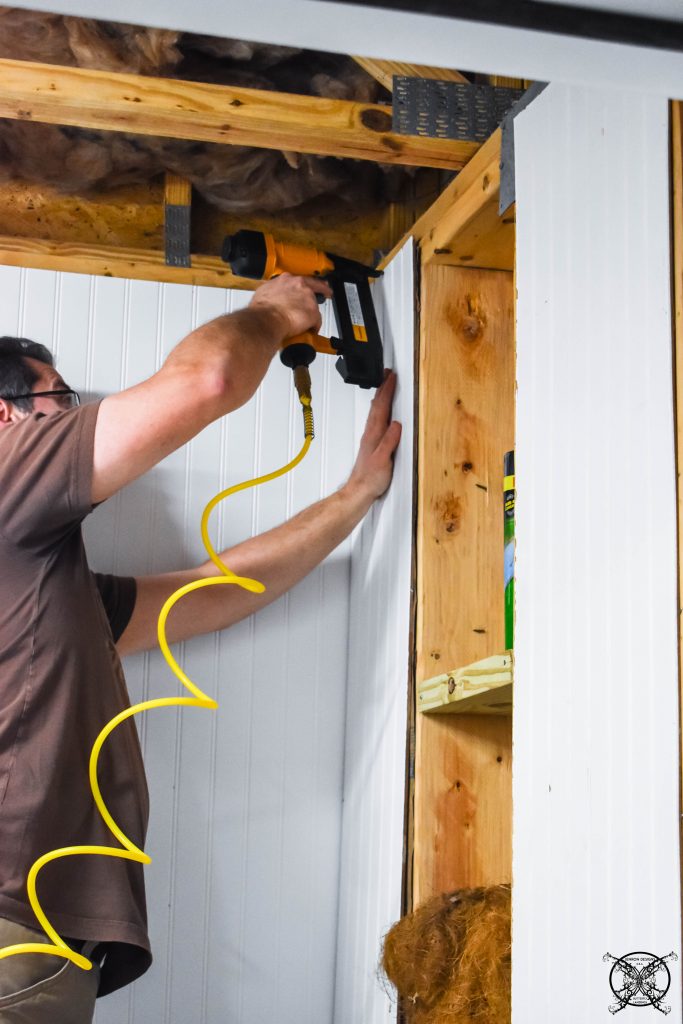 Once all of the beadboard was in place, we painted everything with a coat of our house white trim paint. The reason I call this out as our “house white trim paint” is because we buy in 5 gallon buckets and it literally is the trim for the entire house. It does every room, everywhere with no deviation and we always keep a ton of it on hand. Personally I would recommend this tip to any homeowner new or old, pick a trim color and stick with it. This is just a classic vibe, not old fashion per say but a smart way to maintain the continuity of your home.
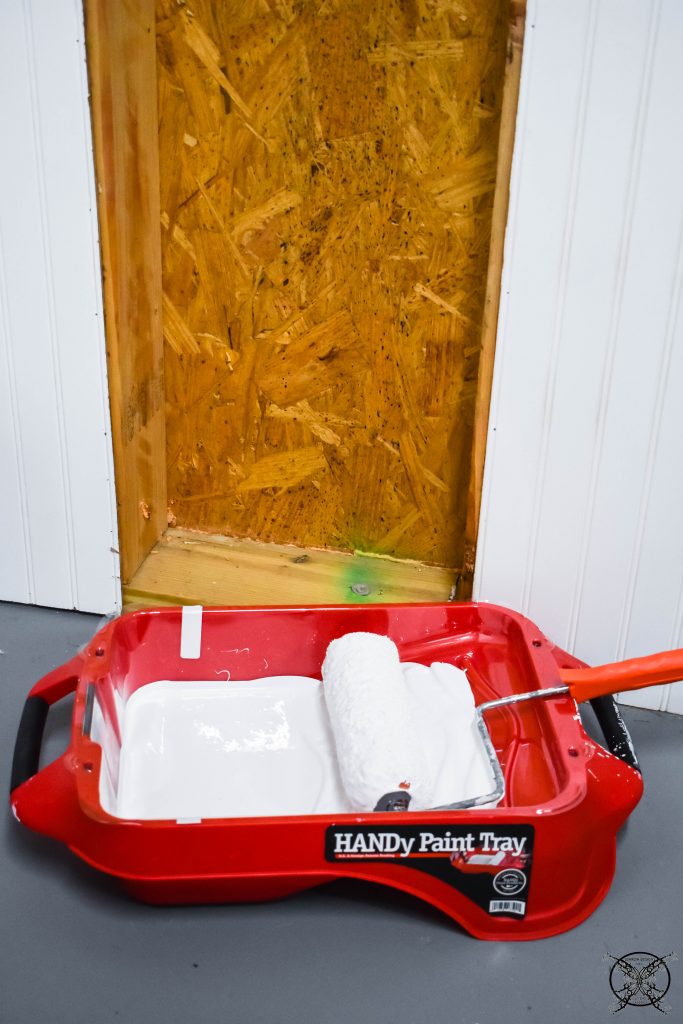 Once we had a nice coat on the wall you can hardly tell that it was simply a open wall cavity in my garden shed area. It now looks as if I built in a rustic style cabinet or cupboard into this space. While it certainly will need a second coat of paint, I am pleased with the basic results so far. Of course it was all made possible with my favorite HANDy paint products.
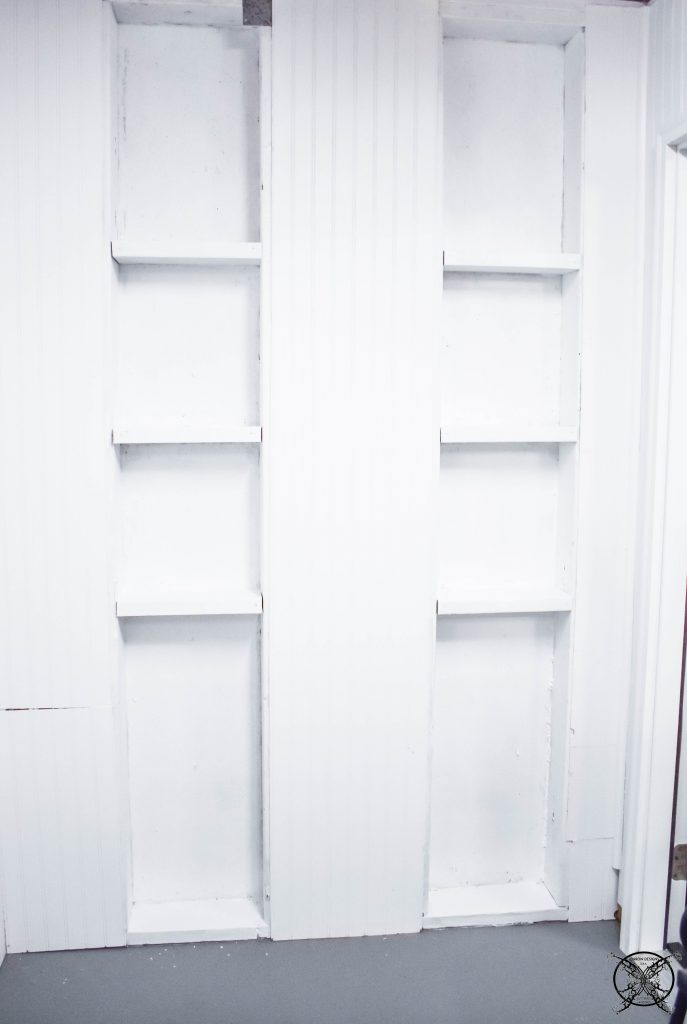
PIN This Project for Later and be sure to follow us on Pinterest at Jen @ JENRON DESIGNS
We also painted the plywood walls as well at the same time. I did however notice that I was not very keen on the seams between the sections of the plywood sheets, even for a garden shed. Lucky for me I had a few of these great pieces of Stickwood of shiplap panels leftover from my friend Suzy at Chelsea Project. While there was not enough pieces to actually use in a space, they were perfect for small craft projects or covering the seams in this space, and cost me nothing. 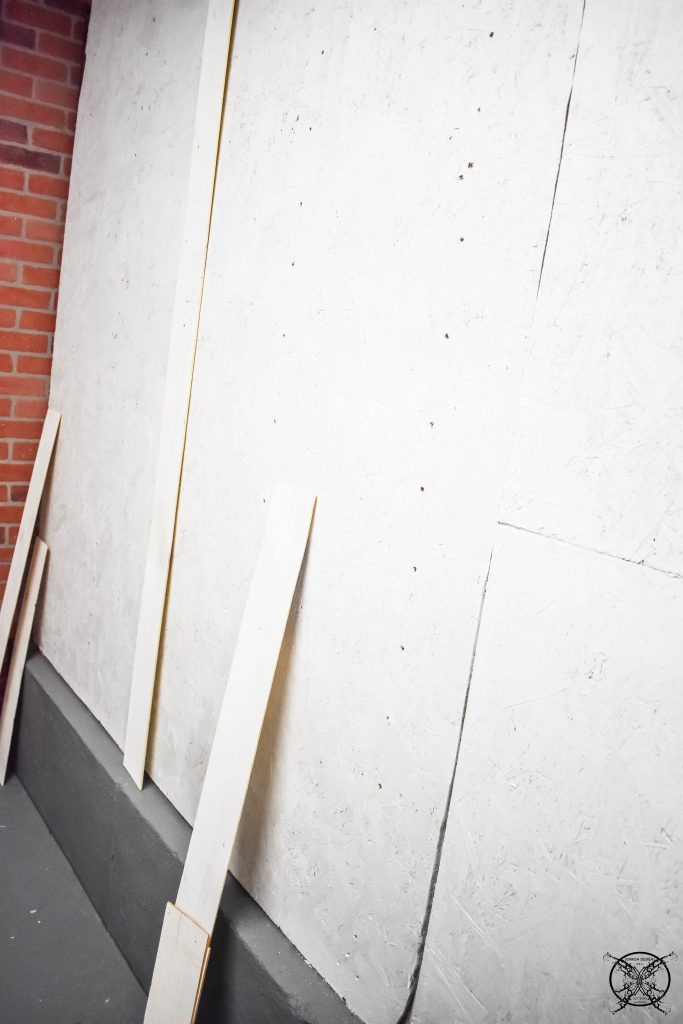 The final part of this weeks project was to add in some reclaimed wire shelves. These are the leftover shelves we did not use in the garage upgrade. We decided to utilize the most of space in this area by adding a long shelf above the double doors. Which we can use to house light items like our outdoor patio cushions.
 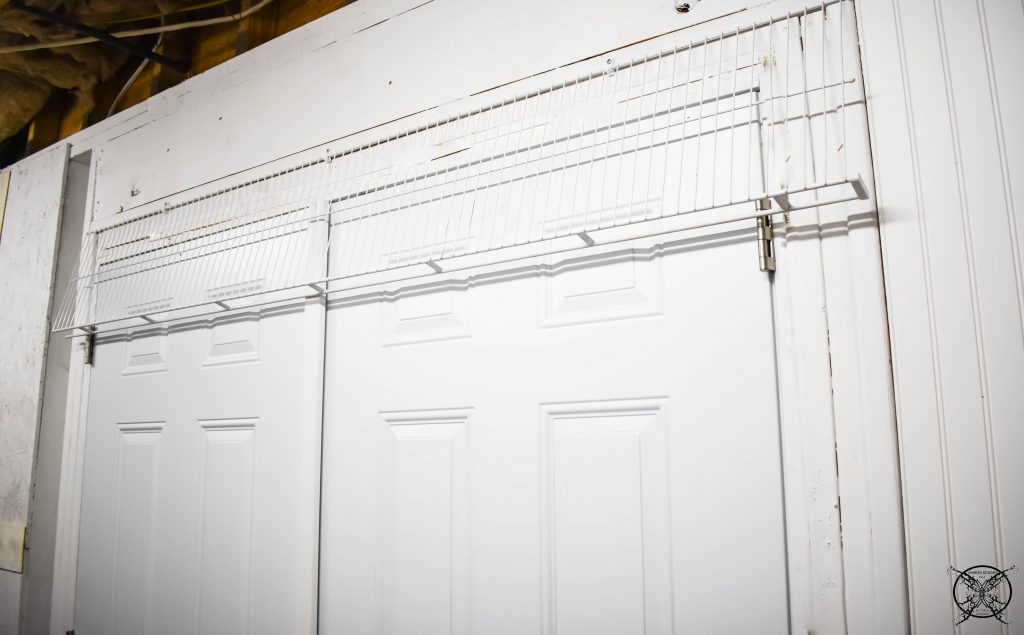 We also added a set of two wire shelves to the far end of the shed space, which will eventually house the HVAC unit on one side. We like the shelves, which certainly add additional storage space further down the road once the duct work and unit has been run in that area. When designing a space these are all things that you must keep in mind.
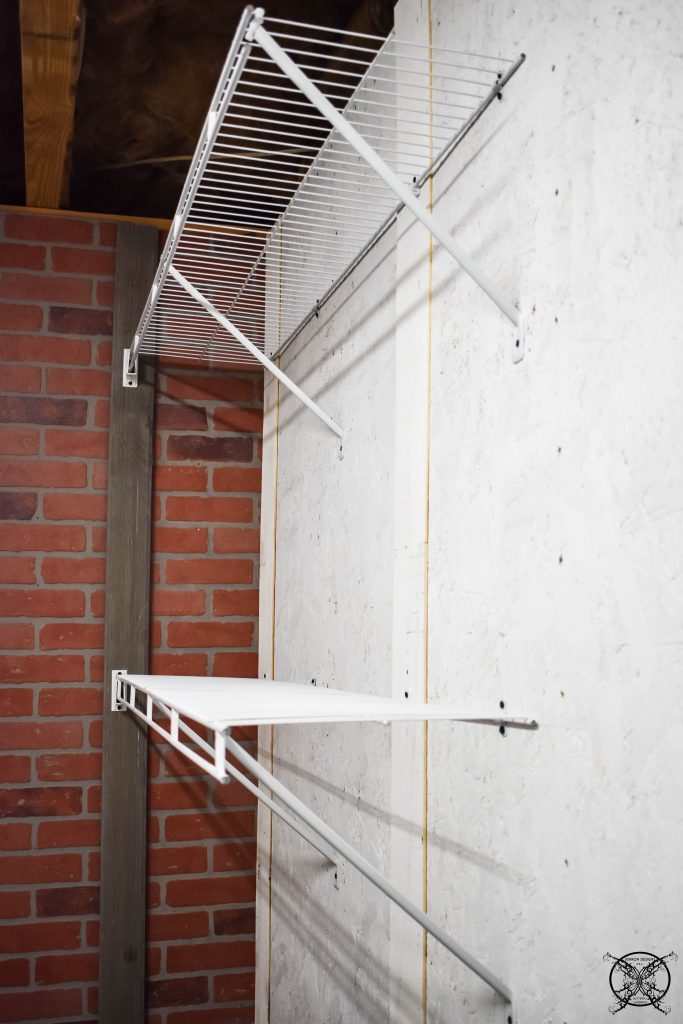
The Proposed Schedule:
Week 1: The Plan, Paint Concrete Floor, Repurpose Building Supplies Brick Panel Wall & Plywood from Doors
Week 2: Add Pegboard & Add Pallet Walls
Week 3: Create Wall Cabinets, Paint Walls, & Add Wire Repurposed Shelves
Week 4: REVEAL
Budget:
Week 1: Repurposed- Brick Panels, Leftover Concrete Paint, Repurposed Paint Supplies, Screws/Brads Leftover from previous projects & Plywood Board from Doors- Free
Week 2: Pallet Wood- Free, Brads/Screws leftover box from previous projects, Pegboard Panels- $19.86 x 2 = $39.72
Week 3: Reclaimed Beadboard- Free, New Beadboard 4×8 Panel- $19.57 x 1 = $19.57, Paint leftover 5 gallon house paint, reused rollers and paint supplies.
TOTAL: $59.29
What a great challenge! Love it ! It’s amazing what you can do for so little !!
I love the beadboard and the white paint looks so good!
Thanks to you I’m discovering easy and simple ways to makeover effective and useful! I love so much!
I love the finished product, and the clever budgeting!
What a great use of that space! This shed is completely unrecognizable already and I can’t wait to see how it all comes together!
What a fun challenge and you guys did amazing with this! It’s amazing what we can do if we really set our mind to it
I cannot believe you have spent less than $60! You have done so much with so little money. I can’t wait to see it all come together.
You’re going to have so much organized storage now! That’s awesome!
I LOVE that you are pretty much just using leftovers to create this space! Isn’t it amazing how much you can get done with stuff you already have?! Cannot wait to see the reveal on Wednesday!!!
Adding the beadboard and painting everything the same color makes this seem so professional and complete. You and Ron are so talented and skilled- it’s so impressive!
Love how the shelves turned out. The beadboard adds such style.
I loove your little built-ins! They are the perfect size for all of those little bottles and bits that always look so messy. What a great way to keep them all organized!
It’s looking great, so much practical storage!
This is great! It’s amazing that you kept the budget so small by repurposing. Good job!
What a smart way to use this space!! I love it!!