Ron’s Workshop
Today I am sharing one of our “back of house” rooms in the basement Ron’s Workshop.
Hello all, today I am taking you on a “back of house” basement tour with one of our rooms that rarely ever gets seen, Ron’s Workshop. This has been one of our little spaces that we created a while ago, but has been integral in helping us to finish some of our other major DIY projects seen in this blog.
BEFORE:
As you can see below in the before photo this area is leaving a lot to be desired and is a bit of a mess. Which is kind of Ron’s thing, he is not exactly known for his organizational skills, however; he does really appreciate organization once it has been implemented. So I offered to step in and make him a space that he would love. 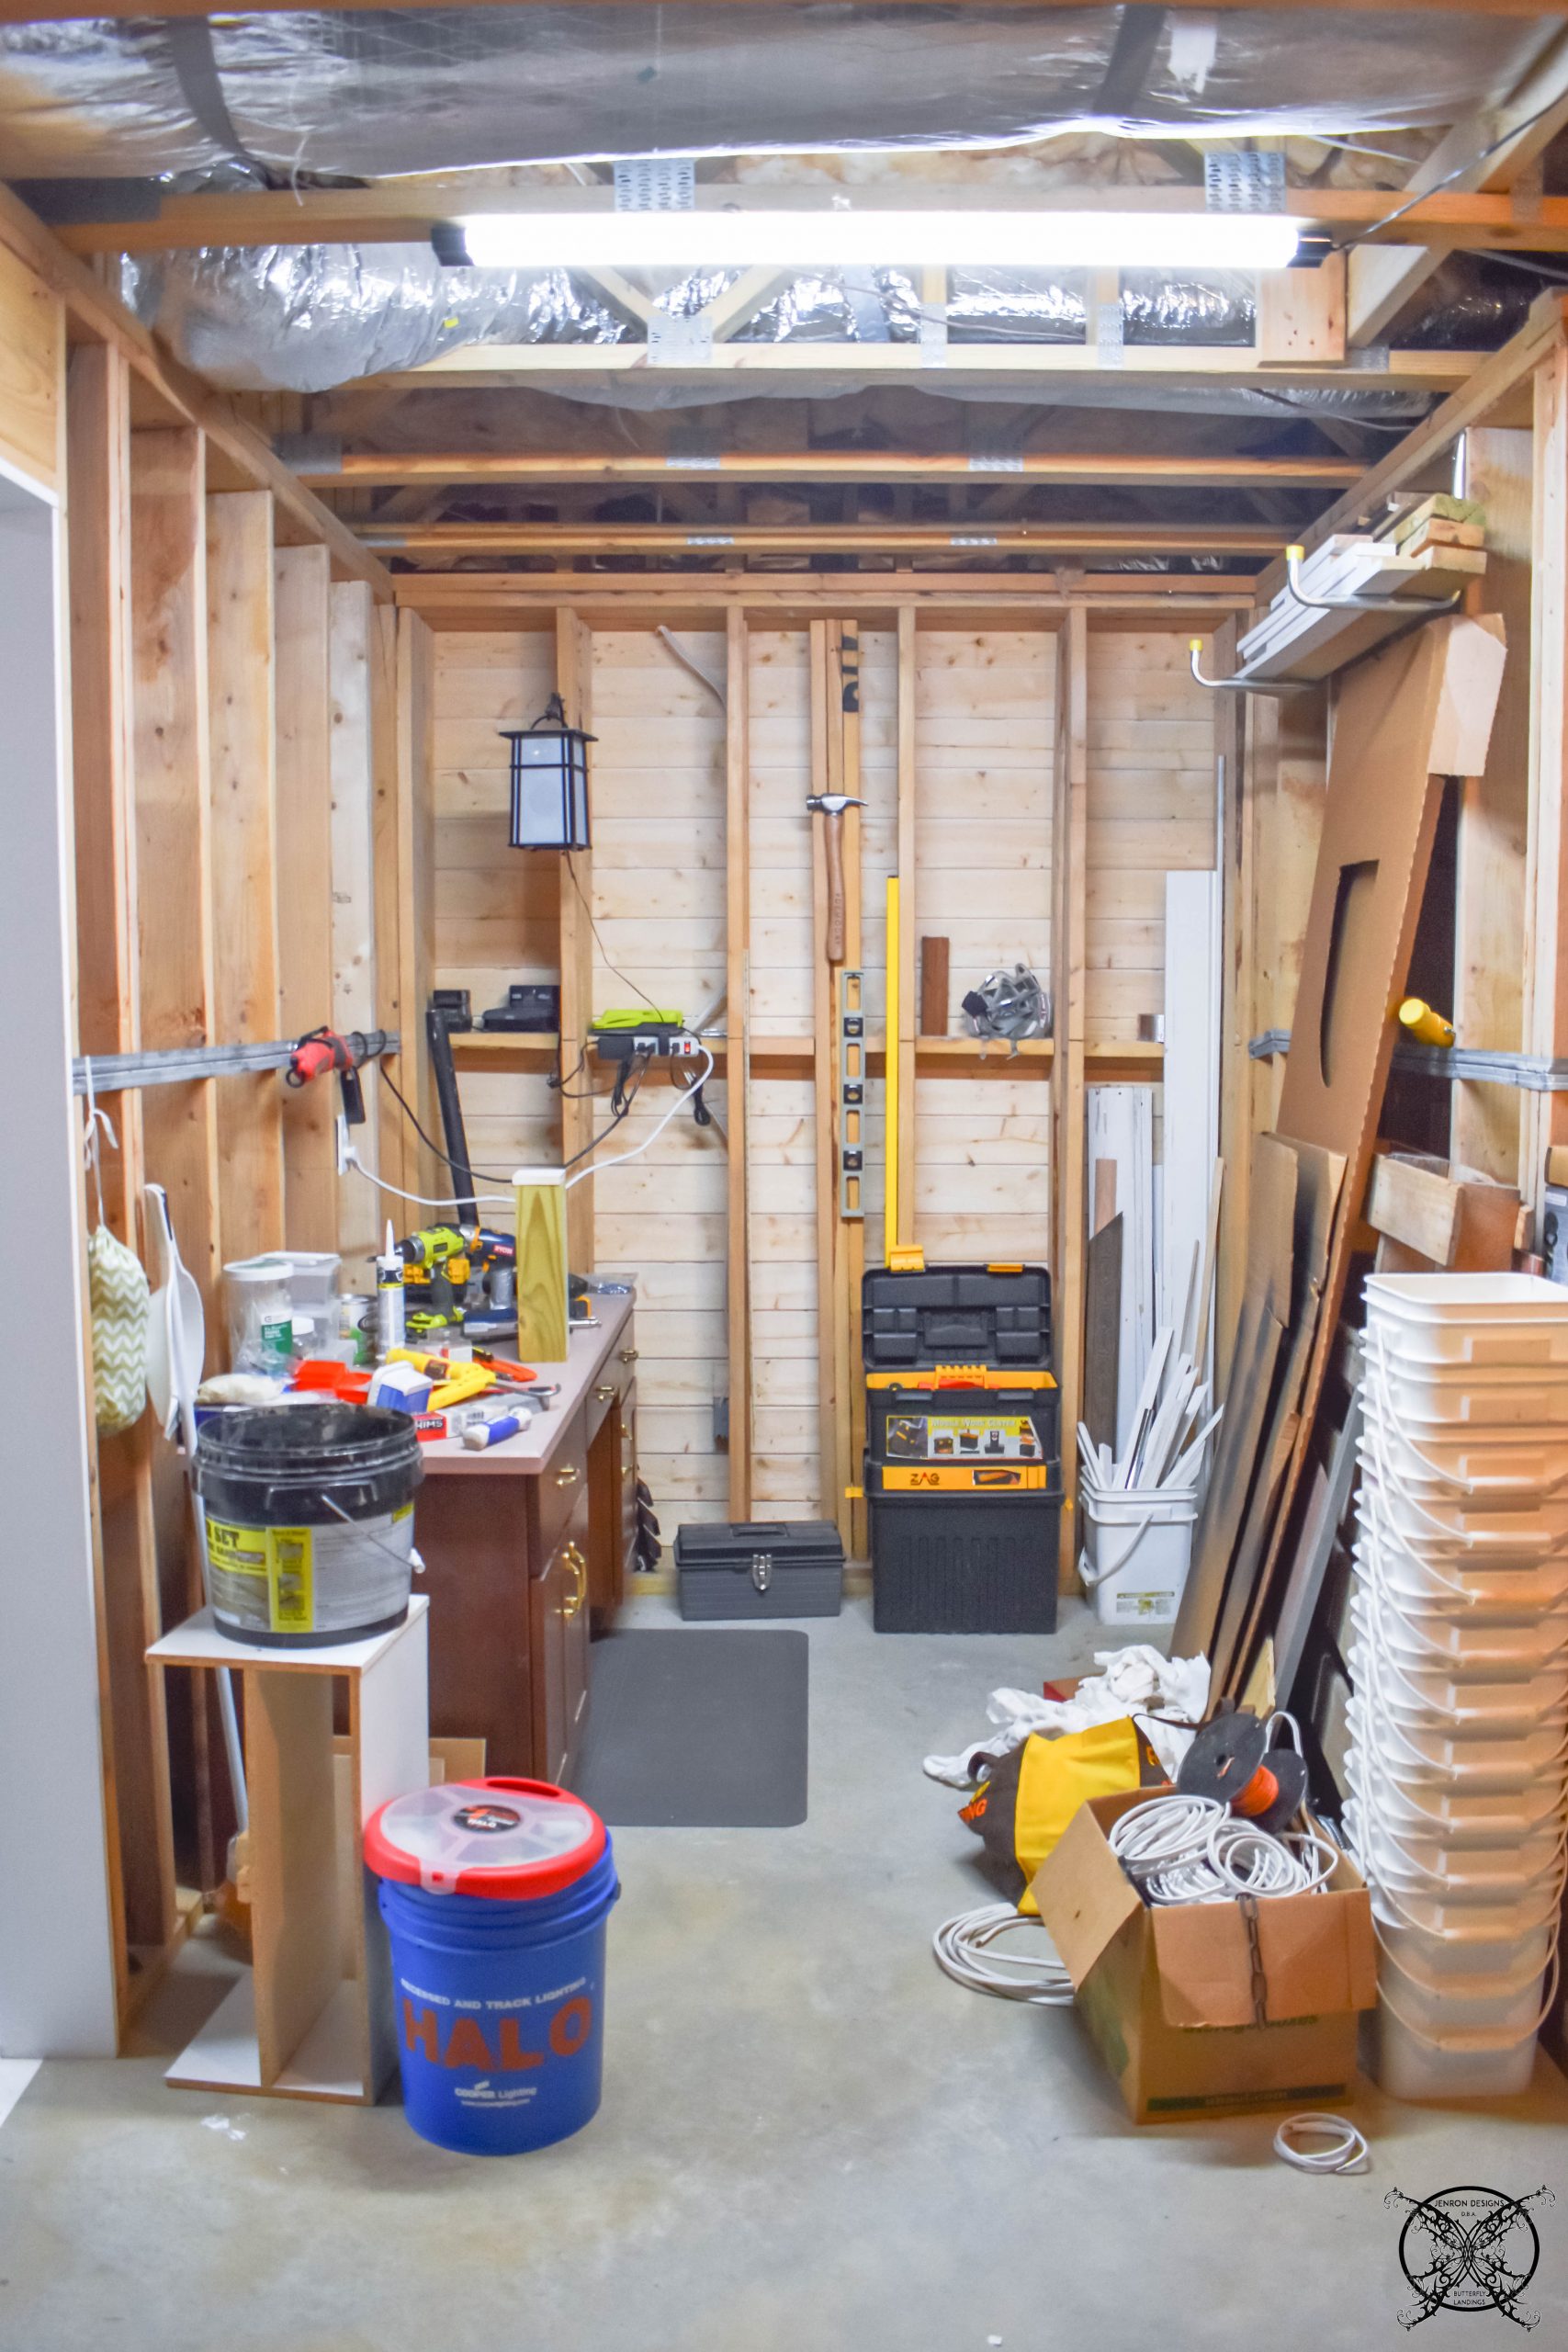 AFTER:
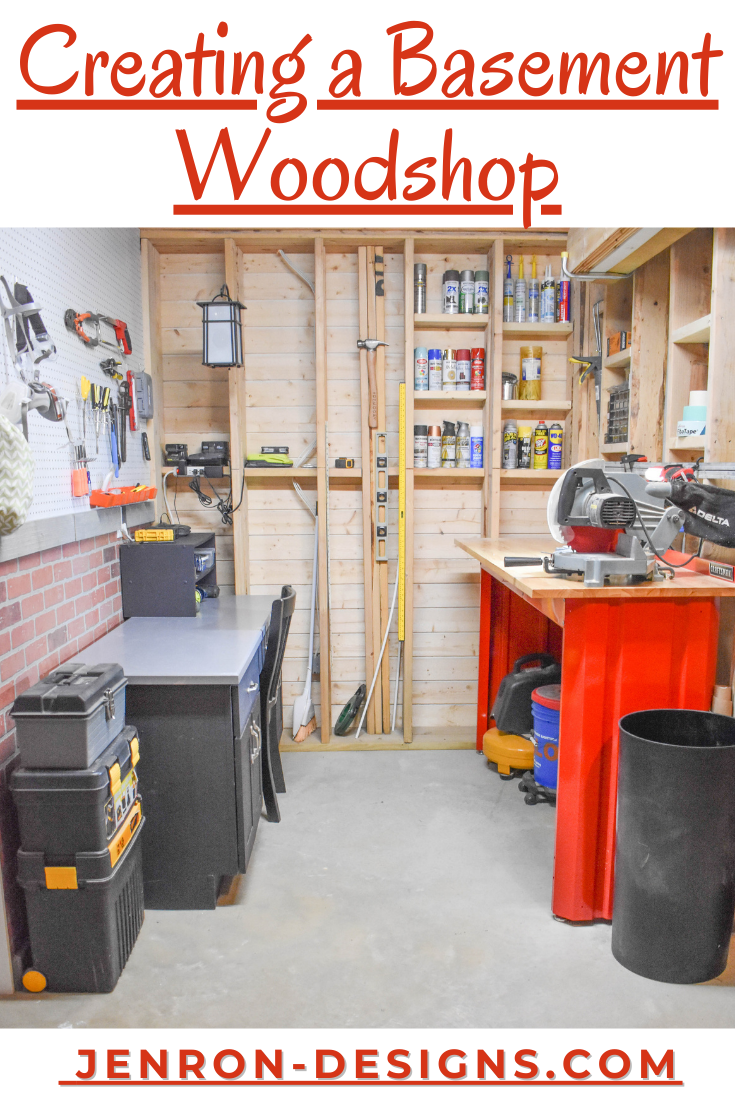
This is where his workshop ended up after a few simple changes were made into his space. A few were cosmetic, while others were organizational. I can say he is very happy with the overall results, and can find all of his tools easily. Plus it does not drive me crazy anymore when I walk by the area, so that is a win win for us both. 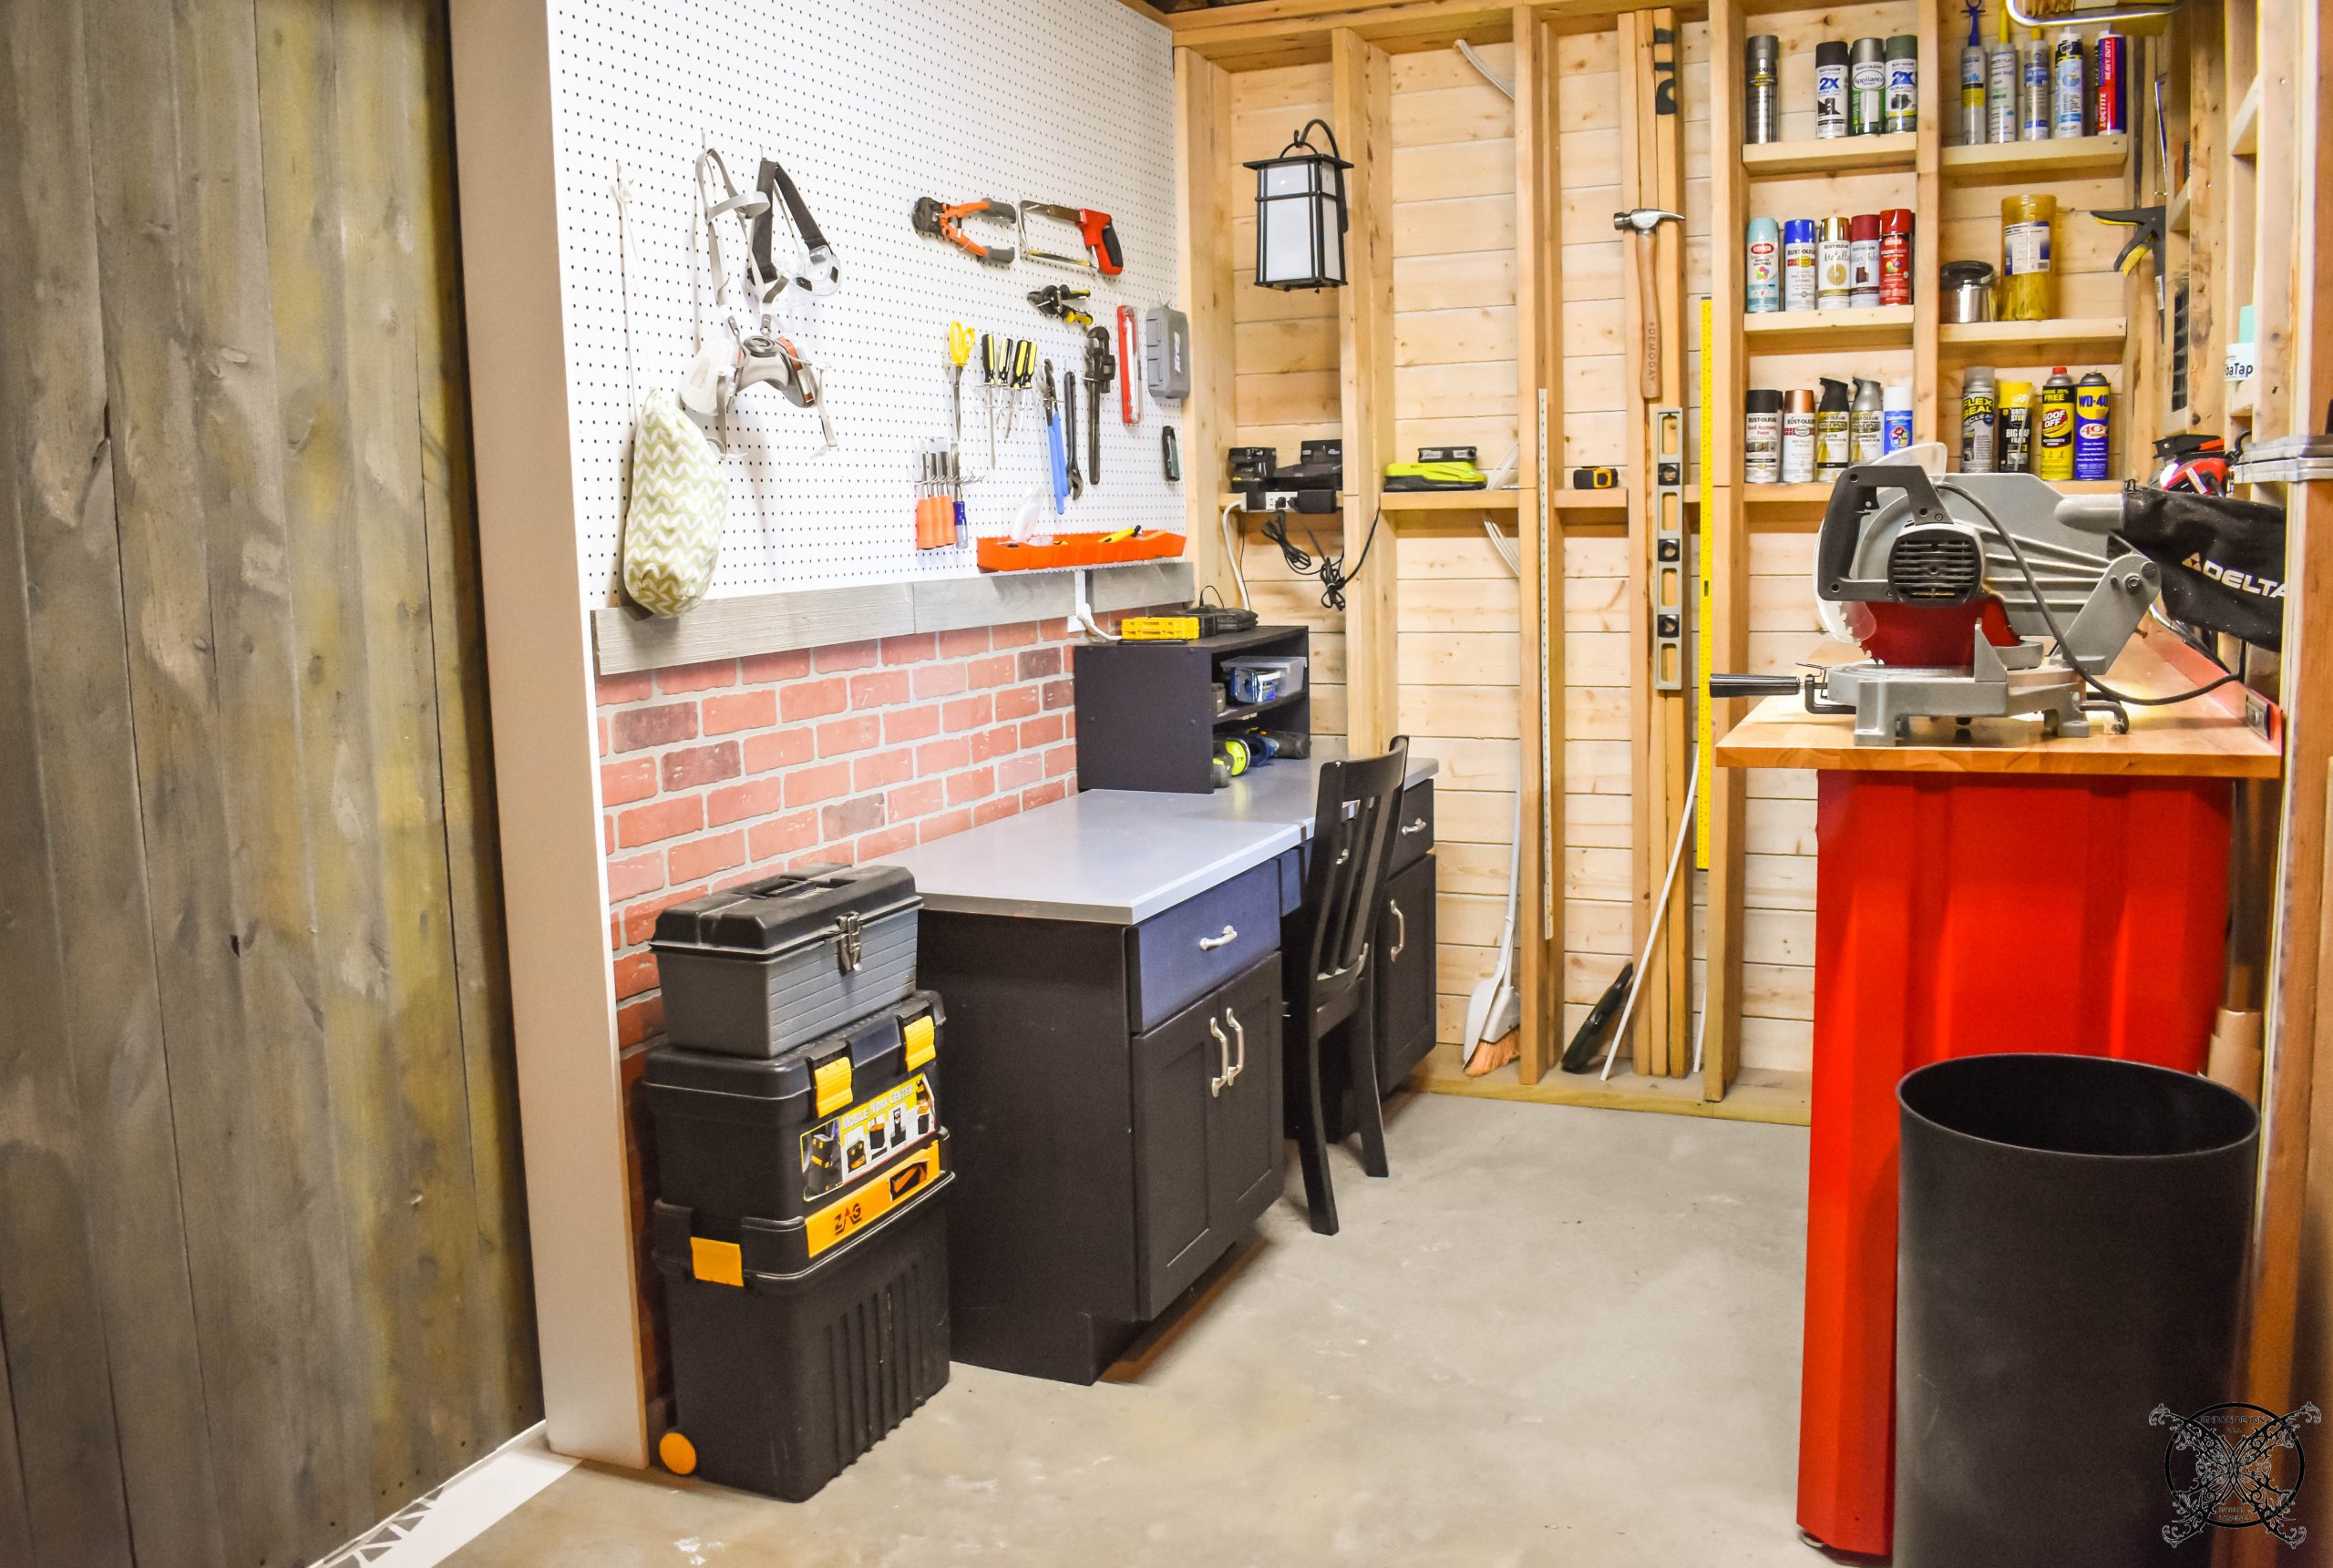 Cabinet Refurbishing & Refinishing
One of the first things I did for this space was refinish this refurbished kitchen cabinet. We had originally picked up this cabinet from a neighbor, thank you Stephanie, from the curb as an unwanted piece. I knew while it would never be a piece that would be used in a main living space it would be great for the woodshop. However the pink countertops were not an ideal design choice for this space.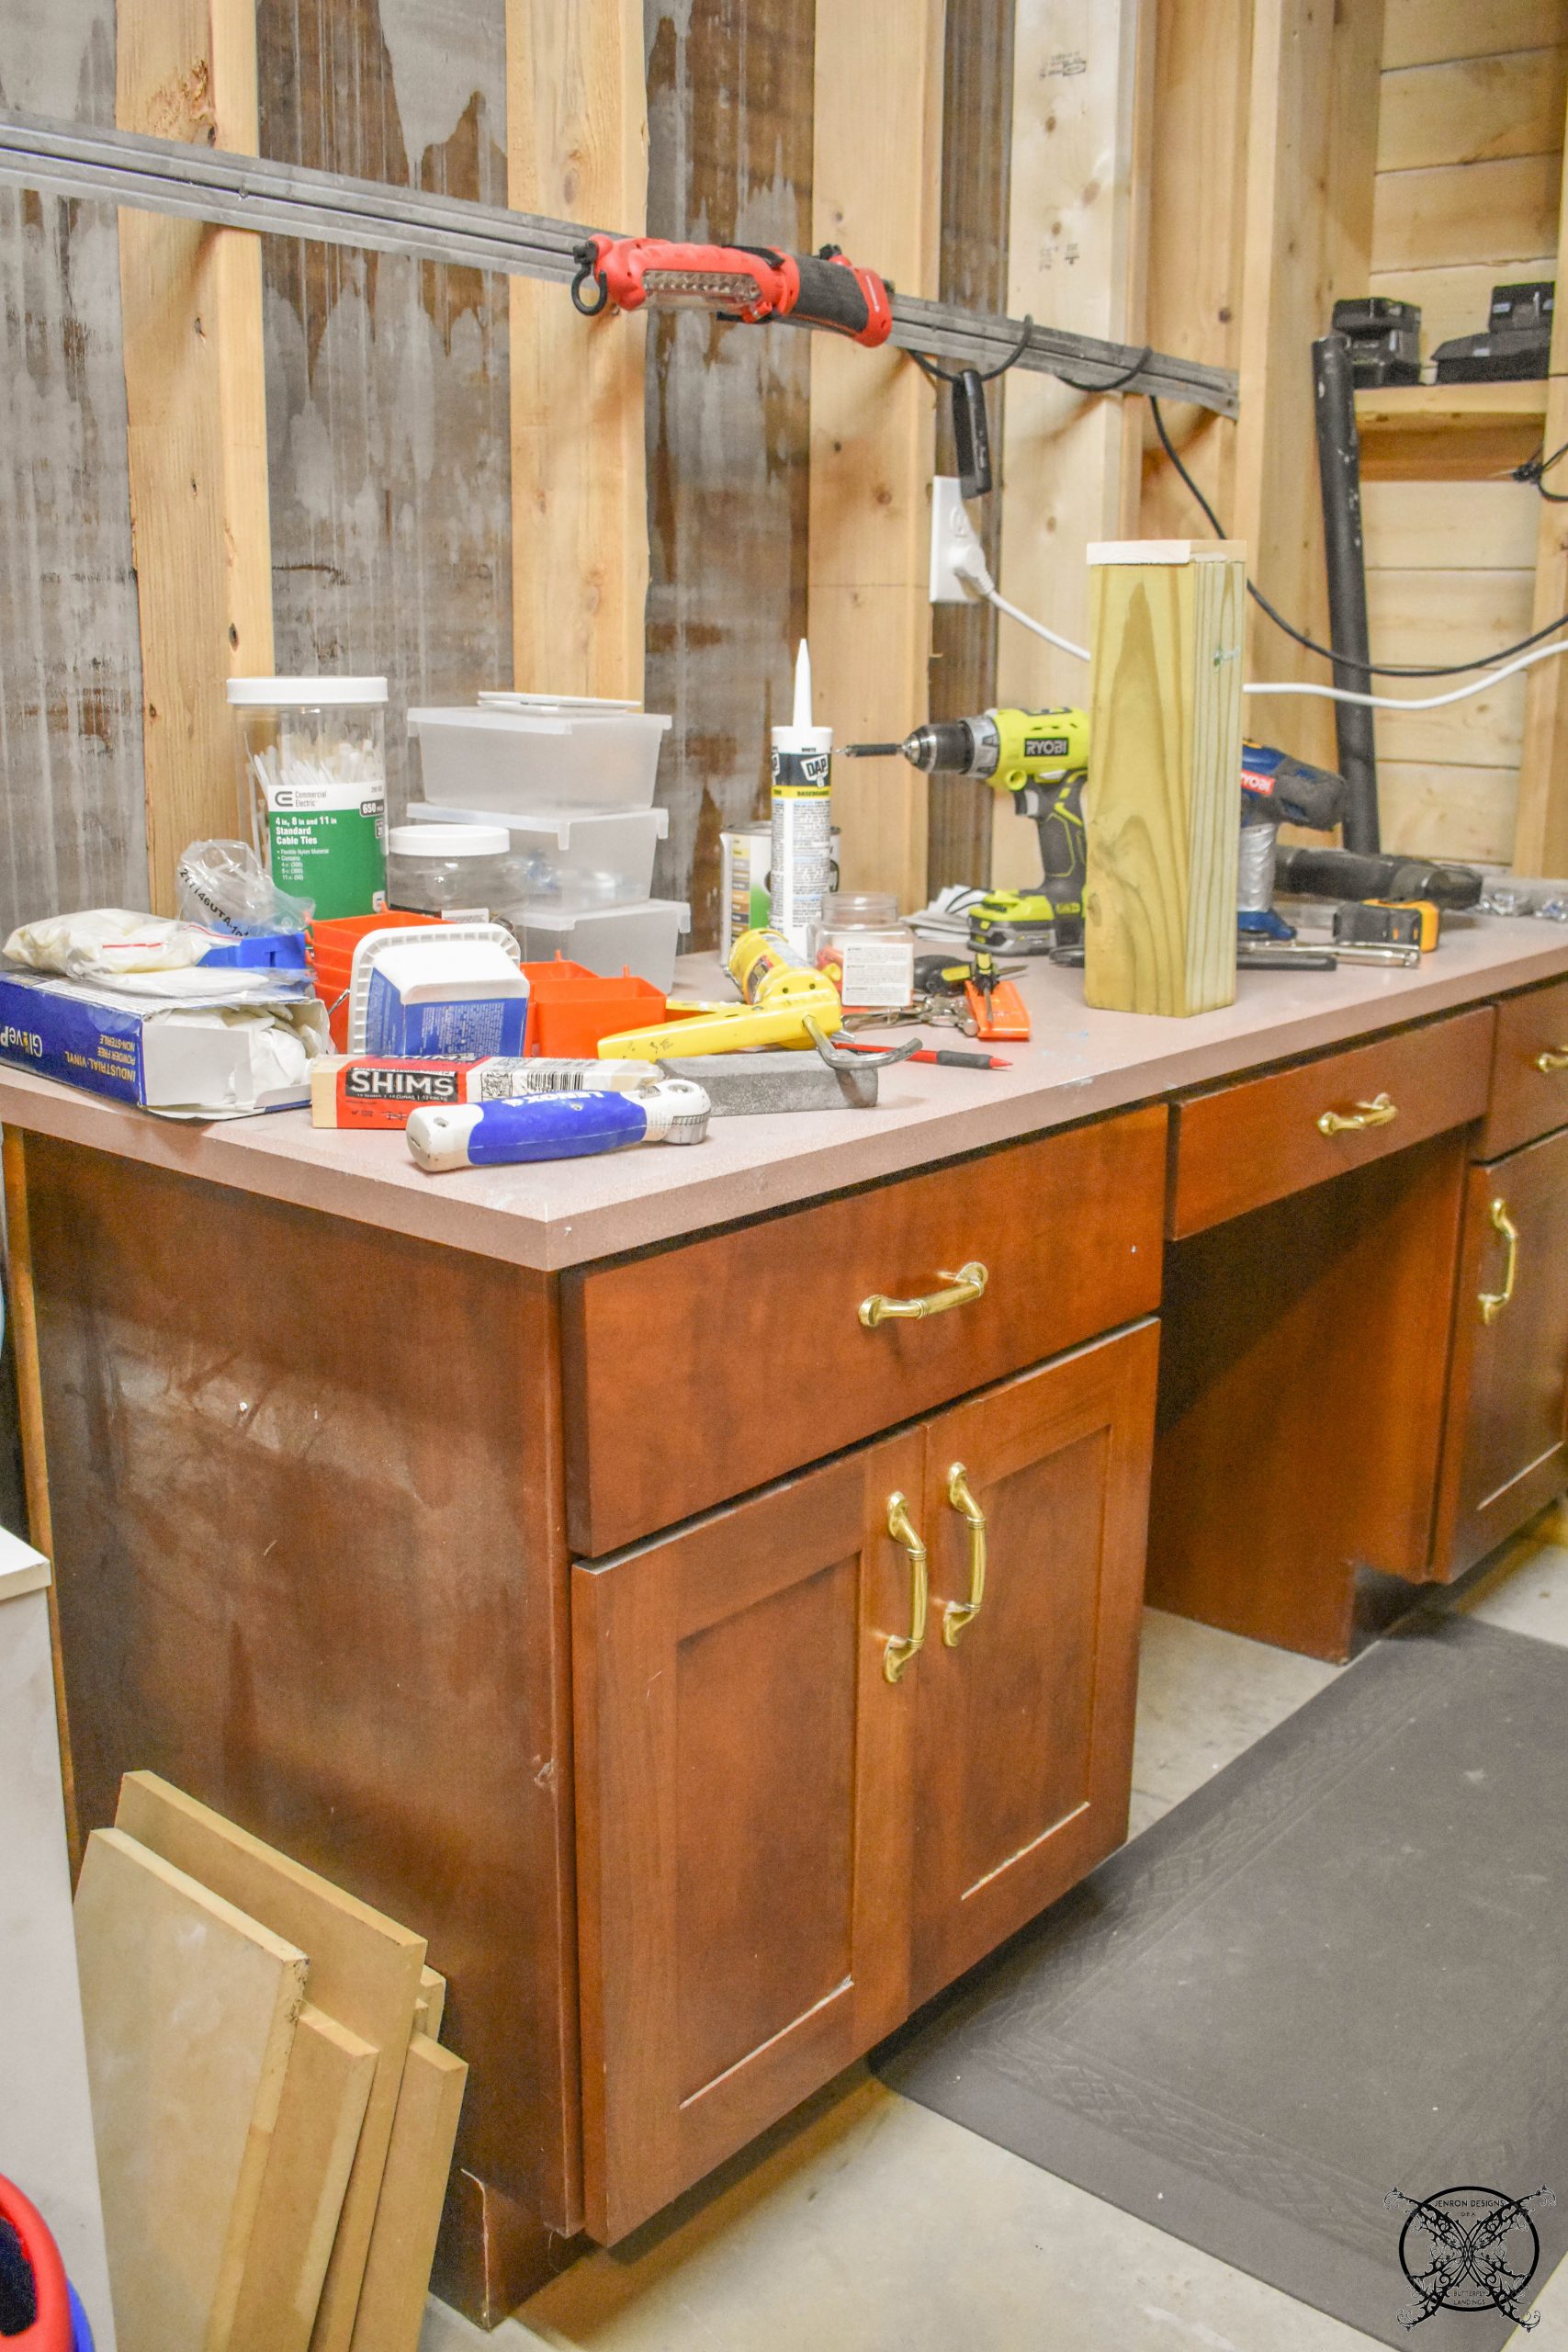 To complete the refinish I used Amy Howard Jet Black Paint to refinish the base cabinet, which turned out great in just just two coats. Then I used the Rustoleum Interior Countertop Coating in Gray for the Countertop, which took two coats. For the handles I used Rustoleum Hammered Metal in Silver Nickel to coat the Brass hardware.
*Please note that I was compensated for this post. This post contains affiliate links for your convenience. These involve no extra cost to you. You can view my full advertising disclosure here.
Designer OPINION Alert: Yes, while I know brass hardware is coming back into style again, “just like it was in the 1980’s ugh!” Personally I never liked it the first time around, so I will not be diving back into that particular, hopefully short lived, trend again, I just can’t do it AND no hideous powder pink & cornflower blue either LOL!
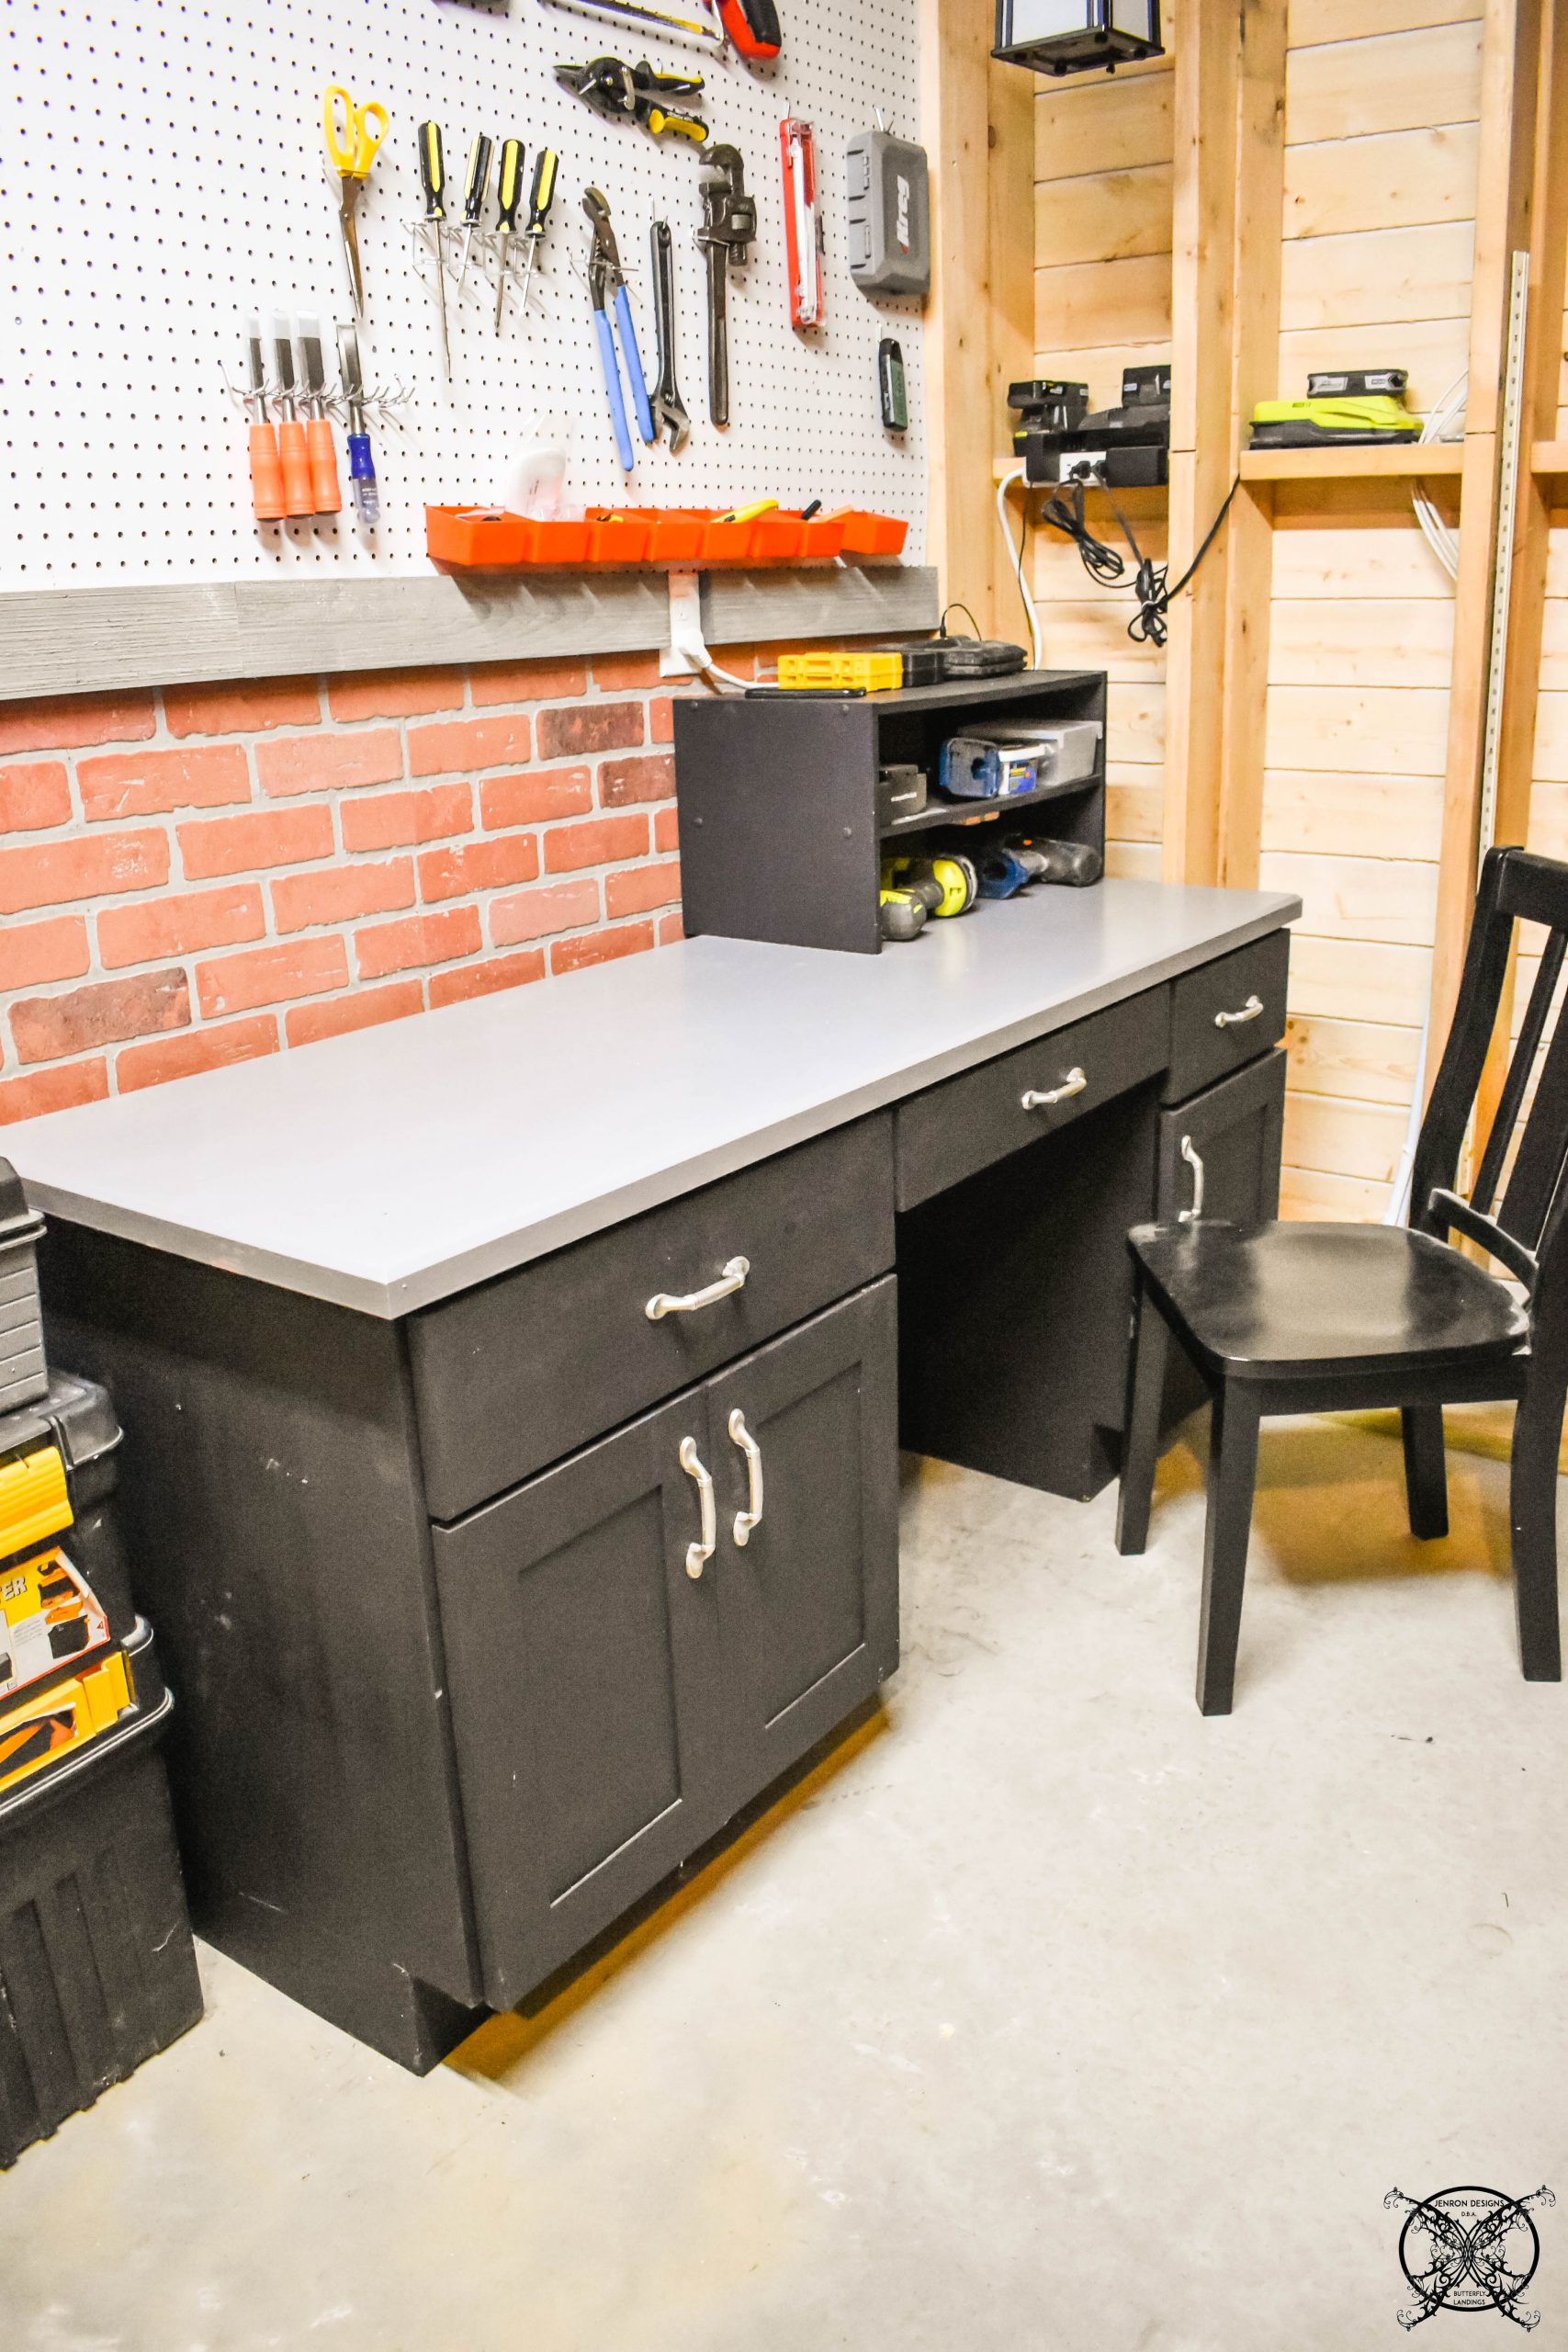 This was how that curb side cabinet turned out, not bad right? I also ended up taking the little shoe rack which you might have spied in the before picture up top and painting it a matching black as well to add some more storage shelves to the desktop.
Adding Storage
Another thing we added to area to gain more storage space was the peg board wall. This will be a great addition moving forward as we add more and more tools to this wall.  This was also a great way to close up sections of the walls as well. We used left over brick panels for the bottom half of the wall and one sheet of 8 ft pegboard turned on it’s side covered the remaining space easily. Now Ron can see his tools easily, and organize them however he would like in this area.
 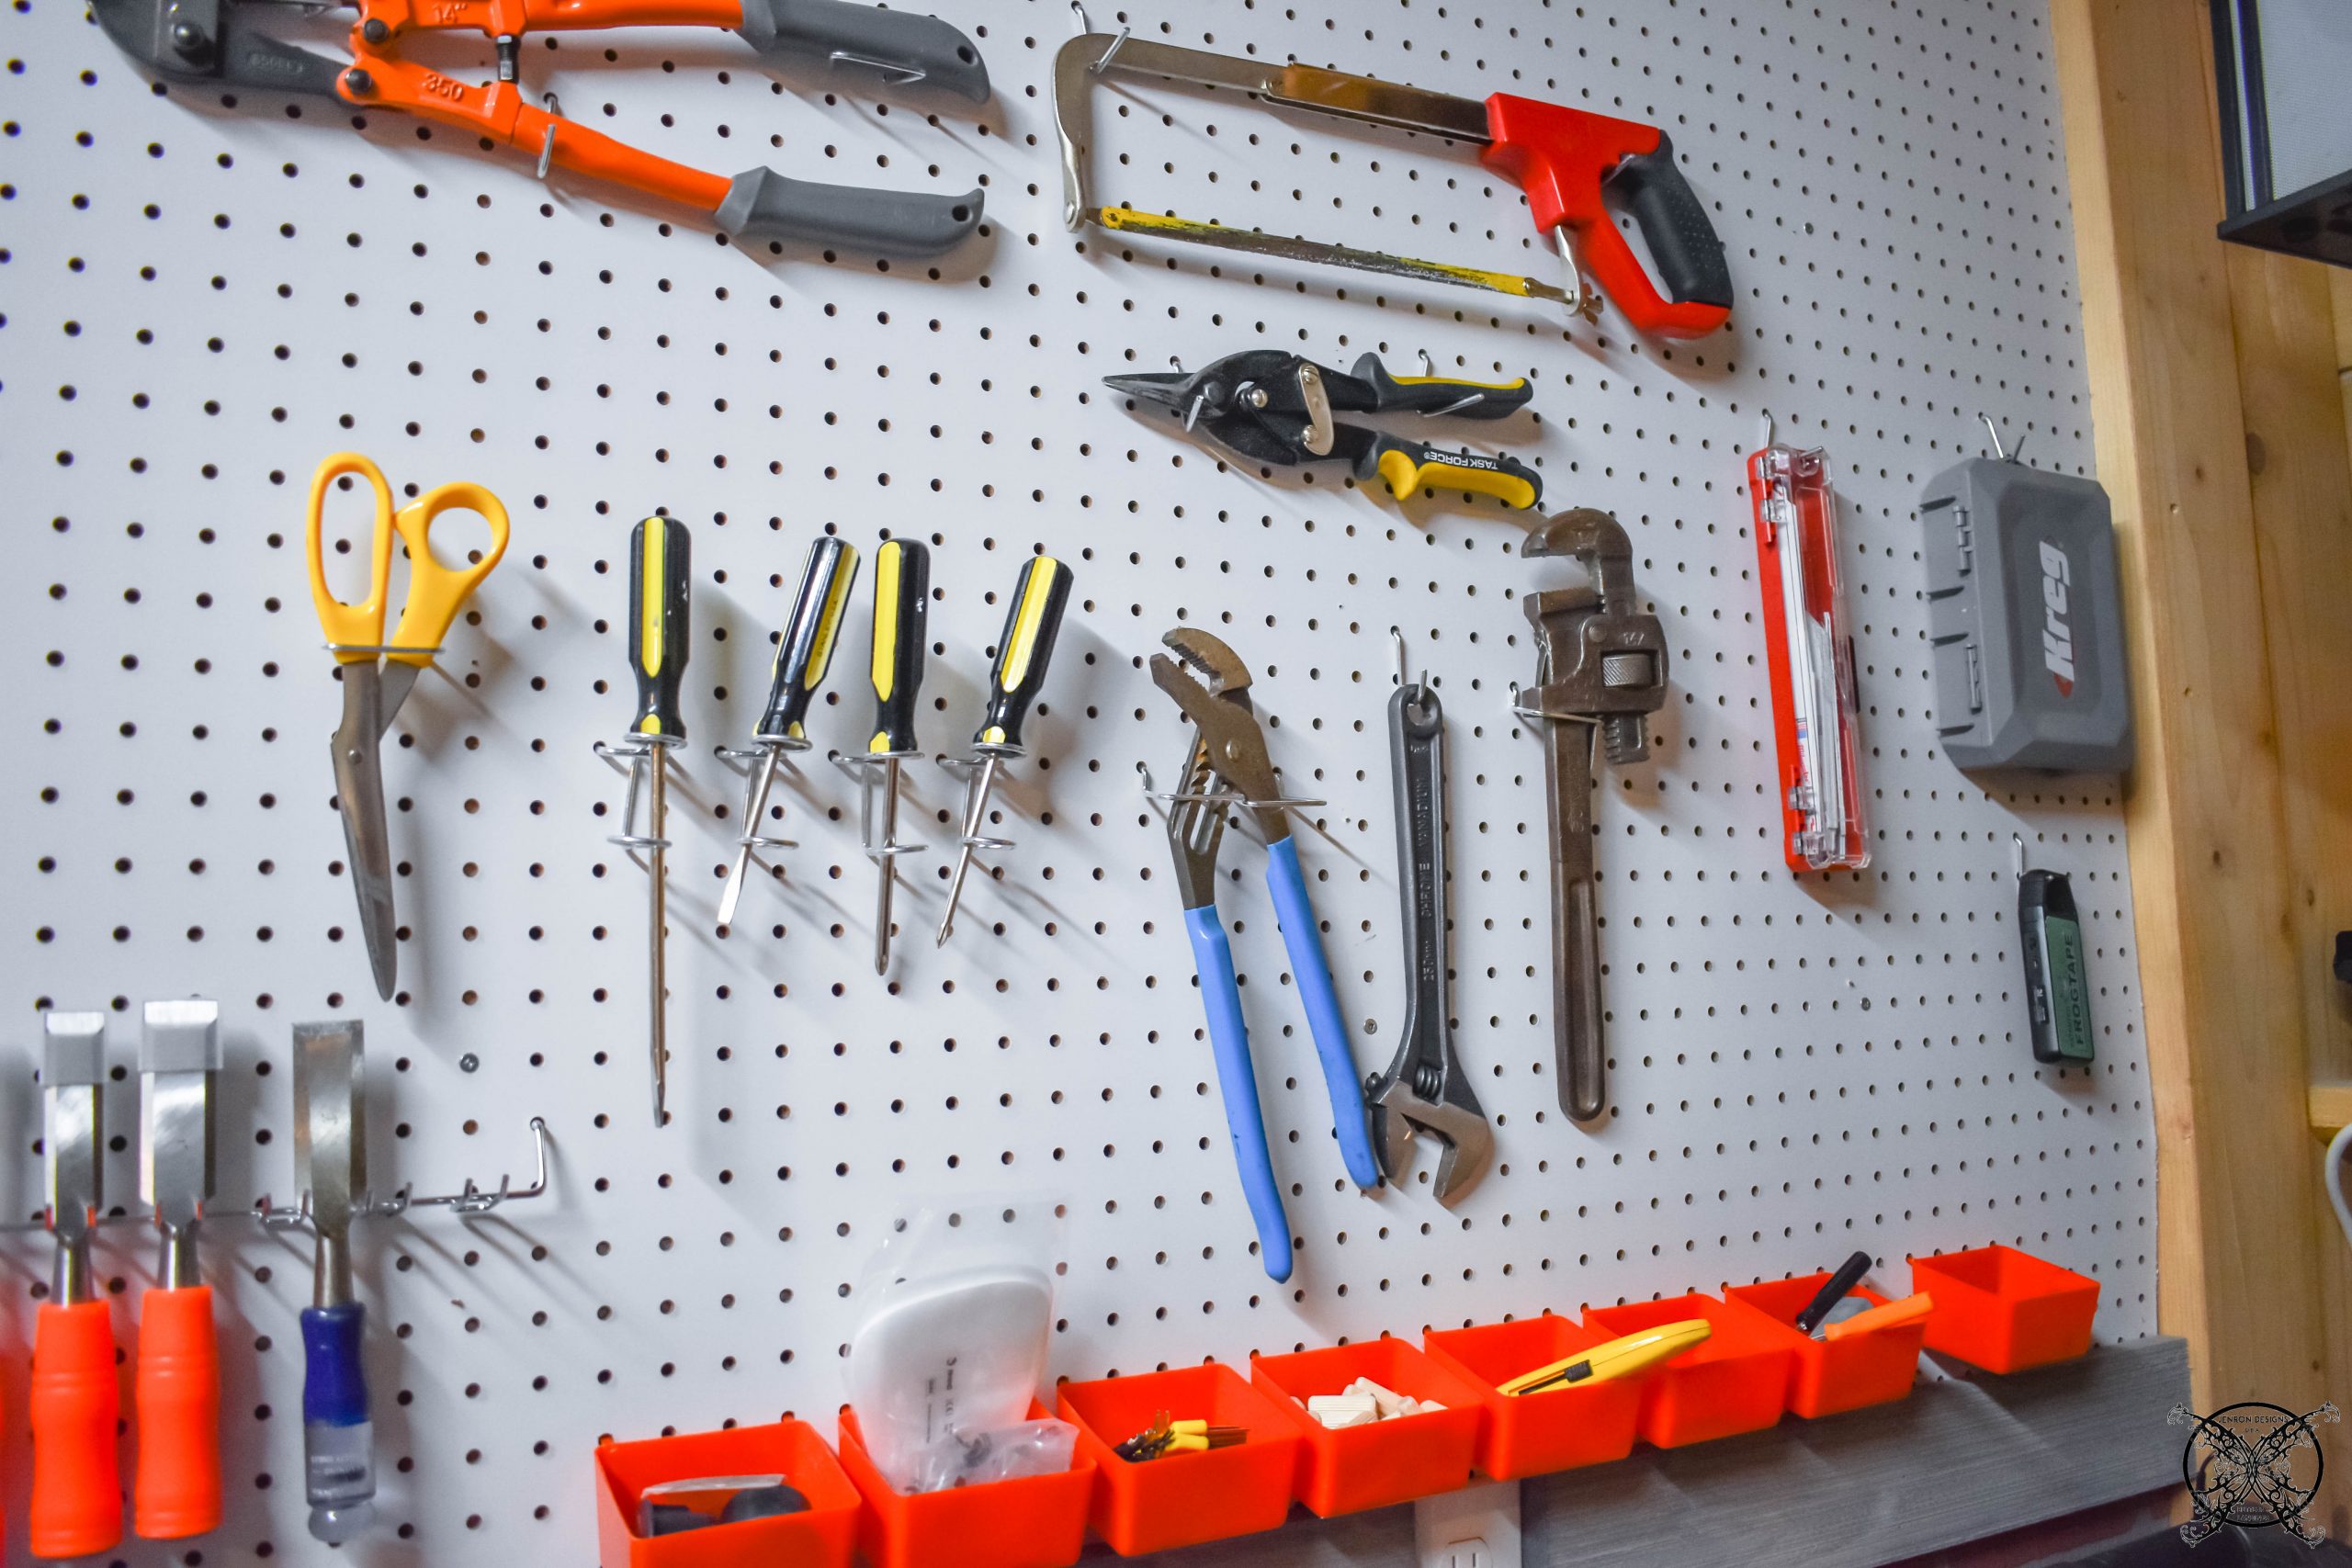 Another simple trick to add storage is adding shelves inside the stud spaces. We did this in our gardening shed space for the $100 Room Challenge seen here. I decided it would be another good use of these leftover short boards and this space again.
  It gave us this ability to create this great paint and caulk storage space area. Now we can easily see what we have on hand and it get the items organized and off a larger shelf, which now houses larger equipment.
 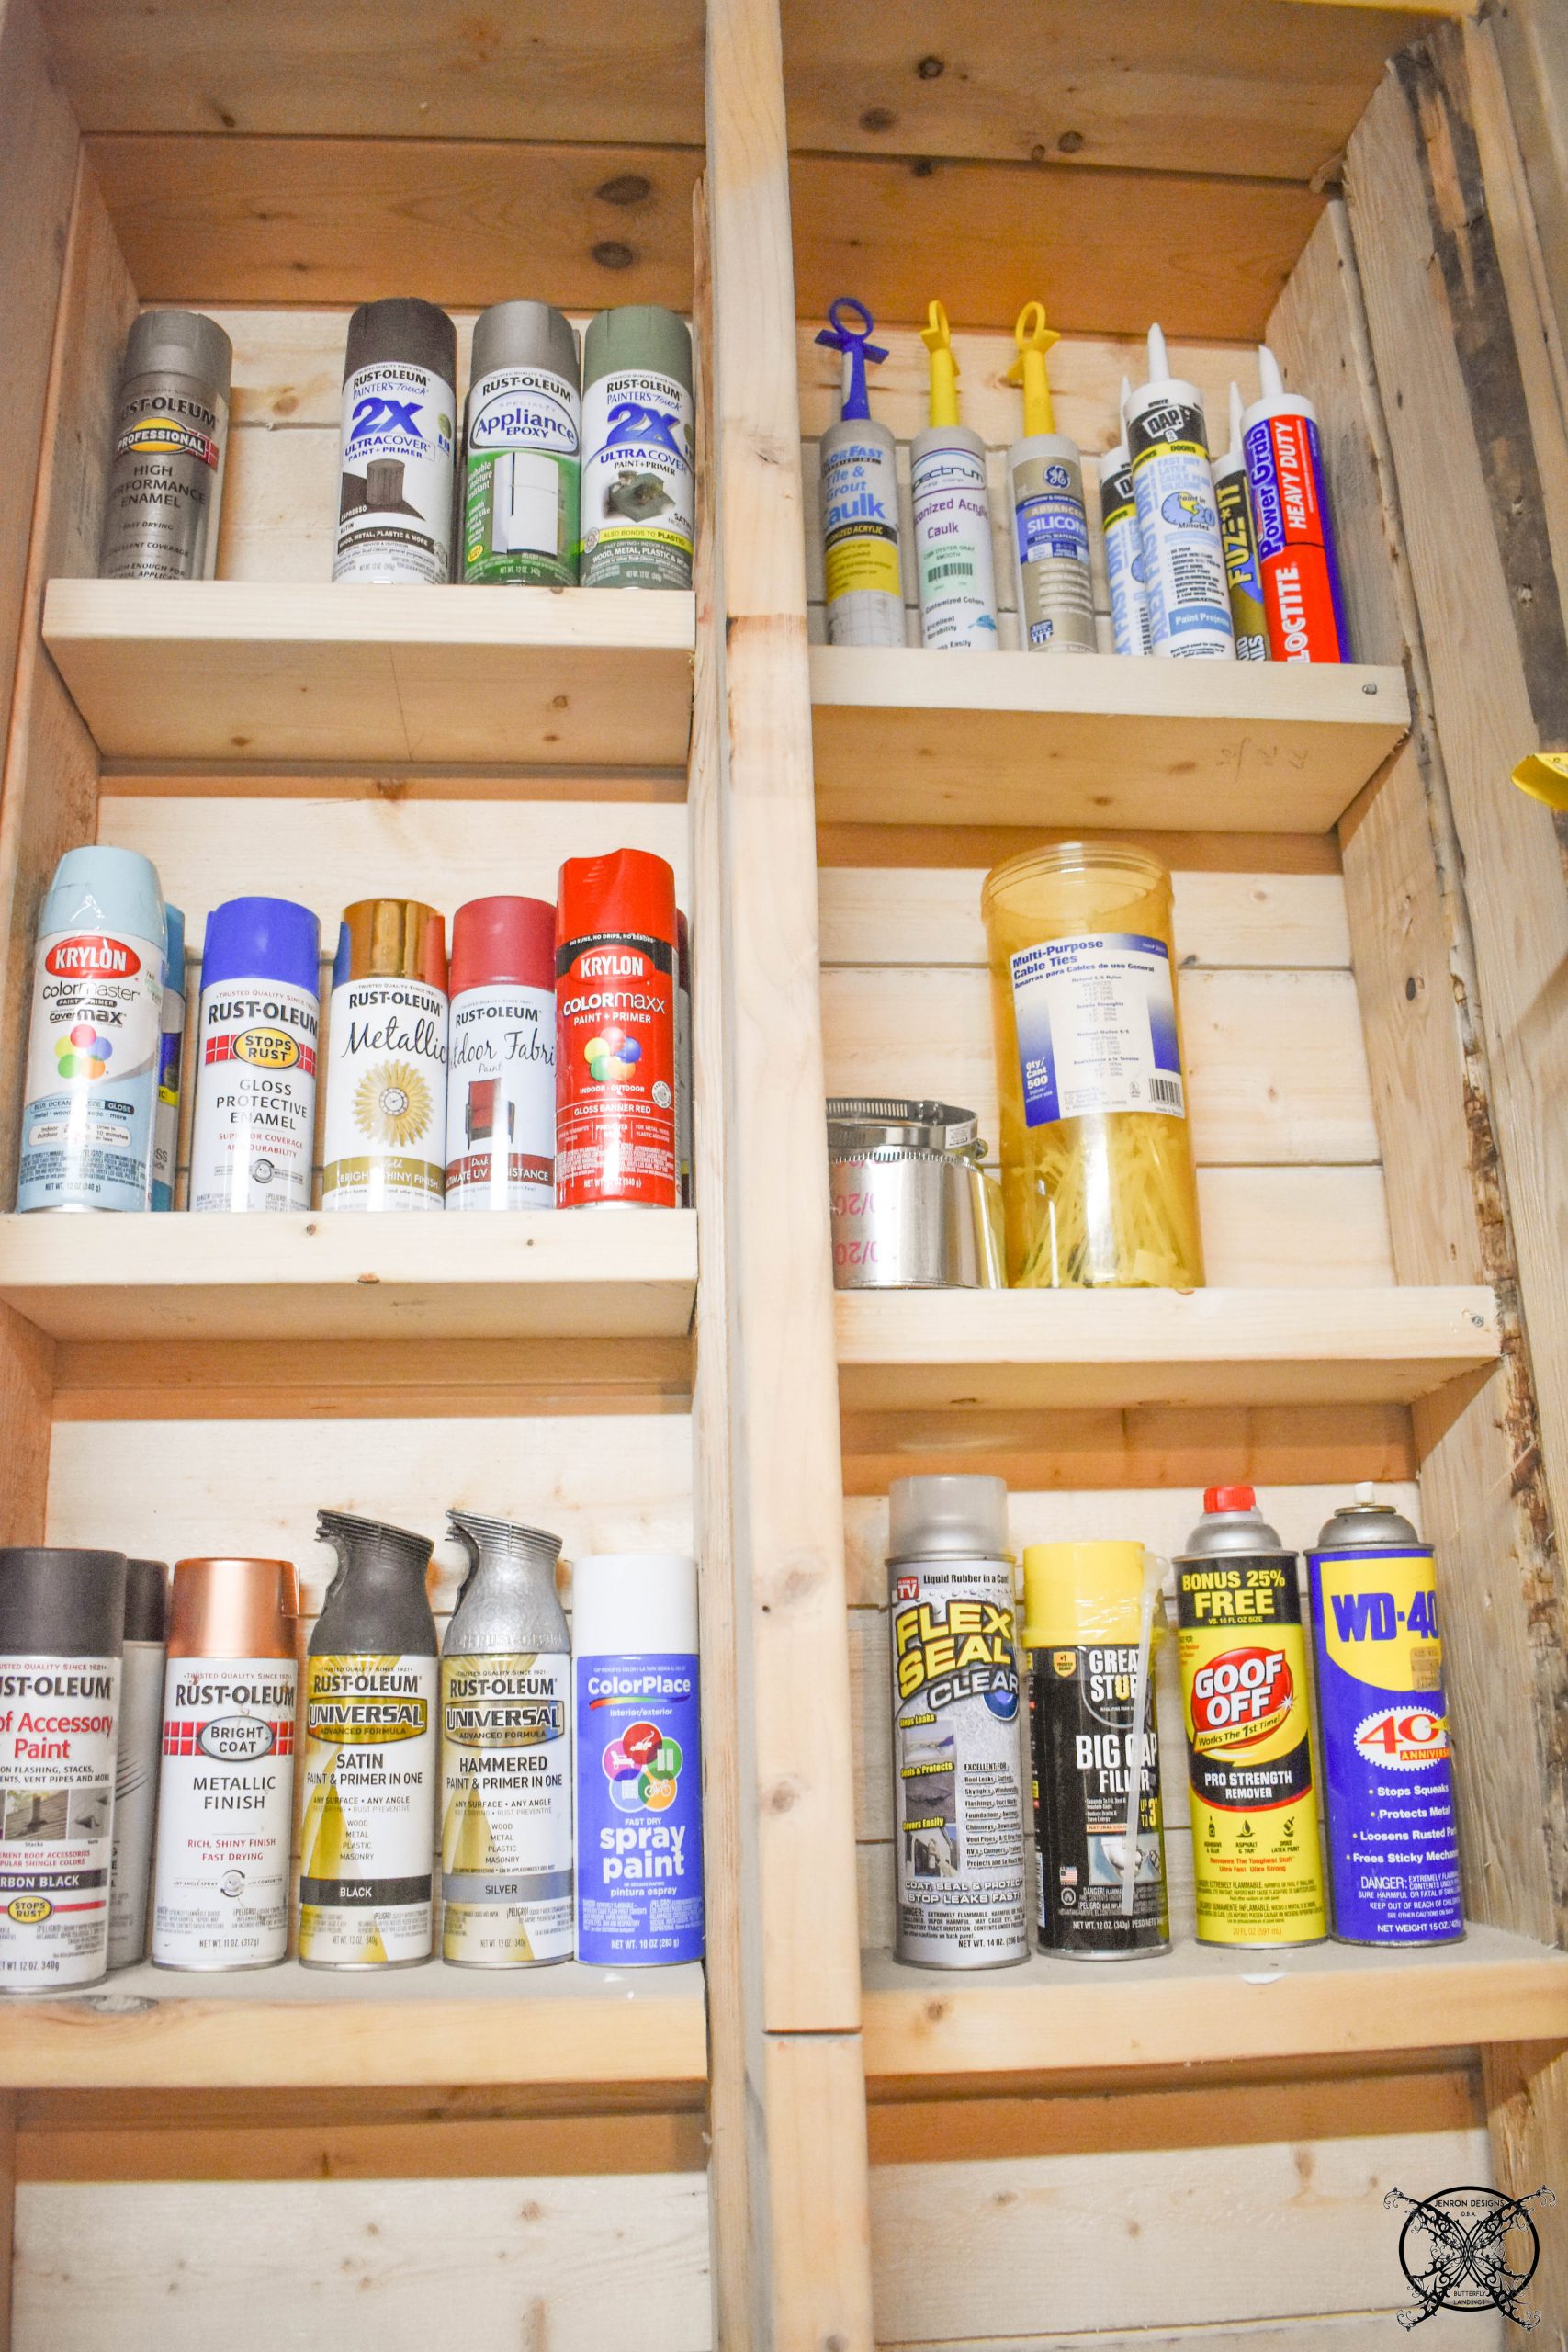 We also were able to place the caulk guns, and nuts and bolt drawers on these same shelves. Again using a narrower shelf space for these items and keeping the larger shelves for large drill boxes, and reciprocating saws. Which file away easily in their storage crates.
 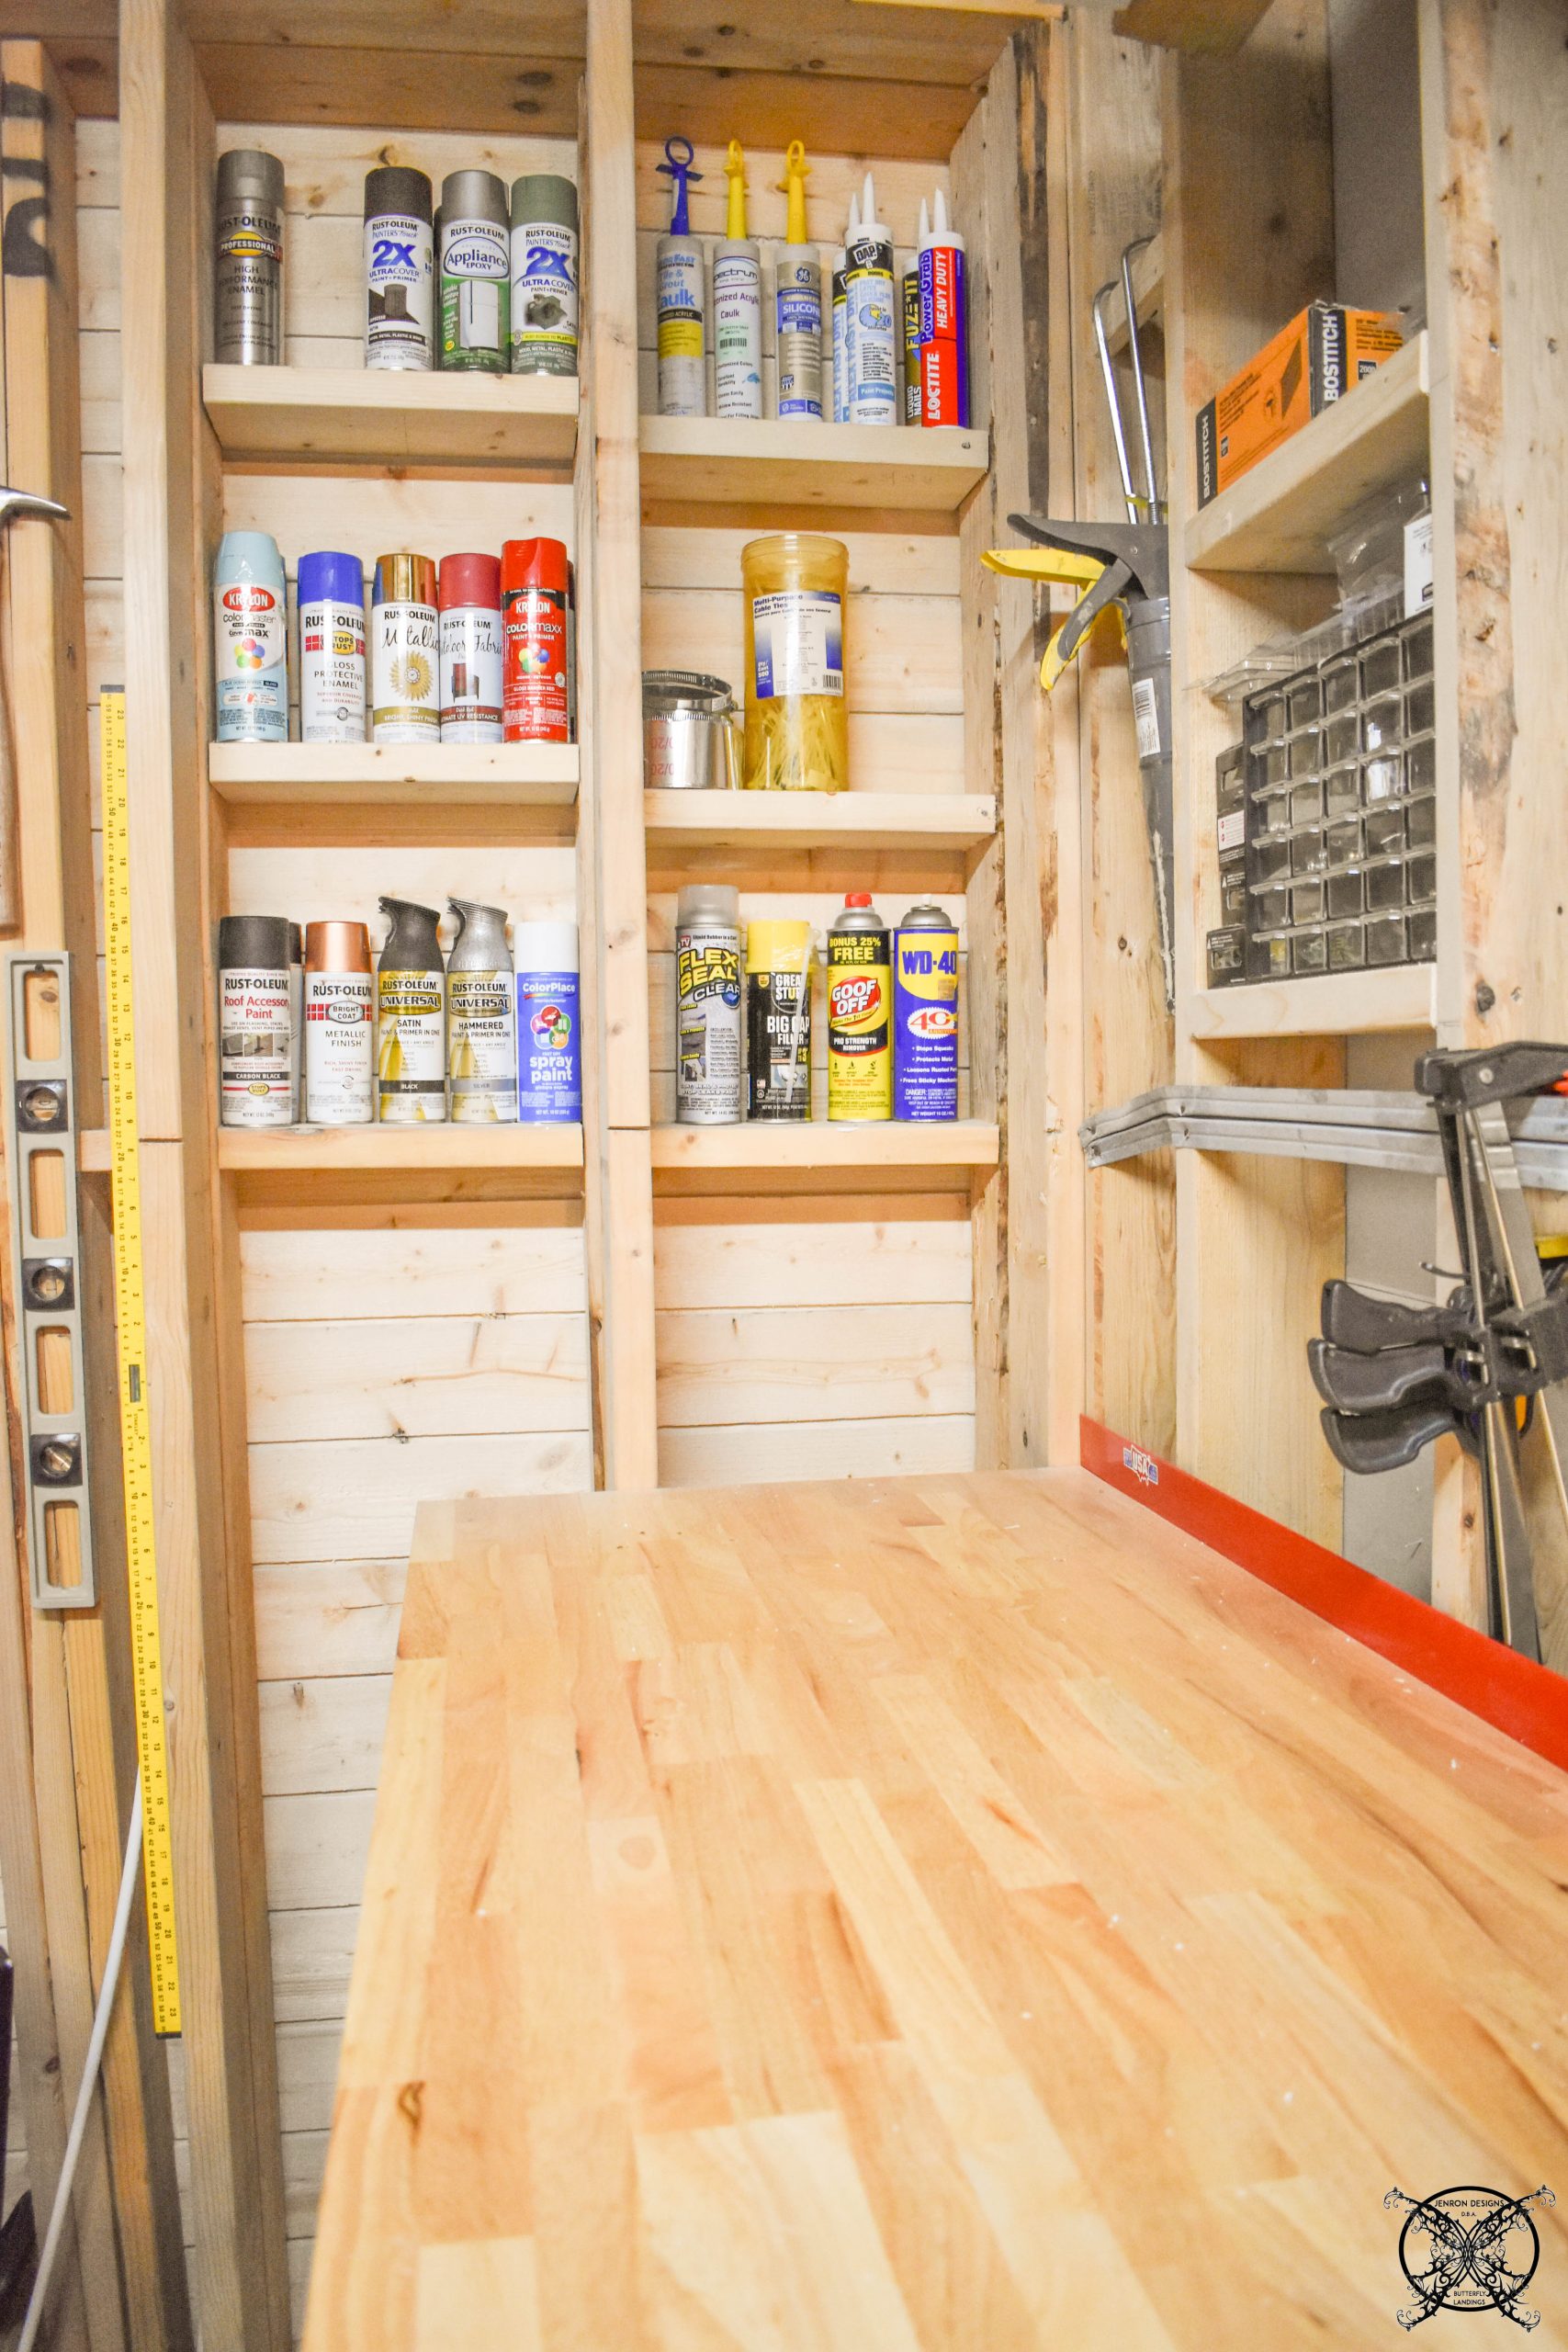 We also invested in a workstation, which is nice when cutting lumber and doing those projects that need a workshop table. It is the perfect home for the miter box which is what we use to do the majority of our cuts on all of our projects.
 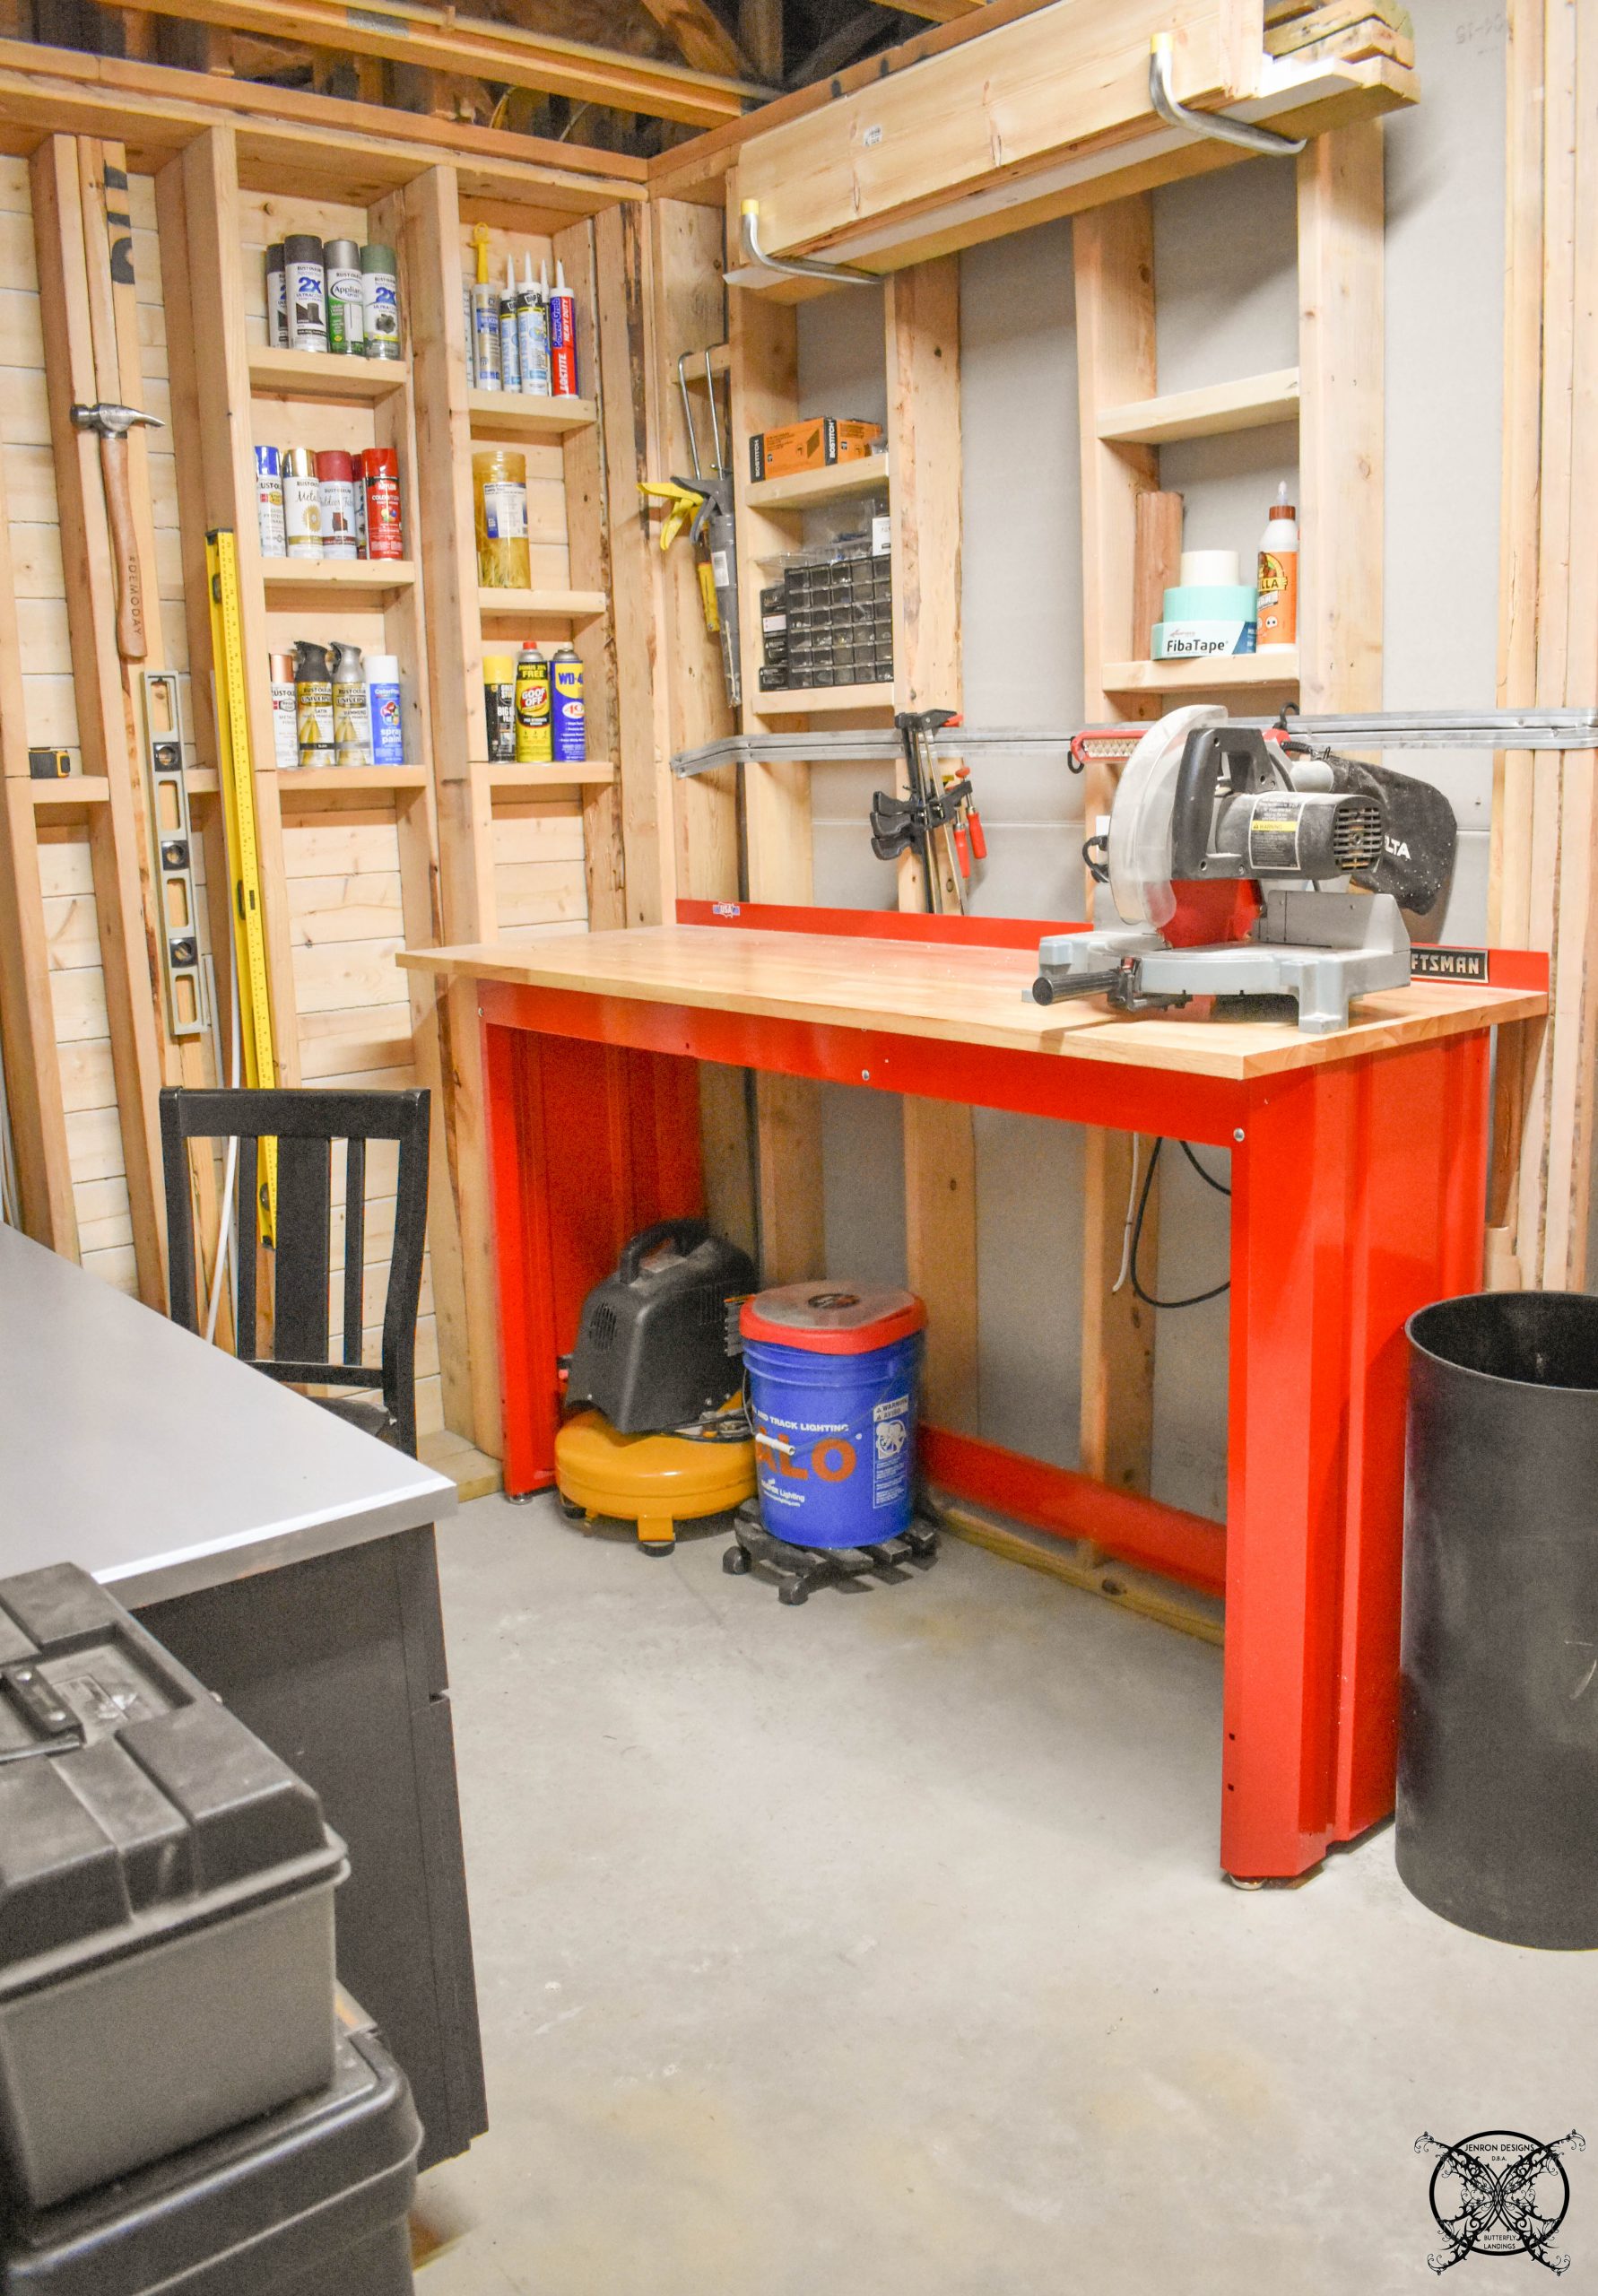 Above this table we have a lumber storage rack which was previously installed but is still a handy item to mention. Now it makes even more sense as the space has cleaned up even more.
  Ron is really enjoying his new and improved worked space, which you may notice is right next door to my little workshop as well. We can simply close the sliding barn door to avoid and unwanted sawdust from floating over into my area. I do hope that this makes the rest of our home projects move along even easier, stay to tuned to see more on the way!
PIN ME for later and be sure to follow us on Pinterest at Jen @ JENRON DESIGNS
That seems like such a welcoming space now! But still very manly and workshop feel.
My husband would love to have a space like this. Our garage is scary right now so maybe one day.
You have awesome DIY skills! This workshop looks really great!
I love this! I’m about to do my garage into a little work space for myself this helps with an idea!
Such a great way to be organized especially using all available space.
What a great space upgrade! Looks like there is even more room to work on which is important.
I love the organizational changes! We need our garage to look like this.
This entire revamp project is an absolute dream! For Men and Women alike! I’m super pumped to fix up some of our work and creative spaces now! His space is so organized!!