DIY Farmhouse Pantry Shelves
Y’all, I am so excited to show off my new DIY Farmhouse Pantry Shelves. They are beautiful thick cut cedar boards with hand forged brackets.
Here is how our DIY Farmhouse Pantry Shelves project went down this year. While most ladies probably like chocolate and flowers for Valentine’s, my dear sweet husband rebuilt our pantry for me, and now I have the farmhouse pantry shelves of my dreams. Honestly, it is the pantry that should have always been in our home, but did not come with the house. Here are a few before pictures to let you see how this transformation took place over a weekend. 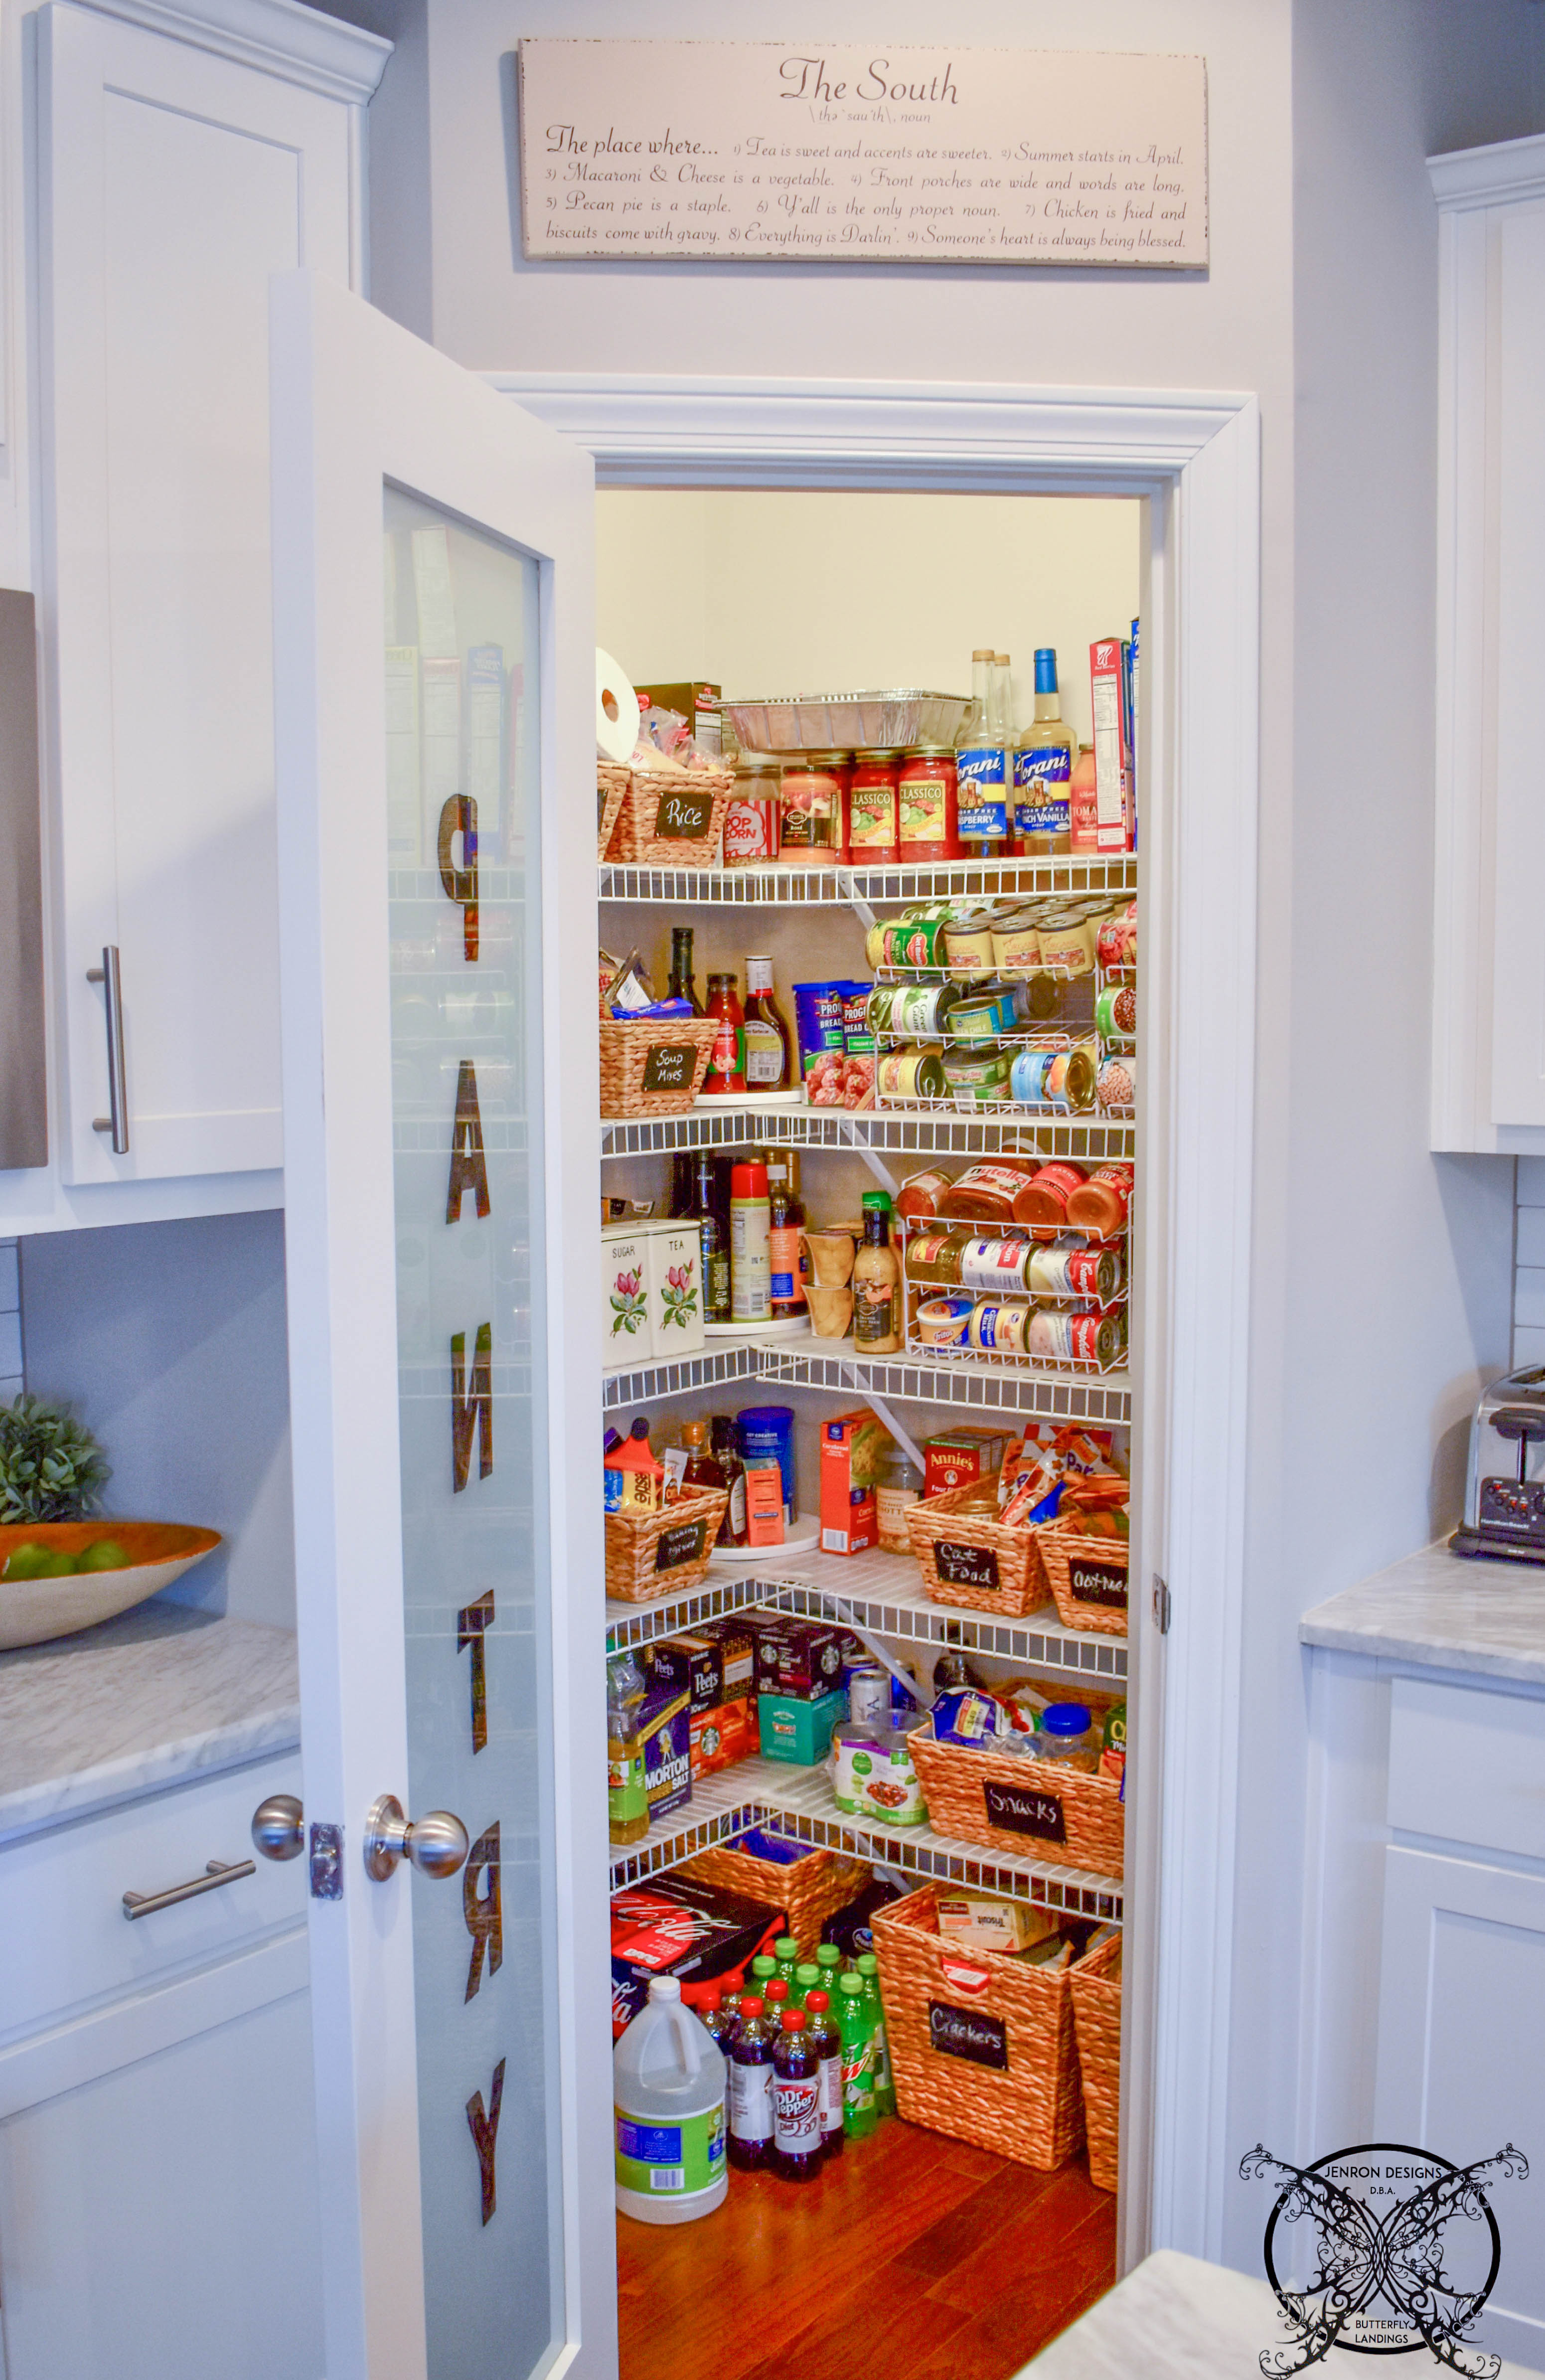
*I was compensated for this post. This post may contain affiliate links for your convenience. These involve no extra cost to you, but may result in me receiving a small commission – for which I am very grateful! You can view my full advertising disclosure here.
As you can see, we had a decent size pantry, it is roughly a 4 x 4 corner pantry with a door set on the angle, which leaves us with lot of room to grow. Upon moving in, I decided to really organize it for functionality sake and my own sanity. I added nice labeled baskets, shelf liners to keep items from dropping through the wire shelves, Lazy Susan turntables in the hard to reach corners and can racks. Last summer, we added the pretty frosted glass Pantry Door, which you can see this is the full DIY post link here on my blog with all the details for that particular project. 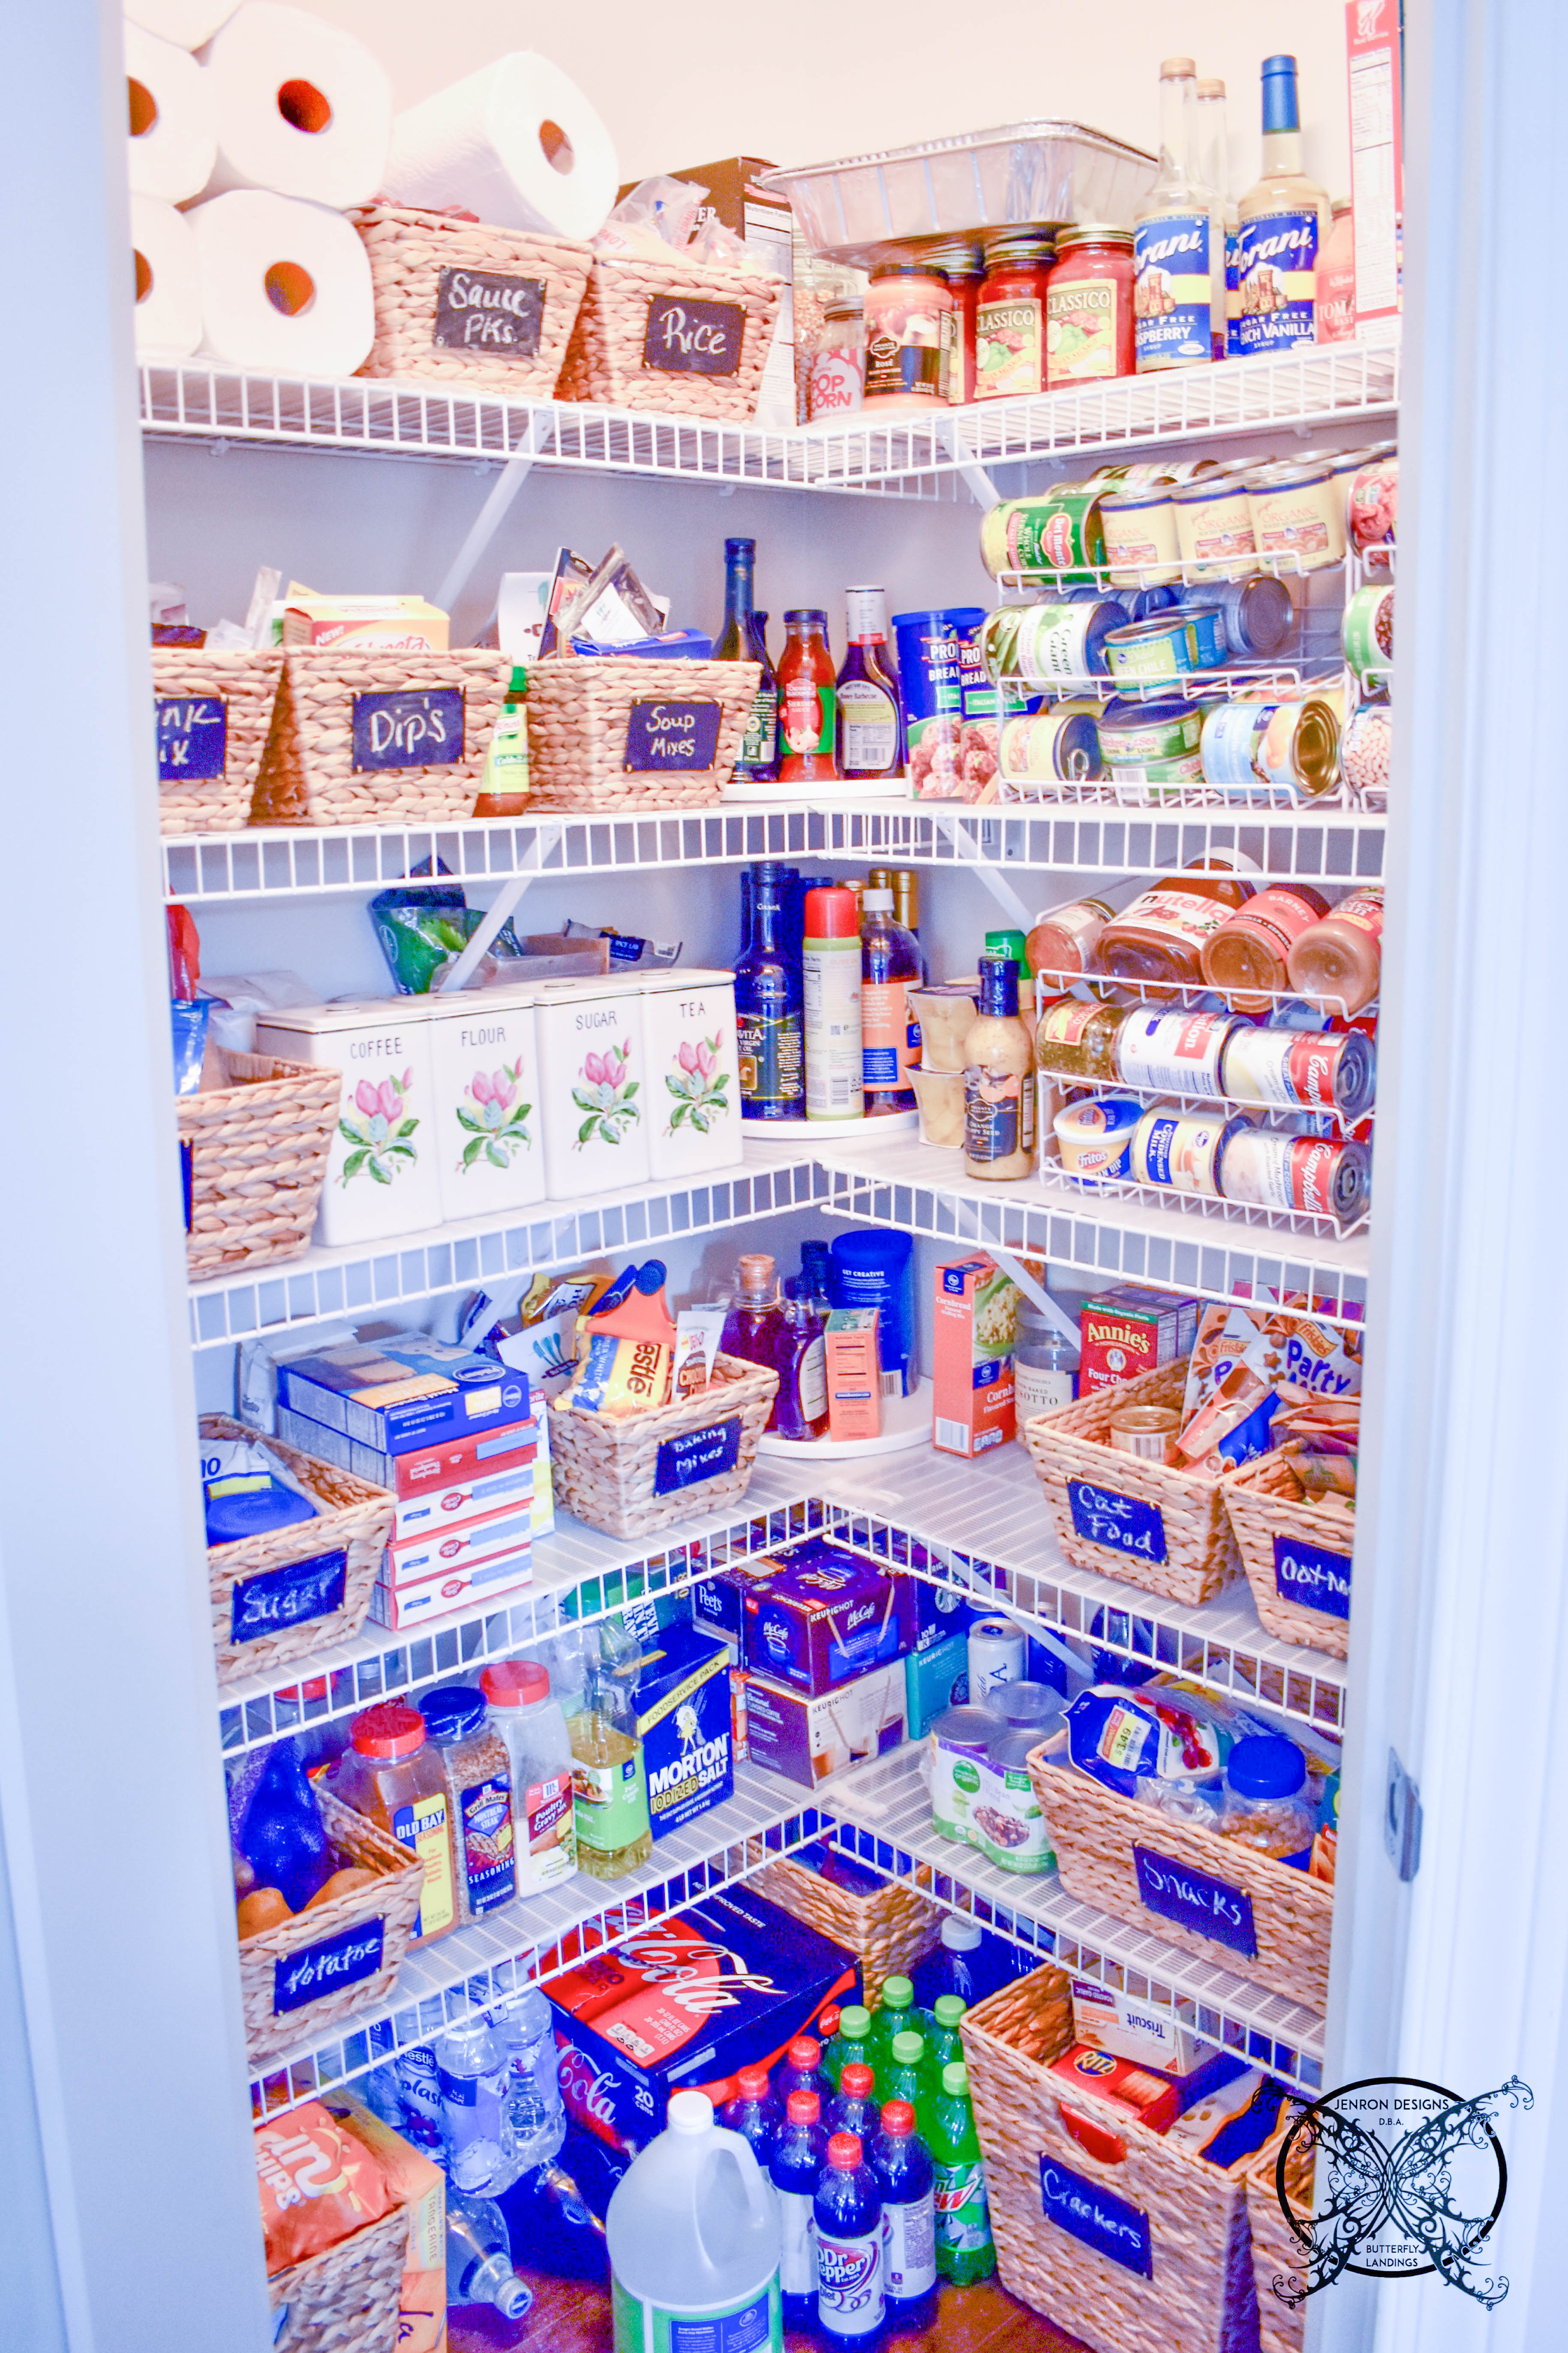 Even with all the organization I still felt like we needed to add an extra shelf to the top. We had a huge 3 foot gap between the shelf and the ceiling, which in my mind was just wasted.
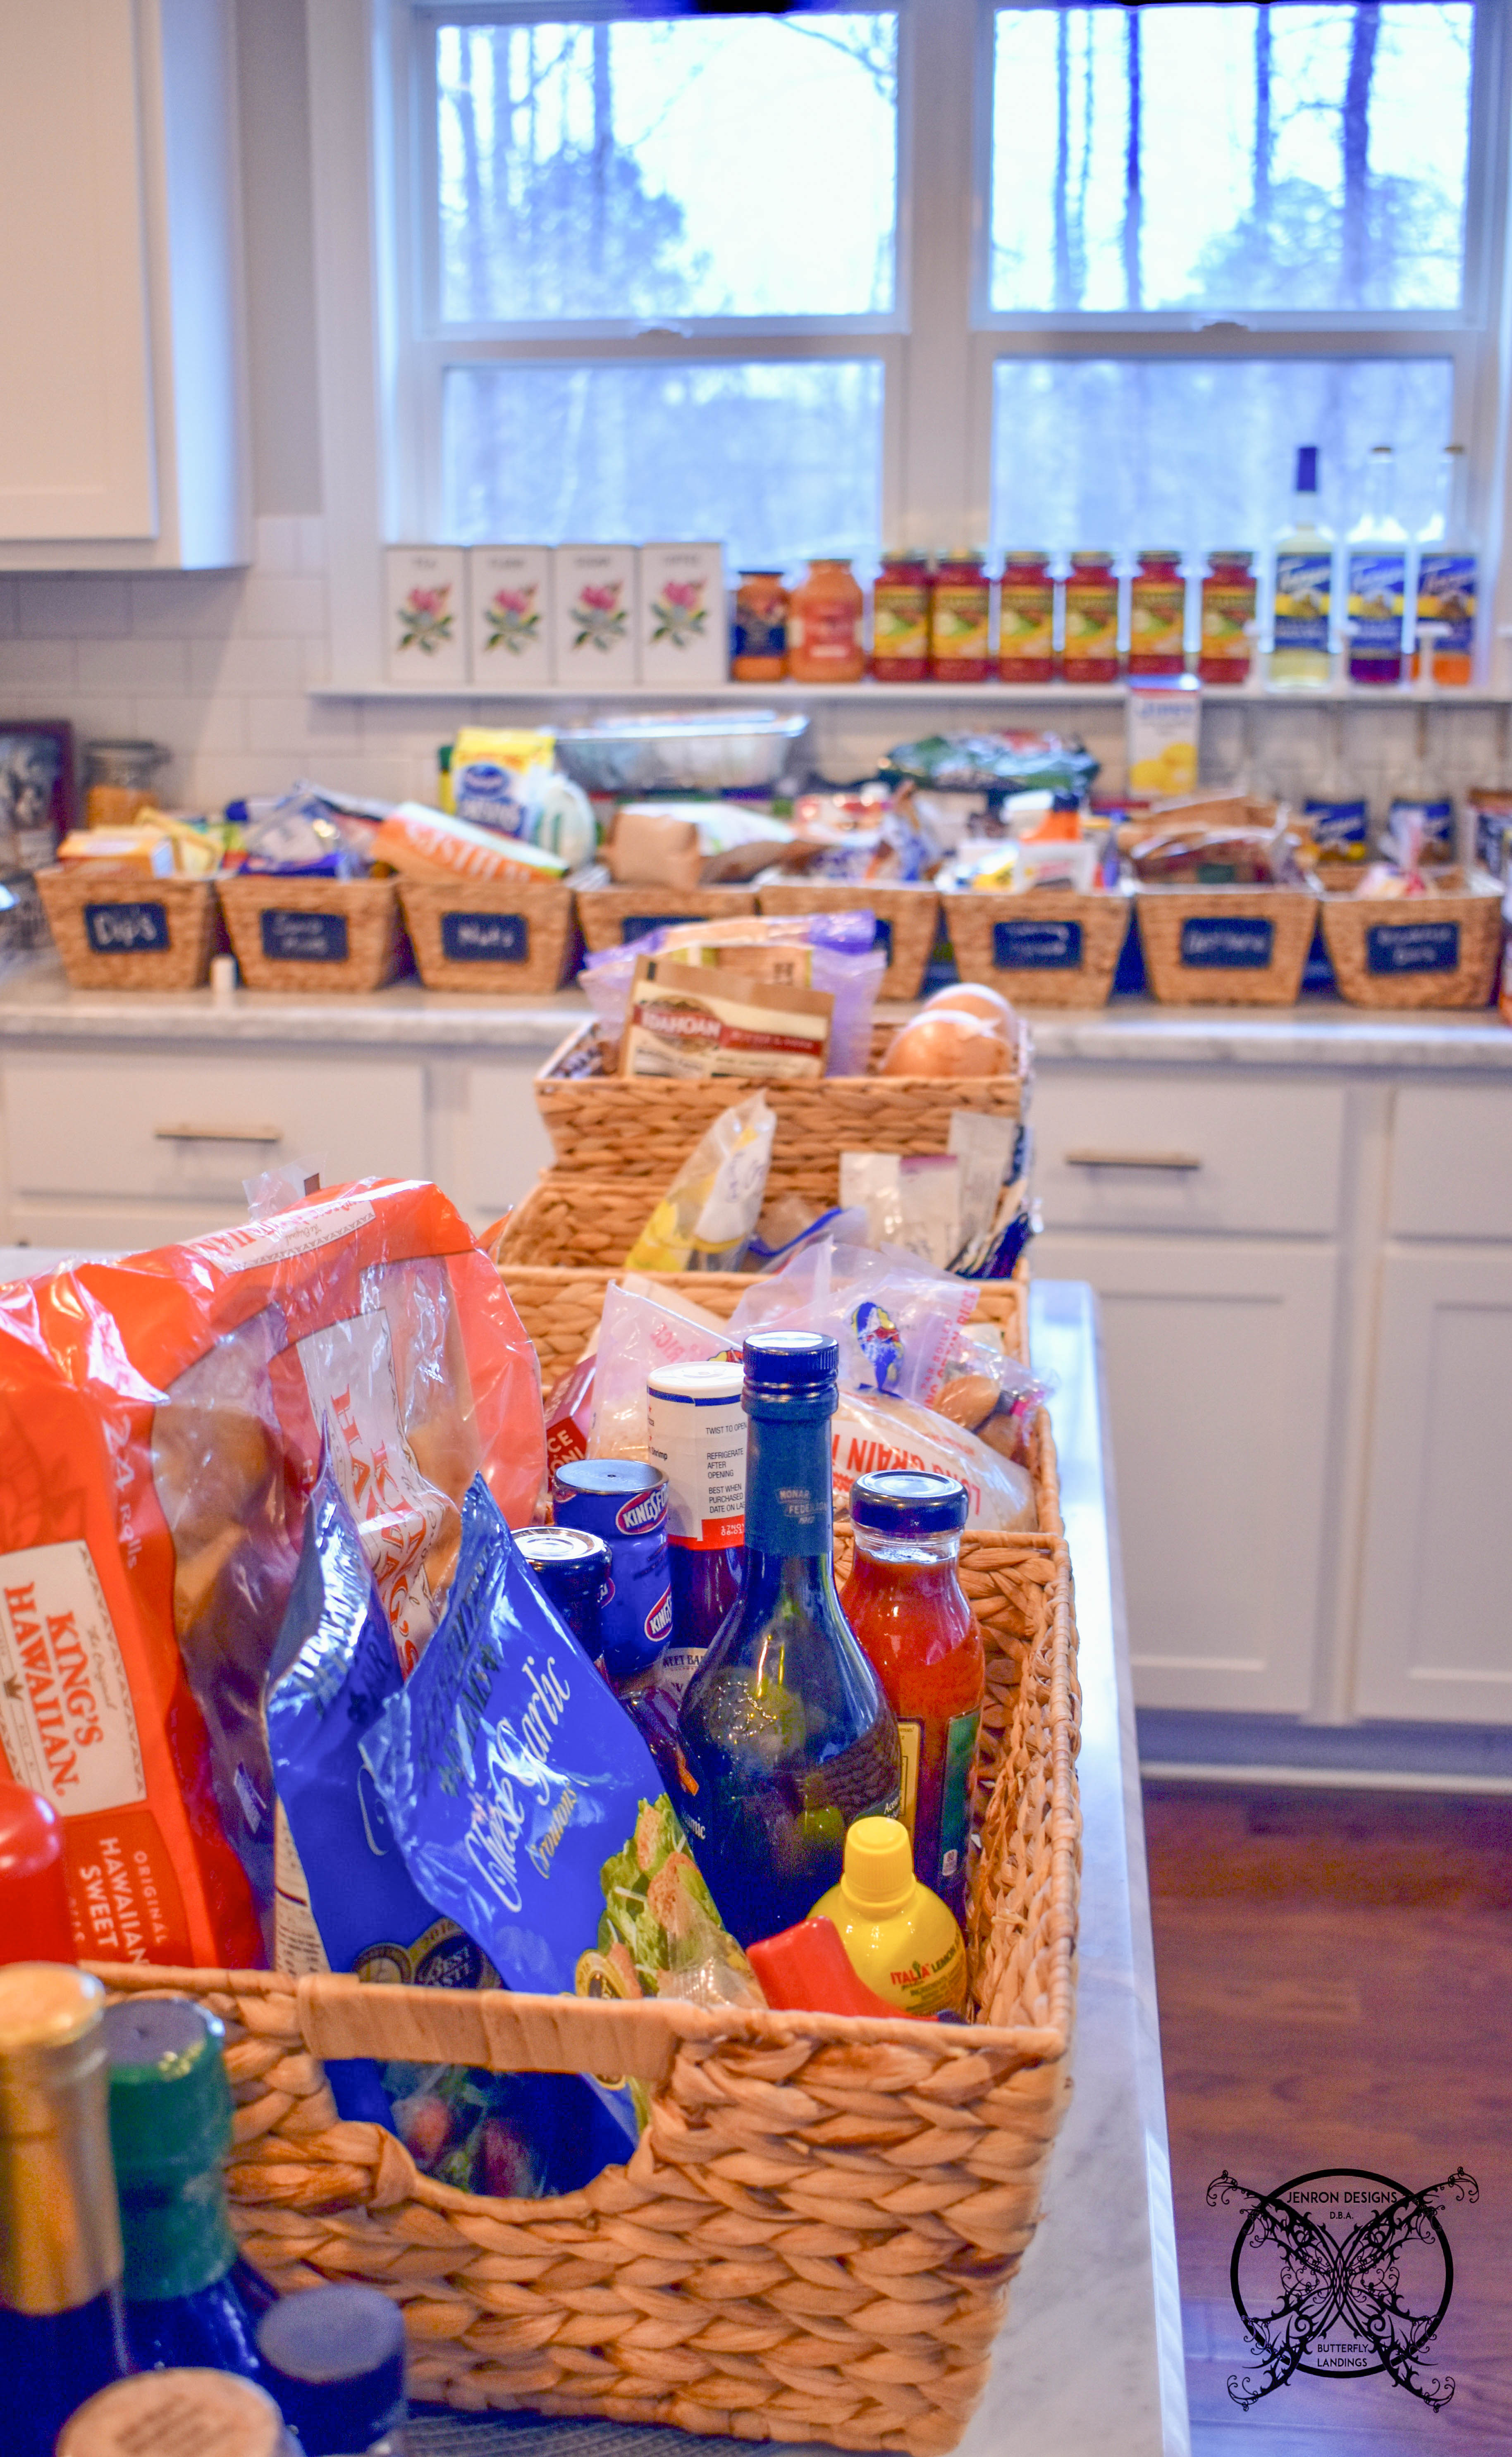
Demo Day:
First things first, I had to remove all the entire contents of my pantry. So basically my kitchen was a complete nightmare for a couple of days. Once all the food was moved out, then it was time to remove those awful wire shelves. I must say, I really hate wire shelves in a pantry. It always seems like items never sit evenly and things are always falling through the shelving, even with my shelf liners. So they just had to go, we may repurpose them into the garage or basement storage, but someone less noticeable.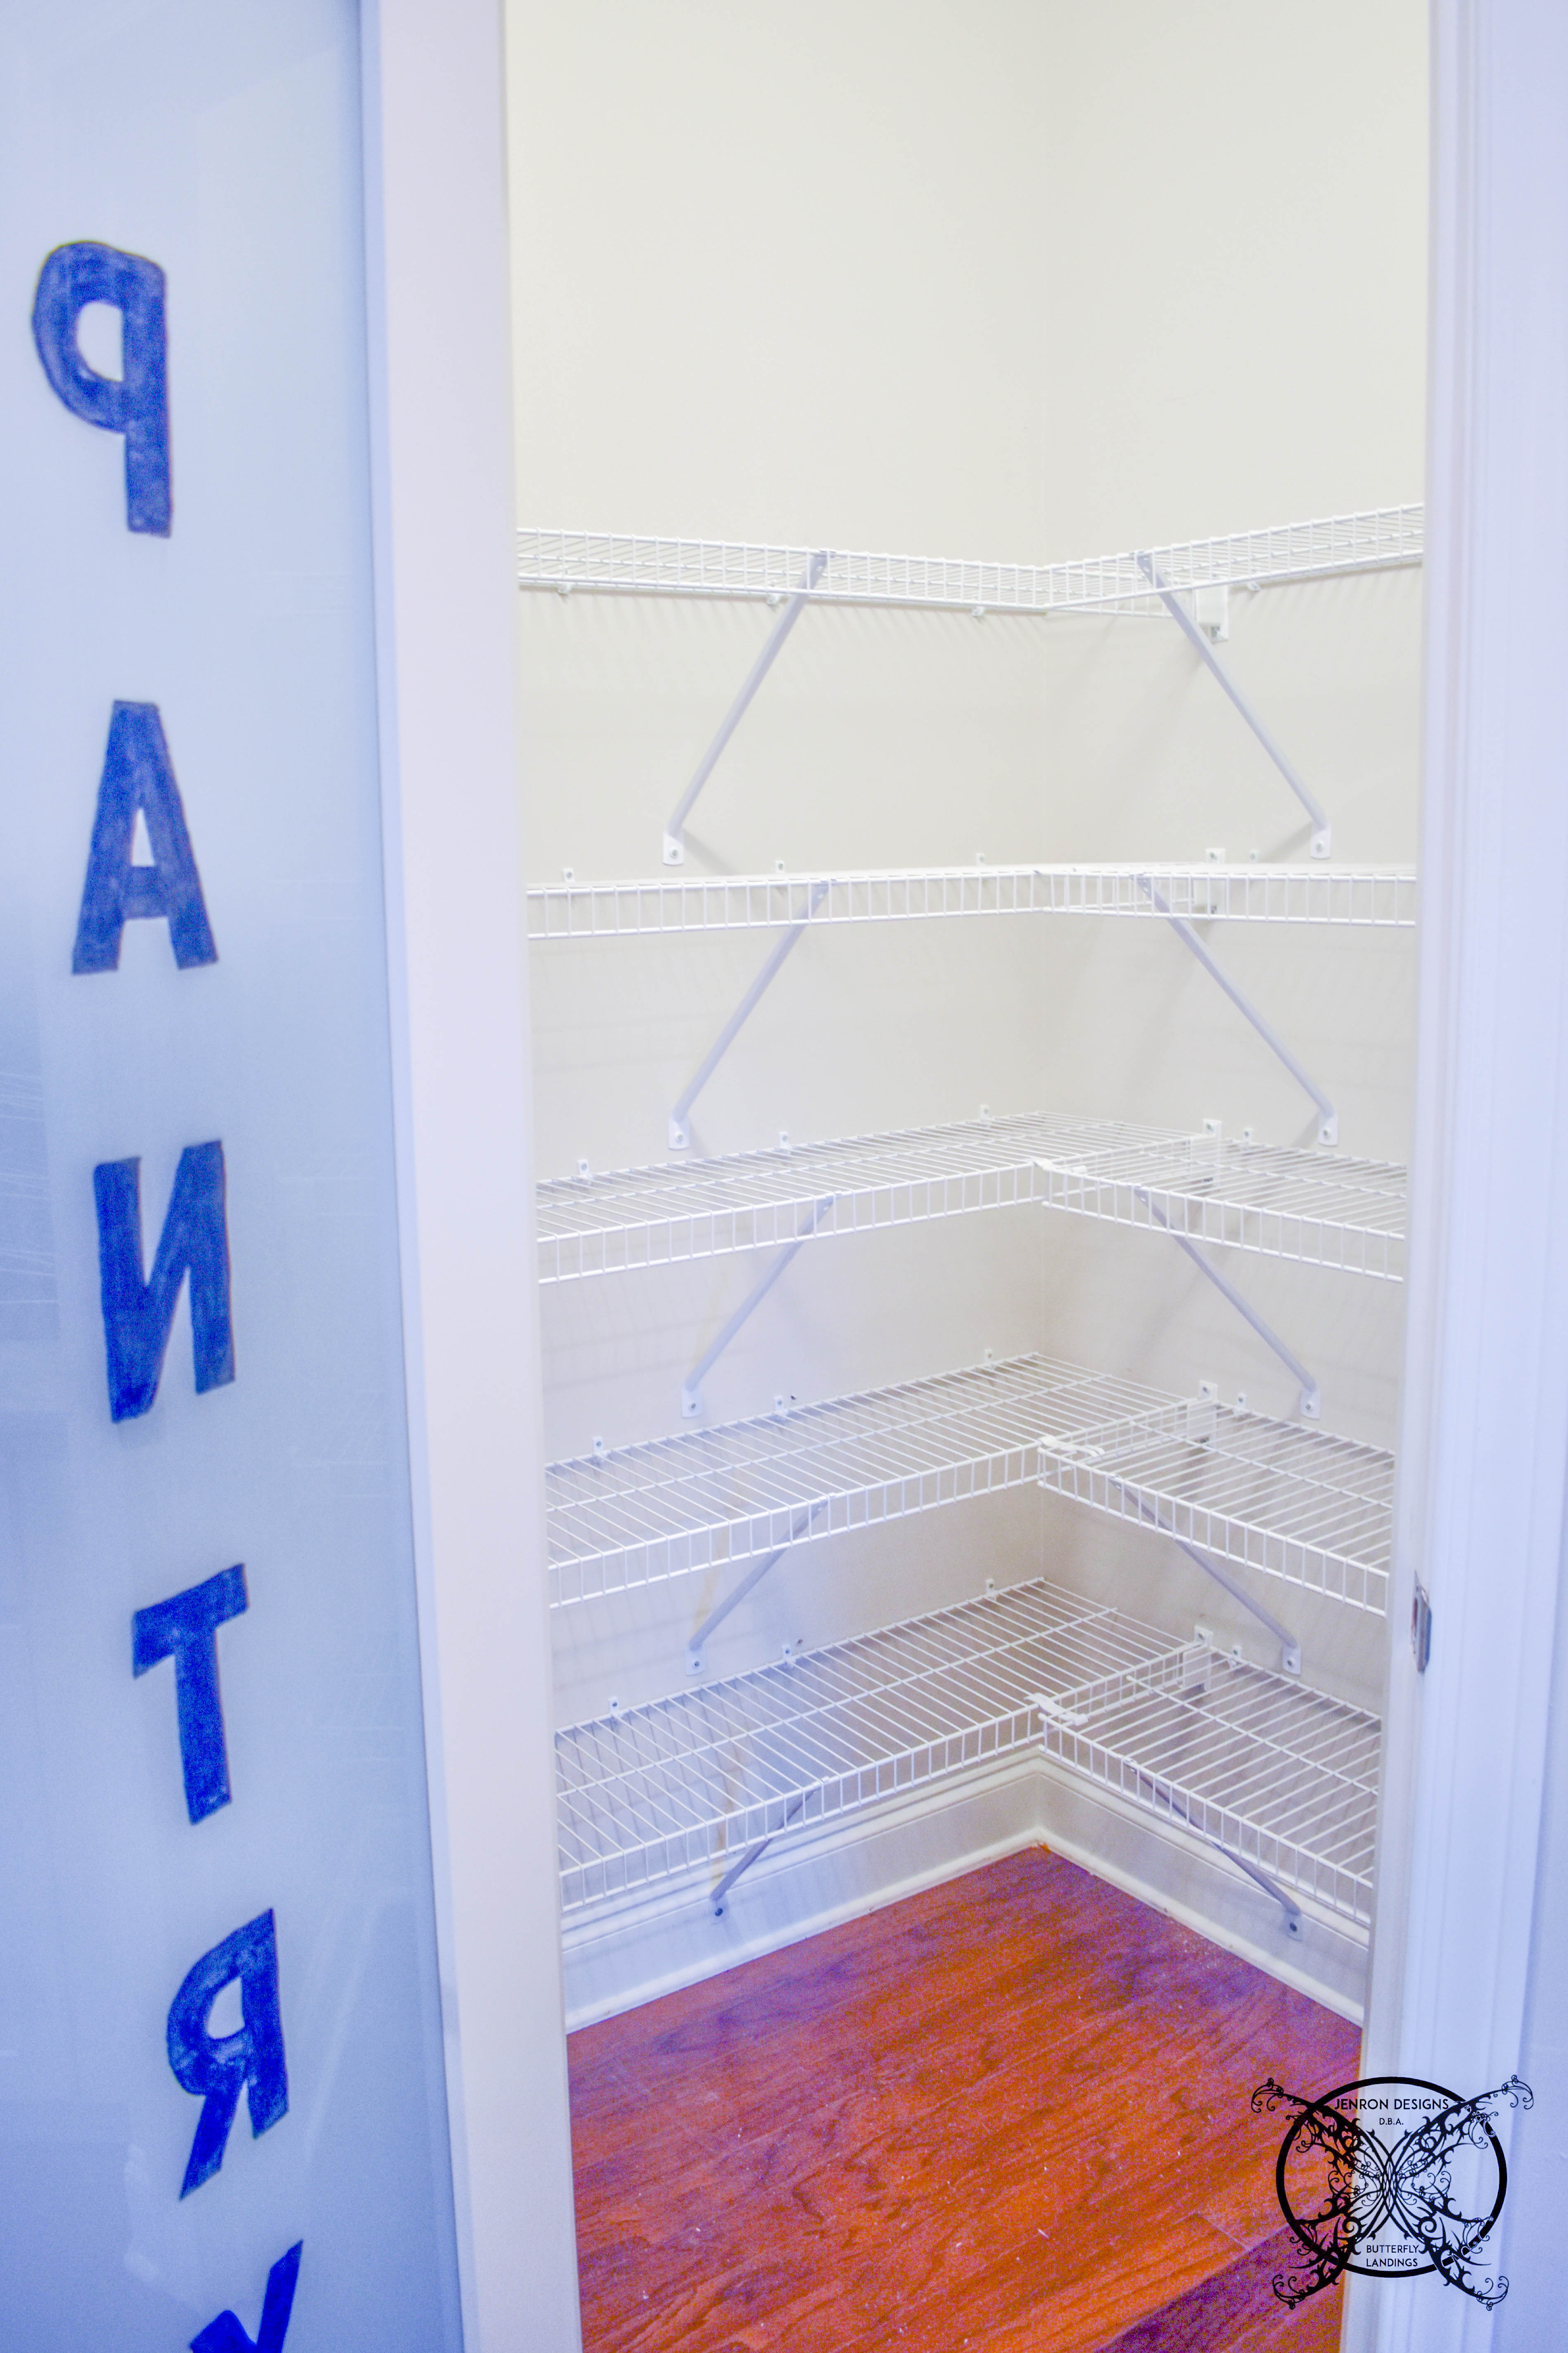 To remove the old existing wire shelving my husband recommends a few specific tools which made the removal process very easy. It also leaves very little scarring of the walls too. Although in our case it didn’t really matter, since we were lining the walls with white beadboard, to add a more of a farmhouse vibe.
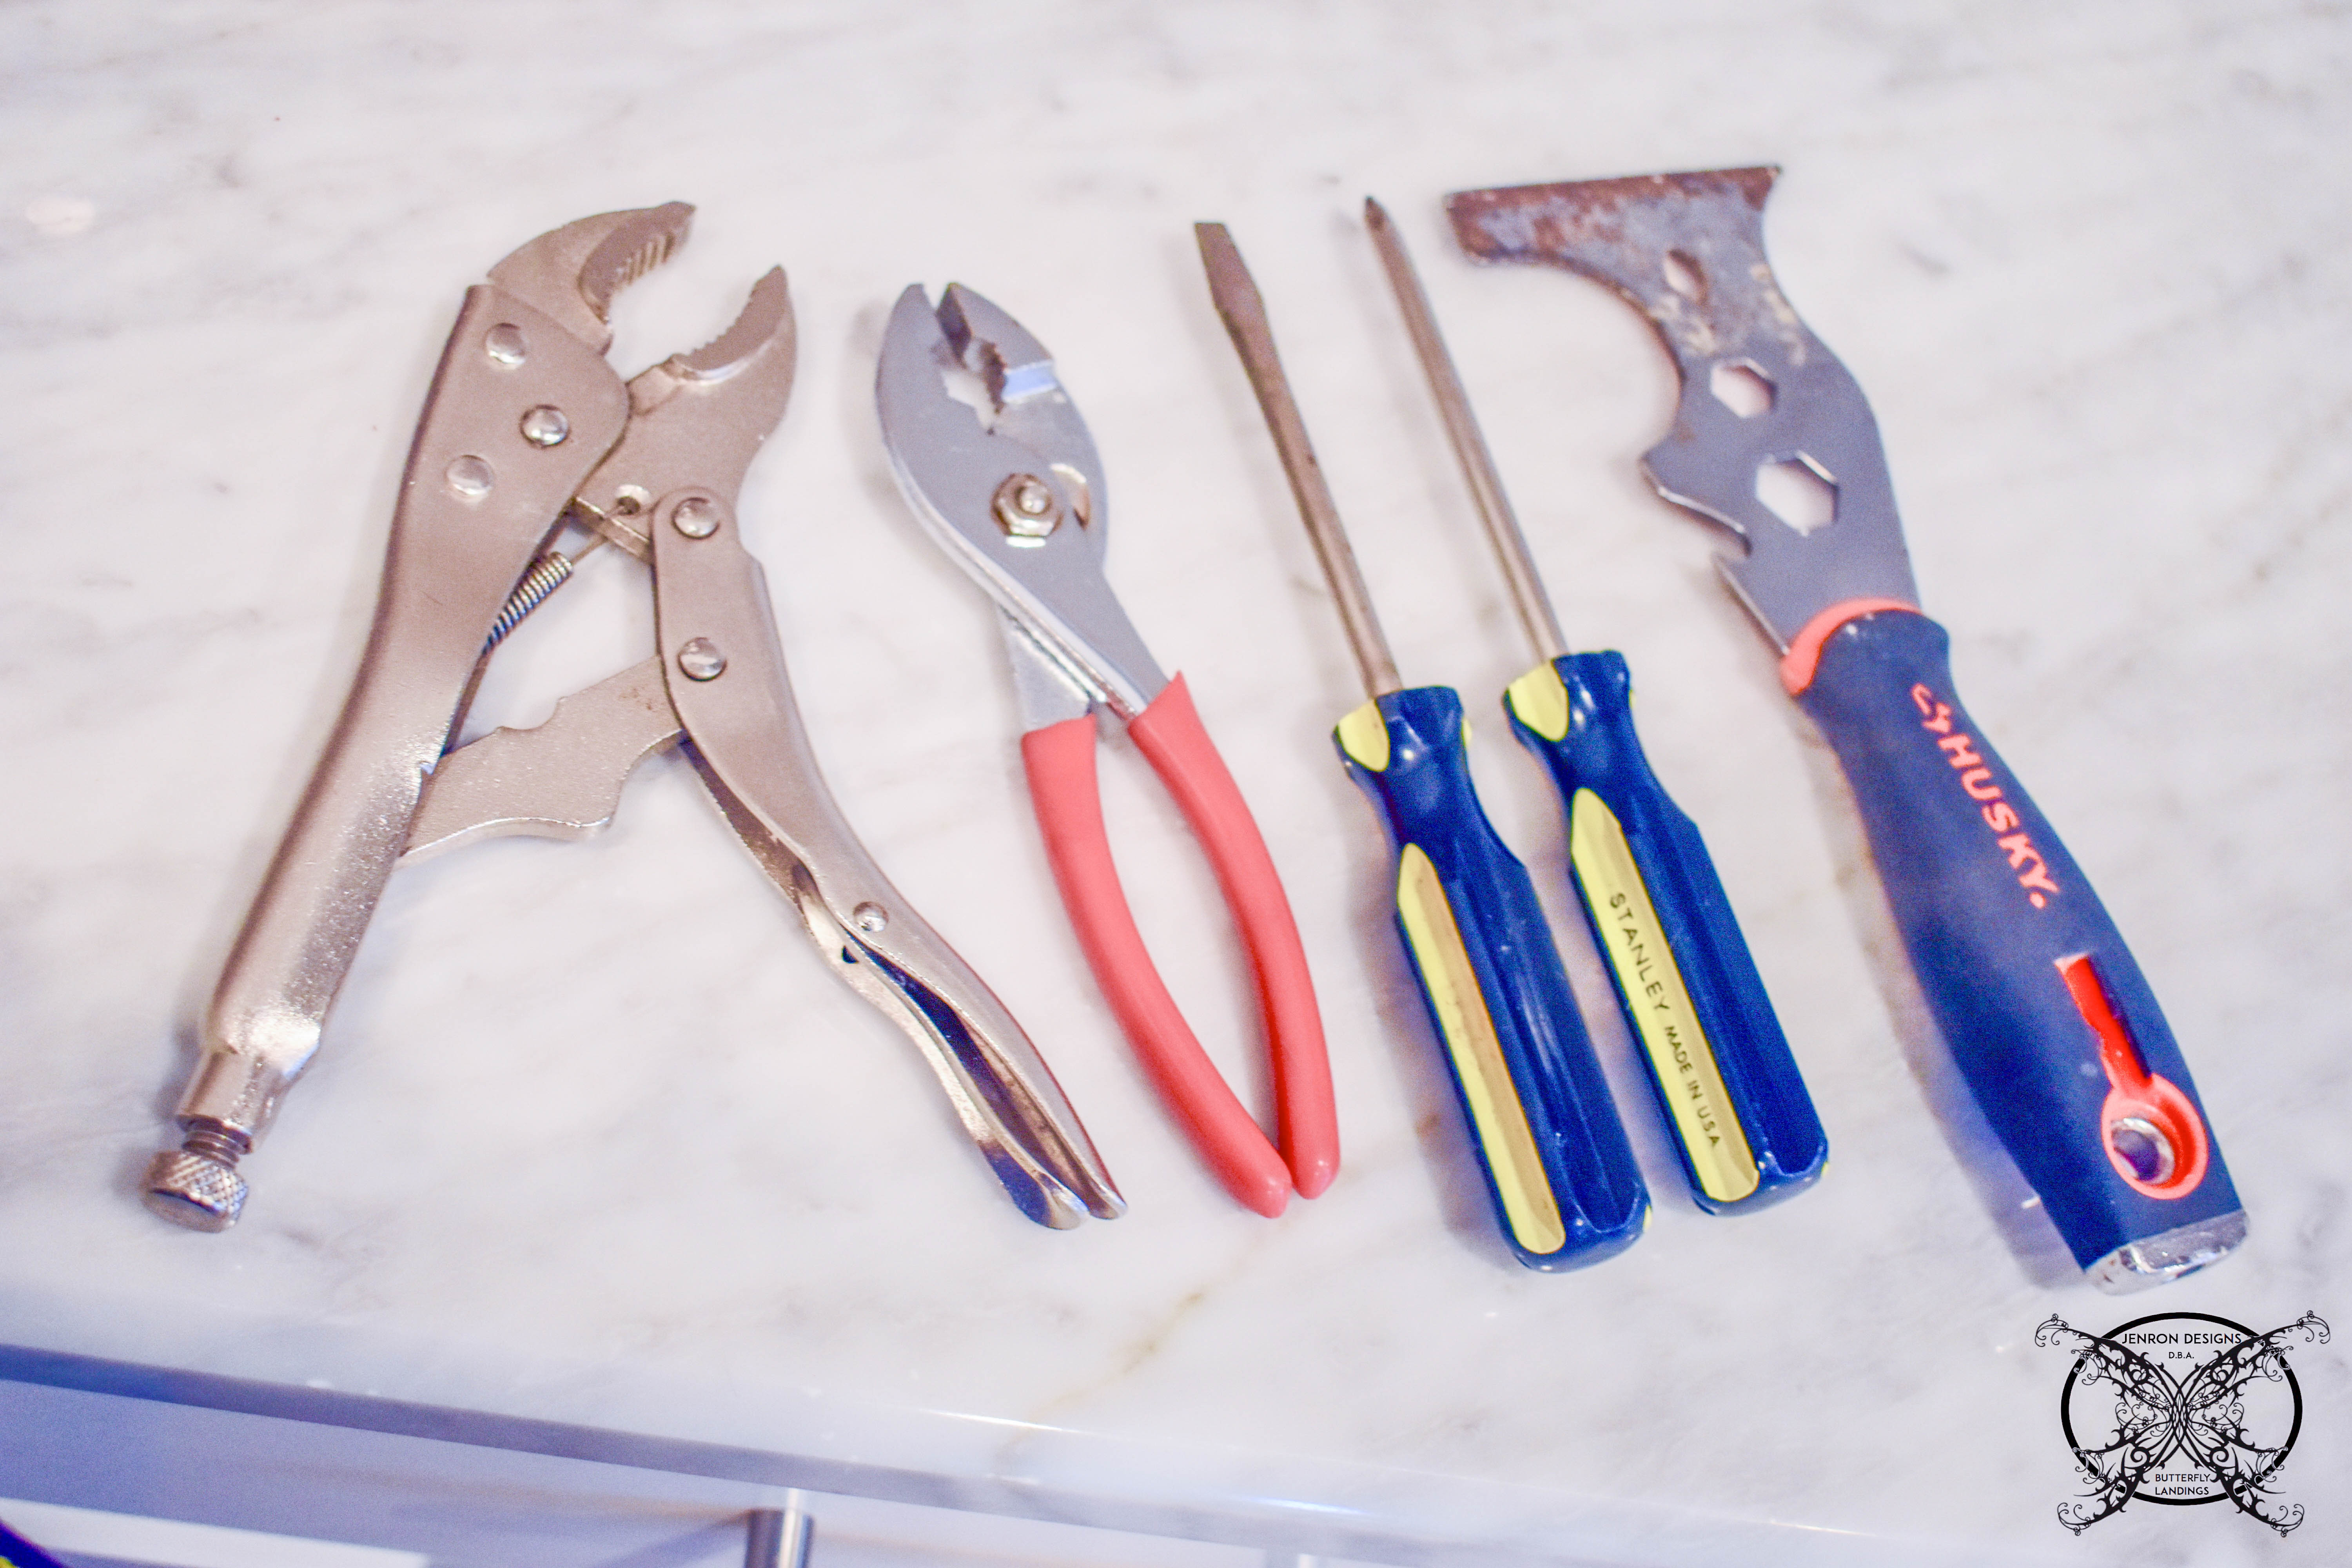
The Inside Lining:
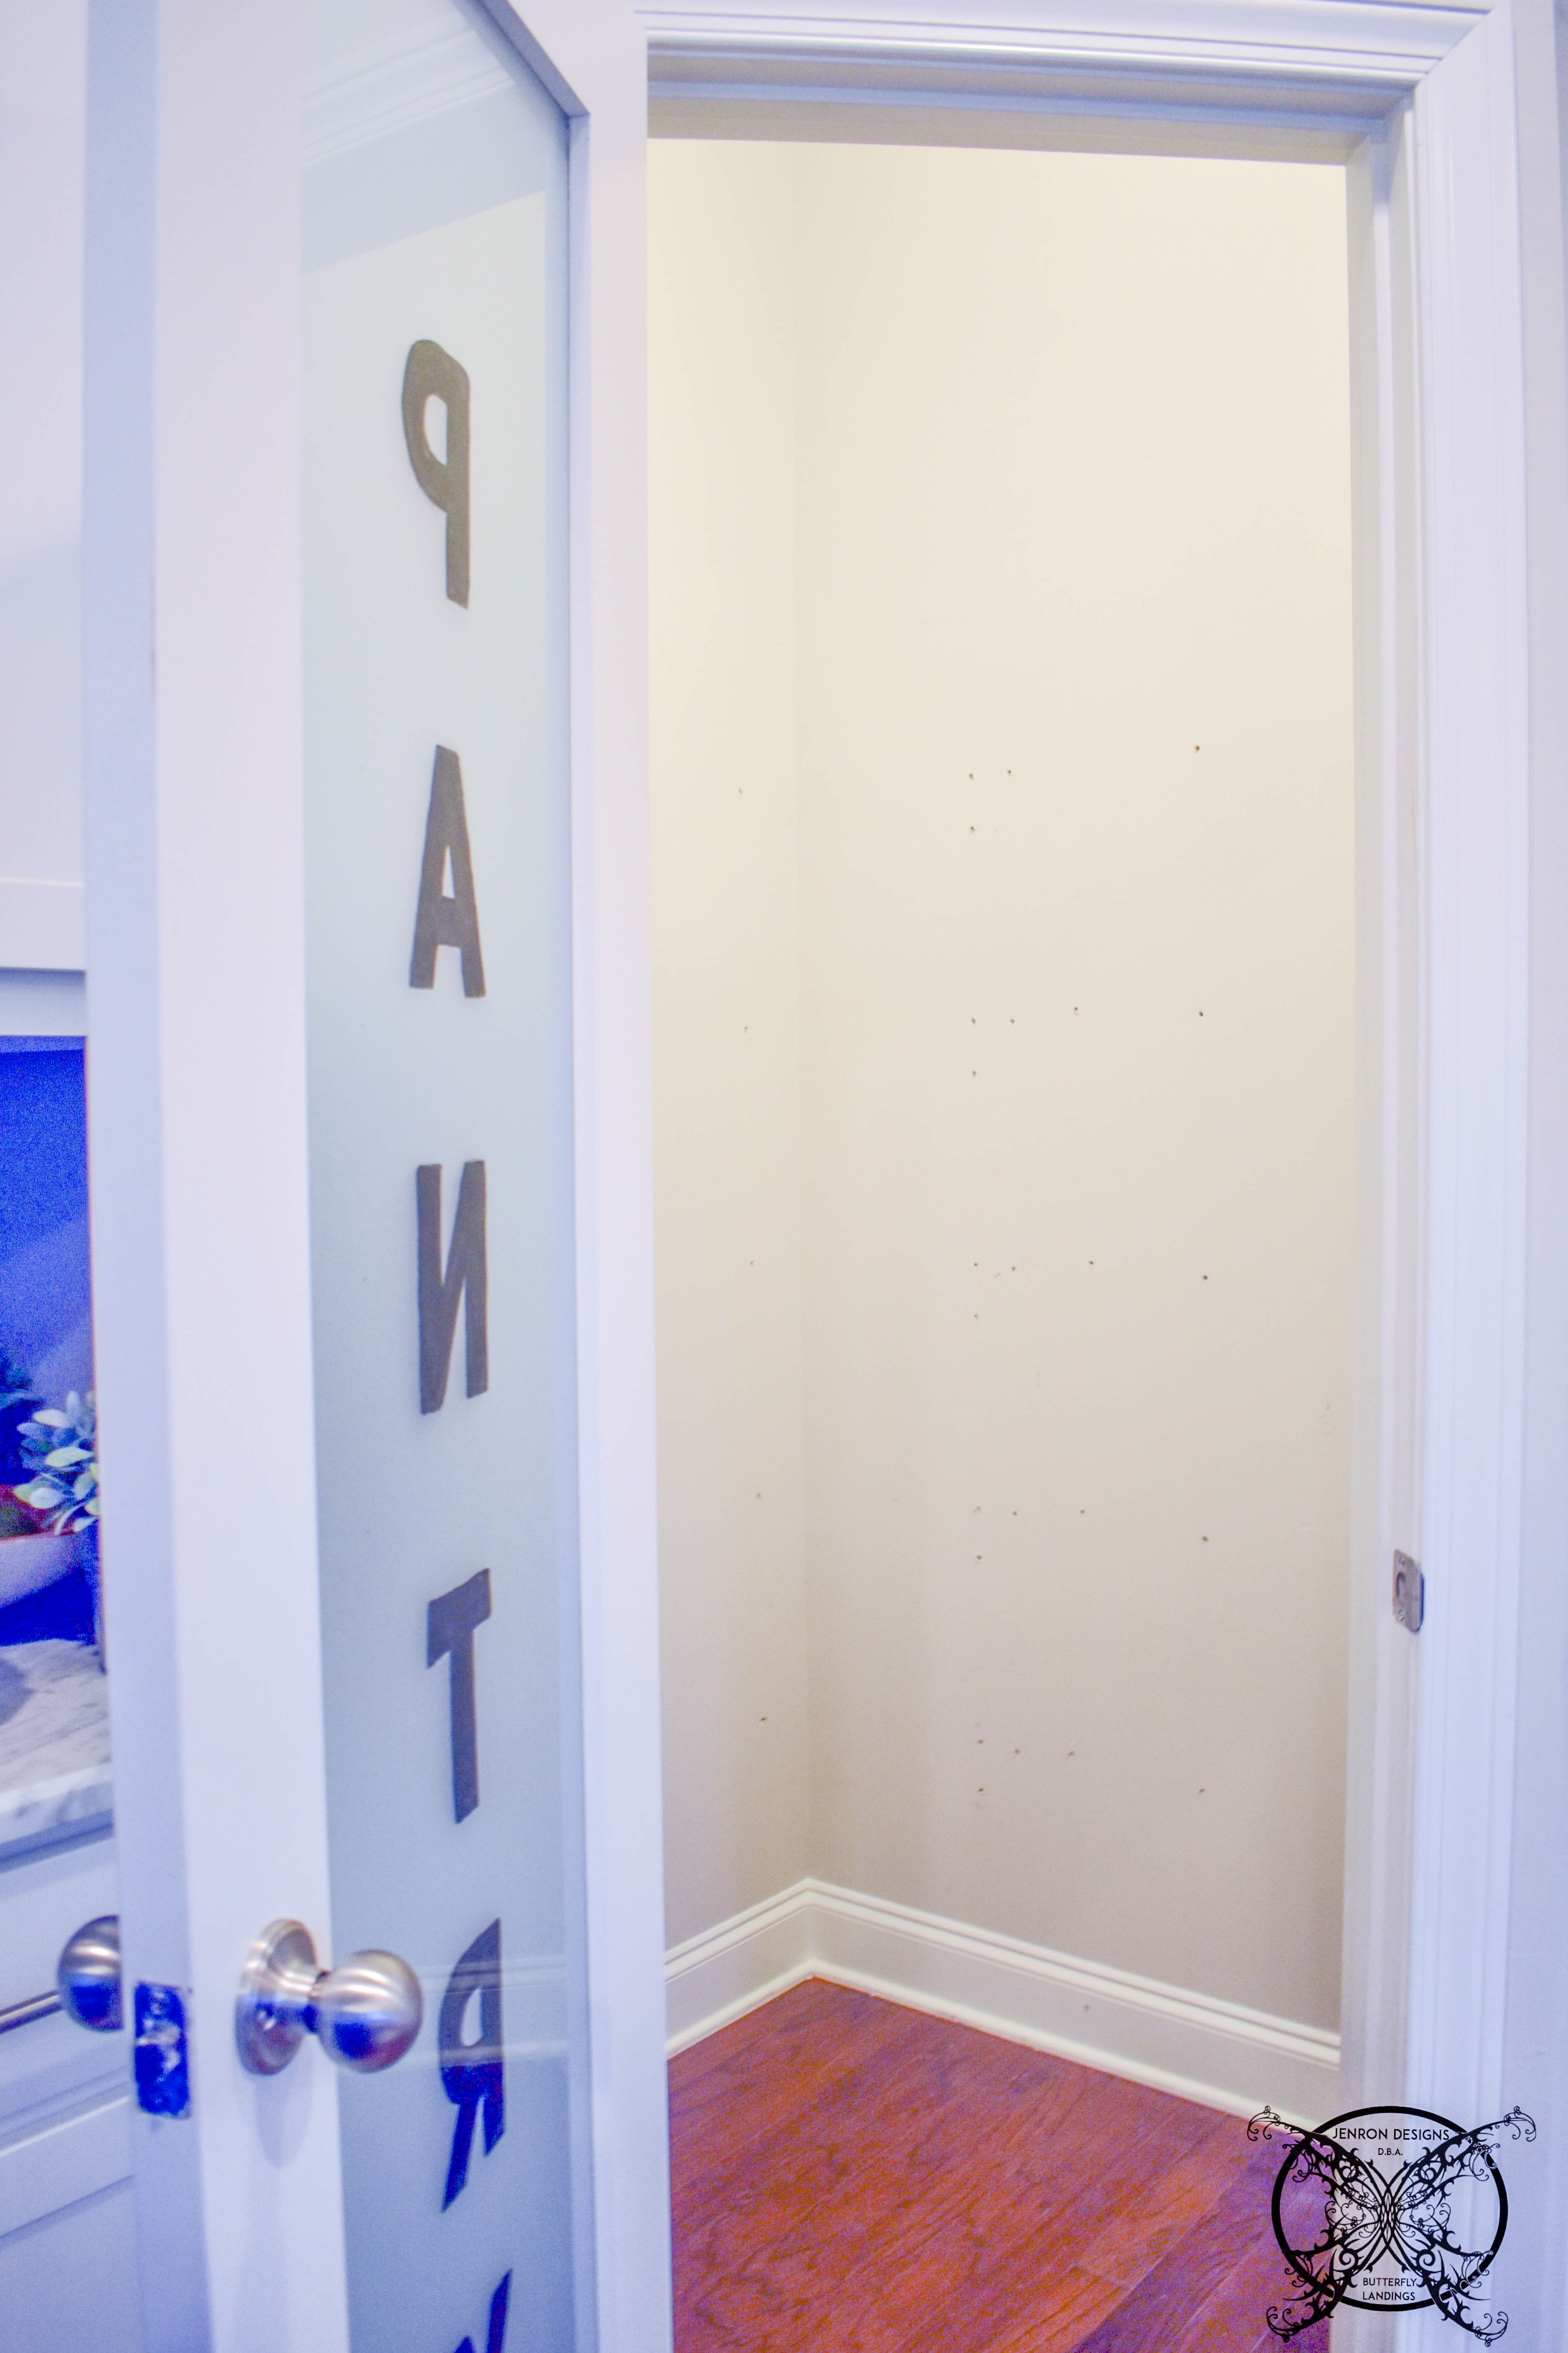
You can see the amount of holes left behind by this builder grade wire shelving. It would really be a nightmare to patch and paint all of this, which was part of the deciding factor to cover the walls with beadboard. Plus, I really wanted to add white walls to reflect a bunch of light and brighten up this space, since I know that the cedar shelves were going to be dark. My husband, Ron, measured the wall in 3 separate places, top, middle and bottom then cut the bead board wall boards accordingly. As many DIYer’s know, walls are never straight or plumb, LOL. After making his cuts, he tacked up the bead board sheets with a nail gun using very thin brads to limit the nail holes left behind.
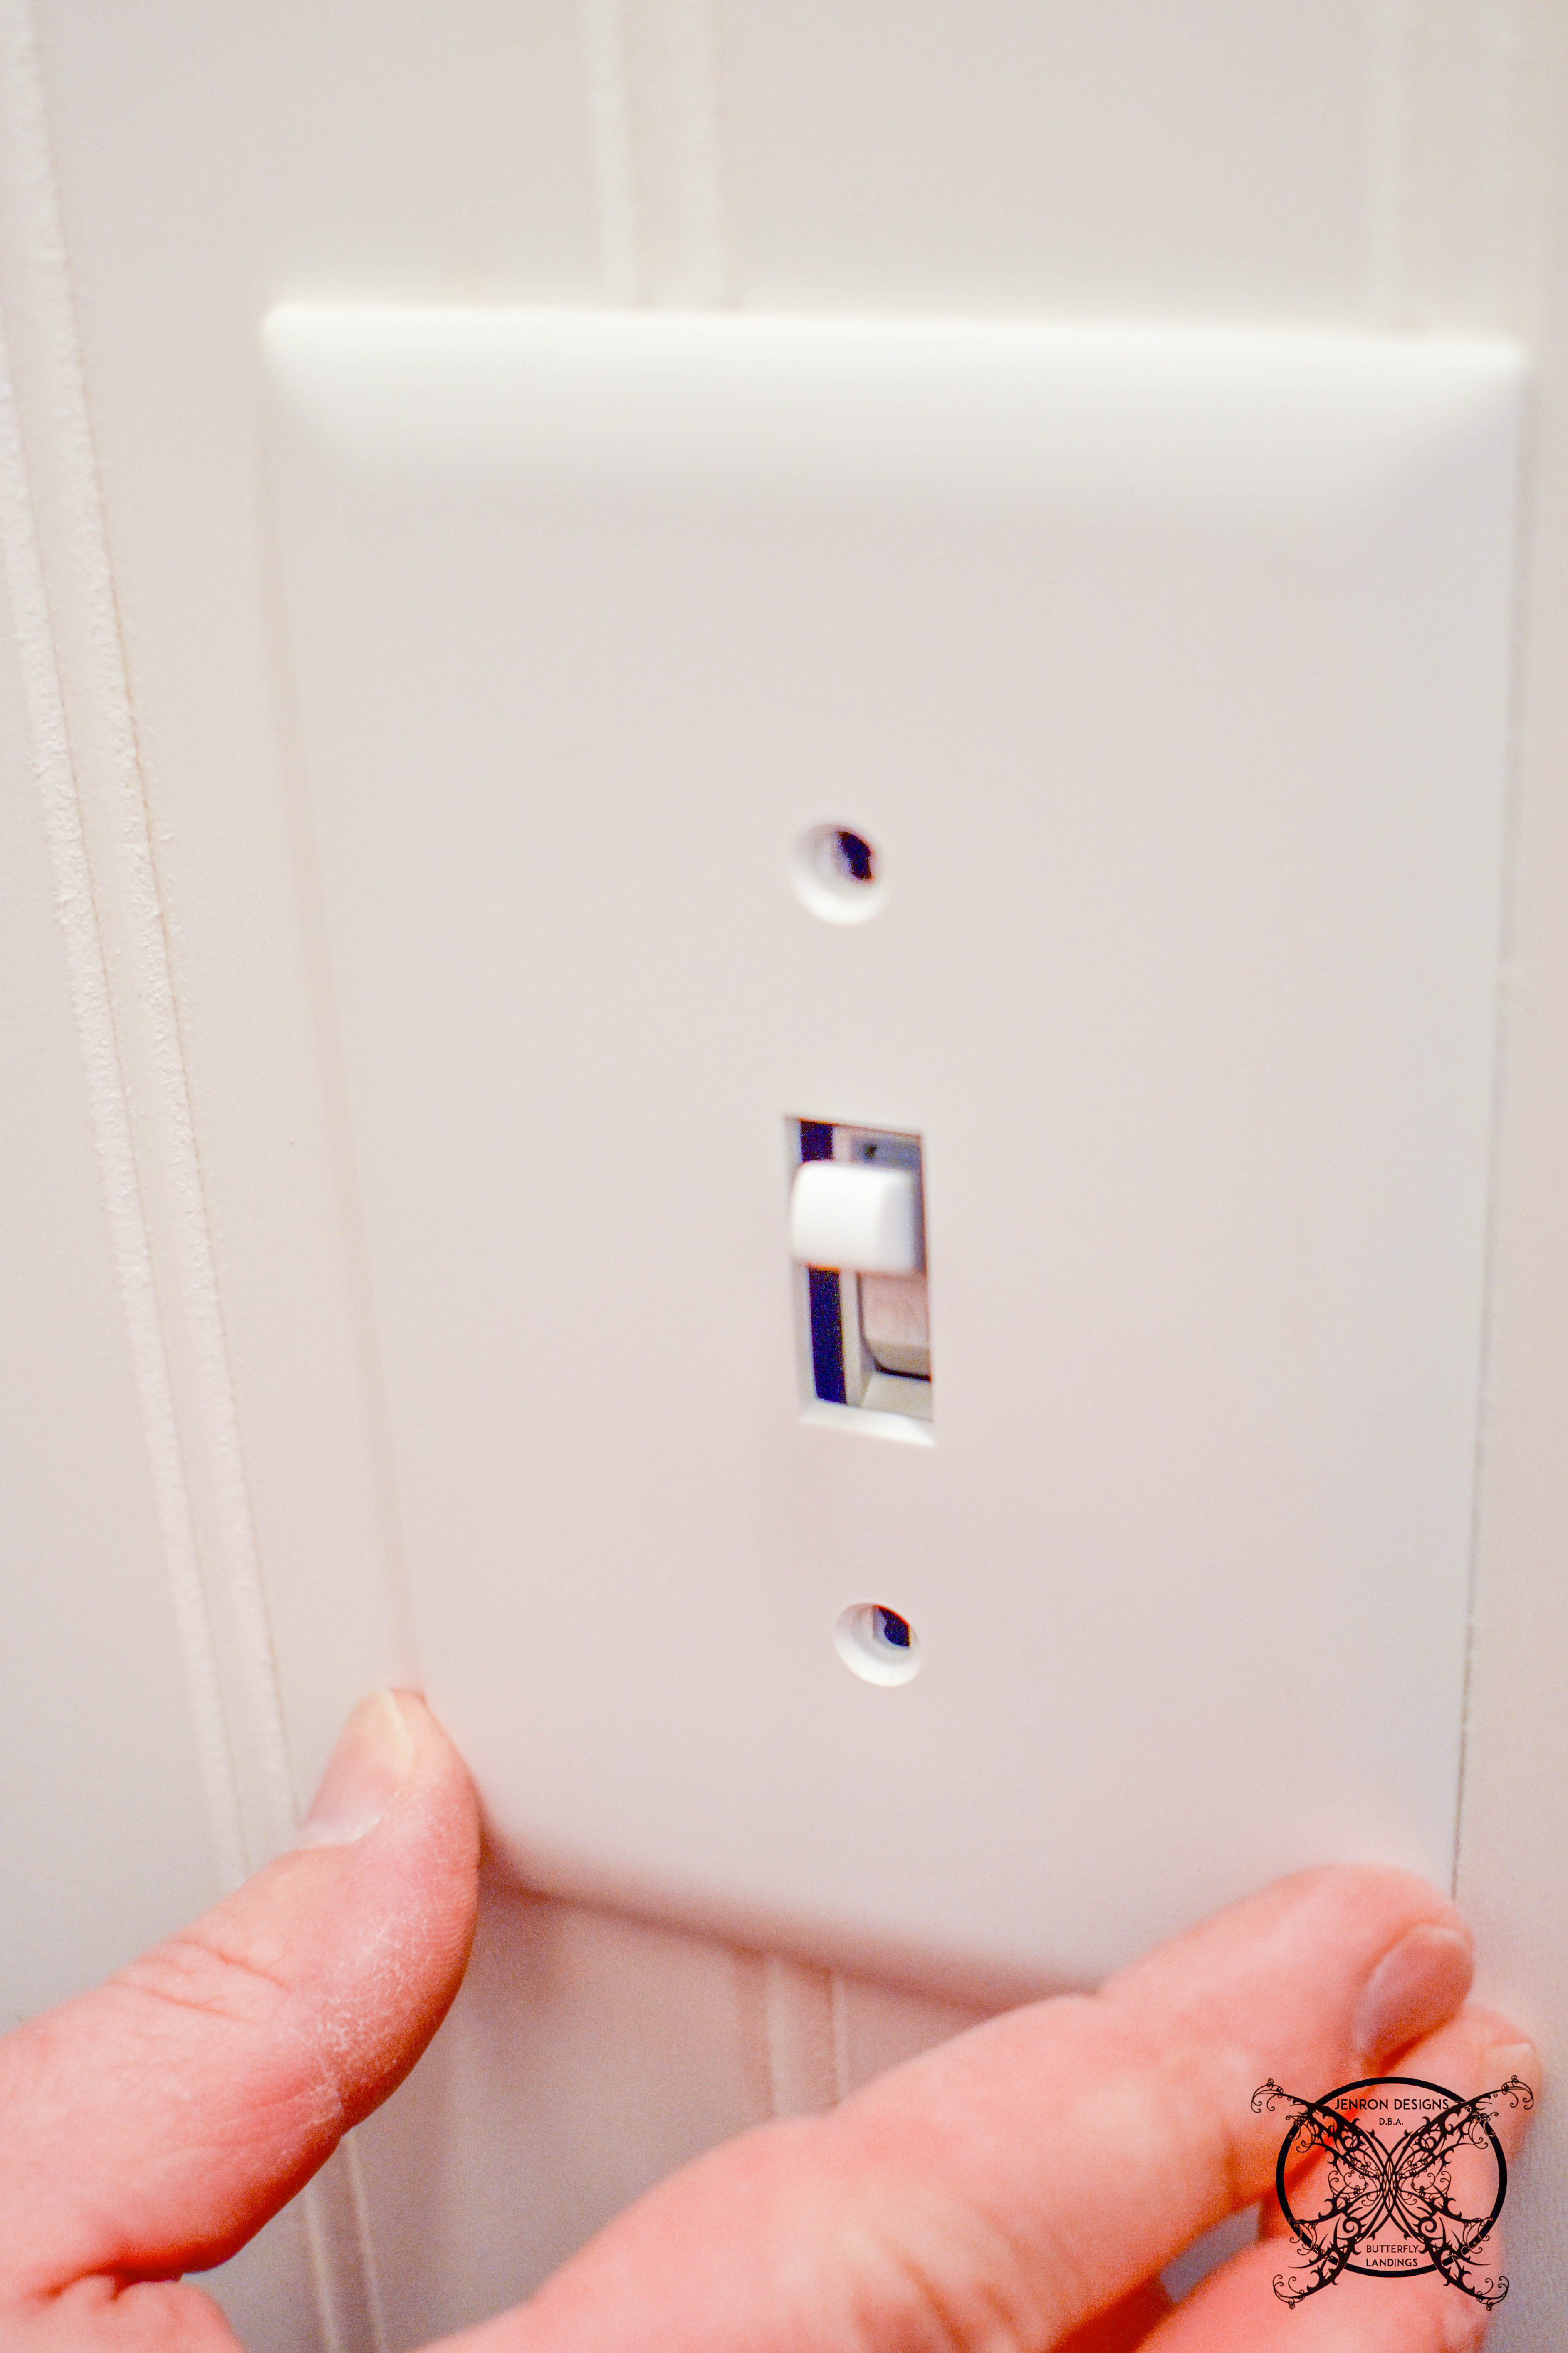
Power Off:
Since you would be adding additional depth to the walls by adding the bead board, you will need to readjust your plugs and/or switches. So you do not end up with this problem. 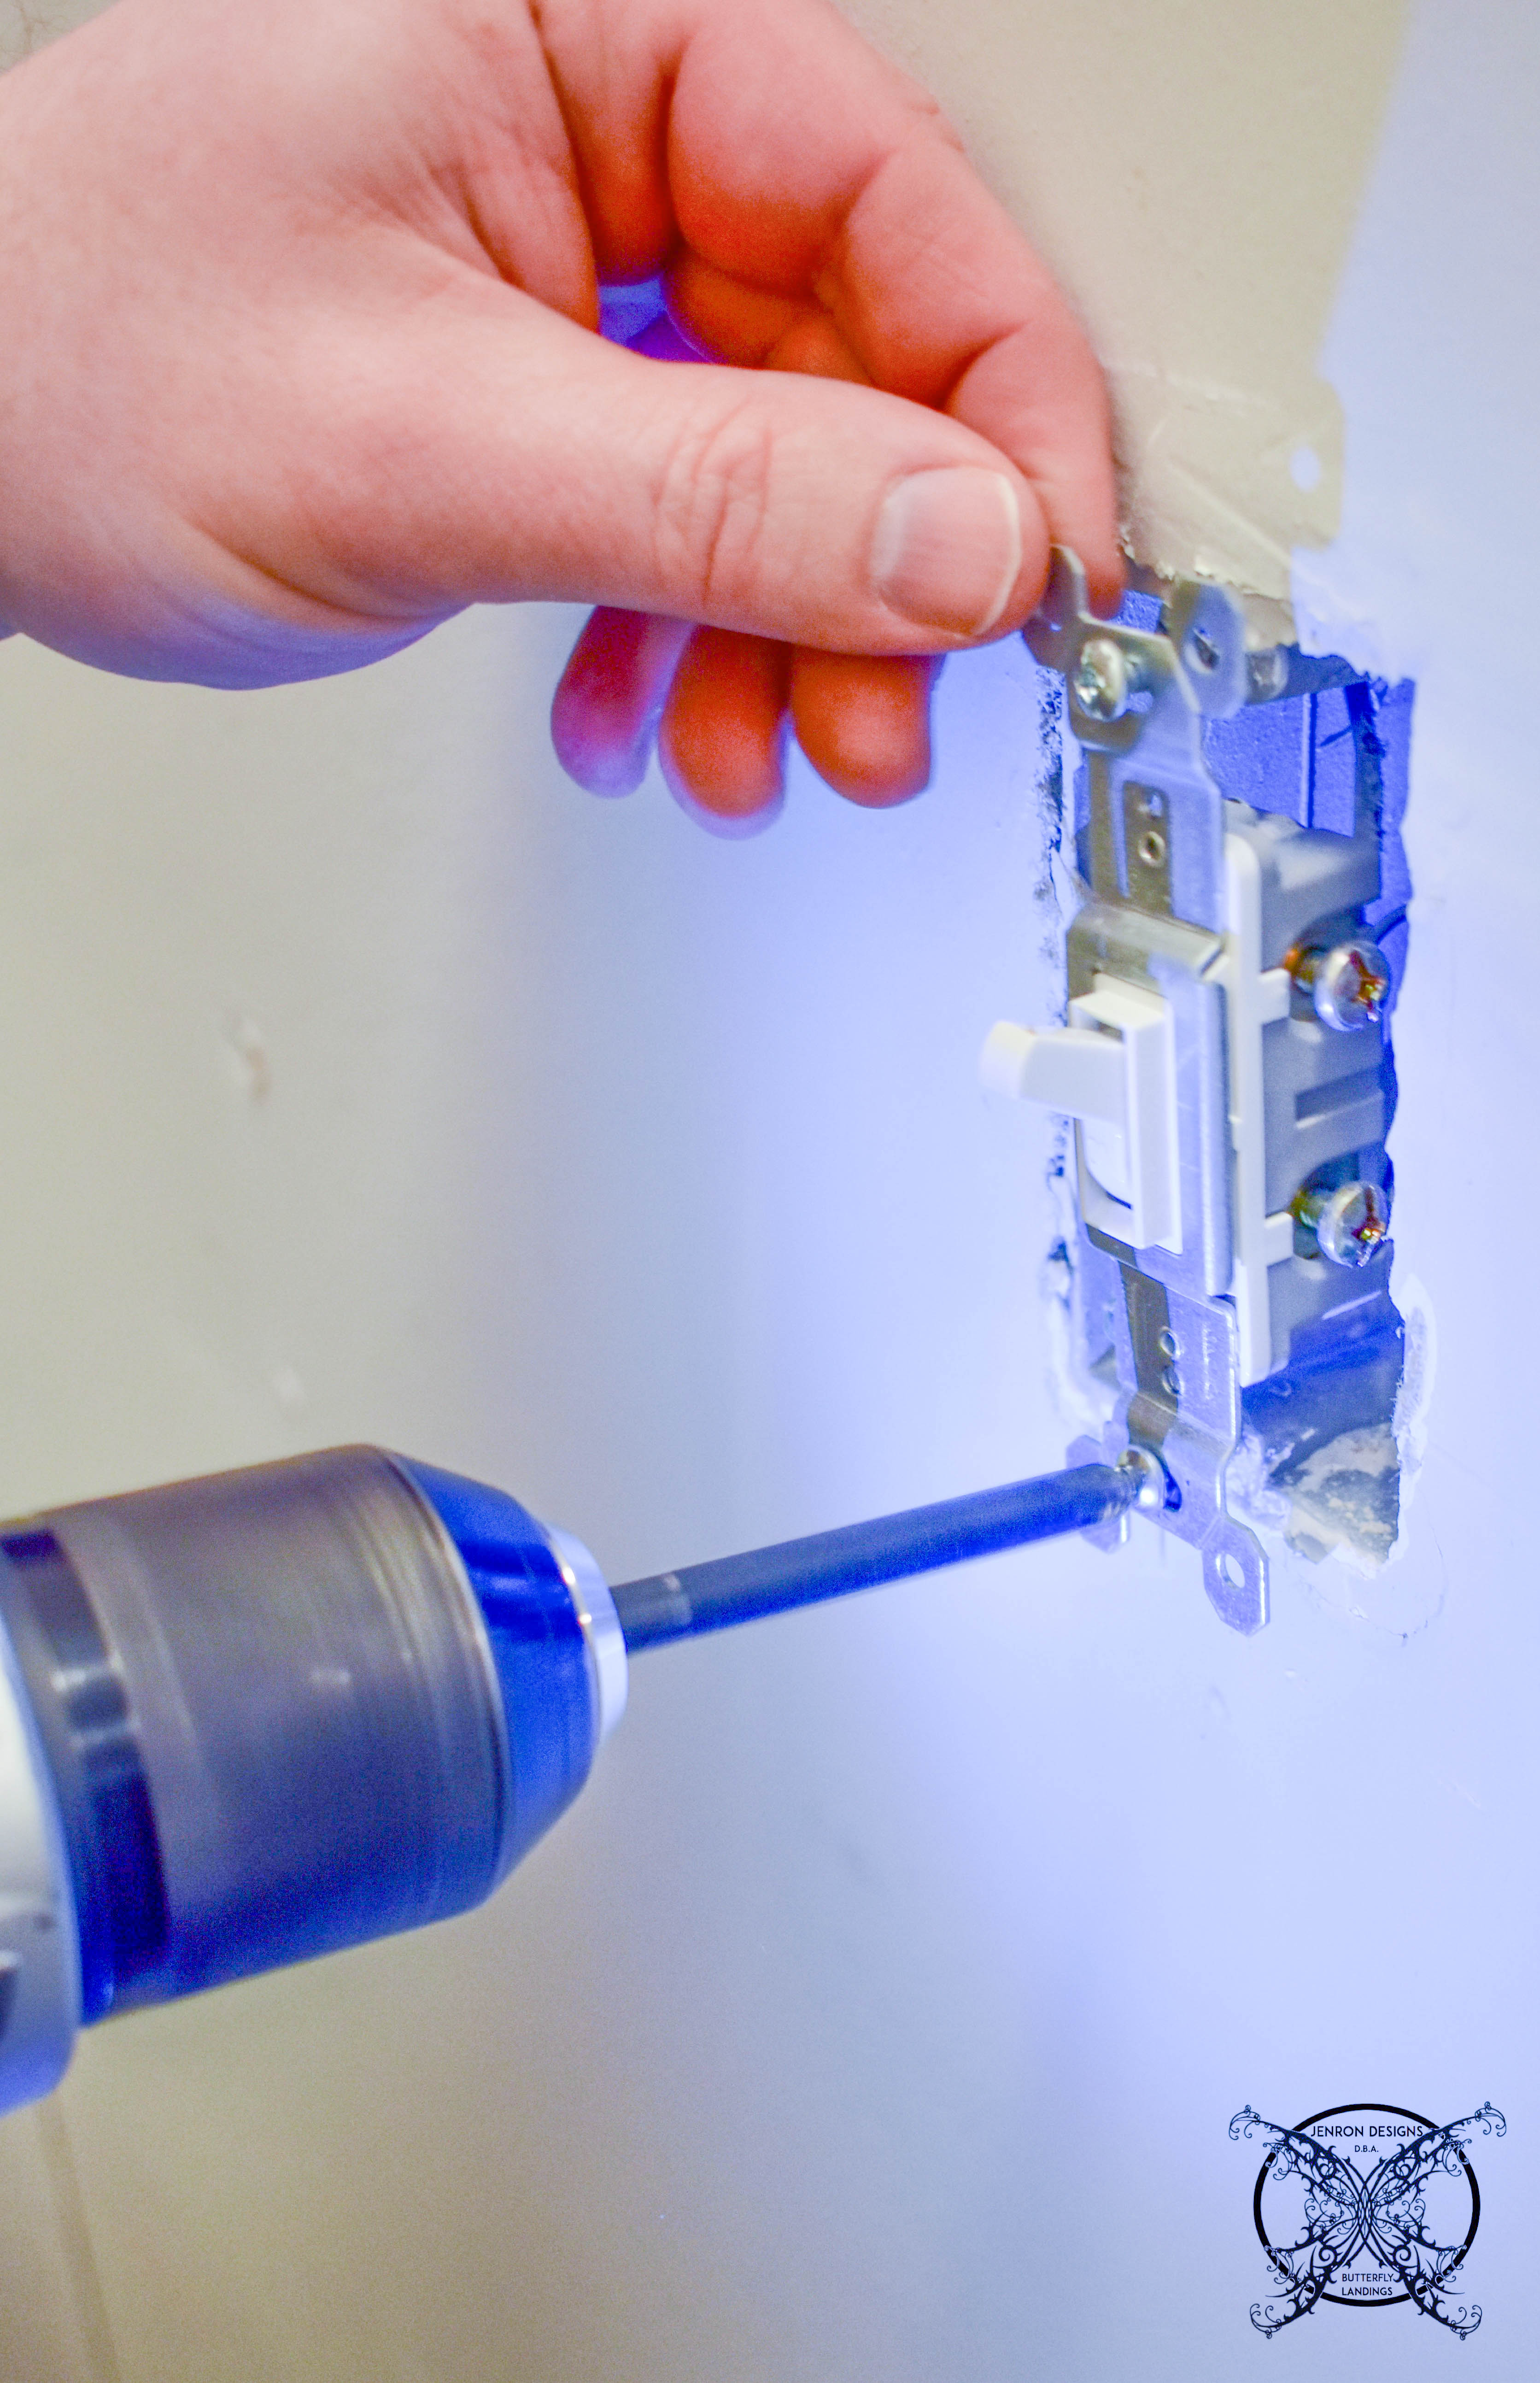 It is very simple to do just make sure that you first and foremost TURN OFF THE POWER to this switch before attempting the move or adjust it. As you can see below, we are now working with a shop light and lighted drill.
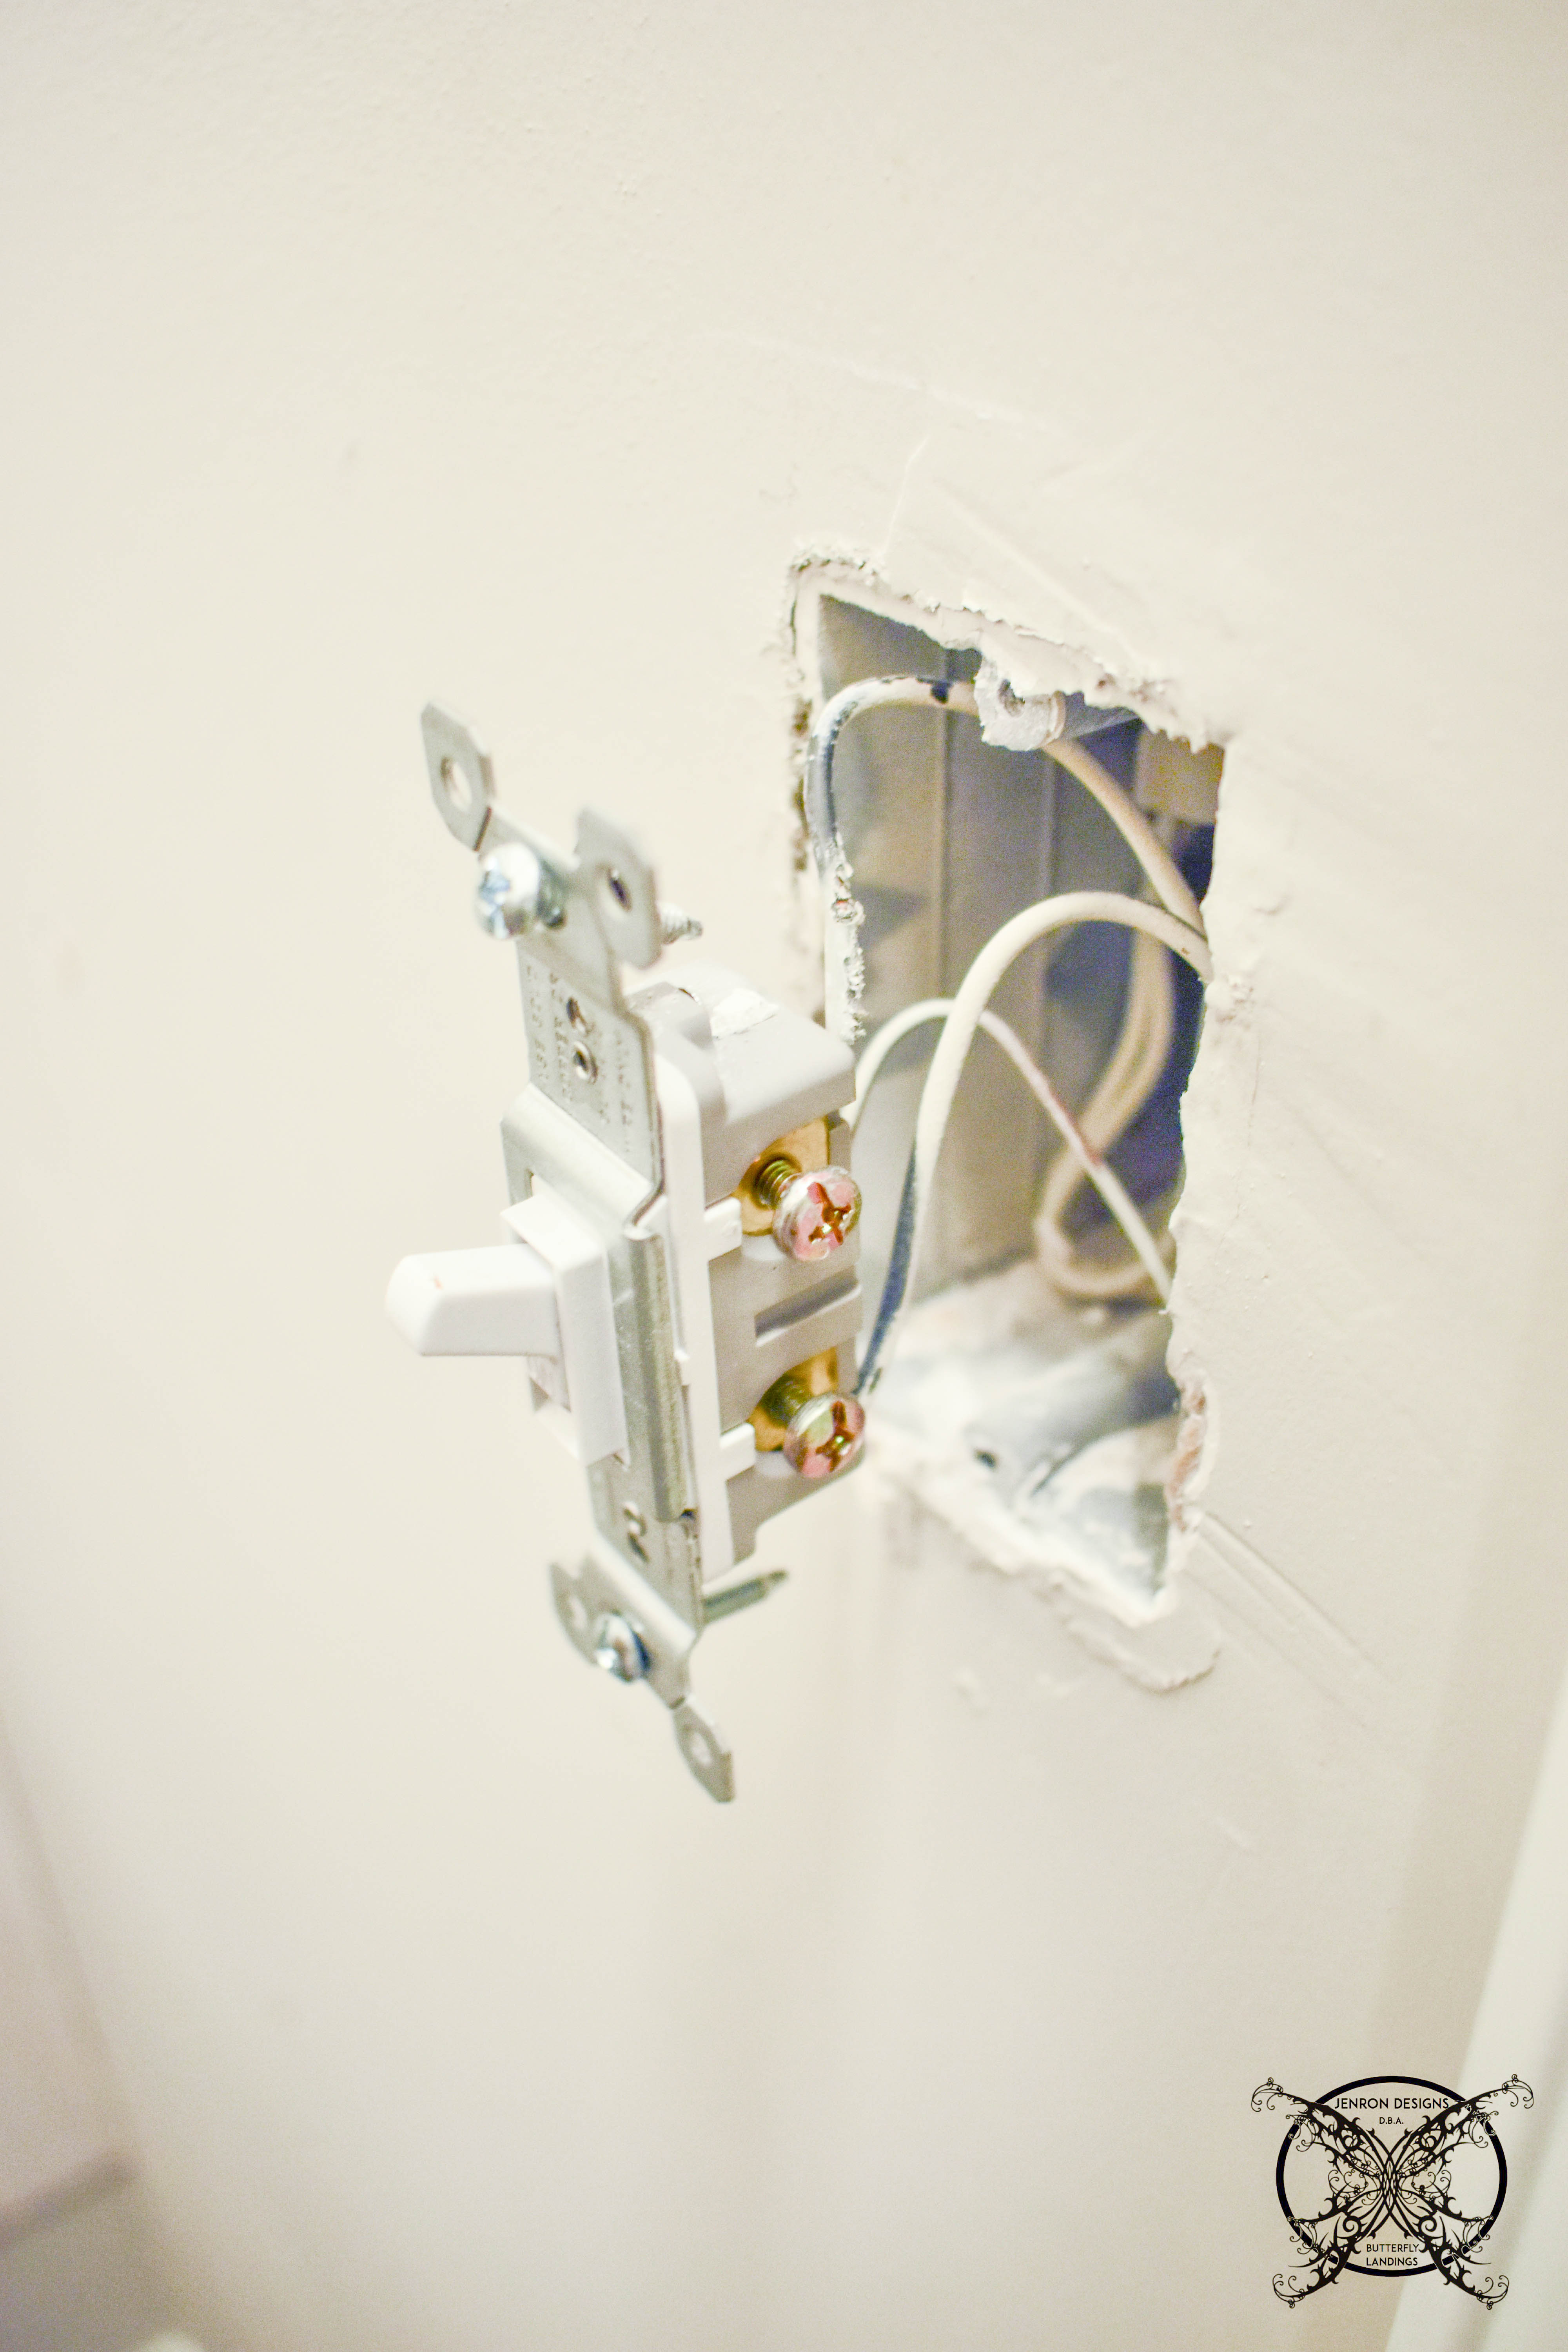 Then, thread the loose plug through your pre cut hole in the bead board and reattached on the face side of the board. This will make the switch or plug flash to the surface and eliminate the gap.
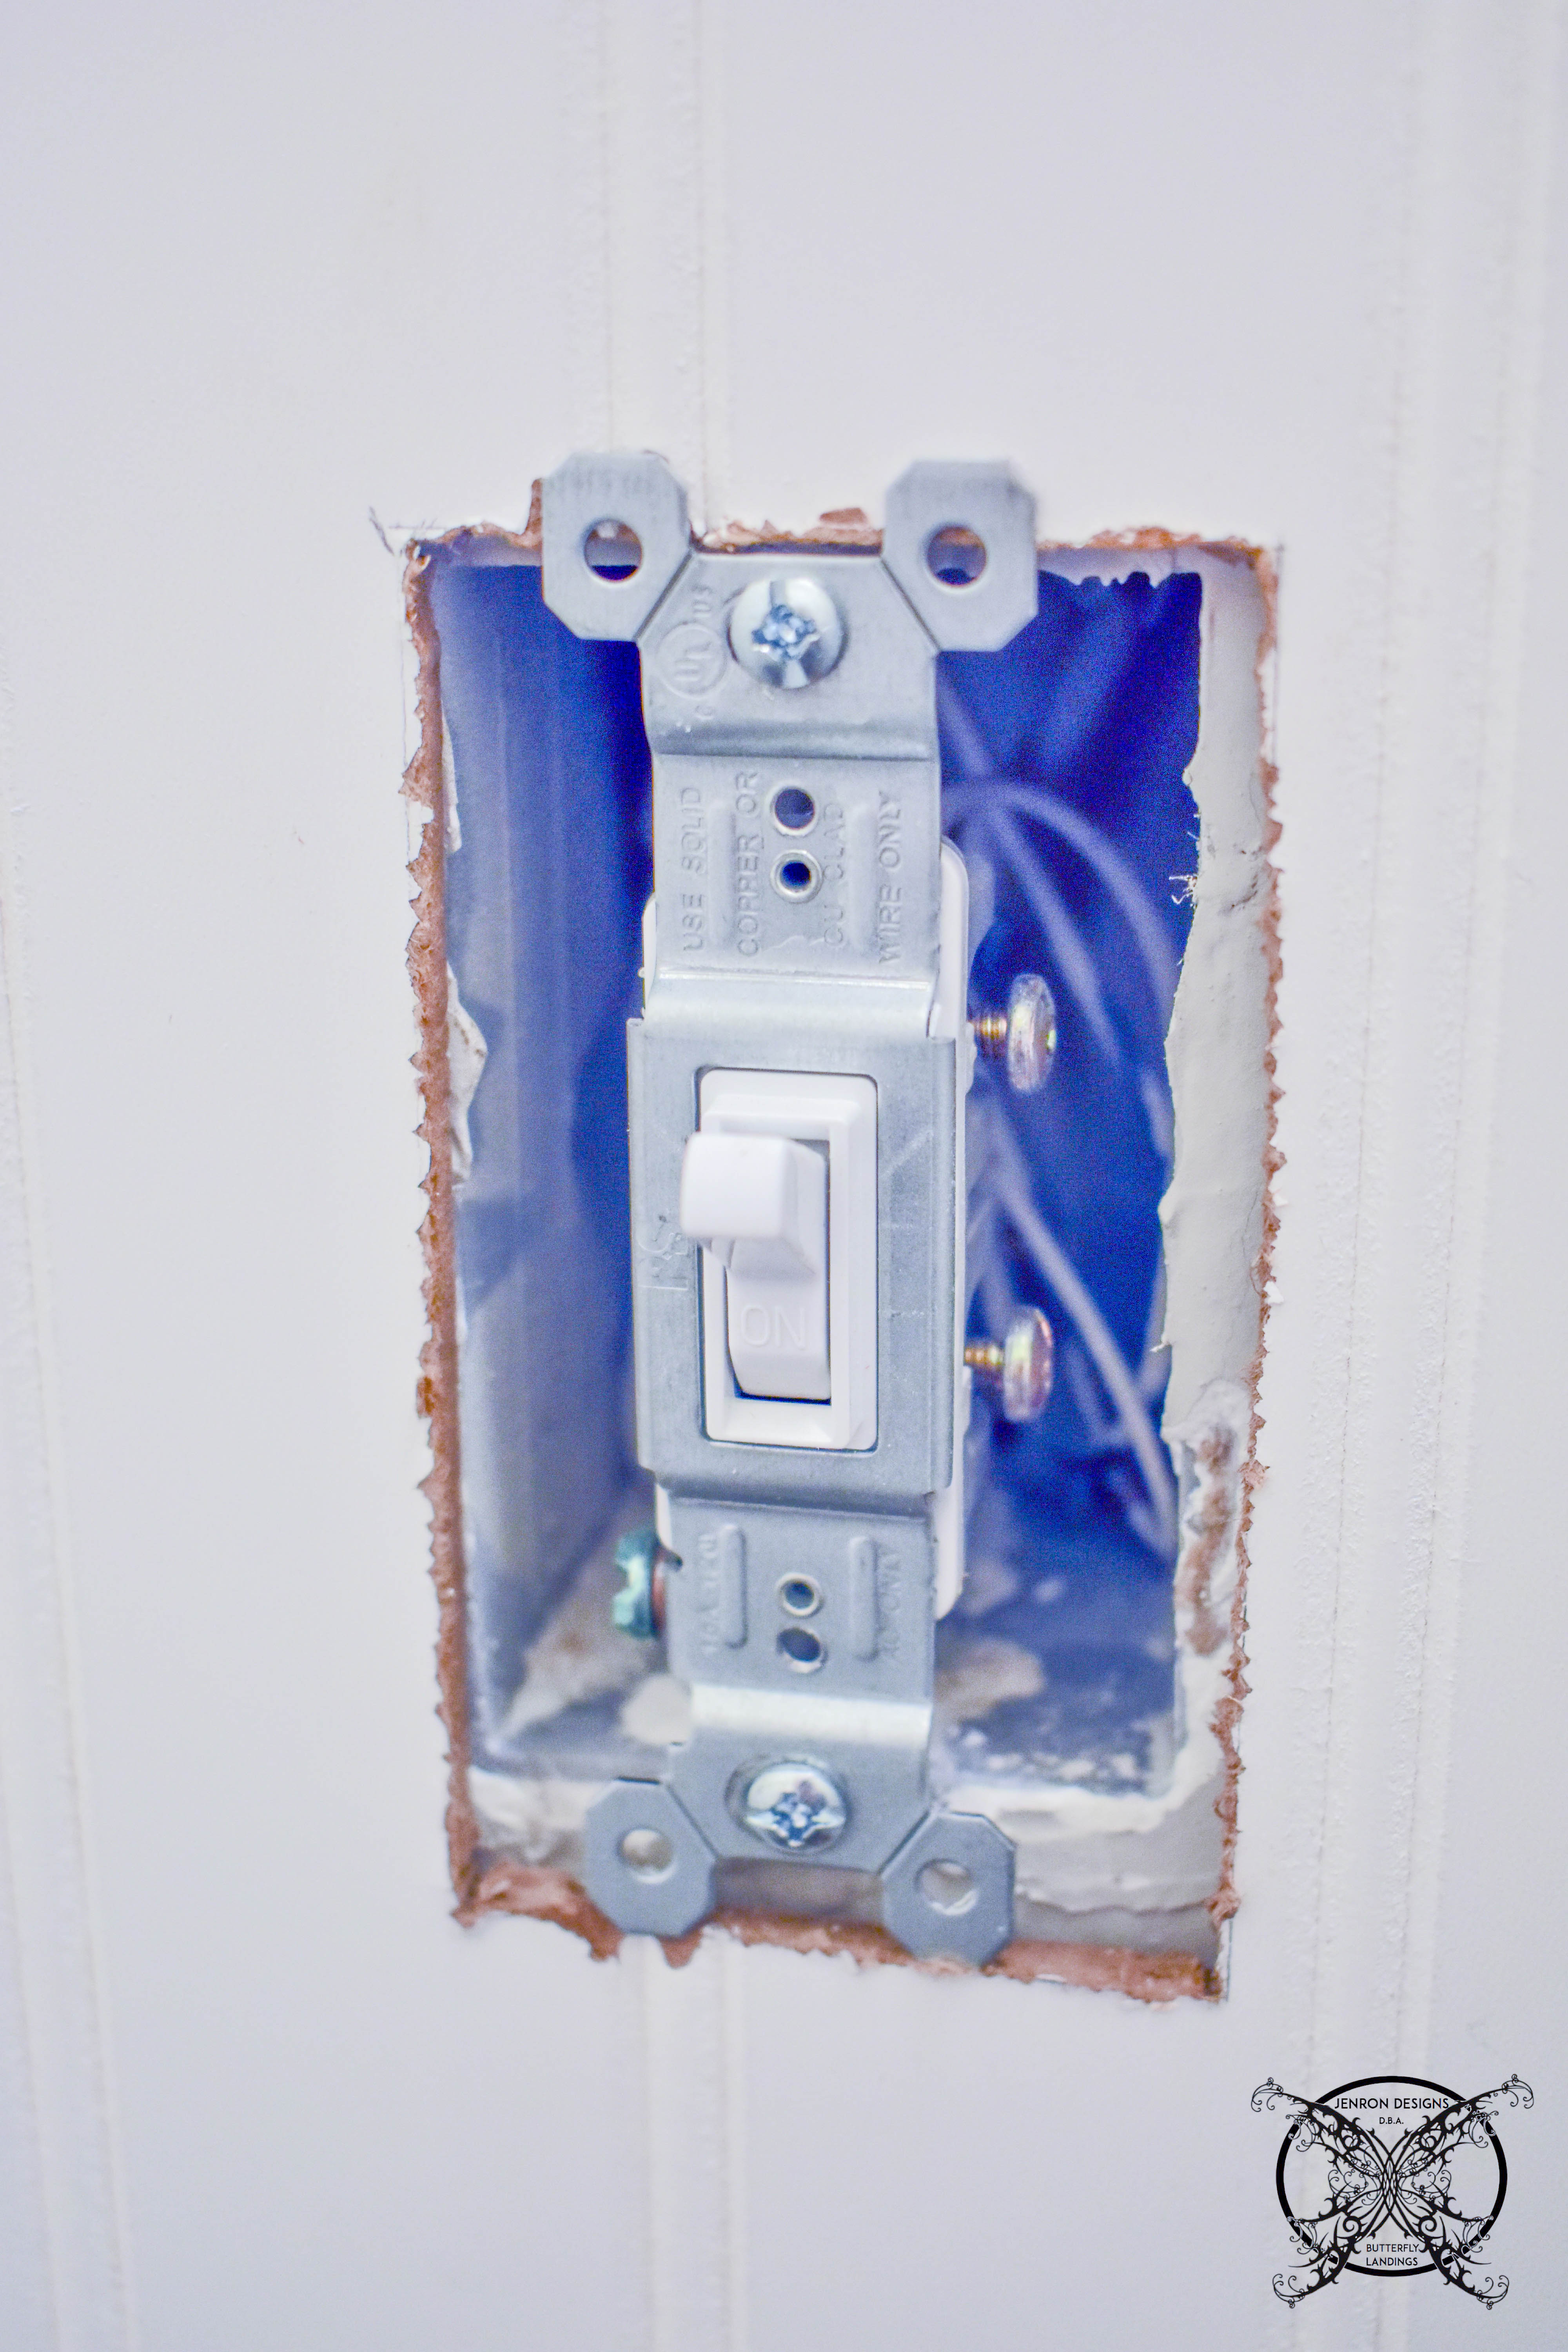
Measure Twice, Cut Once:
The next step was adding a basic farmhouse, flat molding, to the top. This allows you to hide the gap that you will probably have at different points along the ceiling. Remember, nothing is ever square in your home and you will always has a slight variance.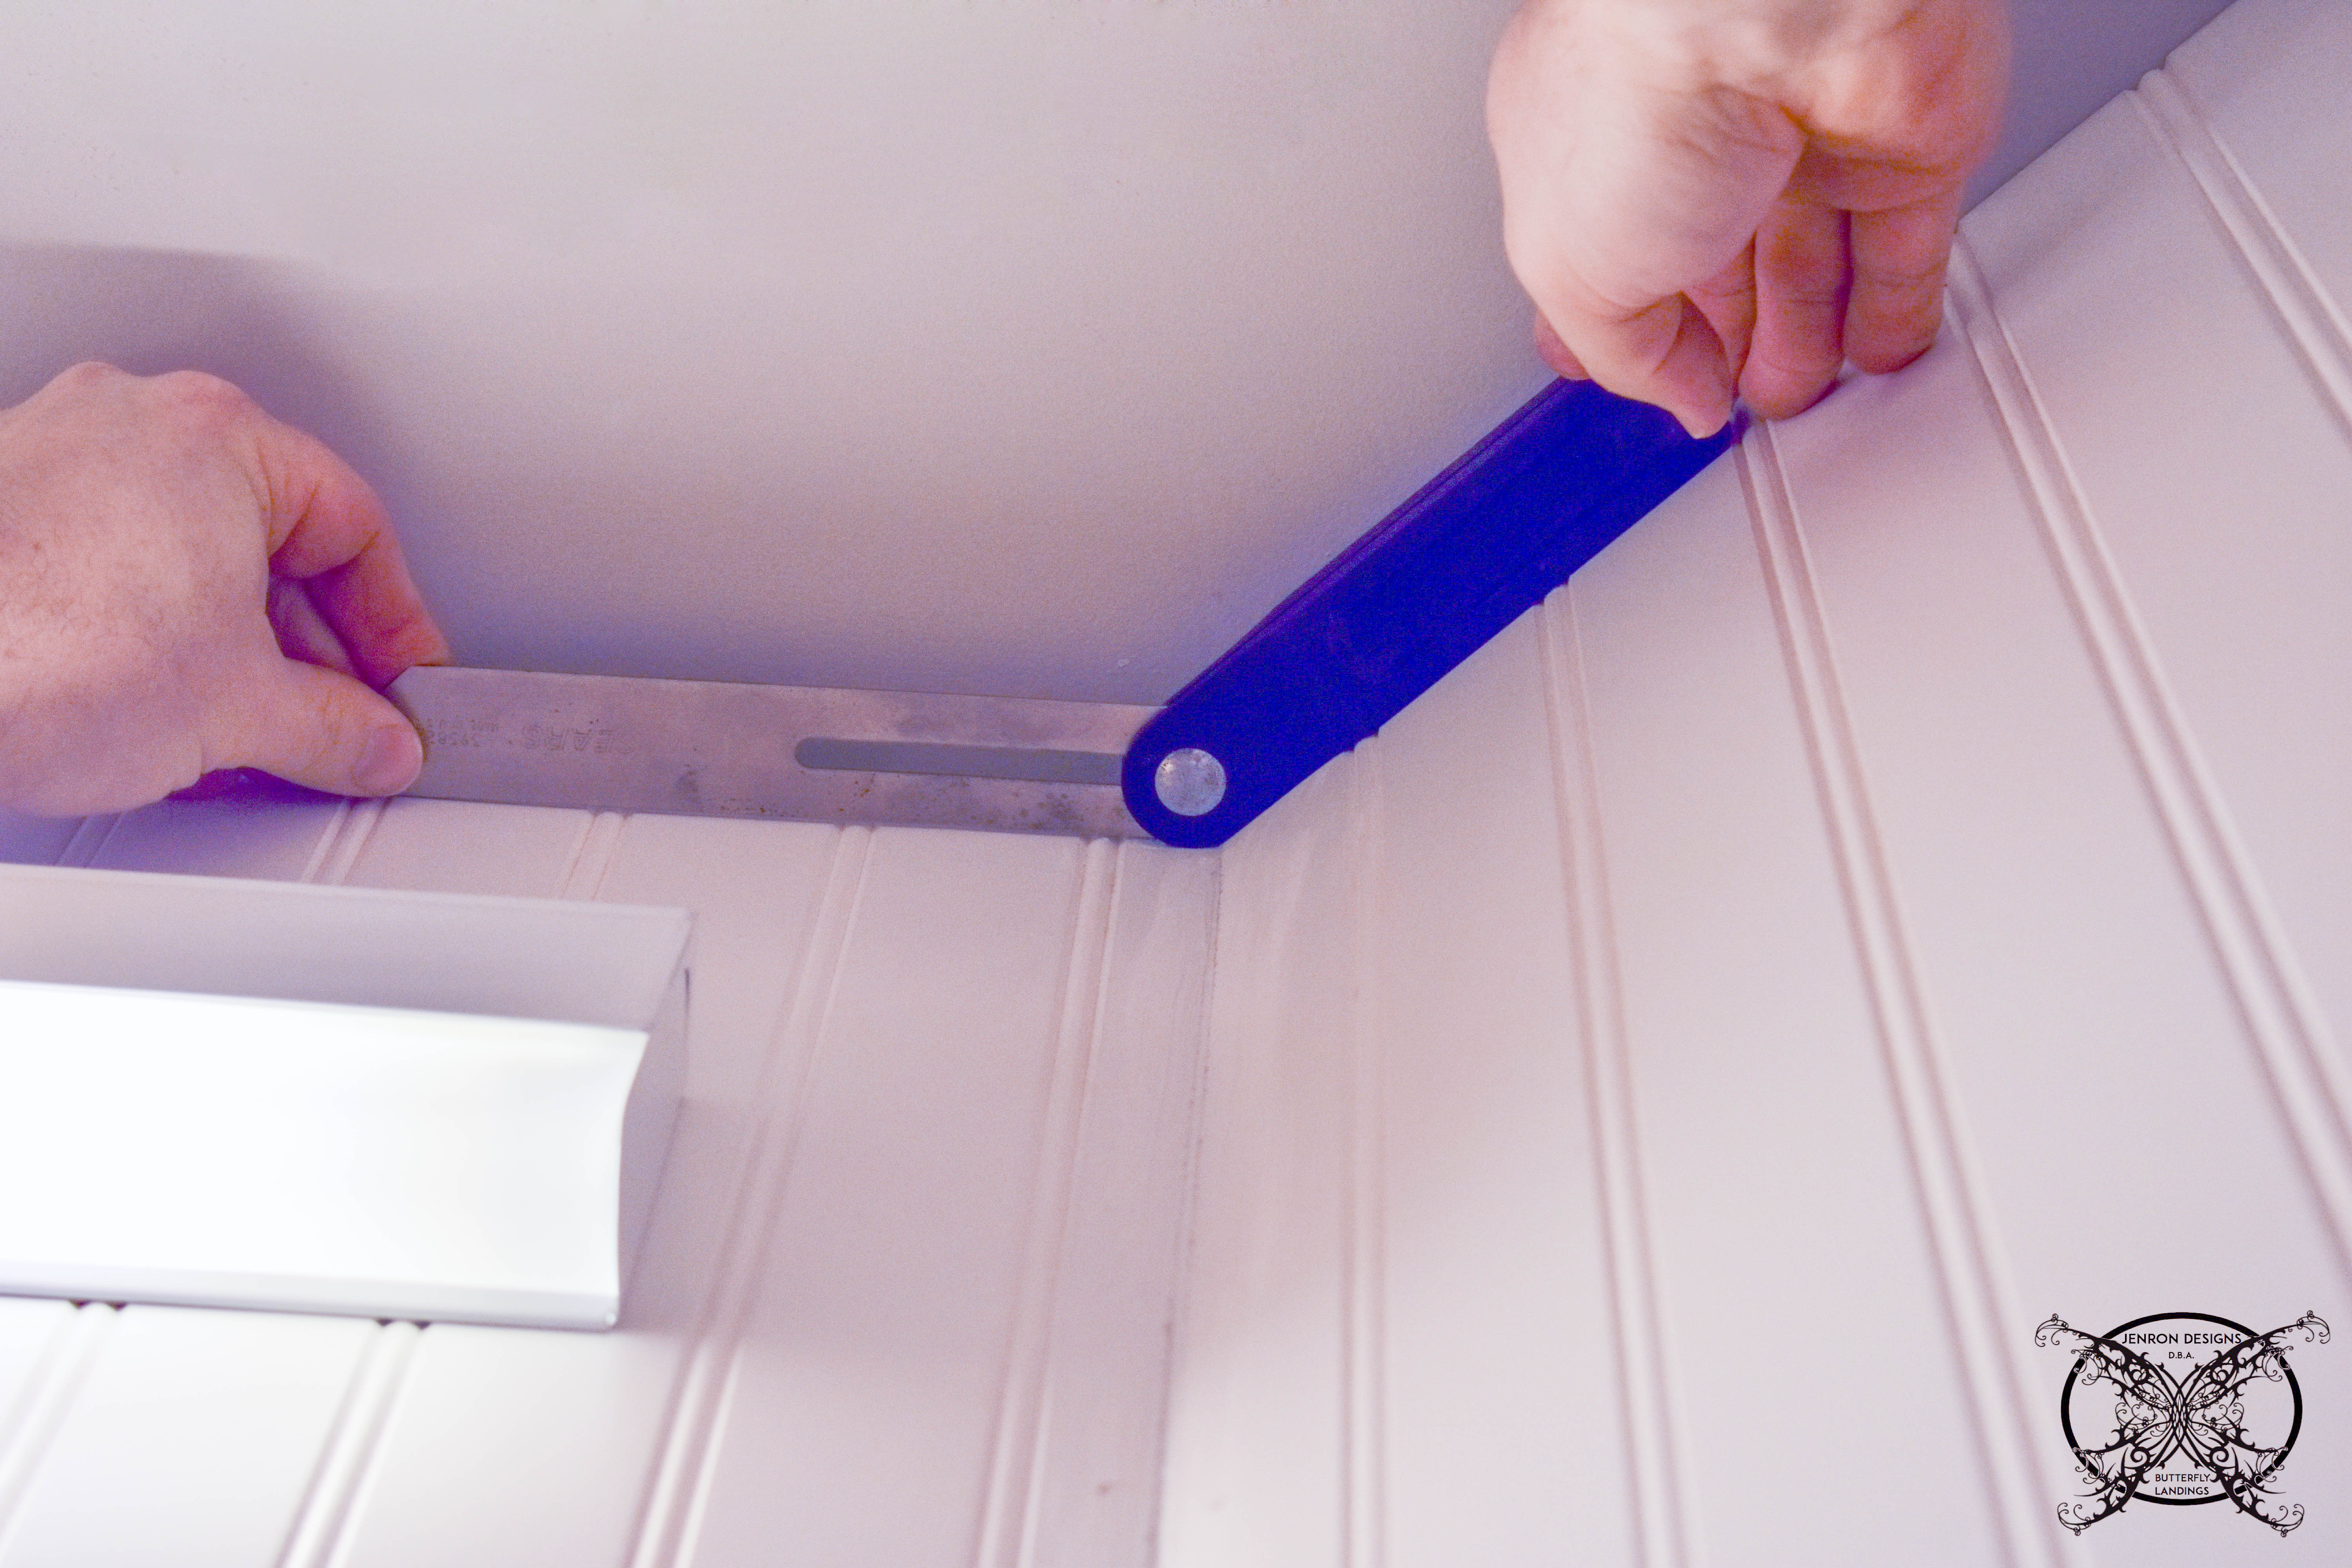 The tool you see above, is called a bevel, and it was absolutely invaluable. It will help you to get the proper angles for corners that are not just a simple 90 degree angle. This was still a pretty basic chamfered angle at 22.5 degrees, which is a standard on most miter boxes. However, it is always good to confirm that before cutting up your materials.
  You can see adding the molding makes a nice clean finished look at the ceiling and also covers any damage that might be on the edges of the bead boards too. The bright white has also brighten up the space to make it seem larger than before too. This will also help when we add in the stained shelving which with immediately darken the space back up.
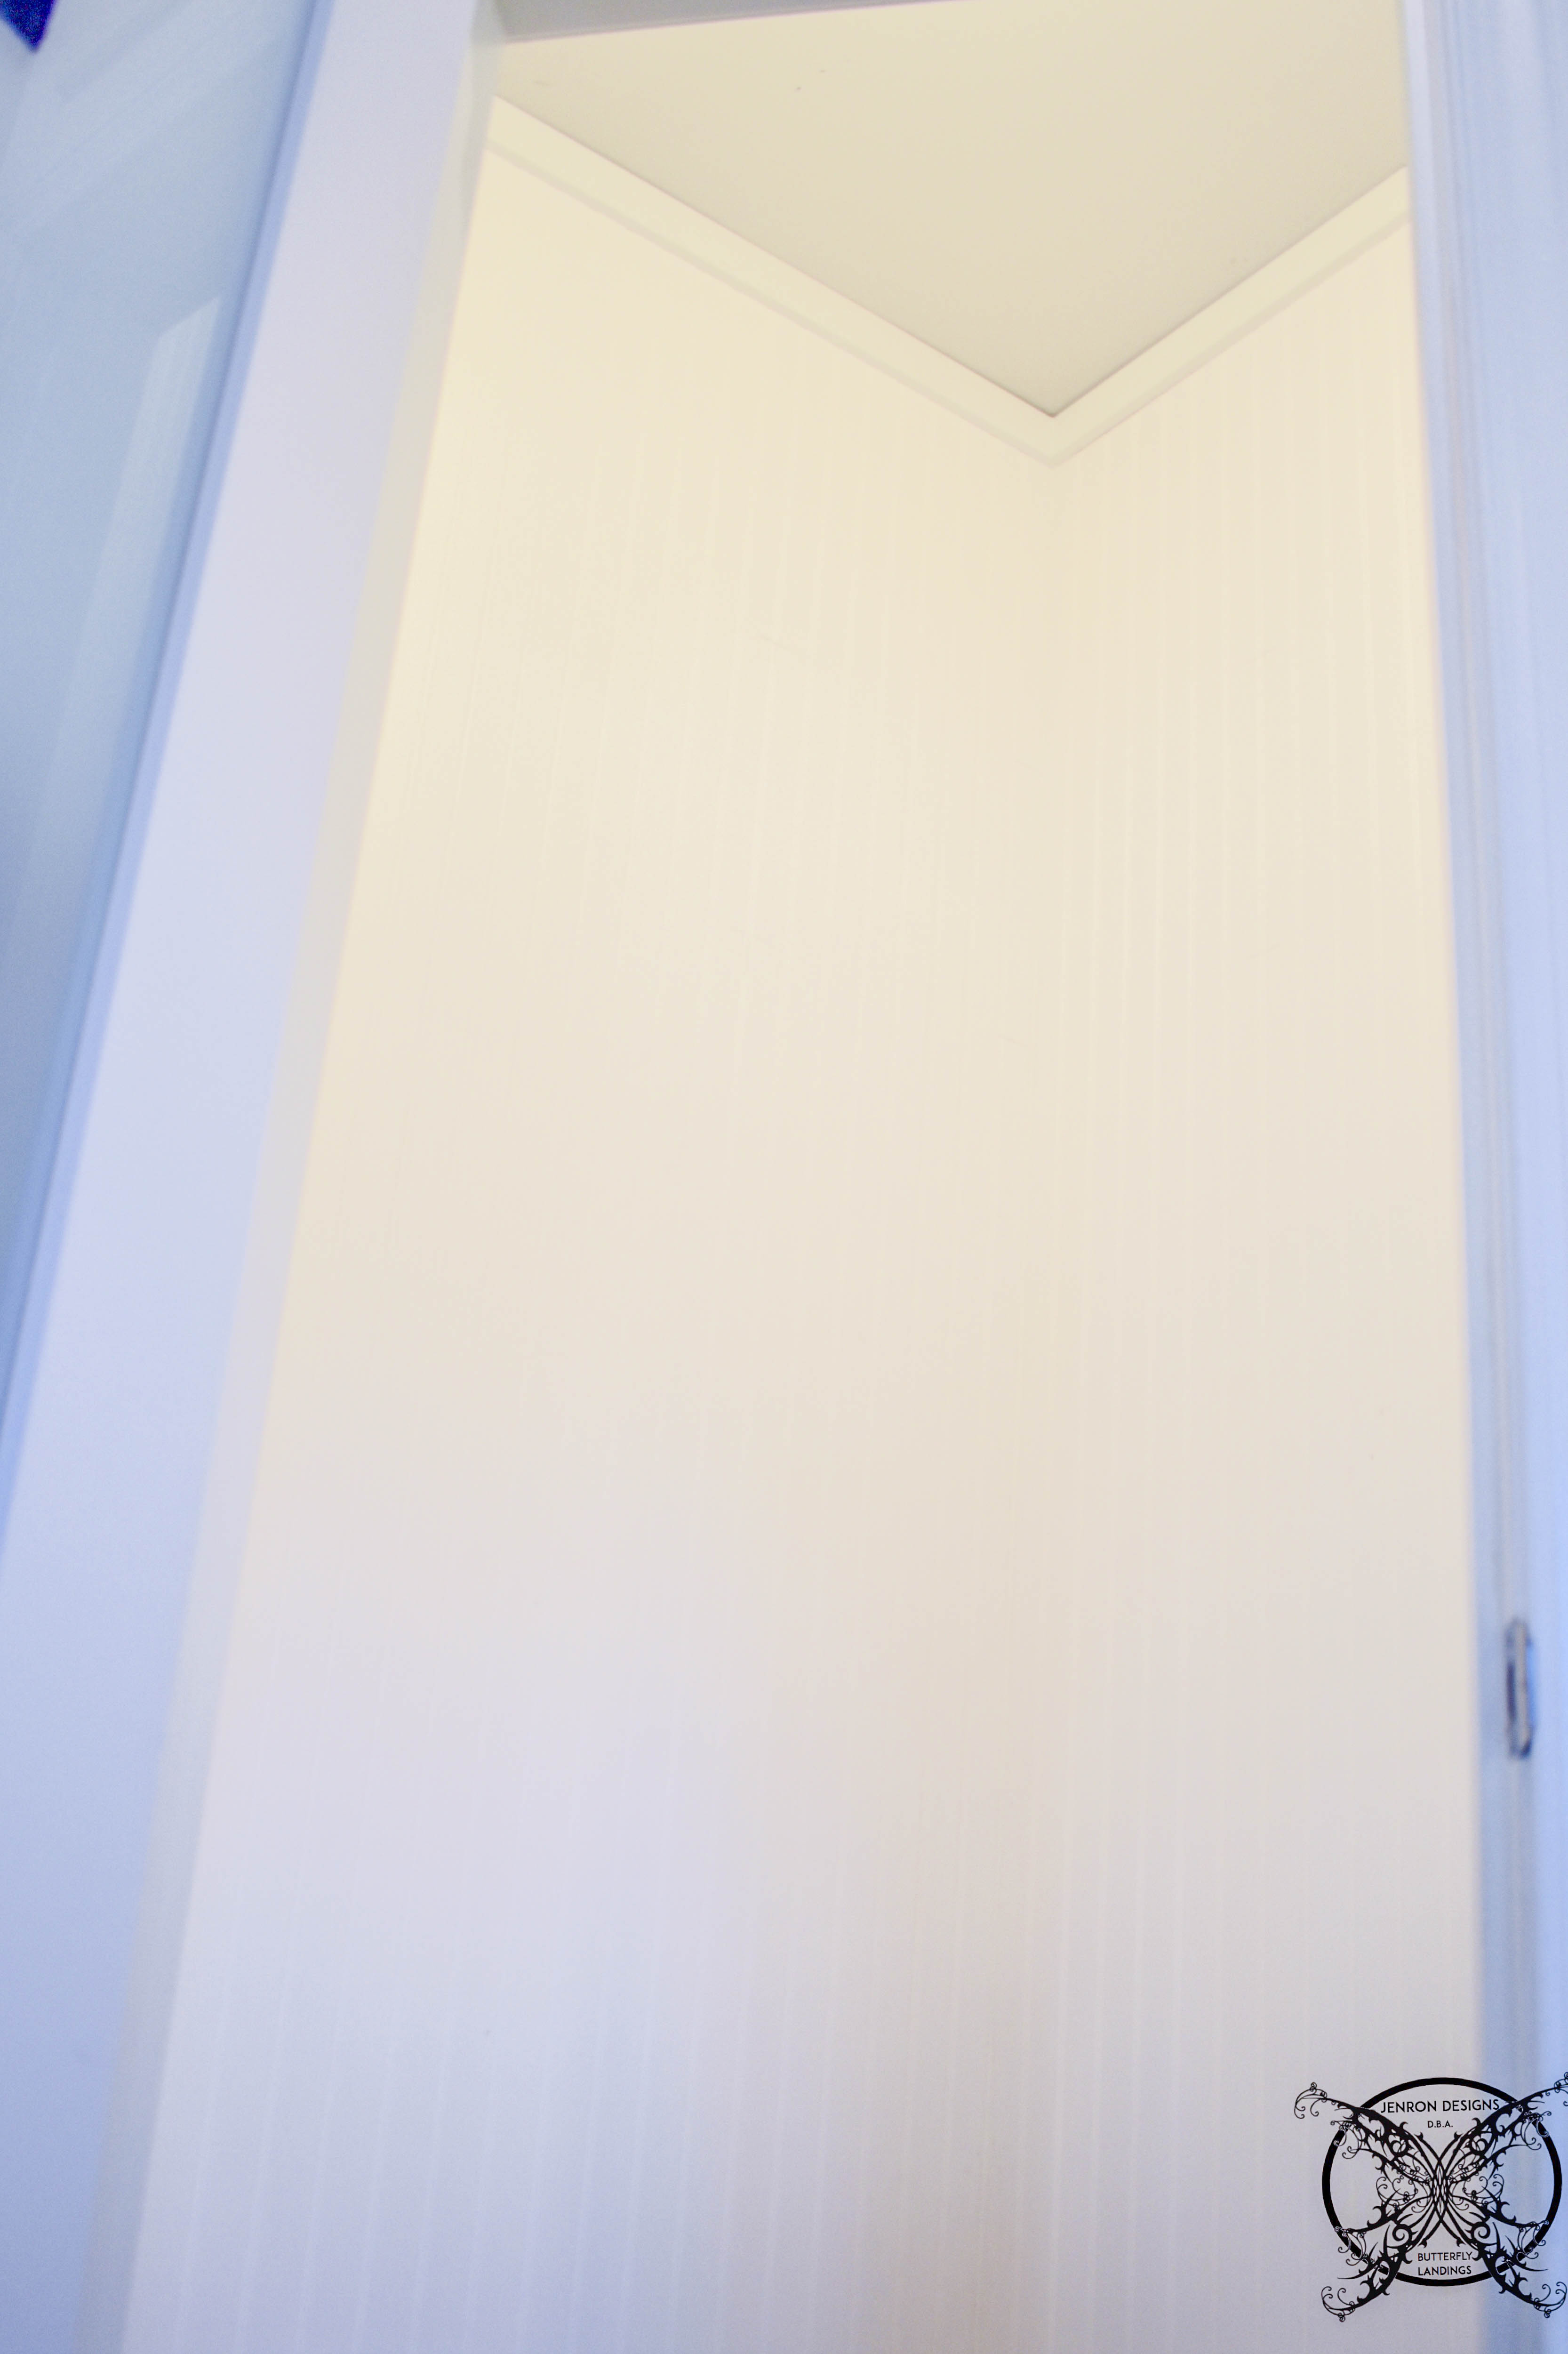
Choosing A Stain:
So, while all of this was going on upstairs, I was working on a few projects in the workshop in the basement by myself. I was in charge of staining the beautiful cedar boards we were using for the actual shelves. Actually, I had started them earlier in the week to allow for the proper drying time.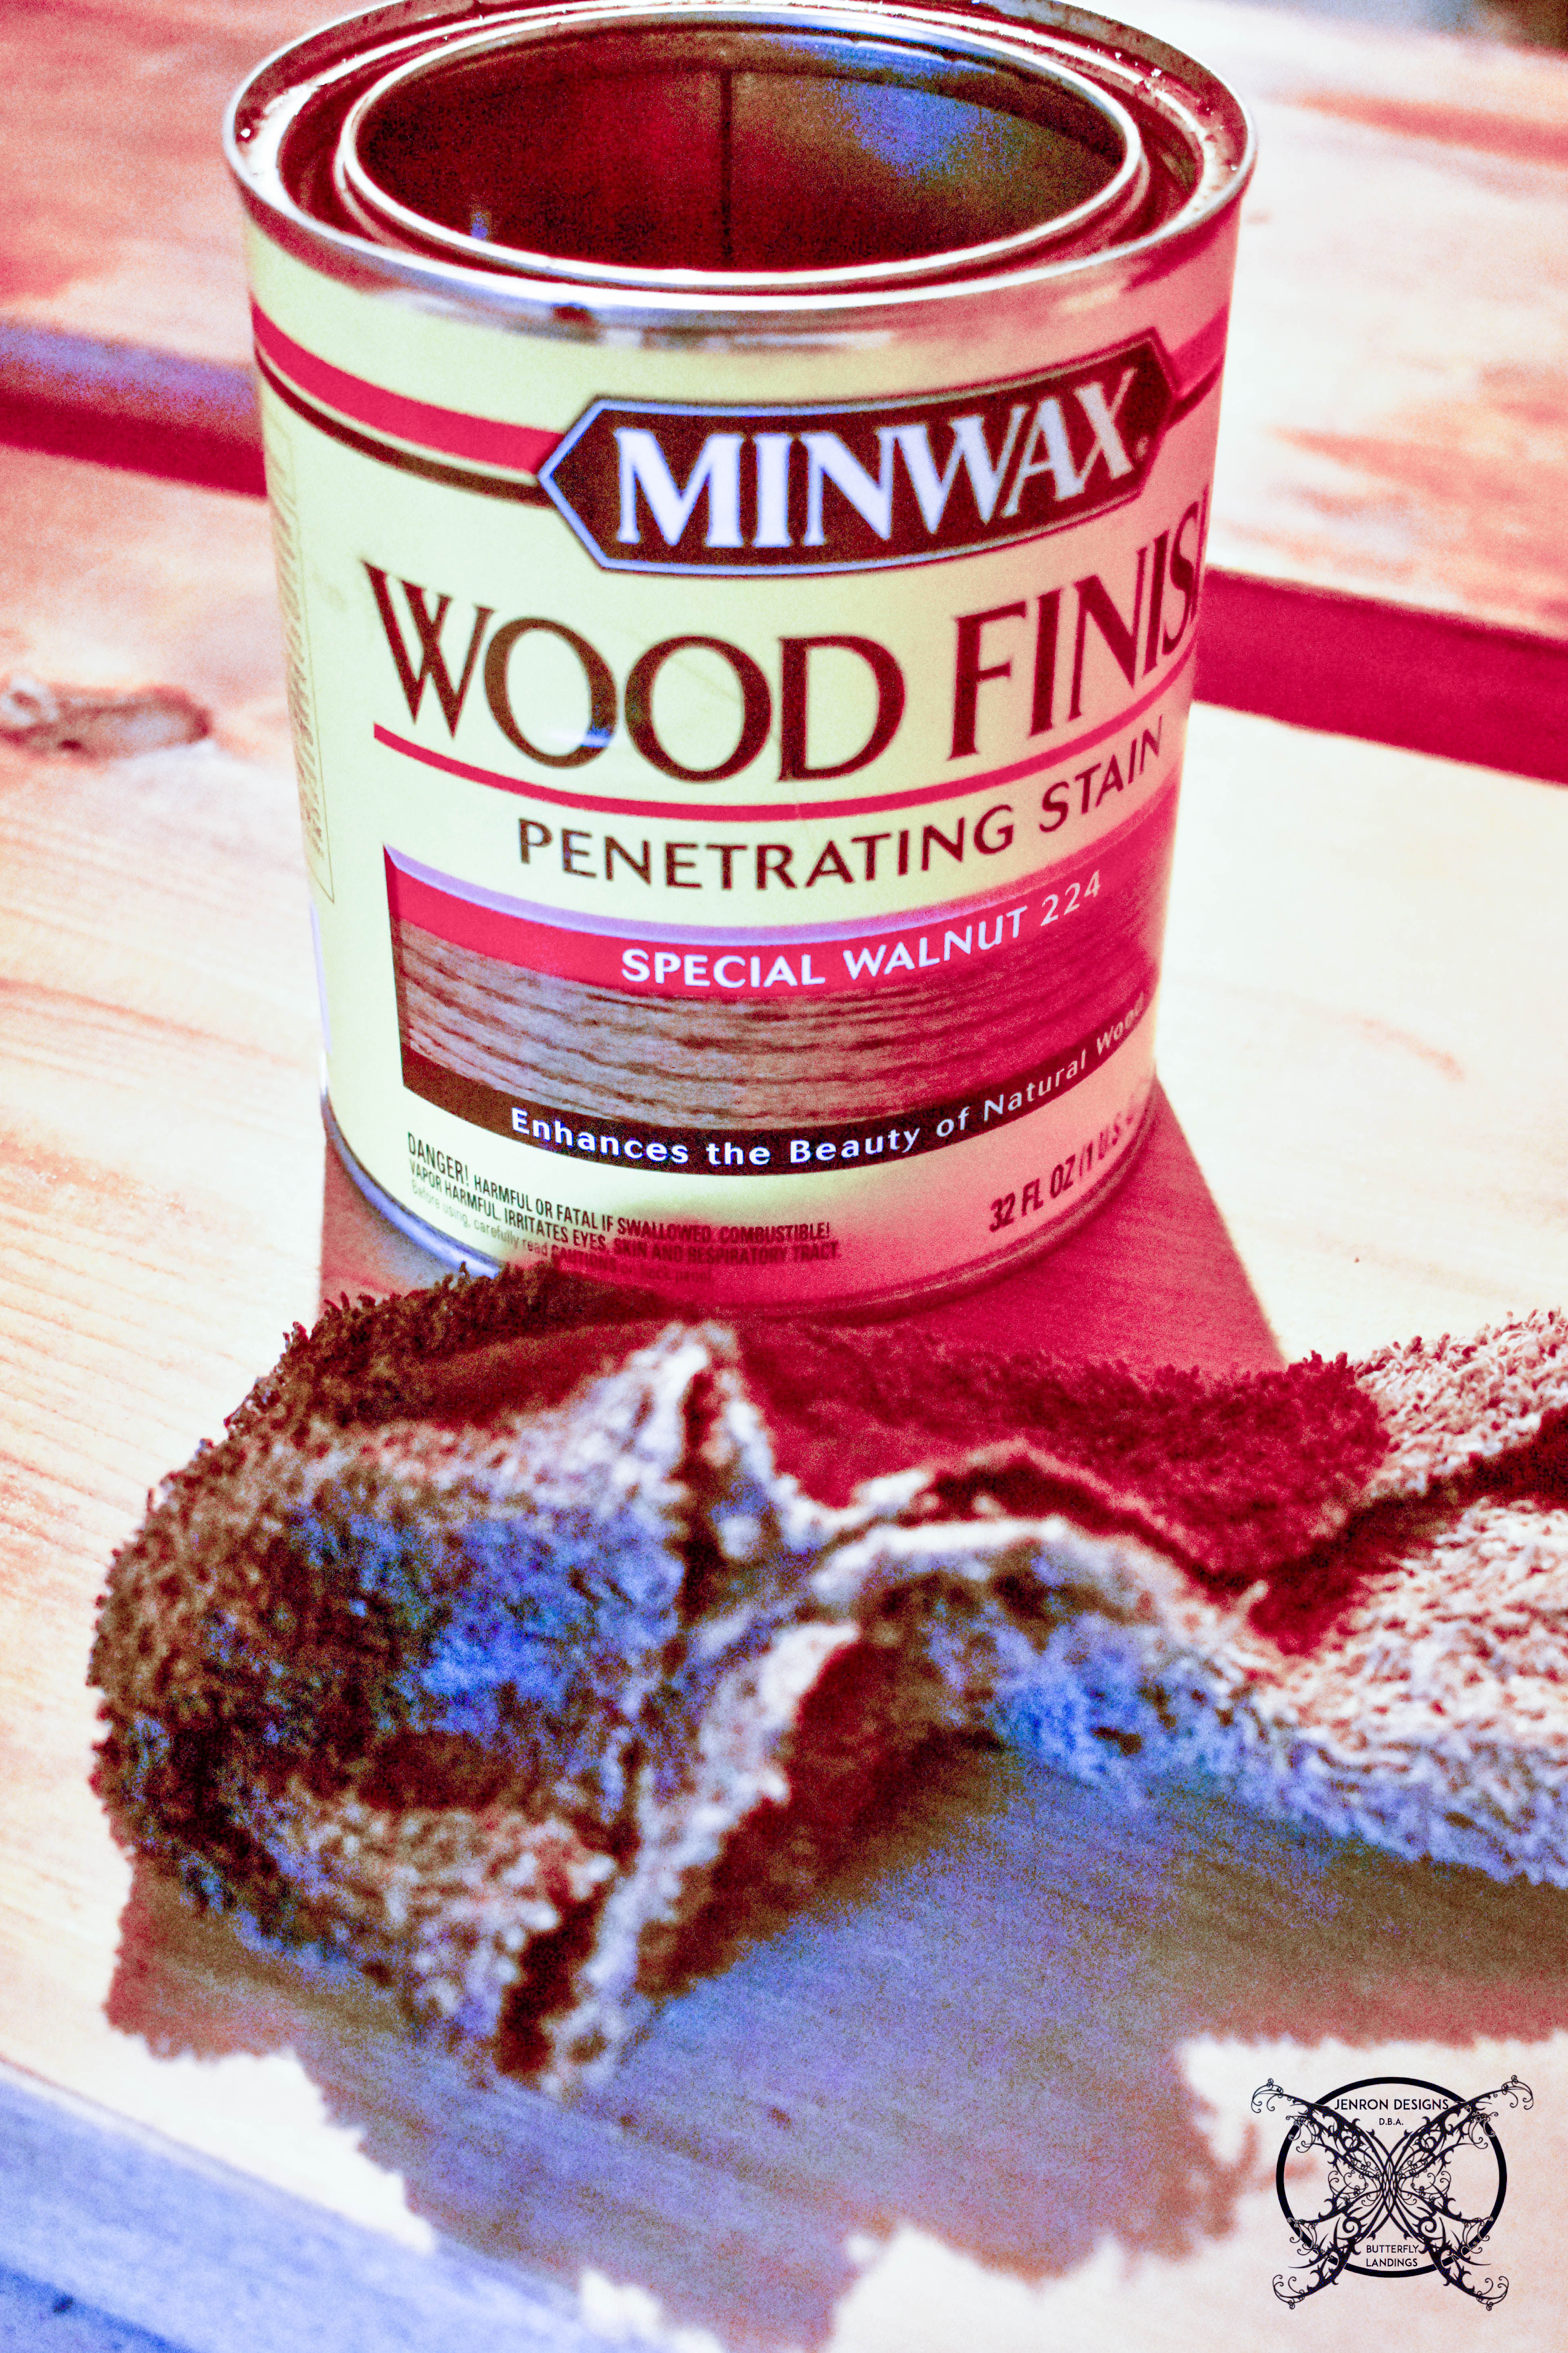 I decided to use Minwax Interior Wood Stain, 1/2 pint, Special Walnut
, which was the perfect color to accentuate the beautiful smooth cedar and protect it at the same time. As you can seen below, the raw cedar verses the stained. My word of advice; always, always, always hand rub your stain on to the boards, and always make sure to dry rub the stain. Meaning, do not over wet the rag. It makes a huge difference in the finish.
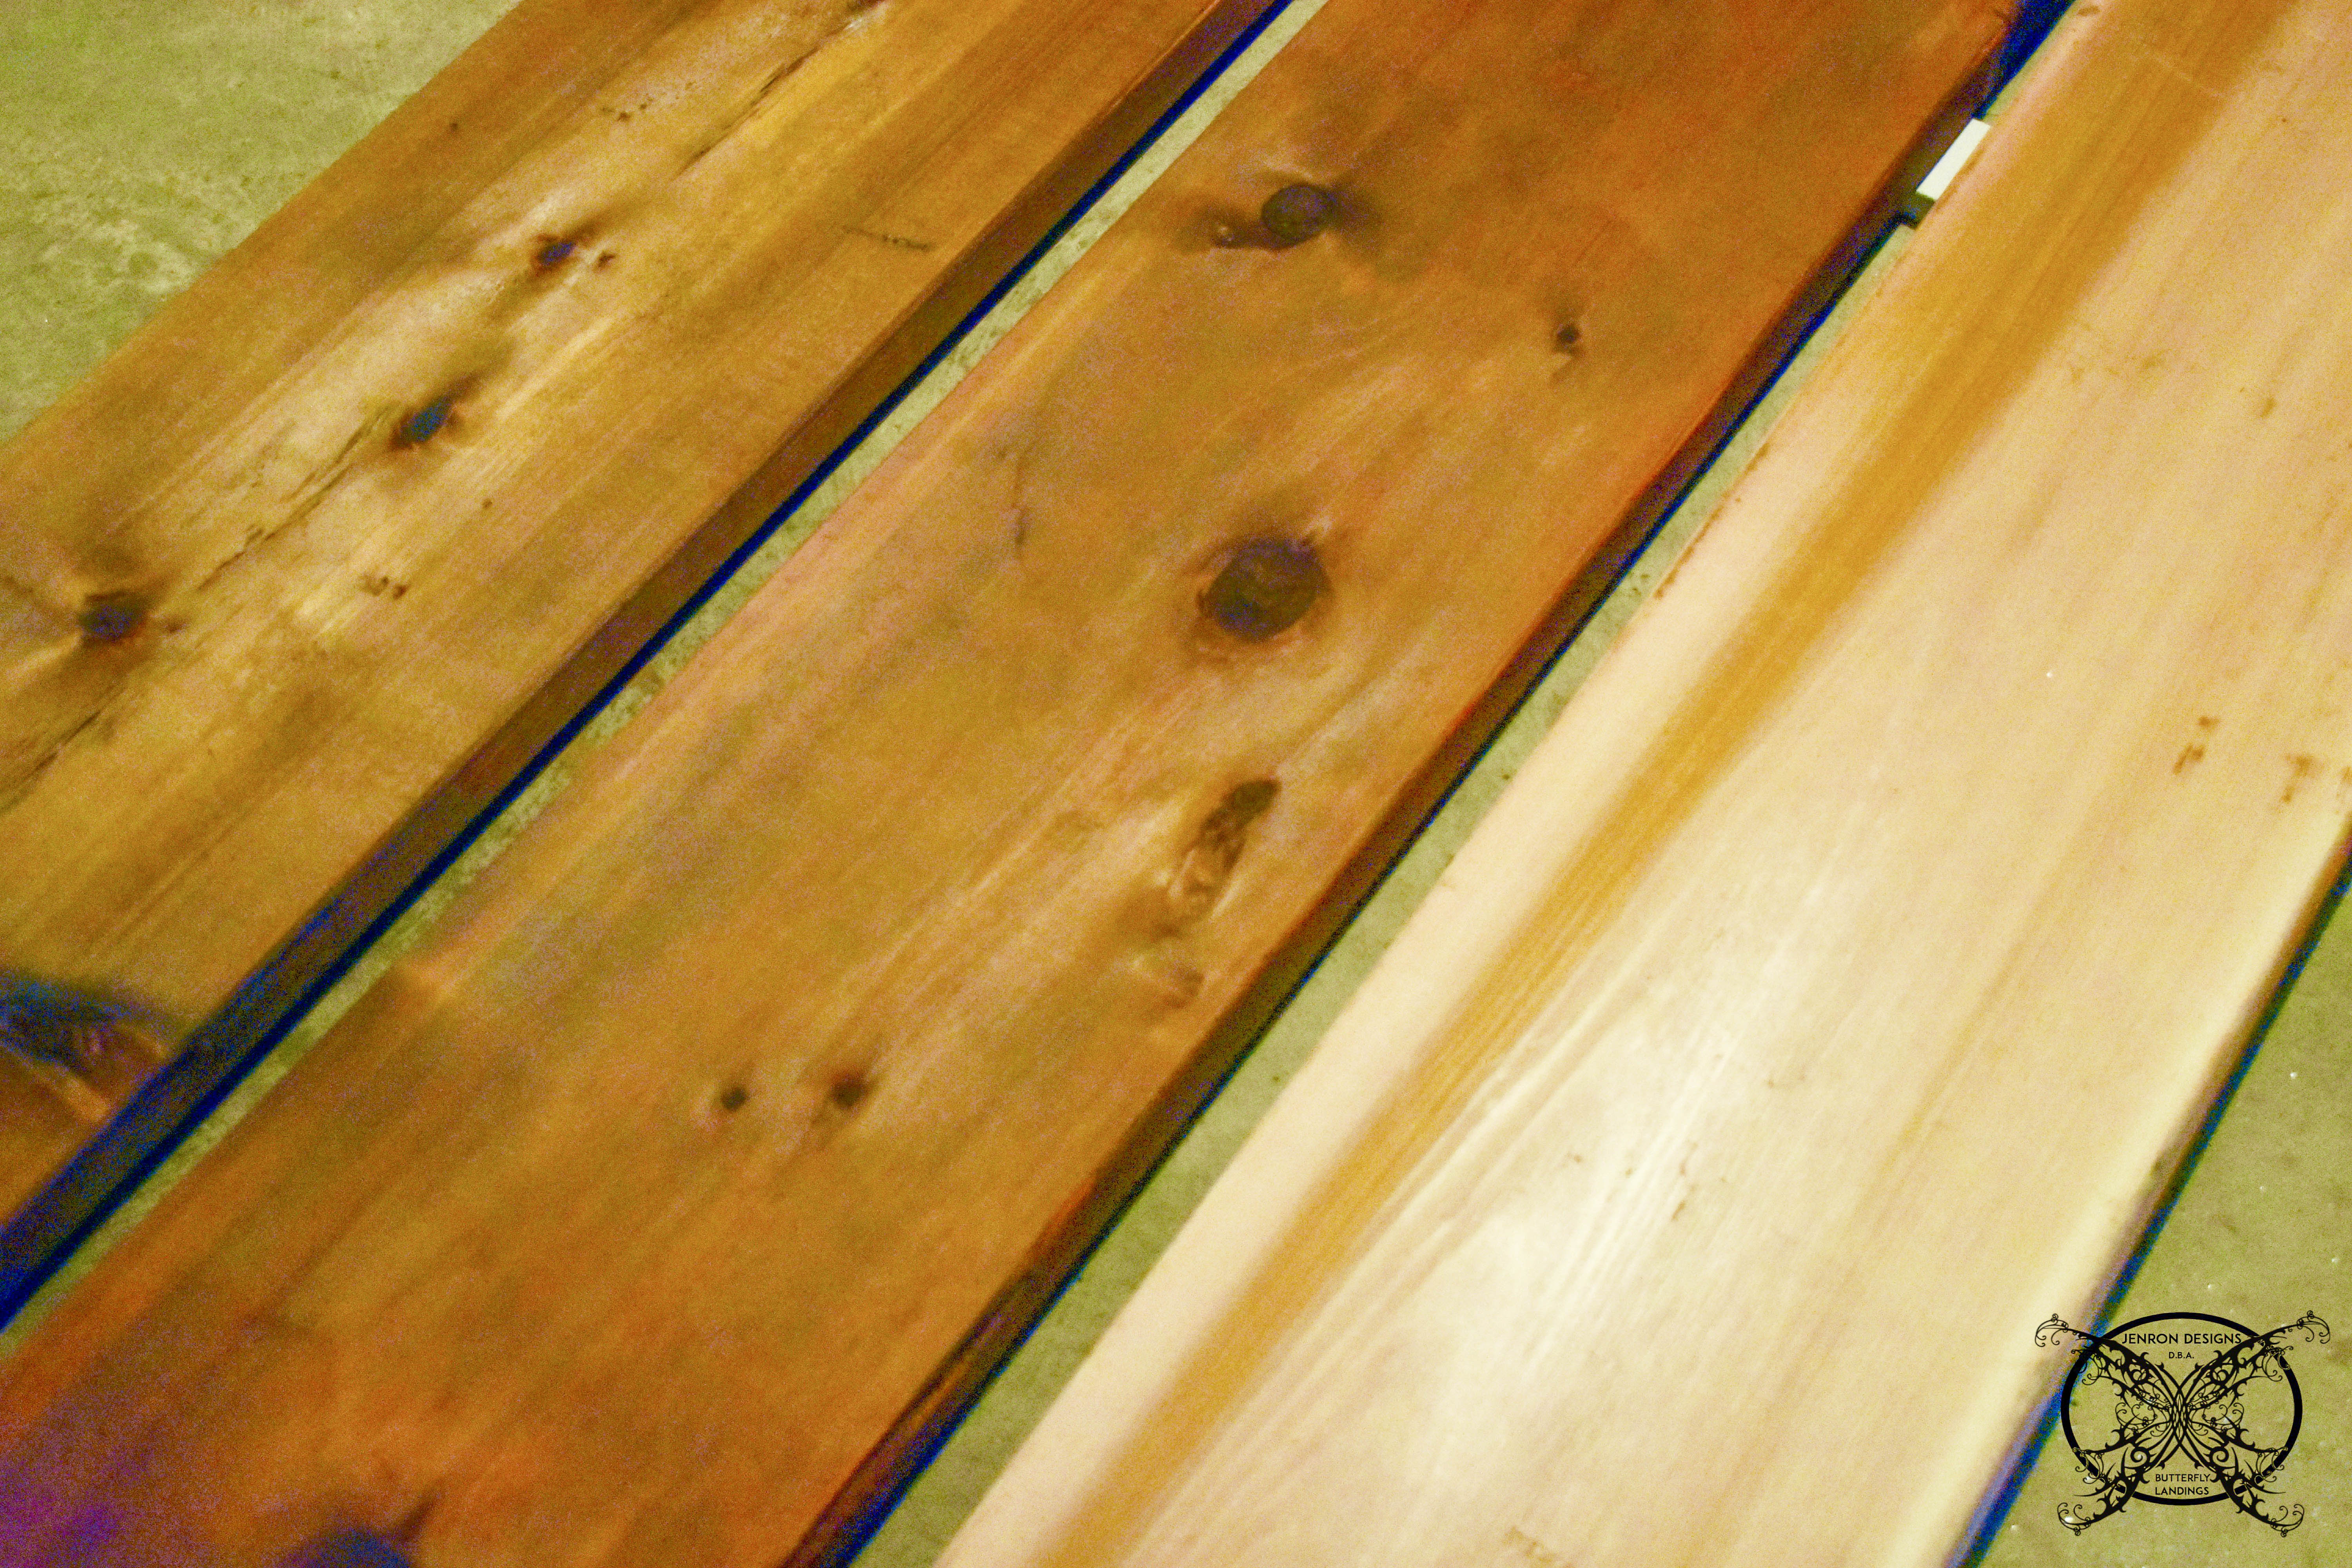 I just want to give a quick shout out to Thomas Supply, which is where we purchased these nominal 2″ x 12″ thick cedar boards (the actual dimensions are 1 3/4″ x 11 3/4″). This is a fantastic old timey lumber yard and we are very lucky they are just up the road us.
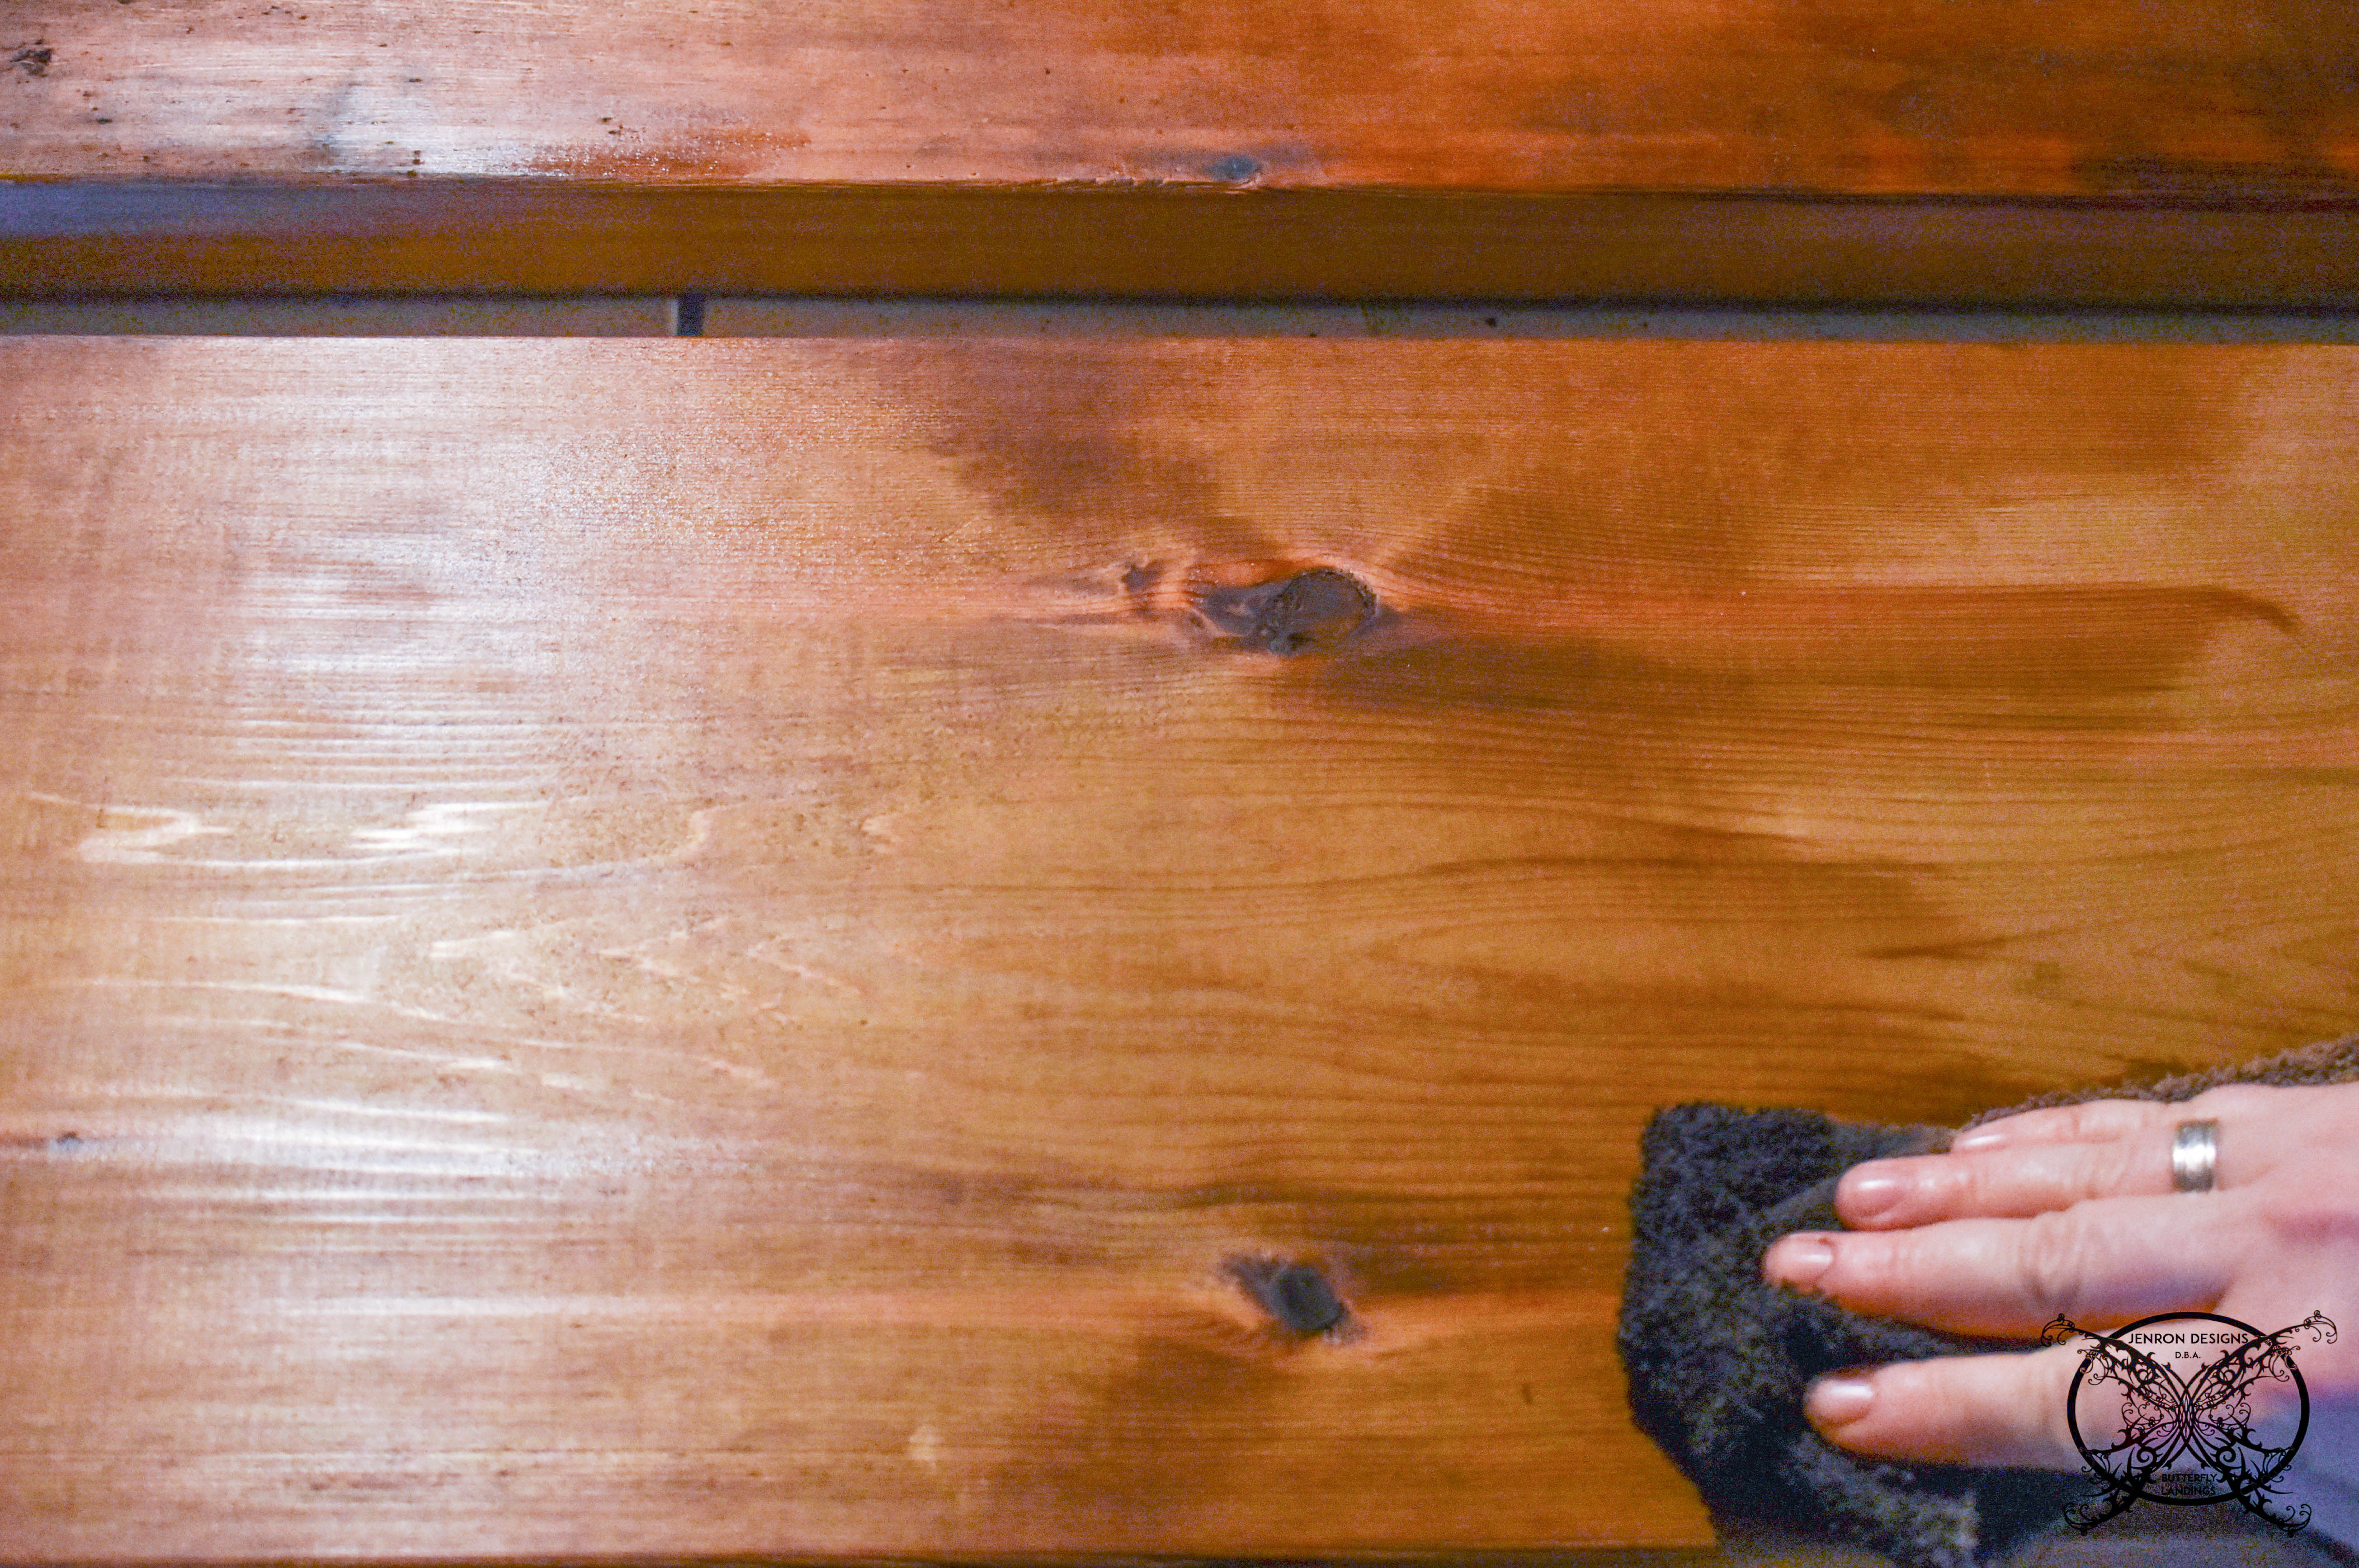 They have been in business for over 90 years and carry quite a few types of rustic and beautiful varieties of wood for all your farmhouse applications. Thank you guys, y’all had exactly what I wanted and needed for this project.
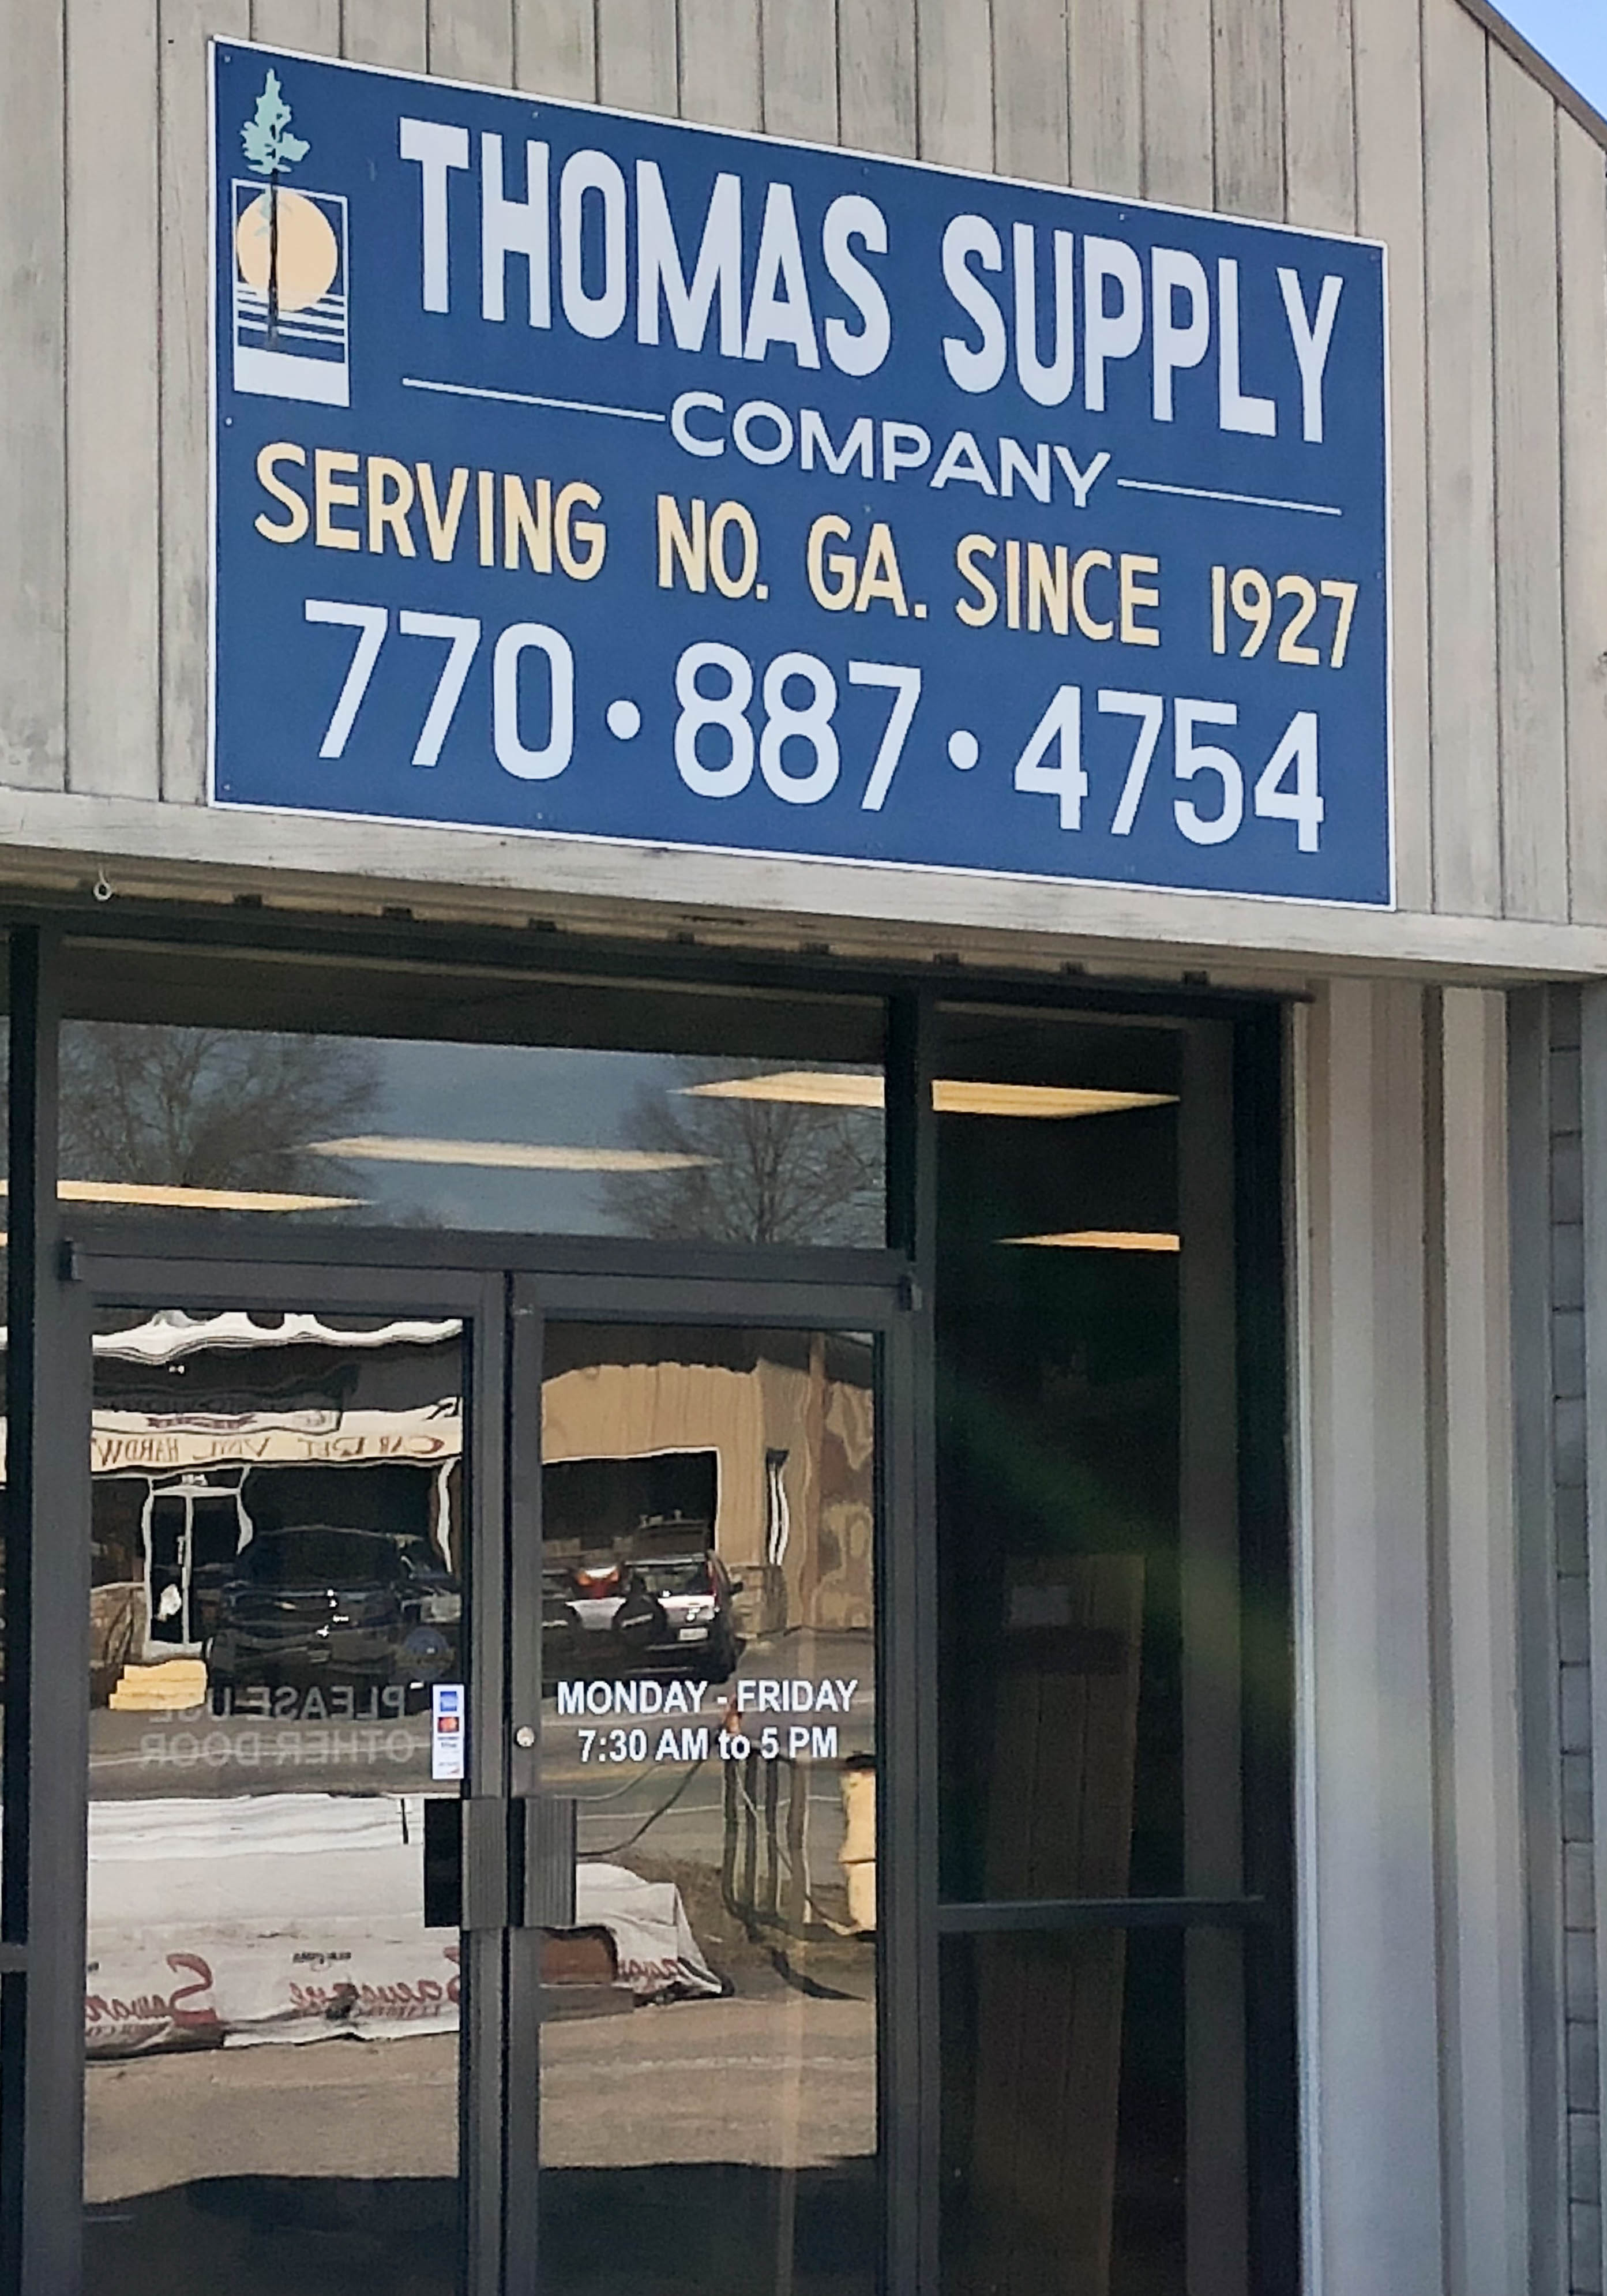 My next project was to spray paint the once white wire can racks and the Lazy Susan’s matte black. Since we custom ordered hand made iron bracket’s from Mountain Metals (these are currently not available anymore) in black for the shelves. I wanted to make sure these items matched the hardware and save a little money by not ordering new ones. I used a Primer Plus Paint Spray Paint that would bond to the plastic coating. Remember these, you will see them again at the reveal below.
Level Up:
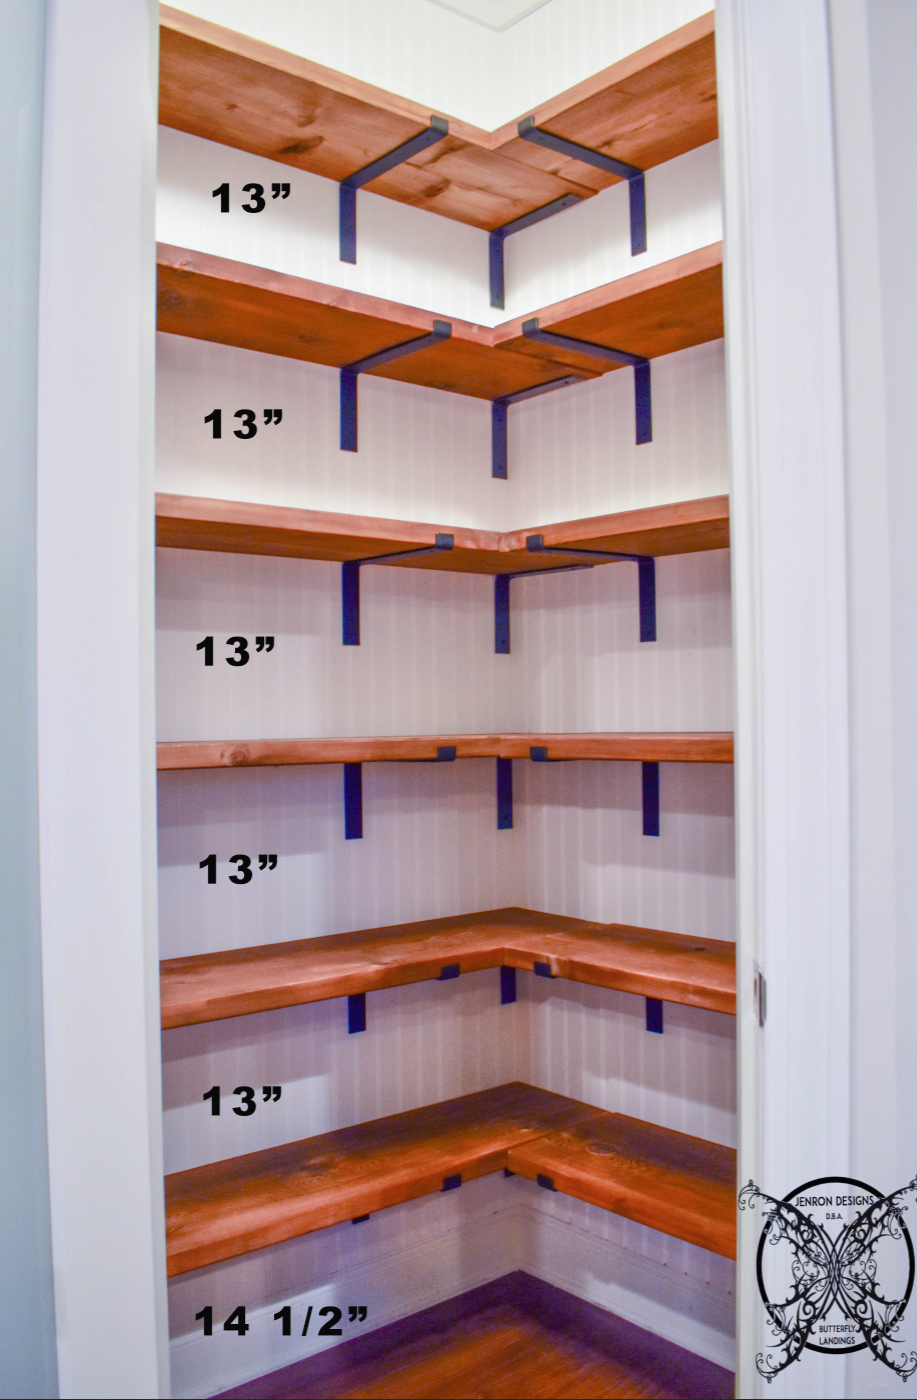
The next section of the DIY required prior proper planning, it was the shelf layout and spacing. As I had mentioned earlier. I wanted to add an extra shelf to the top, so the wasted space could be utilized. I also wanted to increase the spacing for the bottom shelf to house a few of the larger baskets and two liter bottle drinks.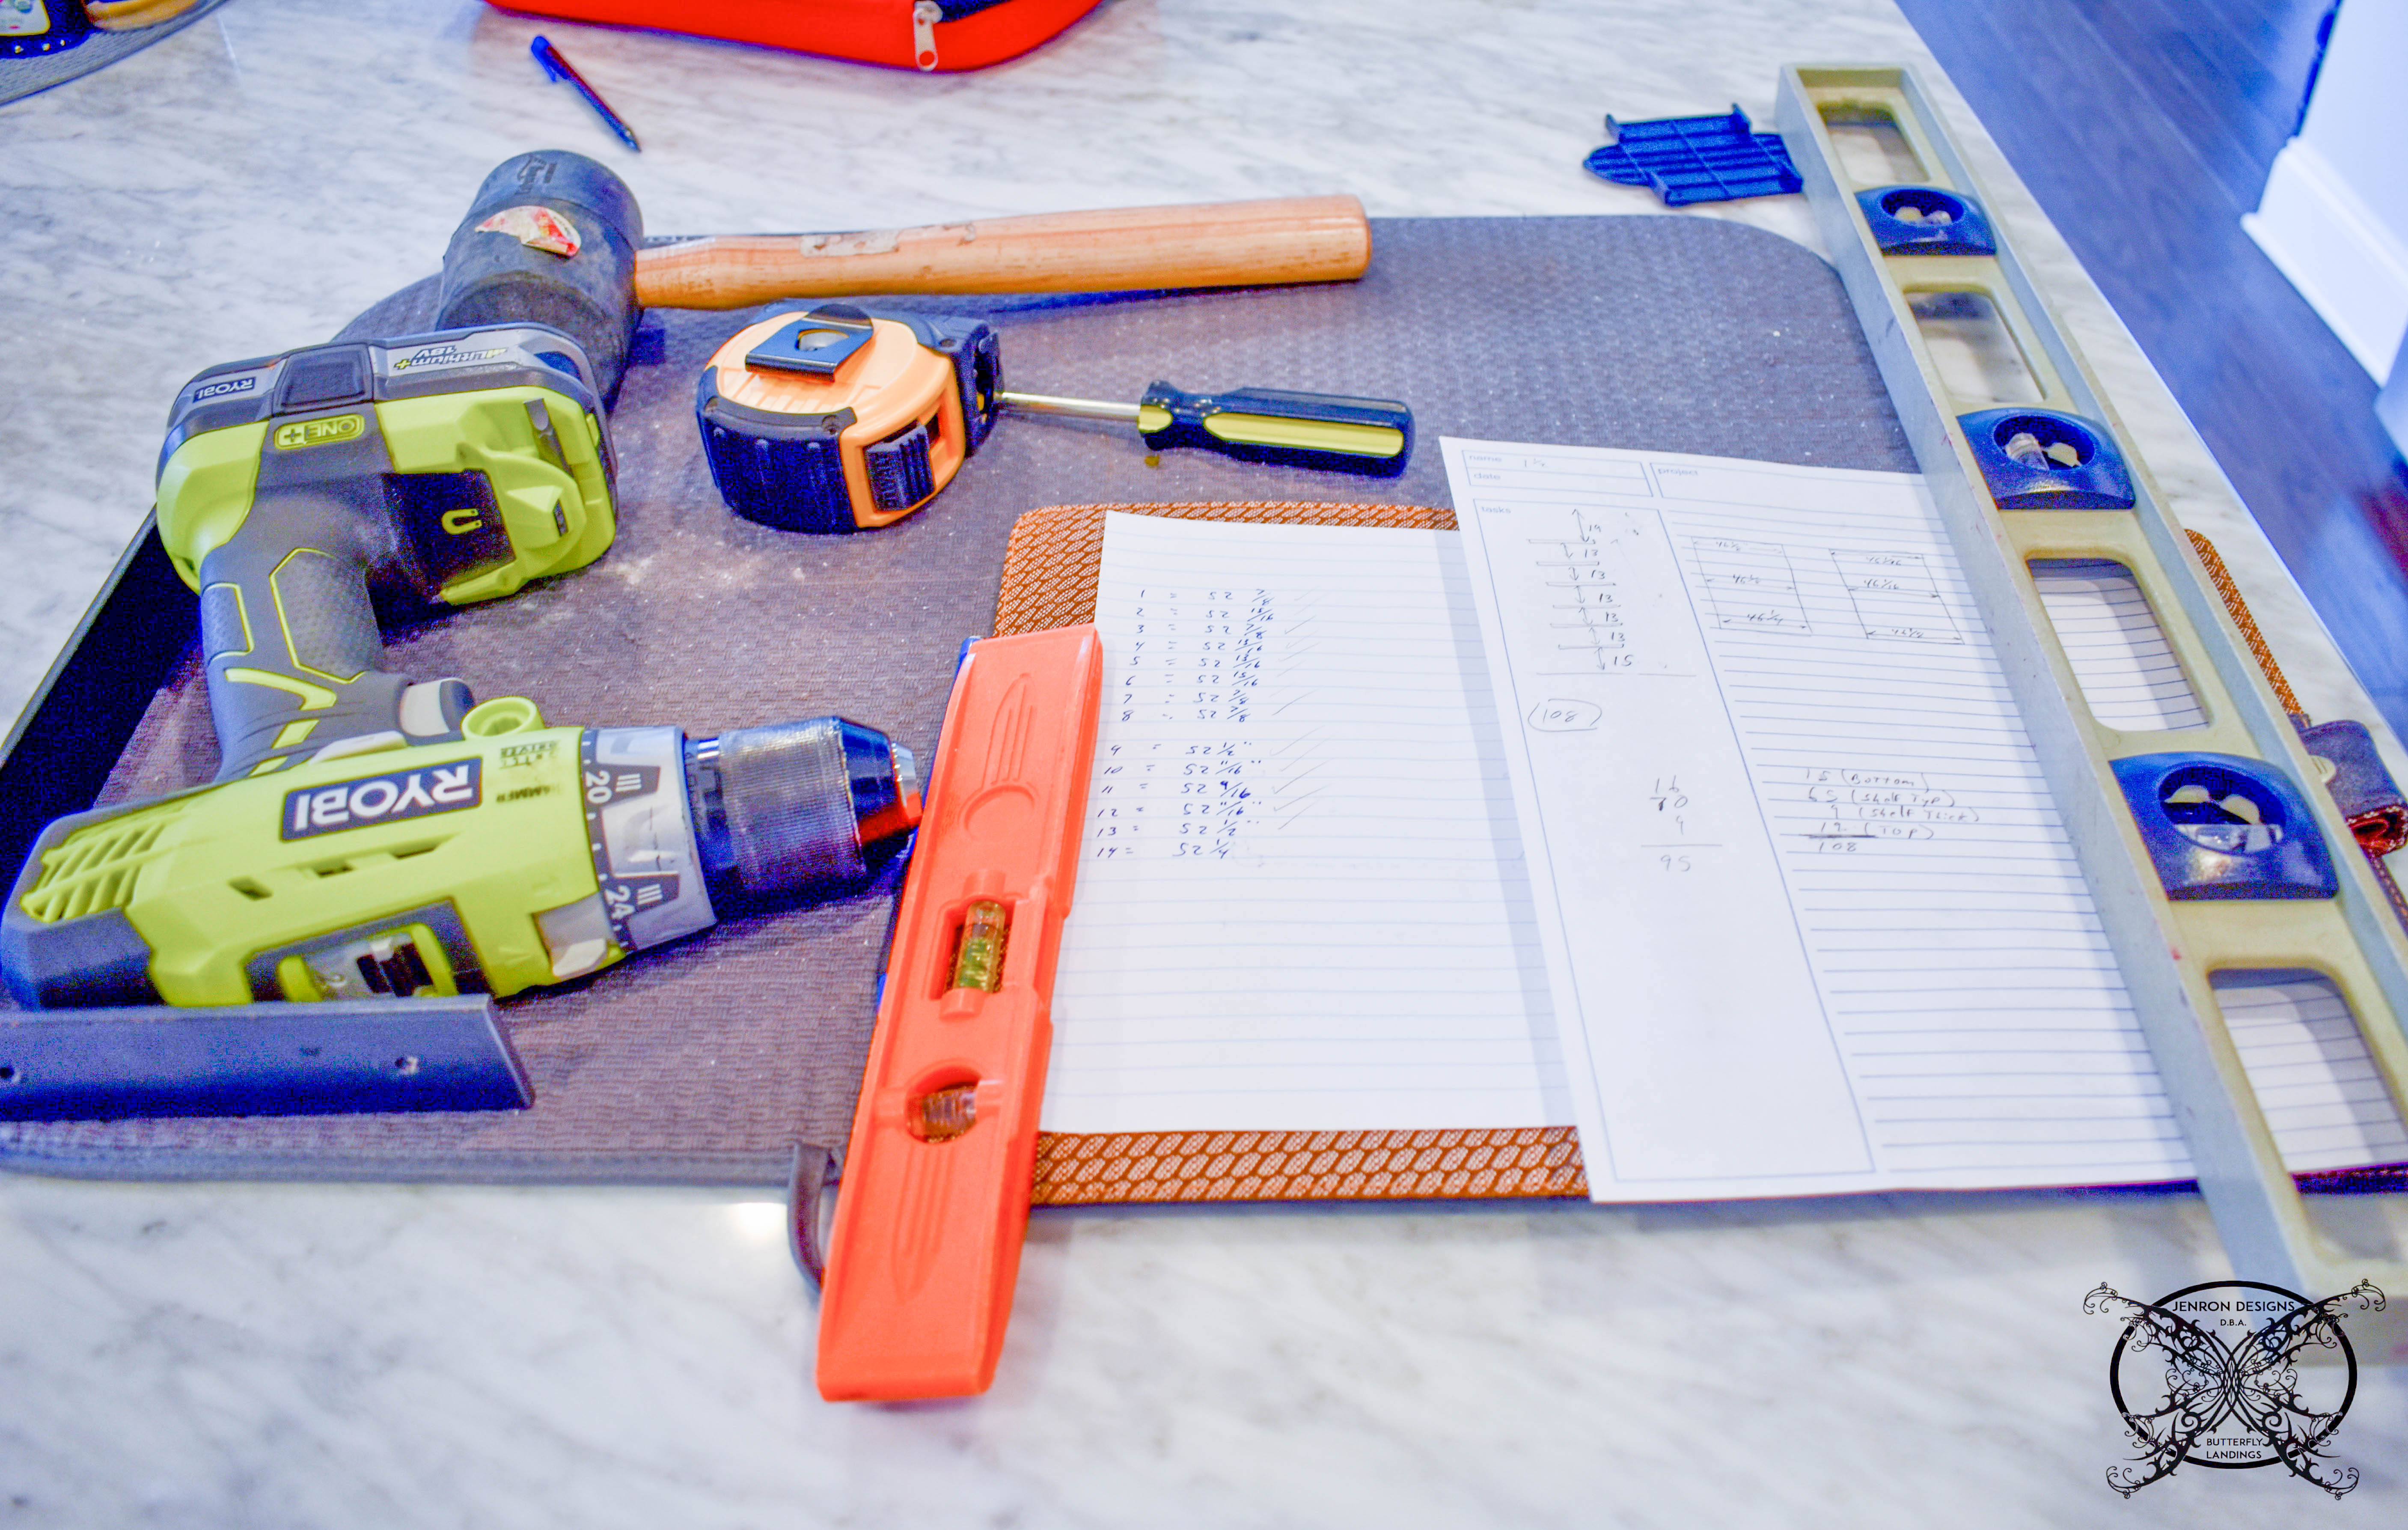 I know a lot of people that custom place shelves based on the items to go on the shelves. Which is great for using all your space, but I wanted a visual standard and balance when I looked inside. So, that meant evenly spaced shelves. At 14″ each plus the 1 1/2″ thickness of the boards.
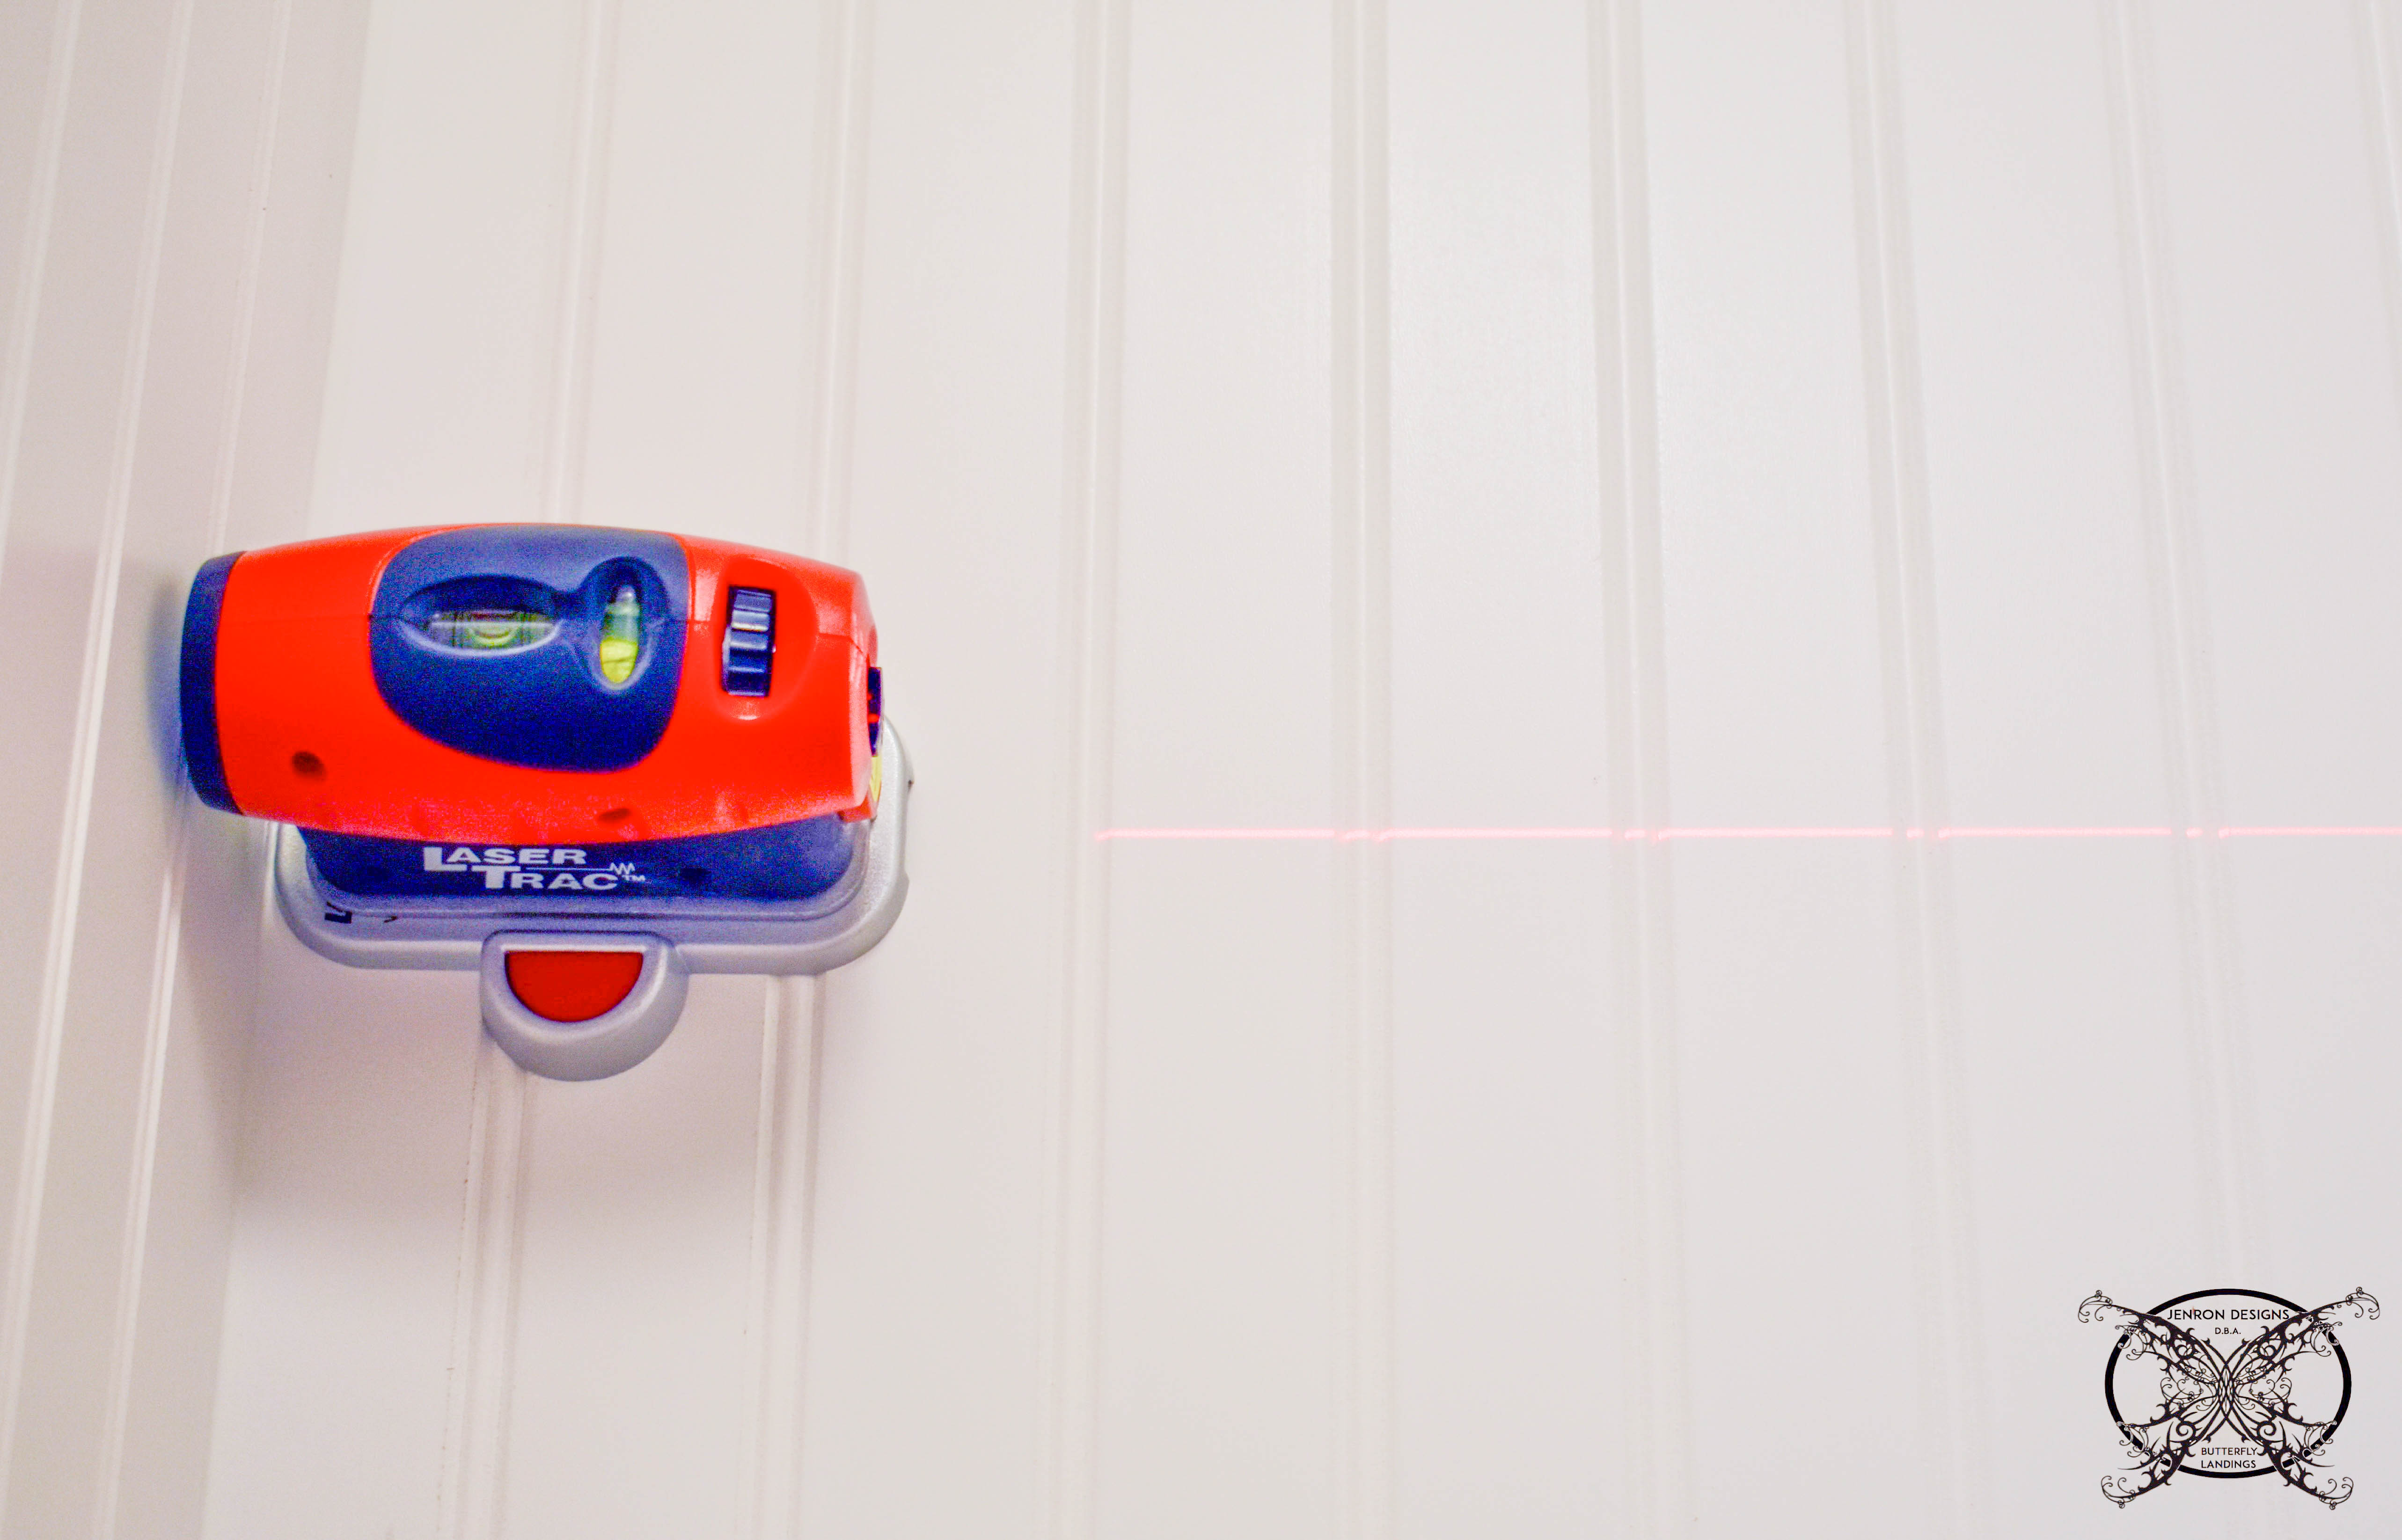 Ron used a laser level to insure that the shelves would be level around the room. This is such a useful tools to have for these kind of projects and makes hanging level art work a breeze. He marked and pre drilled all the holes to make the bracket installation super easy.
 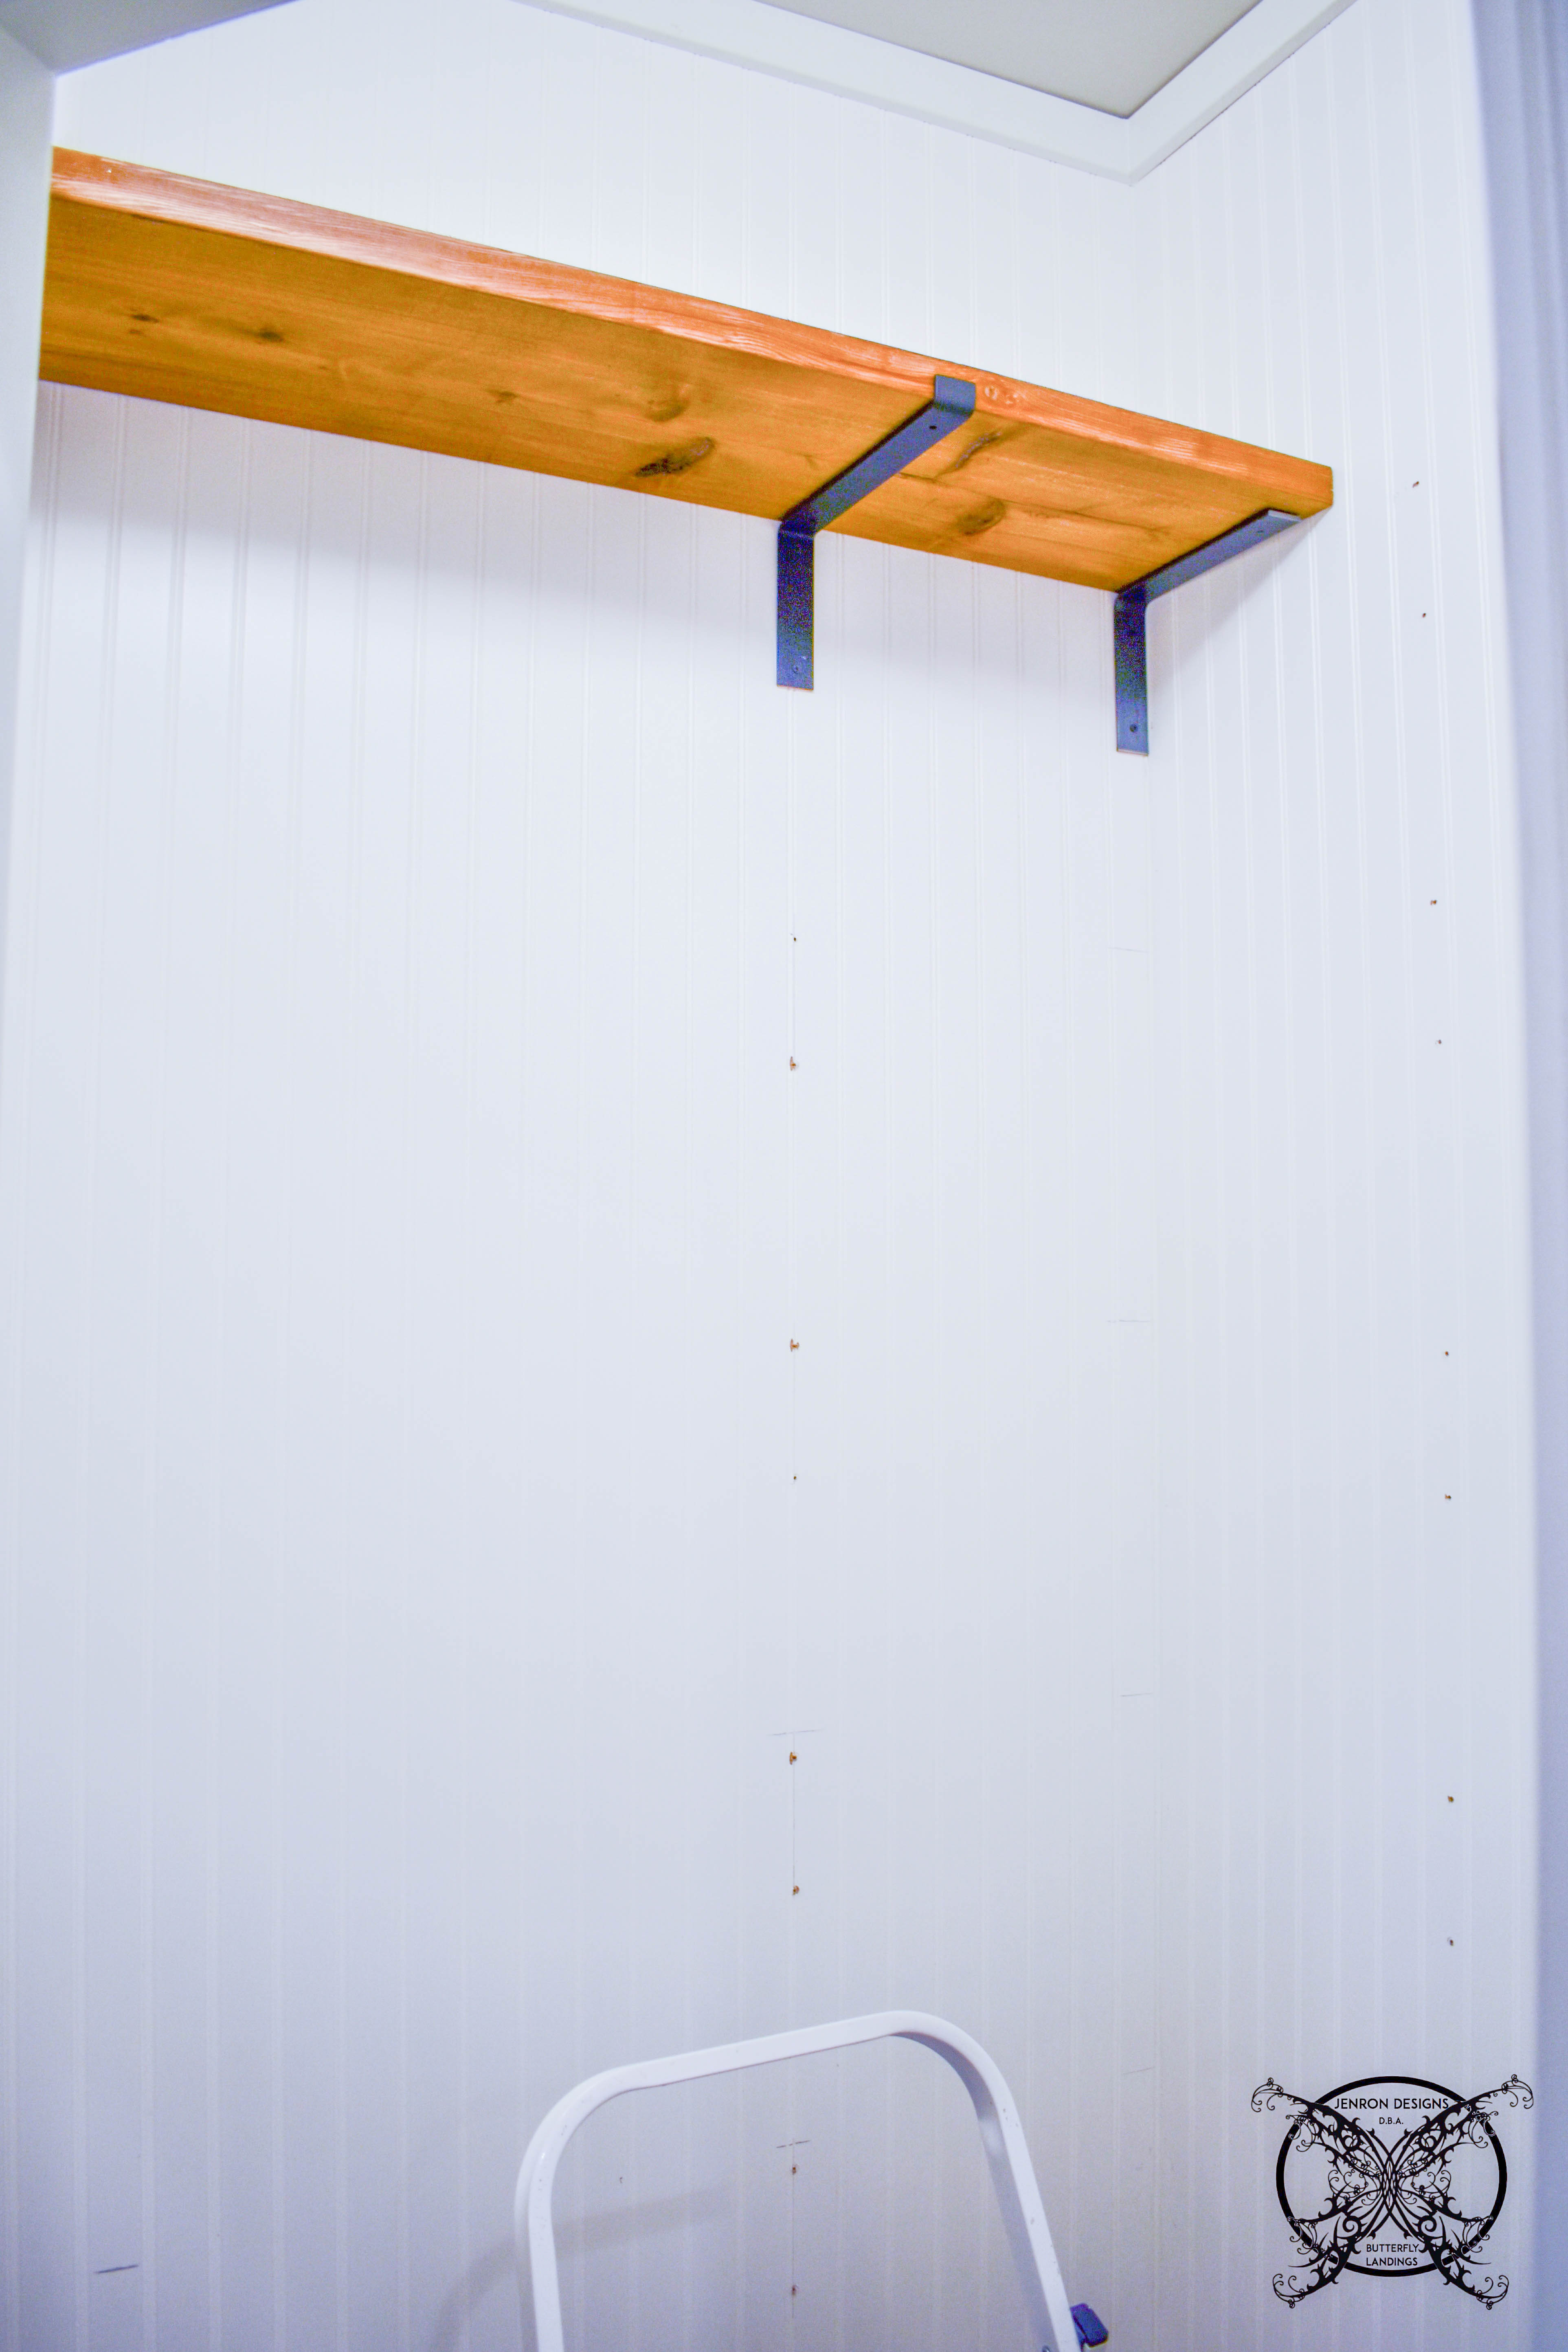 He proceeded to mount the first set of shelves. Starting from the top allowed easy installation of the brackets as he worked his way down the wall. This way he was able to work under each shelf with ease and not worry about the drill fitting in the space between the shelves.
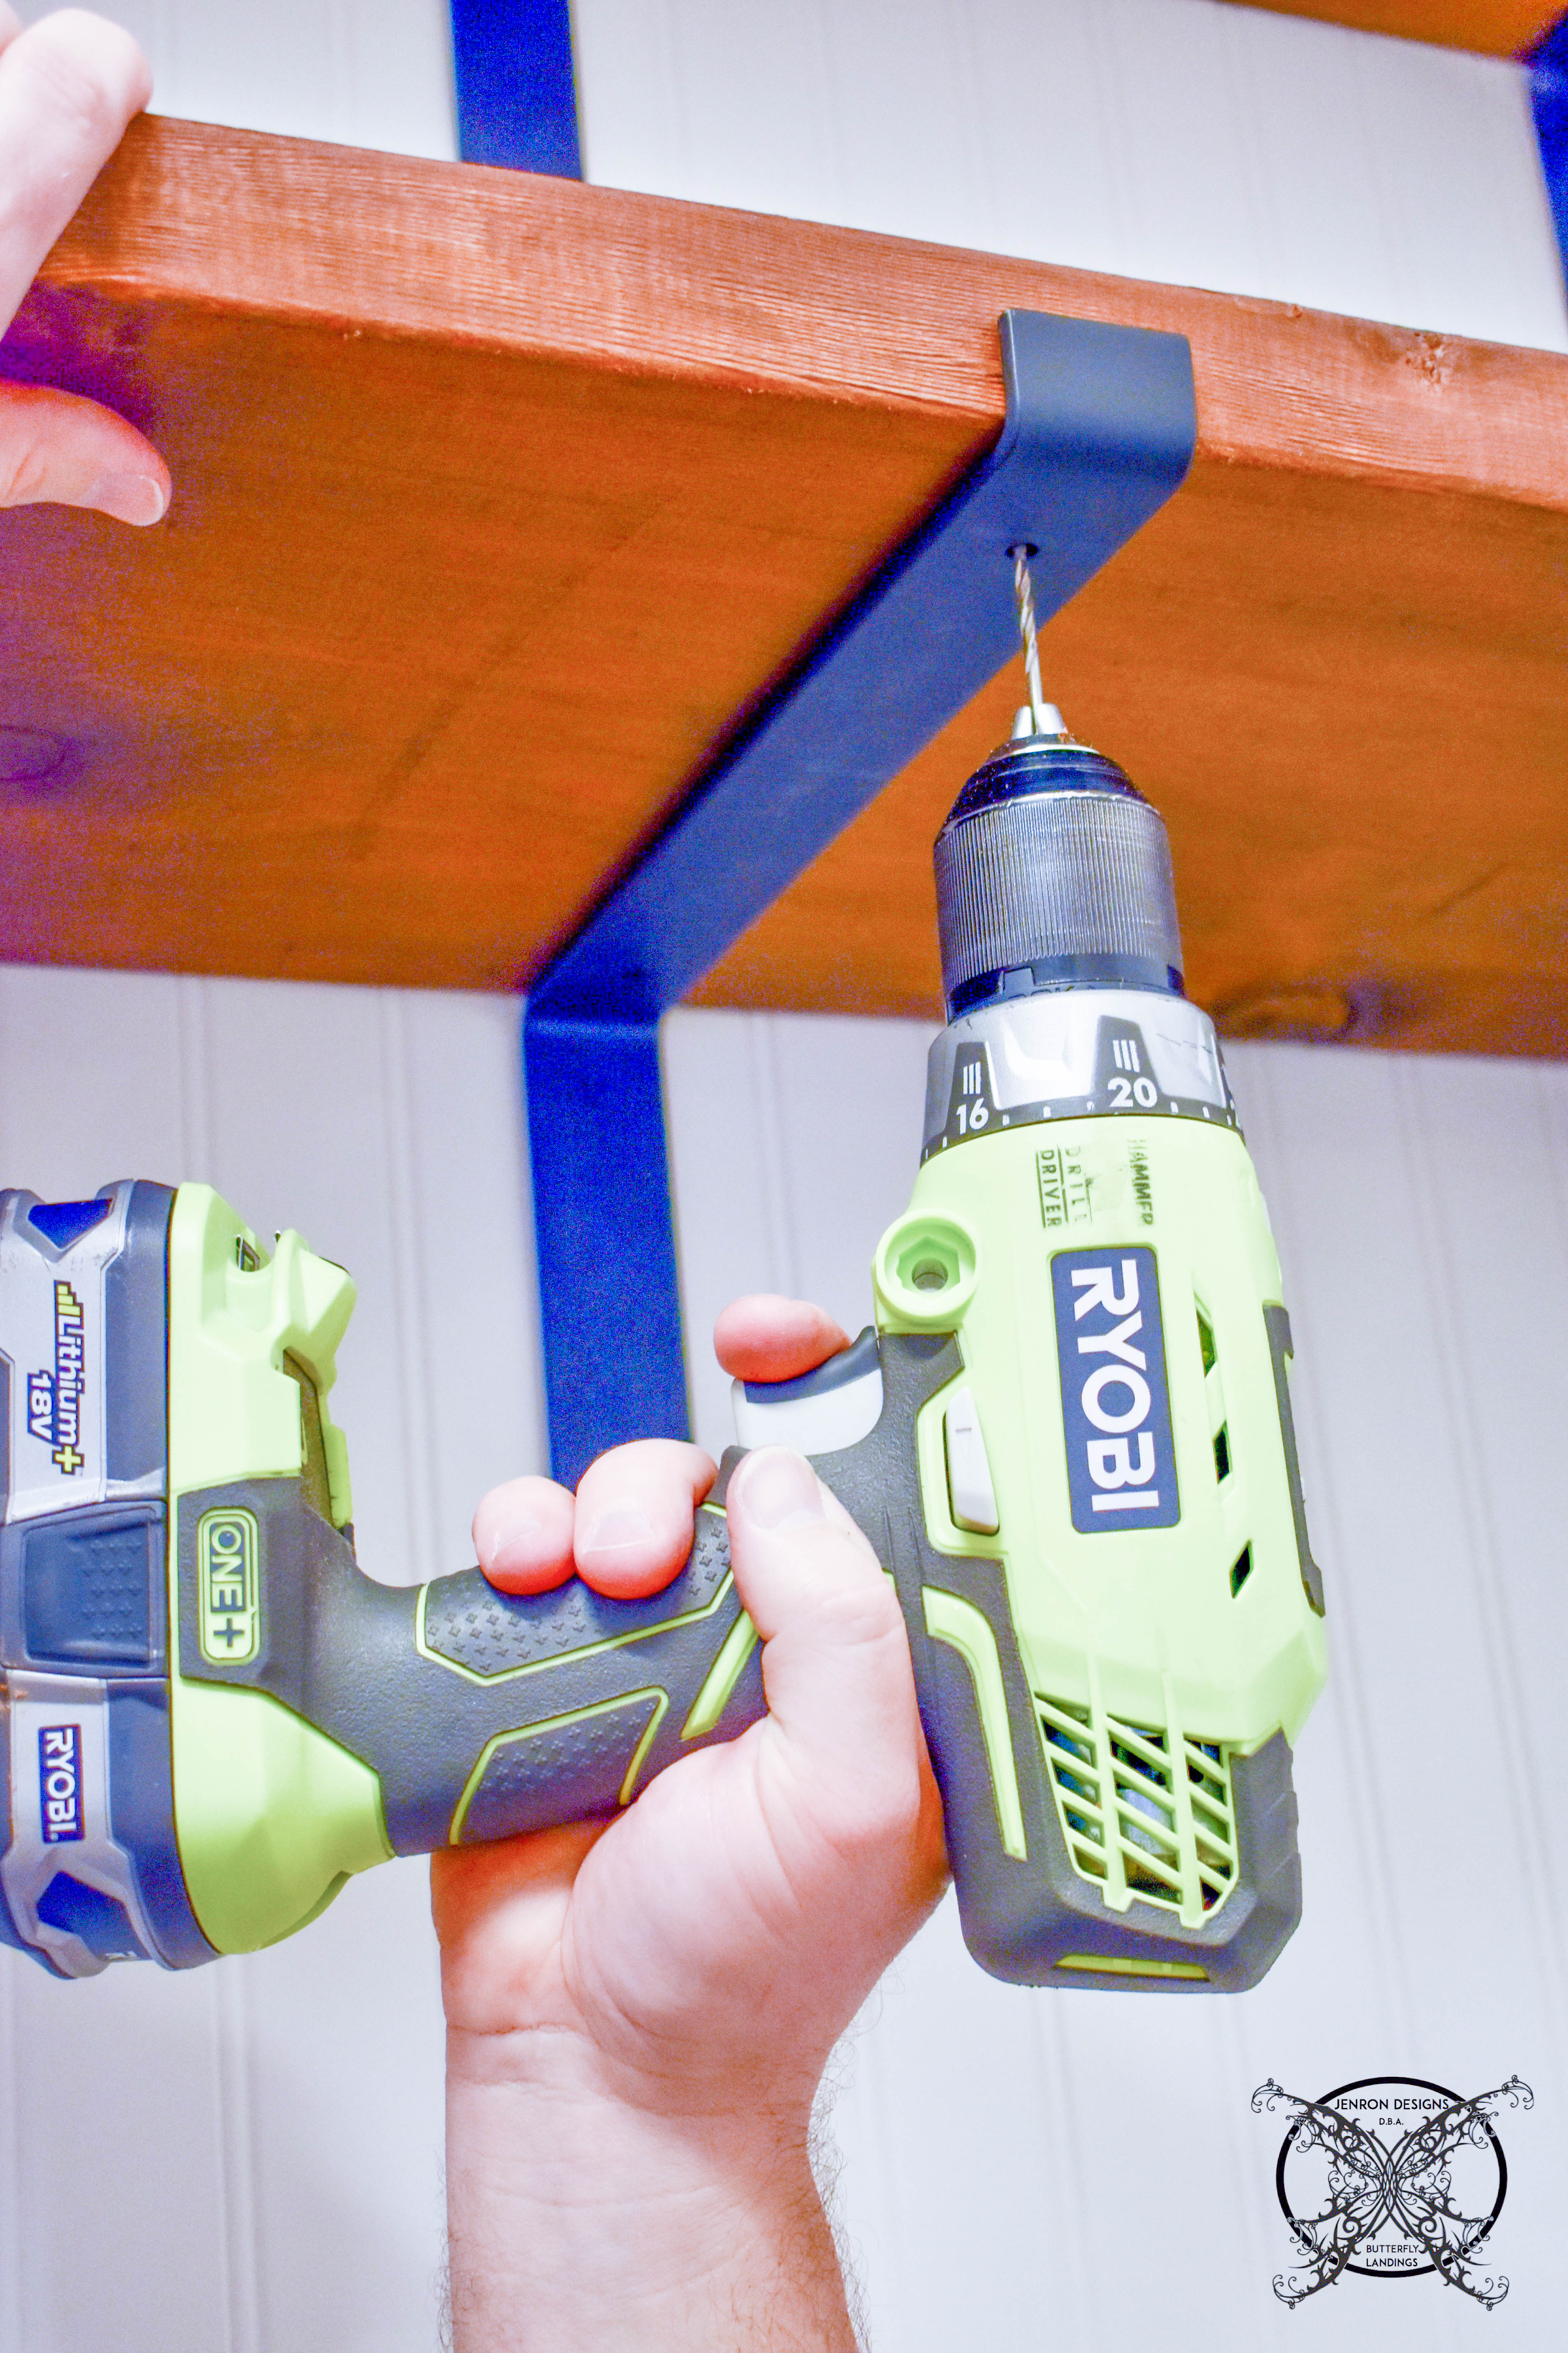 As I mentioned above, we got these beautiful hand made brackets from Mountain Metals, which are sadly not available in this style anymore. They use raw steel material bought locally in the Blue Ridge Mountains. The steel is cut to the desired length which includes the length required for the mounting holes and the all the proper bends. Then drills the holes and uses a sanding wheel to remove any burrs, then bend them to the final shape and paint.
Here are some other available options in a similar style to my pantry brackets:
WEKIS 12 Inch Heavy Duty Floating Shelf Bracket
9 .25 Inch Wall Brackets w/lip 8PCS
6 Pack Black, 11.25 Inch Heavy Duty Floating Shelf Bracket
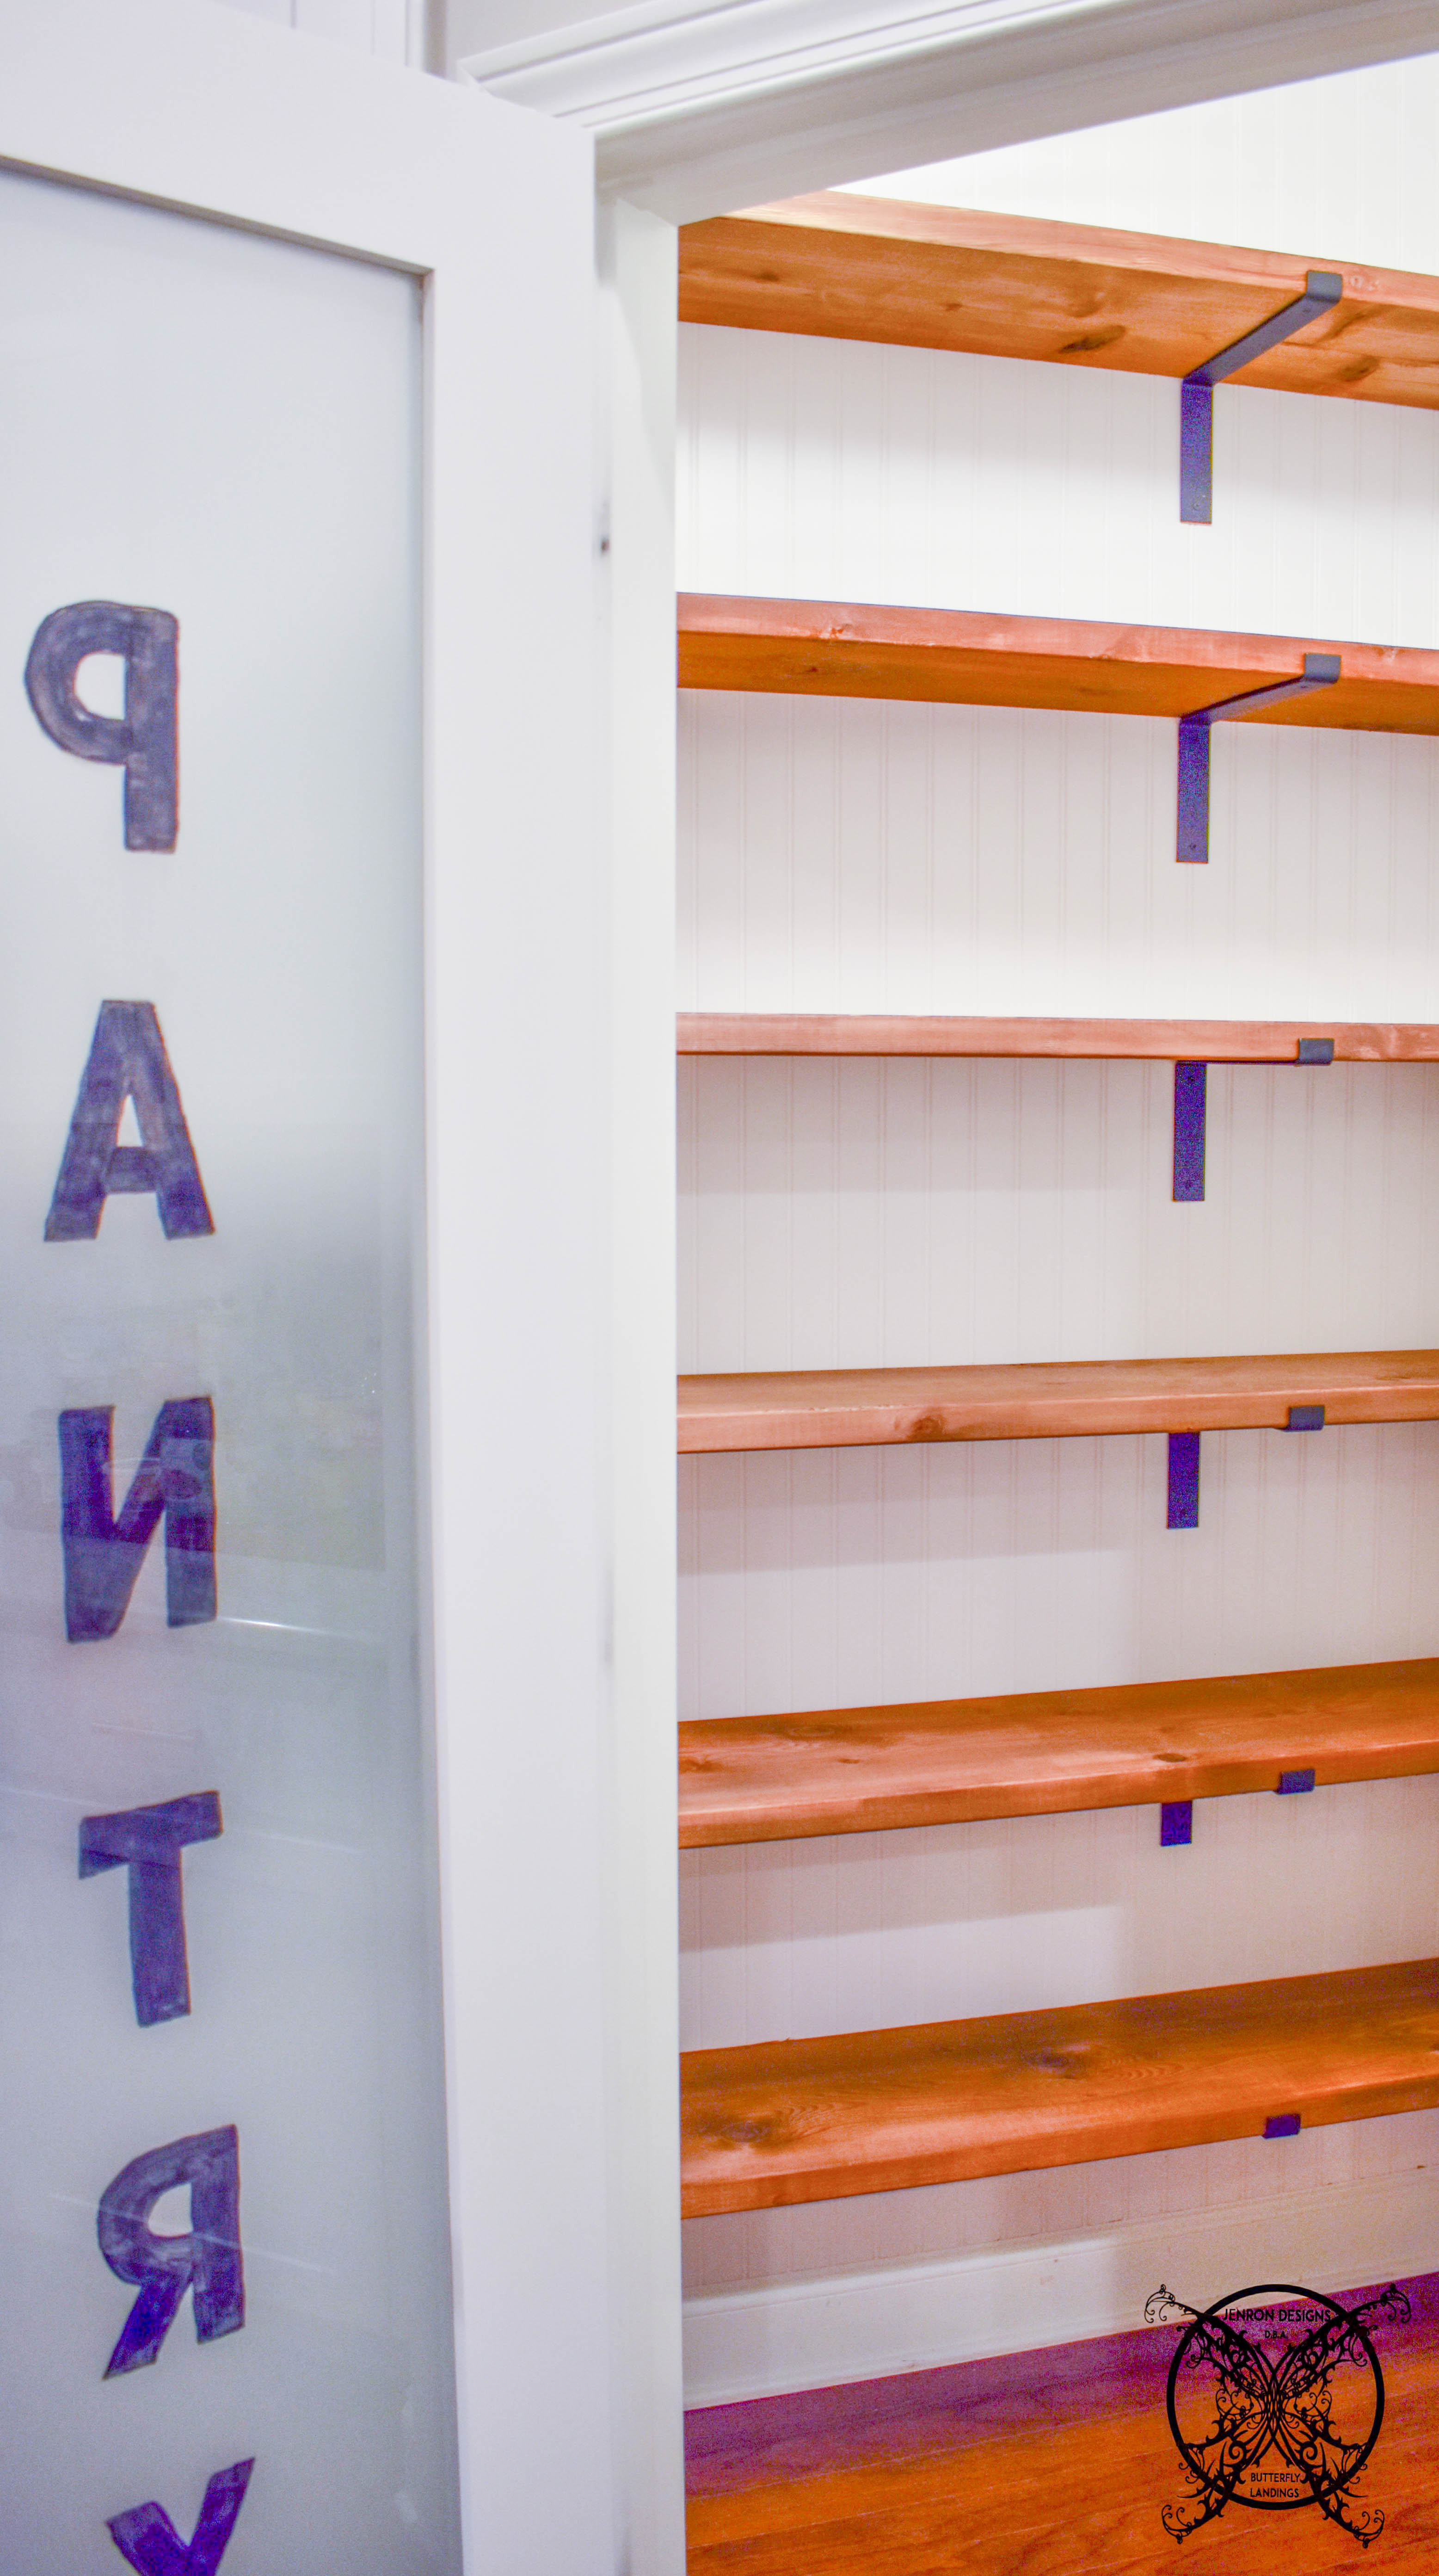
 Here is the final look with all the shelves installed. We were even able to add an additional shelf at the top, just as I had hoped for. Now I have six total rows of shelves which adds so much more space to this pantry. I really love how the shelves look on top of the bead board wall. It really invokes the farmhouse feeling I was looking for in this space.
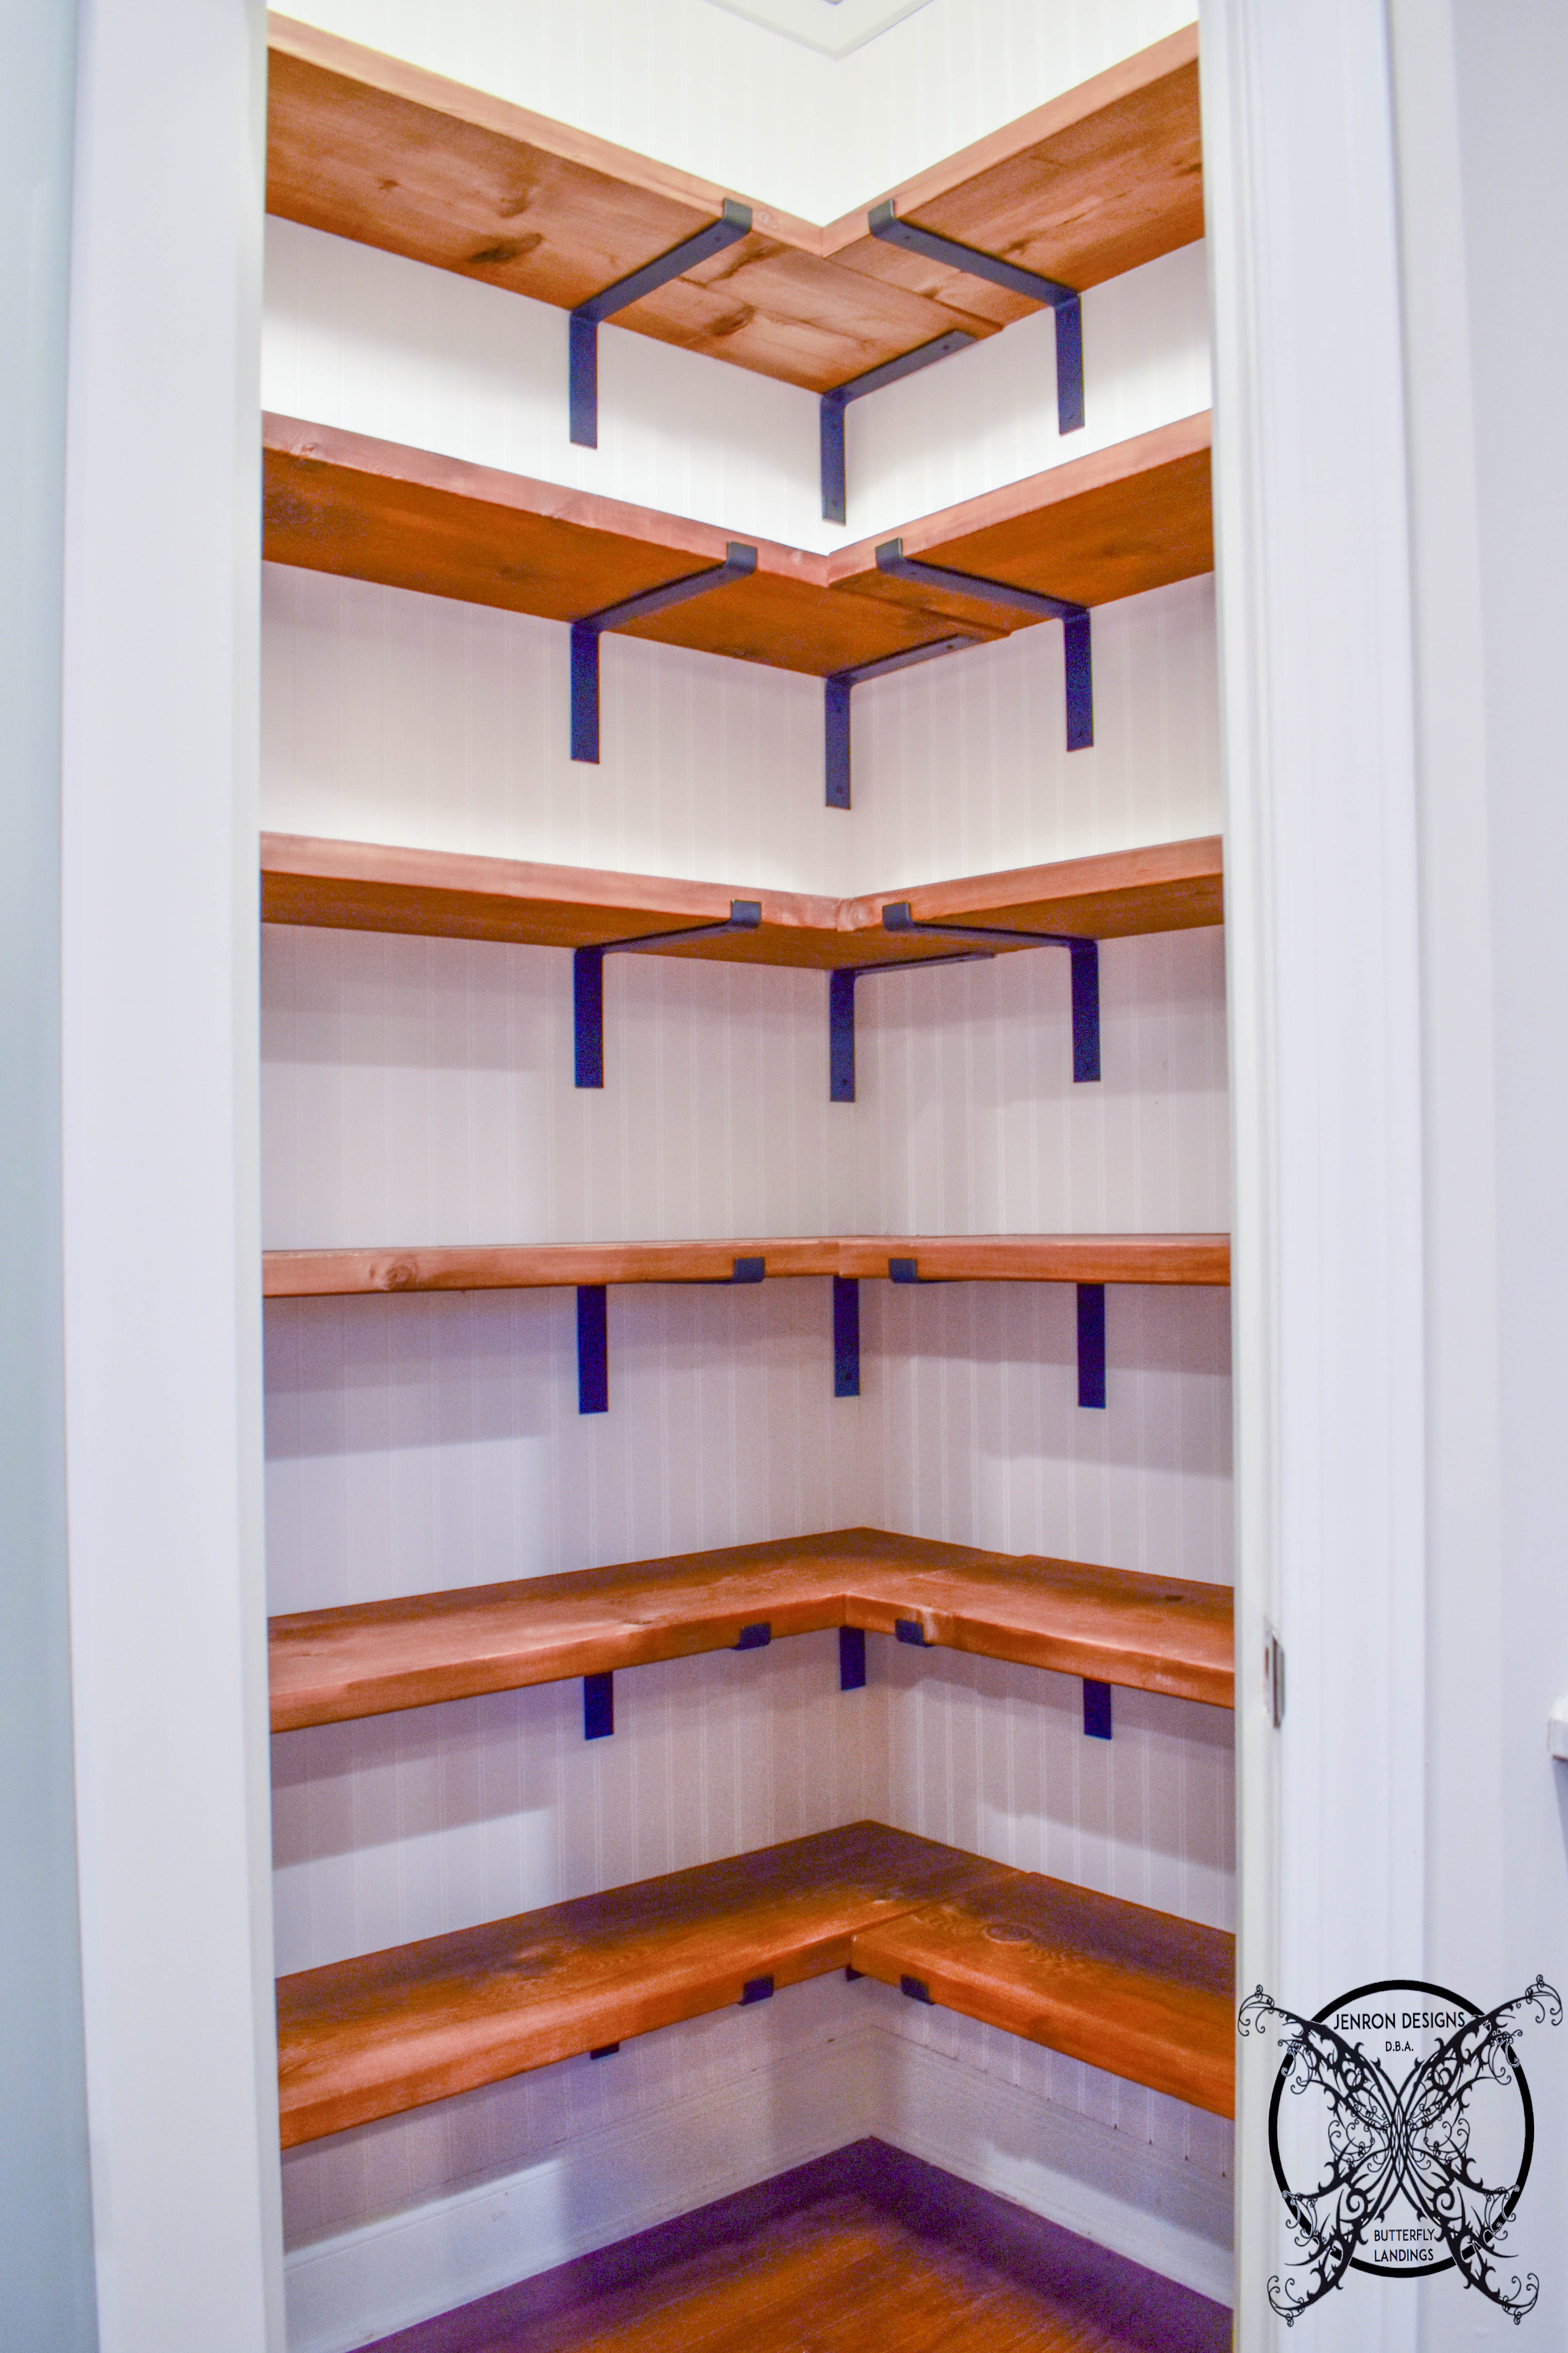
FILLER UP:
The final step in the process is to get my kitchen back! By putting everything back into the pantry. This part might take a little time. Especially if you group like items together for easy use sections, like seen below. A few possible examples are baking supplies, soups starters, and snacks.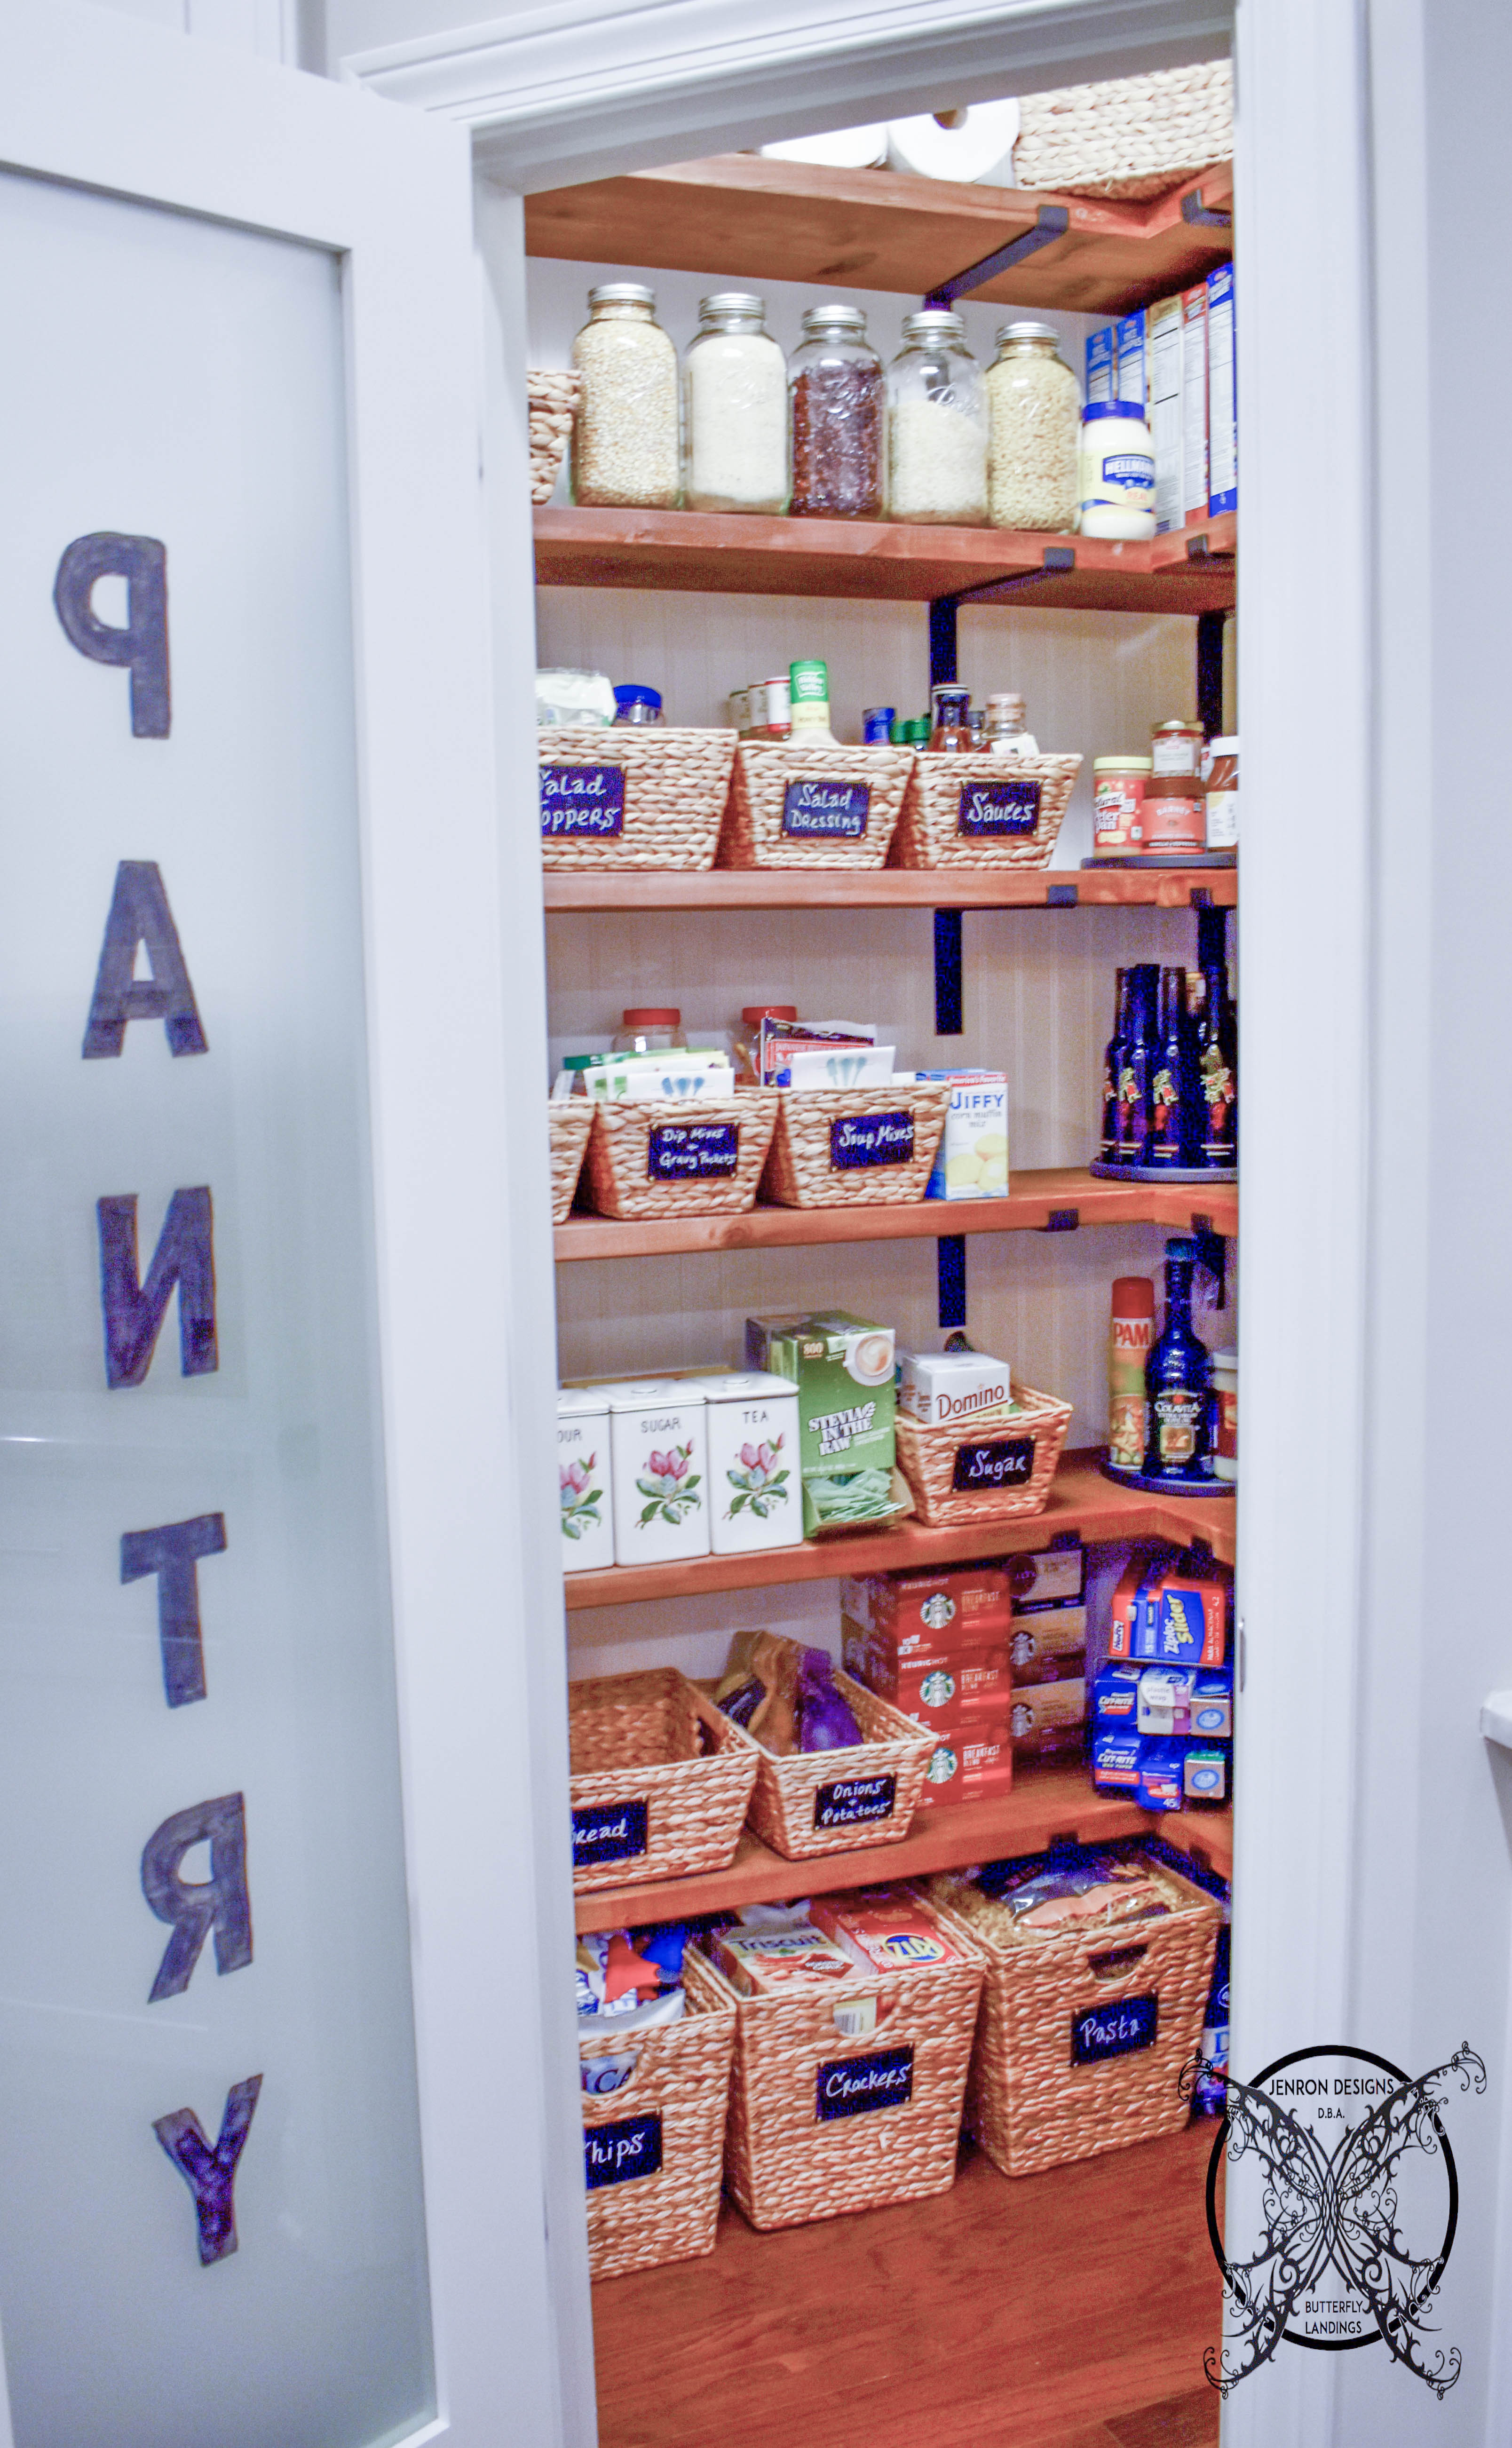 My cereal boxes, dry goods and canned goods usually have longer dates on them.My cereal boxes, dry goods and canned goods usually have longer dates on them.This is the perfect time to make sure everything is in date and the older foods are rotated to the front of the shelves.
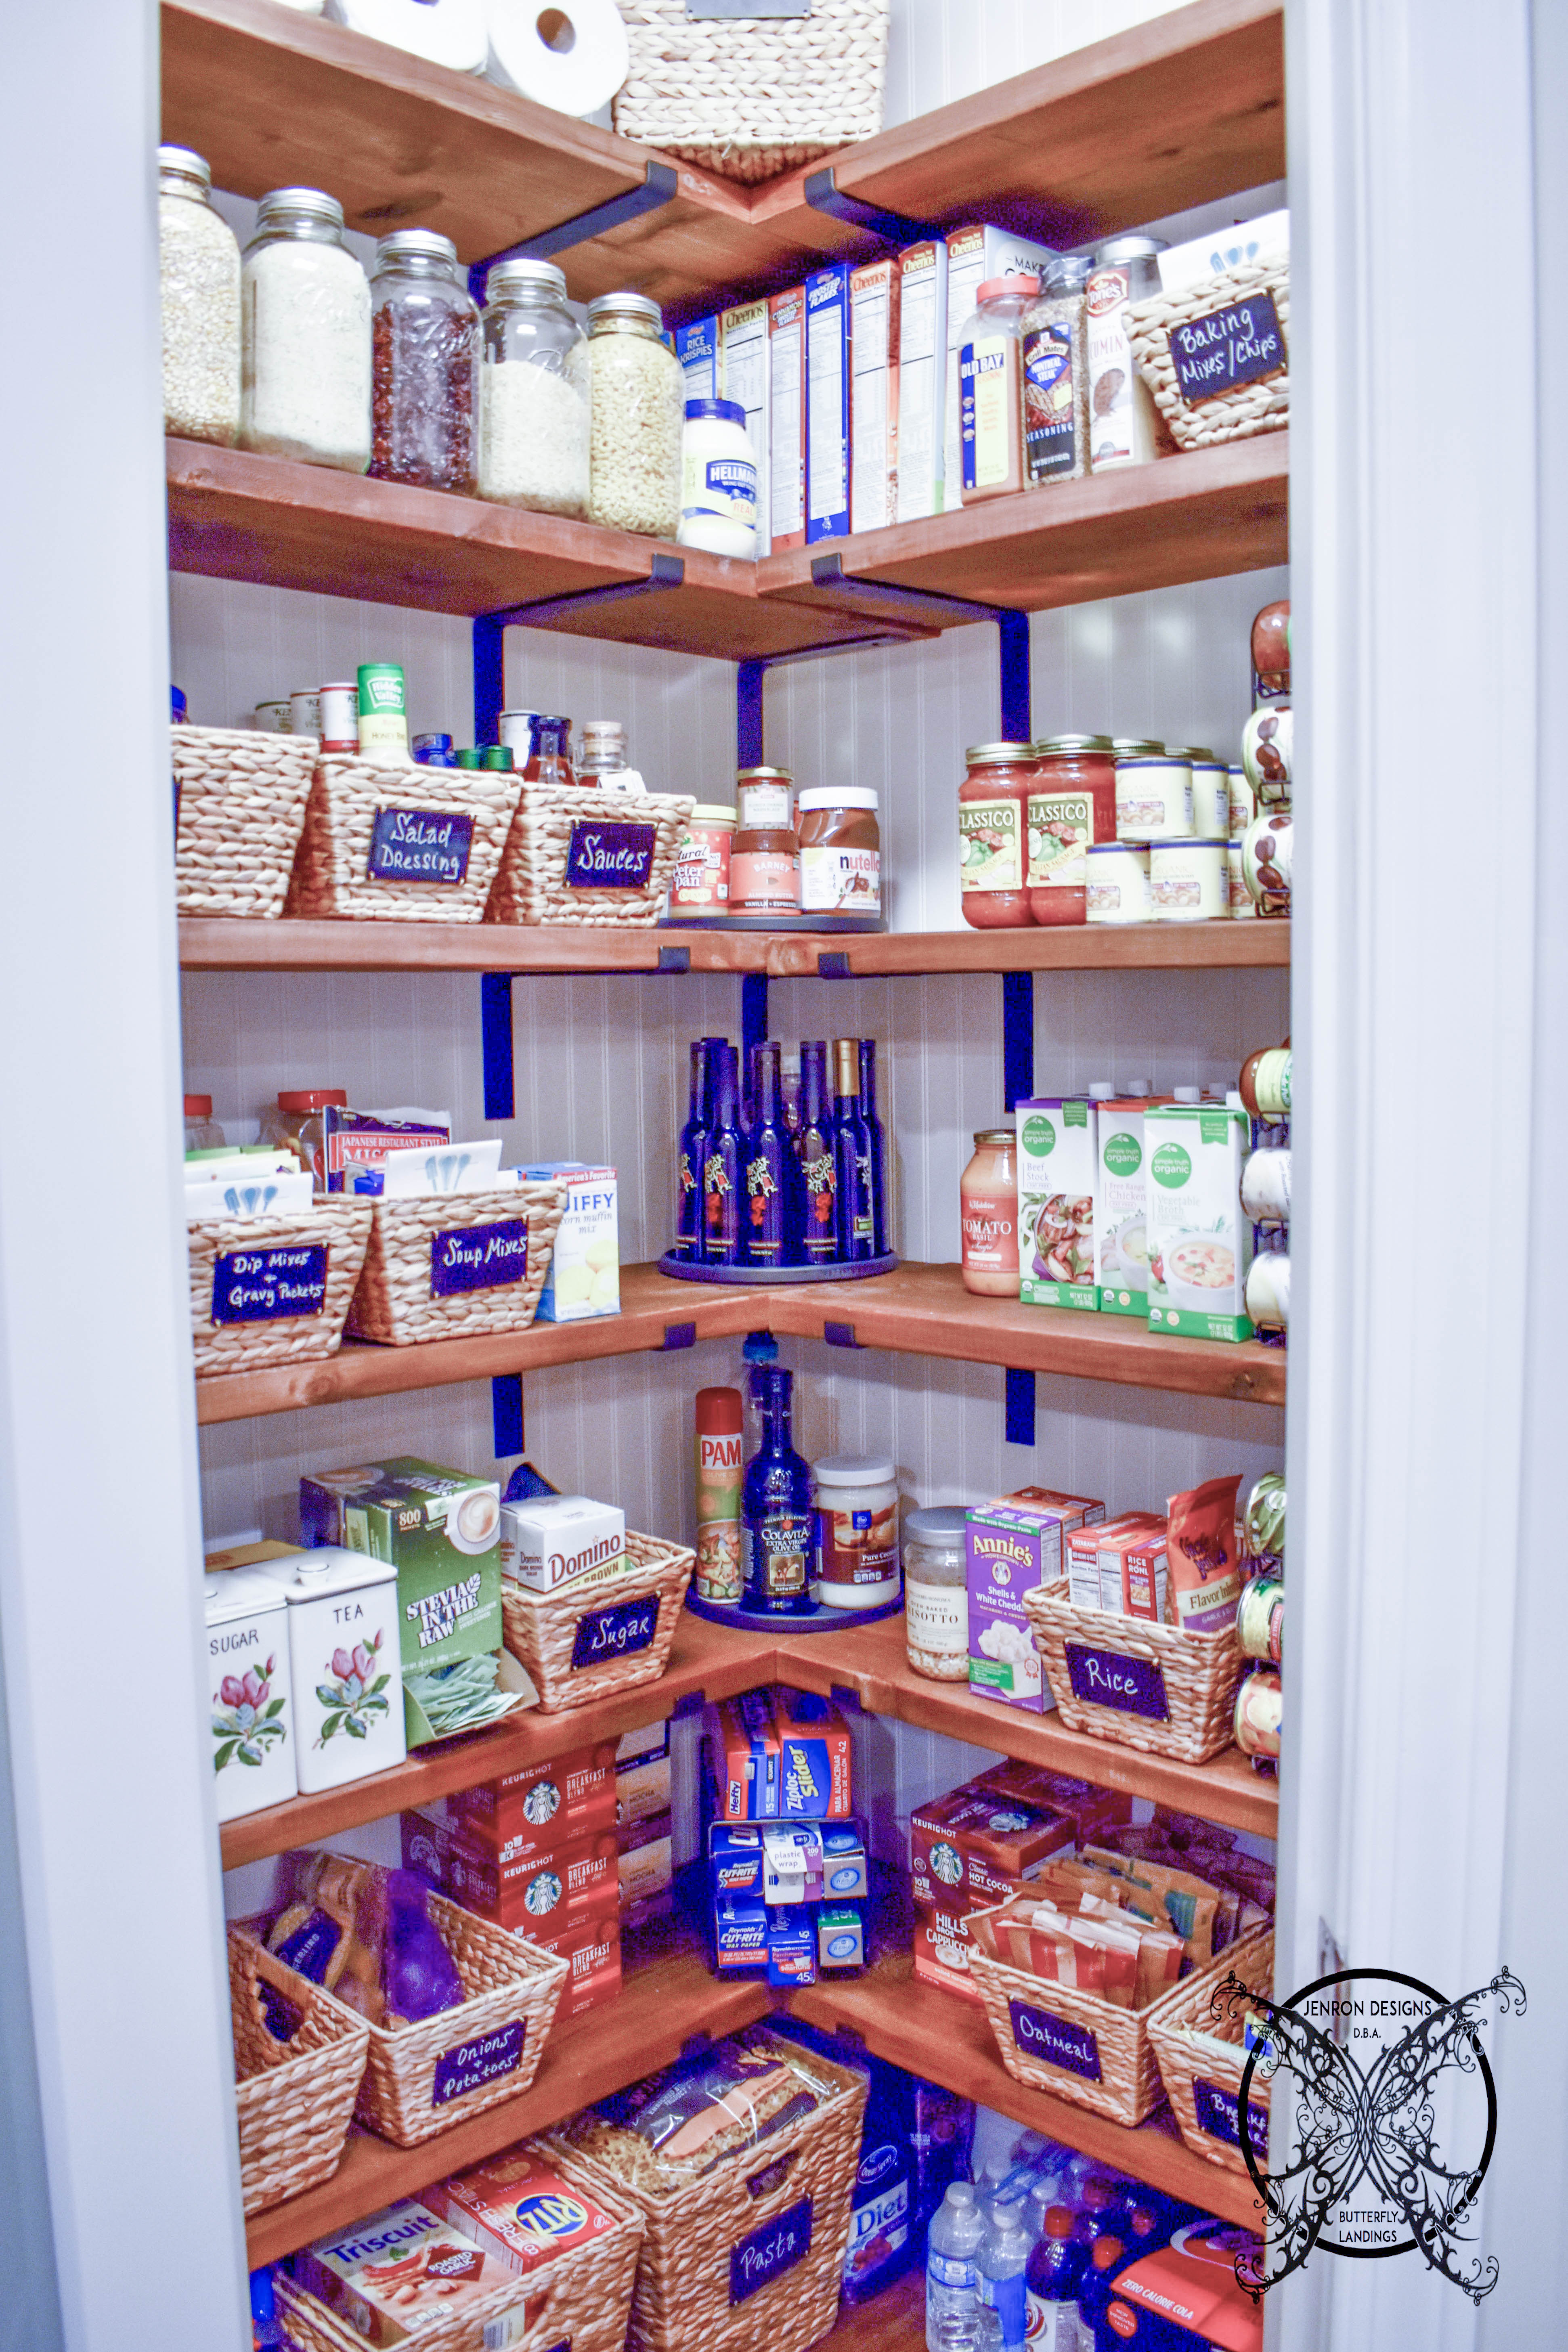 You can do this by taking a quick glance at the sell by dates and just putting dates further out to the back. I find that salad dressings, mayonnaise, and pasta sauces tend to be my biggest offenders in this category. The chalkboard baskets make separating into categories super easy.
 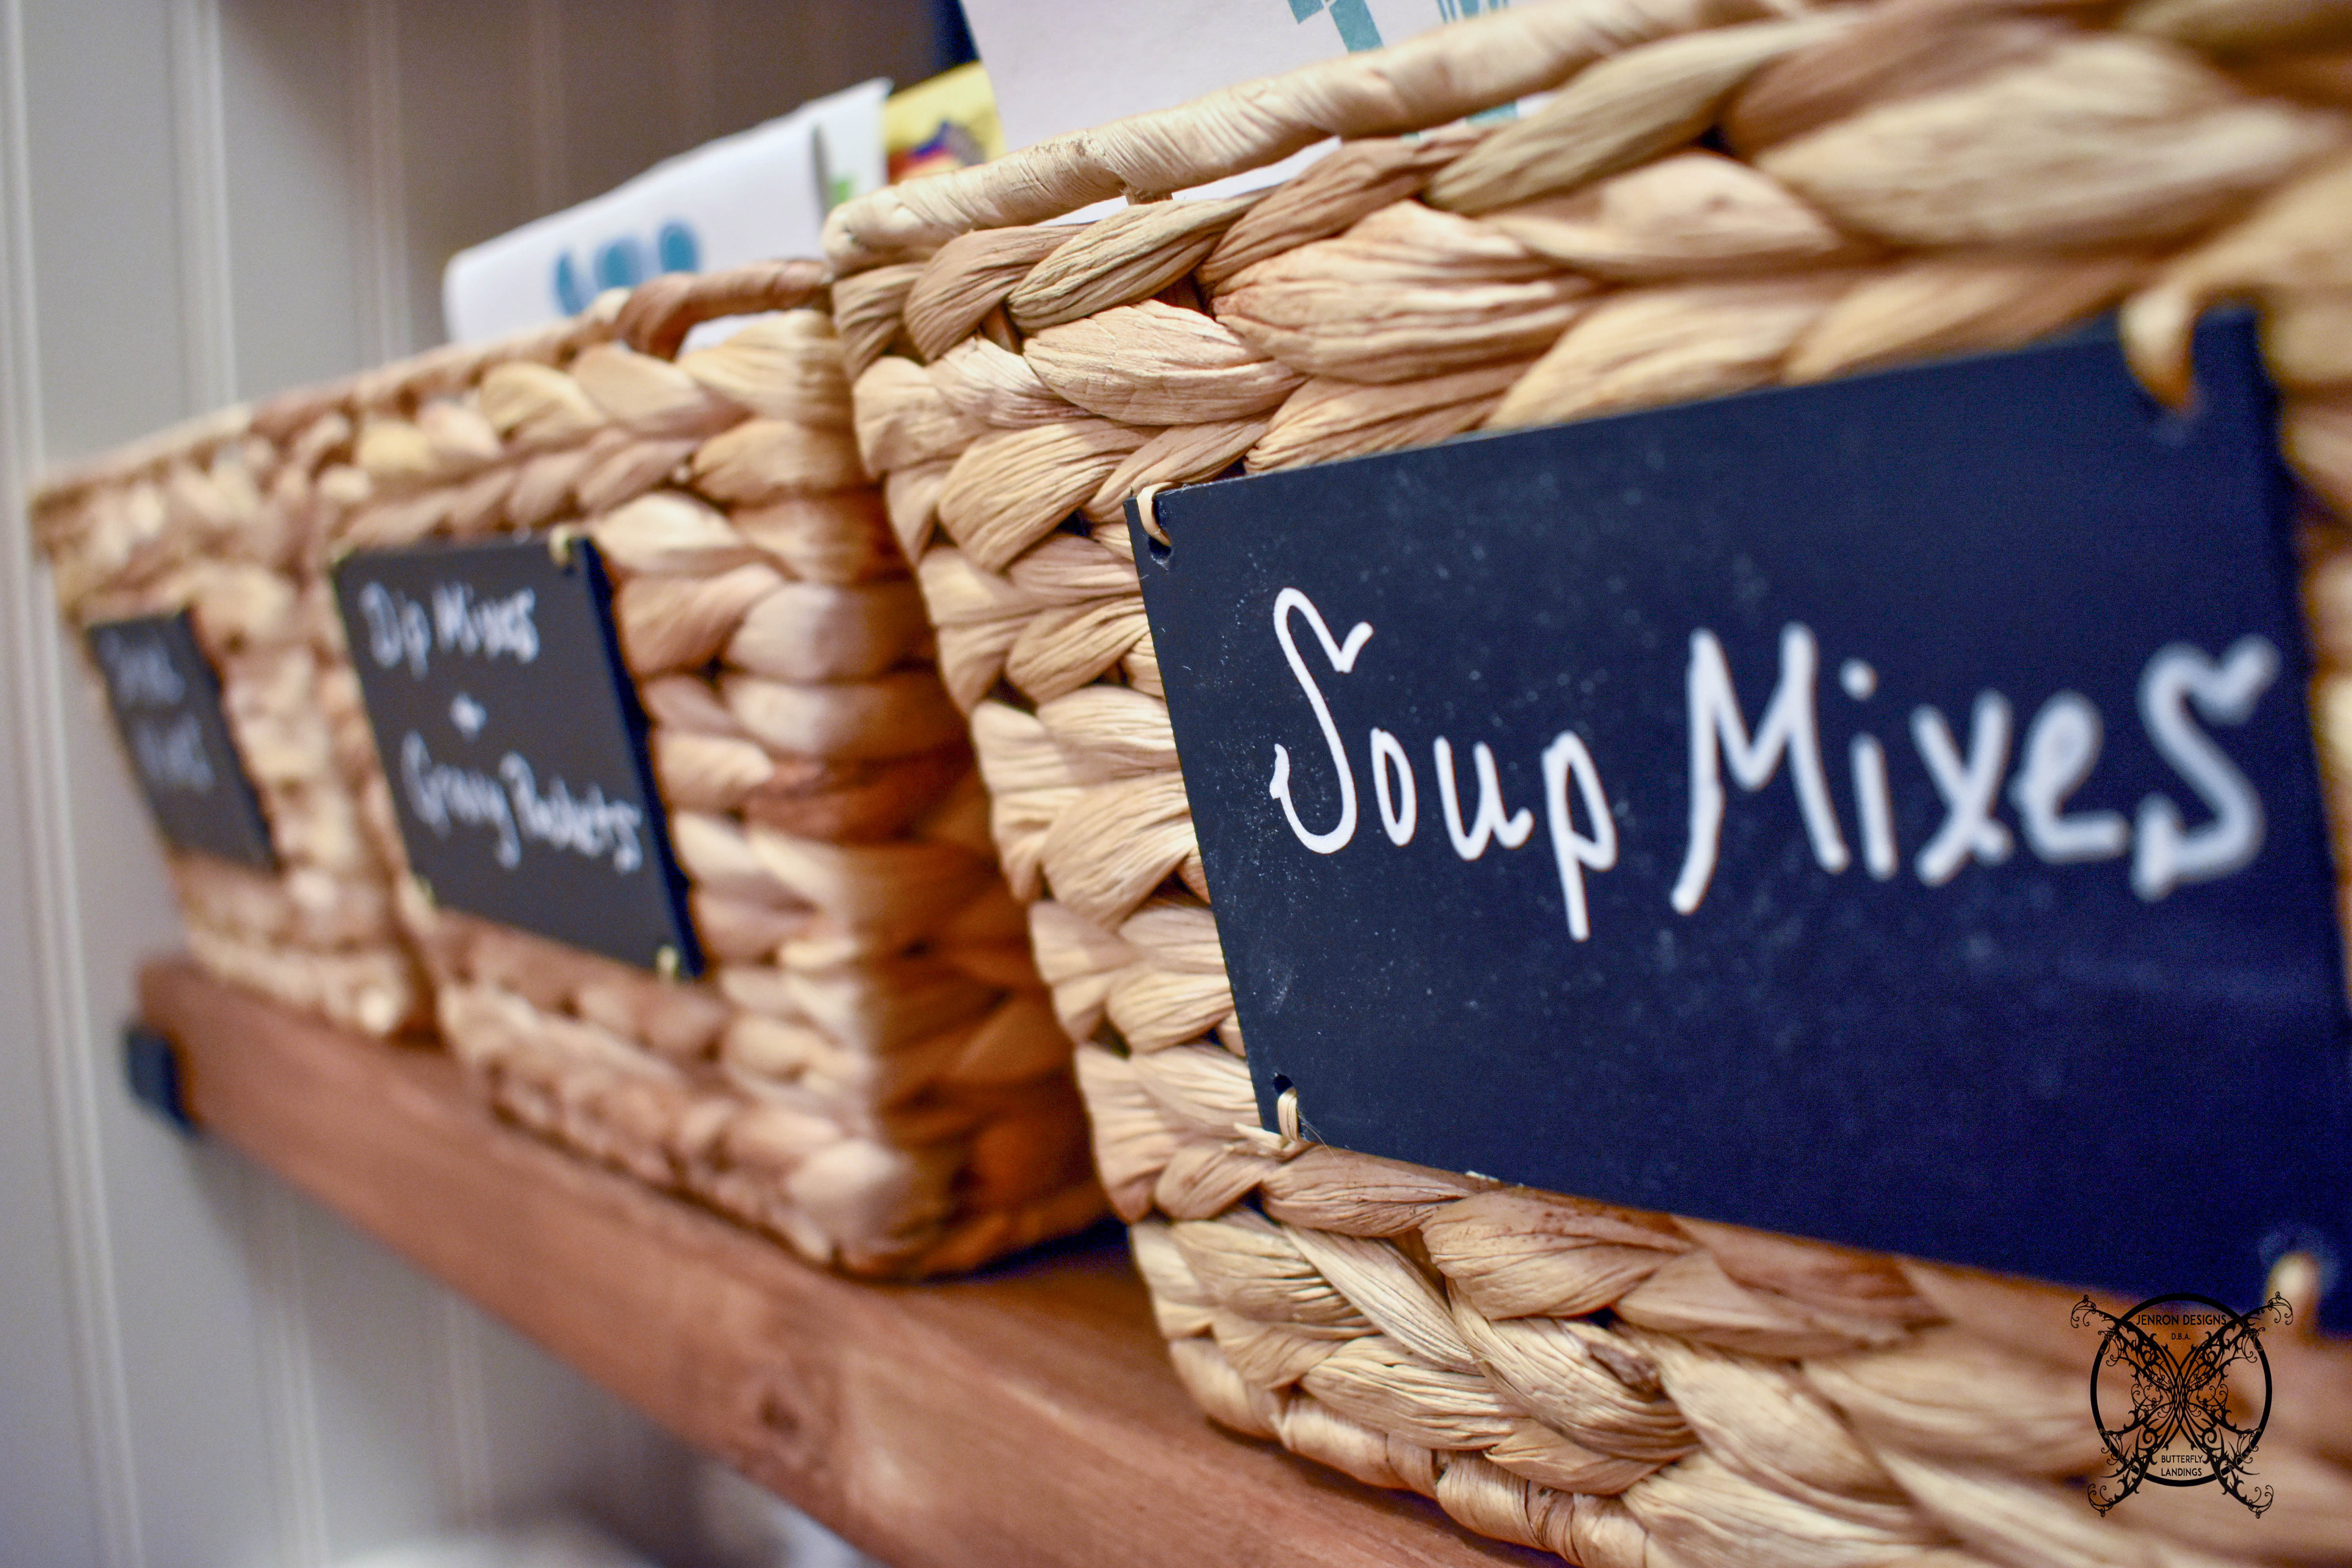 My cereal boxes, dry goods and canned goods usually have longer dates on them. These items are perfect for placing into large gallon mason jars or air tight containers which keep items fresher longer.
 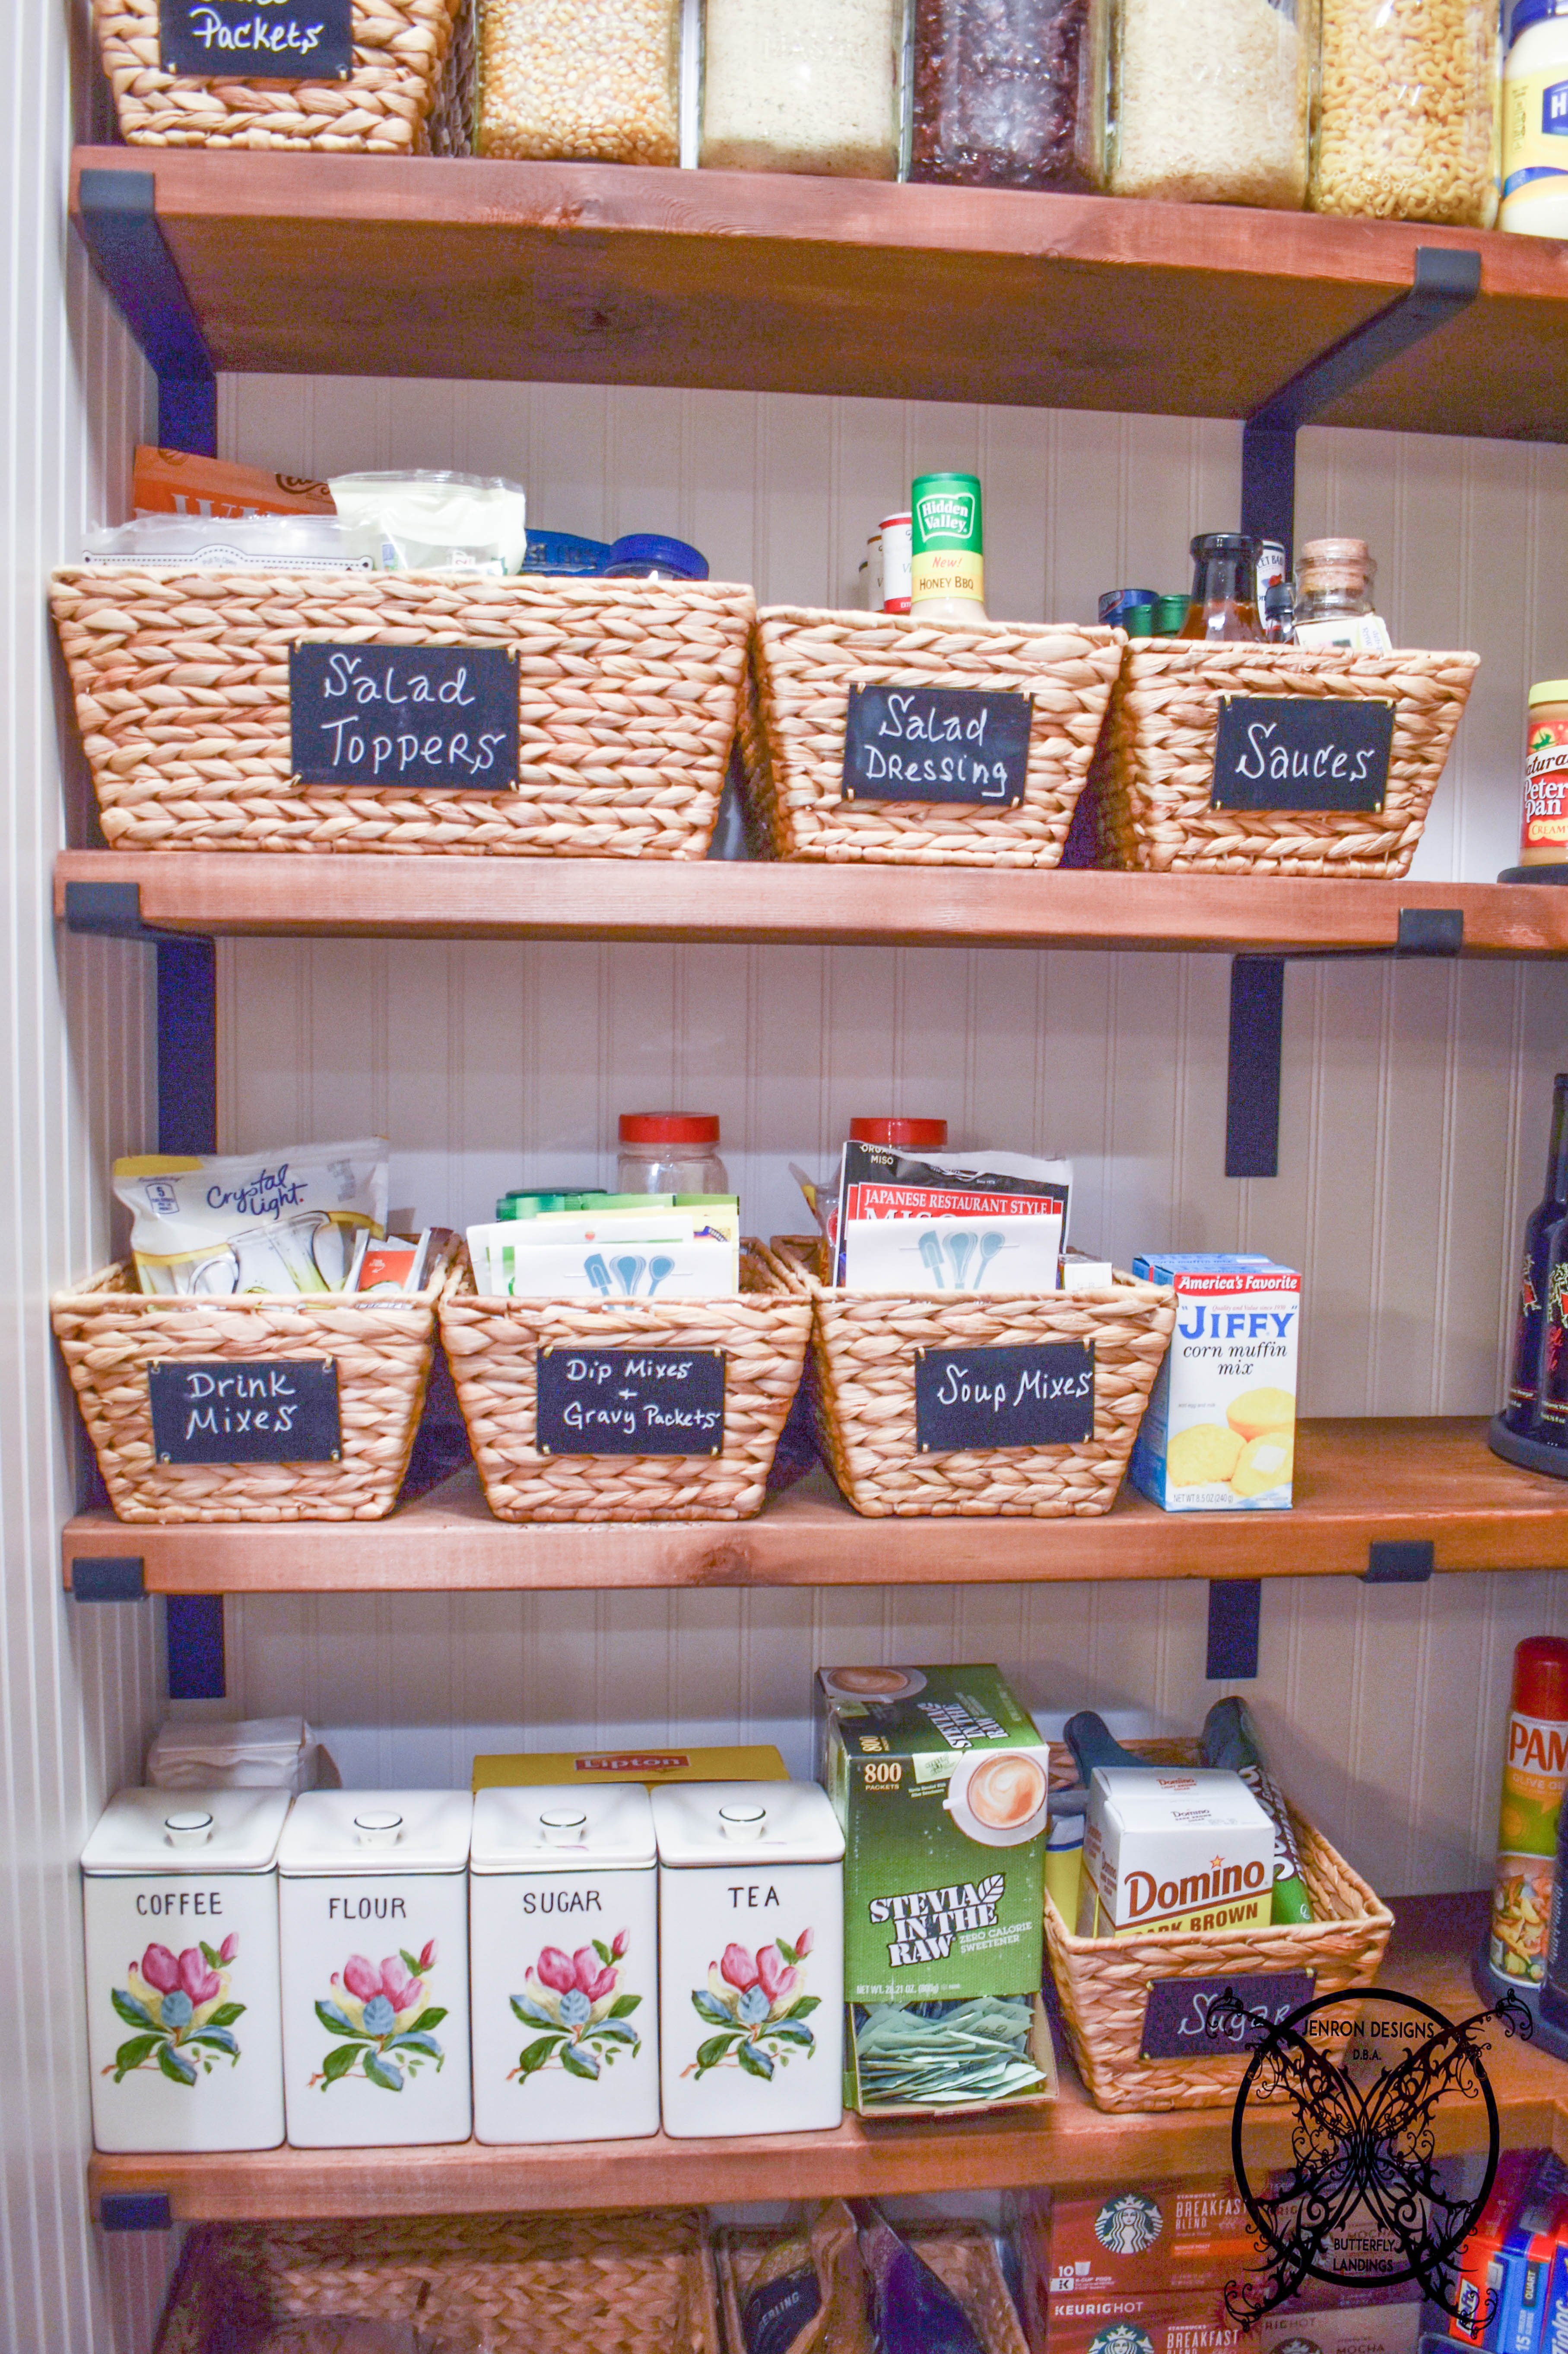 I reuse my existing baskets to divide groceries into subcategory for things that easily get lost in a pantry. Things like soups mixes, drink mixes or dip packets. I did however invest into an actual chalkboard markers, which made a HUGE, difference in my penmanship. Using little chalkboard markers they are now very crisp and permanent, so they are not as easy to wipe off when grabbing a basket.
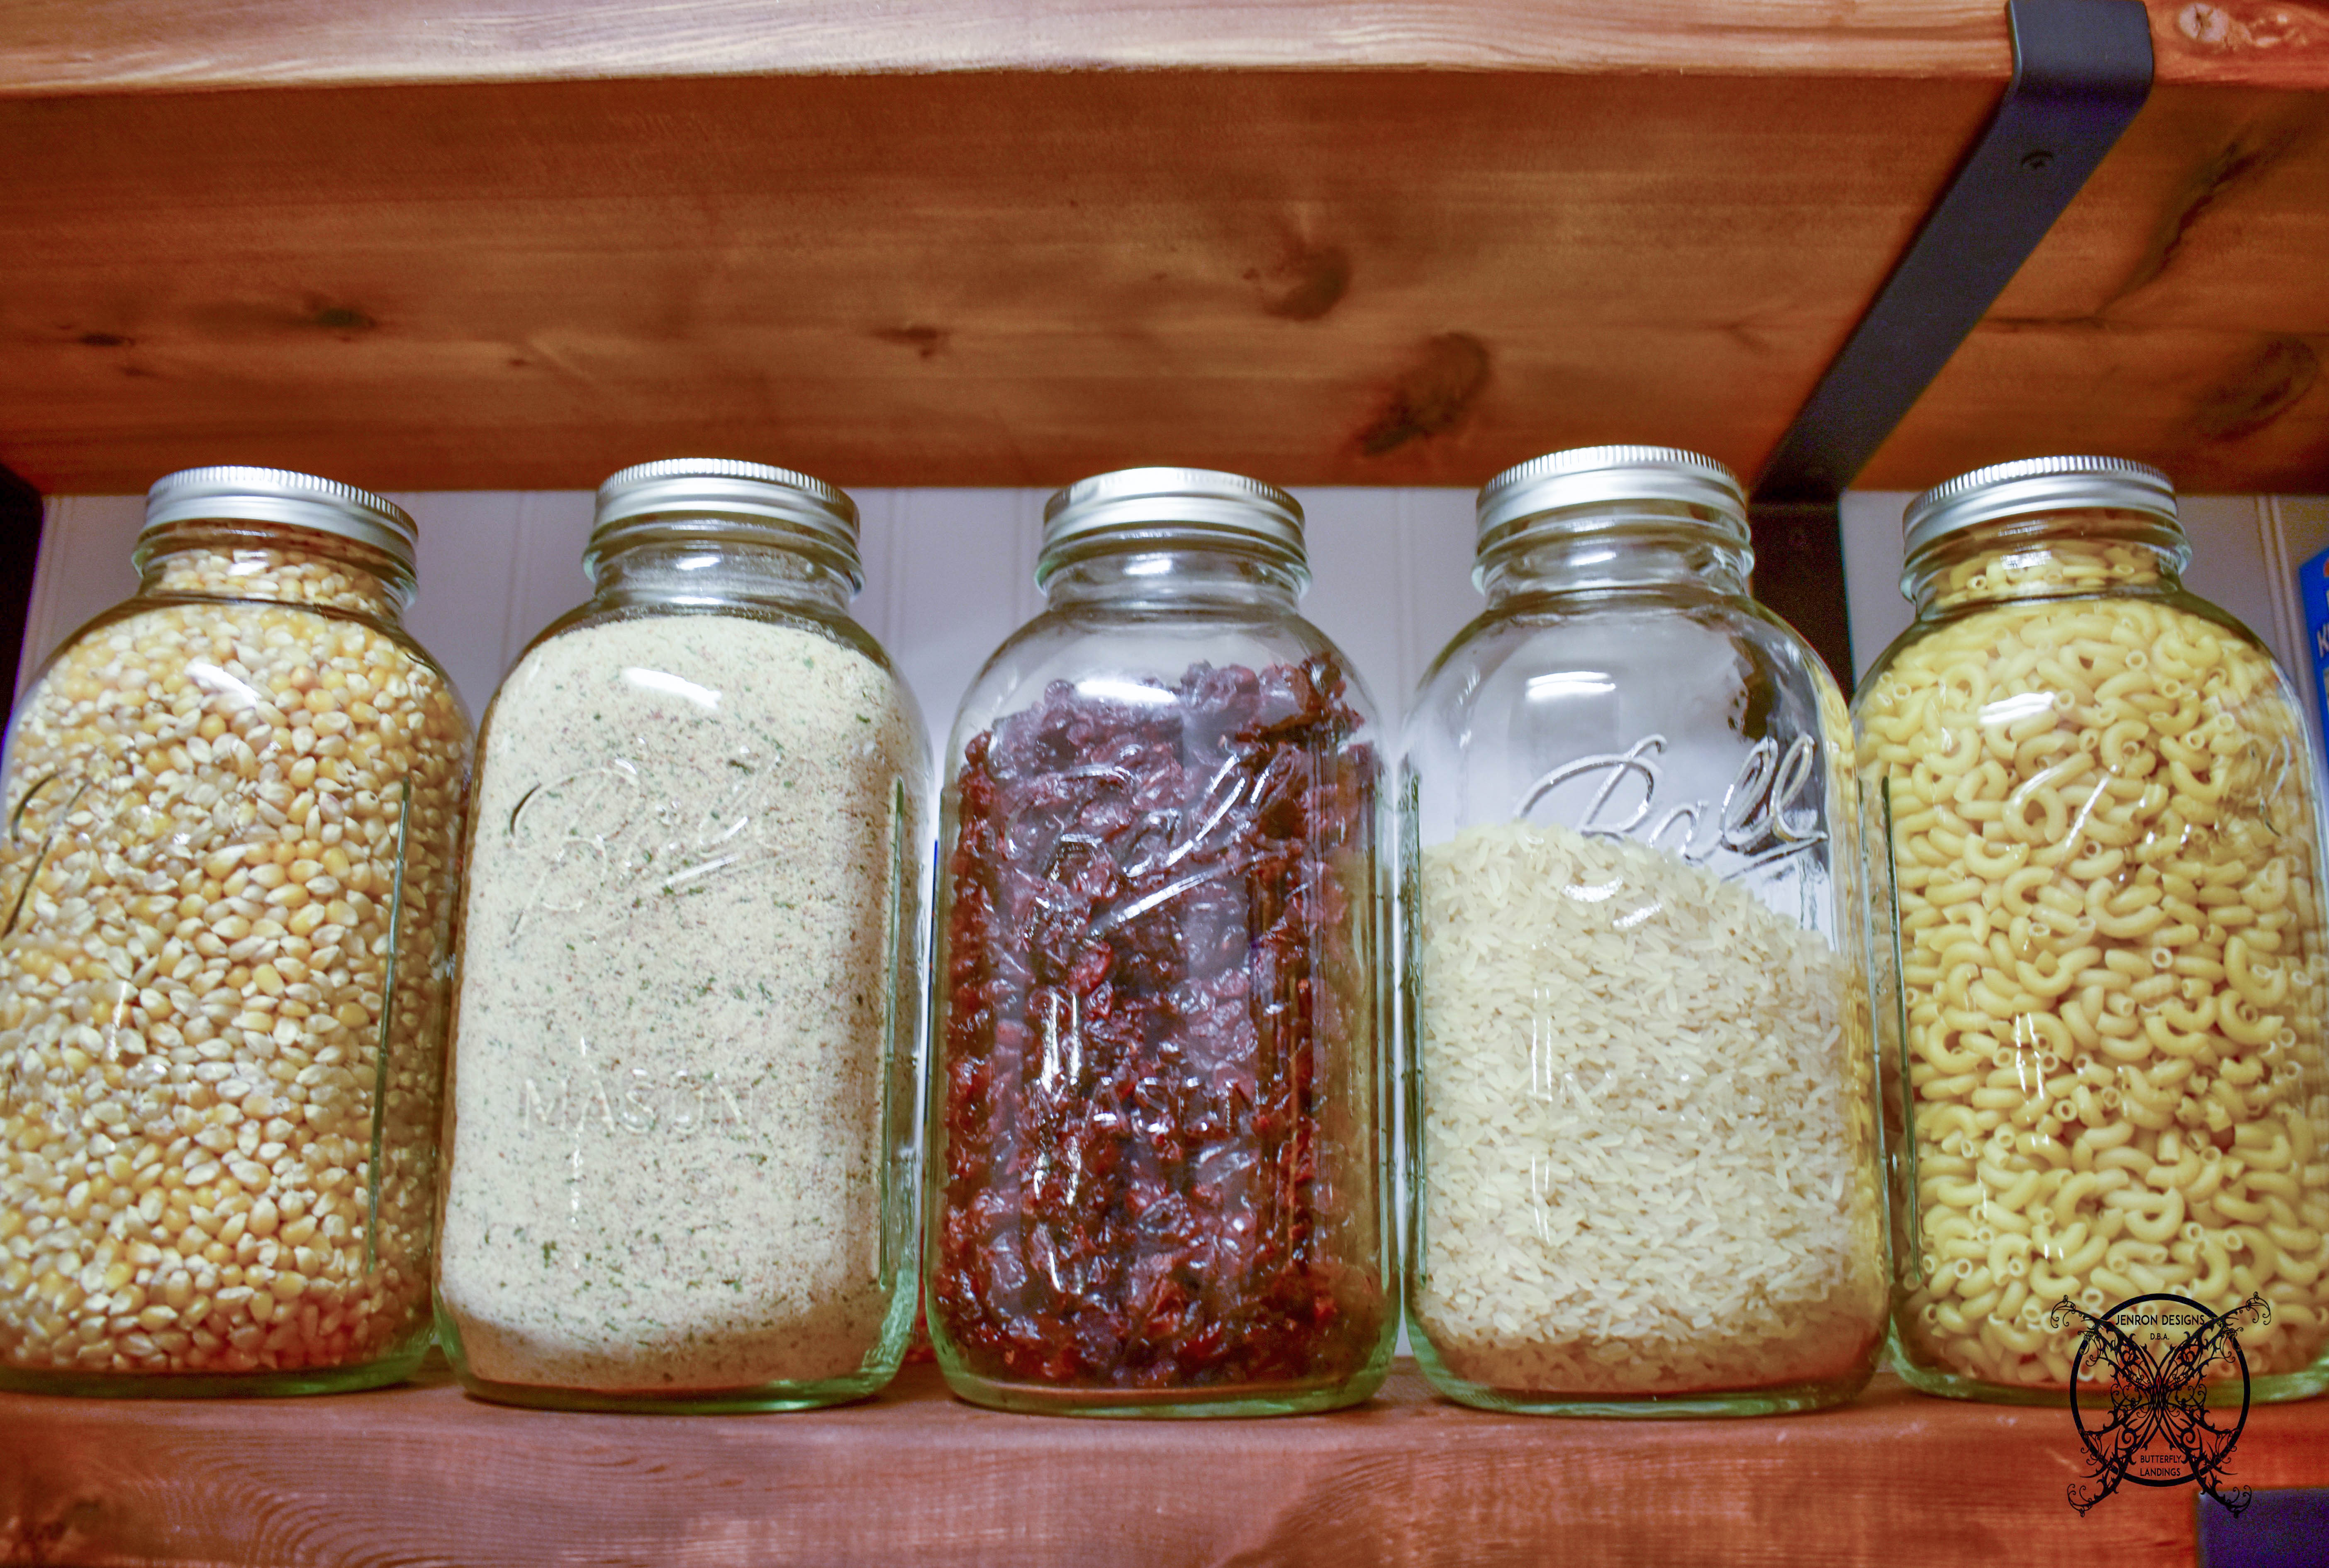
Mason Jars are also a great way to store lose dry goods, like rice, popcorn, pasta and other grains. I use the large gallon size wide mouth mason jars which are pretty and functional for this rustic look.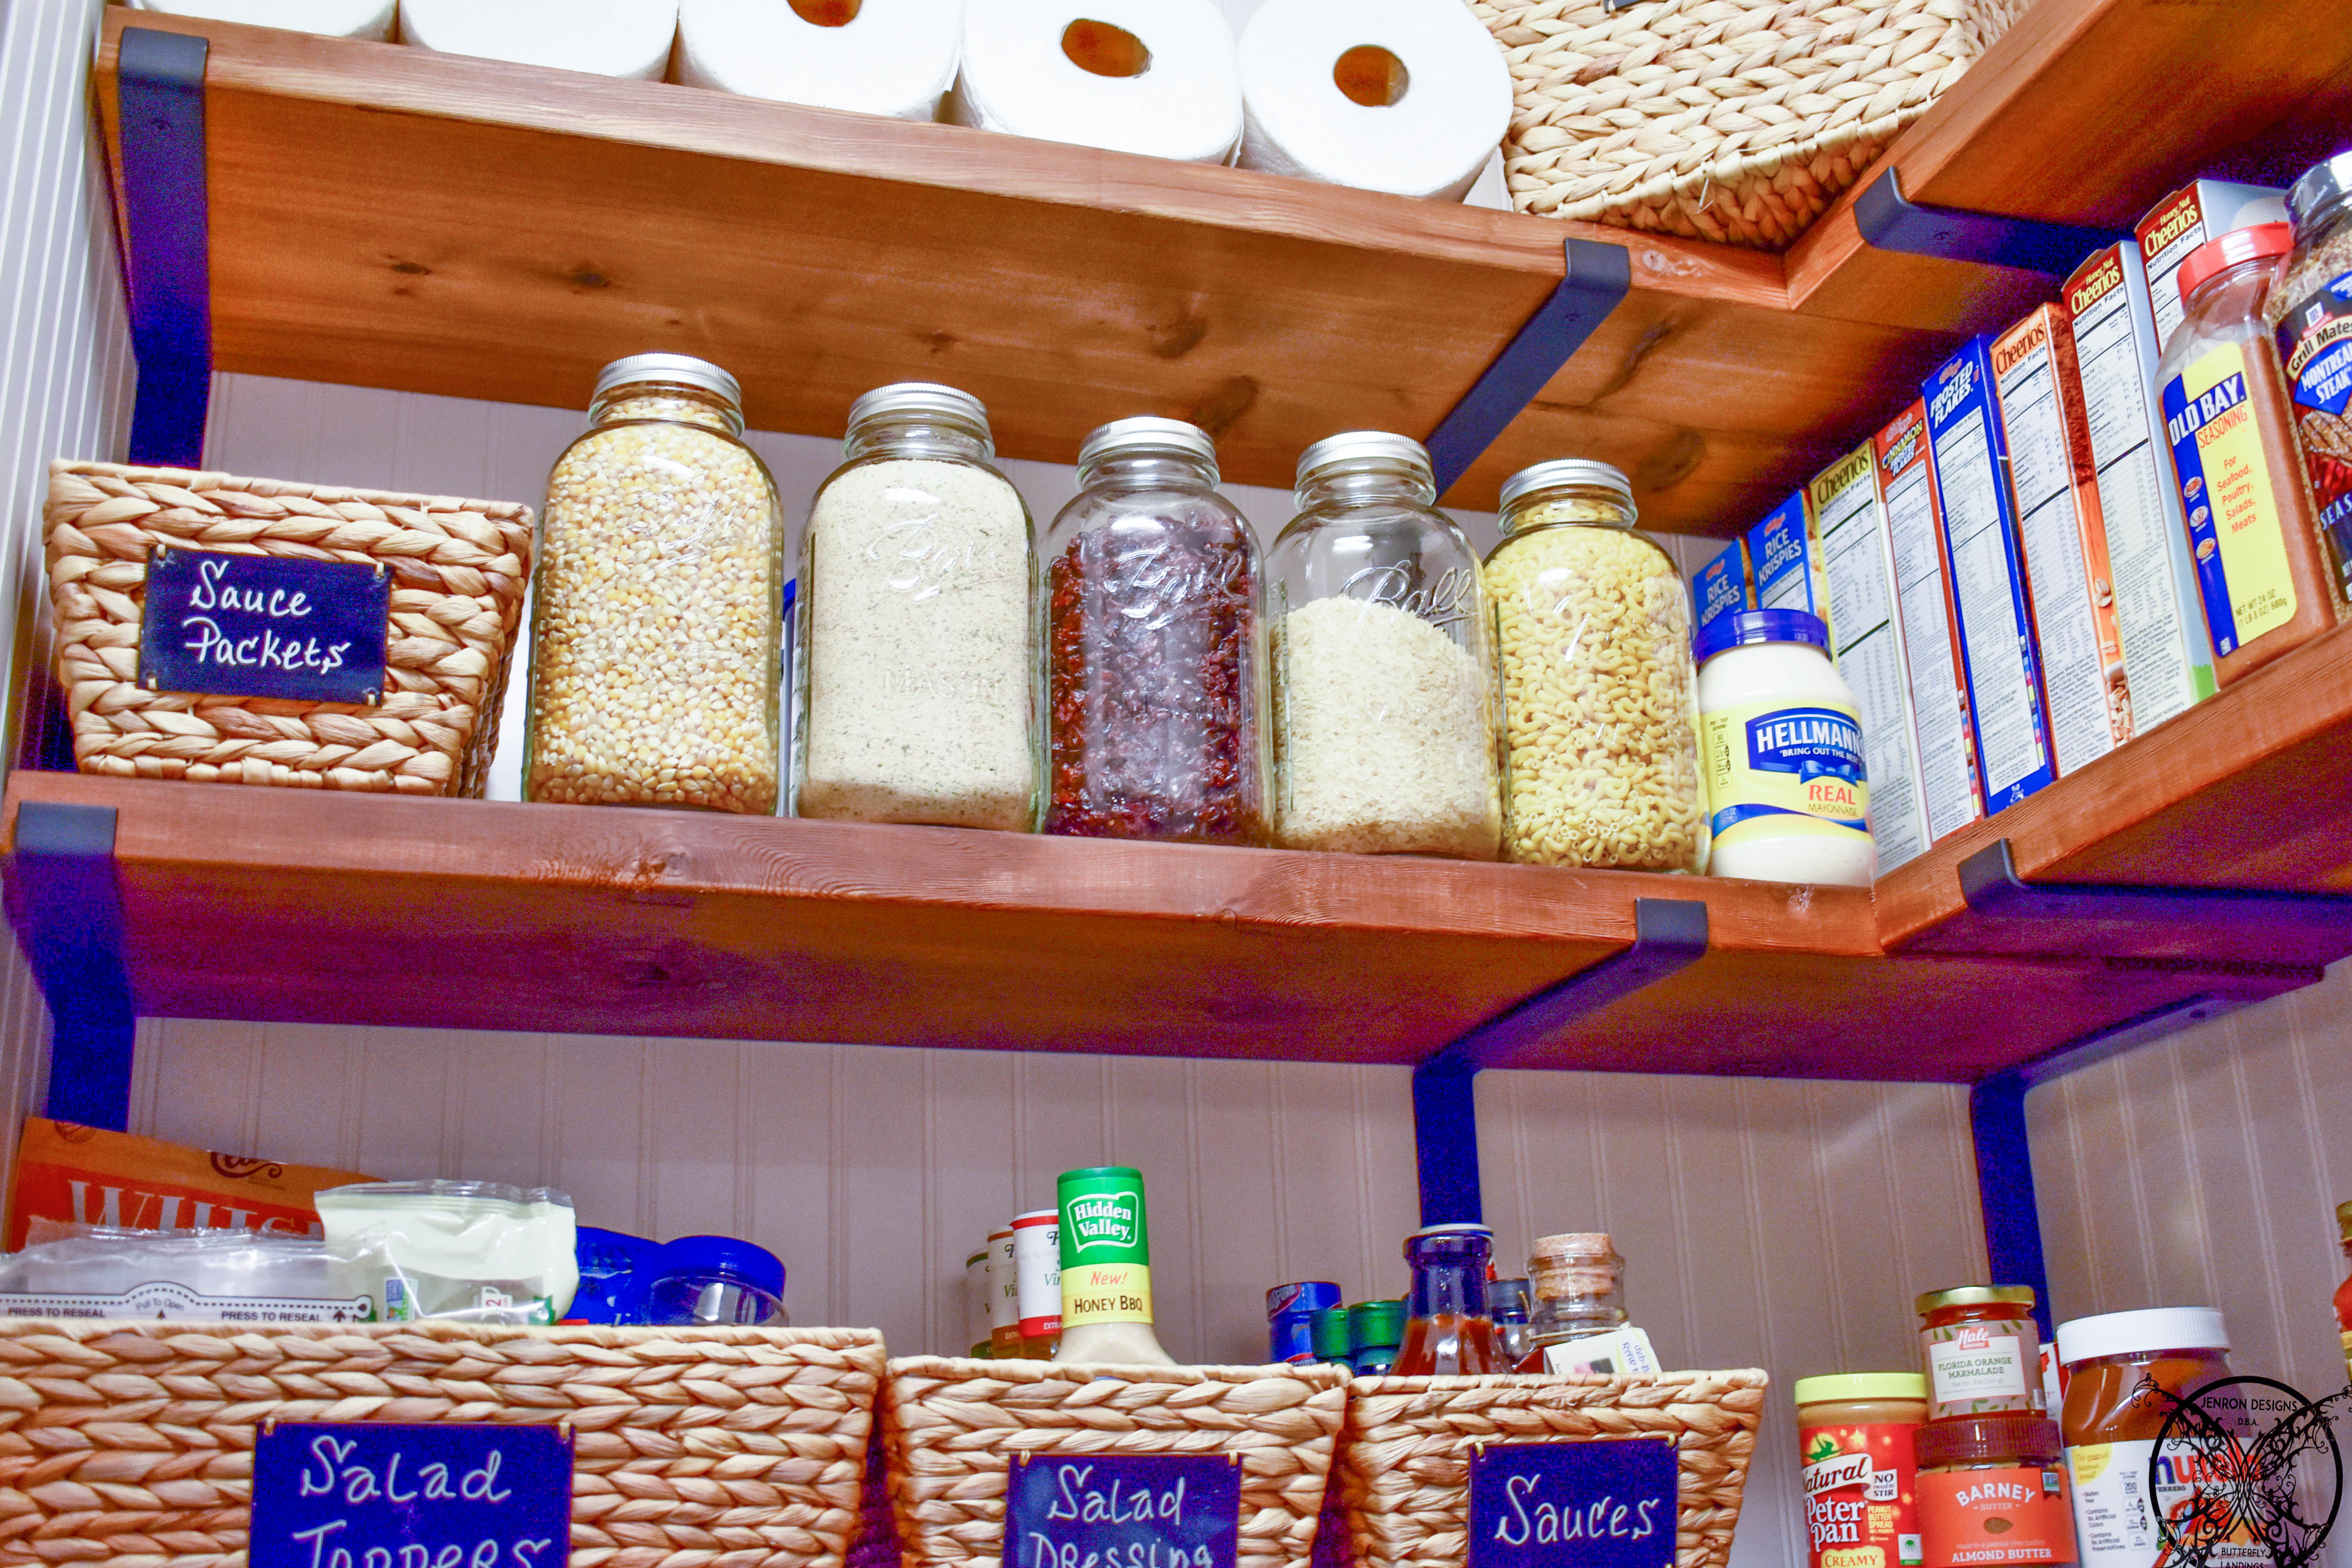 I also decide to add a few large 64 oz Mason jars to house bulk items we used all the time, such as rice, elbow macaroni, Italian bread crumbs, Craisins, and Popcorn kernels. I think they add a bit more of rustic quality and by being in glass, create a visual texture too. Plus this elements those pesky half opened boxes or bags floating around the pantry.
 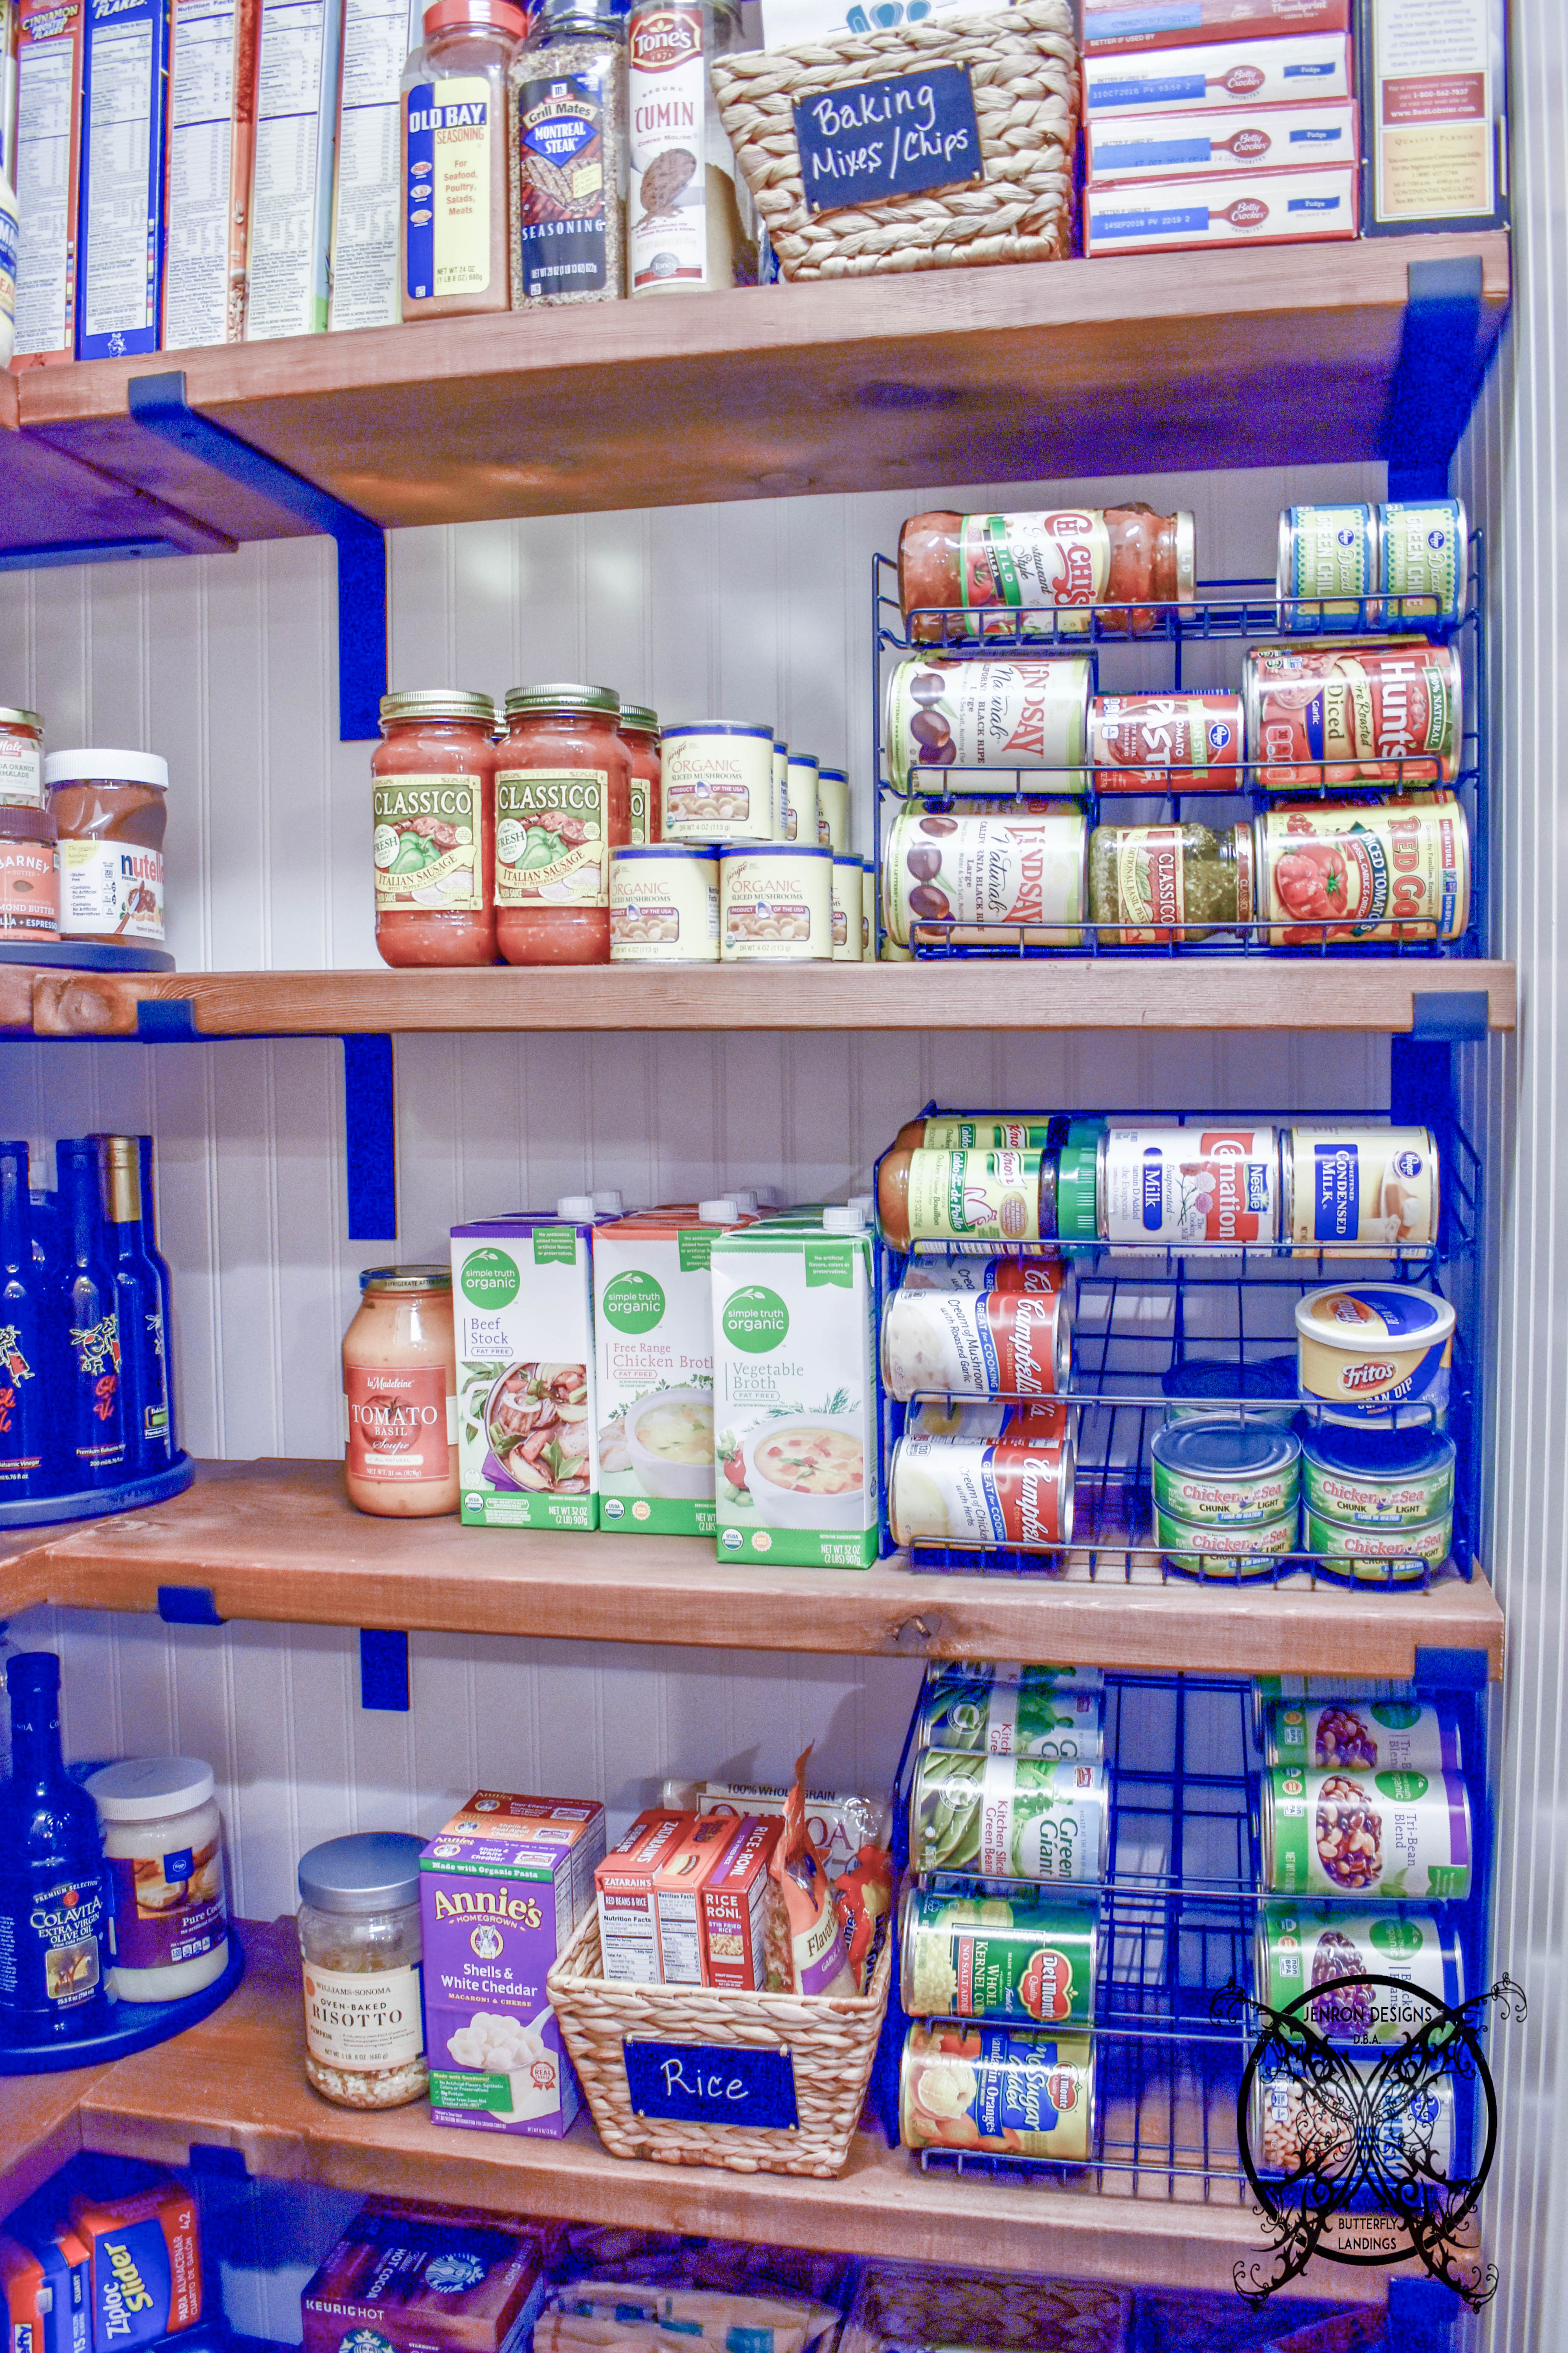 Remember those old white Simplehouseware Stackable Can Rack Organizer
 well, check these out now. First off, they sit on the solid shelves easier without falling through. The spray paint was perfect and really looks great with those rustic iron brackets.
 Even the white Lazy Susan Turntables turned out looking pretty good. Which is great news, because I loved having them in the deep back corners for things like Olive oil and Vinegar’s. I will take a minute to say that Oli+Ve is one of my local favorite olive oil companies, as I am sure you could tell by vivacious stockpile, lol. Just wanted to give a shout out to all the ladies there!
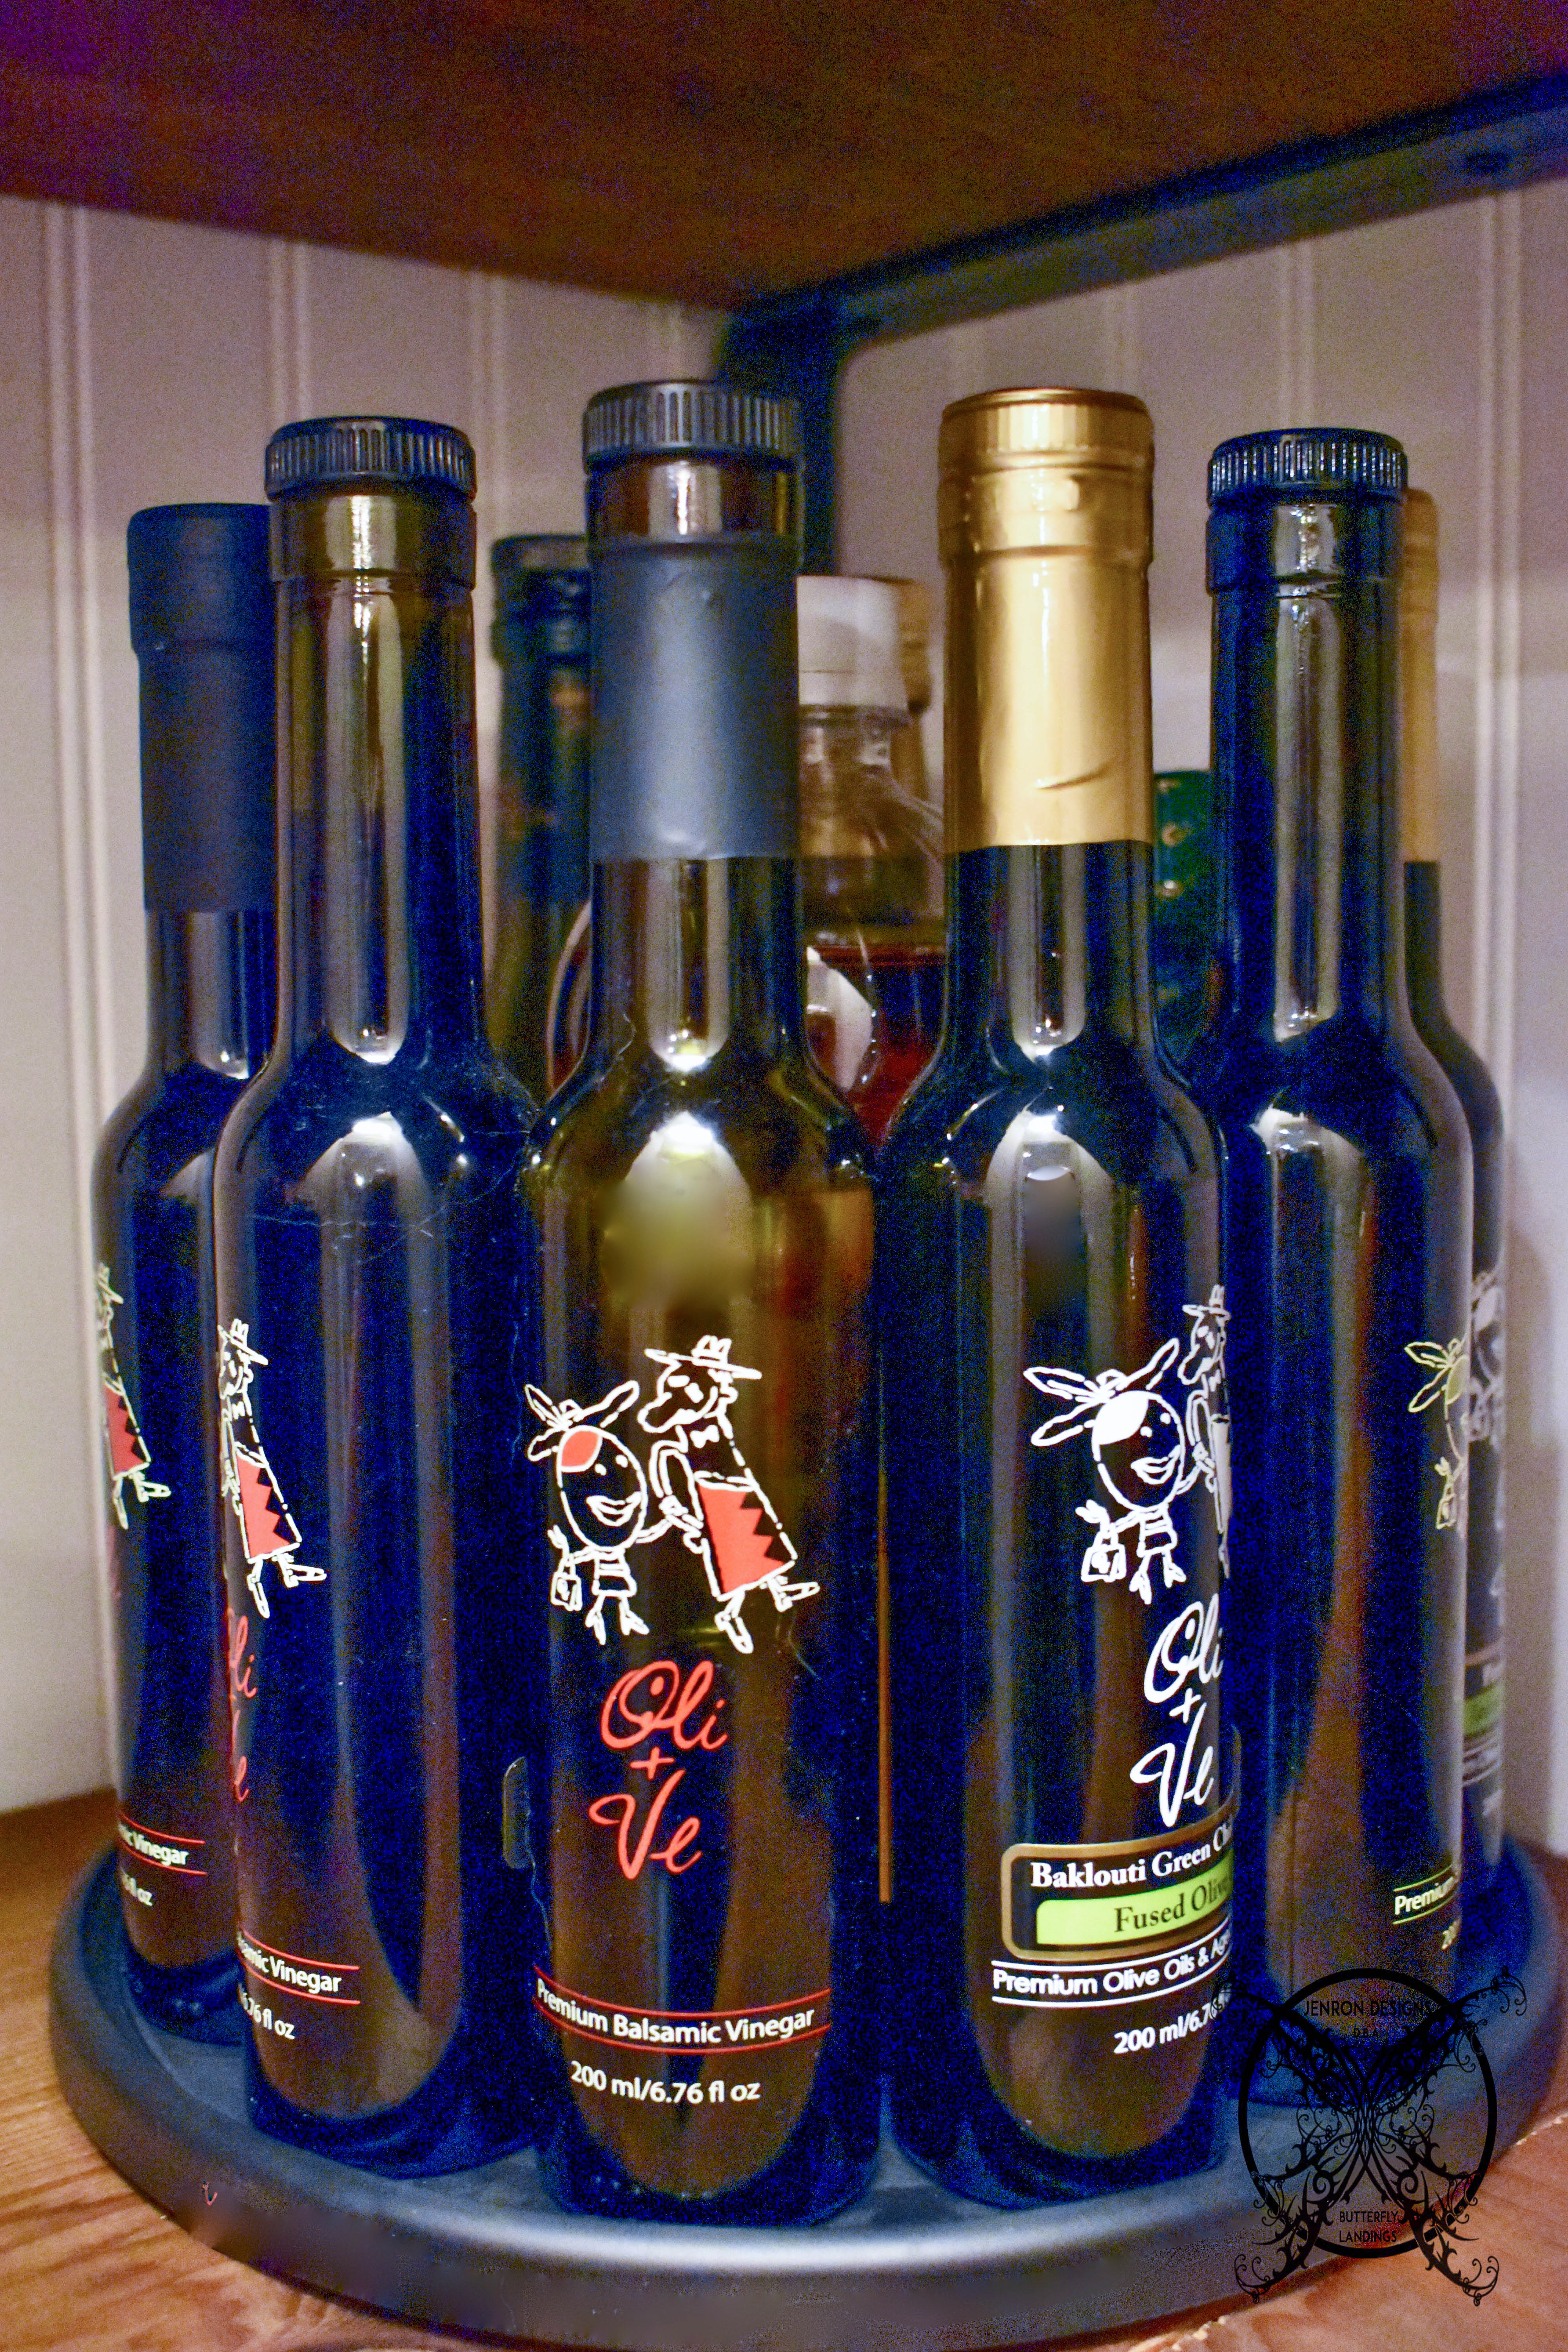 I even had plenty of space to include these fun retro baking canisters, which actually do house the listed contents. I think items like these add personality to your pantry.
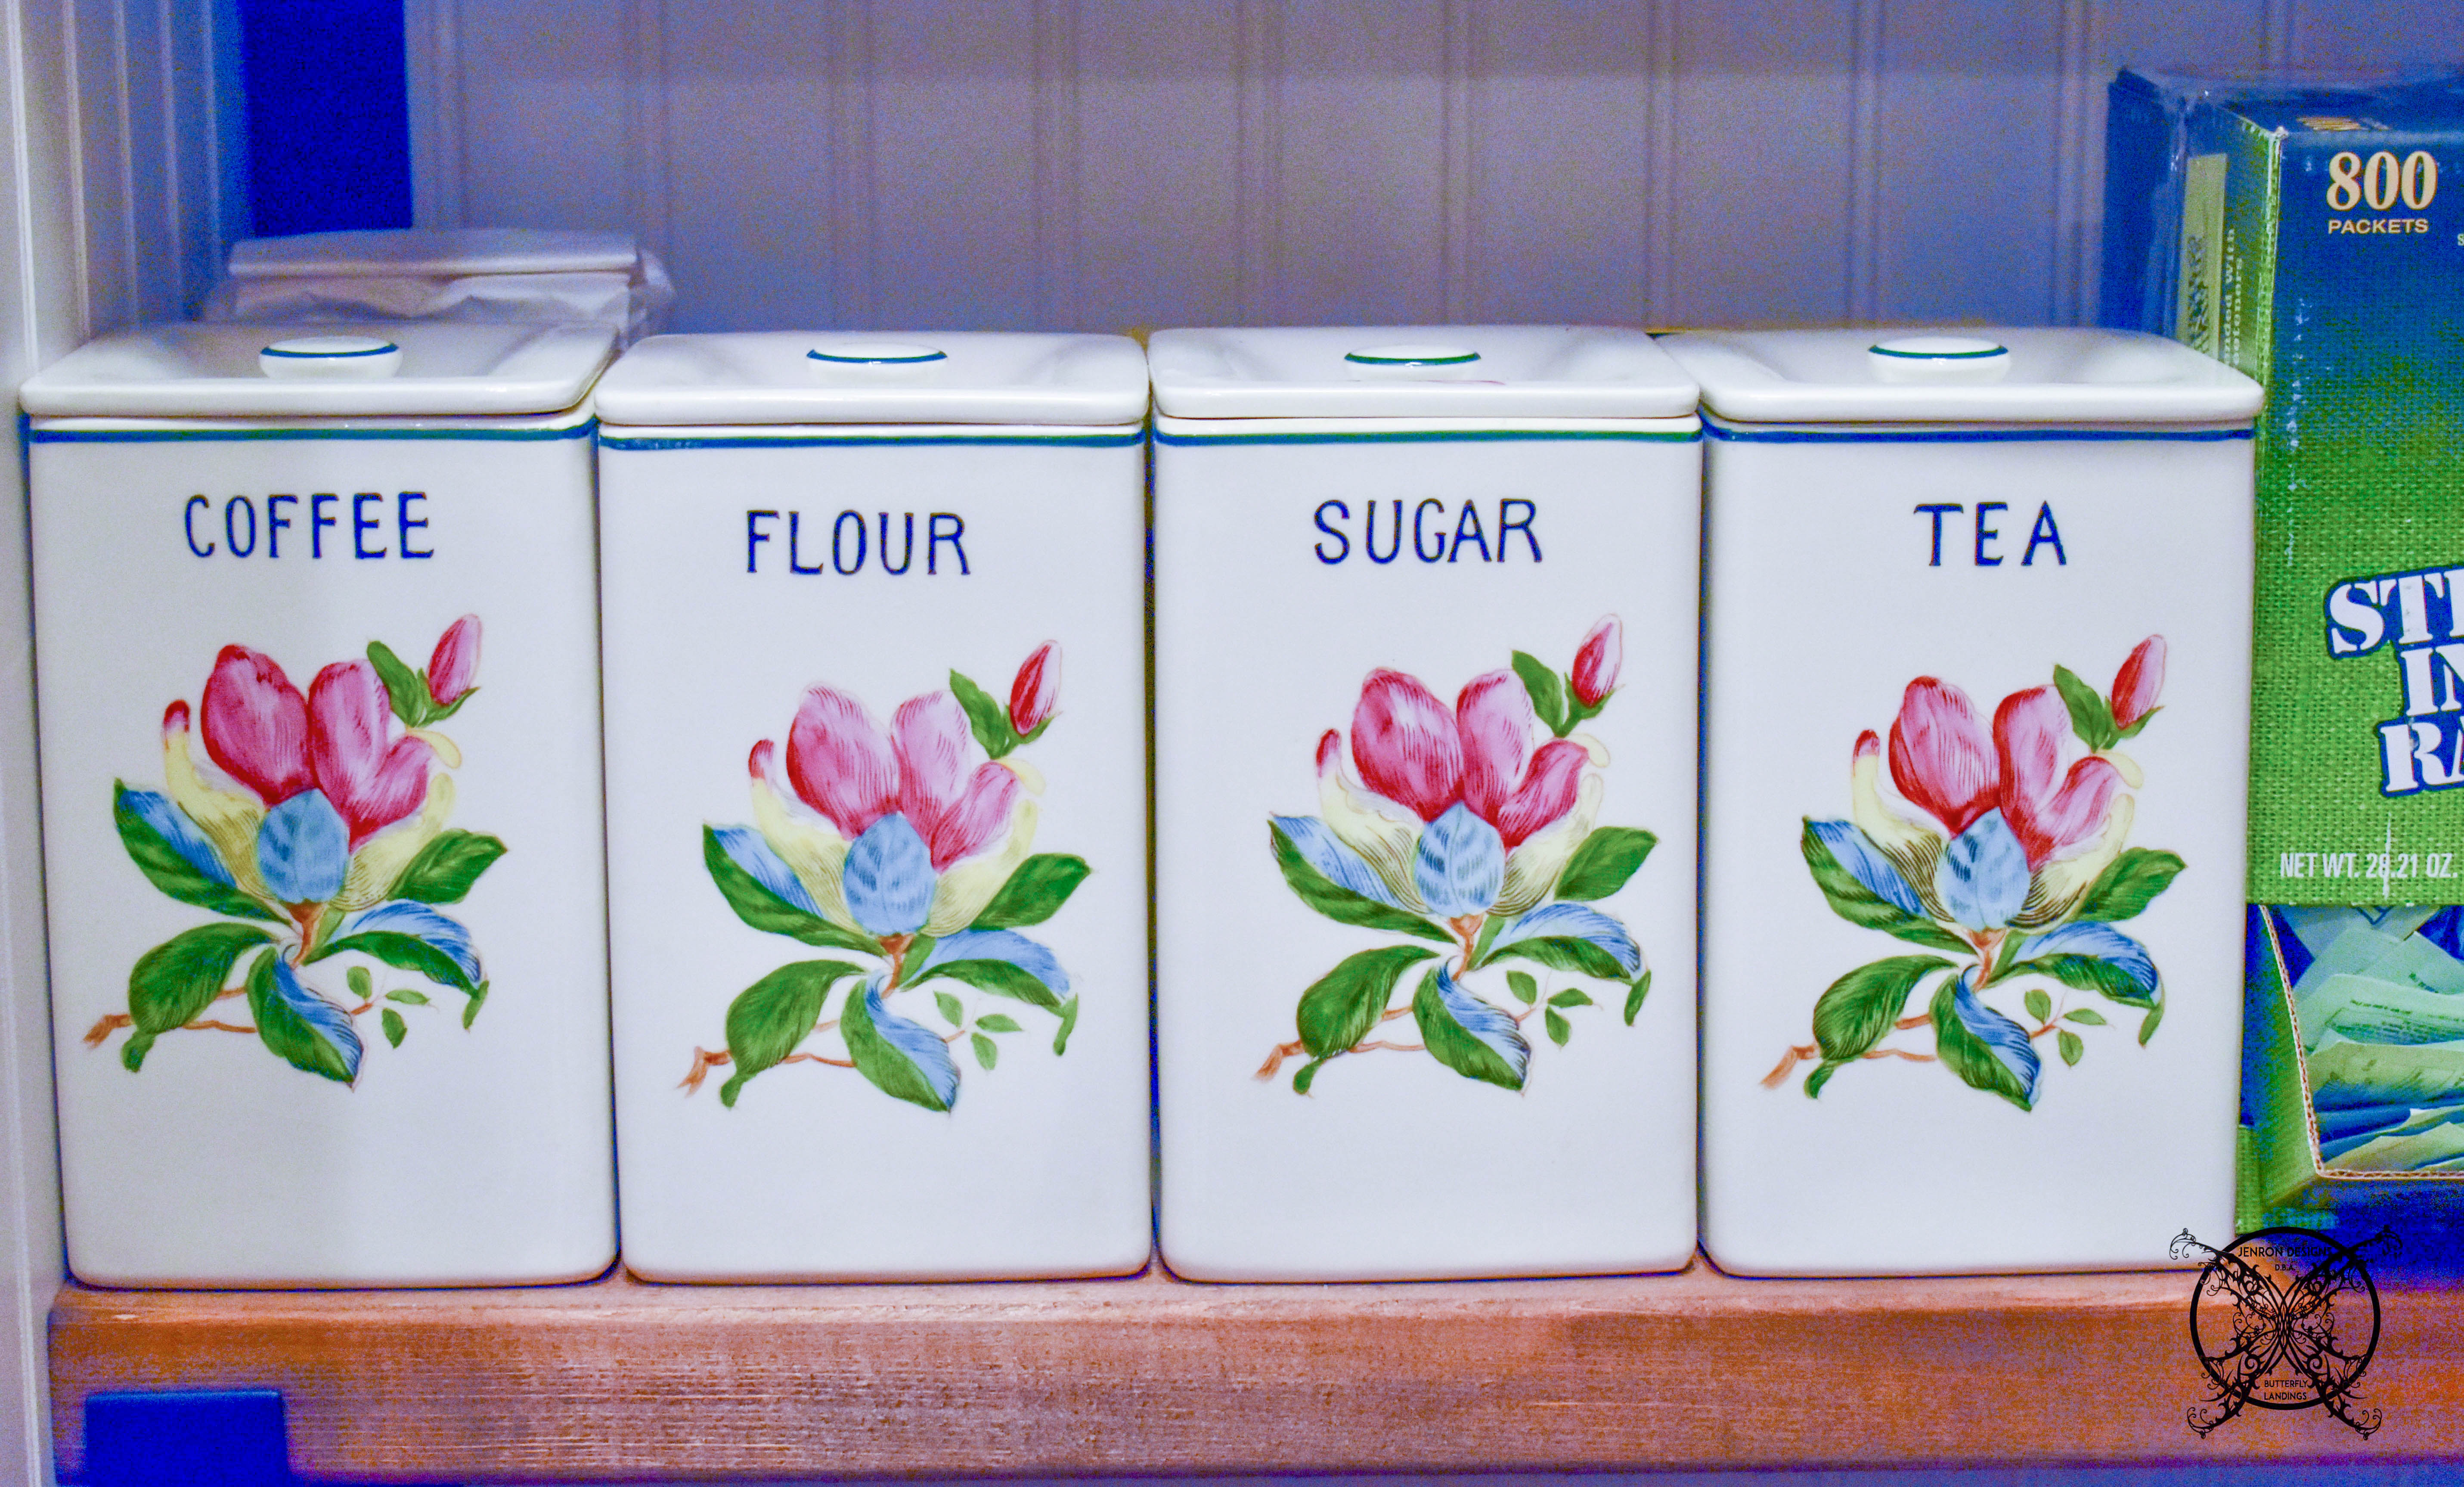 They make the space personal and decorative while actually being functional. Finally, I just wanted to speak about how important the shelf spacing is when re-doing the shelves. Just look, I can now stand up my cereal boxes which utilizes less space.
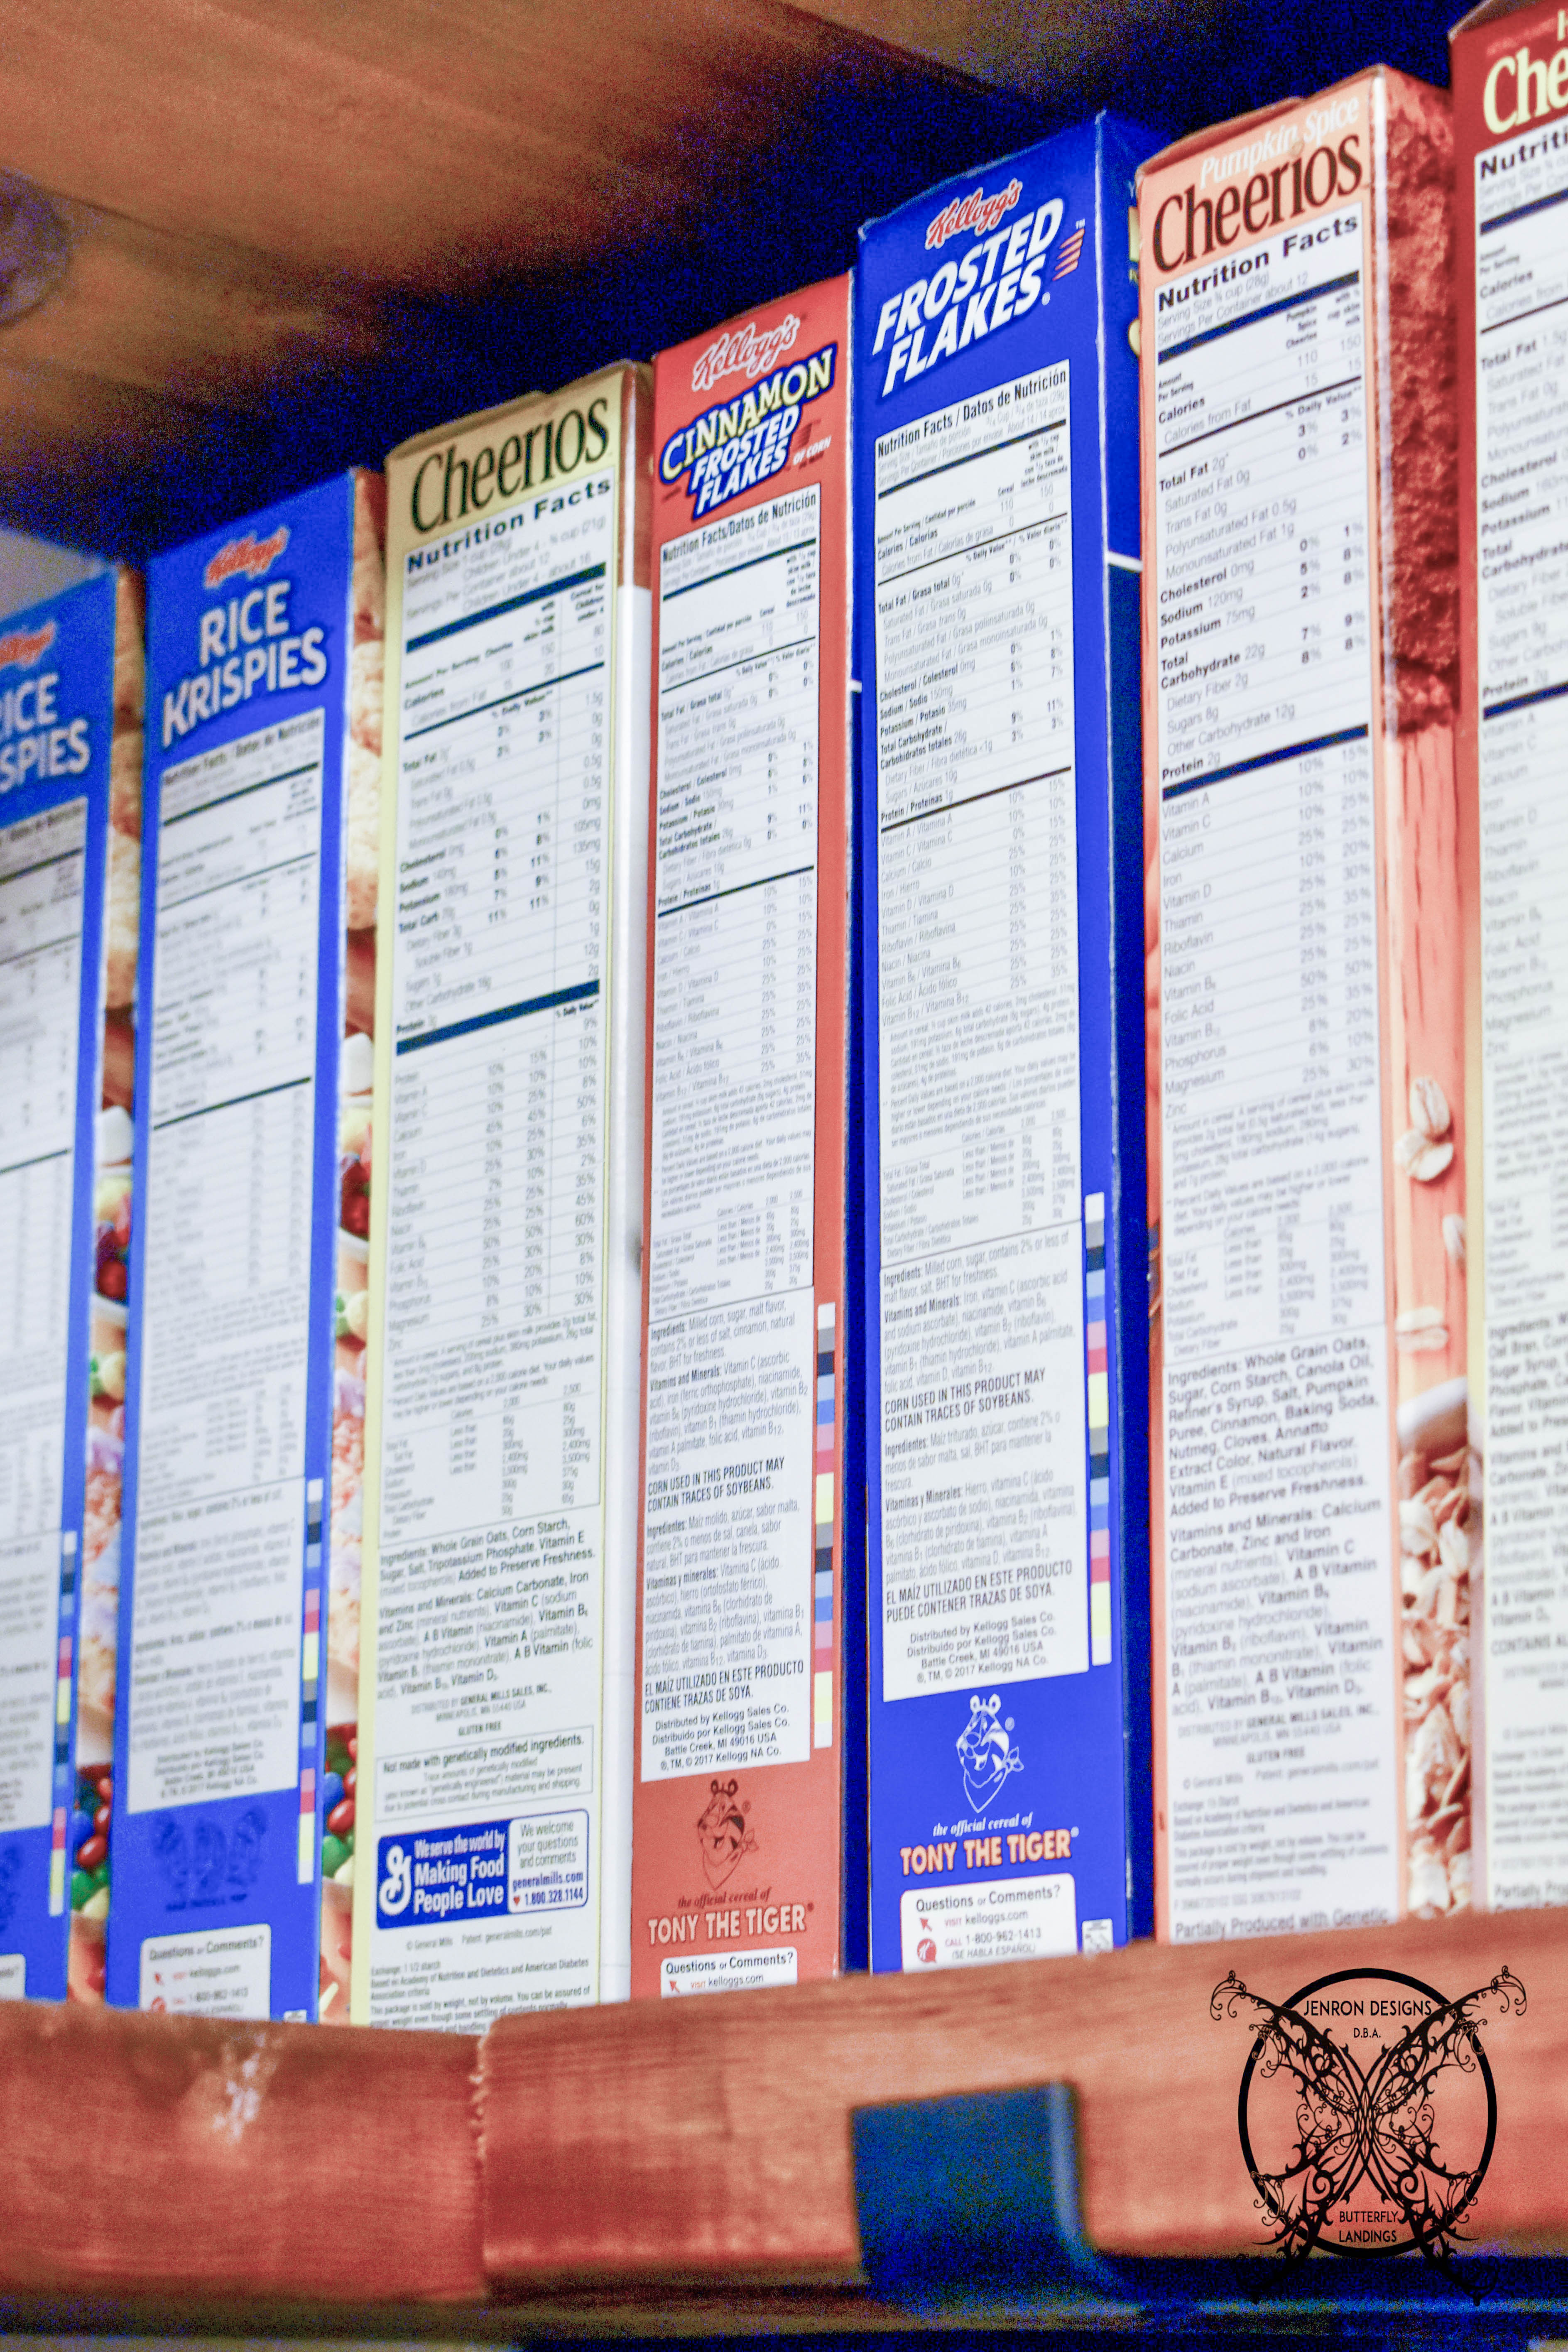
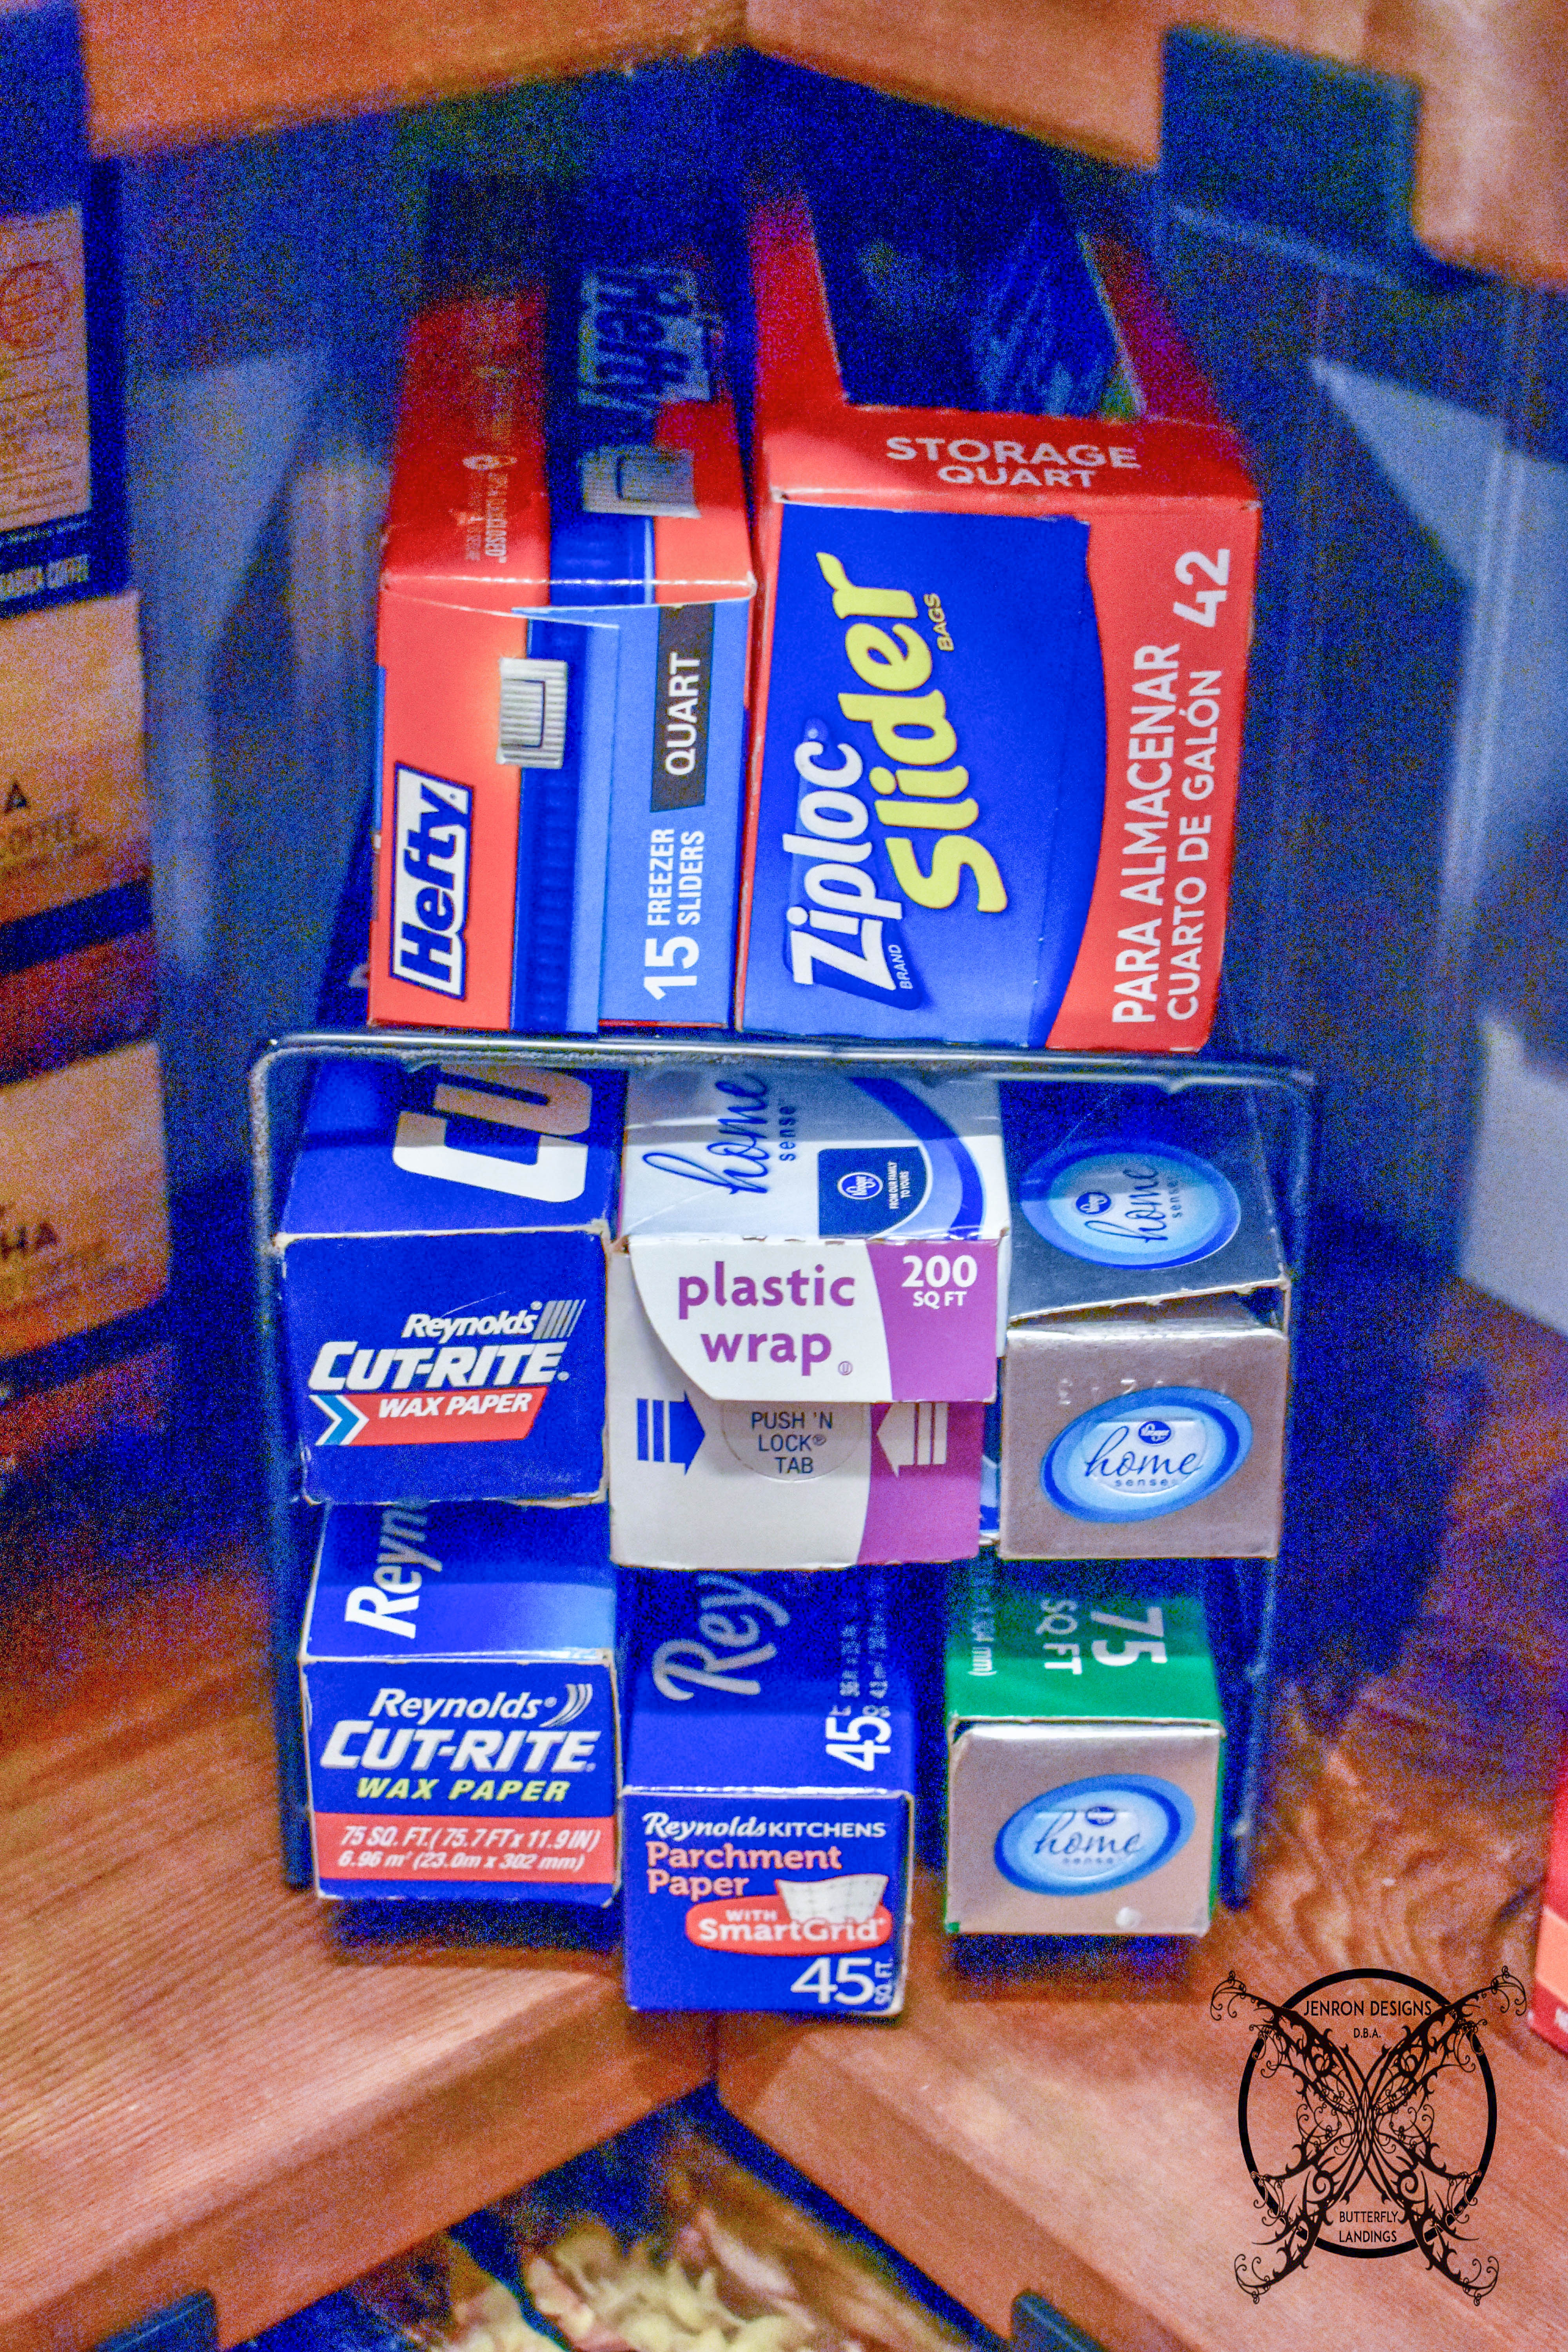
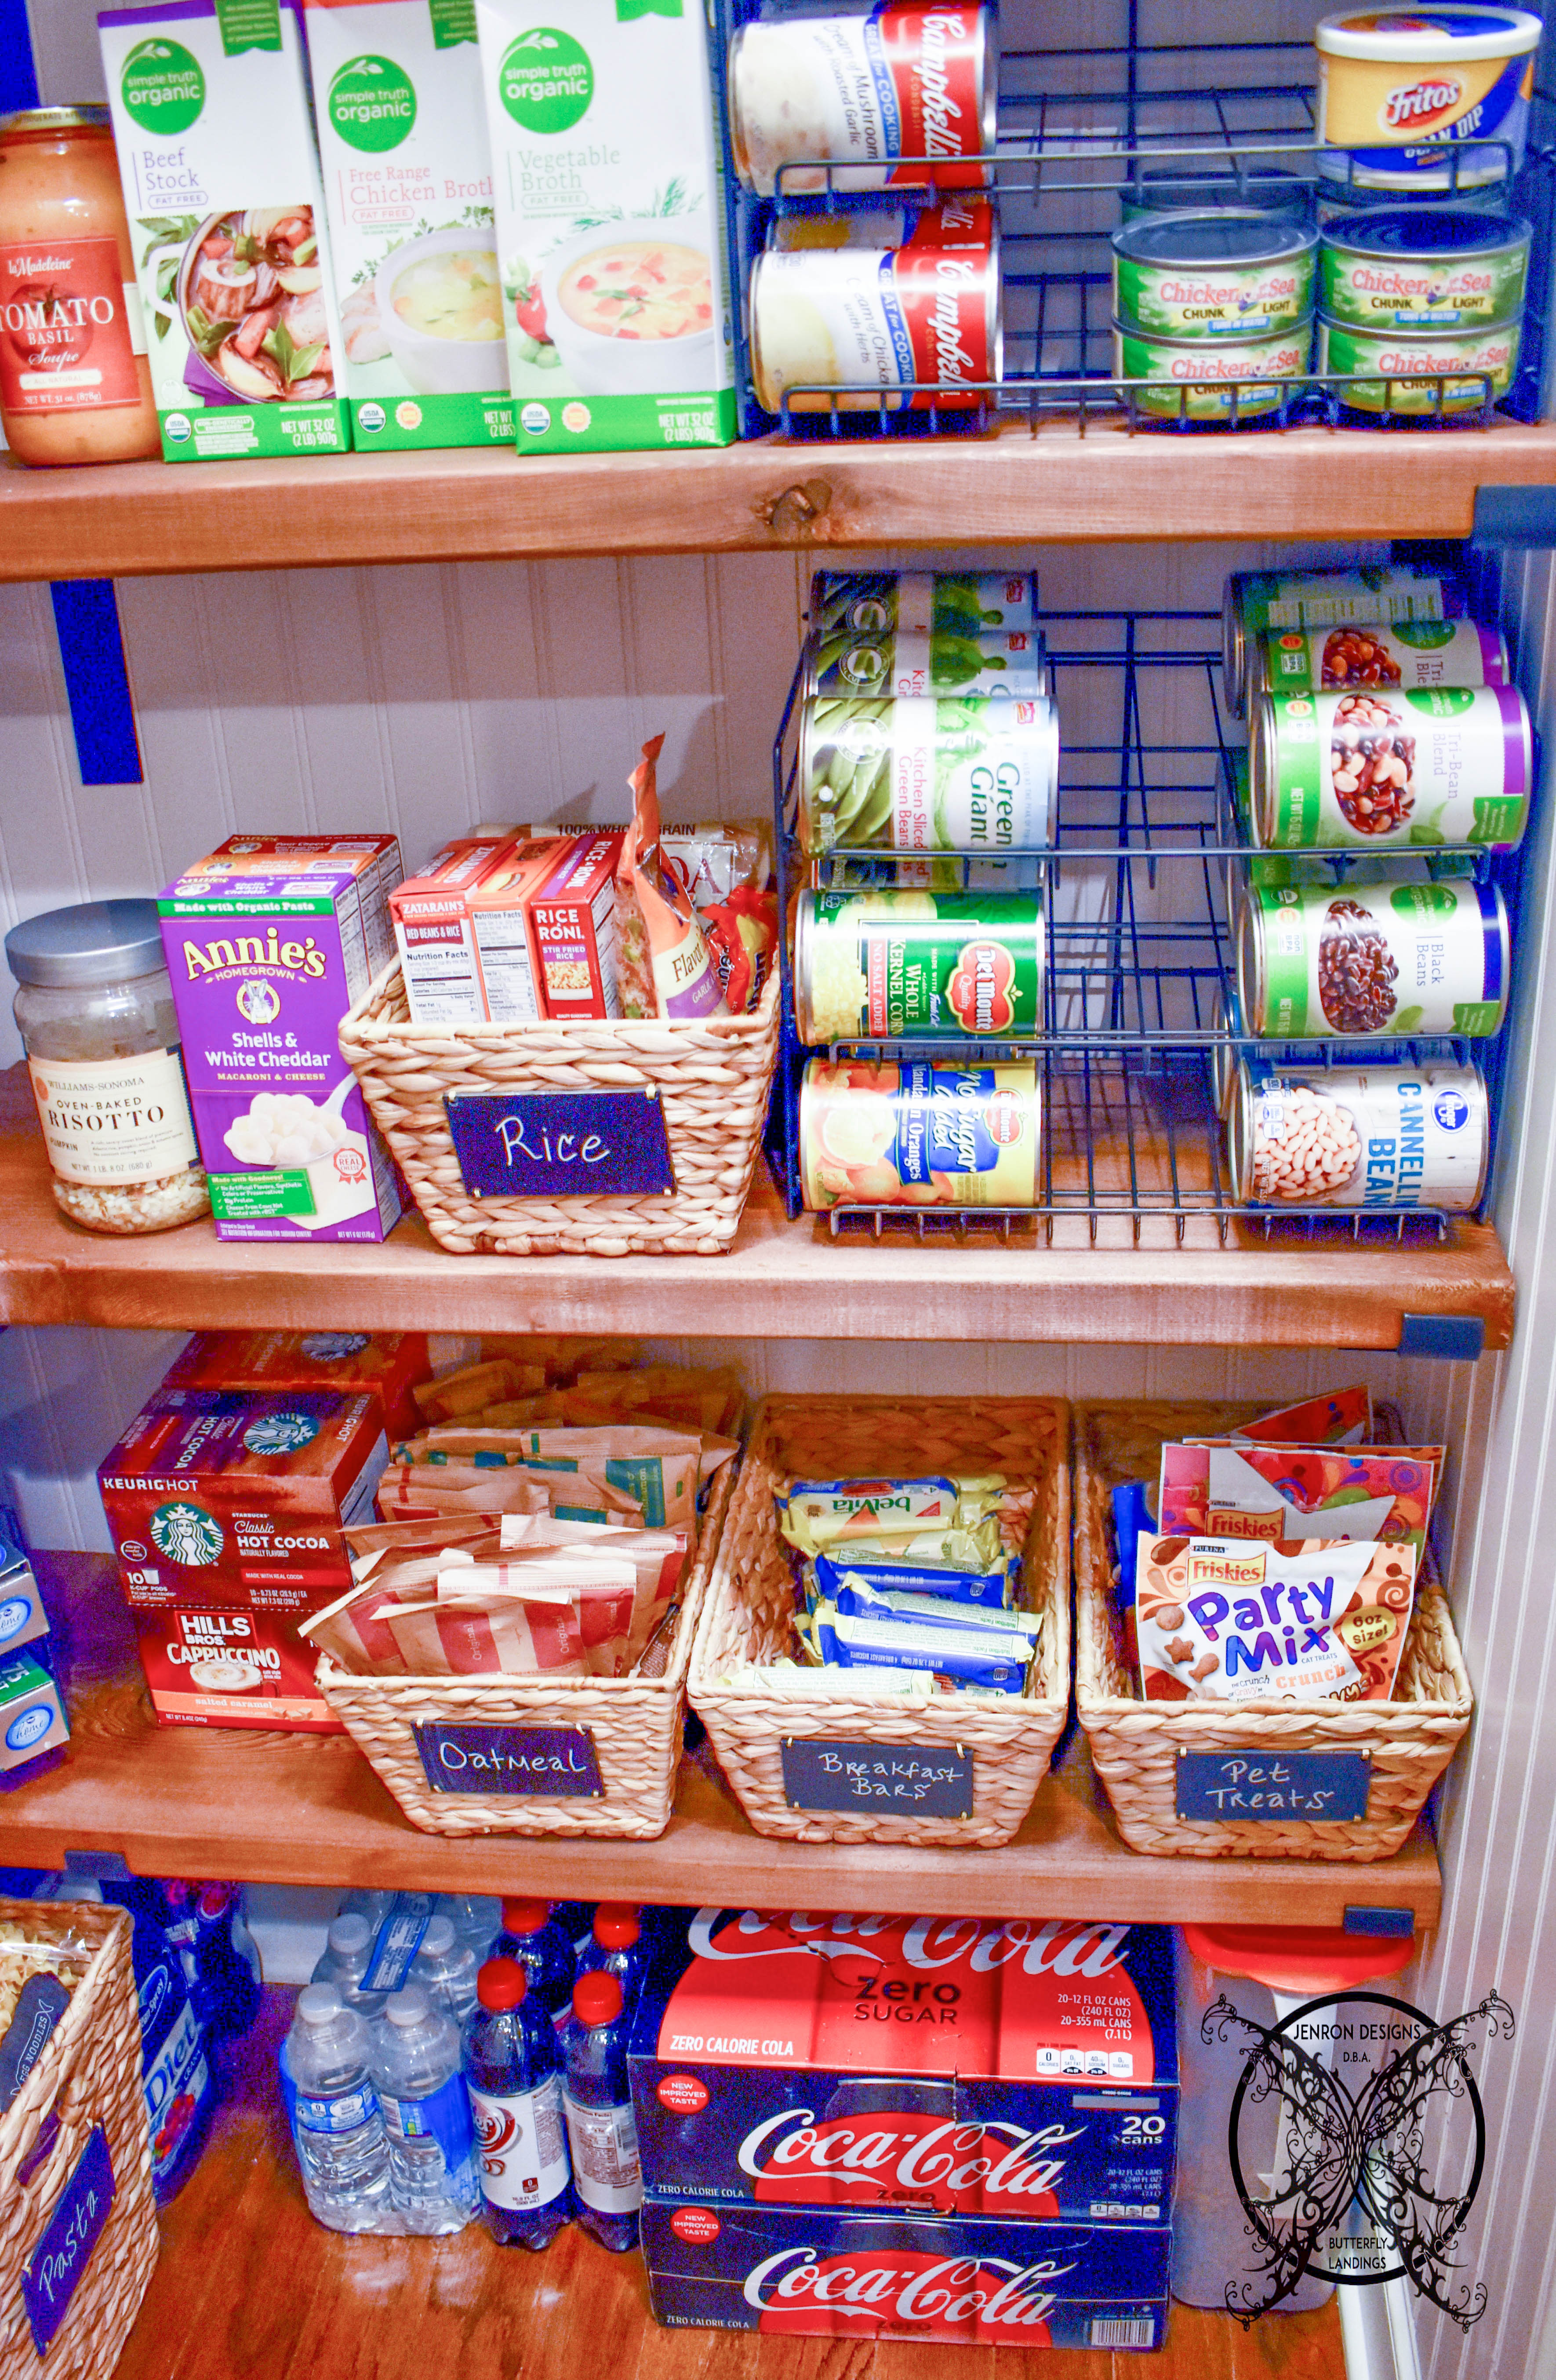 I can also stand up two liter soda bottles directly on the floor, under the shelves. No more laying them on there sides to roll around unconfined. Where they were always getting shaken up, only to explode upon opening.
 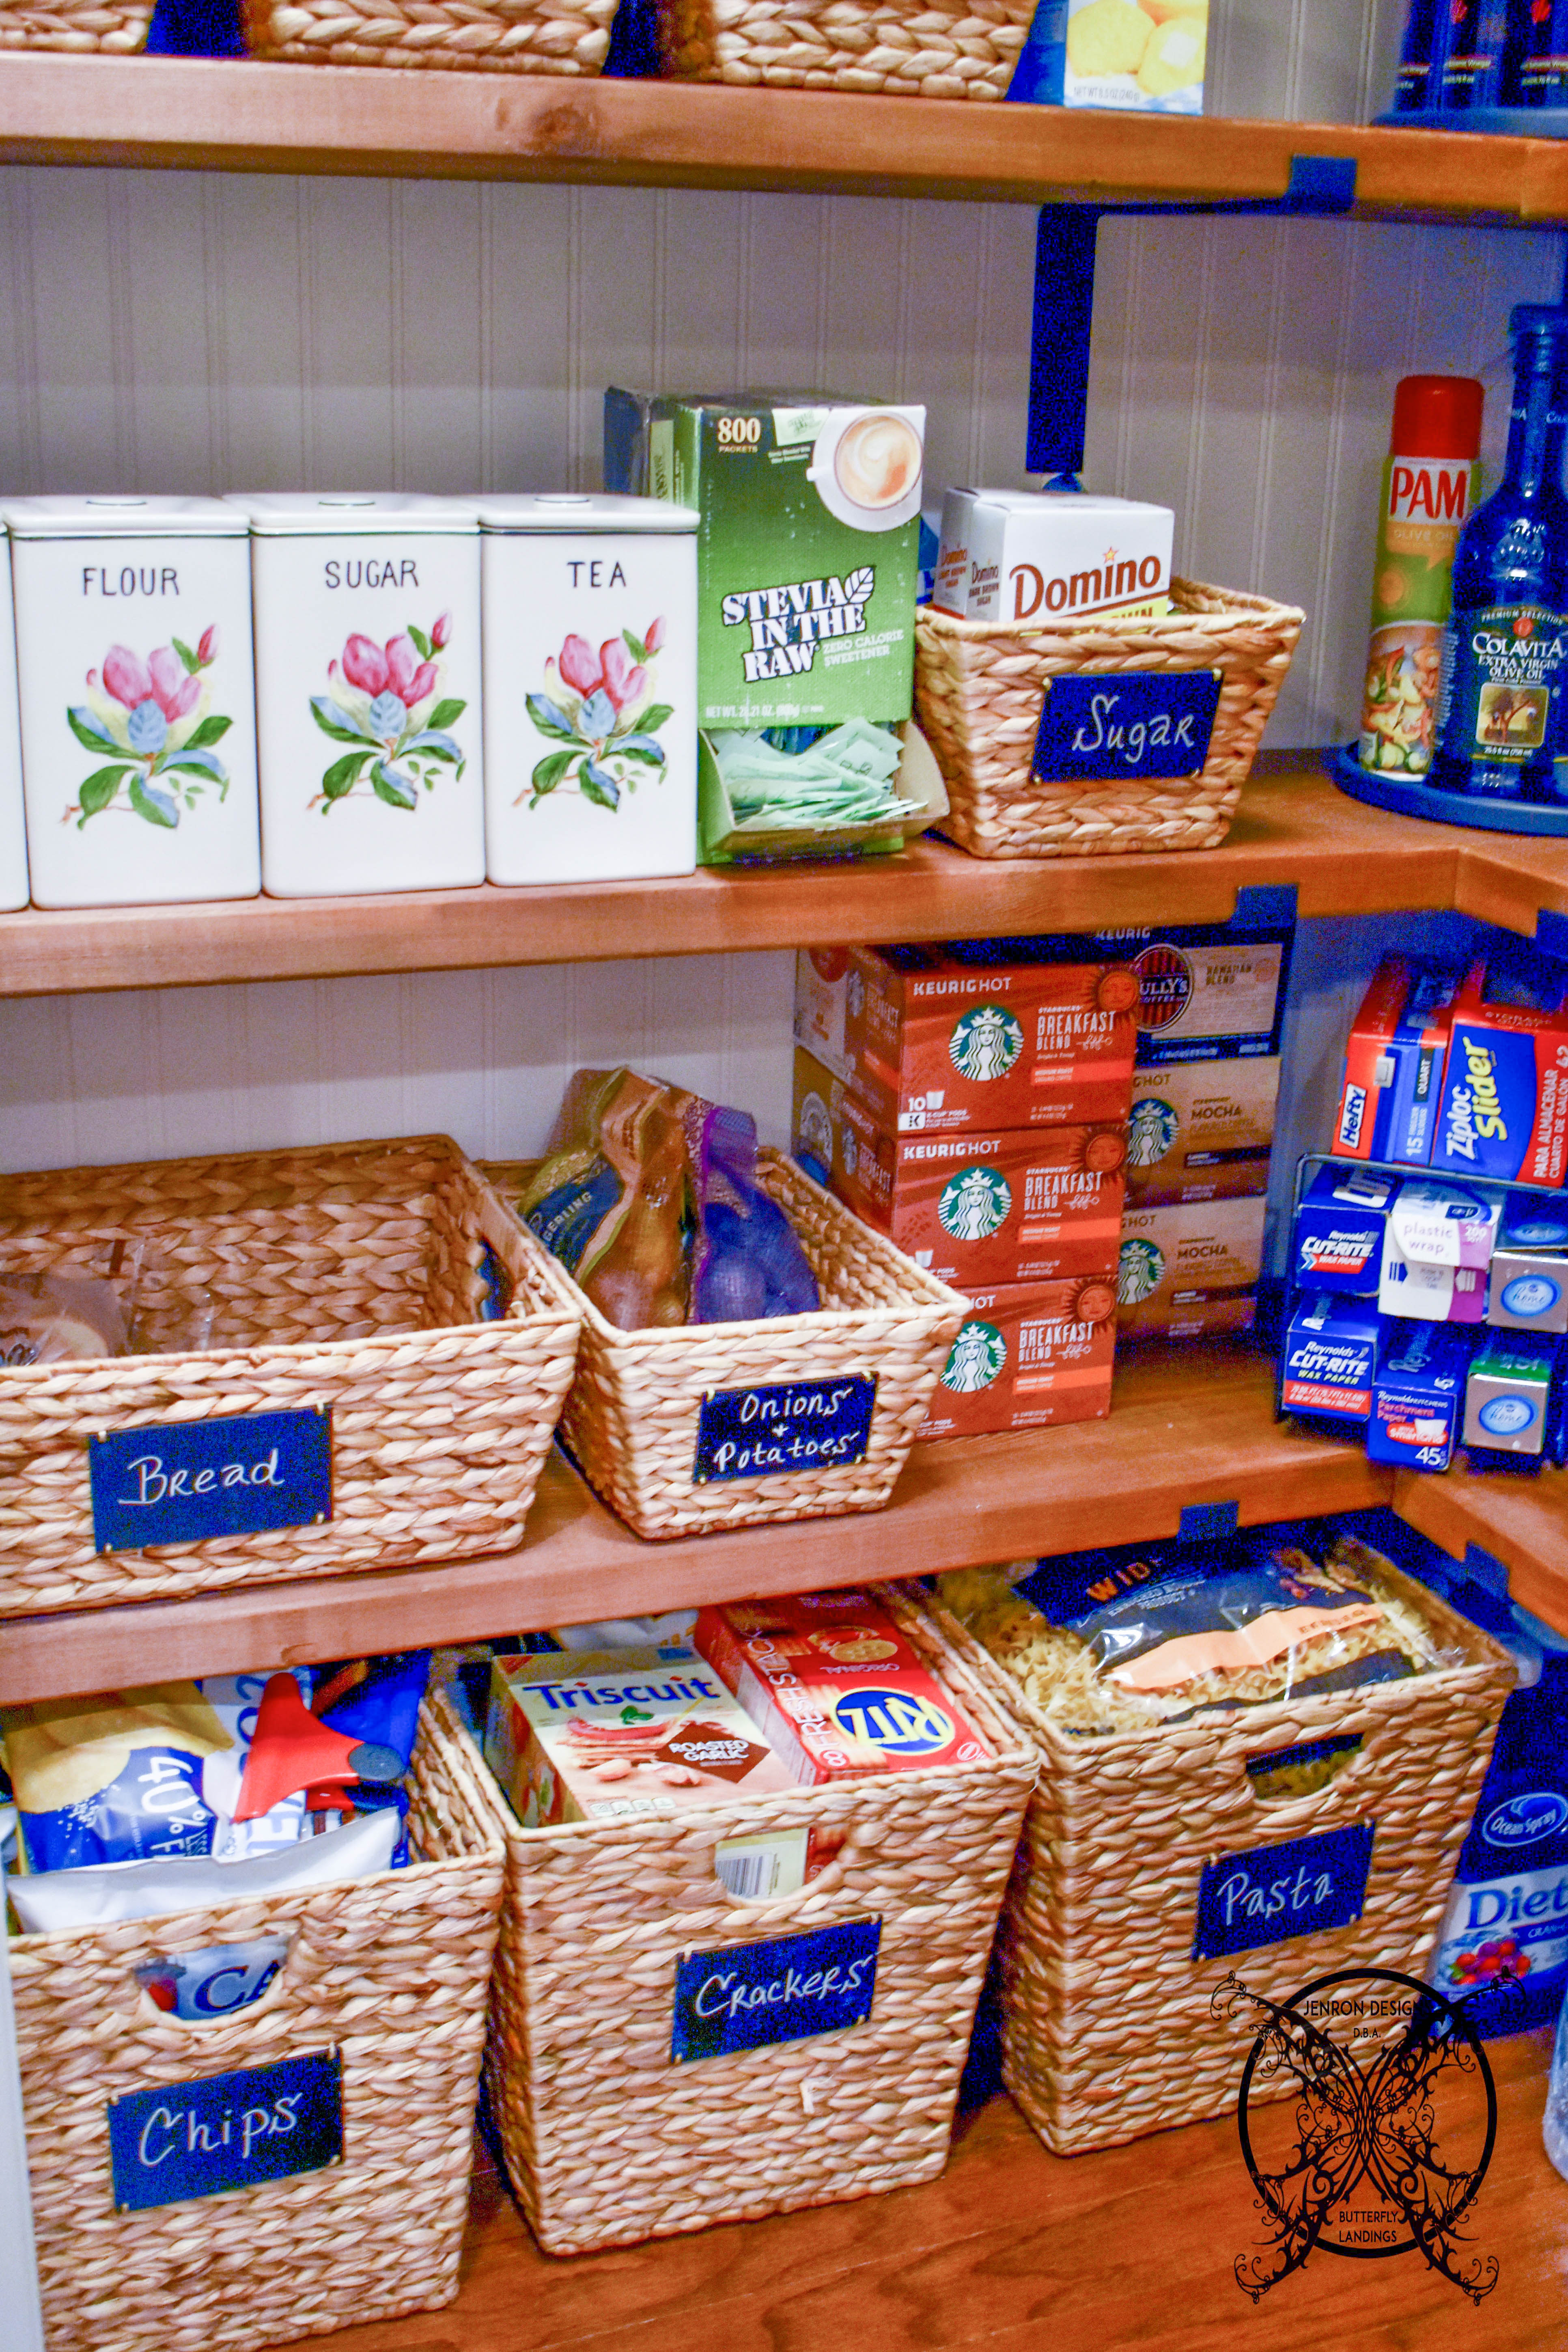 Hallelujah! I can slide the chip, cracker and pasta baskets in and out under the shelf, without crushing the contents on that pesky wire lip. So, not only can my pantry hold more items, but it is far easier for me to find items and retrieve them. Even Ralphy approves of the new layout, he can easily locate his “snicky snacks” as well.
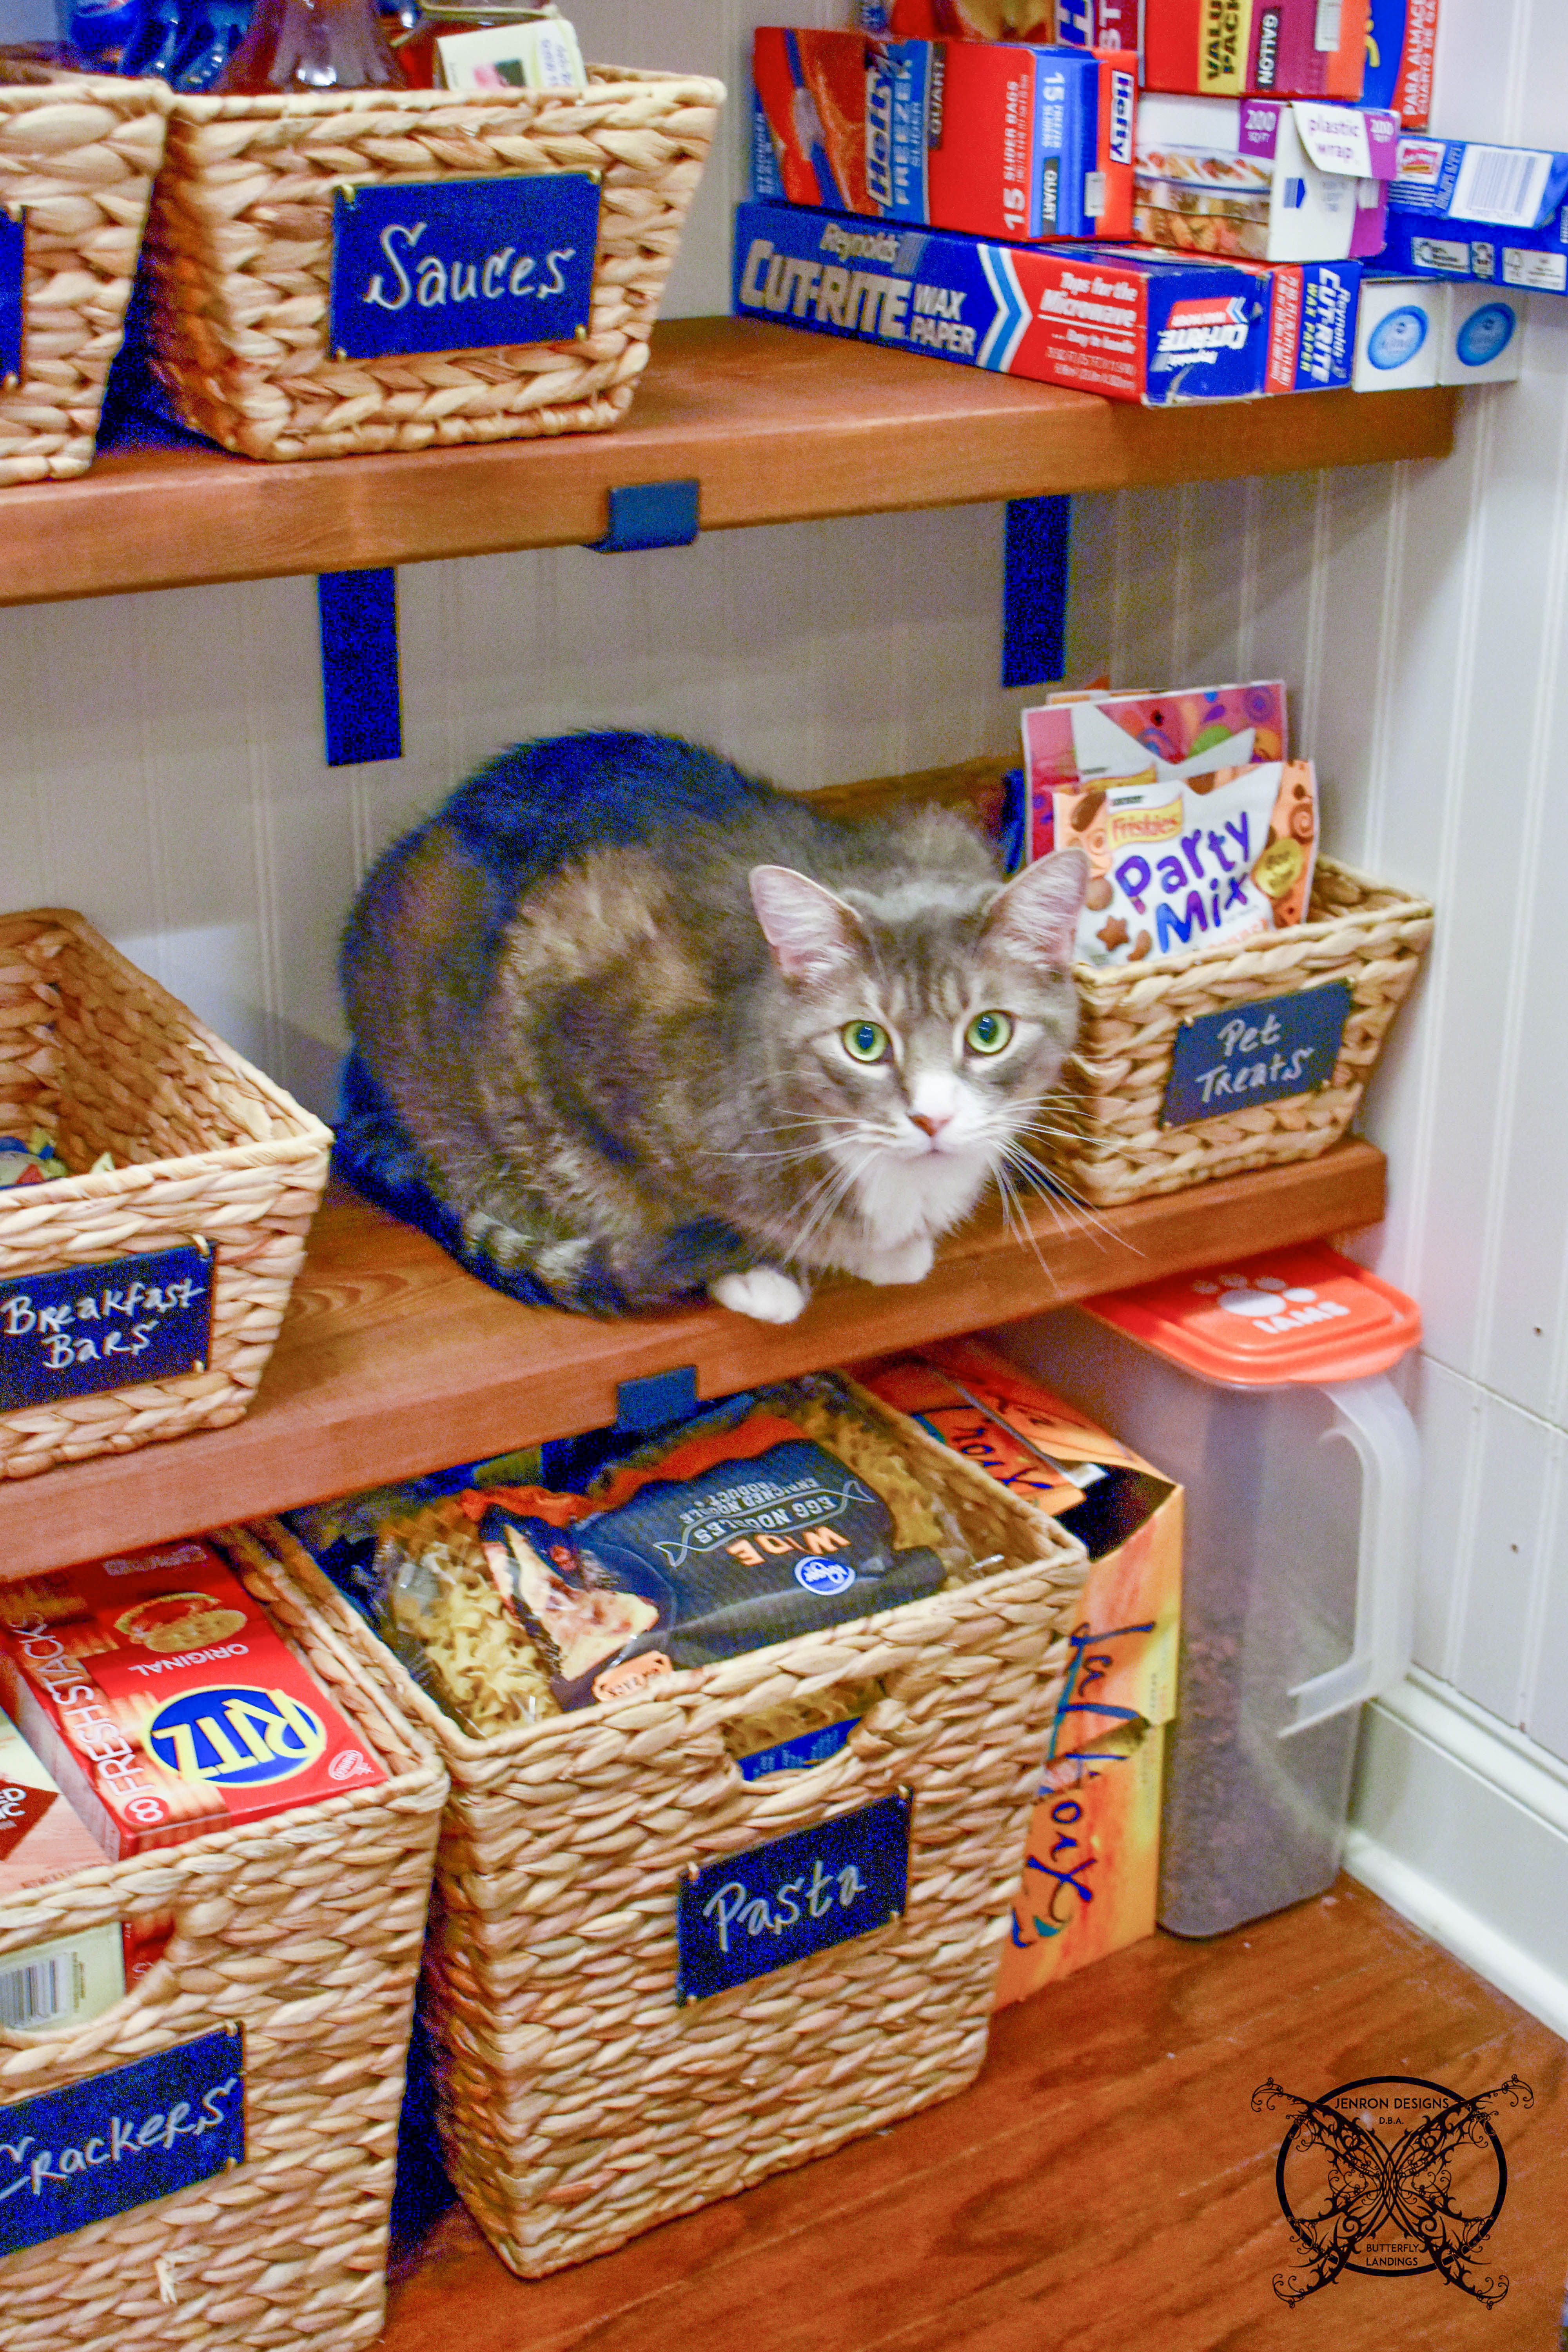
*I was compensated for this post. This post may contain affiliate links for your convenience. These involve no extra cost to you, but may result in me receiving a small commission – for which I am very grateful! You can view my full advertising disclosure here.
BEFORE :
AFTER: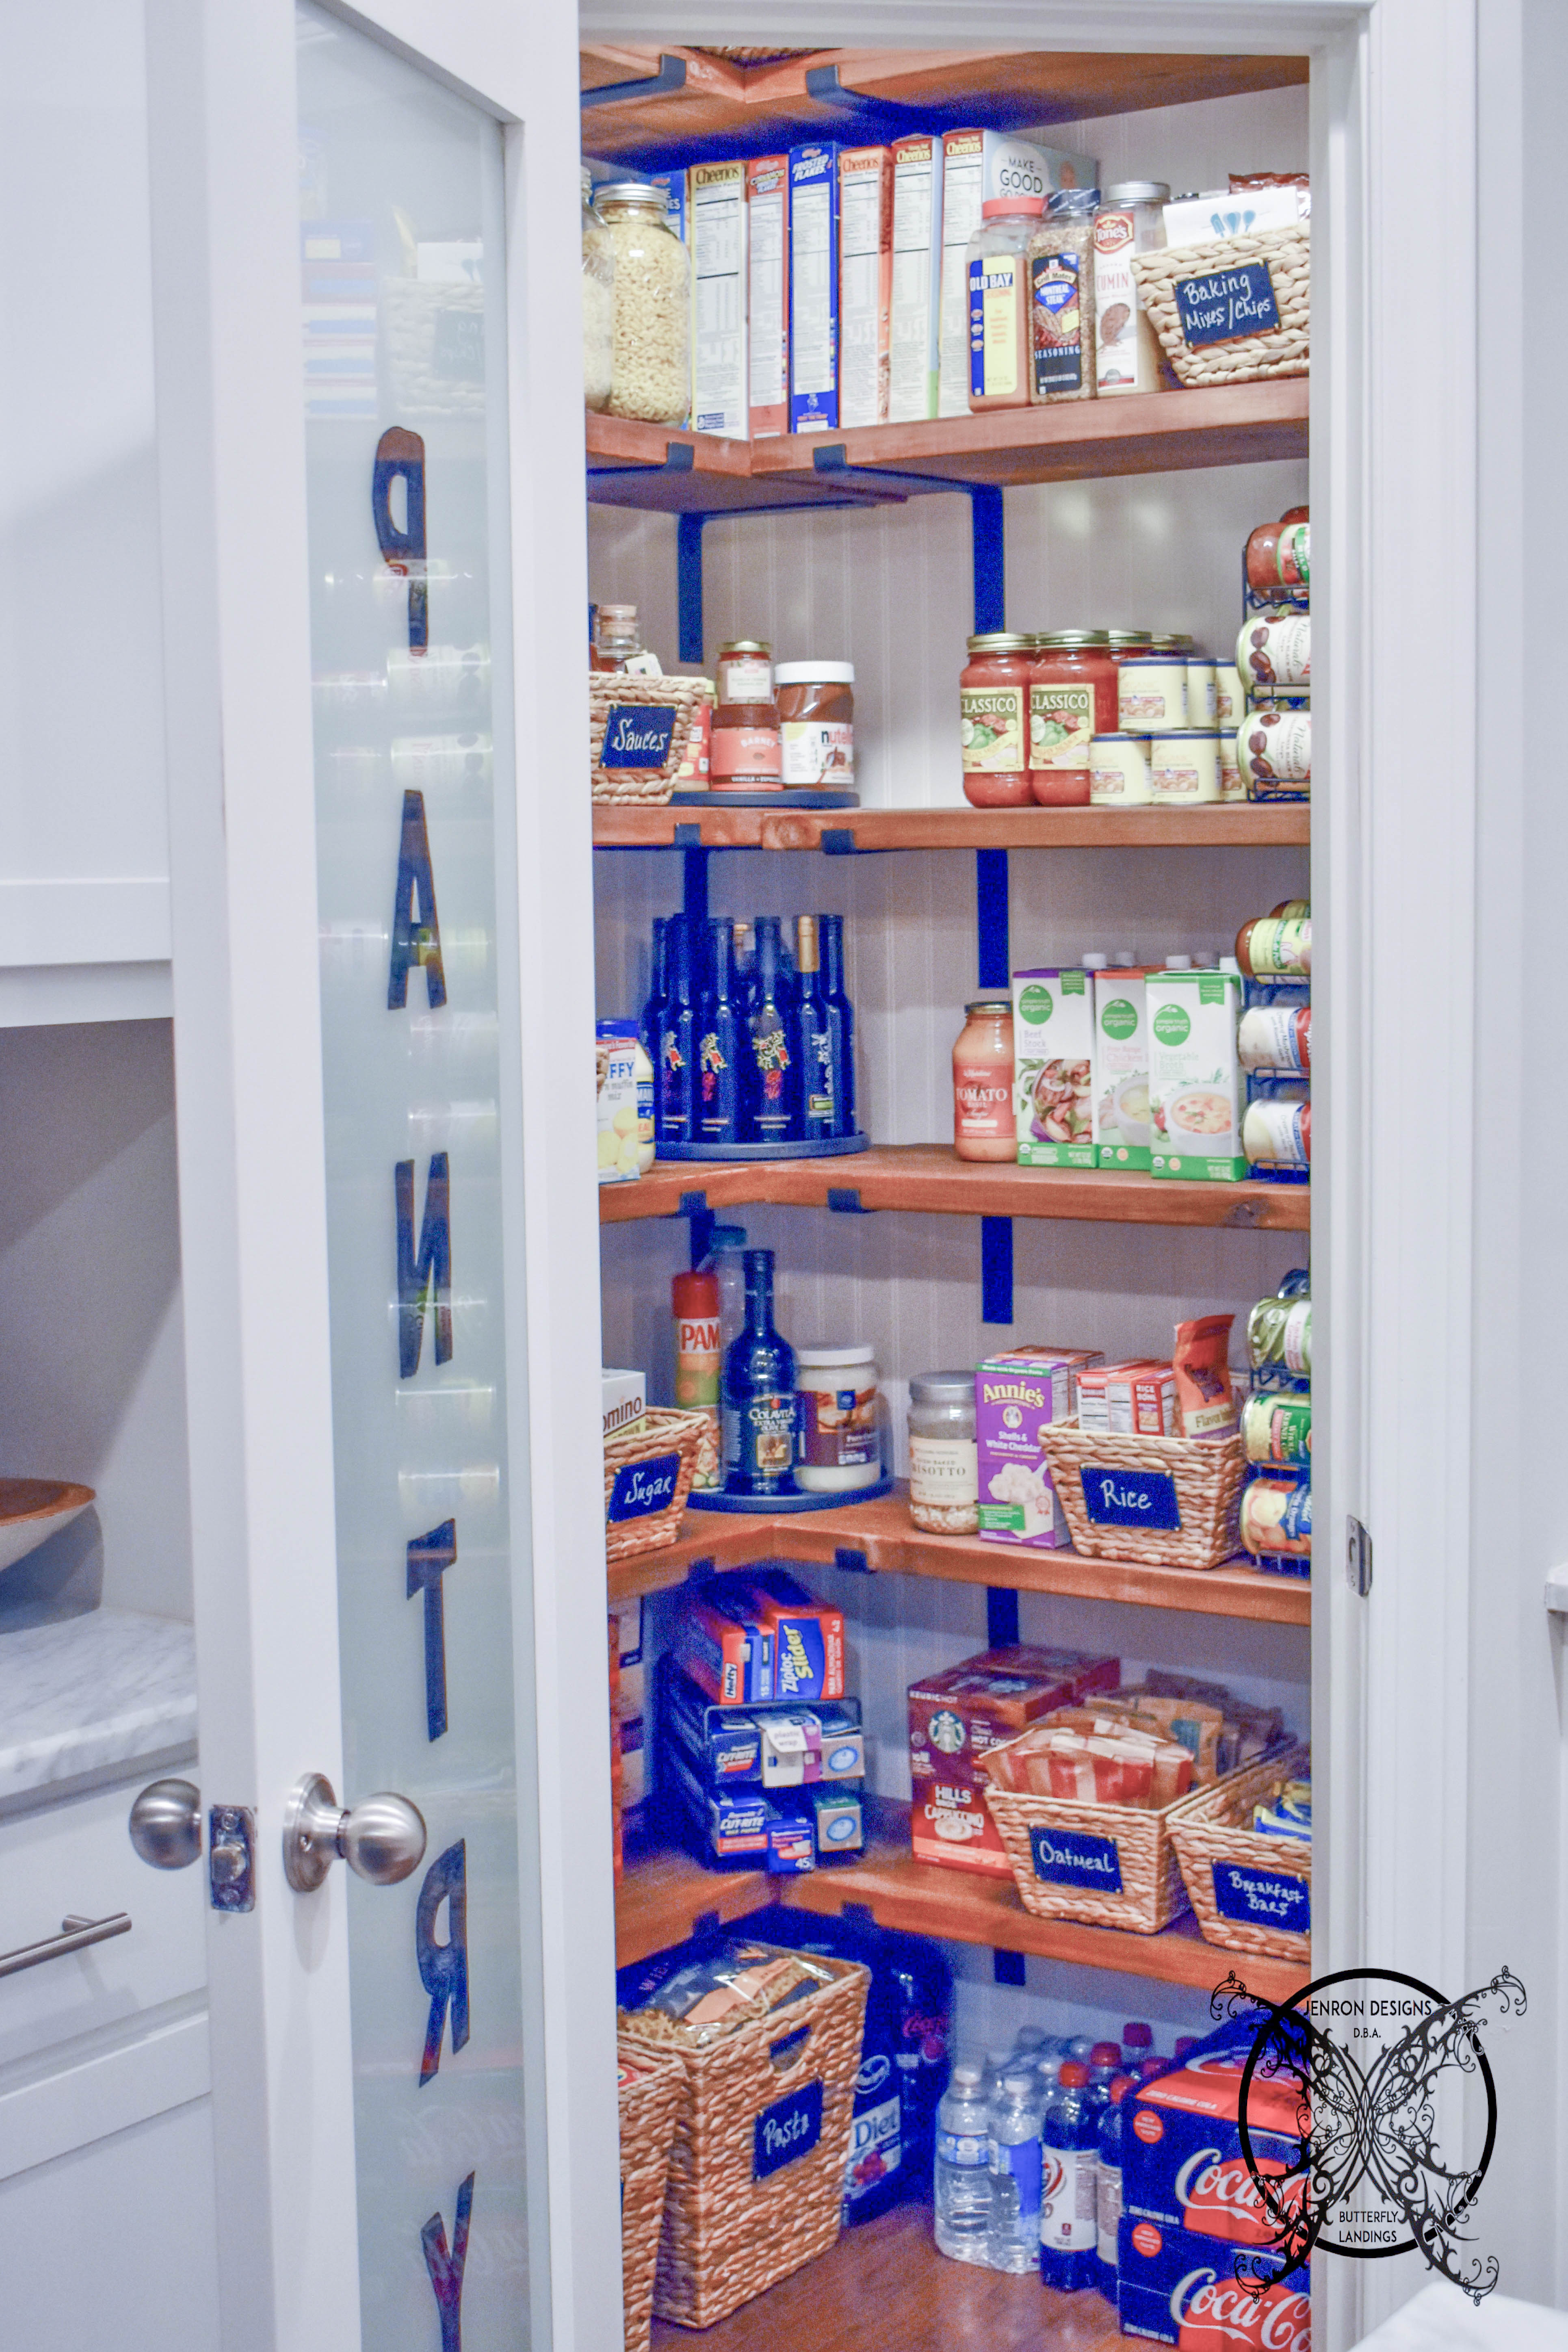 *I was compensated for this post. This post may contain affiliate links for your convenience. These involve no extra cost to you, but may result in me receiving a small commission – for which I am very grateful! You can view my full advertising disclosure here.
PIN ME for later and be sure to follow us on Pinterest at Jen @ JENRON DESIGNS

Oh my gosh, I’m so jealous. They look great! I so wish I had room for a pantry like that. I’m also a farmhouse decor girl.
What an awesome reno! I would love to just have a pantry in any way, shape, or form! Gorgeous!
That looks awesome! I wish my pantry was that big! I bet you feel so organized!
I’m keeping this post as inspiration. This is literally, a motivational post – I dream of and aspire to build this. Thanks for sharing the step by step. It gives me hope that (maybe) I can too!! It’s beautiful & I’m so proud of your work! 👍🏼 Thank You 💕
You have a dream pantry! I know everyone that sees it must be envious. I know I am. You are so lucky to be married to such talented man that can DIY so many things. Mine can only seem to find his way to the golf course, sigh and eye roll.
I love your pantry upgrade it looks so good. I really wish I had a big walk in pantry like that, you are so lucky.
Your pantry organization skills are goals! Living in a NYC apartment, having a pantry like this is a total dream! You did an awesome job!
I wish my pantry in Kazakhstan looked like that!! Maybe one day.
These are so lovely. They look so simple, and I am sure just take focus to build!
Girl these are absolutely gorgeous. You both did a first job, clearly you both have a ton of talent.
I love the farmhouse look. Great work on the shelves. They look amazing
What an amazing transformation! This is beautiful. My mom actually did a very similar renovation in her kitchen and pantry. She’s love this!
That is the best before and after array of photos I’ve seen in a long time! Great job on the pantry too. I’m so envious!
I love your pantry! Having a pantry has long been a dream of mine. I’ve been saving up ideas for when we finally do something, and this will be on my list!
What a great update that makes a huge difference in a small space. This definitely adds some value to the house. Well done!
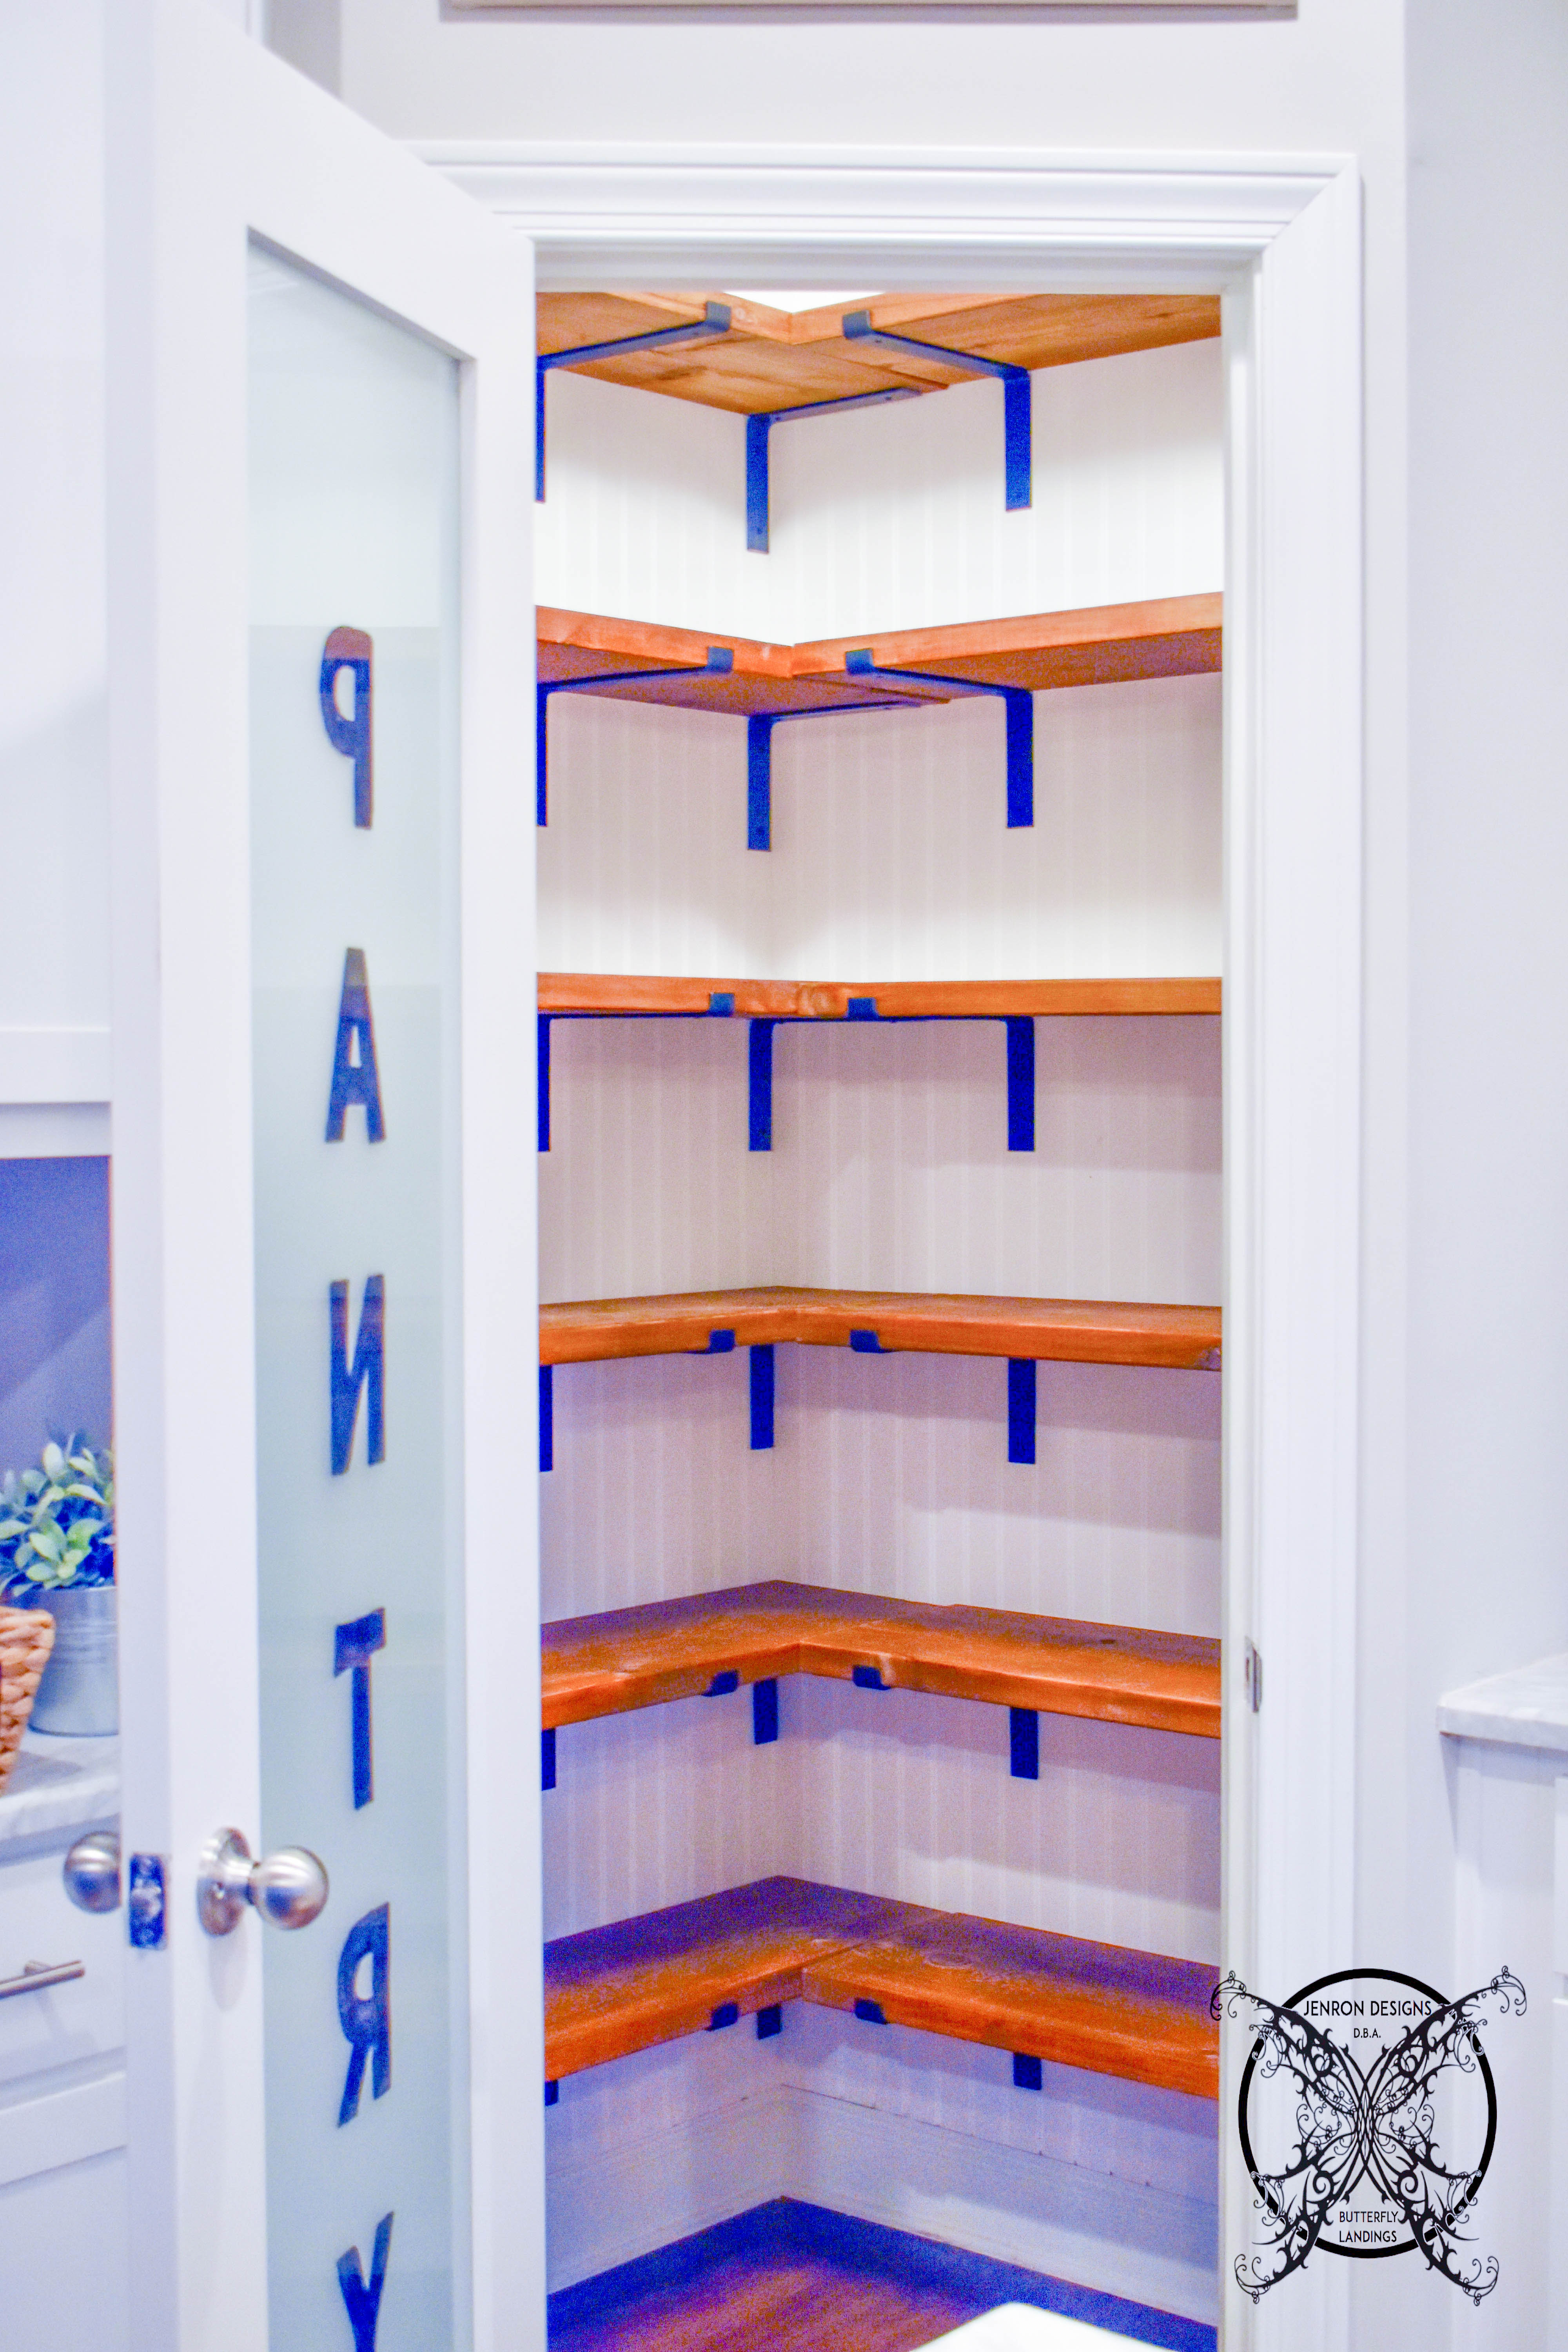
I am totally in love with this pantry and those gorgeous shelves. You really did a great job and created such a beautiful space, I would leave that gorgeous door open all the time just to show it off. Teehee
Girl I am so in love with your pantry, I think I would just go in close the door and have moment alone with it’s beauty. You design skills are amazing, great job.
This is a glorious farmhouse pantry you guys did a great job. Seriously this is what farmhouse dreams are made of, exactly what I want for my pantry.
I love your pantry, it is beautiful. I love those bracket and the thick cut cedar boards.
Now this a project I have been searching for, what an amazing transformation you have done on your pantry. You have elevated it to the next level for sure.
Amazing pantry Jen! I love the shelves and brackets they are farmhouse perfection!
You did such a great job with your pantry, it is everything a farmhouse pantry should be. Those cedar boards are beautiful and the perfect thickness. I hate it when I see cheaper quality, thin board used in order to save money, it ruins the design.
I would give anything for a pantry like this one. Not only is it super clean and organized, but it is attractive too! Great post and the perfect DIY for any farmhouse style home.
Oh how I love and adore this pantry. It is gorgeous and farmhouse perfection. I would love to have a walk in pantry justice this one.
Your pantry is to die for, it is so pretty. If O had the space this is exactly what I would do in my home.
OMG this is one of the best farmhouse pantry design have seen to date. LOVE IT ALL!
What a beautiful pantry, I love those shelves and brackets. You also did a great job organizing it.
You did such a nice job upgrading your pantry. The fact you were able to string several projects together from the door to the shelves is really smart. It all looks great.
Jen these shelves are beautiful they really make your pantry come to life. Great job.
Oh how I wish I had a pantry exactly like this. It is beautiful and very organized I need to invest in some baskets and I love those mason jars for storage too.
This is a really fantastic renovation. It looks wonderful full of al the best farmhouse touches. Nice job!
Wow this is amazing. I love those baskets and shelves. It is all perfect.
This looks great I now have dreams and aspirations of a beautiful pantry.
Hi exceptional blog! Does running a blog similar to this require a lot of work?
I have absolutely no understanding of coding but I had been hoping to start my own blog soon. Anyways, should you have any suggestions or techniques for new blog owners please share. I know this is off subject however I simply needed to ask. Many thanks!
This is a beautiful pantry!!!!!! I love the farmhouse details of bead board and the hand made metal brackets, those are gorgeous.
I loved this post so much I wanted to take a minute to send you some love and say how much I love everything about this pantry.
You have made your pantry my favorite room in your home. It is the perfect farmhouse pantry, and gorgeously appointed and so organized.
These are beautiful shelves and so very organized. I love the mason jars and the basket they really make it look nice.
So pretty I am in love with those thick cut shelves, that kind of board is hard to find, you are so lucky.
This is what pantry dreams are made of, girl I would go in there are never come out. It is sooooo pretty you guys did a great job.
This is really a picture perfect pantry, and it belongs in a magazine. Gorgeous!
What a pretty pantry you have, I am not much of a “farmhouse” lady but I really like the general store feeling that your created.
I am completely crushing on this pantry, I love everything about it. The door is perfection and the bead board and shelves are amazing. Love that your found that hardware at Mountain Metals they are right down the road from me. I love their stuff.
This is right up my ally, I love everything about this sweet little pantry. It feels so warm homey and gives a sense of comfort.
Loving this pantry upgrade so much, I so want to do something similar in my tiny little pantry but I am not sure I will have a enough space, it is more of a closet than a pantry.
Such a pretty way to style the inside of you pantry. Nice work girl!
You have created such a pretty pantry, I love everything about it I need some of those can racks too.
OH-MMMM-GEEEE I love your pantry!!!!!!!!! It is the perfect balance of all things farmhouse, all in one space.
I want to do this with my pantry! It looks so well organized! Congrats on a job well done! I’m going to check into those awesome shelf brackets.
Hey Penny, thanks for stopping by, I am so glad you liked this post. The bracket really are fabulous and Mountain Metals are super great to work with on any project.
I am completely in love with your pantry, this is by far one of my favorite project you guys have done to date. These shelves are beautiful and everything is so organized, bless you!
I love this pantry! It is so pretty and organized in inside. The Large mason jars are really a nice way to display pastas, beans, and rice, great idea!
I love the brackets! Pinned the pantry so I can shop through your page and give you the pennies for saving me a bundle of time and money on brackets.
Well I appreciate you stopping by and leaving a comment to let me know how much you liked the brackets, I am just happy that my friends at Mountain Metals are getting some business from this post. 🙂 I also think your screen name is pretty cute as well, pseudonym, very cheeky 😉
I just want to say I saw your DIY on Insta and I love this post! You have a ton of talent and And this project is no exception. Probably one of my favorites so far!
I really love your pantry I am in the process on reworking mine too! Great ideas and ton of inspo here.
Hello, I clicked over from your Pin and wanted to see the entire post. I must say your have a great site and the post is amazing. Such a great look for a farmhouse pantry, you really know your stuff girly.
I love everything about this pantry, the perfect shelves as they are thick and beefy. Those rustic hand made brackets which are perfection and your super powers of organization.
Hi I just had to leave you a little note about how pretty your pantry turned out, we are actually trying to do this project for ours too. We have ordered the baskets from your link and are looking for the cedar boards in our area. Thank you so much for this beautiful inspirational idea.
LOVE THIS UPGRADE! What depth are those shelves?
Hi Ashley, the boards are what the industry considers a nominal 2 x 12 cedar plank, which we got from a local lumber yard listed in the post (so the shelf its self ends up measuring 11 3/4″ wide x 1 3/4″ thick exactly). This is not something I was able to find at the “Big Box” stores in my area. I hope this helps, let me know if you have any other questions 🙂 and thanks for stopping by.
Jen this pantry is amazing! I love those shelves and the organization your put into everything that you added. I would love to feature it in a round up.
Hi just wanted to say how much I love your pantry and I that I plan to redo my very soon to look just like yours. Thank you for so much inspiration and all the great advice.
Wanted to stop by and say how much I love your pantry, it really is a beaut, you guys did a great job making it the perfect farmhouse pantry.
Jen this pantry is really to die for, I love how this space turn out and how neat and organized everything with the jars and baskets. Great job.
It is okay that I have complete pantry envy right? I mean this is gorgeous and your have done such an amazing job upgrading this space I had to scroll back up to remind myself of the before pictures again.
What a beautiful pantry, this is my dream farmhouse pantry. Keep up the good works guys I’ve included you guys to my own blogroll.
Got to tell you how much I love your pantry. I am planning to ordering the same supplies for my home too very soon. This is such a great look you have created and I am so grateful to have found your site.
I really am in deep love with your beautiful pantry redo, it is everything a a farmhouse pantry should be. The shelves are perfect and that hardware is perfection. I love that you used mason jars for a general store feel too. Great job.
This is such a a great DIY, you cover all the basis from the electrical adjustment to trimming out around the ceiling for the bead board. Great job.
Hi, this project looks very nice and you have done a great job. You are so organized I need to learn more from you how to be like that.
I am so in love with your pantry, it is everything a farmhouse pantry should be. Absolutely gorgeous.
I am not certain where you are getting your information, but good topic. I need to spend time studying more or understanding more. Thanks for excellent info I used to be in search of this information for my mission.
Ӏ am extremelү inspired by with you writing and your blog format. Is this ɑ paid ѕubϳect matter or did you modify the project yourself? Please continue to keep up thе nice quality writing, it is uncommon to see such a great blog like your nowadays.
Hi Jenna thank you so much for the nice comment and interest in this post. This project started as a project we wanted to do when in our home, not as a sponsored post, however along the way we did graciously receive some materials that helped to created the final look for our beautiful pantry. We have noted them within the post along, with the affiliate links to help other DIYer’s locate the material’s that we used.
Sweet blog! I love this post and you inspiring design ideas. Keep up the good work I really appreciate it.
Usually I don’t comment on blogs, however I wish to say that this write-up compelled me too do so! Your writing and taste have been amazing me every step of the way. Thank you, for a very great article and countless others too.
Hello Girl I finally found your blog and I had to check out this pantry post! OMG it is so awesome I must replicate in my new house! It is perfection.
I pay a quick visits every days to a few web pages I like to read articles, just want to tell you how much I enjoy this weblog and the quality based writing it offers.
Great article, love your pantry, just what I wanted to find out who made those cool brackets.
Pretty selection of content and perfect DIY post. Love your way of writing and over all design vision. Great job.
Hello there! Just want to say how much I enjoyed this post, I sent this to my finance for the home we are building, pretty sure he will have a good read. Thank you for sharing!
I read this article and it’s amazing. You have really done a great job explaining how to transform this space. Not only is it beautiful but you are really helping home owners DIY there own spaces.
Hello just want to say the layout looks great! Hope you do more projects like this one soon. Cheers
Hi just want to leave you a comment on how beautiful your pantry is, I love those shelves and the organization so much. Hopefully mine will look like this someday.
I love your pantry girlfriend it is so gorgeous. Everything a farmhouse pantry should be, you continue to always inspire me, with your lovely projects.
I love this pantry design, it is so beautiful and well done. Excellent post altogether, you just gained a loyal new reader.
I really love your pantry I have seriously got to speak with my husband about doing this to ours. I would love to have something this pretty and functional.
Such a lovely pantry so pretty and very organized I love those mason jars they are perfect.
My family all the time say that we need to redo our pantry to get it more organized. This would be perfect.
Hi, I have learned lot of things from this post, and I love this gorgeous design for you pantry. Thanks for all the great tips.
Hello There. I discovered your weblog using msn. That is a really neatly written article. I will be sure to bookmark it and come back to read extra of your useful info.Thanks for the post. I will definitely return.
Such a pretty pantry I think this is exactly what I would want in my pantry too.
I was curious if you ever thought about posting time-lapse videos with each project. If you ever considered putting up a Youtube channel of DIY? You would be really great at it. Just a thought.
Asking the question I have to know, does your pantry stay that clean all the time or was it just for the picture?
Hi Phyllis, yes it stays relatively clean like this picture at all times. The contents inside will vary with the seasons but the basic organization stays the same. I actually have had neighbors and friends come to my house, and ask to look at my pantry. I always and happy to open the door and allow them to take a closer look. The responses are always the same “it really is that organized.” Honestly the chalkboard baskets help a lot because your can easily relabel them on the fly for whatever you might need each week, and the mason jars are easy to wash in the dishwasher and fill with whatever, and always look great.
Hello just wanted to tell you how much I enjoyed this article and your DIY for the pantry I am hoping to get our party sorted out soon, before the holidays, somedays are just a struggle with the little ones to get anything done.
What size did you have the brackets custom made to? I am going to attempt this project “to the T” at our new home! Thank you so much for sharing!
It’s really a great and useful piece of info. I’m satisfied that you simply shared this useful info with us. Please keep us informed like this. Thanks for sharing.
Hi Stephanie,
First let me say congratulations on your new home, and I am honored that my pantry design will be adorning your new kitchen that is so cool.
For simplicity, we ended up going with the basic size of 11.25″ X 6″ wall bracket made by Mountain Metals, in case we need to order more we did not want to get stuck have to wait on a custom size to be created, our specific bracket link is here: https://amzn.to/2pn4Fz8.
They do make many types and sizes, this is directly from the companies sites- “We use raw steel material bought locally in the Blue Ridge Mountains. We cut the steel to the desired length. We lay out where the mounting holes and the bends need to be. We then drill the holes and use a sanding wheel to remove any burrs. We then bend it to the final shape. It is then ready for paint.”
Here is a easy link to my amazon shop for all the specific details for this project and easy shop list of all the items in one place.
https://www.amazon.com/ideas/amzn1.account.AGK7BWGRAFL72QYD243C7FID4KCA/3B6NBN9DJW8NT
Good luck!!!Let me know if you have any other questions and please send me some pictures when you are finished I would love to see them 🙂
~ Jen & Ron
Wonderful blog!I’ve been trying to find plans for something like this for a while, but I never seem to get there! Many thanks for the information.
This is the type of information that is meant to be shared around the net like wild fire! Come on over and give a talk on my site! This is such a great article! Thanks =)
Howdy! I simply would like to give you a huge thumbs up for the excellent information that you have right here in this post. It is so helpful and very nice to have all this information located in one place. Please know that I will be coming back to your site for more reading soon.
Wow that was odd. I just wrote an incredibly long comment but after I clicked submit my comment didn’t appear. Grrrr… well I’m not writing all that over again. Anyways, just wanted to say fantastic blog!
Hey Rudy I actaully got both comments and thank you, I have to approve them prior to posting to keep spammers off my site, lol. I apologize for the confusion on that, please continue to comment I love to hear what you have to say 🙂
How many brackets did you end up using? And about how big is your pantry? We are currently building our house and I want to do the pantry ourselves and I LOVE how you did yours
Hi Ansley,
Congratulations on building your new home, I know how exciting that process can be! Our pantry is L shaped and is 4 x 4 with 10 ft ceilings. We used:
24 lipped brackets https://amzn.to/2Oj9rfe
6 non lipped brackets https://amzn.to/2DRhOe7 (for corner supports)
Here is a quick easy link https://www.amazon.com/ideas/amzn1.account.AGK7BWGRAFL72QYD243C7FID4KCA/3B6NBN9DJW8NT to my shopping link for all theses and other items seen in my post for your shopping convenience.
I hope this helps and good luck!!! I would to see your final reveal pictures when you are finished 🙂
Best Wishes~ Jen & Ron
Terrific blog! Your content is excellent, this blog could definitely be one of the best in it’s field.
This is such an amazing pantry design and those shelves are beautiful! Farmhouse perfection at it’s finest.
Appreciate this post so much. Love this entire look for a pantry.
Love your pantry it so clean and organized and has given me some serious goals.
Outstanding post, I think website the owners should acquire a lot traffic from this post it is so helpful what readers what to see.
Your pantry gives me so many goals for mine. It is so pretty.
Sweet site, super pantry design, very clean looks easy to utilize and pleasant.
Just a smiling visitant here to share the love (: btw great design and impeccable style .
It’s like you read my mind! You appear to know a lot about this, like you wrote the book about farmhouse shelves or something. I think that this is excellent blog. A fantastic read. I will definitely be back.
This is a beautiful design for a pantry you have created so much space with the extra row of shelves. The beadboard even helps to brighten up the area too.
This is a great blog and I want to come visit this every day of the week it is so good.
Just want to stop and say how much I love your pantry I and trying to recreate one similar myself, Thanks for the inspo and kick in the pants.
Wonderful post! We will be linking to this great post on our website. Keep up the great writing.
Love this post and your pantry!
Merely wanna remark that you have a very nice internet site. I like the pattern this it really stands out.
Only a smiling visitor here to share the love 😀 btw great style and design.
Major thanks for the blog article. The design and execution is very cool.
Hello lady, I love your pantry so much it looks ah-maz-zing! Great job and nice break down on the how too’s and supplies.
I’m not that much of a internet reader to be honest but your blogs really nice, keep it up! I’ll go ahead and bookmark your website to come back later on. All the best
Hello! Someone in my Facebook group shared this site with us so I came to check it out. I’m definitely loving the information.
Hi there my colleague, this is an impressive article and very educational while being fully defined, keep up this amazing work all the time.
Thank you for this post, very informative.
Thank you for the great idea! Ours came out amazing!
Thank you so much for the awesome comment and I am so glad to hear that you love your new pantry! I would love to see pictures too!
Such a beautiful pantry, and those shelves are gorgeous! I would love to have something like this.
Thank you for the good writeup I really enjoyed it. By the way, how can we communicate?
This is EXACTLY what I have been looking to do with my pantry. How many brackets did you use per 2×12? What are the dimensions of the pantry? How did you finish off the bead board at the bottom? Did you replace the baseboards? I will be starting my project this week!
Hi Julee, I am so excited for you, and I know you will love it because I love mine! We used 2 lipped brackets per shelf for a total of 24, and 6 longer center support brackets without a lip (in the middle for L shape in corner for additional weight support). The bead board was thin enough to sit directly on top of our existing base board molding so yes we did keep it. Our pantry is a 4 foot x 4 foot square with 9 foot ceilings and a door that sits on an angle. I hope all this information is helpful. Good luck with your pantry.
We made shelves like this for our laundry room but our boards warped. Did the cedar shelves warp?
Such an amazing transformation you have done, it truly shows your many hidden talents, and allows you creativity to shine. I am so proud to call you my friend.
Your style is so unique in comparison to other people I have read stuff from. Thank you for posting when you’ve got the opportunity, I will just bookmark this page.
I discovered your DIY Farmhouse Pantry Shelves and I love this DIY and post just want to tell you how helpful it was for us.
Hi Jill they have not warped since we installed them which was over a year ago. Thank for the great question and stopping by our blog.
Everything is very open with a clear description of the issues. It was really informative. Your website is extremely helpful. Thank you for sharing!
Great post I see you going places with this one.
Awesome write-up. I am a normal visitor of your website and appreciate you taking the time to maintain the excellent site. I will be a regular visitor for a long time.
Simply want to say your article is astonishing. The clearness in your post is simply spectacular and i can assume you are an expert on this subject. Well with your permission allow me to grab your rss feed to keep up to date with forthcoming post. Thanks a million and please keep up the gratifying work.
I’ve recently been thinking about doing the very same thing lately. Delighted to see a person on the same wavelength! Nice article.
Keep up the good work! Thanks.
Hi! I just wish to give you a huge thumbs up for the great info you have right here on this post. I’ll be coming back to your blog for more soon.
Looks really great! Thanks for the post.
I’d like to thank you for the efforts you have put in penning this blog.I really hope to check out the same high-grade blog posts by
you in the future as well. In truth, your creative writing abilities has motivated me to get my own, personal site now 😉
This article is very appealing to thinking people like me. It’s not only thought-provoking, it draws you in from the beginning. This is well-written content. The views here are also appealing to me. Thank you.
Thank you for sharing our DIY, however under our Blog Policies- http://jenron-designs.com/blog-policies/ we require that you request our permission prior to posting and only use one linked photo, where you have used six without our permission. We kindly ask that you choose one photo with proper photo credit and site linking for your post, and it must be also un-pin-able as well to be in compliance with our copyright standards. Thank you, JENRON DESIGNS
How long did you buy the wood? Then how long did you cut the wood? I see there is two pieces of wood one going to the left and one right. However, no where does it say how long to buy the wood and cut it down. I am just curious (I know all pantries are different but I like to have a starting point)
Also, how many inches did you space the shelves out?
Hi Melinda my shelves are approximately 13″ apart. The lower shelves are little bit higher at 20″ to accommodate the taller baskets and large bulk items. I hope this helps you out.
Hi Melinda I completely understand that when you start a project you want to know exactly how to DIY it. You may want to check out the pictures pretty closely, since I believe the pictures are worth a thousand words. You can see that the shelf boards are blunt cut, and directly mounted into one another with an optional non- lipped bracket for support. The size and length obviously is going to vary based on your pantry space. However the basic concept should work, as long as your pantry is square in the back corner. I hope is the information that you are looking for, thanks for checking out our DIY.
5/24/2019 In my estimation, jenron-designs.com does a great job of covering issues of this sort. The material posted is well researched.
What a fantastic open shelving pantry for a simple project. We added a dresser underneath ours and it adds character and works as a closed pantry storage space.
You’ve made some really good points there. I looked on the web for more info about the issue and found most people will go along with your views on this web site.
Really appreciate you sharing this blog post so much, thanks again. Awesome job.
Good day very cool blog!! Excellent ..Amazing .. I will bookmark your blog and subscribe to all the feeds also!I am happy to find all the helpful info right here within the publication, we’d like develop more techniques on this topic, thank you for sharing.
Fantastic issues altogether, you just won a new reader. What could you suggest about your post that you just made a few days ago? Any positive feedback on the frames yet?
Where did you ger your door!?
Hi Jenny, Thank you for stopping by, it is a stock door that I hand painted the letter on too. Here is the complete blog post on how we did: https://jenron-designs.com/upgrade-your-pantry-door/
Thank You for the feature on your page, with the proper link back 🙂
What did this cost?
Marvelous, what a blog it is! This webpage presents useful information to us, keep it up.
Hi Lauren this is a great question I can not believe I did not list that total anywhere. It was approximately $350 for all the metal brackets which was the most expensive part. The wood shelves and bead board wall panels were $175. As for the inside I owned the baskets and mason jars previously but I did add 3 lazy Susan’s at $9 each, and 3 can racks at $20 each. Total is was around $600 for the project.
This excellent website definitely has all of the information I wanted concerning this subject and didn’t know who to ask.
Thank you so much for the shout out on your page!
Hi there very nice website! Beautiful .. Superb ..I’ll bookmark your site and take the additional feeds, since I’m so glad to see tons useful information here within the publish post thank you for sharing.
Hi Jennifer I would be happy to answer you question but I need a bit more information. Is your pantry the same size as mine?
Hello there and thank you for your info – I have certainly picked up many new tips from here.I am adding this RSS to my e-mail and can wait to look out for much more of your fascinating content delivered to my in box.
Thank you so much for the great link back from your site, however I would appreciate the picture not being pinnable thank you.
Oh my gosh I love how organized your pantry is this is amazing and such a pretty space.
I really like the way your reorganized and designed your pantry. That is the best Valentine’s Day gift ever!
Wow! Your pantry is breathtaking. I love it.
WOW!!! These look so amazing!! I’m definitely a respecter of organization, and these farmhouse shelves are perfect!!
I absolutely love this ! simple shelves can make a huge difference, visually they look amazing, and space wise too! BTW I Love your cat!!
Thanks for sharing this post! I keep learning new ideas and new ways every time you post!
We are tackling this pantry renovation right now. I am super excited for the finished look, but I am finding some information was missing from the original post, and the overall cost to you doesn’t seem consistent for replicating. I was wondering if you would have any interest posting another person’s take on your project on your blog? Lots of information, pricing, pictures, etc. available from our project. I don’t have a blog, so the content would be exclusive.
Hi Stacy I have to say this idea is very intriguing and I do want to hear more about your project. First, I want to apologize that you may have not found all the the information you needed for your specific project, but we do our best to always answer any questions on our site, as I am right now. As for the pricing unless your pantry was the exact same size as mine, I imagine there would be a price variance. I will also say that farmhouse design is way more popular now than it was 4 years ago when this project originally took place, so I am sure that supply and demand have driven those prices up as well.
Thank you so much for the wonderful linkback Debbie I appreciate your support on all my projects.
I was just visiting your site and wanted to say how much I love your pantry and your organizational skills!
Thanks for sharing such information with us, I hope you will share more information in future.
It’s really a great and useful piece of information. I’m happy that you simply shared this useful info with us. Please keep us informed like this. Thank you for sharing.
Thank you so much for the sweet feature at your site, we are happy to be shown among so much talent.
I was suggested this website by a friend, You are amazing! Thanks for such an informative post!
Do you mind if I quote a few of your posts as long as I provide credit and sources back to your blog? My blog is in the exact same area of interest as yours and my visitors would truly benefit from a lot of the information you present here. Please let me know if this okay with you. Thank you!
Hi Myron as long as you are providing the proper link back to my site, I have my copywrite share requirements listed here: https://jenron-designs.com/blog-policies/ for your review. Thanks for taking an interest!
I really like everything you guys are often up too.This sort of clever work and coverage! Keep up the really good works guys I’ve you guys to my blogroll.
Did you have any issues with the cedar boards impacting the taste of your food?
Hi Emily thank you for such an insightful question. No I have not noticed any change the flavor of my foods at all, and I tend to have a very discerning palate, when it comes to food and smells. For the first year I did have a nice cedar small inside which has since faded a bit. I will say that I did store most of my open pasta, rice, nuts and open cereals in glass mason jars, which probably help to alleviate them from absorbing any aromas from long term storage. As for the things like bread and such they only last a week if we are lucky, so no time to absorb in smells.
You’re very intelligent and you know your stuff in terms of this subject. However it’s like men and women are not fascinated unless it’s one thing to be accomplished with Lady Gaga! Your personal design stuff is outstanding. Always love your stuff!
I have the same size pantry and am planning on doing it very similar to this in the next few weeks. I’m doing wallpaper as the back instead of the bead board. I also think I am going to do one less shelf with a little more space between them. The 13″ just doesn’t seem like enough for some things. But I love the overall look, just need to find the right boards.
We would love to see your finished project, I love to see how our inspiration have grown new ideas in in other pantries. The wallpaper sounds lovely and I agree shelf spacing if completely subjective to the occupants needs.
Fantastic items and share on your part. I’ve take a look at your stuff previously and you are simply wonderful and keep it smart. I can’t wait to learn more from you at this really terrific site.
Hi it’s me, just want to say that I this web page is truly pleasant and the viewers are truly sharing good thoughts.
Hello to everyone, just wanted to say that it’s genuinely a nice for me to visit this site, and it includes very important decorating information.
I think this is among one the best ideas for a pantry for me and I am glad to be reading your article.The website style is wonderful, Good job!
I have been researching whether or not to use cedar (shelves or walls) in my new pantry. I have read some information that indicates that it will ruin the taste of your food. I found your blog about remodeling your pantry and wanted to see if you have any problems with the cedar changing the taste of your food.
Thanks much!
Rita A. Fague, CPA
This made such a huge difference! Love how it turned out. I am officially putting it our our project to-do list. Next week we are working on some kitchen cabinet door replacements.
Hi Rita,
That is a great question and I wonder if the the people with those issues maybe did not seal their cedar? We have not had a single issue with the boards ruining any of our food. I will also tell you I have a very sensitive sense of smell and pallet, so I would probably notice this more so than my husband. Also we used glass mason jars to store things like rice, oats, sugars, and flour which might have a tendency to taken on flavors of their surroundings. I hope that this information helps.
Thank you for featuring us in your article we appreciate it!
What an amazing transformation! These shelves turned out so beautiful. I am setting a goal to do a couple home improvement projects this year. I think we are going to start out with some kitchen cabinet refacing. Thanks again for sharing your beautiful ideas! You are so inspiring!
I am so glad you enjoyed this post, it has been one of my favorite transformation in our home to date, and one of the most useful ones as well! Wishing you all the best!
This looks so good! I love the soup racks
What a fresh and clean design. I am definitly adding this to my home reno vision board.
We need to do this at one point. We just have the blah white wire ones. I prefer these!
Oh my goodness!! I mean, it was nice before, but now it’s just beautiful!! Well done!!
OH this makeover is awesome! This pantry is a dream
I love these farmhouse shelves – such an upgrade compared the the metal ones! I’m hoping to do similar to our closets soon!
I chose the Mountain Metals link & it took me to Amazon but I can’t find the brackets like yours. How do I order them?
You are absolutely correct, thank you for letting me know. I believe that they have started to make a new style of bracket now. However you find that these are a similar type of bracket to my original brackets https://amzn.to/3wL9Sow or https://amzn.to/3tN43Vm I hope this helps in all your DIY needs.
Wow and you guys used my before picture too with the wire shelves as inspiration! I guess it was not as bad as I thought LOL!
Were you able to screw the brackets into the studs or were some in the drywall? I’ve been wanting to do the same thing but am scared that only one or two brackets will be in the studs (8’ wall x 9’ ceiling) and that the shelf and food weight will not hold after a while.
Hi Cherie, This is a great question and yes every bracket was installed into a stud to help with the weight that the shelves would be holding. Since the pantry previously had wire shelving in place prior, this was already done previously for the first pantry. However we added heavy duty iron brackets to up the weight capacity of the wooden shelves could hold. We also used anchor bolts in areas where we added brackets that would not be utilizing the the studs for added support as well, these were mainly used for decorative use and in corners to make sure the shelves were balanced and did bow over time, the majority of the weigh was held on the the studded brackets.