
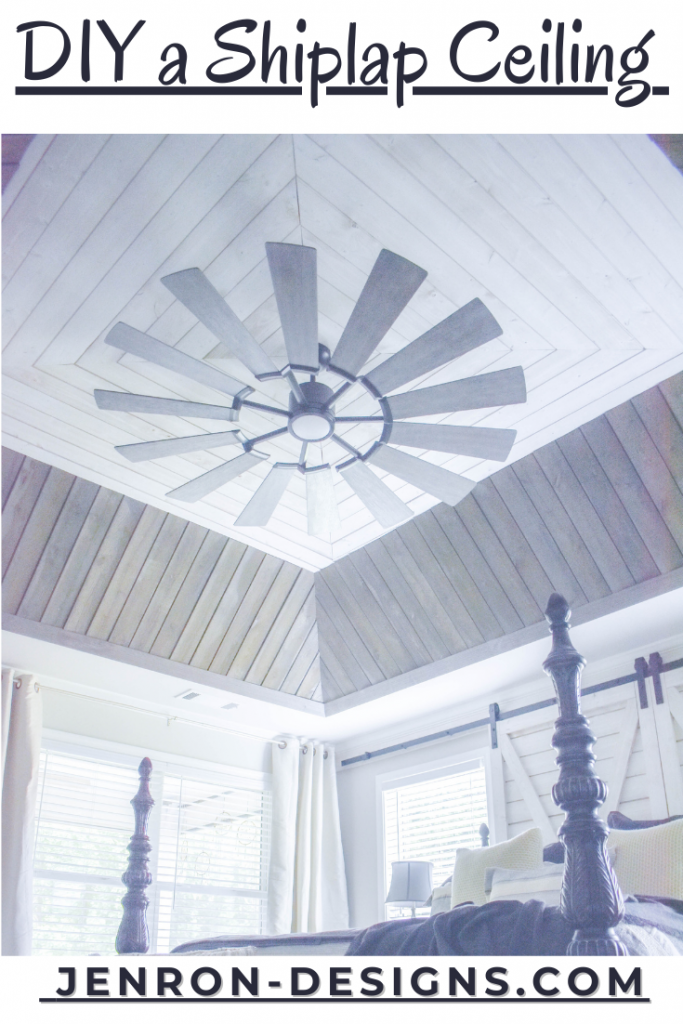
Owners Suite Bedroom Ceiling Shiplap DIY
Owners Suite Bedroom Ceiling Shiplap DIY, follow this step by step tutorial post and see more on our new YouTube Channel.
This summer we decided to do a little self love renovation in our Owners Suite Bedroom, which has sadly been an area of our home that we have not really focused on yet. This post will walk you through our Bedroom Ceiling Shiplap DIY portion of the renovation process. Just to get you started, here are a few of our before ceiling pictures so you can see where we are starting. 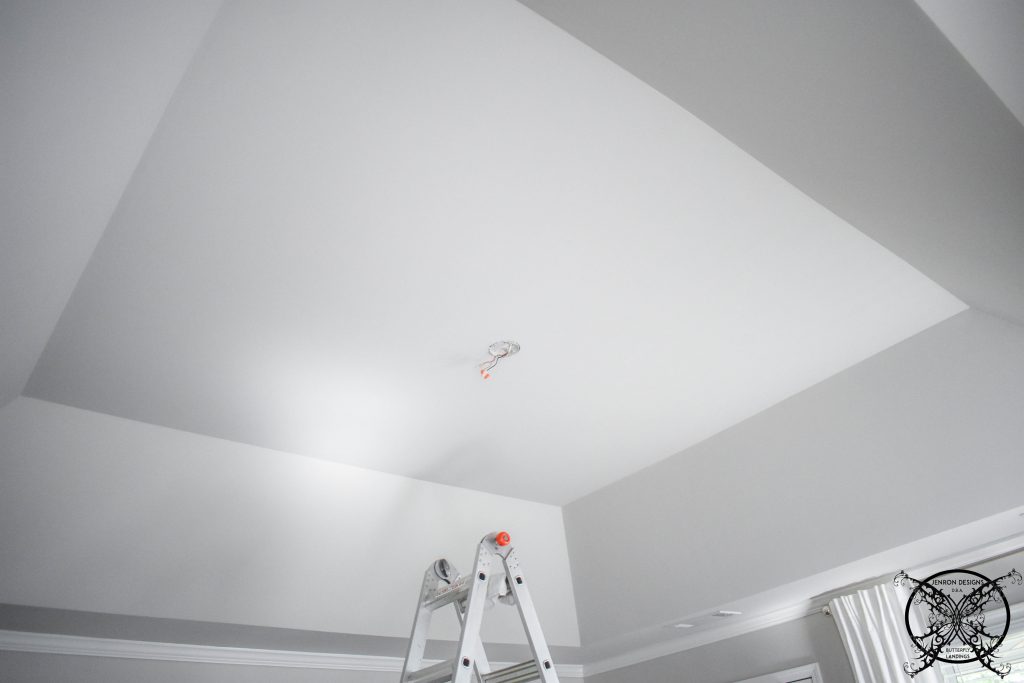 One of the things we really had been discussing for a while now has been adding a pretty focal feature to our tray ceiling, since that is an area we a constantly looking at from the bed. The tray ceiling is quite large as you can see. The complete tray measures approximately 12′ X 13′ and is almost 3 ‘ tall.
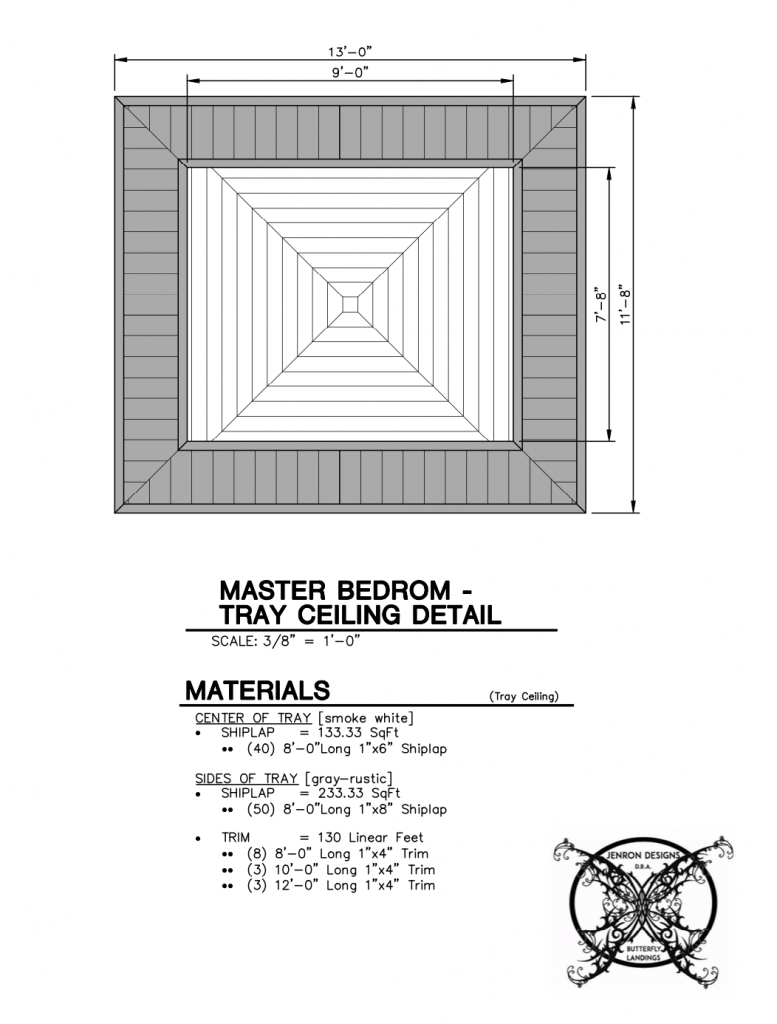
The actual blueprint drawing of the ceiling with the proposed pattern is attached above. Compliments of my super talented husband, thanks babe! This is the very same drawing that we submitted to the design team at UFP Edge, Which they loved! Along with phase two of the project which I am not releasing just yet.
*Please note that I was compensated for this post. This post contains affiliate links for your convenience. These involve no extra cost to you, but may result in me receiving a small commission should you decide to purchase after clicking on my links – for which I am very grateful! You can view my full advertising disclosure here.

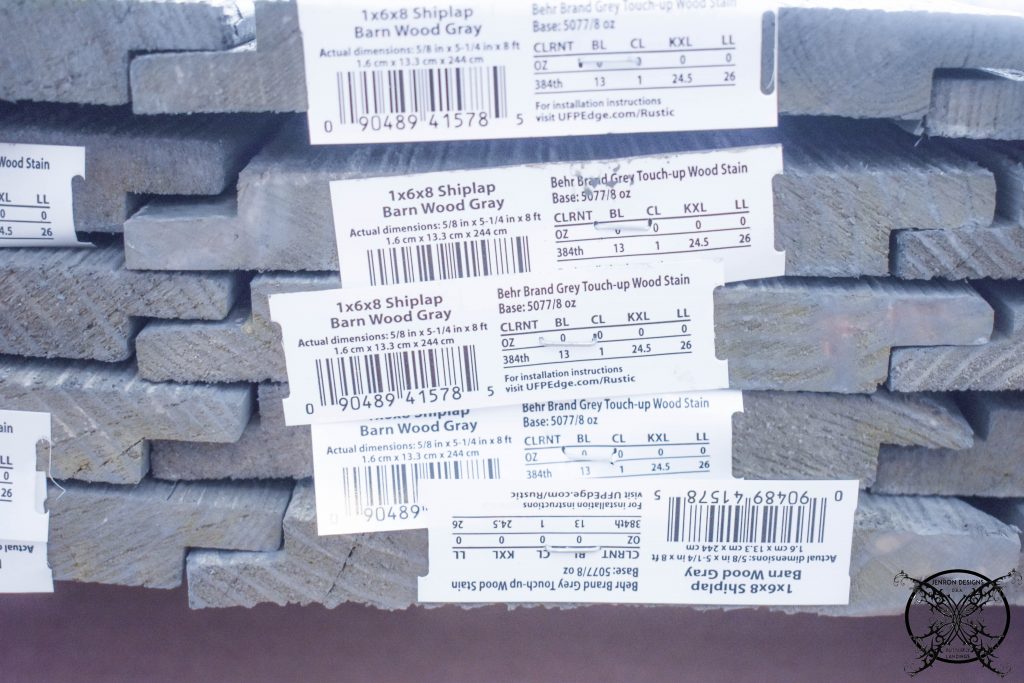
We would like to take a minute and say a big thank you to UFP Edge for being our Sponsors for this entire shiplap project. They offer such amazing products, and this will actually be the third room in our home that has their beautiful wood products on display. We are so excited to be working directly with their company for our Master Bedroom, thank you so much guys! 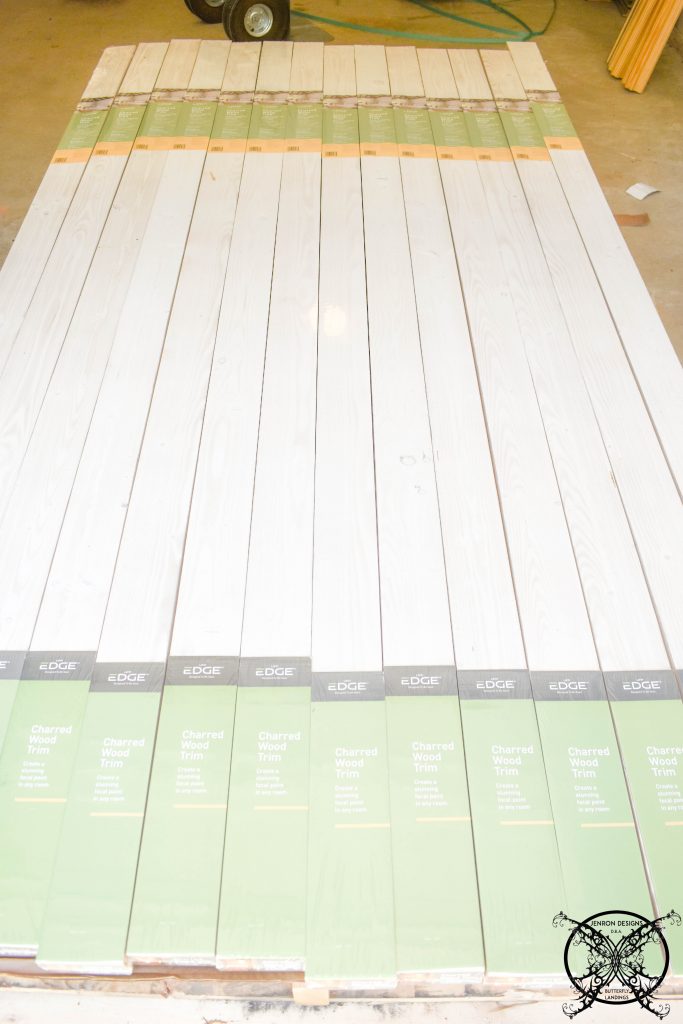 This project will use two different types of shiplap available from the UFP Edge product line, the center ceiling portion is the 1 in. x 6 in. x 6 ft. UFP-Edge Rustic Collection Shiplap Charred Pine Board in Smoked White. I have to say these boards are absolutely gorgeous in person and look amazing on the ceiling.
 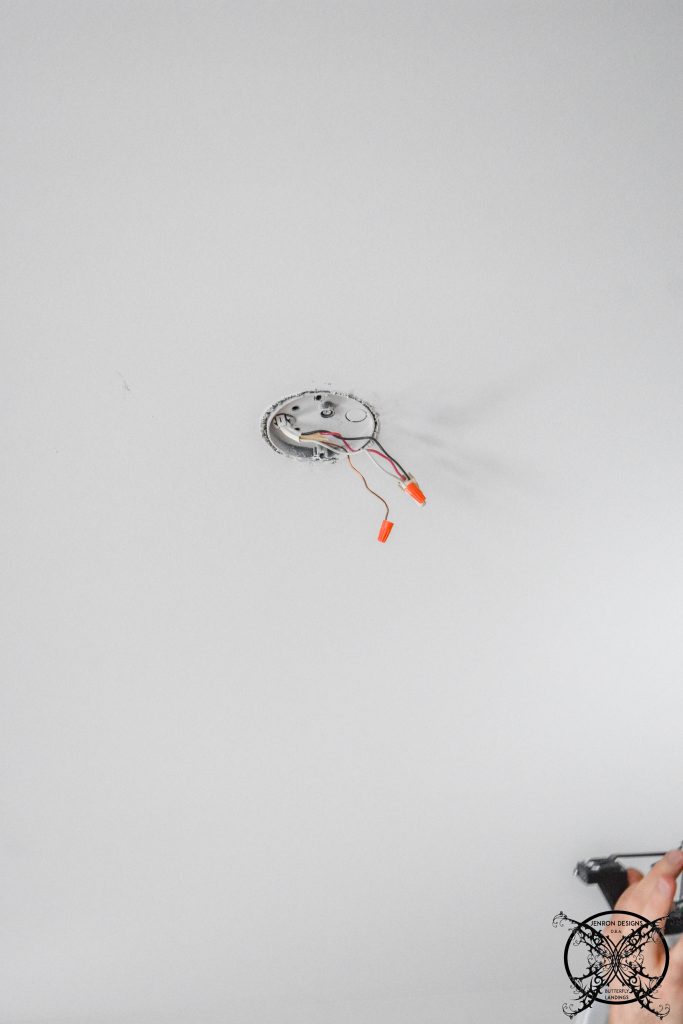 We started the design cuts from the center around the the base of where the electrical box would be. This was a tricky cut to make from one piece of shiplap since it needed to be 6”x6”, as you can see we had to doctor up a small edge piece to sit on the lip of where the shiplap reveal would normally be.
 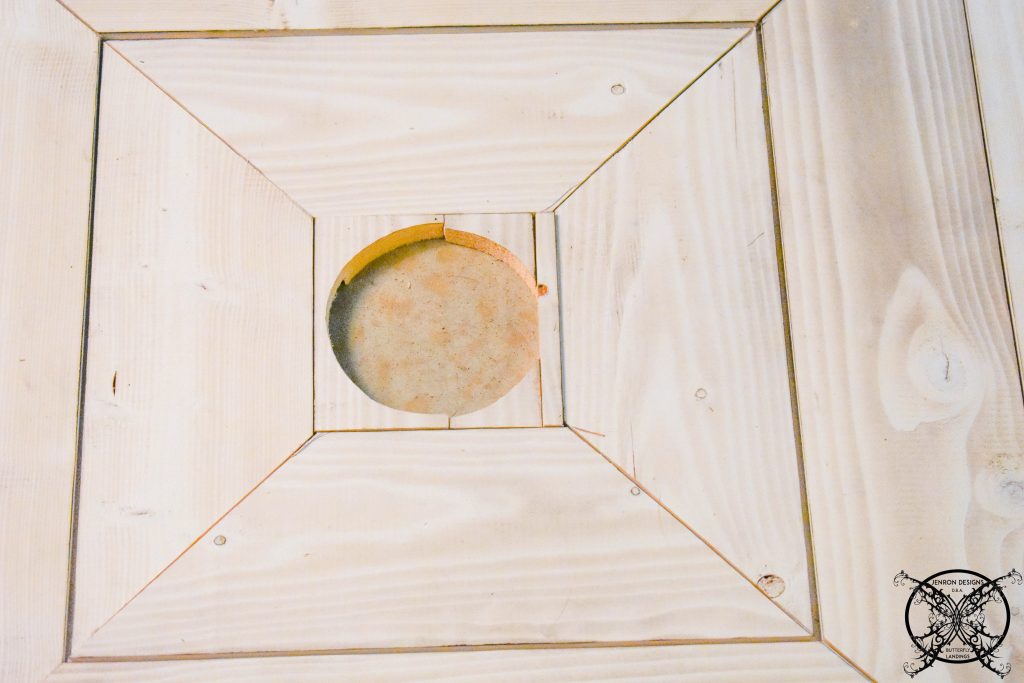 Since this piece will eventually be covered by the ceiling fan you will not even see the midsection cut made so Ron could use a jig saw to cut out the center hole.
 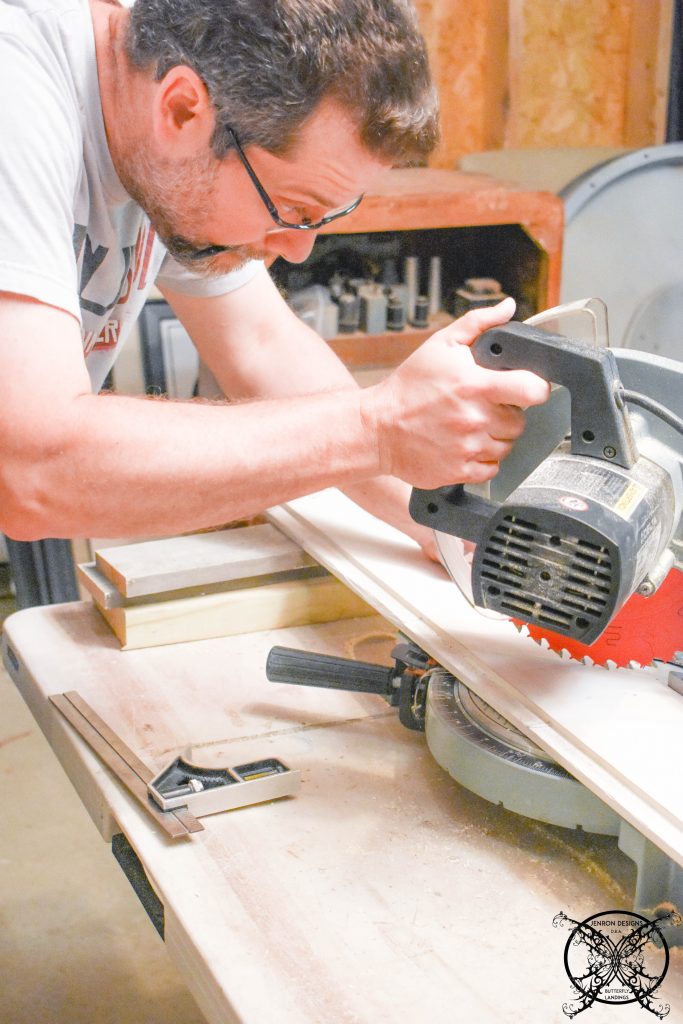 We decided that pre-making all the angled cuts and laying out the ceiling first was the way to go. So all the mitered cuts were made until we could no longer make basic square cuts, due to the ceiling tray being a rectangle.
 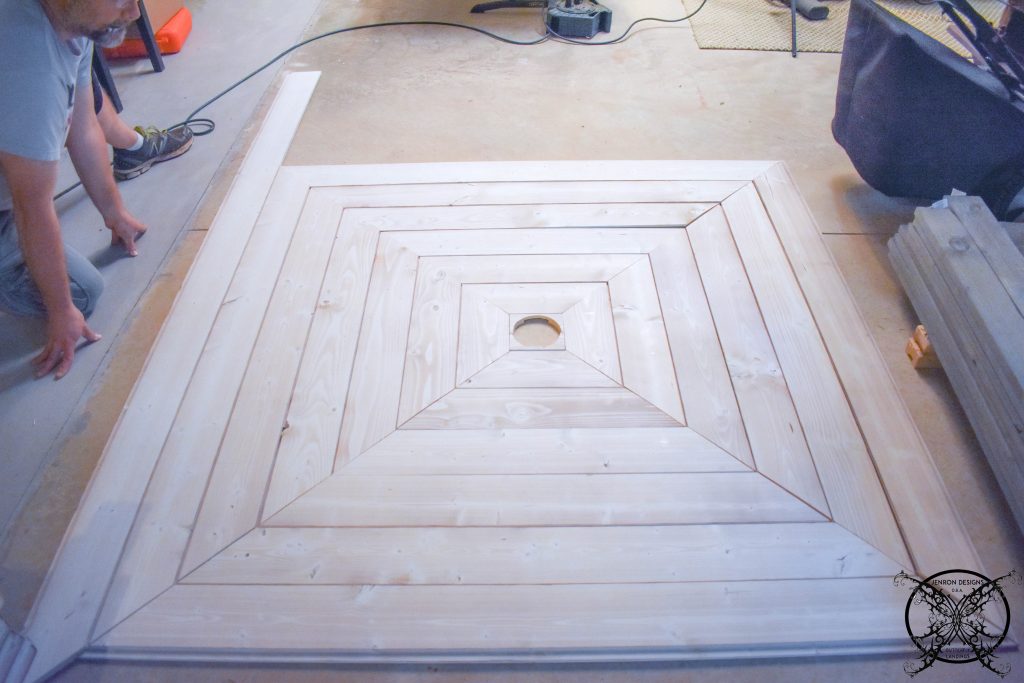 The pieces were laid out on the floor to verify the proper fit at each corner. Once we reached a 7′ x 7 ‘ square the pieces were all carried upstairs in a stacked order for a quick and easy assembly.
Which also made great video footage for our Youtube Channel DIY, subscribe here!

Again Ron started from the middle, and you may notice some tape in the picture, this was to hold the small filler piece in place after we used some wood glue to affix it into place. Since it was such a small piece we did not use a brad nailer for fear of splitting the wood. 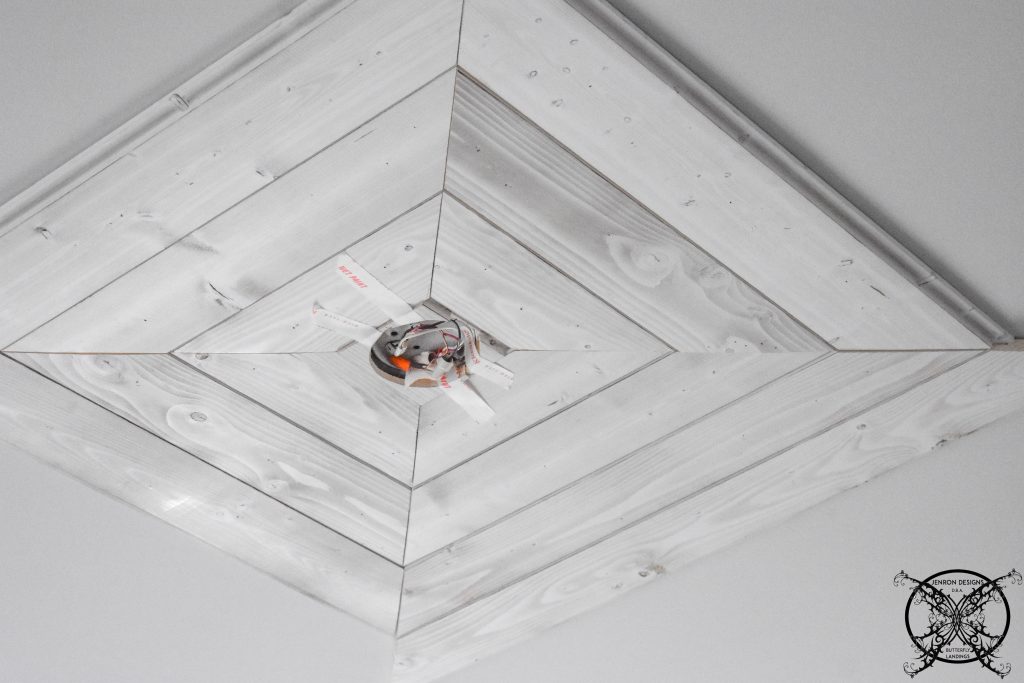 Ron used a 2″ long brad, not a nail, to attach the shiplap to the ceiling. Since we are going for a rustic look I do not mind having a few small brad marks in the wood, but for the most part they disappear never to be seen. For extra stability he would make sure to tap the brads through sections that would overlap both boards, if you are worried about seeing the nail brads you can hid them inside the shiplap grooves for one of the sides.
 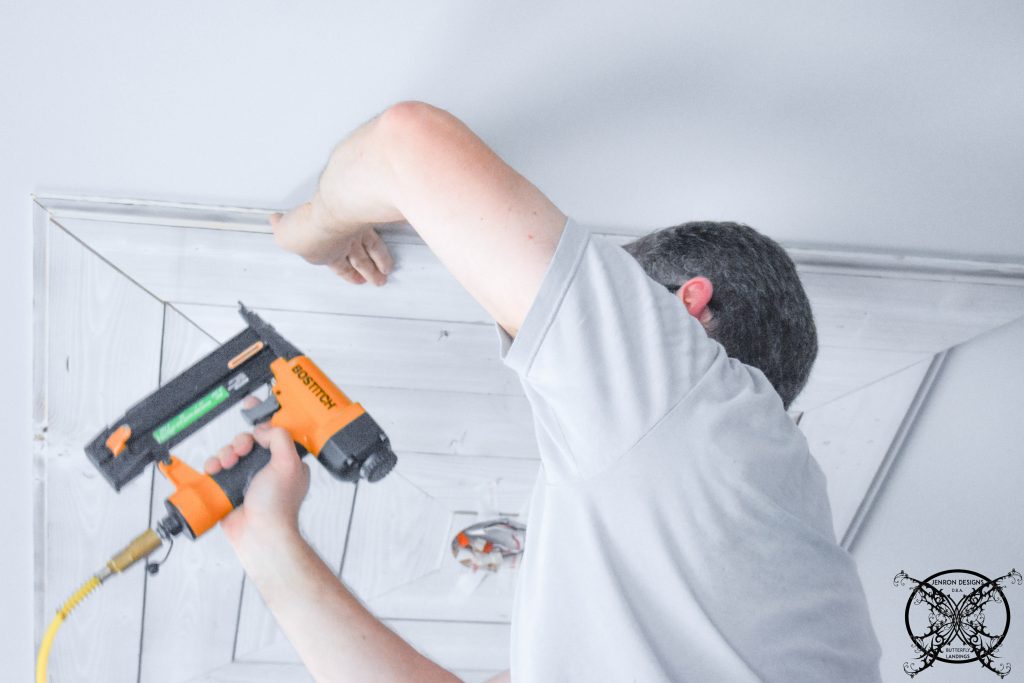 Ron got the complete square installed then had to make a few specialty cuts based on the remaining area of the tray ceiling. A few boards needed to be ripped in half will others just ran end to end.
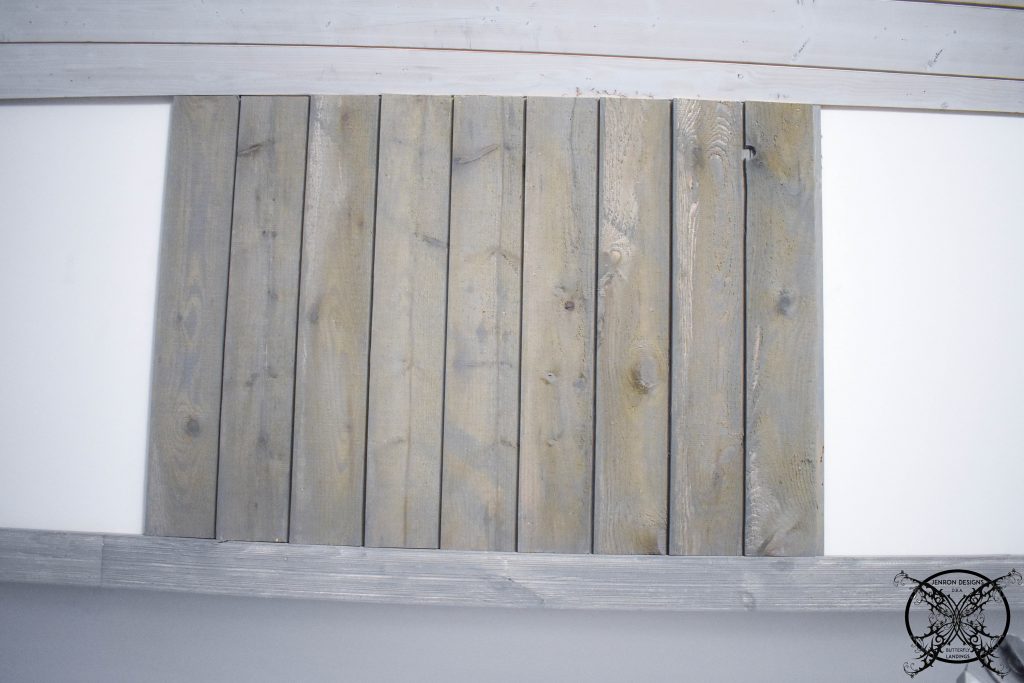
 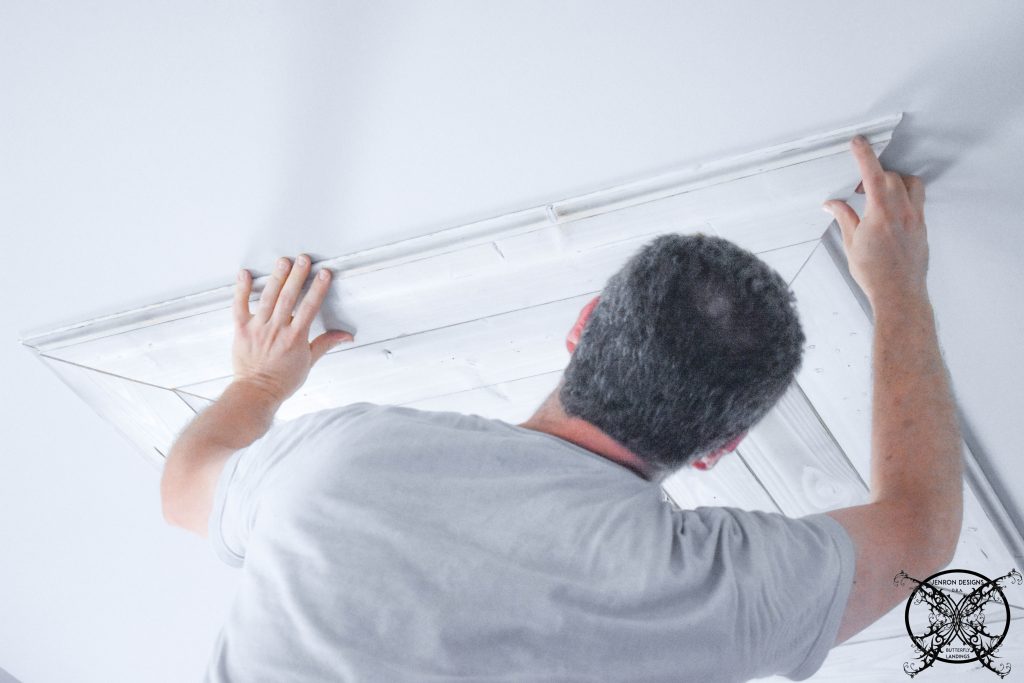 Once the center section was done we began work on the the outer edges. For this portion we used 1 in. x 6 in. x 6 ft. UFP-Edge Rustic Collection Shiplap Pine Board in Rustic Gray and we started with the 1 in. x 4 in. x 8 ft. UFP-Edge Rustic Collection Trim Pine Boards in Rustic Gray.
 We first wanted to create the gridlines or framework for the rest of the vertical shiplap boards to sit into. This was done by lining the bottom edge of the the tray with the solid trim boards. This would give us a shelf like ledge to set the shiplap directly onto when attaching it to the angled ceiling.
 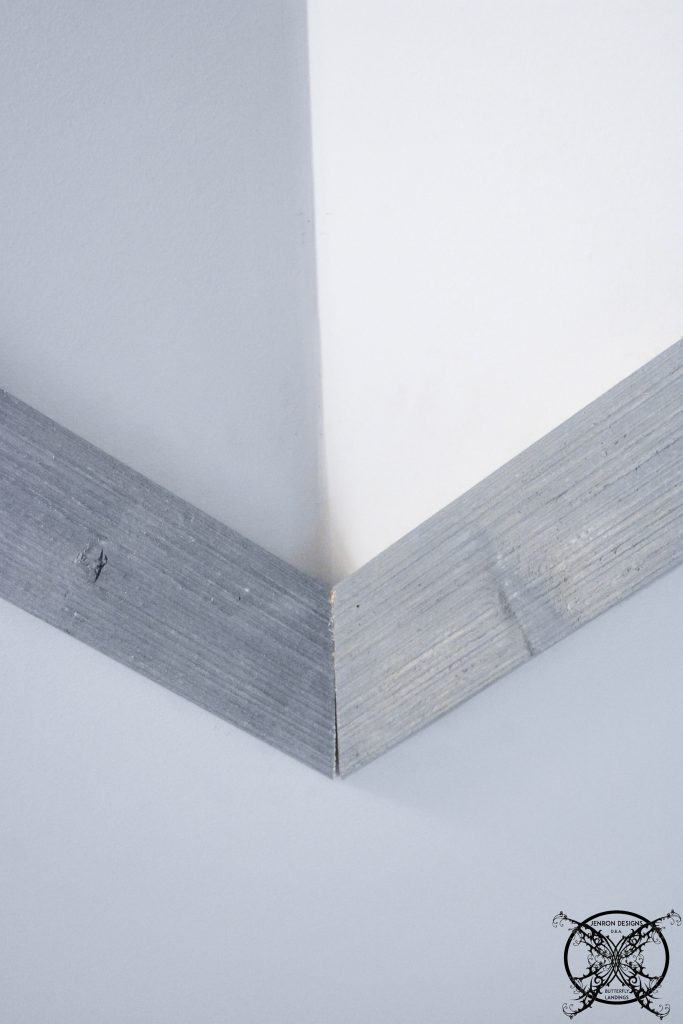 Once we had those pieces in place, we found the center of each vault and placed our first piece of shiplap and worked our way out from either side. You do not want to cut all the board the same length since each one will be slightly different as you move along the wall, because no home is ever square or plumb.
 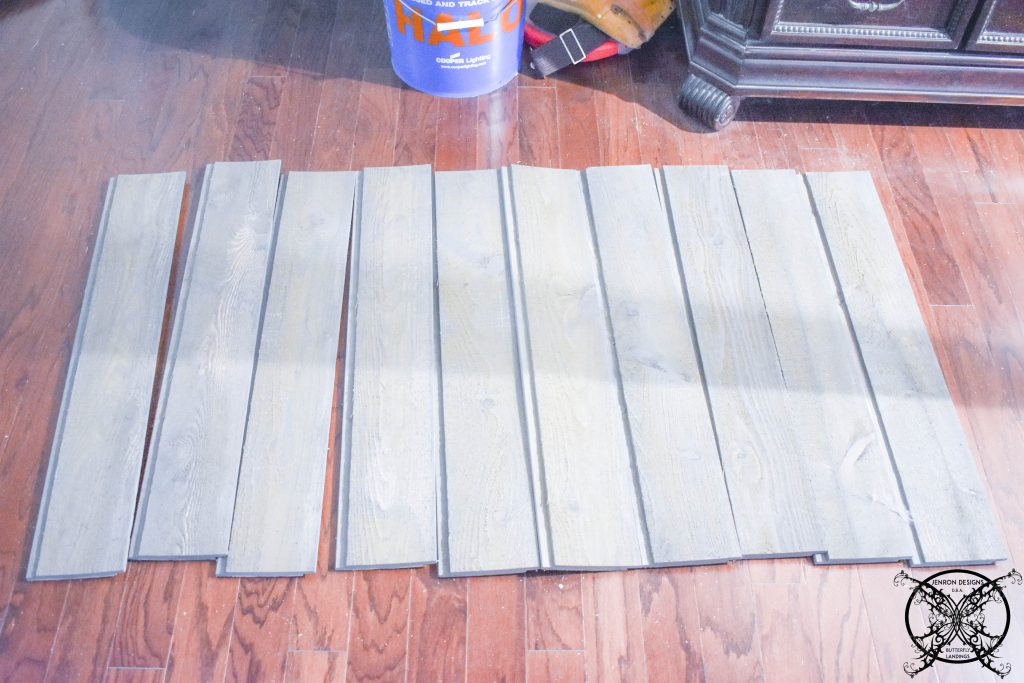 You can however take several measurements and premark where your next board will be going and measure again if you like the ability of making all your cuts at once. However, I do recommend numbering the back so you do not get them mixed up.
 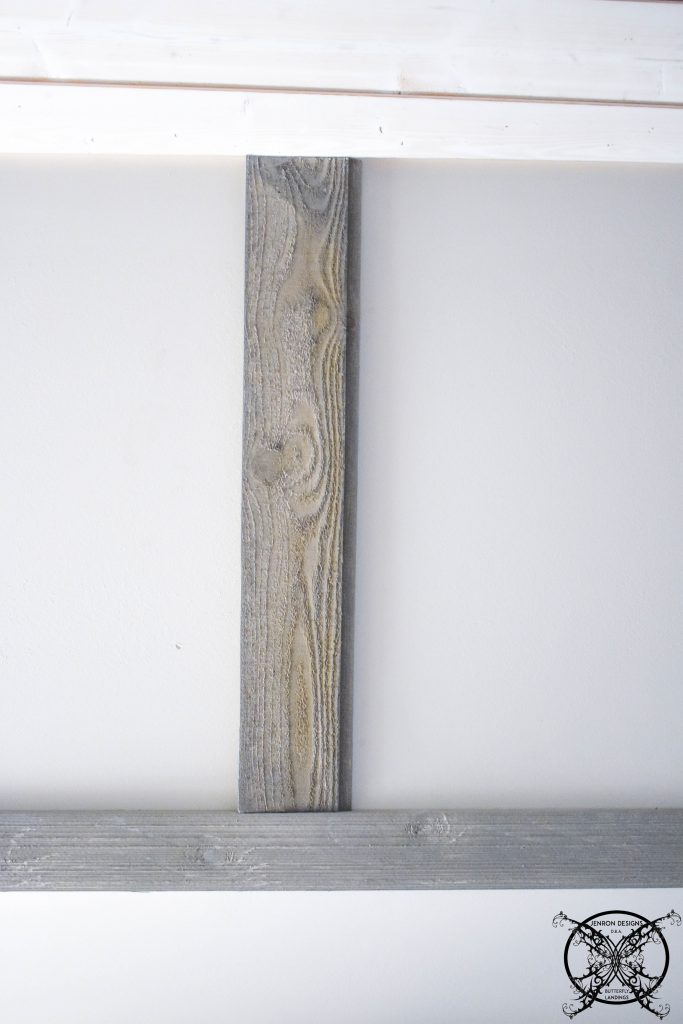 This will give you a better picture of what we were doing as we moved along the ceiling edge. I will recommend at this point, once you make the cuts to the Shiplap, you will want to touch up the edges prior to nailing them to ceiling.
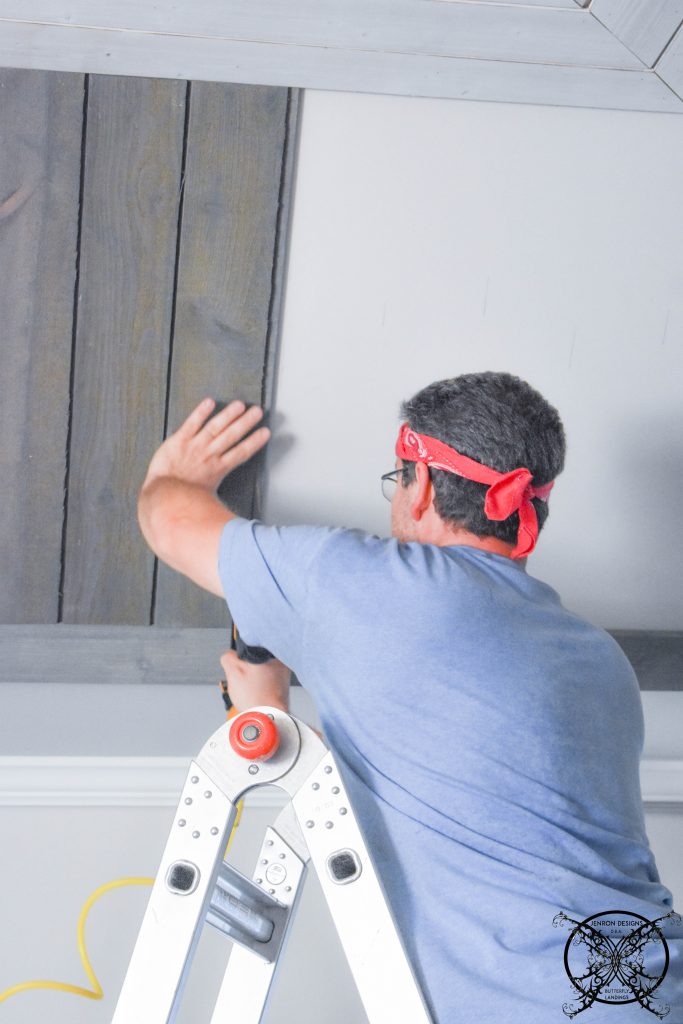
 I promise this tip will save you a lot of time on the back end of the project. Plus if you tend to have a touch of OCD like I do, laying in bed at night noticing these things will contribute to a lack of sleep, LOL.
 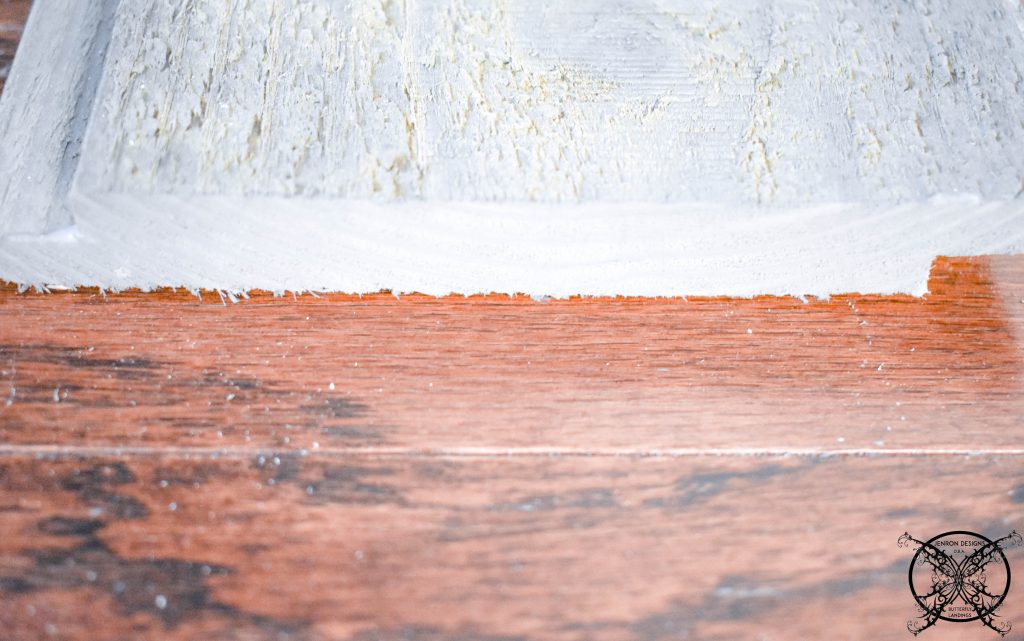 I personally found a craft paint back when we were working on our Shiplap Fireplace , and the Shiplap Drop Zone so I already had one on hand since this is the same color shiplap as those two areas. However, UFP Edge has made the process so simple for you and already given you the perfect stain color match for the touch ups.
 Once you get the many full width board sections done you will get to the angled corners, which gets into special cuts again. It is easier to piece these areas together once you have two sections of adjacent walls done to create the shapes of the boards you will need to cut.
 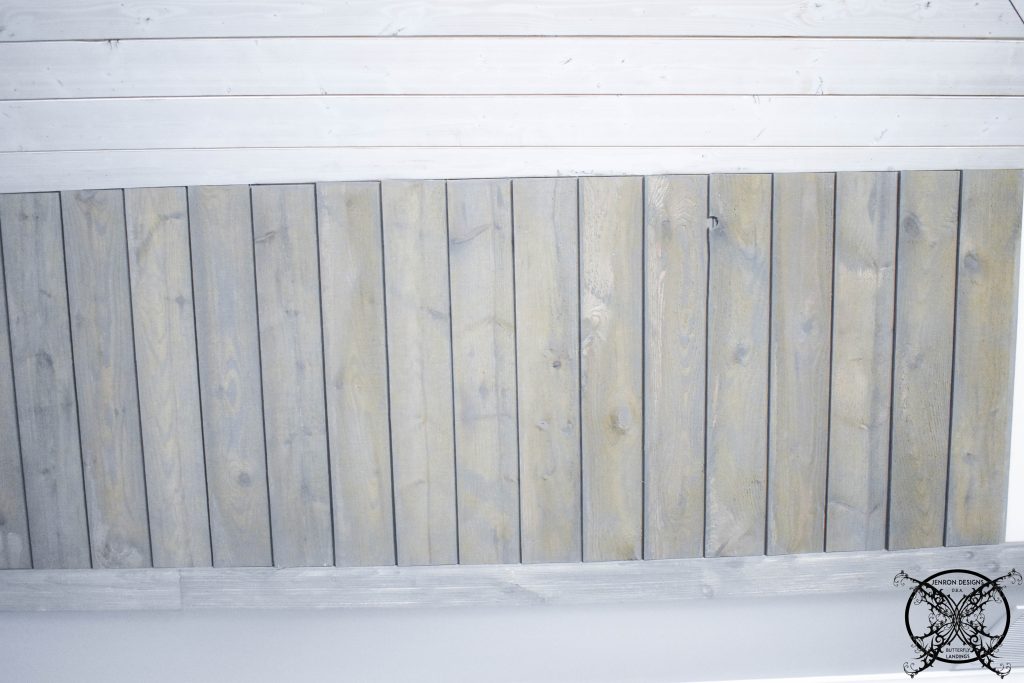 For these cuts a T-bevel is the easiest way to go. You place the bevel up into the angle of the ceiling and it will give the exact angle you need, then you can transfer the angle to your board with pencil to make your cut.
  It is basically a slide ruler that can measure the angle and lock at that angle so you can transfer it to another item exactly. No calculations needed, but as you can see each board required a special cut to meet up in the corners.
 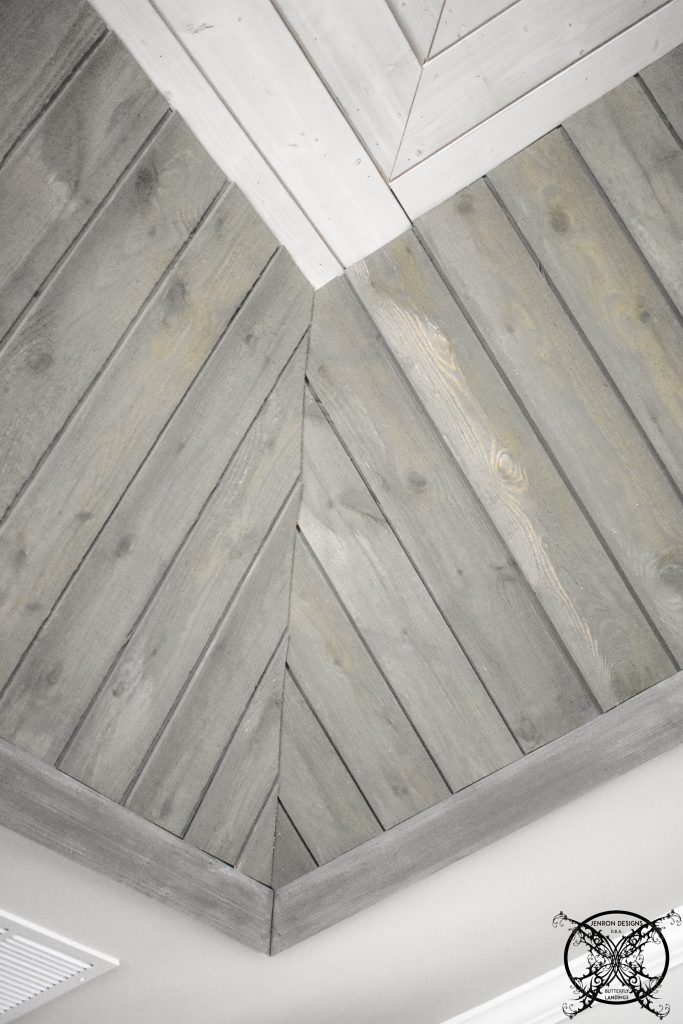 Another cut out to be aware of will be around the smoke detector box, which I am repainting since it is bright white. I think a nice galvanized hammered metal will look nice on the wood.
 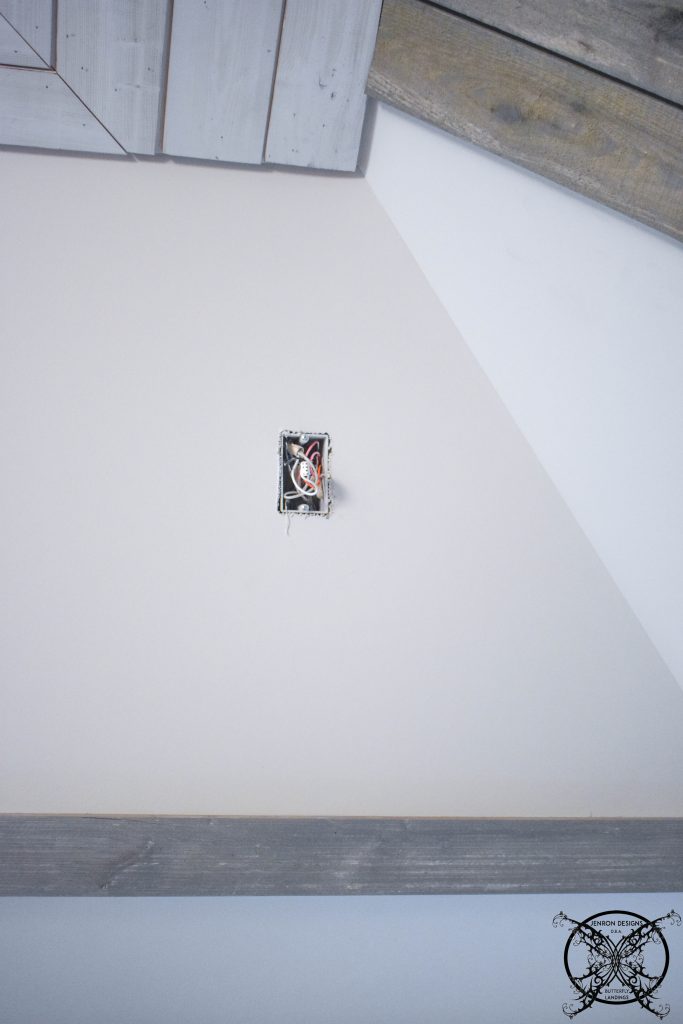 Basically you just need to make sure you measure out wear the hole will need to be in your shiplap board and use a jigsaw to out an access hole for the wires to pass through for the alarm to plug back in after the install.
 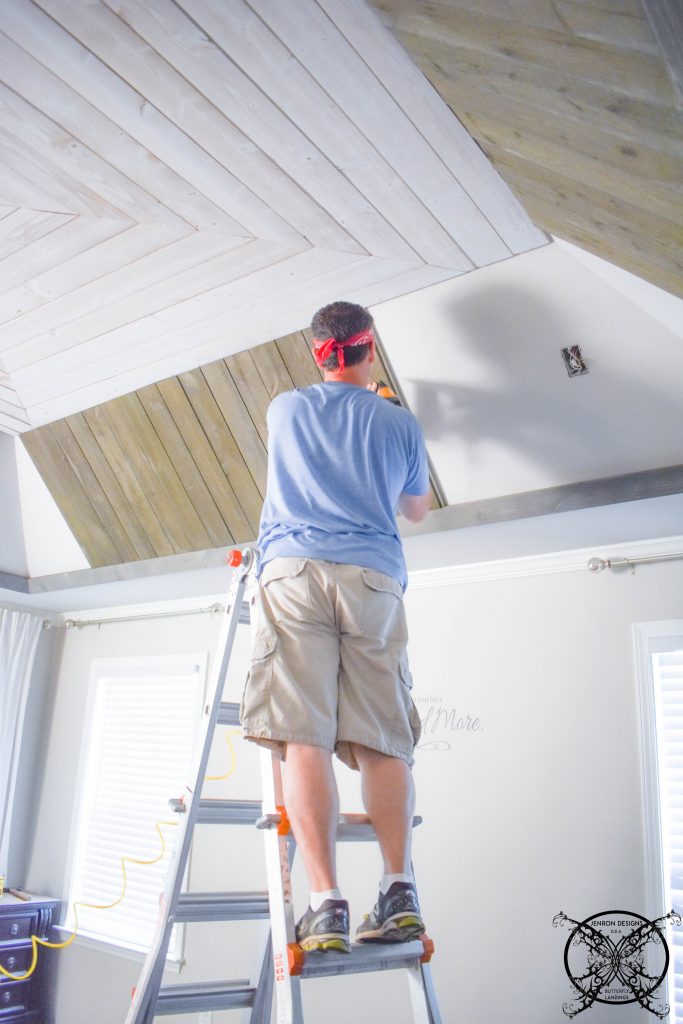 Yes I could relocated it, but in all honesty it is there for a reason. I am sure that engineers figured out that is where the smoke would settle in the room, and by code it must be located 5 ft from the bed, so that is where it must stay. I only altered the color of the fixture which is not an issue since I removed the plastic cover from the sensors before painting.
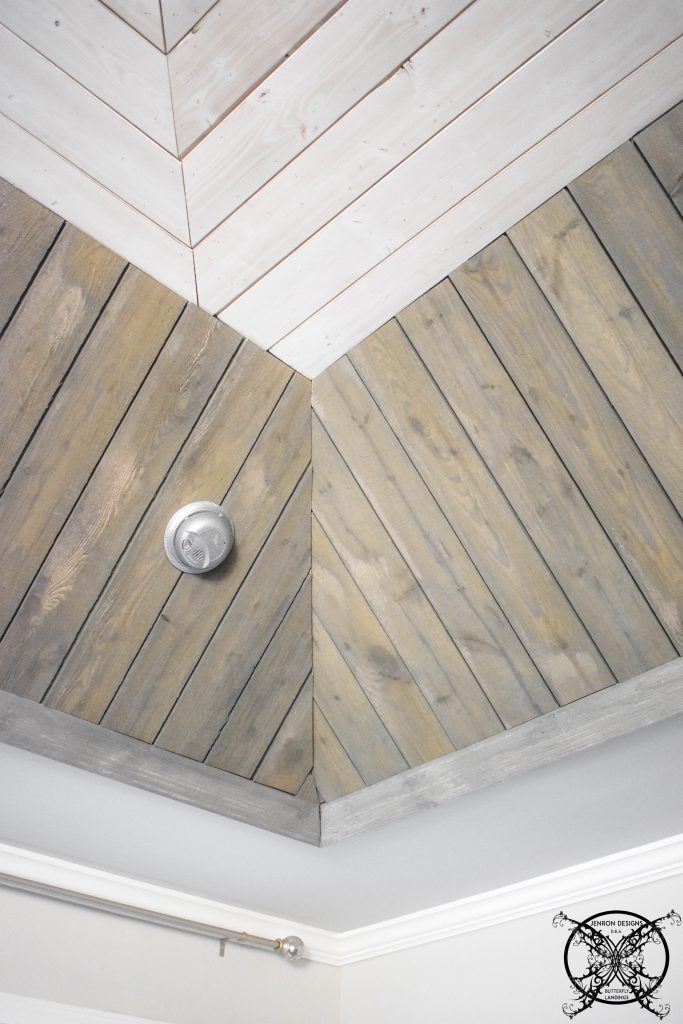 You can see how the galvanized hammered metal, now looks much better than a glaring bright white smoke detector on that rustic wood, and yes we are still keeping safety first, by not removing it all together. Which would actually be against building codes, even though I have seen many decorators, contractor, and homeowners do it, I do not recommend it all, it will cause you a issues down the road with resale of your home.
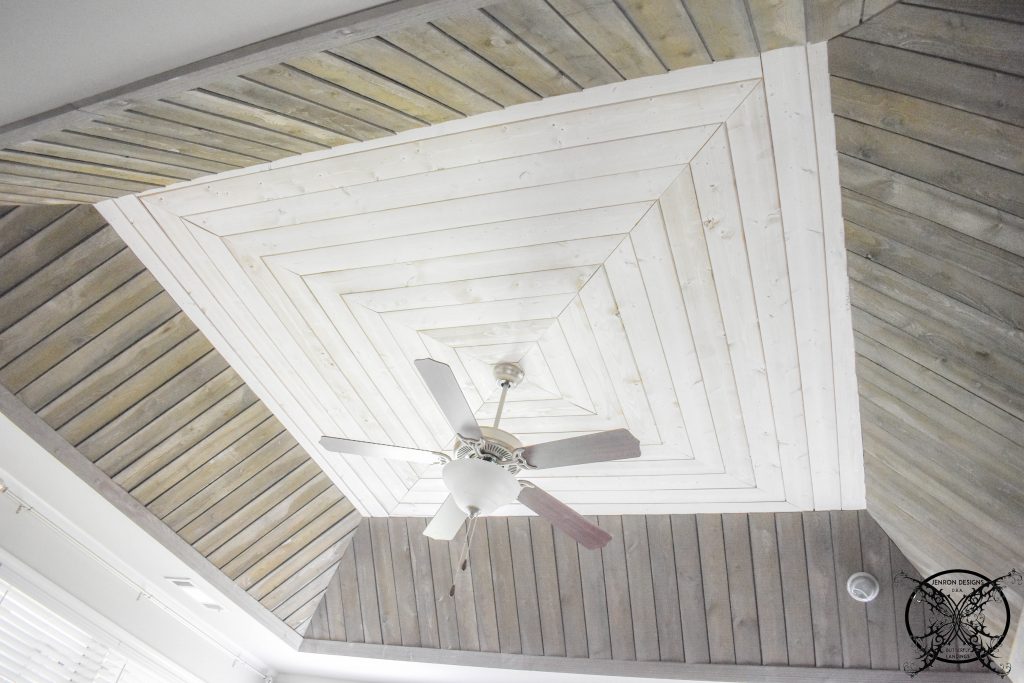 So this is the finished product which I absolutely love and now I notice I am going to need a wide angle lens for my camera, LOL. This is so large it is hard to even get a good picture of the entire thing. We still have another DIY shiplap project in this room along with a few more decorating treats headed your way, which involves getting a new fan!
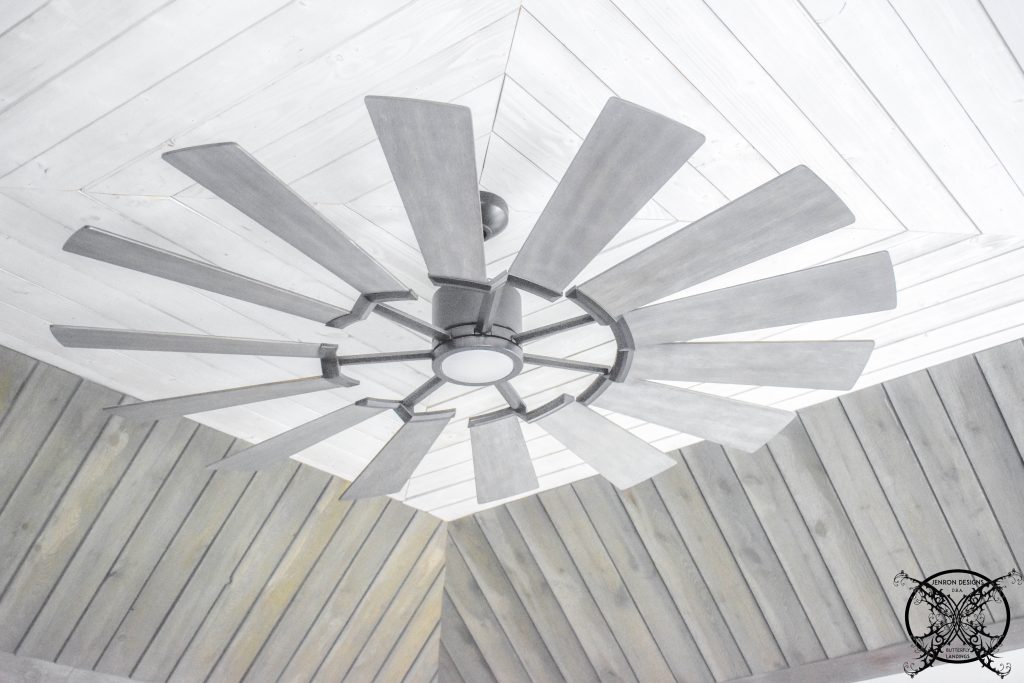 We are excited to say that we finally got in our new ceiling fan it really looks amazing on this beautiful ceiling. It is the perfect thing for this space and really finishes off the entire rustic farmhouse look of this space perfectly!
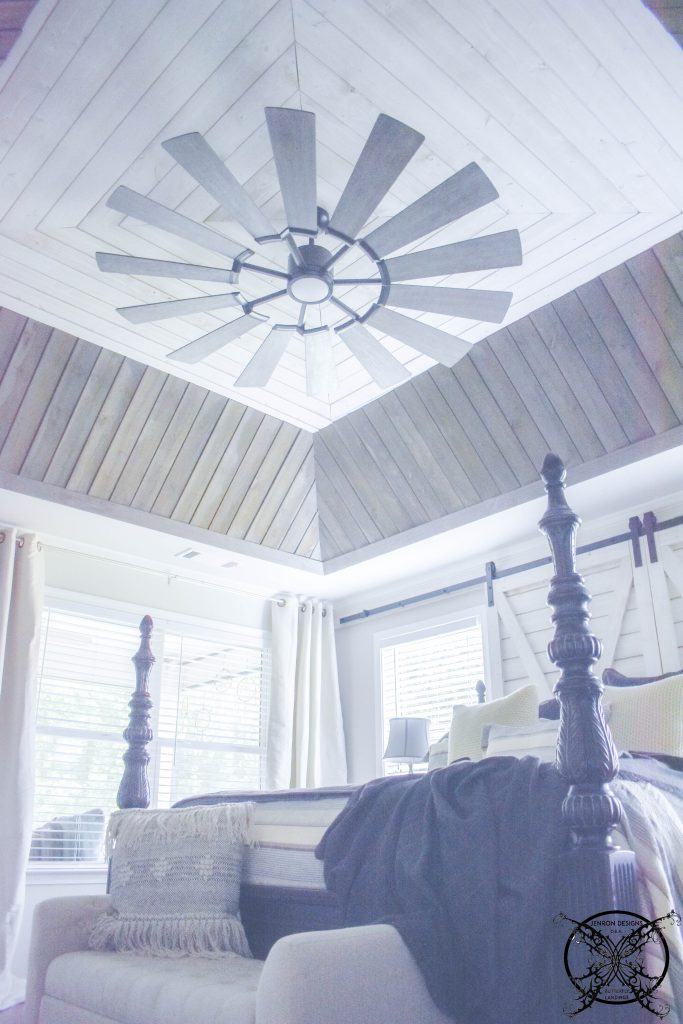
PIN ME for later and be sure to follow us on Pinterest at Jen @ JENRON DESIGNS
Hi Jen! I absolutely love this! Thanks for the detailed step by step guide and images. My husband loves wood working, and I love this look! Thanks for the inspiration!
XOXO Catherine Wilde
Very beautiful!! I love the step by step. Thanks for this DIY . You got my brain working.
Wow Jen this is AMAZING! I am really impressed by all the hard work you guys put into this project and can not wait to see it all complete. Also I LOVE the videos showing you guys actually doing the work! Which proves you are truly DIYer’s not just hiring someone else and claiming the work as your own, which so many bloggers do these days just to make a quick buck, LOL as if we didn’t know already.
The shiplap ceiling is really nice. i particularly like the colour combo. nice.
Holy wow! This is incredible! Maybe one day when I own my own home 🙂
Wow this is amazing step by step guide to make shiplap ceiling. You guys did awesome work. I doubt if I can do this so patiently. Thanks for sharing.
Heena
Wow! The final result is amazing! I am really impressed. You guys are so talented. Would love to try some cool projects with my hubby someday… not as big as this one of course 😆
I would have never even thought of attempting anything like this on my own. You have made this look so easy. And I love the finished product. Well done!
Looks amazing! We just scraped the popcorn off our ceiling in our living room and adding shiplap like this will look awesome. Thanks for the extensive instructions.
I have been so busy this summer I can not believe I missed this renovation! I absolutely love it the ceiling is gorgeous.
WOW! This looks amazing!!!
This is incredible!! It’s so cool that you and Ron are both so creative and make amazing projects together! I love how the shiplap ceiling turned out 😍
Such a lovely bedroom ceiling work! I like the way it is well-explained with helpful photos.
You had me at shiplap. I love shiplap!! But to create a patterned tray ceiling with shiplap?!?! Totally awesome! You guys are incredible.
Wow, this totally transforms the ceiling! Such a cool idea and I bet it was worth the hard work!
WHOA!!!! This is amazing. I really love the texture. I wish we have high enough ceiling for this!!!
This is so beautiful. I am currently building my home and this DIY falls right into the theme for my decor.
The hard work you put into this is amazing. Love the ceiling gets totally transformed and looks luxurious.
Wow this is absolutely beautiful! I’ve never heard of shiplap until I watched an episode of fixer upper one day lol. It’s very beautiful.
I love the square center pattern. But what are you nailing the shiplap to on the boards that run parallel to the joist?
Hi Joe that is a great question, since the boards are not very heavy it is really all about securing them to the ceiling. The joist will do to the main support while using a alternating tacking angle method, where 2″ brads are installed at a 45 degree angle through the boards it will hold the shiplap securely to your sheetrock. We have had no issues with ours for the the last two years, no loose boards or bowing so the method does work.