
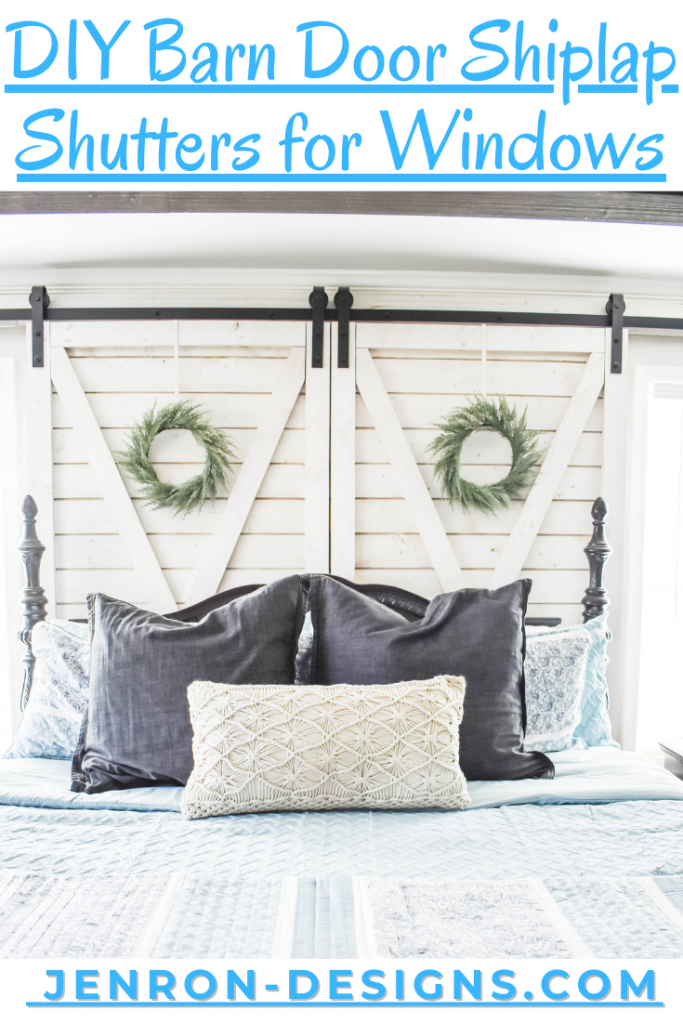
DIY Barn Door Shiplap Shutters for Windows
This post will walk you through the creation of my DIY Shiplap Shutters for Windows.
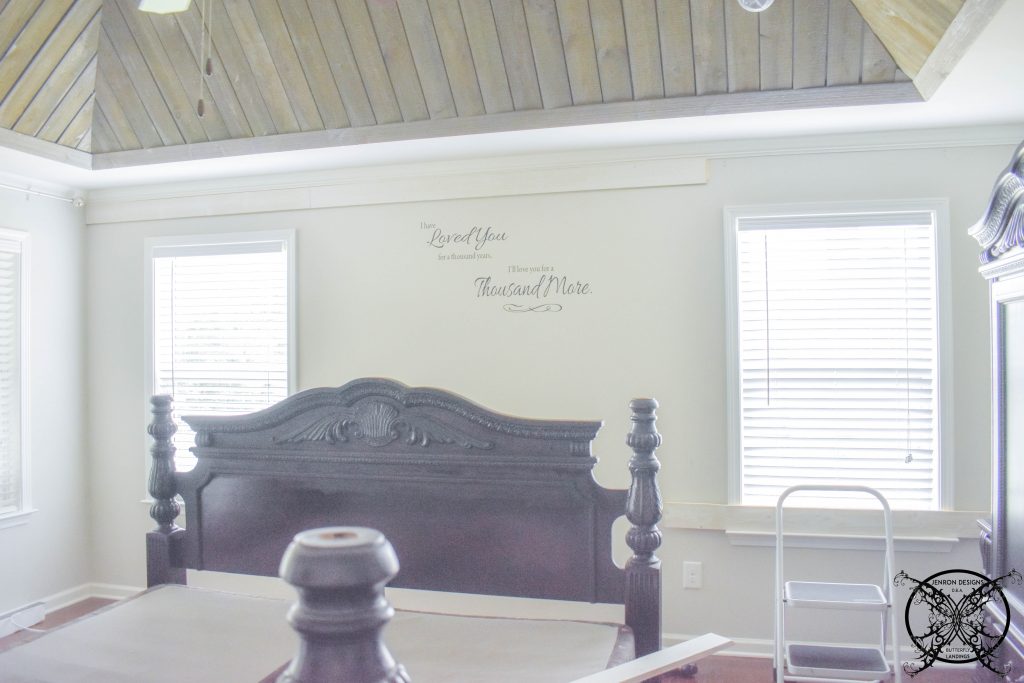
I have been wanting to create some barn door style DIY Barn Door Shiplap Shutters for my master bedroom windows for a while now. This bedroom renovation was the perfect opportunity to implement this idea that I have mulling around in my mind. This is a before picture from our most recent Spring Home Tour.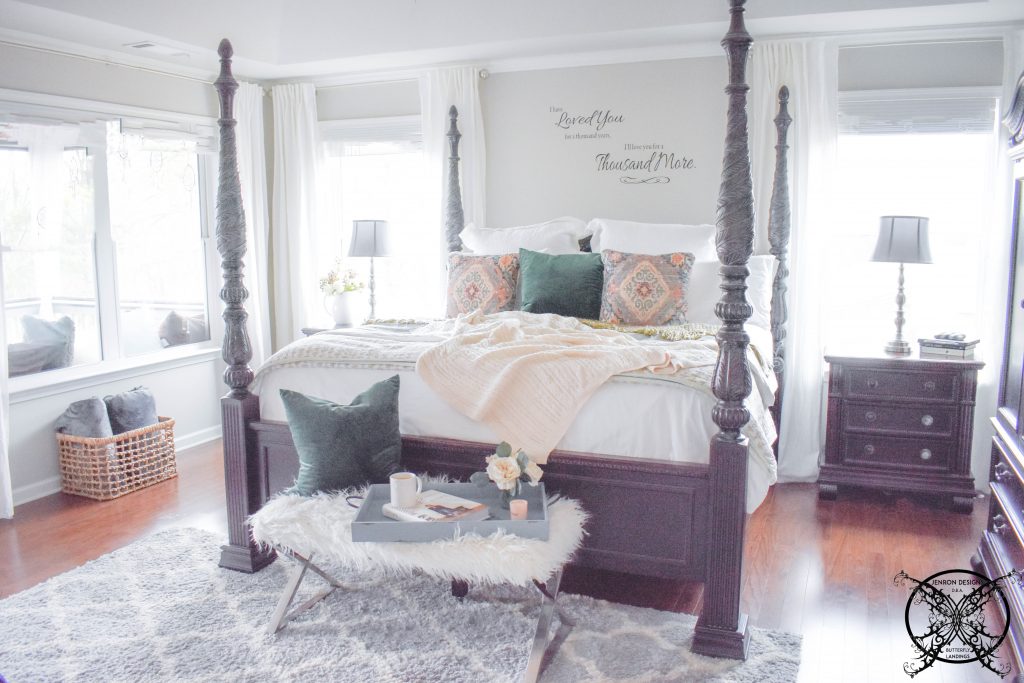
The solid panels of the barn doors will eliminate all of that and hopefully will also help climate control the room a little bit as well. Especially since we tend to get a lot of early morning sunlight and light bleed from car headlights through these windows at night. Here is the actual blueprint drawing of the shutter door wall design we submitted to the design team at UFP Edge, along with the DIY Shiplap Ceiling Project. 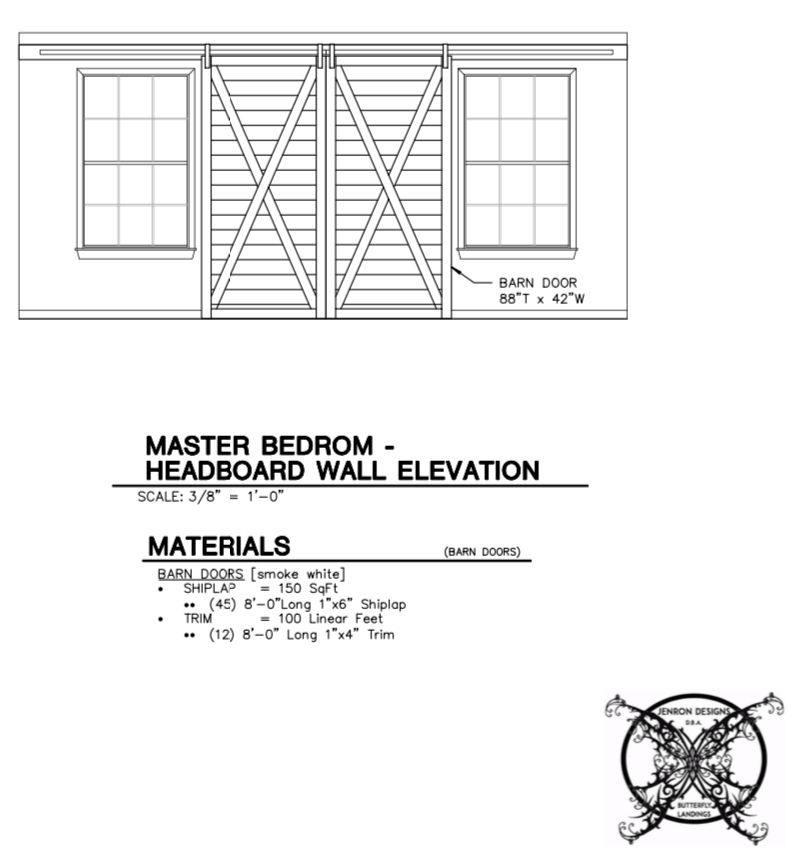
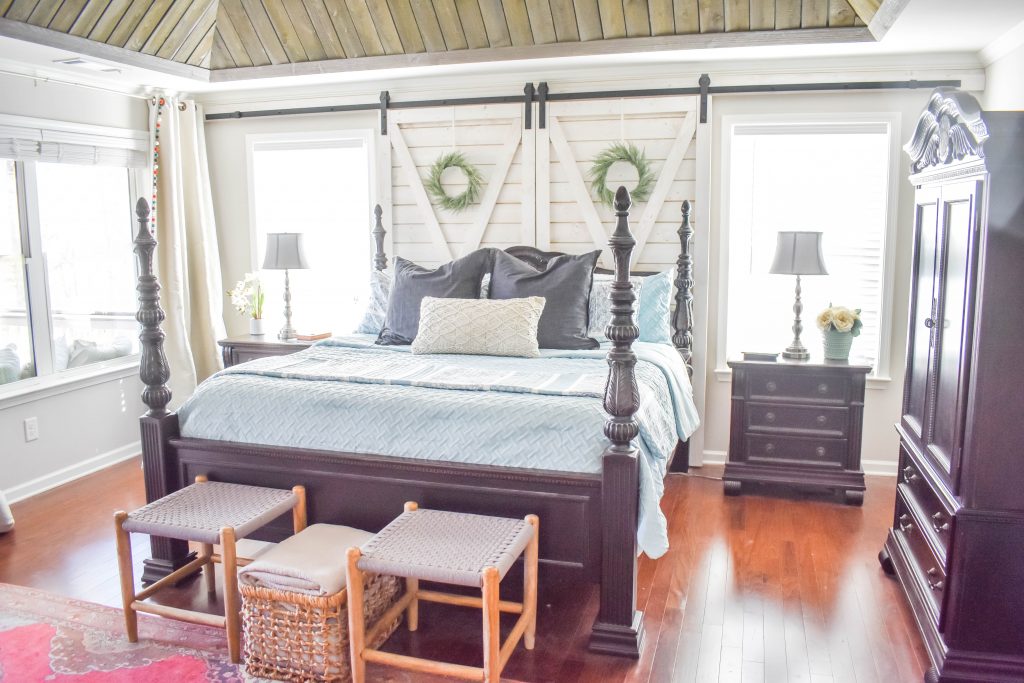
As you can see the plan is add a double sliding headrail to accommodate two custom built barn door sliders that will also double as a focal feature or headboard behind the bed during the day. At night the doors will slide over the windows to provide additional light blocking for moonlight, car headlights and early sunrises.
 *Please note that I was compensated for this post. This post contains affiliate links for your convenience. These involve no extra cost to you, but may result in me receiving a small commission should you decide to purchase after clicking on my links – for which I am very grateful! You can view my full advertising disclosure here.
Building The Doors:
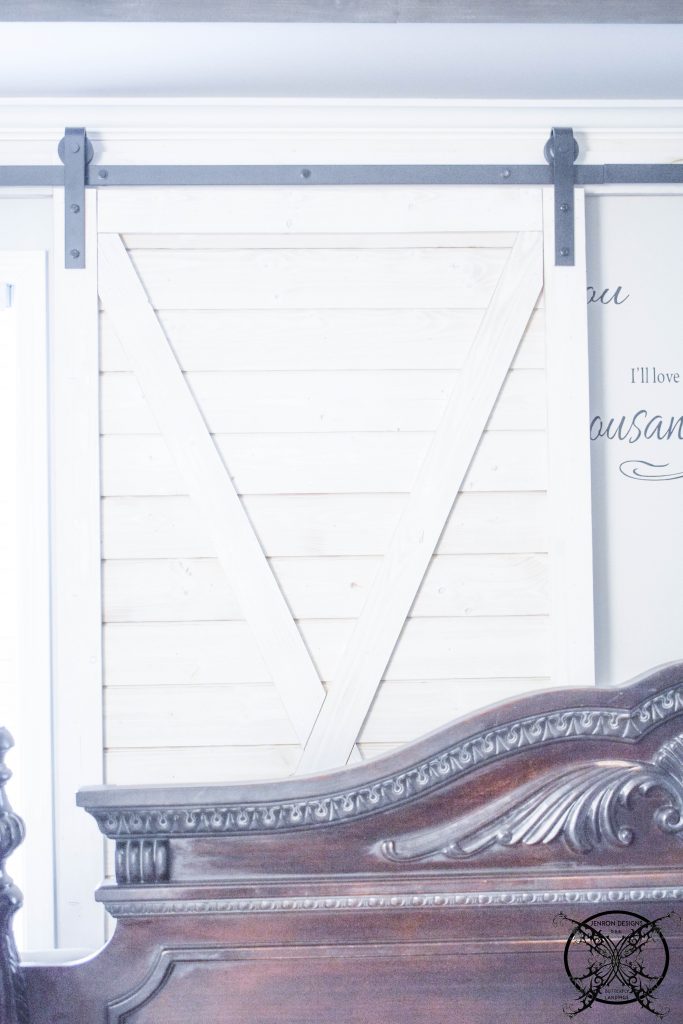
The first step in building the doors was to have a back board cut to size. We purchased 3/4-7-ply, maple veneer HPVA Maple Plywood, which was available in a perfect matching color for the shiplap. We had the plywood cut to the exact size of the shutters at the time of purchase, which saved us a little time. Since the plywood was already pre-painted on the front and back this created a finished look for the shutters on both sides. 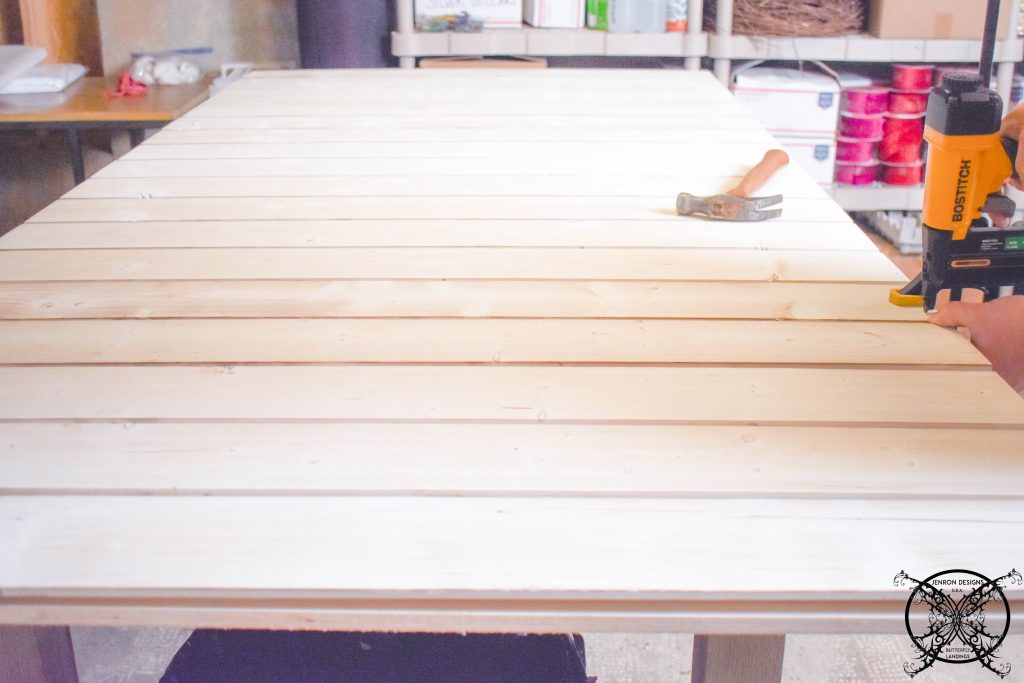 Then the next step was to cut the shiplap boards and mount them to the plywood board. We used 1 in. x 6 in. x 6 ft. UFP-Edge Rustic Collection Shiplap Charred Pine Board in Smoked White. Ron layered the boards starting from the top and working his way down in the traditional way a shiplap would have been installed.
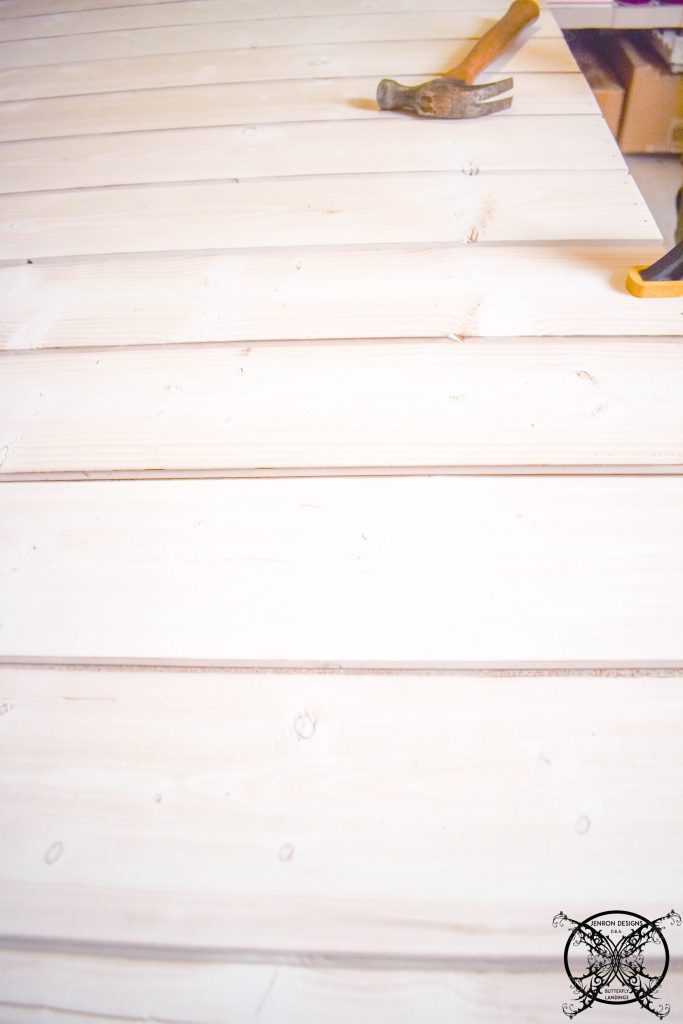 You see back in the day shiplap, was traditionally used in siding designs because of the need for consistent wall spacing, insulation and creating water tightness. The lapped joint is one of the simplest methods used to accomplish wall spacing and stopping water, which is why shiplap was, and is so popular.
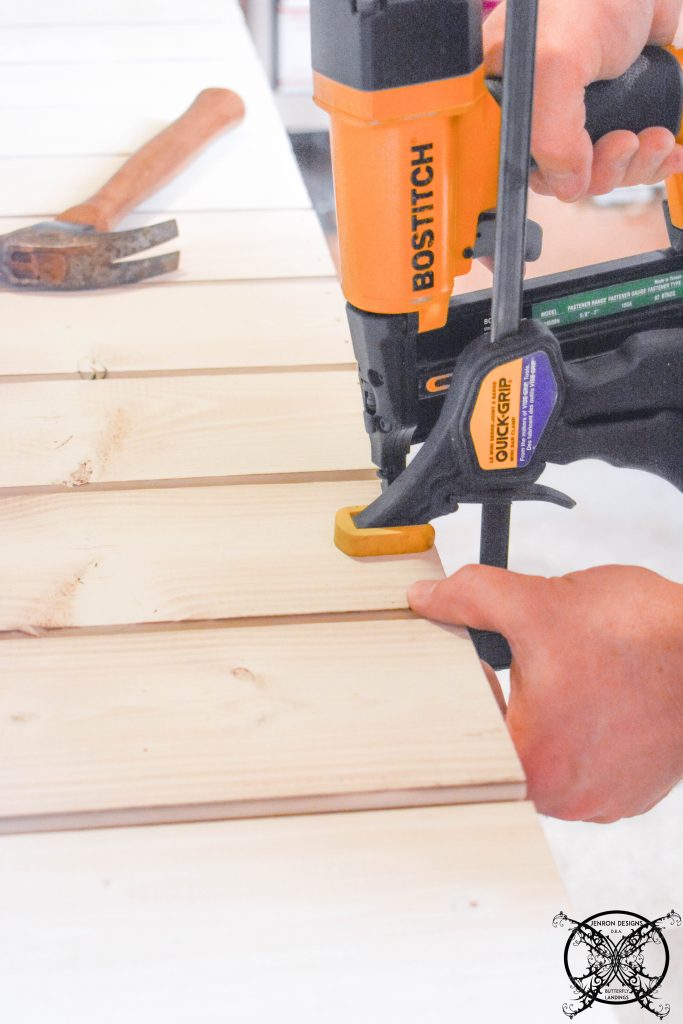 The boards were cut and evenly spaced, Ron used a 3/4″ brad nailer to attach the shiplap boards to the plywood backer mainly along the edges and where the center X would lay out. This allowed us to hid multiple nail holes in the shutters.
  Once all the shiplap boards where attached the outer frame work was built. Matching trim boards 1 in. x 4 in. x 8 ft. UFP-Edge Rustic Collection Trim Pine Boards in Smoked White.were cut to length to create a frame over the edges. We did find during this process the use of temporary clamps kept the boards in place while nailing them each to the backer boards.
  As a design choice we opted to make the frame board cuts very simple, with square blunt cuts on the outer vertical boards. Then we added horizontal boards into the remaining center space for a nice tight fit.
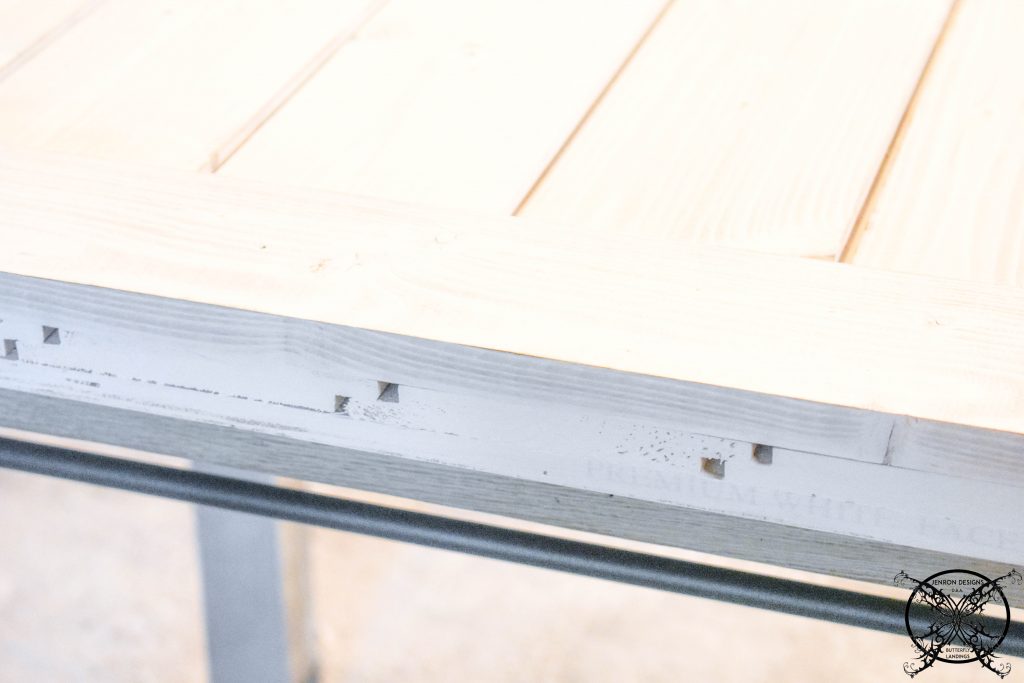
 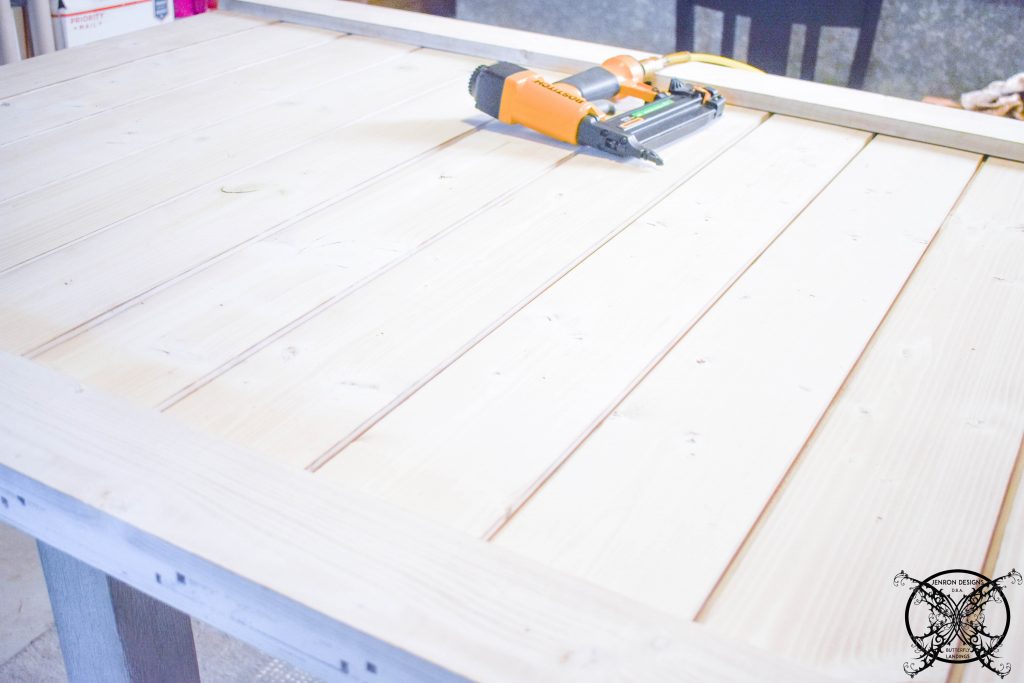 I also noticed that my plywood had a little writing on the edges that would be visible once the shutters were hung. Along with the visible cut edges of shiplap. This was easily fixed with a little Behr Farmhouse White chalk paint which was a perfect match for the smoked charred wood and the maple plywood.
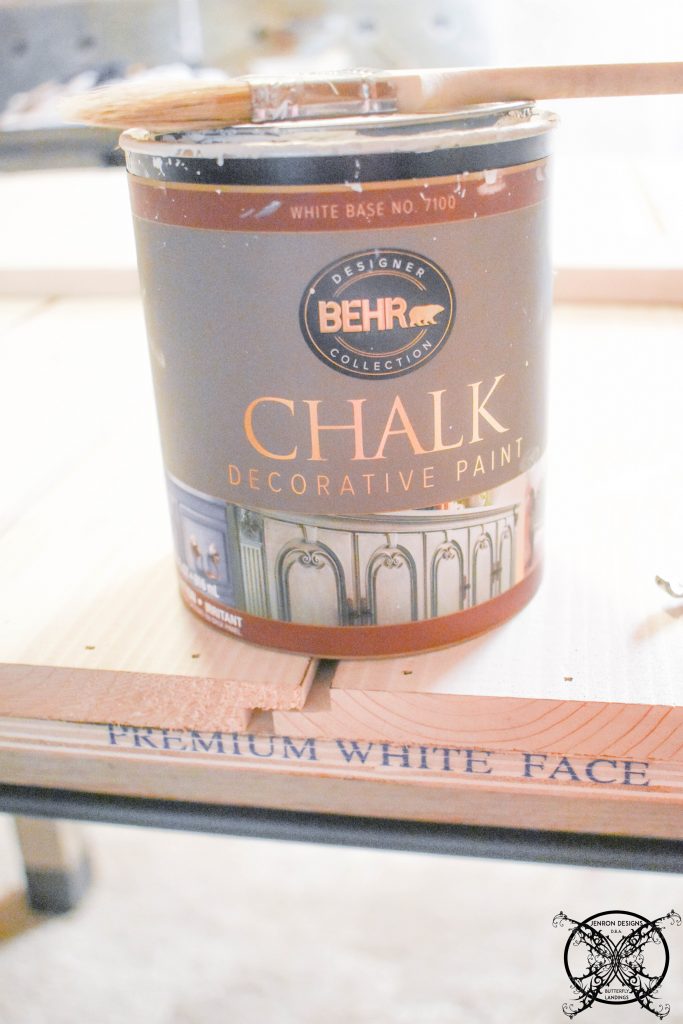 It was a quick one coat coverage and the edges matched perfectly. I decided for time sake that I could paint this while we continued to cut the decorative center cross boards for the doors.
 To cut the cross board you want to center a full size trim board on your door on the diagonal. This is more of a visual thing so you need to really look at it from all sides. Once you are happy with the placement temporarily clamp it to the door to get your angle.
 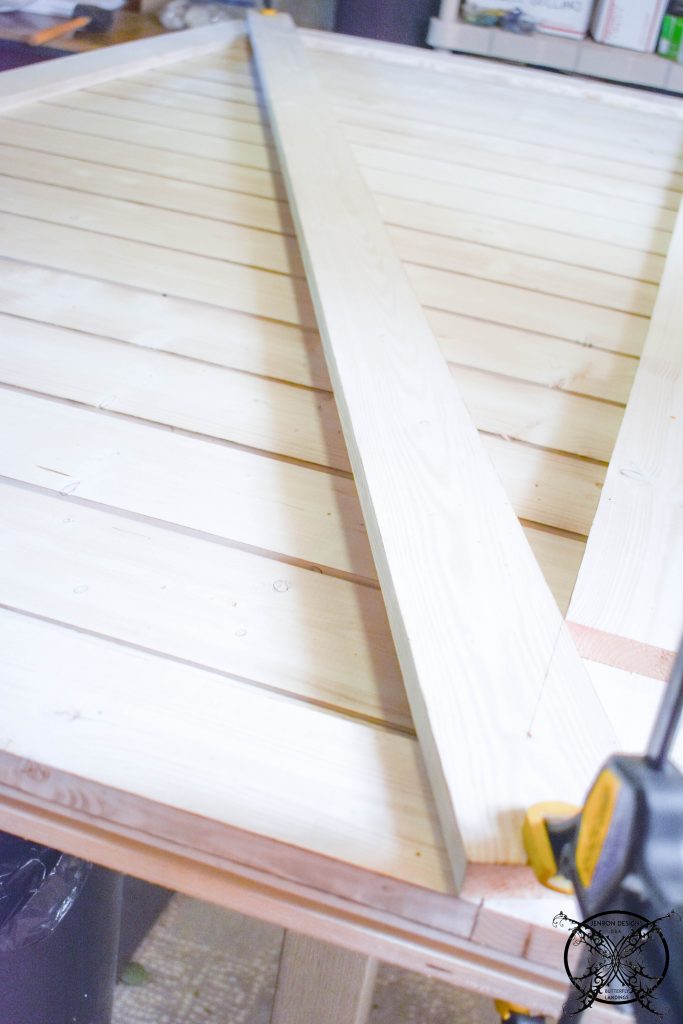 Next you will want to pencil in the lines of the existing frame already attached to the door as seen below. This will give you your cut lines for corner. For simplicity we added a riser board and used a a straight edge to make the cut lines. Do this process for both ends, then make your cuts for the perfect cross board.
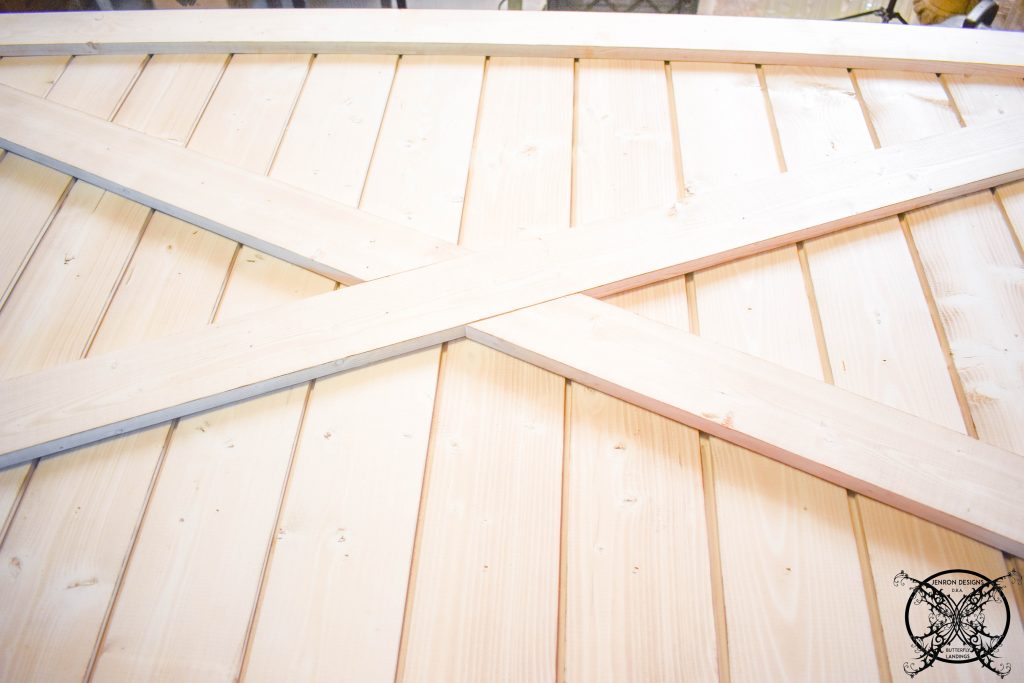
 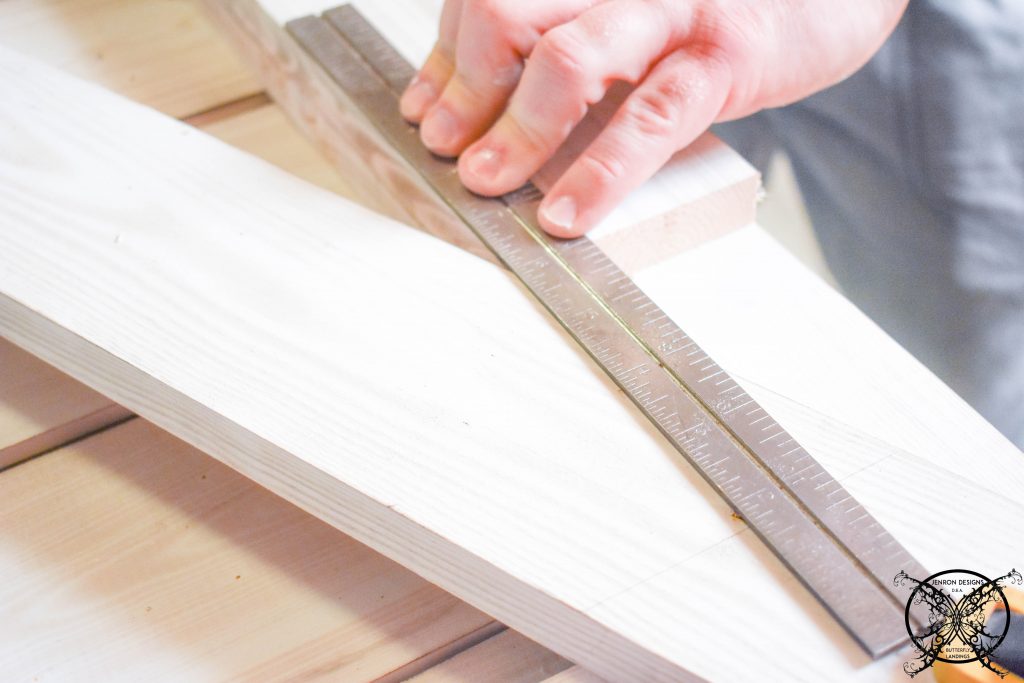 To create the X you will do the same process as above for the cross board. Then replication the process with the existing cross beam and straight edge to determine the cut out space for the middle.
 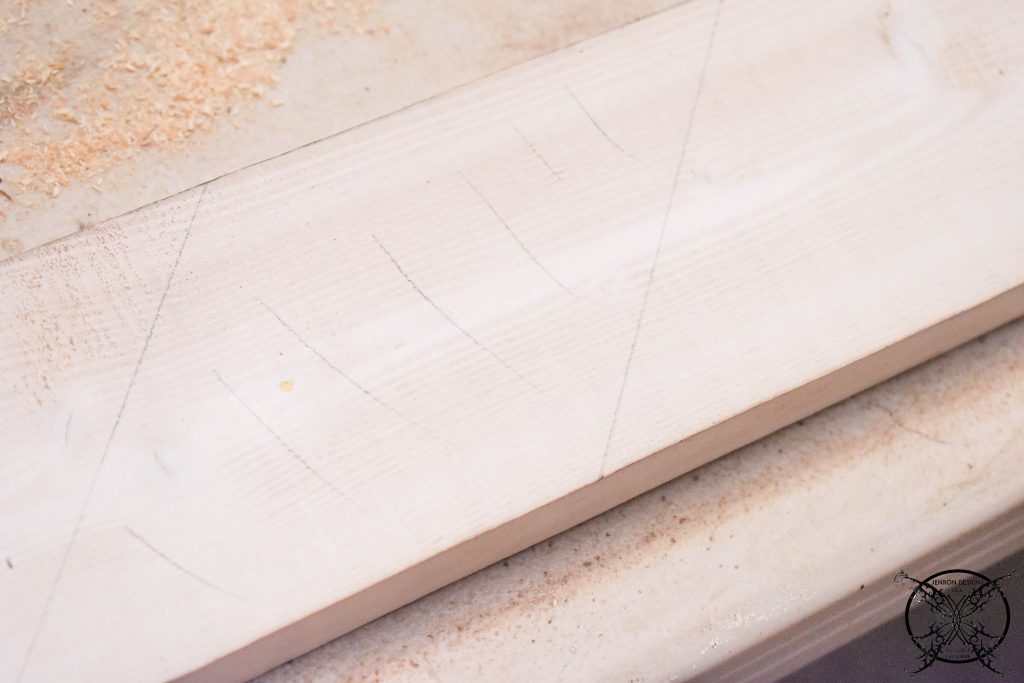 I also recommend that you use a detail sander to lightly sand down the edges for these boards. Since they do tend to have a bit of fray which was a little more rustic that I was wanting for these doors.
 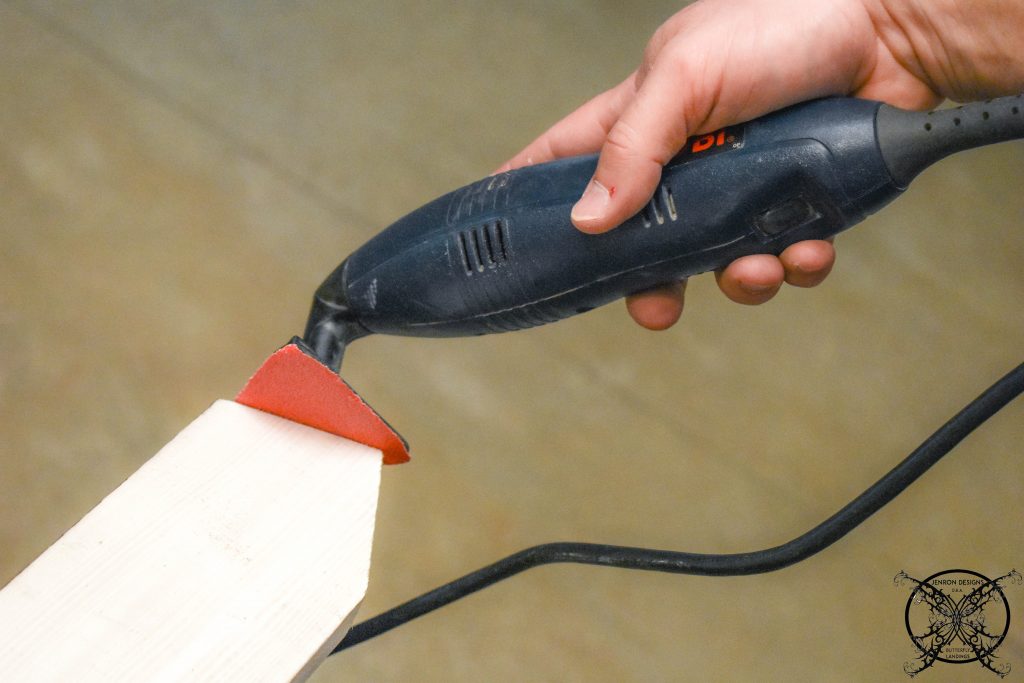 Once you have all your pieces cut and sanded you will just attach them to the door with a you nail gun. We did end up going up to a 1 1/2″ brad for all the trim work just to make sure that we were hitting all the layers of the boards.
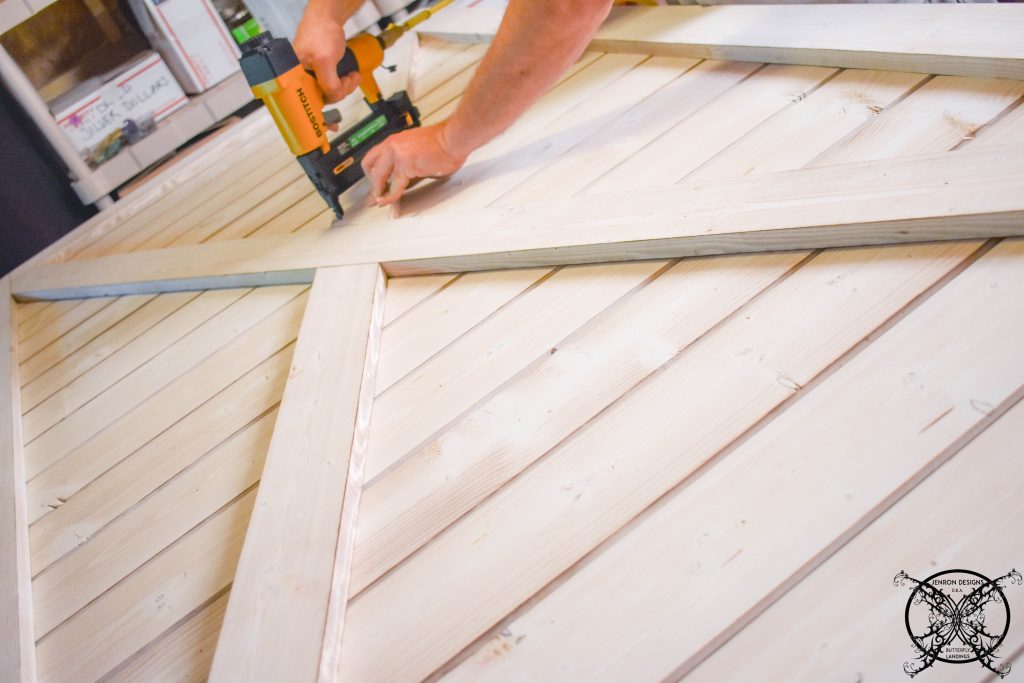
 That is how we created the barn wood door. Then we made a second door just like it for our project.
 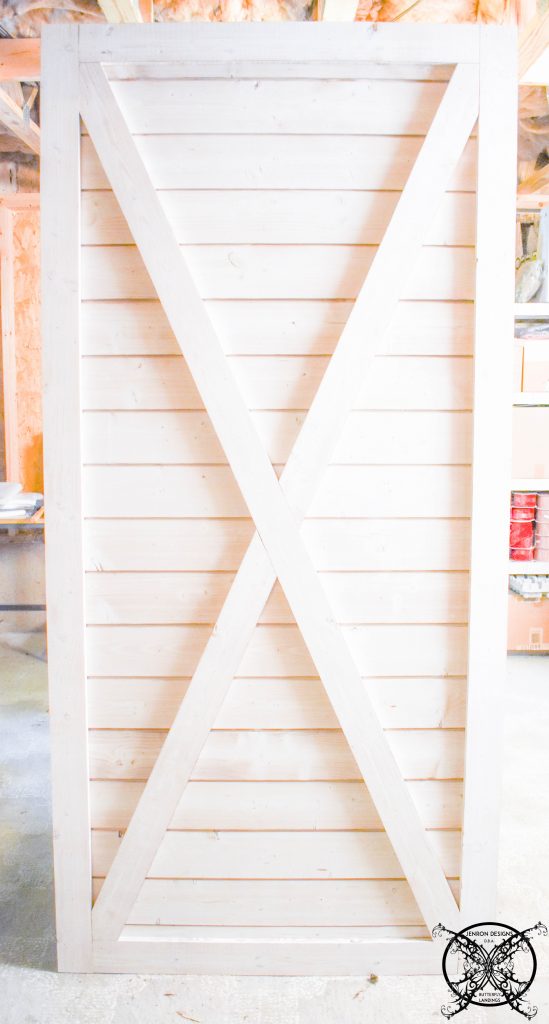 This is Part 1 of our DIY You Tube Video where Ron explains in more detail how he built the Barn Door Shutters along with the video to watch the process:
Installation Day:
After we moved the massively heavy doors up 3 flights of steps from our basements and had a mild coronary, it was time to install them. We had previously purchased a double set of barn door slider rails that would span the proper distance for the windows and headboard area. We decided to use a piece of 1 in. x 4 in. x 8 ft. UFP-Edge Rustic Collection Trim Pine Boards in Smoked White. as the mounting board.
 Since the length of the room was longer than several boards we opted to put a full 8′ board in the middle. Then miter two side boards at either end to get the length that we needed to span the wall. We pre drilled pilot holes to make sure that the screws would not accidentally split the shiplap.
 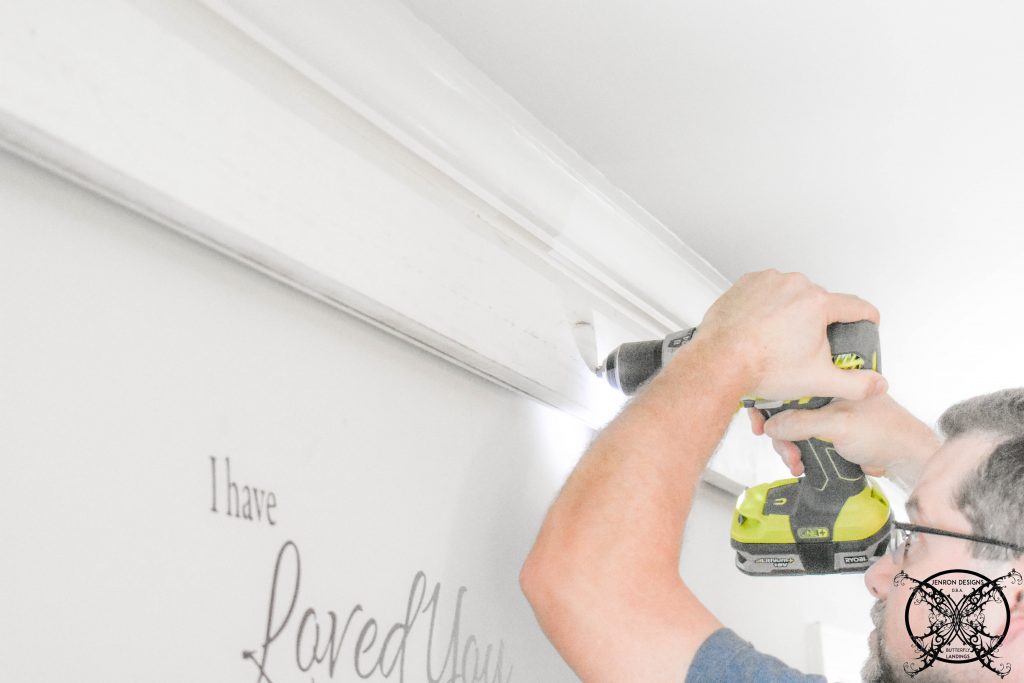 Then we realized that the depth of our window sill was a little bit deeper than the header board of shiplap. Meaning the barn doors would crash into the sills as they came across the window.
 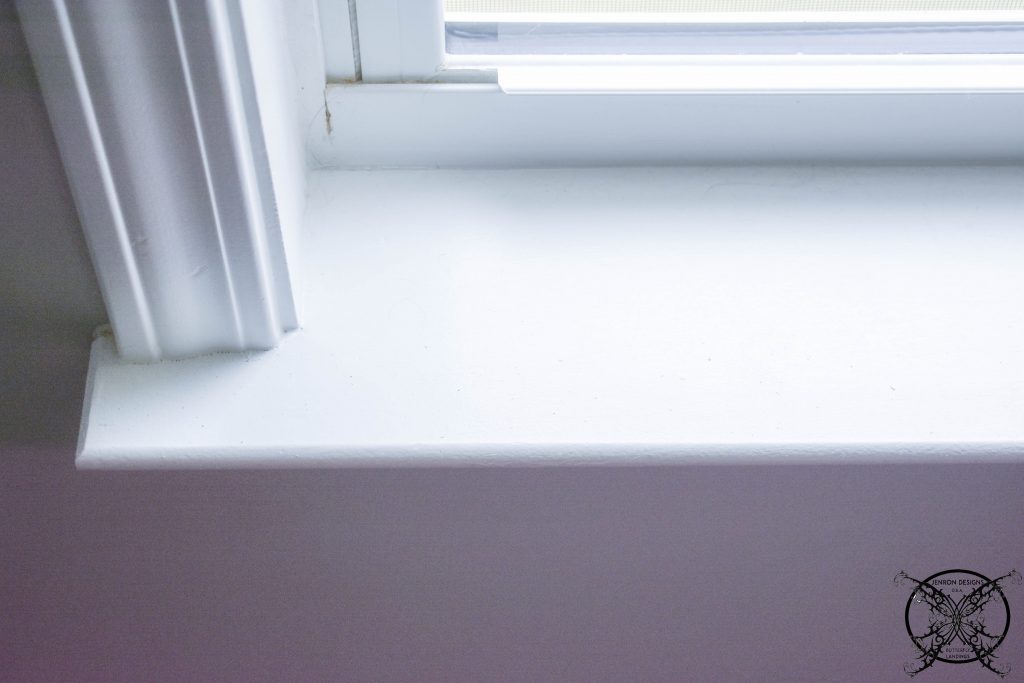 Since I am not about to cut up my gorgeous deep window sills we decided just to add an additional piece of trim board to the bottom of the shiplap base board. Which gave us the perfect amount of “clearance….Clarance”! Sorry I might be a bit of an Airplane fan, lol.
 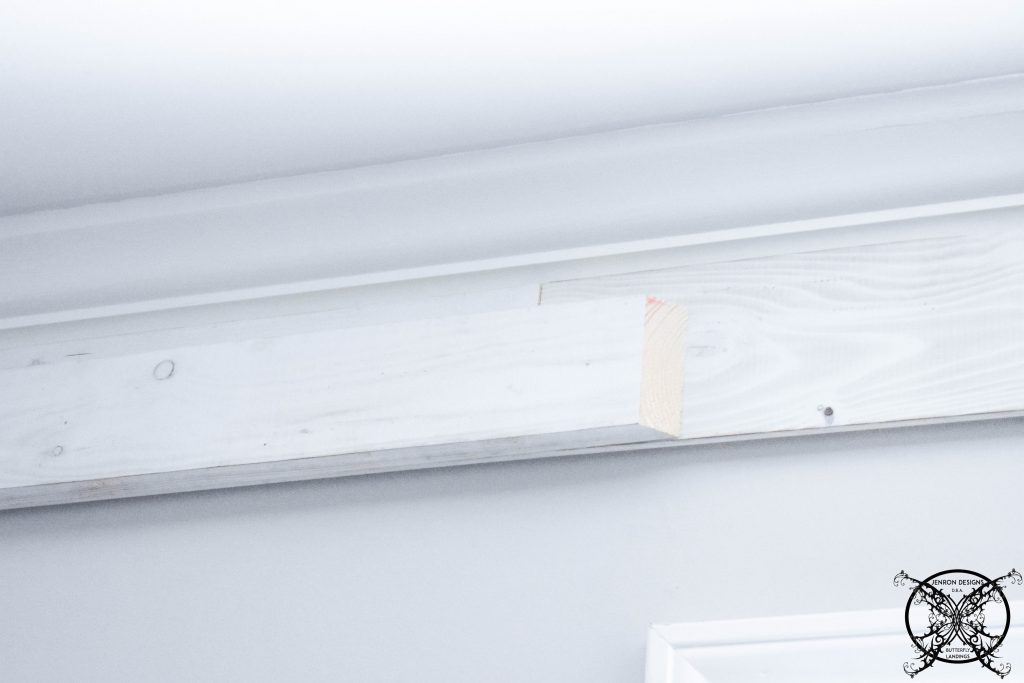 Here you can see where we added the additional 1 in. x 4 in. x 8 ft. UFP-Edge Rustic Collection Trim Pine Boards in Smoked White. We again feathered the miter cuts on either end to hide the fact that the boards were not long enough to span that length.
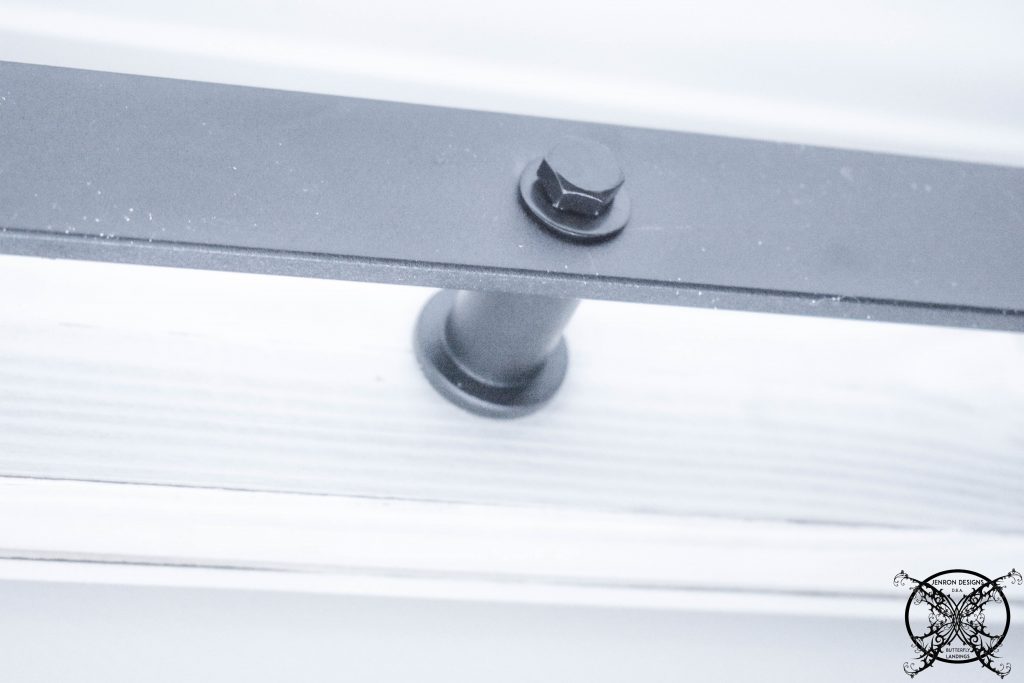
 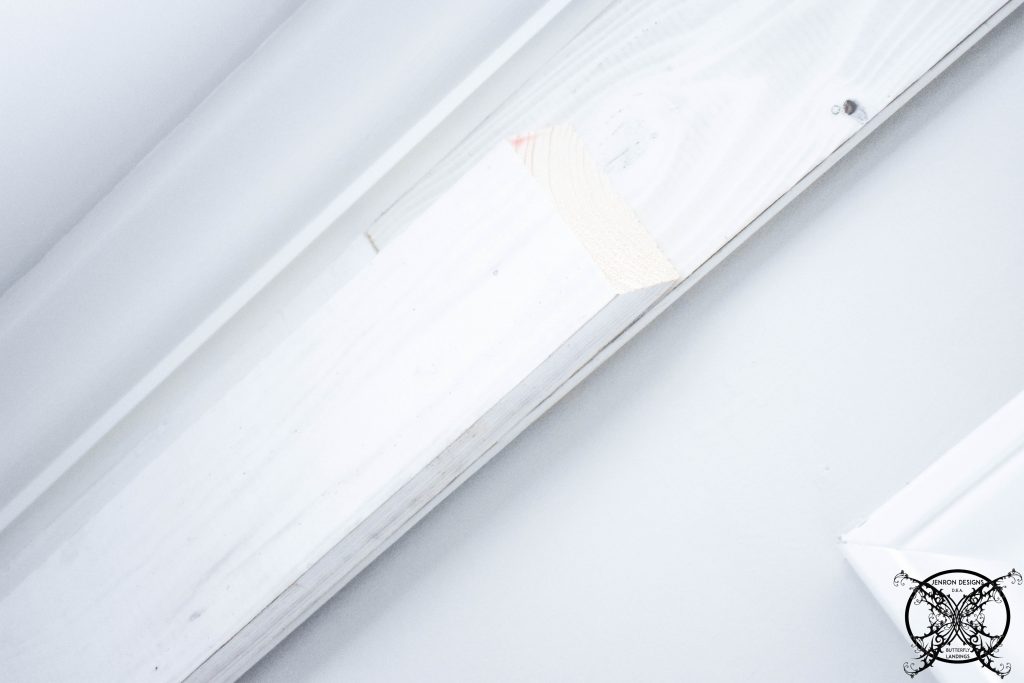 Once we had our boards secure, we pre-marked the holes for the mounting hardware of the slider rails. Since we would absolutely need a pilot hole drilled for these boards and the additional thickness.
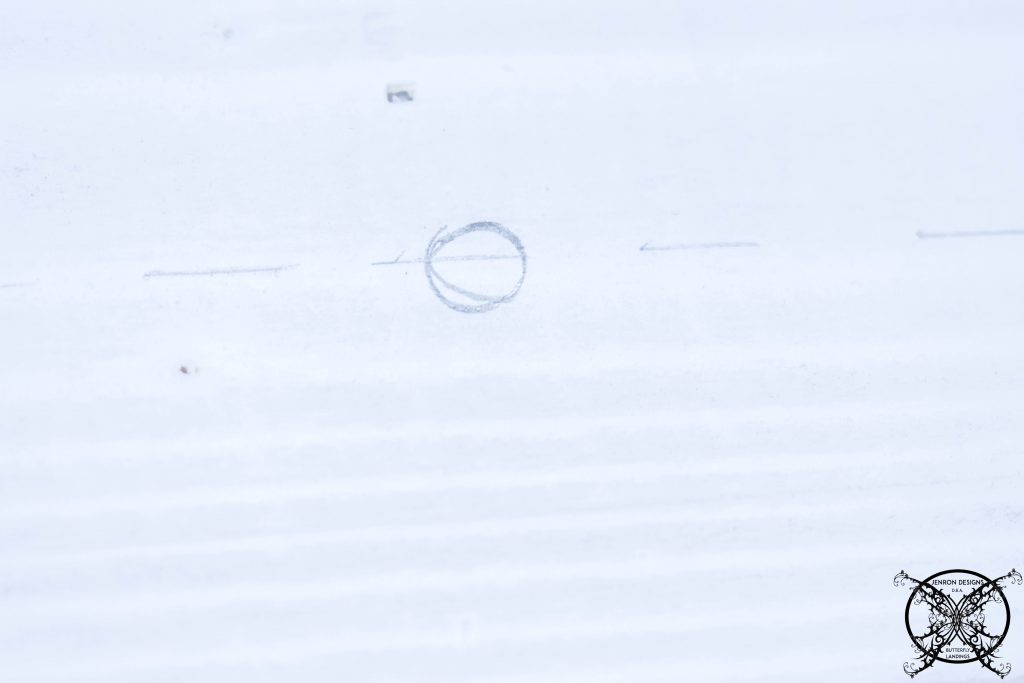
We used 2 sets of the SMART STANDARD 8 FT Heavy Duty Sturdy Sliding Barn Door Hardware Kits, Single Rail, Super Smoothly and Quietly, Simple and Easy to Install, Fit 42-48″ Wide DoorPanels. These are the same rails we have used before with the optional soft close kits which are amazing and we love them.
 We attached the rails one a time, which was very simple. The rails come with mounting instructions in the package so I will not go into a lot of detail here, since we are not reinventing the wheel.
 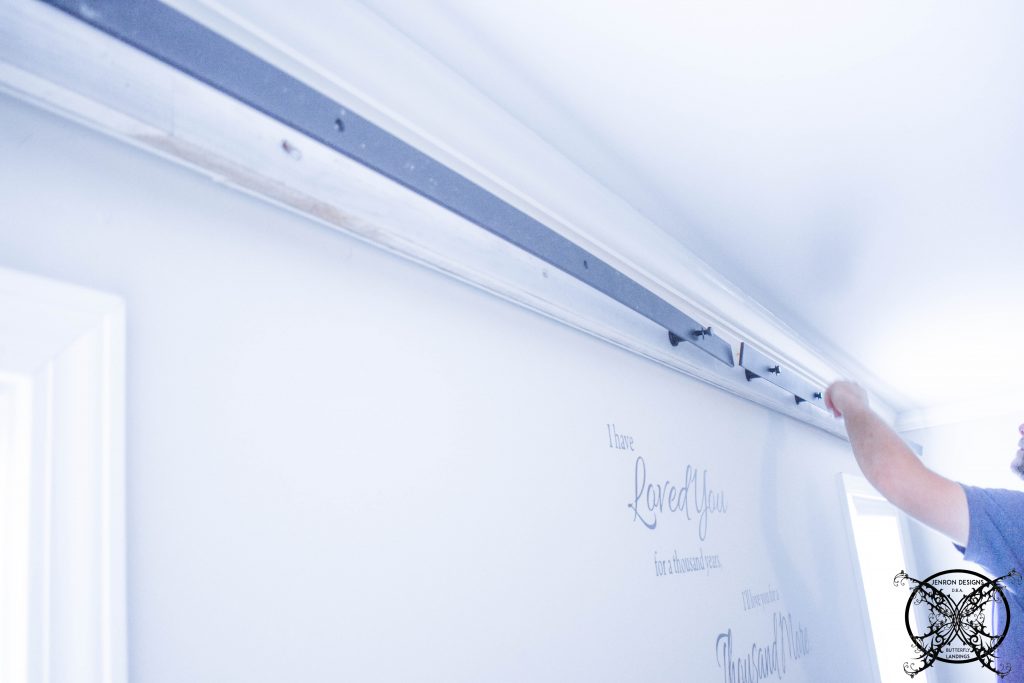 The next part was to add the rolling wheels to the actual doors we had built. Again per the instructions that came with the hardware assembly kit.
 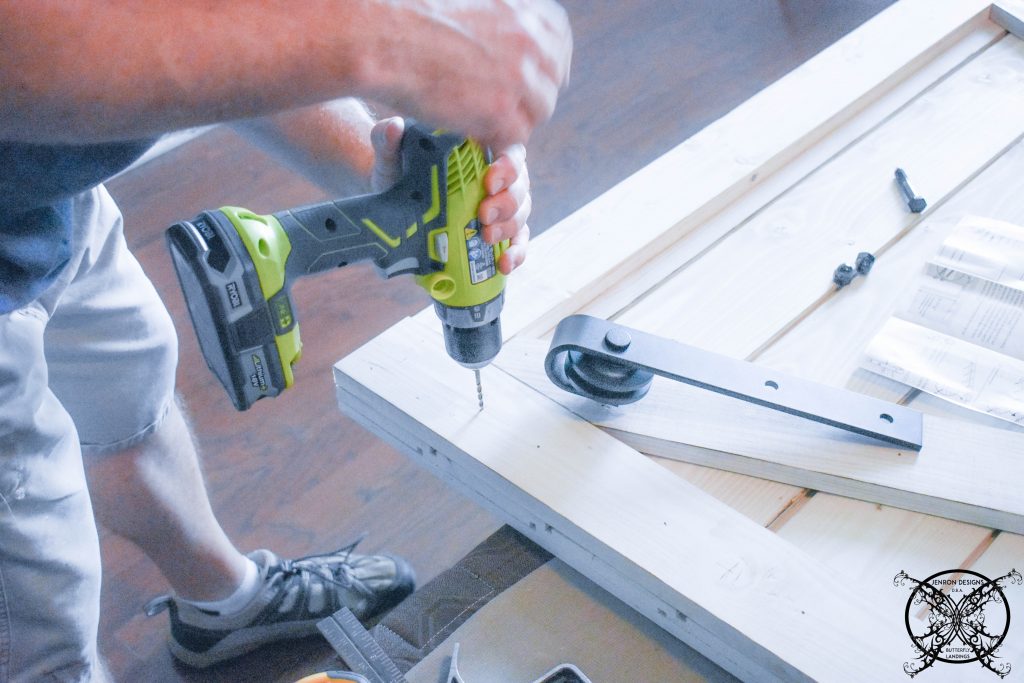 It was super simple and went together in no time. The only specialized tool you may need is a socket set for the large bolts. It is great if the sockets can go into a drill to make the job go even faster.
  Then we had to lift the heavy beast one last time to place it into the track, it’s permanent home. As you can see it is a perfect fit. We added some track base assembly at the bottom to keep the sliders on course. Then we set the track stops so the shutter door would not go past the windows on each side.
  We also located where we wanted it to stop in the center as well. This will just make the daily opening and closing much easier, and since it has the soft close tracks there is no banging or hitting of the shutter doors. Just a smooth operation.
 Here is a quick view of both the shutters up with the windows covered which really blocks out a lot of the light and heat. I am so excited about this project. I know the quality of our sleep is really going to increase in addition to the pretty esthetic value it adds to the room as well.
 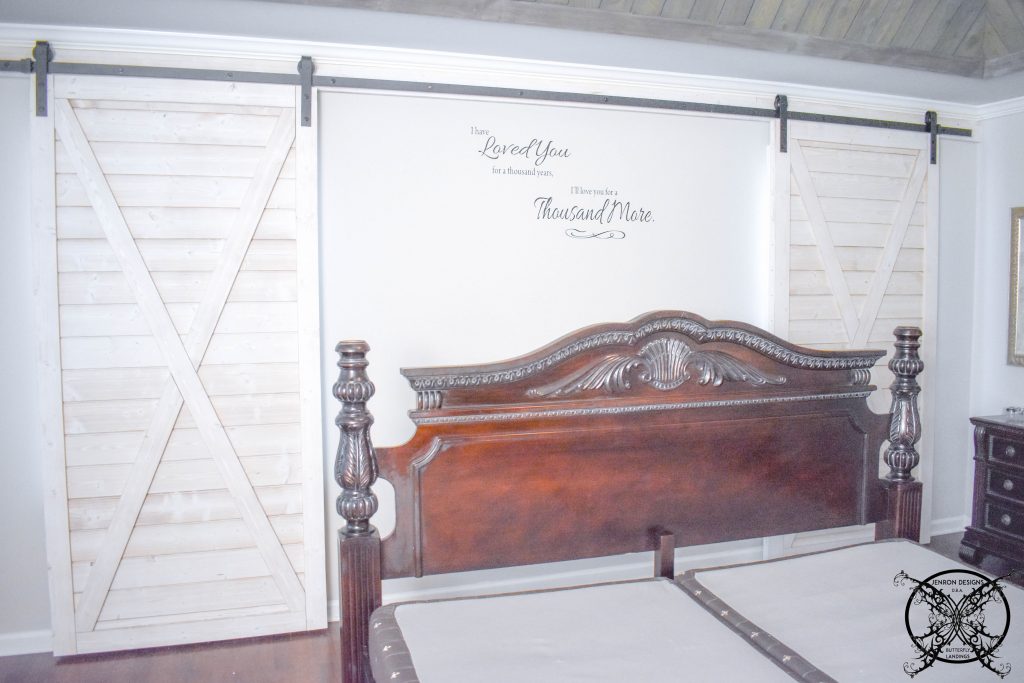 Another little tip we have decided to do while the bed is still pulled out is we are going to pre-run our cords and power strips. Since the shutters are moveable you will notice that the plug is located directly in the slide path. For this reason we wanted to pre run and tack the cords so they do not end up caught in the sliders.
 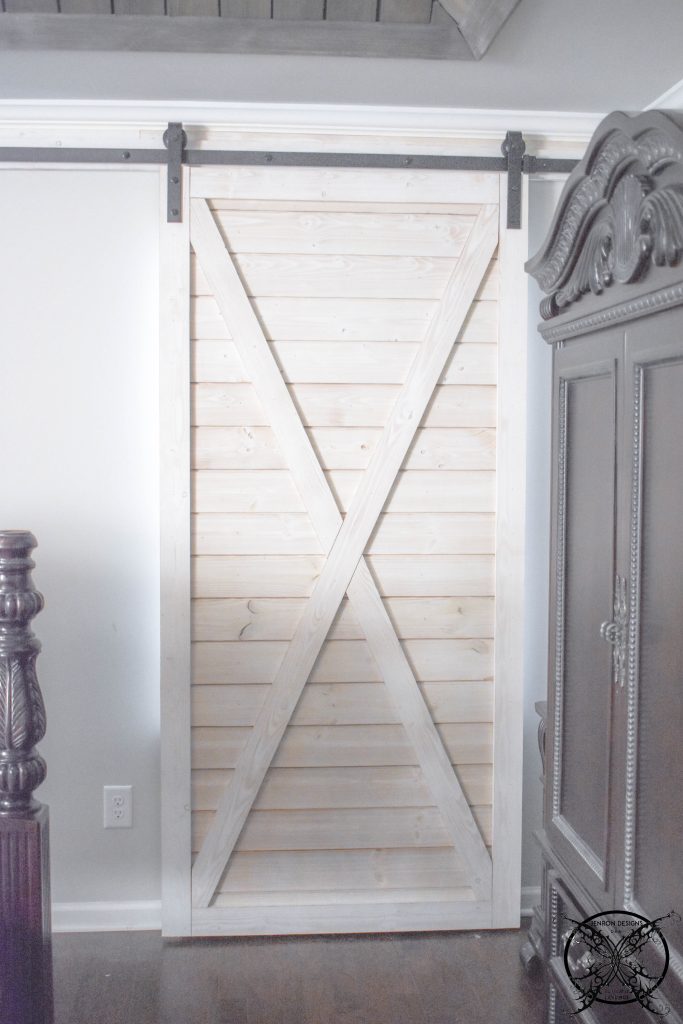 So this is one final look at this project with windows closed and opened. To give the idea of how this will look once we get the rest of the room decorated and designed.
 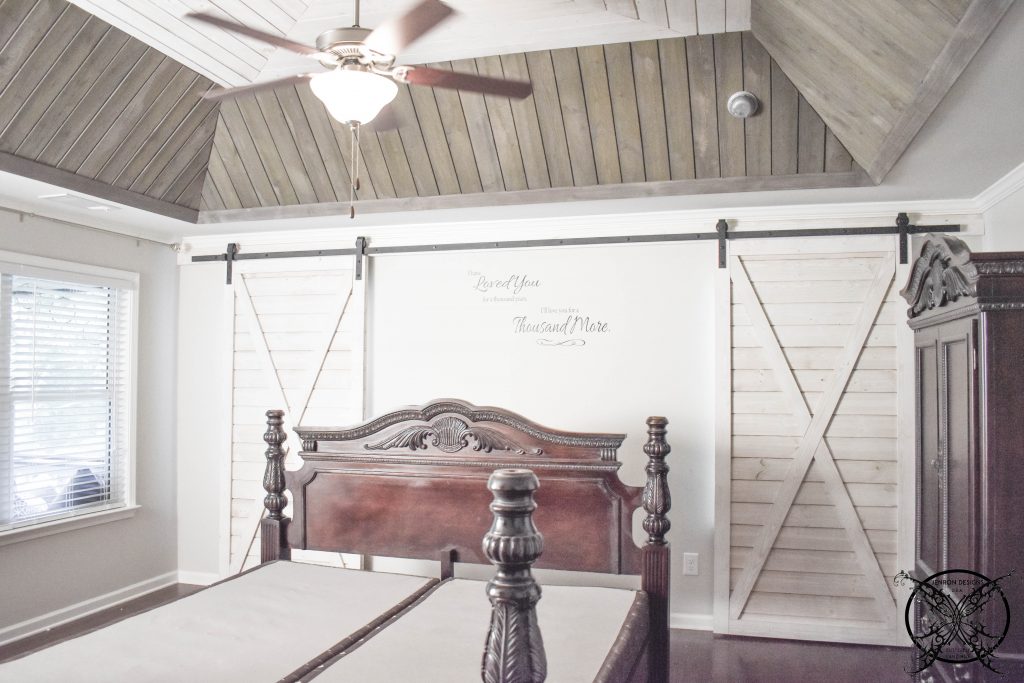 I did decide to keep our little Twilight quote on the wall since during the day you never even see it with the shutters open. I feel like it is like a little secret message just for us when we get ready for bed. It is kind of like the ones that say “Always kiss me Goodnight” which would be cute in this application too. Since they are not as popular as they used to be, but they may be special to the occupants. Now you can have the best of both worlds.
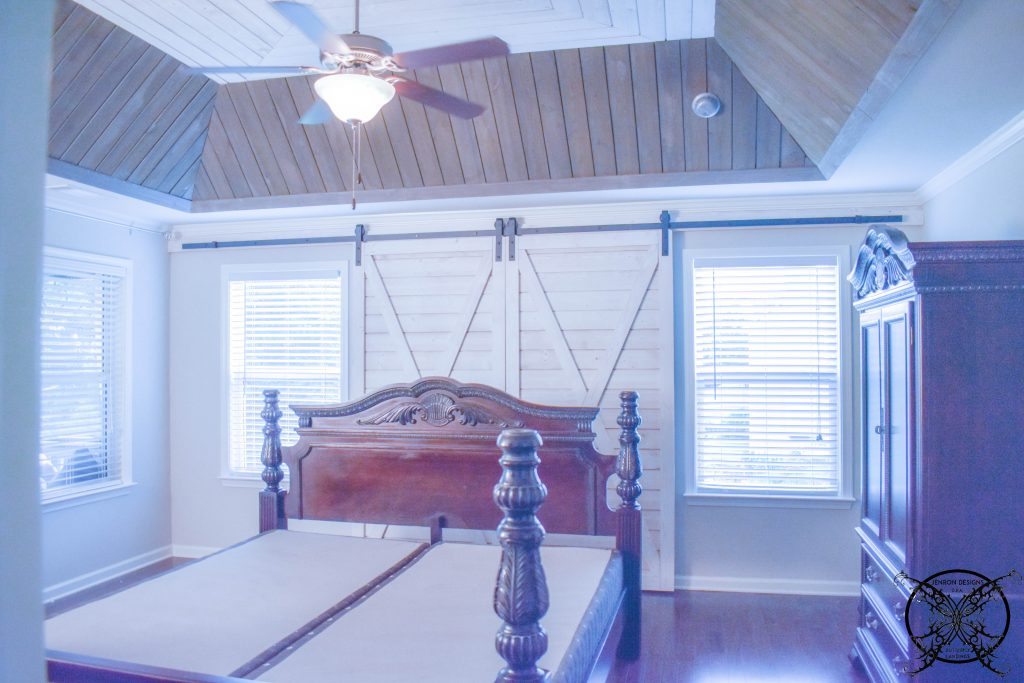
Here ‘s the quick over view of PART 2 of our YouTube Video on how we installed these sliding Barn Wood Shutters:
PIN ME for later and be sure to follow us on Pinterest at Jen @ JENRON DESIGNS
That frames the bed so well!
These look so amazing!! I just remodel my room and these door has given me inspiration. They look so beautiful!! made
So cute! This looks like a fun diy project and it looks great in your room!
They are really cool. It adds beauty to the room. I really like them.
This is such a cool idea, I love how you used a barn door application to make window treatments and then it is a headboards too!
This is such a clever and unique idea! I love how you showed each step in the process. Wow—the final results are amazing!
That is gorgeous!!!! I love the way this looks and such functionality!!!! Great job!
I absolutely love these! They are gorgeous. I love how you showed the DIY in detail! My husband might build these for me now lol. 😉
I absolutely love everything about these shiplap window shutters. What a fantastic master bedroom idea! Thanks for the inspiration, pinning for later!
Thanks for your wonderful, step-by-step guide! I have a colleague who’s building a new house & she should see this.
What a beautiful idea. It looks wonderful in your bedroom, I love it. Such a great inspiration!
Wow the shutters really do look great!
Wow these look awesome! We haven’t tried any diy projects. All your articles are so motivating. Feel like starting one now.
These look amazing. Thanks for your wonderful, step-by-step guide!
Oh wow! Looks great, at first It was a headboard. It functions well for that purpose as well.
Truly this is one of the best DIY’s I have ever seen, your creativity and genius ideas have my mind spinning!
Great DIY project for shutters for windows. Easily understandable with step by step and lovely pics
Gorgeous! The final result it’s so chic and makes the room look so cozy
They look AMAZING! It’s crazy what a difference such a little change can make. You did a great job, I’m totally inspired but don’t think I have the skills for this LOL!
This looks amazing! what an amazing DIY, so important to make stuff on your self im renoing my hole house im so excited !!!
These look so good! I wish I had seen this sooner as we just bought a barn door for my office and this could have worked great instead!
This is an excellent tutorial and they turned out so beautiful!
I love these! I need to make some for sure. I love how yours turned out.
I did modren bar door in my house and I did them super similar to this! they were so easy make
Wow those look amazing! I would love to try something like that. It adds so much to a space. Yours look great!
They really are so easy to make, we have also made all of our barn doors and slider doors in our home as well, which is such a great way to get that custom one of a kind feel for your home. I think sometimes it feels like a daunting DIY when it really is not. Adding a slider door whether it be modern or rustic is actually way simpler than adding in a pocket door from a structural standpoint.
I always love any DIY projects! I’ve always wanted to have all the tools i needed to create beautiful pieces.
I love the look of this and how well it turned out! Great job!
These are great looking shutter sliders and I bet they do keep out a lot of the unwanted lights from a neighborhood. These days it seems like those are far worse than they used to be with the lack of trees.
Loved this tutorial! The way you transformed those windows with shiplap shutters is pure genius! Can’t wait to try this on my own home, thanks!
I absolutely love this DIY project! The shiplap shutters add such a charming touch to the windows. Your easy instructions make it feel so easy to do. Can’t wait to give this idea a try. Thank you for sharing all of your creativity and tips!
Thanks for sharing. I read many of your blog posts, which are all so cool, and your blog is really very good.
I love this DIY! The barn door shutters are beautiful and functional for any window. Your detailed instructions and tips make it feel approachable. Thanks for sharing such an inspiring idea, I can’t wait to try it for my bedroom windows!
I absolutely love the idea of DIY barn door shiplap shutters! The detailed steps and beautiful photos make it so approachable. I can’t wait to try this project in my own home to block out those pesky street lights and noisy neighbors. Thanks for the inspiration!
I really love this project, and barn door shutters add such a charming and rustic touch to your windows. Plus your step-by-step instructions are so clear and easy to follow I feel like this is totally do able. Can’t wait to try this in my own home! Thank you for sharing!
I absolutely love this DIY idea! The barn door shiplap shutters add such a warm and rustic touch to any window. Your step-by-step instructions are clear and easy to follow. Can’t wait to try this project in my own home! Thanks for the inspiration!
I absolutely love this DIY project! The barn door shiplap shutters add such character to the windows. Your step-by-step instructions are super helpful, and I can’t wait to try this in my own home. Thanks for sharing such an inspiring design!
I absolutely love this DIY project! The barn door shiplap shutters add such a unique and charming touch to the windows. Your step-by-step instructions are clear and easy to follow. Can’t wait to try this in my own home—thanks for the inspiration!