
Tips for Painting Walls
Okay welcome to the ORC FALL 2018: Week 2 Tips for Painting Walls
This week our primary focus this week will be on sharing our Tips for Painting Walls to get ready for our reclaimed wood accent wall next week. Follow along as we get the wall behind the wall all ready to go.
WEEKS AT A GLANCE:
WEEK 1 WEEK 2 WEEK 3 WEEK 4 WEEK 5 REVEAL
 So we are celebrating the ORC FALL 2018: Week 2 Tips for Painting Walls this week. In case you are wondering what exactly The One Room Challenge is, so here is the scoop. This event was started by Linda Weinstein @ Calling It Home and is hosted twice a year, in April and October. For the past 14 seasons, the ORC has hosted over 250 interior design & decor bloggers, that have joined together to makeover one room in their homes. The participants have six weeks, from start to finish, in order to complete a full room transformation. To date, more than 2,200 rooms have been transformed through the One Room Challenge and many spaces, have been recognized and featured by several of the hosts seen here:

Inspiration Board & Designs Plan:
 *Please note that this was a sponsored post and may contain affiliate links for your convenience. You can view my full advertising disclosure here.
PAINT & PREP
JENRON DESIGNS WOULD LIKE TO THANK OUR OFFICIAL ORC SPONSOR:
![]()
This week after getting the room cleared down to a blank slate, we needed to get all the walls prepped for a new design layout. This will include patching any holes mainly from previous wall art that will not be used going forward in the new design. We will also be painting a dark base coat on our reclaimed wood accent wall, to insure that you do not see any light wall color between the possible cracks in the wood. 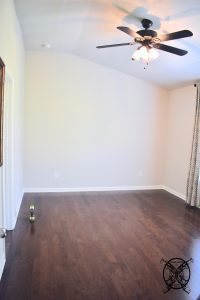
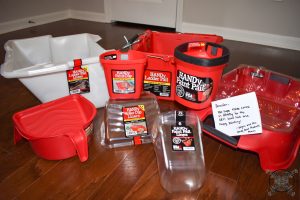 This week we were so lucky to be sponsored by HANDy Paint Products, they are just one of many the amazing sponsors for the One Room Challenge. We were able try out a lot of their amazing paint products for this portion of our painting DIY.
  In full disclosure, we have used the HANDy paint products before, and already knew that we loved the HANDy Paint Cup, which is one of our go to painting tools of choice. Our favorite features about it is the magnetic paint brush holder built into the side that holds your brush, inside the cup to prevent drips. This is really a perfect tool when you are trimming out a room, and we use ours all the time. It is also great if you have to stop in the middle of painting and do not want to lay your brush down, you just snap it to the side and presto, instant painting assistant.
  However, I can say I think after trying the HANDy Ladder Pail my husband now has a new favorite. Since our ORC room has vaulted ceilings, a lot of the painting was done on a 15 ft ladder. The HANDy Ladder Pail easily attached on to our ladder and saved him so much time. It has a built in roller tray, so he did not have to go up and down the ladder to refill his roller each time. All I can say is he is absolutely in love with this product, thank you HANDy Paints!
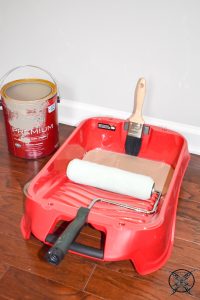
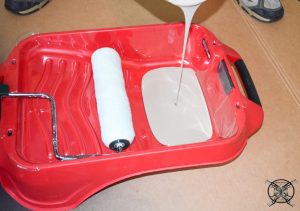 For the lower areas of the wall, I used the basic HANDy Paint Tray along with the convent tray liners. Which really made clean up very easy. I am usually the one that cleans the buckets and brushes, because I am so finicky on how my brushes are cleaned. Probably because I was previously a faux finish artist, and I know how important it is to take care of your brushes and tools. Having one less step really made the clean up process for this project completion so much quicker.
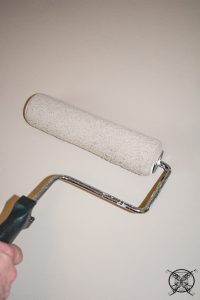
 It has been mentioned to me that a lot people are unsure how to properly roll a wall. The proper painting technique is called V painting or W painting. Where you roll on a V or W shape then re roll over the top to fill in the gaps. This technique prevents streaking and give a good overall coverage of your paint. You will still probably need a few coats for newer unpainted surfaces to get a nice opaque coloration.
 Since two of us painting at the same time the project got done in record time. Now all we have to do, is watch the paint dry, lol. Oh a few more projects I guess….. as I mentioned above, we were touching up a few of the holes in the wall from previous art work. Since this was an entirely different paint color and we were only doing a few quick touch ups the HANDy Paint Pail was the perfect tool for the job.
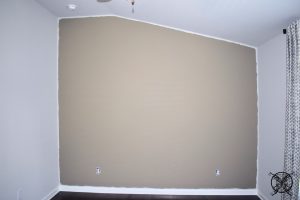
Designer Tip: Okay, so you may have noticed that this wall, while complete, is not trimmed out on the edges. No we are not just lazy, lol. This was done intentionally in case there is a gap at the ceiling or along the sides due to a bow in the boards, the ceiling color or adjacent wall color will be the same and you do not see the base color meeting in the crease. This is a secret little faux finish technique, frequently used in set design, stage applications and even designer show homes to hide flaws of walls that are just not plumb. Most people never even notice, but those with a trained eye, can spot these tricks every time.
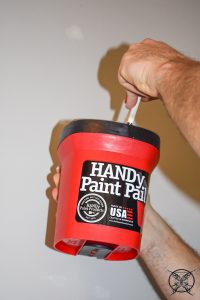 This perfect little paint pail has the standard, built-in, magnetic brush holder and a super comfortable handle that is adjustable. So it’s perfect for anybody and any painting project. Great for touch ups of trim out work, which is not really my area of expertise, so Ron will be handling that portion of the project, lol.
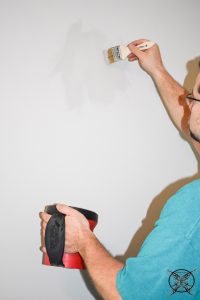 The Wood Wall Layout Plan:
Now that the walls are painted another very important thing we need to calculate is the amount of reclaimed wood needed for the accent wall and the actual layout and pattern, based on where our studs are located. Lucky for us, Ron is fluent in CAD design as an Electrical Engineer; so he just whipped up a quick wall schematic for my approval. Well, make that 3 wall schematics, the first two were vetoed as with any good administration….LOL, but the third was, in fact, the charm.
One other tip I would like to share with all potential home builders is to take pictures of your home during the construction phase. Specially the pre sheet rock phase. These photos are truly priceless when it comes to home improvements. We have pictures of this wall so we can see exactly where everything is inside so we know where not to nail, or cut. We can also see why the studs are not lining up, it is because of the ceiling trusses.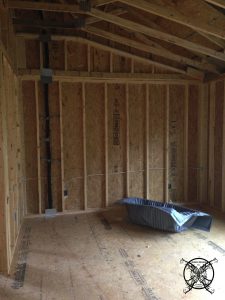 My apologies for the lack of a high quality picture. But, at the time I had no idea that I would be sharing this on a blog site, it was mainly for personal use and quickly taken with my iphone 5, ha ha ha. However, this really is one the most valuable tips I can give anyone building a home, it will save you so much time, money and heartache. We did this in our previous home too and actually left the portfolio with the new homeowners so they would have these records too. Which I think, blew their minds at closing.
 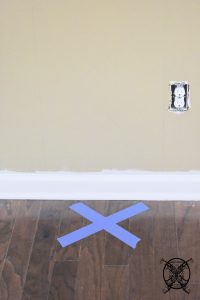 From the picture above we were able to see that a major HVAC line ran directly through this wall. Which probably would not have been detected by a stud finder. So, without these pictures we could have nailed directly through this line, causing a leak in our walls later down the road. In all honesty, I am not even sure that an installer would have done this kind of due diligence, in this particular scenario, which is why I always say if your want something done right, do it yourself.
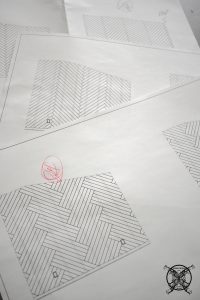 As you can see, we have now marked the area where we can not drive any nails or screws into the wall with blue tape on the floor. We also marked all of our stud lines with a laser level, to make nailing the boards easier. This will save you time and nails, so you know where to pop each board as you are placing them on to the wall.
THE GAME PLAN:
WEEK 1- Introduction, Inspiration Board, Project Outline, Starting Product Estimation & Procurement
WEEK 2- Clearing the Room, Painting the Walls Base Coat, Painting Tips Sponsored by HANDy Paint Products, CAD Drawing-Wood Wall Placement
WEEK 3- DIY Reclaimed Wood Wall Installation
WEEK 4 – DIY Barn Wood Sliding Door Staining & Installation
WEEK 5- Picking Up Custom Orders, Last Minute Accessories, & Room Staging
WEEK 6- FINAL REVEAL
Totally love your plan for the room. And love all your Handy Paint products. I gotta get me some of those! Looking good, girl. ~~Susie from The Chelsea Project
Susie they are such awesome paint products! I am so glad they HANDy sponsored the ORC this time. I love their products but I got to try some things I had not tried before and I am now a bigger fan!
You’re coming along so nicely in this project, Jen! Looking forward to next week’s post.
Such a great post for your project room and what a great sponsor, I love their stuff too! Lucky girl!
Great pictures and instructions. It looks like a really fun project.
The paint looks great! I’m excited to see your feature wall go up to – that’ll be a show-stopper! Good luck this week 🙂
Ohhhh! Loving the progress! Nice work! I’ve never heard HANDy Paint products. Thanks for introducing me.
Love all these tips! The worst part of painting for me is the mess and cleanup-these products look great!
Wow, we have so much work to do on our house, but this post has made me feel a little less overwhelmed. Great advice and instruction.
I’m quite invested in the transformation now. I’m quite fascinated by the whole process. You must feel a real sense of accomplishment when you finish each of your projects.
I love HANDy cup products! Your wall looks great!
Interesting!! Would need to try out this brand
I really like that kind of makeovers! Great job so far! x
I absolutely love the ORC idea! I will definitely be following to see updates and the final reveal. 🙂 xx
This post makes me want to redo all of the walls in my apartment (if only our landlord would let us!) they’re a putrid yellow and horrid. I can’t wait to see what’s next!
This whole idea motivates me to change my walls . Pictures are quite descriptive as well. Thanks
I am sooo going to purchase some handy paint products. So helpful! Looking forward to following along Jen!
That wall is going to be awesome!!! Can’t to see it all come together!
Oh wow…great tips on taking photos of the “insides” of the wall!
Those Handy tools looked so handy! Love seeing your wood wall layout, it’s going to be amazing! Can’t wait to see it.
You inspire me to get out and do the house projects already! haha love this!
Having the right tools is key. Love the stain color and cant wait to see the reveal.
Wow this project is going great. Lucky girl to get all those goodies.
I love the Handy Paint products too they really make painting a breeze.