DIY a Faux Farmhouse Mantle
See how we decided to DIY a Faux Farmhouse Mantle to create a lot of rustic charm to our woodland guest bedroom.
I have always wanted a sweet little rustic fireplace mantle in my woodland guest bedroom, but to be honest the room was not really laid out for a real fireplace addition. So after searching all of the antique stores between Georgia and Waco Texas last fall to find one in the perfect size, we decided to DIY A Faux Farmhouse Mantle to create the look of a fireplace instead. This was a really easy, cost effective way to add a lot of charm to this space without all the hassel of adding a working fireplace.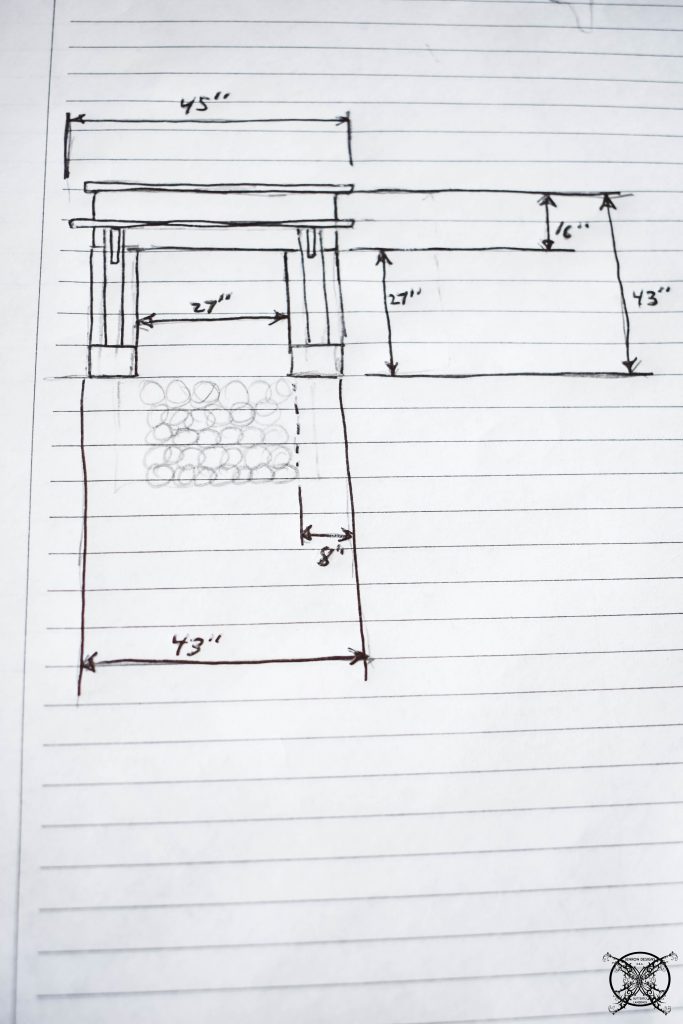 Okay so let me just say that all of our ideas and DIY projects start off with a sketch of some kind, and some are more elaborate than others. This is just a basic hand drawn sketch where I drew out what kind of mantel I wanted and Ron figured up the measurements that would work for our space. When working on a project that I have dreamed up, I find it easier if I can draw it out so Ron can see what I am talking about so there are no questions.
 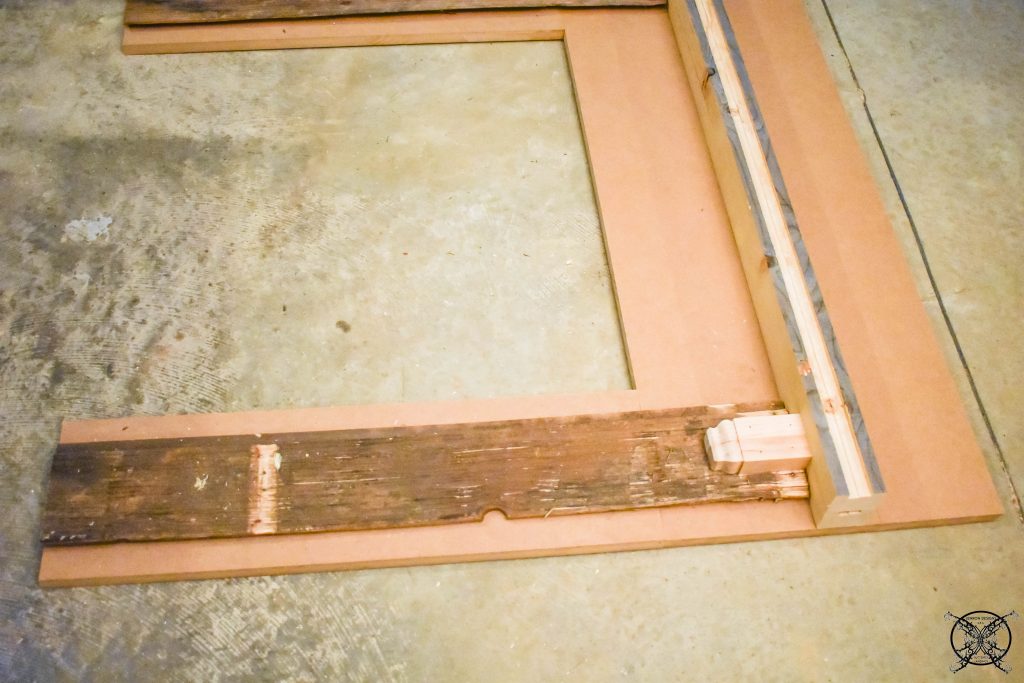 Part of the project was laying out all the pieces. Which I will say, we used a lot of our leftover wood and pallet parts to create this mantle so this was pretty much a free project as far as the budget goes. Plus it cleaned out a bunch of spare wood we had laying around. The back was created from a heave duty masonite board which we previously used for my office cornice board for the One Room Challenge.
 The side pieces were both savaged from an old pallet that I had deconstructed and verified as safe to use for multiple projects like the DIY Outdoor Dining Table and my Deconstructed Sofa to name a few. I loved the dark walnut color of these pieces, and vowed that I would finish this piece so that the color would bleed through and be seen, so those were specifically matched.
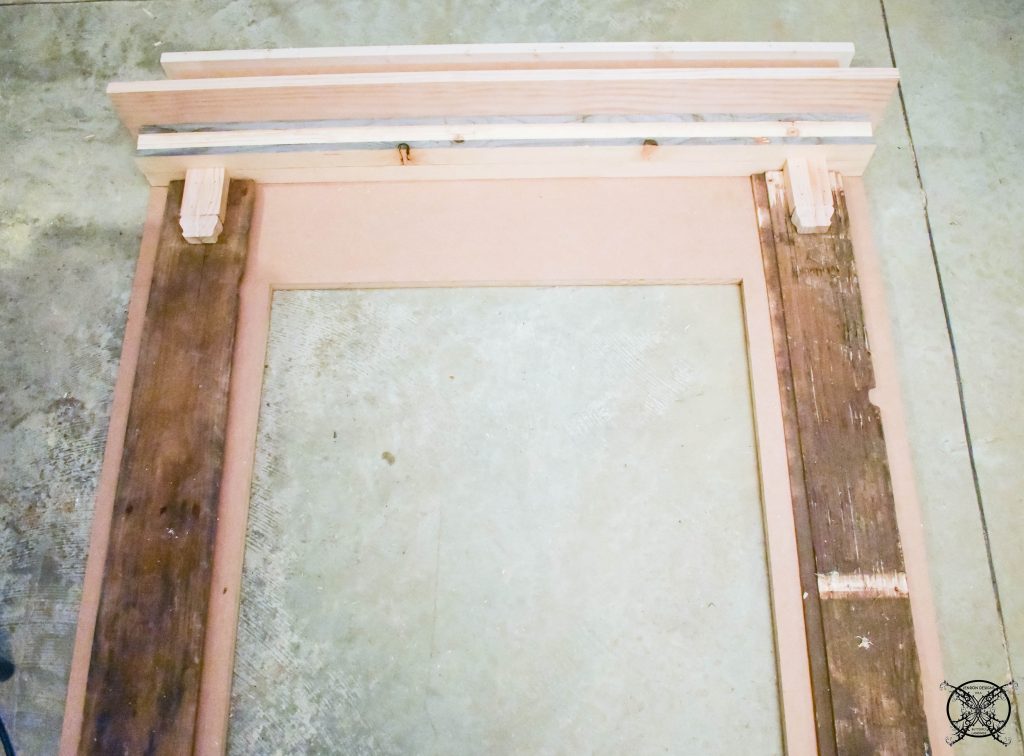
 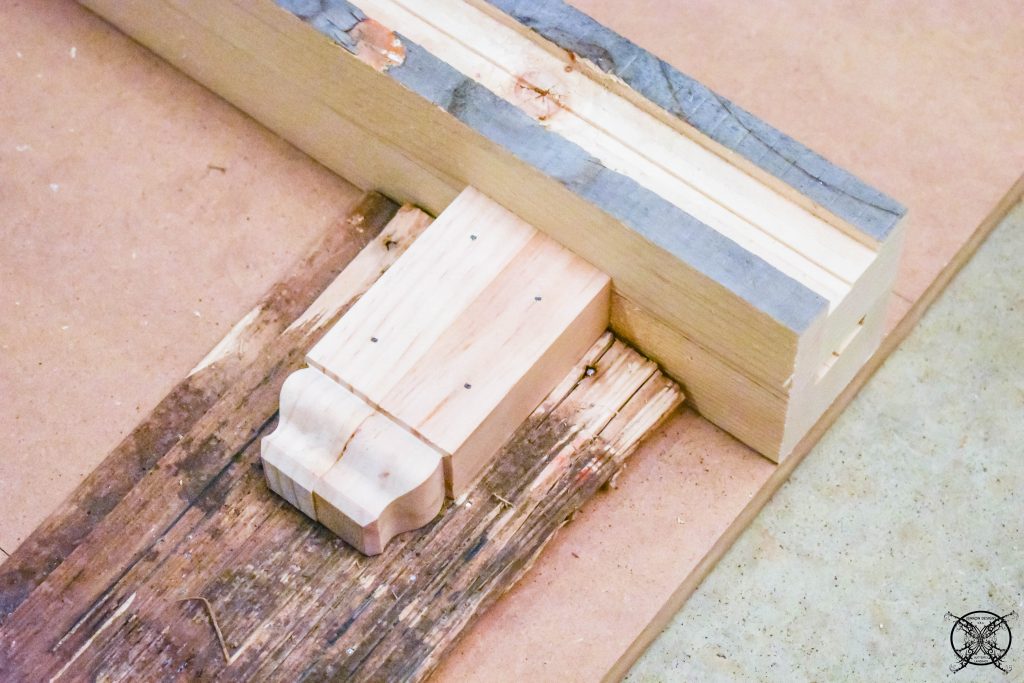 We had to purchase the corbels since I could not find anything in the exact size I needed. In fact we had to put two pieces together in order to create the corbel I wanted, these are originally 1×1 corner brackets for crown molding, which we attached together and cobbled into a corbel.
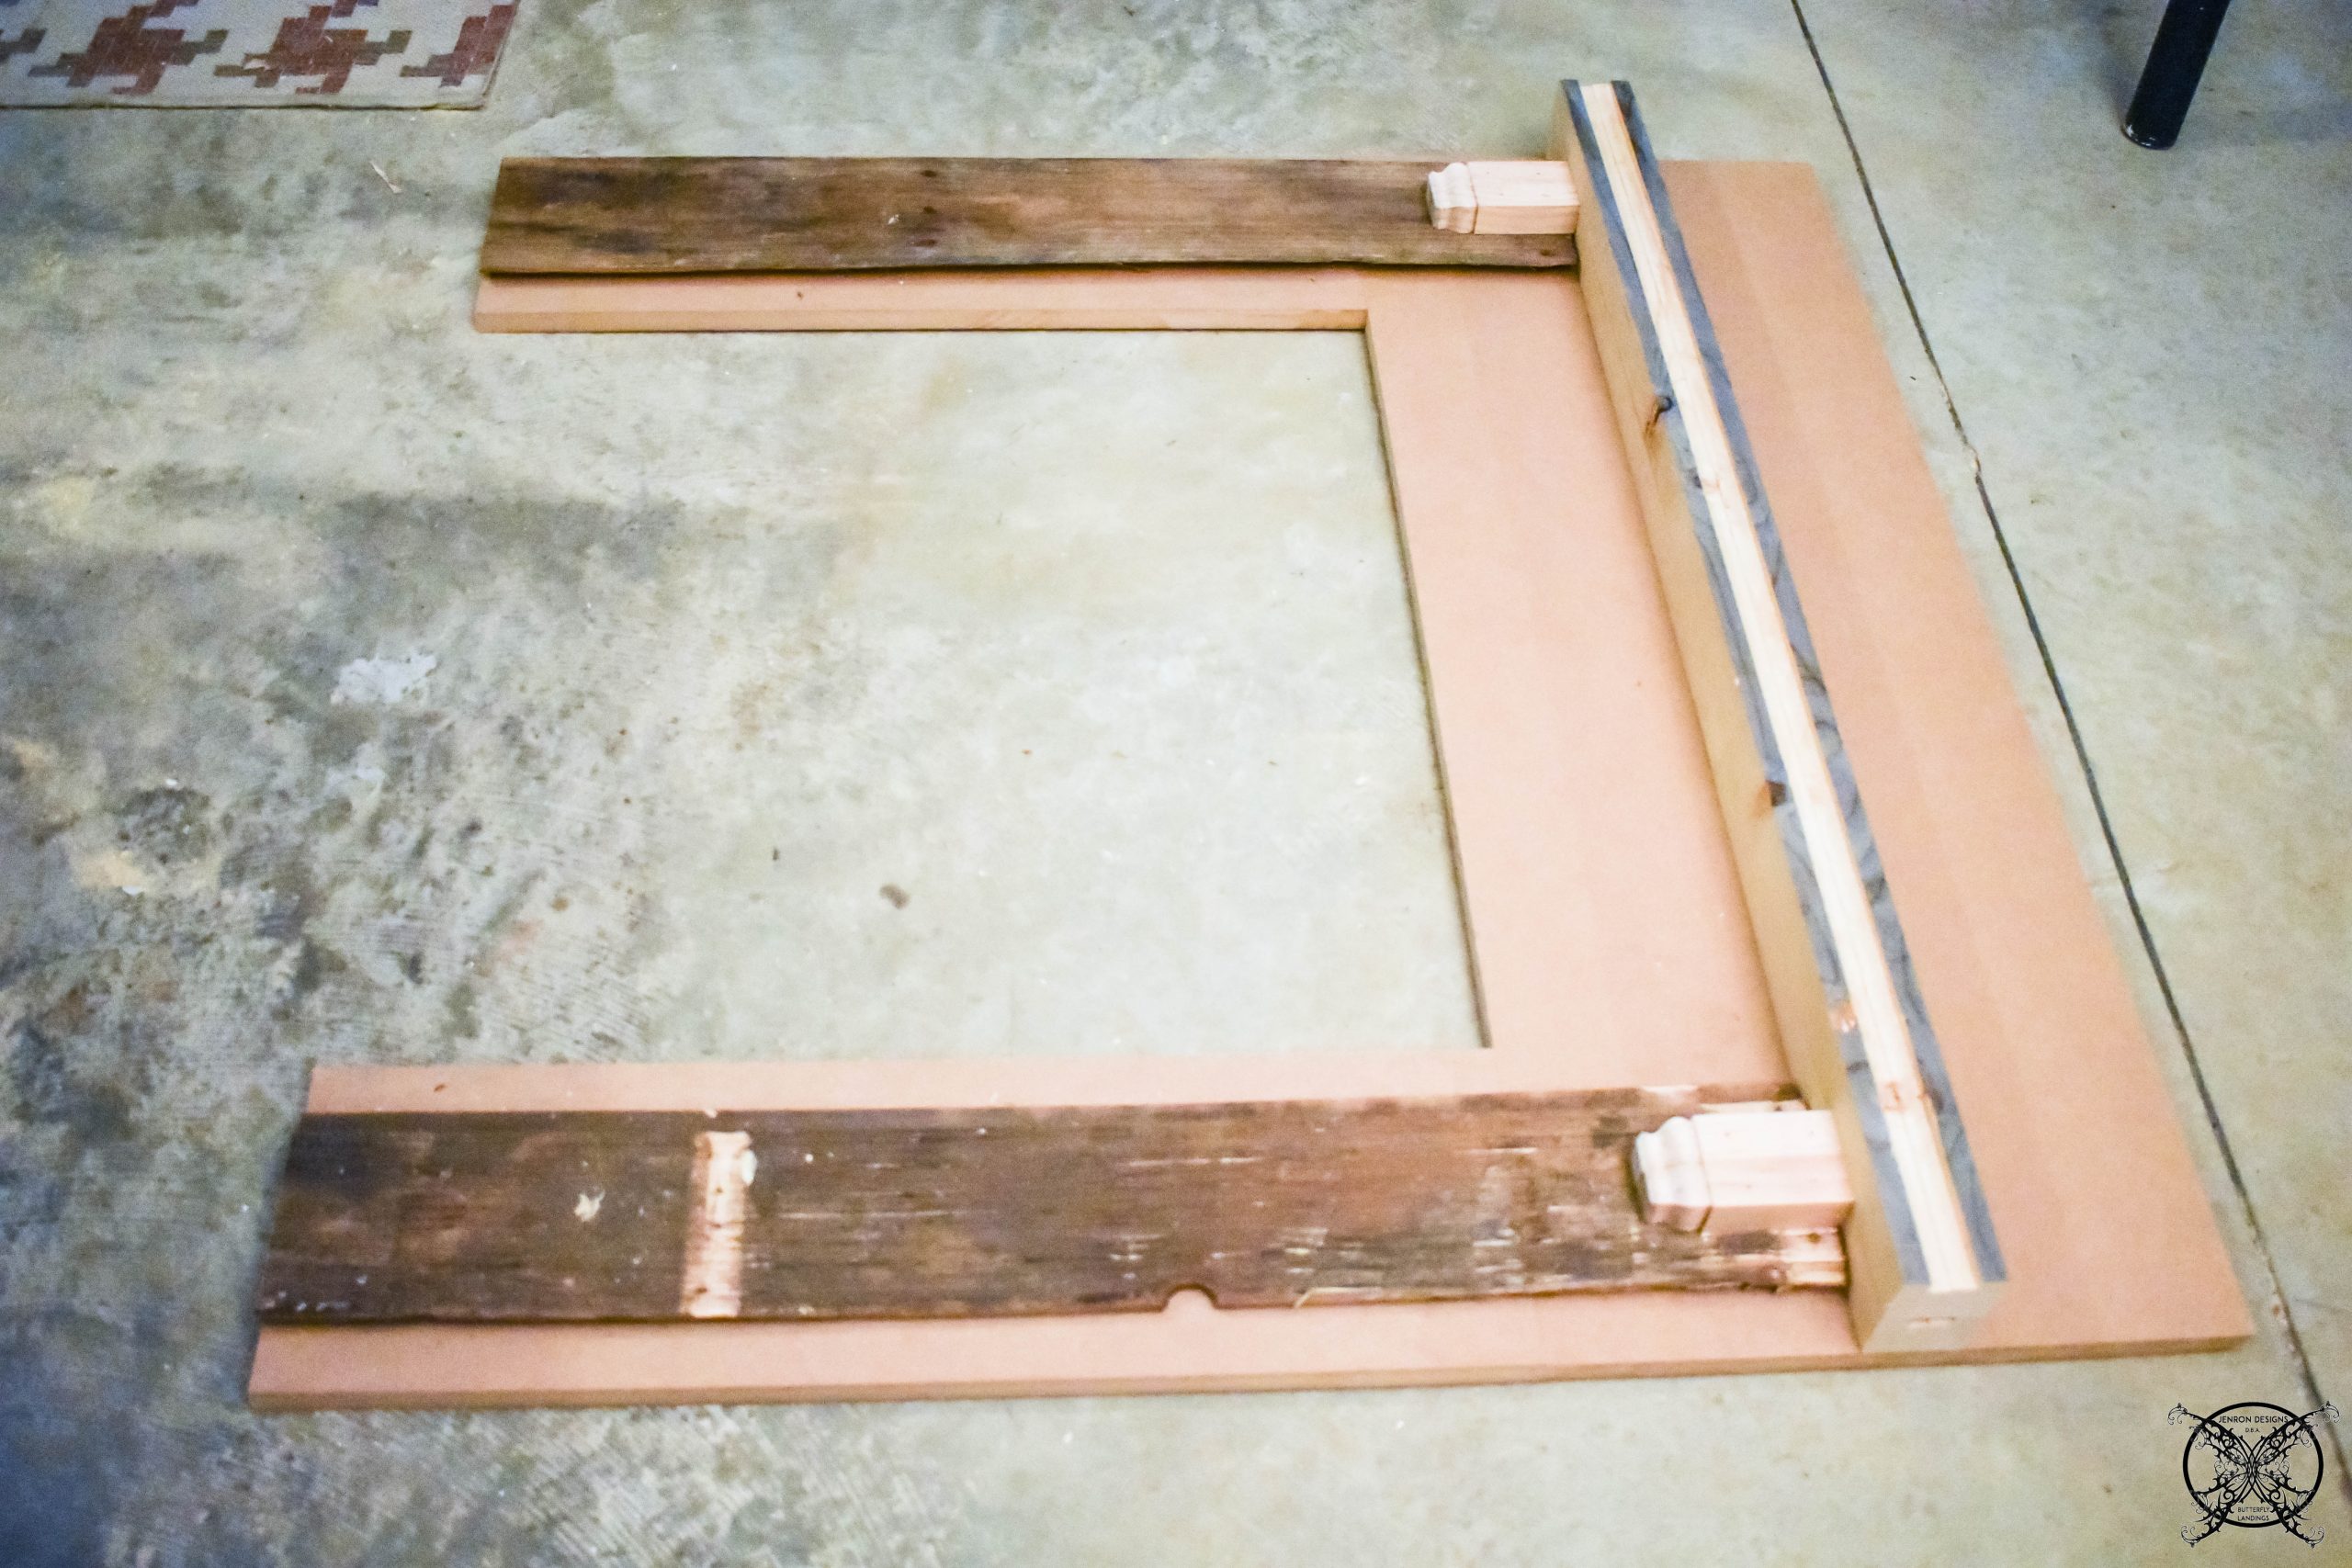
 The support bracket for the mantel was also a recycled piece that was used to reinforce a delivery pallet we got last year. However, if you look closely you might notice that those are actually rough cut handrails for a staircase, which we have turned upside down. Again I loved the grey color already on the wood and wanted to highlight those pieces as well.
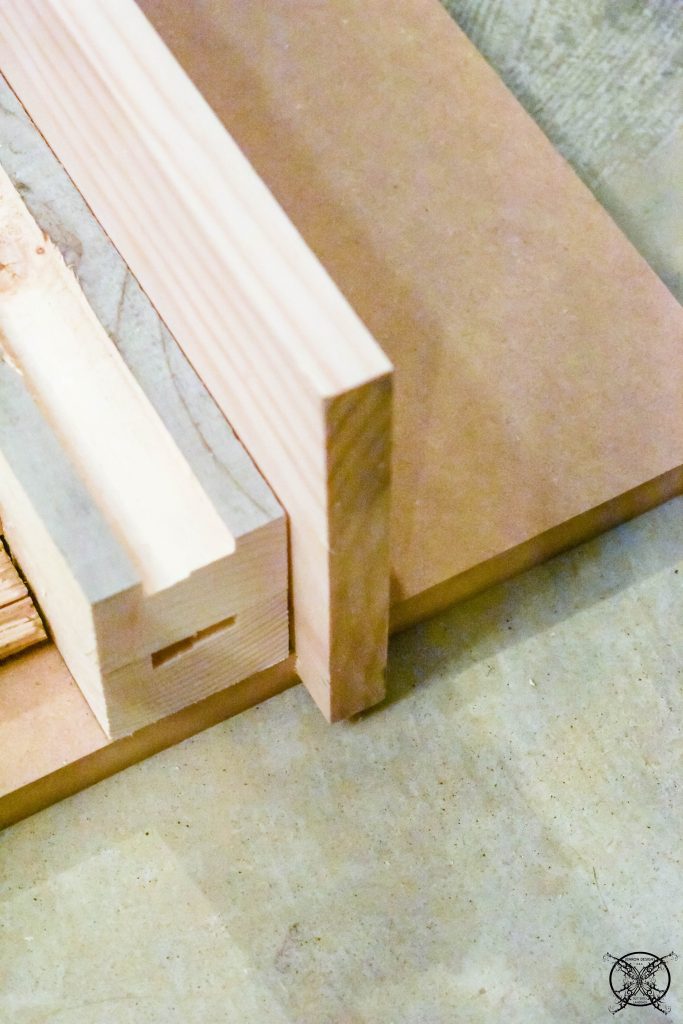
 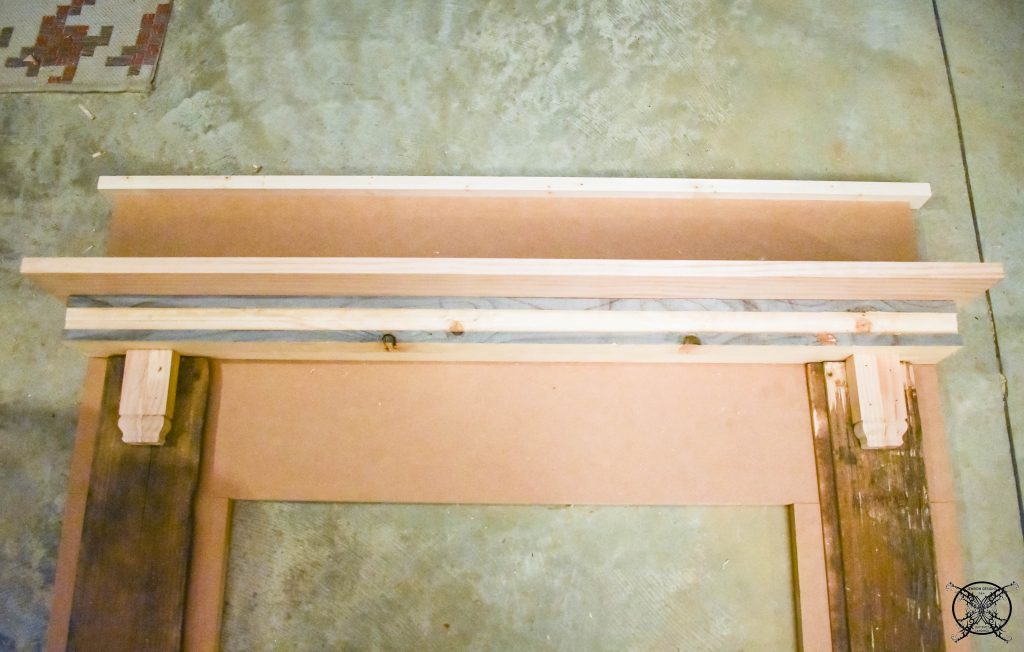 The next step was to cut a board for the actual mantle top which again was a leftover piece from a previous project where I had made a wall sign for my Farm to Table Fourth of July dinner and it happened to be the perfect length. So this was an easy mantle piece, the only hard cut that had to be made was to notch the back of the board so it would wrap around the backboard, which gives the illusion of a real mantle. You can see it more closely above in the previous picture.
 Finally, I decided that it really needed a piece to just give the mantle a little bit more heft, and a finished edge. We used a basic 1 x 2 piece of flat trim that was left over from our DIY Coffered Ceiling we installed for $100 Room Challenge and voila the mantle itself was done.
 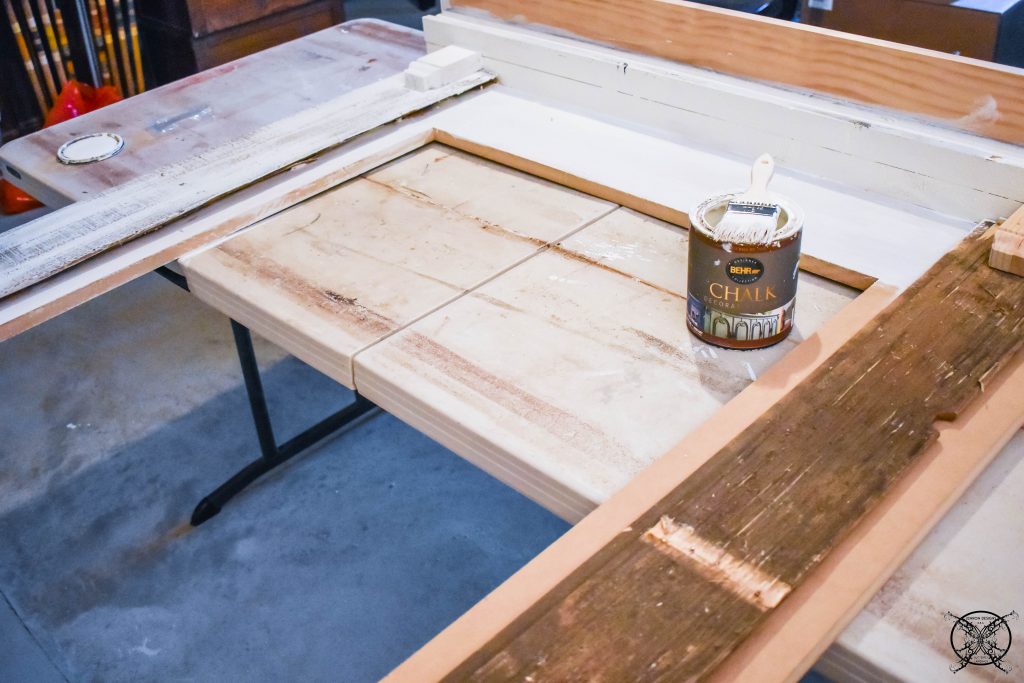 As I mentioned before, I was planning on a very rustic farmhouse chalk paint finish for all this mismatched wood. This would at least unify the mantle. However, there were specific areas that need to have more of a rustic appearance to allows the pretty wood tones to show through the chalk paint.
 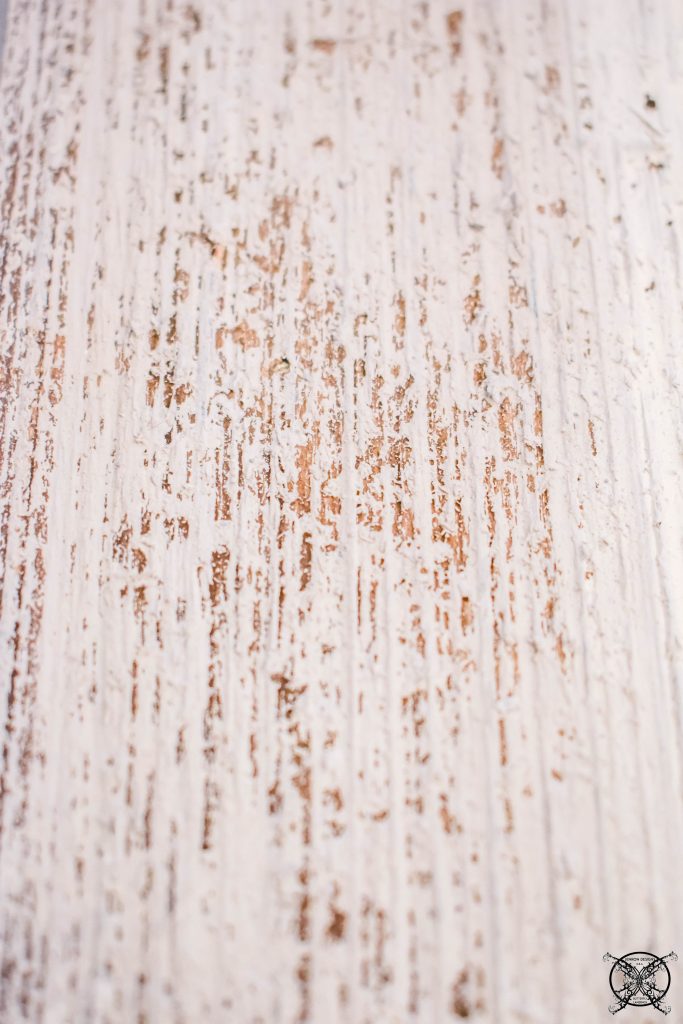 As you can see on the side boards I lightly brushed the chalk on, leaving a ton of negative space for the wood tones to show through the farmhouse white paint. This technique really achieved a nice rustic look without having to take paint off or sand. So I highly recommend to think through the process and save yourself the time if you can.
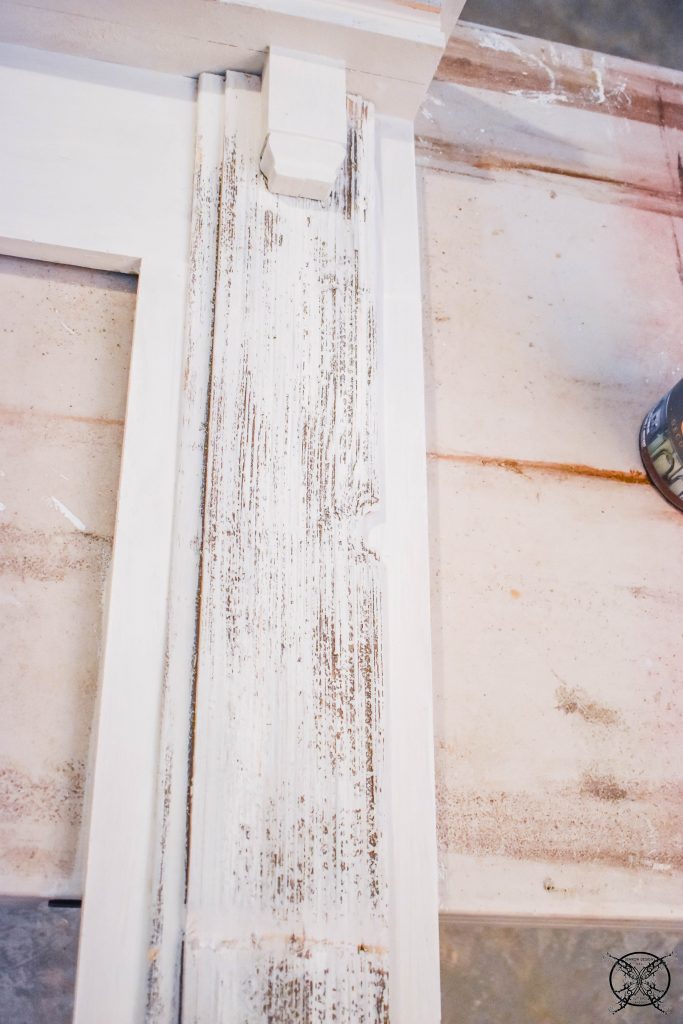 This was the finished look for those side pieces and I also dry brushed the mantle support as well to expose the grey tones just slightly.
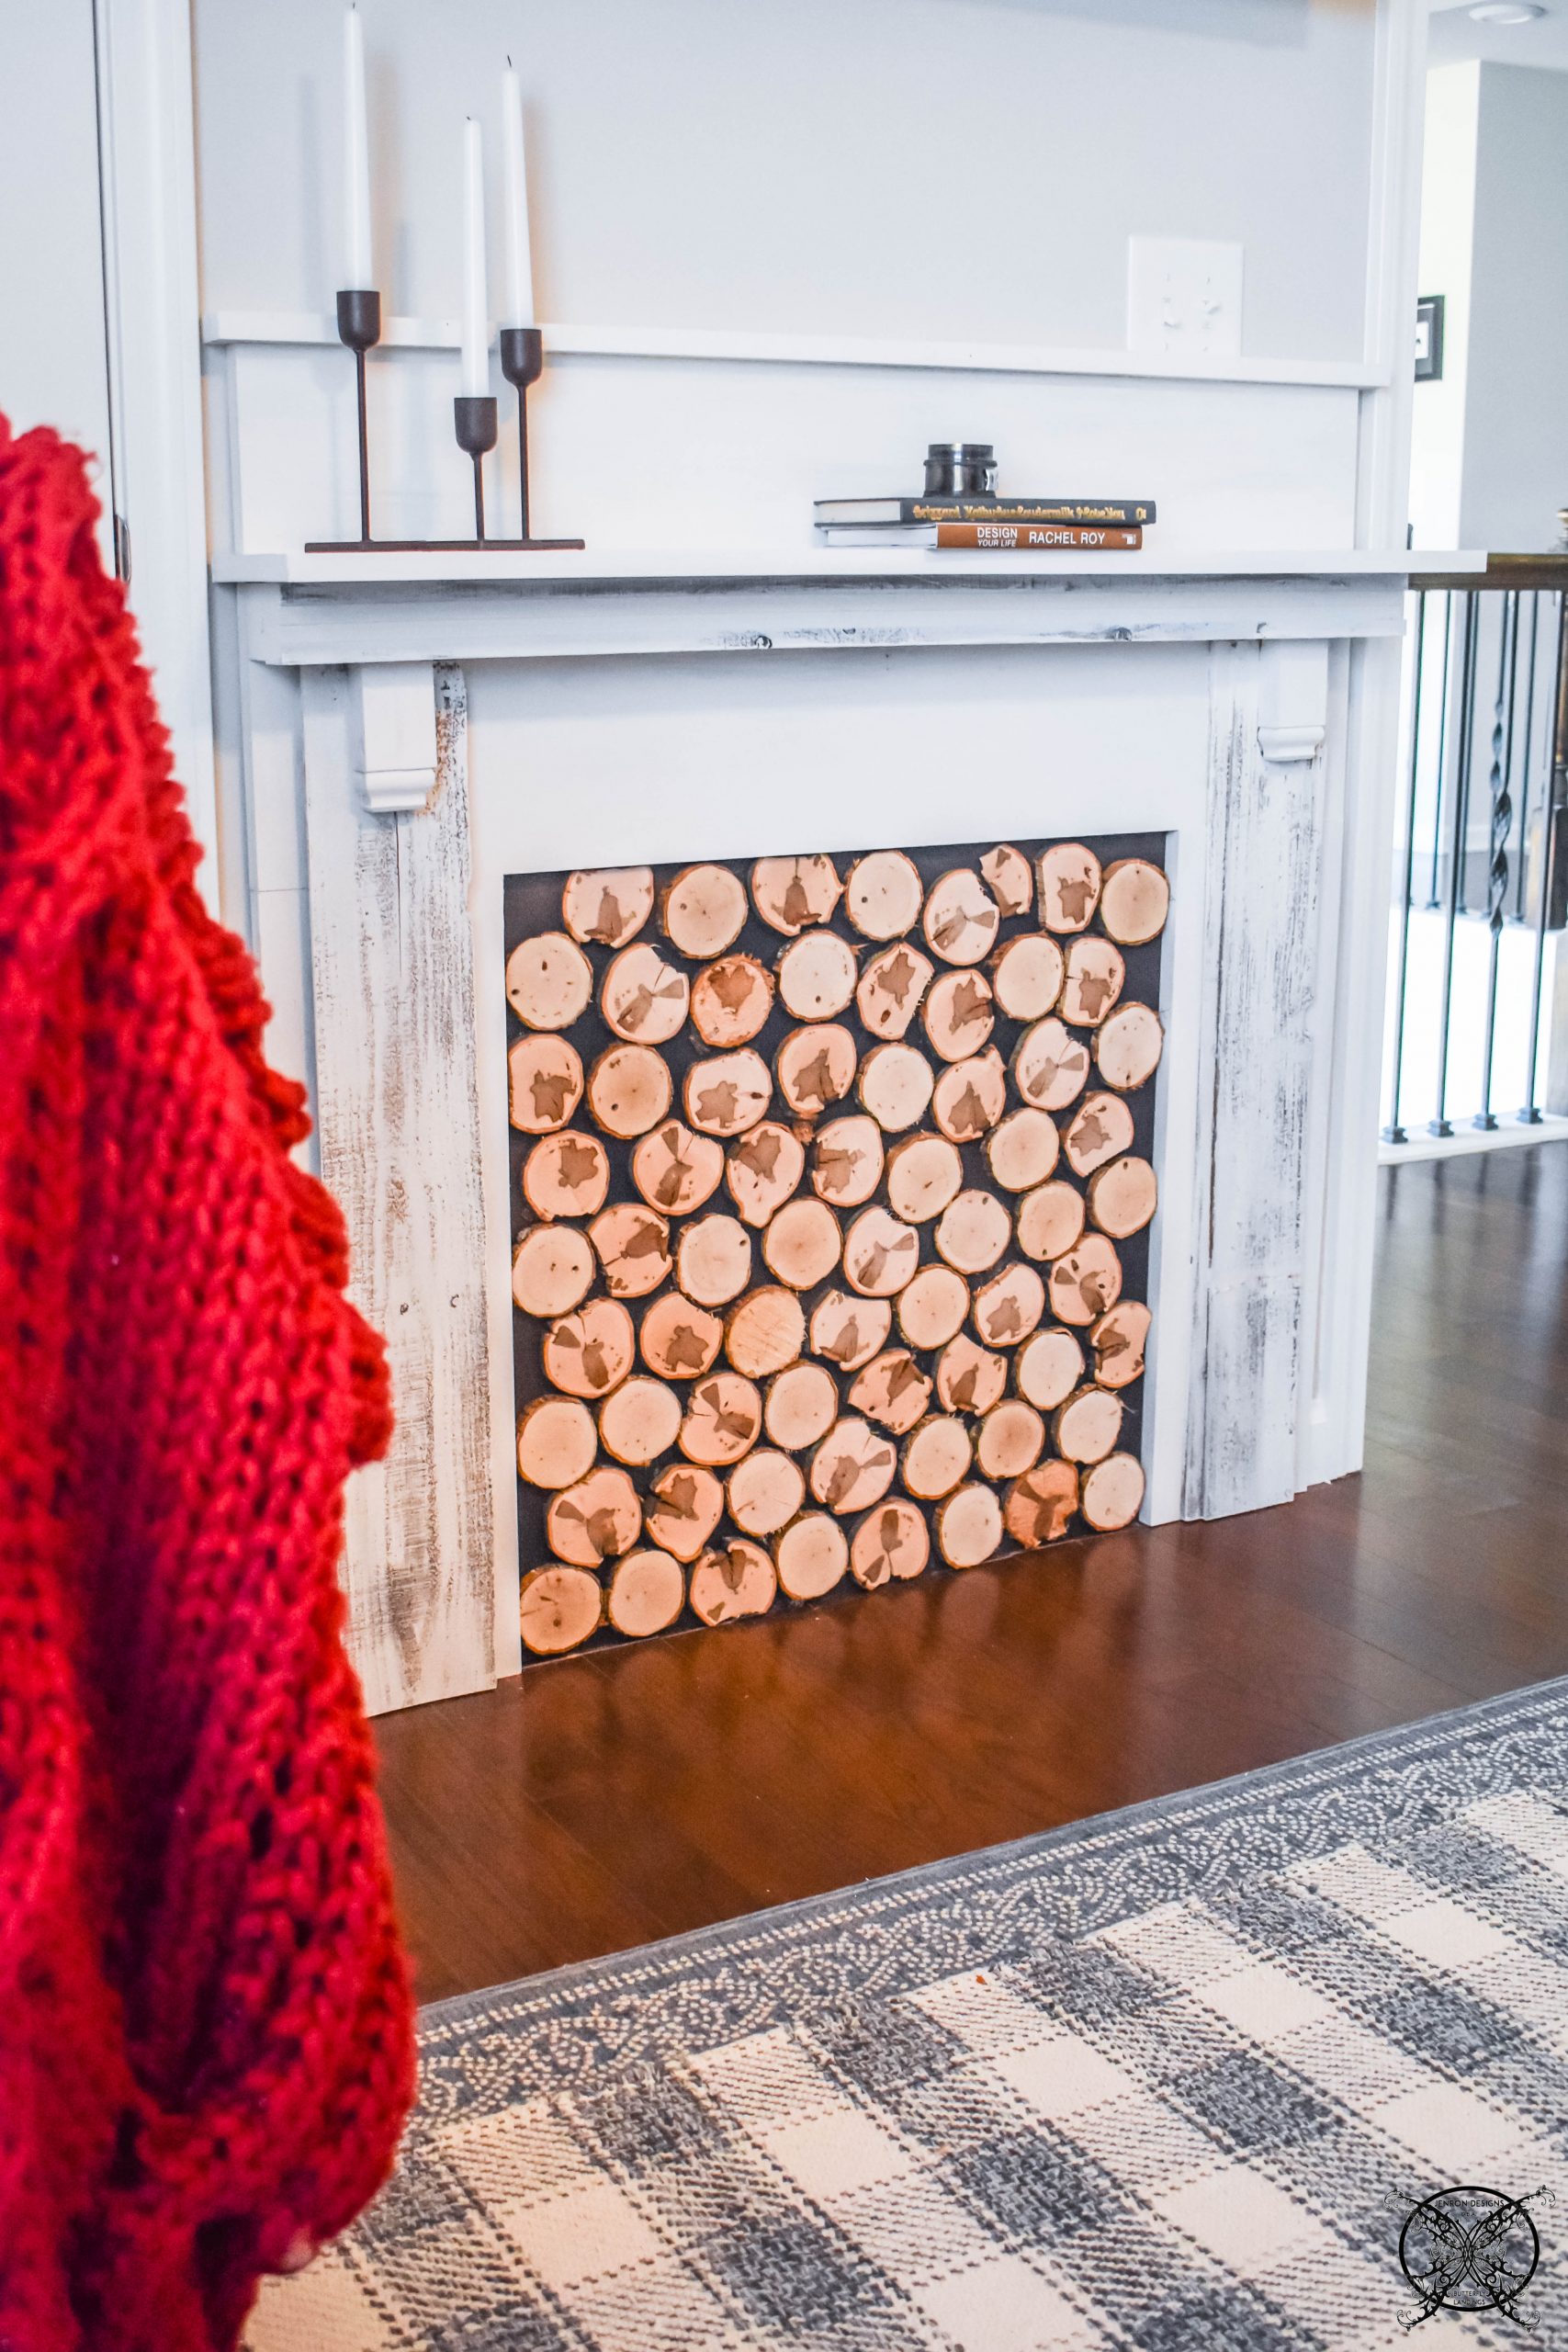
 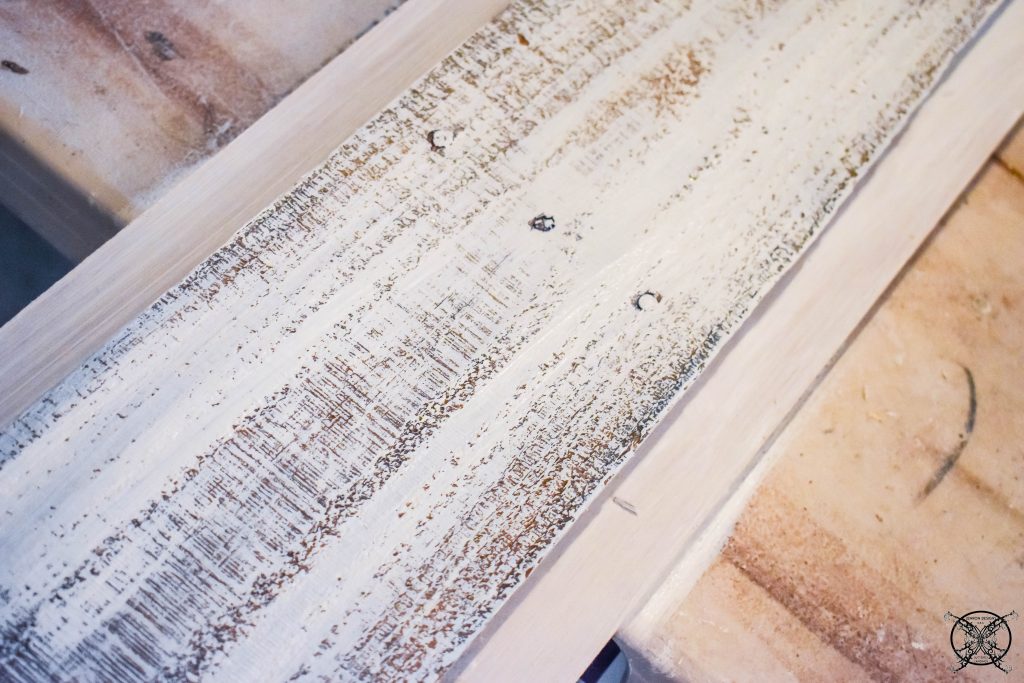 The next step of this process was to build the faux filler, which I wanted to look like stacked logs, as you can see below. We started by tacking a thin masonite board that I repurposed from my Lucky Penny Table Runner base after spray painting it black to create the illusion of depth behind the logs.
 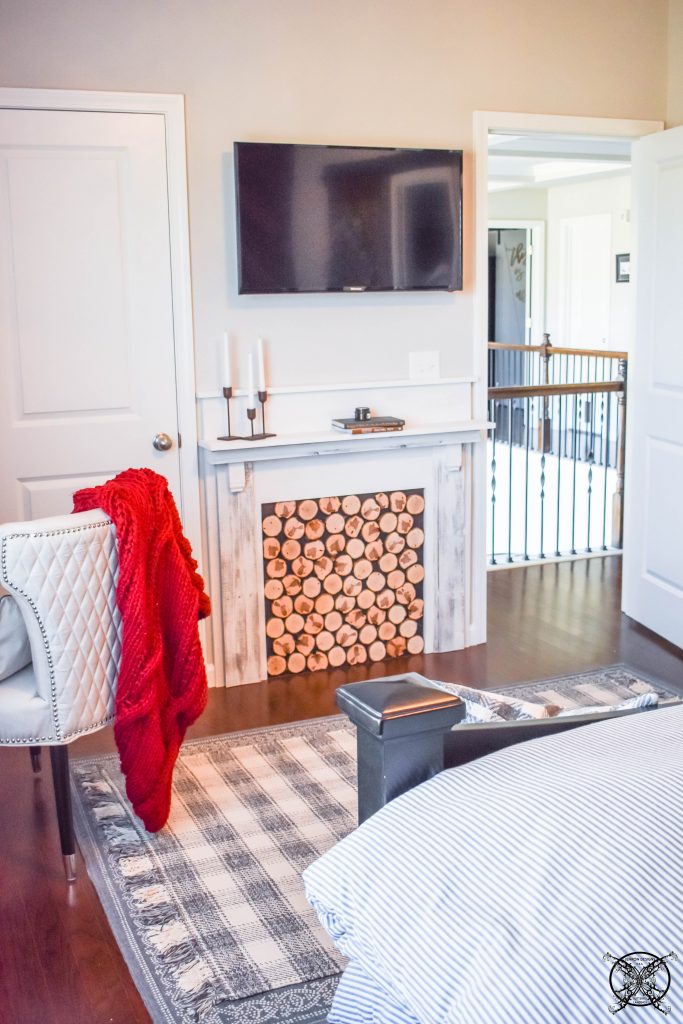 For the cut logs I had selected a few great logs that were delivered with my firewood this season. They were perfectly round and already dried and seasoned, but I still left them next to the dehumidifier for a week or two after spraying with bug spray. Once it was completely dry again, Ron made 1′ thick cuts with our miter box to make sure they would all be the same depth.
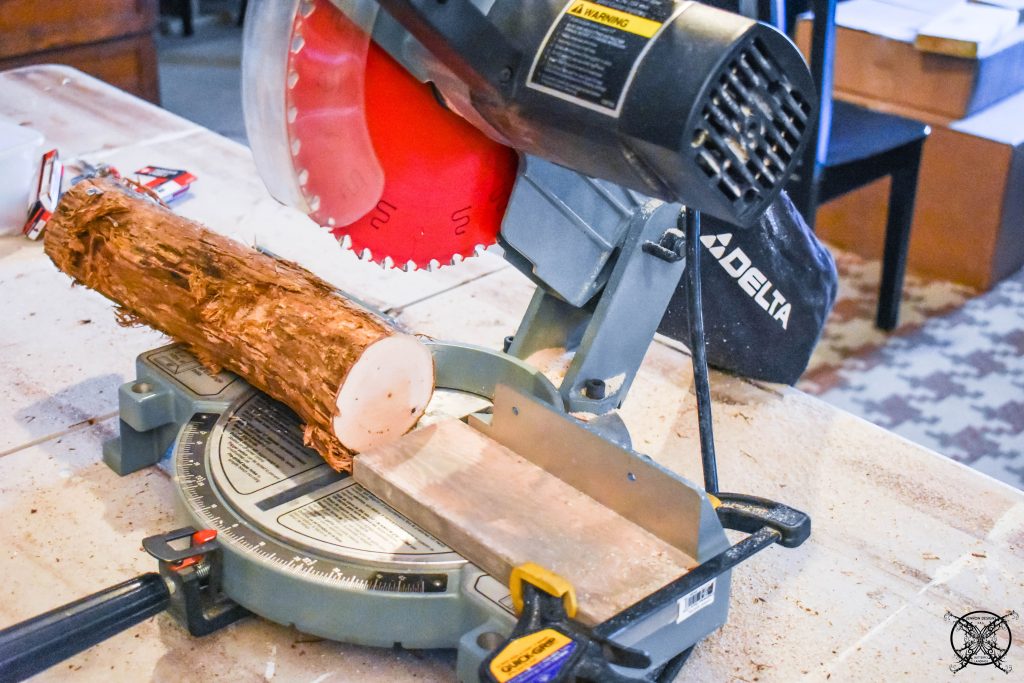
 Once we made all the cuts, I did notice that the inside of the wood rings were still a little wet, so I decided to let them have an additional 48 hours by the dehumidifier to insure dryness for the glue to stick properly.
 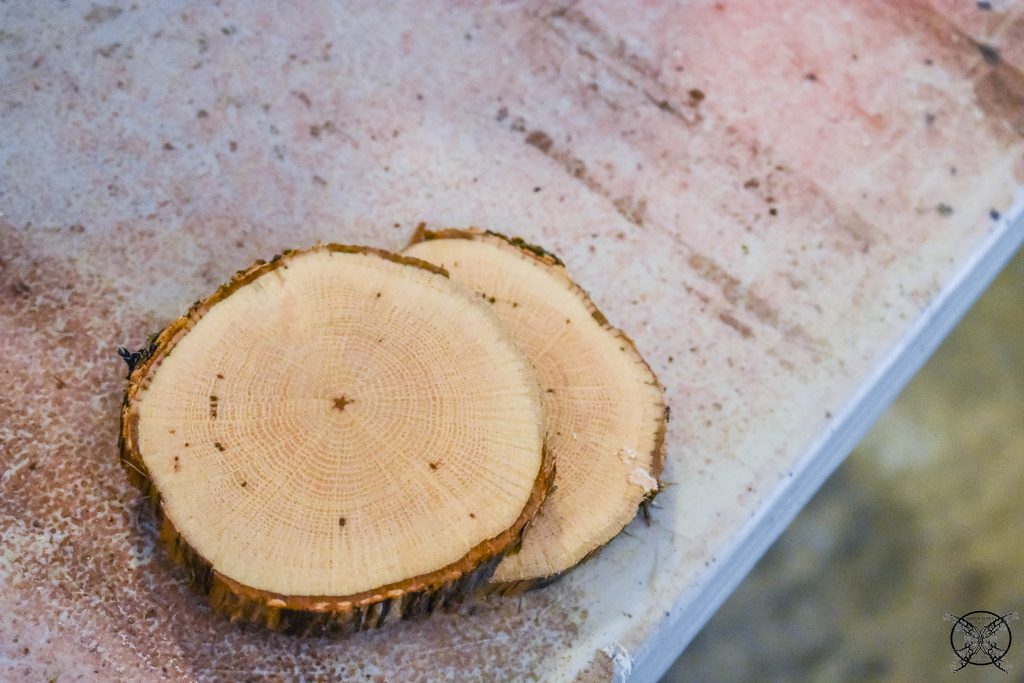 For the next step in the process, I laid out all the wood rings on the black masonite back board that we attached to back of the mantle using our brad nail gun with 1/2 brad nails.
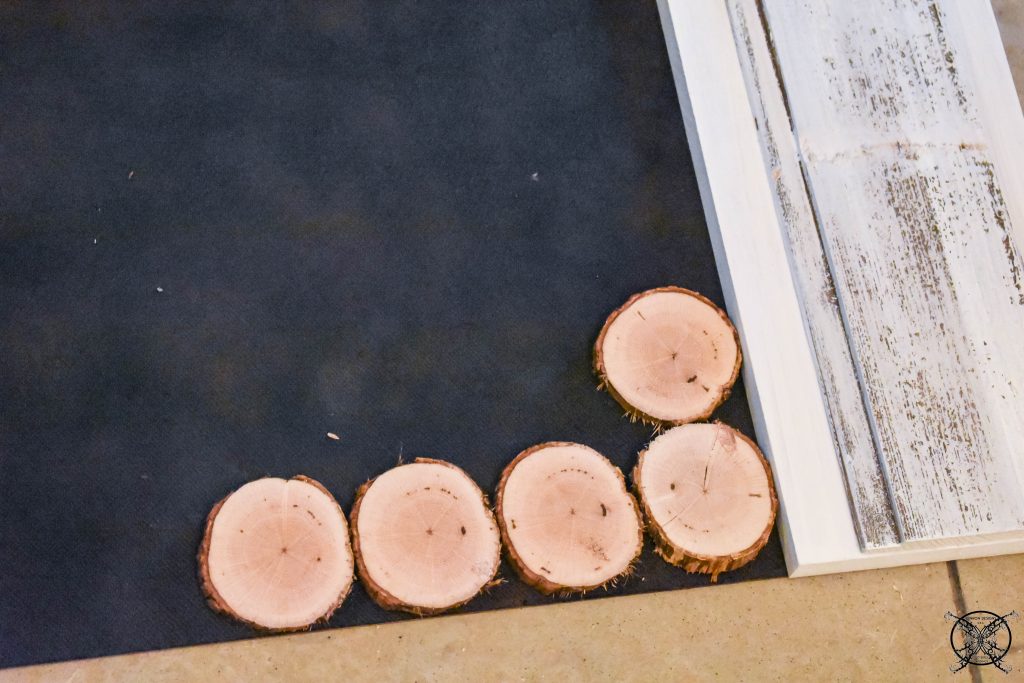 I started placing the wood rings on the blacked out masonite. I did not attach the rings as I went, since I wanted to insure I liked the pattern layout first. Once all the rings were placed I looked at the overall pattern and layout to make sure nothing glared at me or stood out as a flaw. I also worked in a few extra wood rings by shifting the rings around. This is why it is important not to glue as you go.
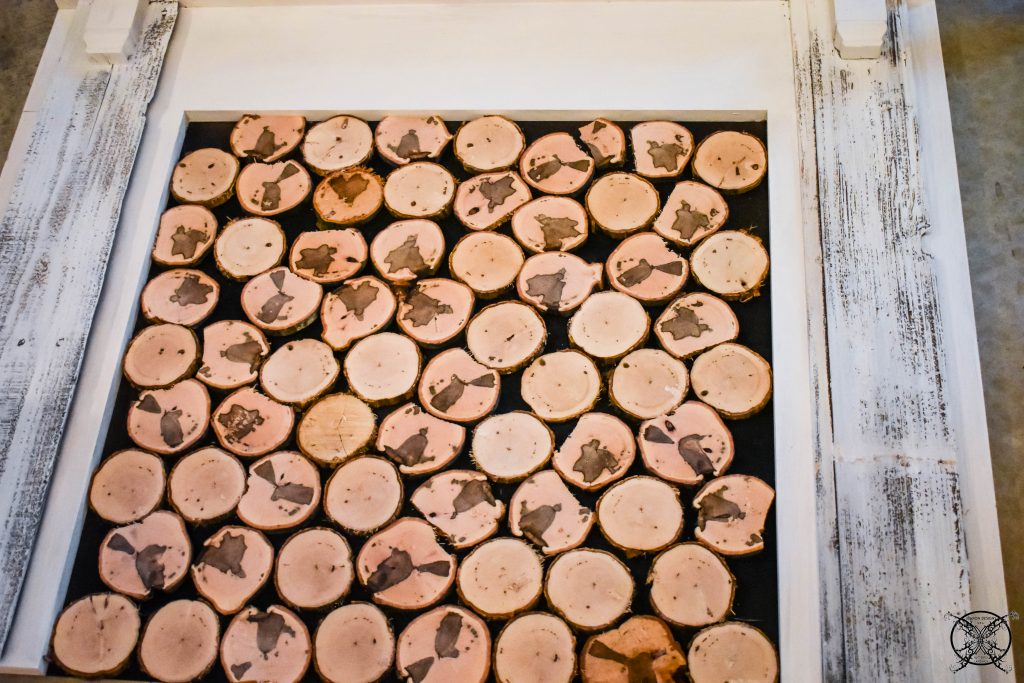 By pre-laying out all your pieces you can see the pattern and create a randomized pattern instead of it looking like the logs were all the exact same or manufactured wood rings. It also allows you to adjust the layout to fit in oddly shaped pieces to hard to fit in the original layout as well.
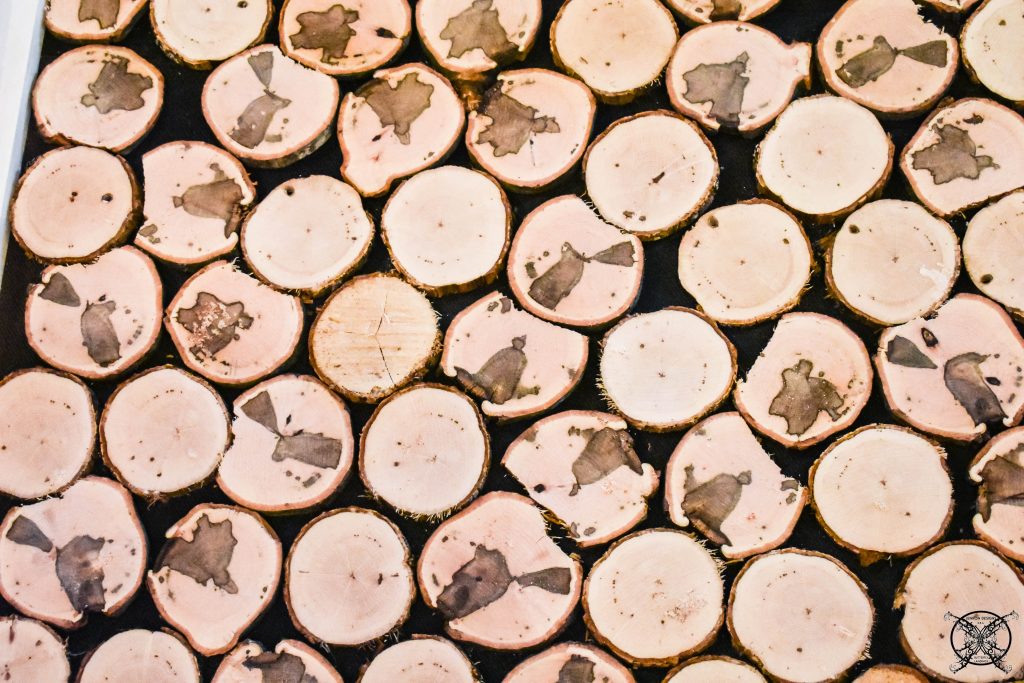 Once you are happy with the layout it is time to glue the pieces in place. I joked with Ron about how old these glue sticks really are, seen below. I found the box in my craft supplies while organizing them and they were my mom’s from when I was a kid, LOL…So maybe 30 years old at this point but they still work just fine.
 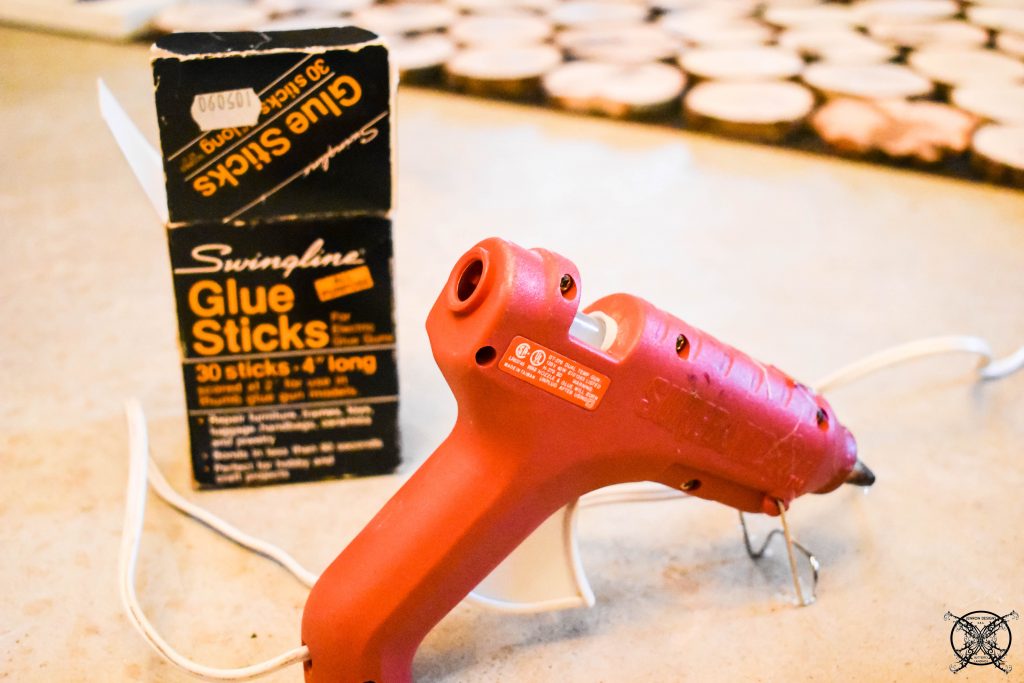 Once the logs were glued in place it was time to install our faux mantle. The first step was to remove the baseboard and quarter round molding to have a nice flush fit against the wall.
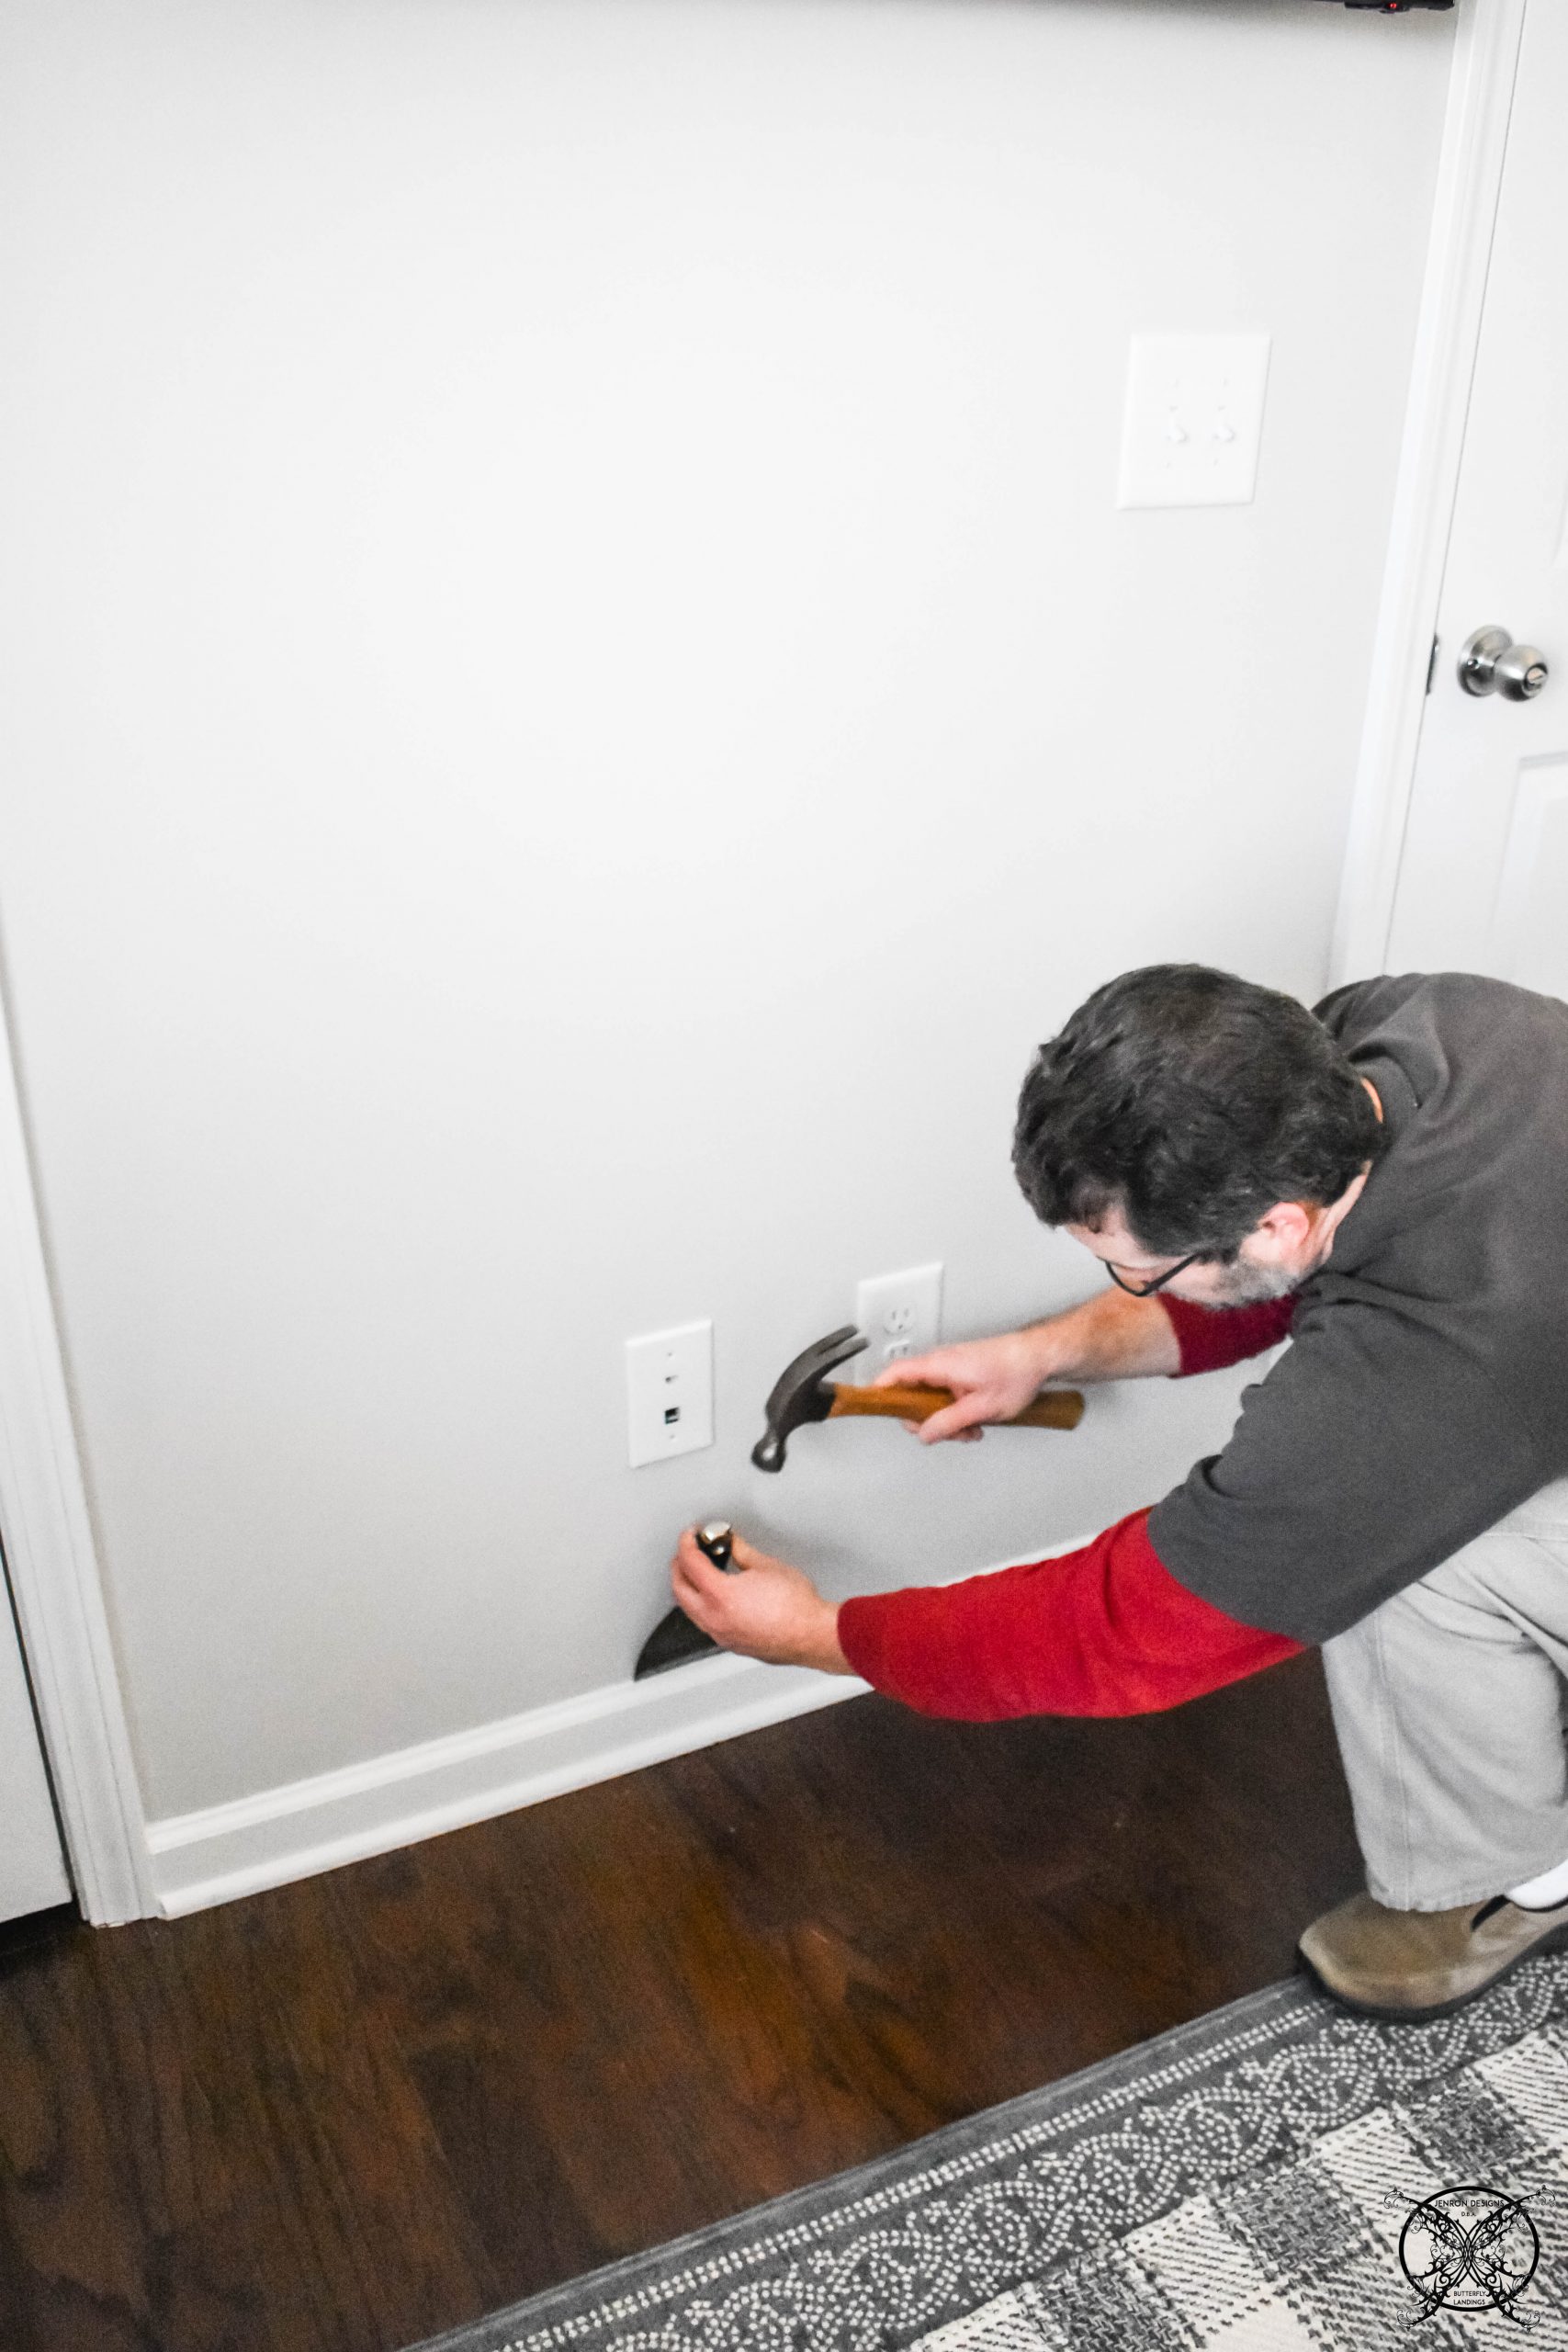
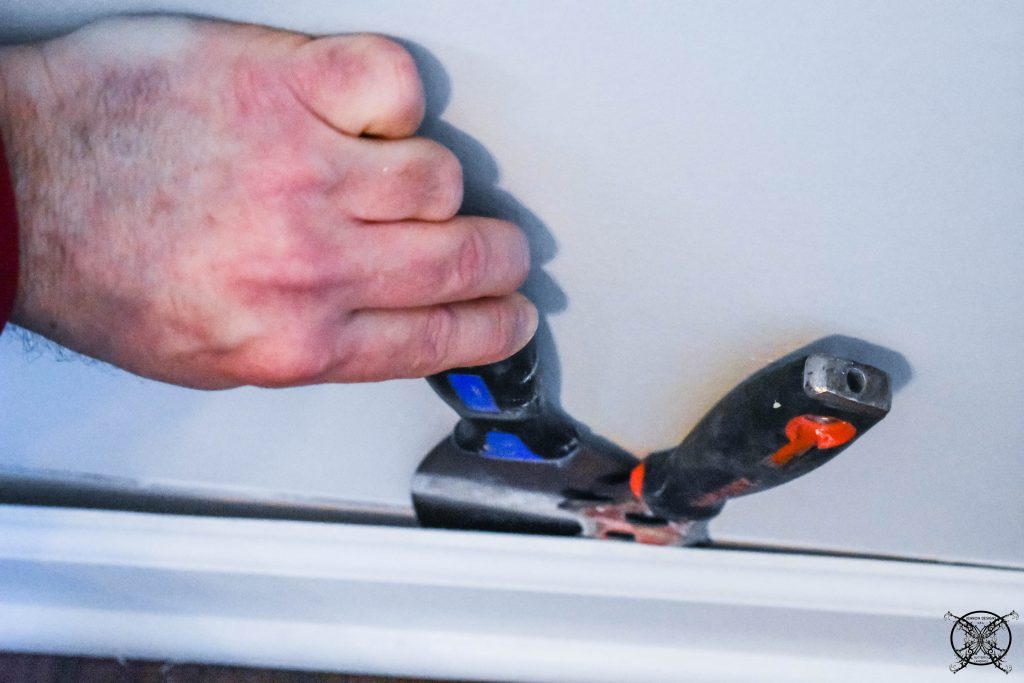 The easiest way to do this is with a putty knife and wonderbar to prie it off the wall in one piece. This all0ws you to keep the baseboard in case you decided to remove the mantle upon moving, or redecorating and add the baseboard back to its original location. We stored ours in the back of our guest closet tucked into a corner in an out of the way space so we can always lay hands on it again.
Designer tip: This is a good tip when doing projects for yourself that may not be permanent to your home, and will save you time on repairs as you move. 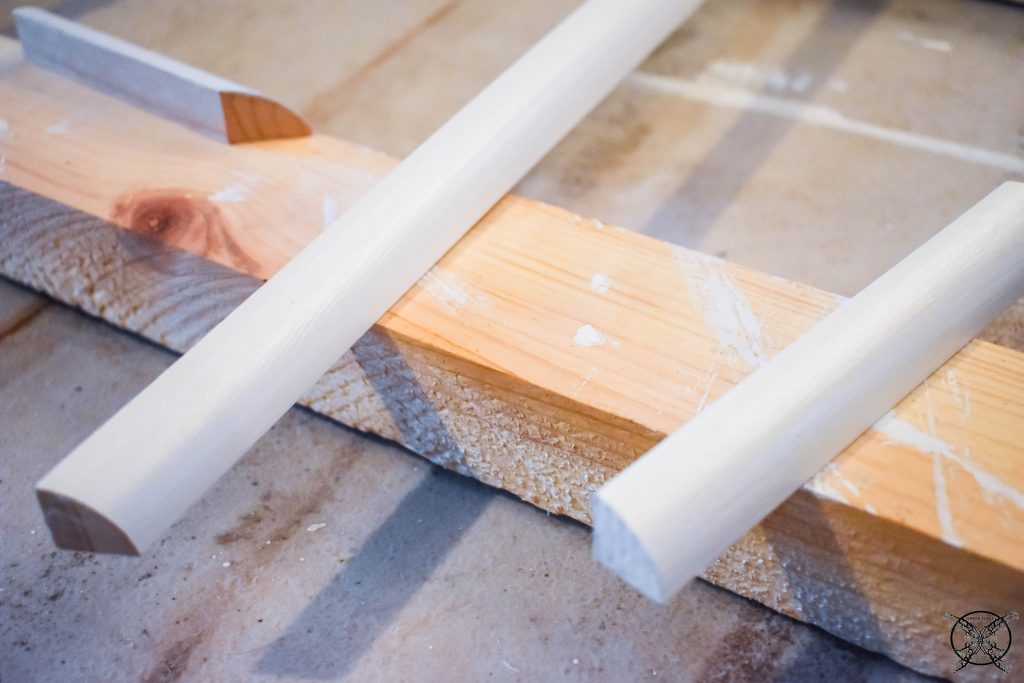 Then we measured the exposed wall space on either side of the mantle once the mantle was installed. We used these measurements to cut, then pre-paint some baseboard and quarter round to fill the small gap between the door frames and the new mantle.
 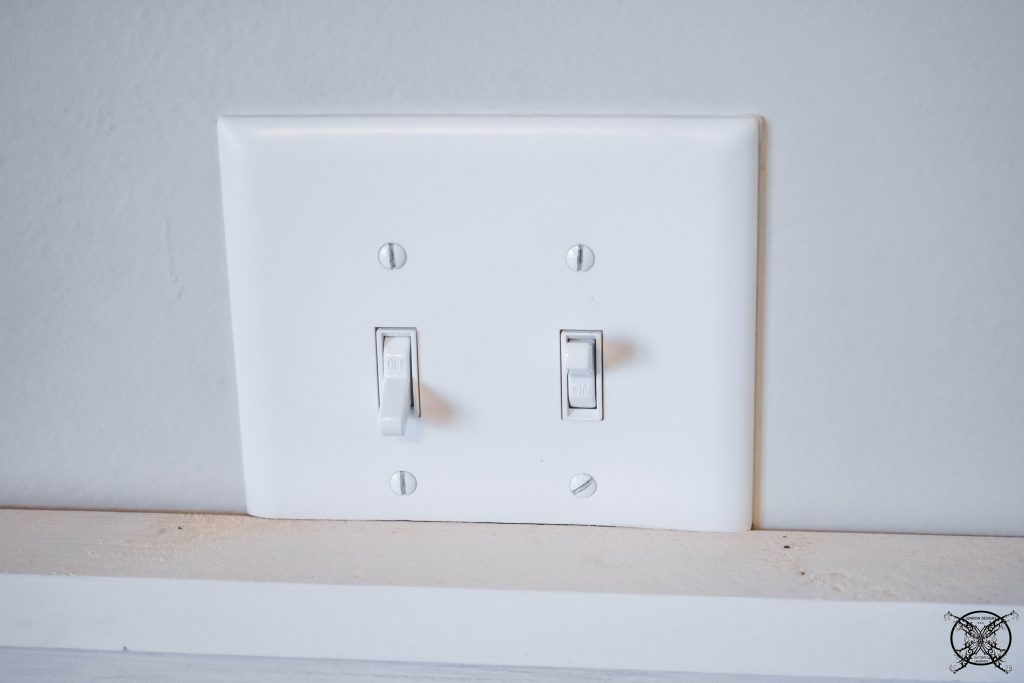 The next minor adjustment was to cut the electrical light switch cover to fit flush over the mantle. Honestly this was my mistake because I decided to add the top board to the mantle which was not in the final measurements, so it was exactly 1″ to tall, as you can see. However this is a great opportunity to show you how to fix this. Switch plate covers are so inexpensive to replace if you decided to remove the mantle, cutting one is not a big deal for the flush fit.
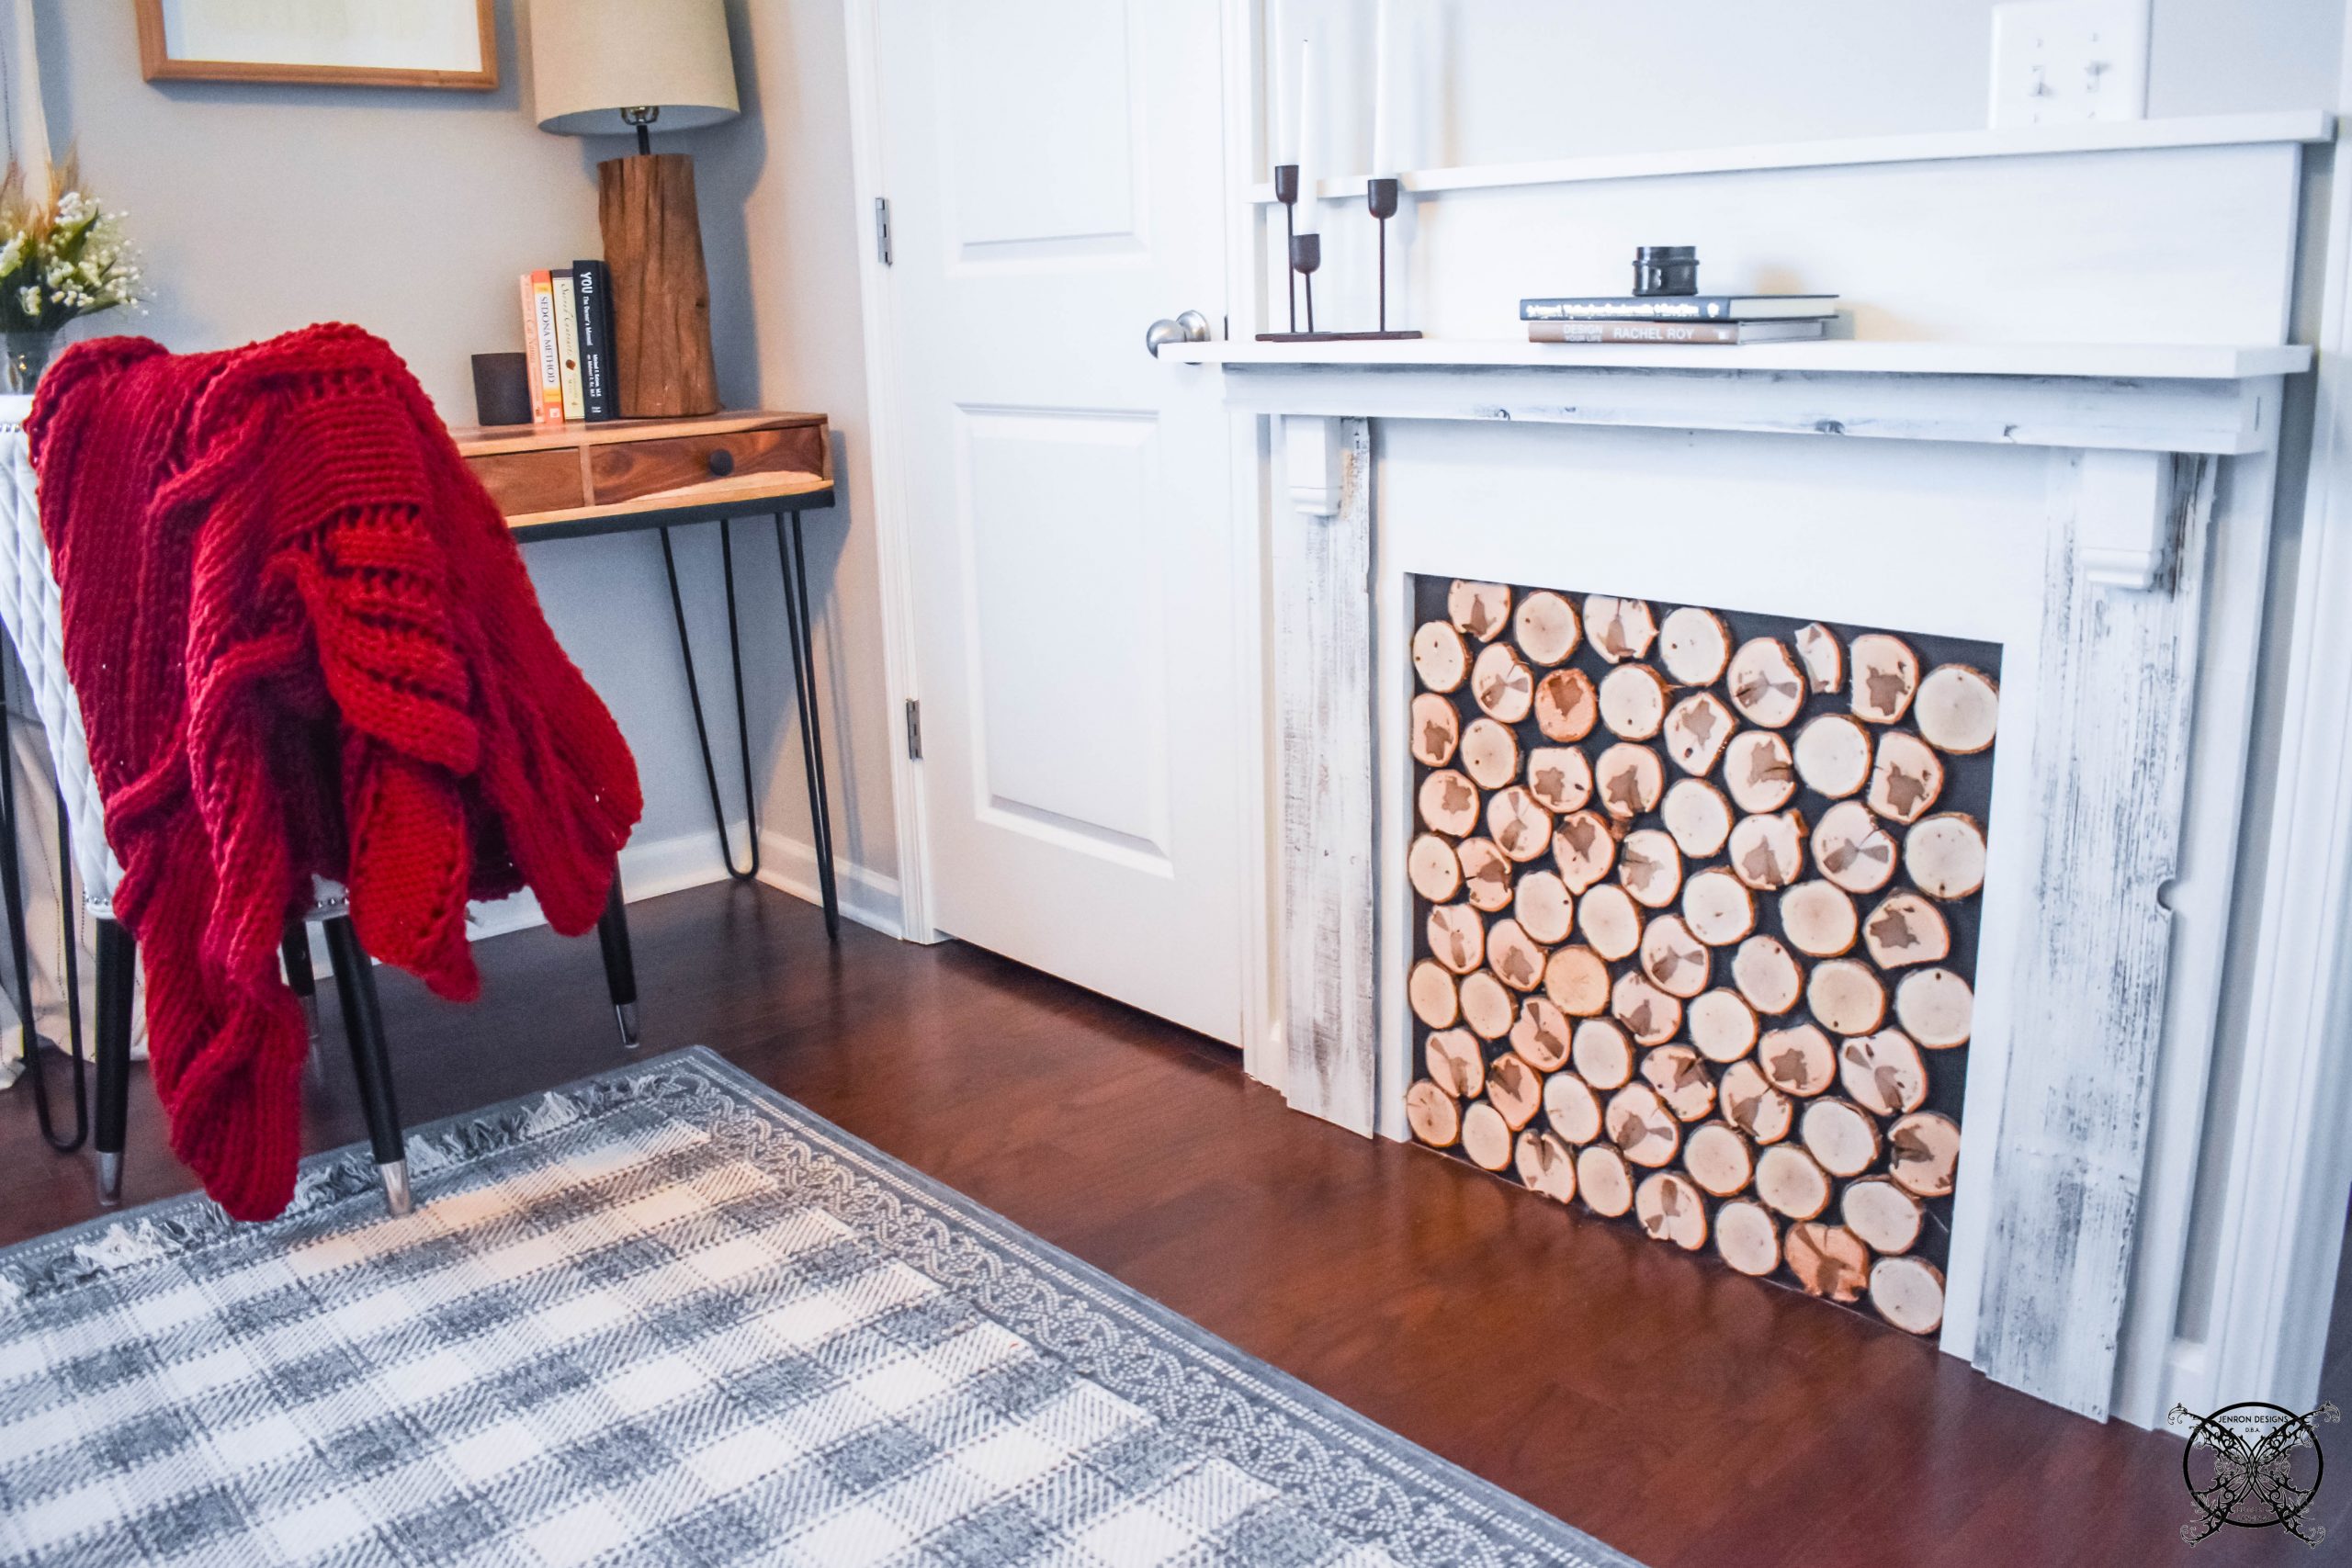
 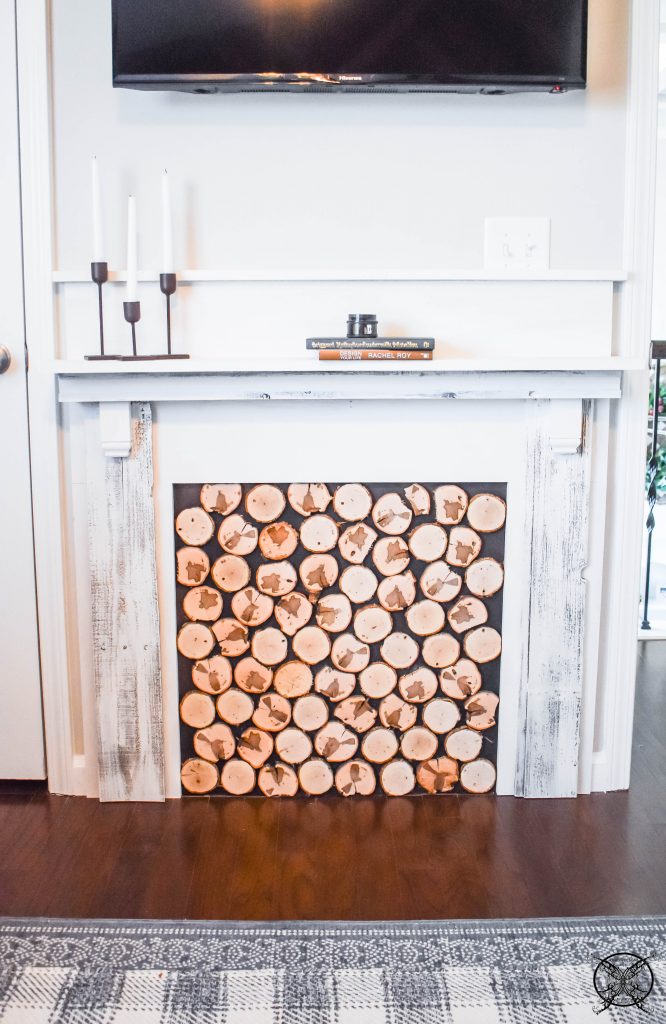 As you can see both of these installation techniques made the DIY A Faux Farmhouse Mantle really look built in to the room. It really fills the space nicely and weights the wall properly under the television without having a bulky piece of furniture that would block the walk space between these two doorways. Plus it really adds some nice rustic charm and visual interest to the wall for your guests.
 PIN ME for later and be sure to follow us on Pinterest at Jen @ JENRON DESIGNS
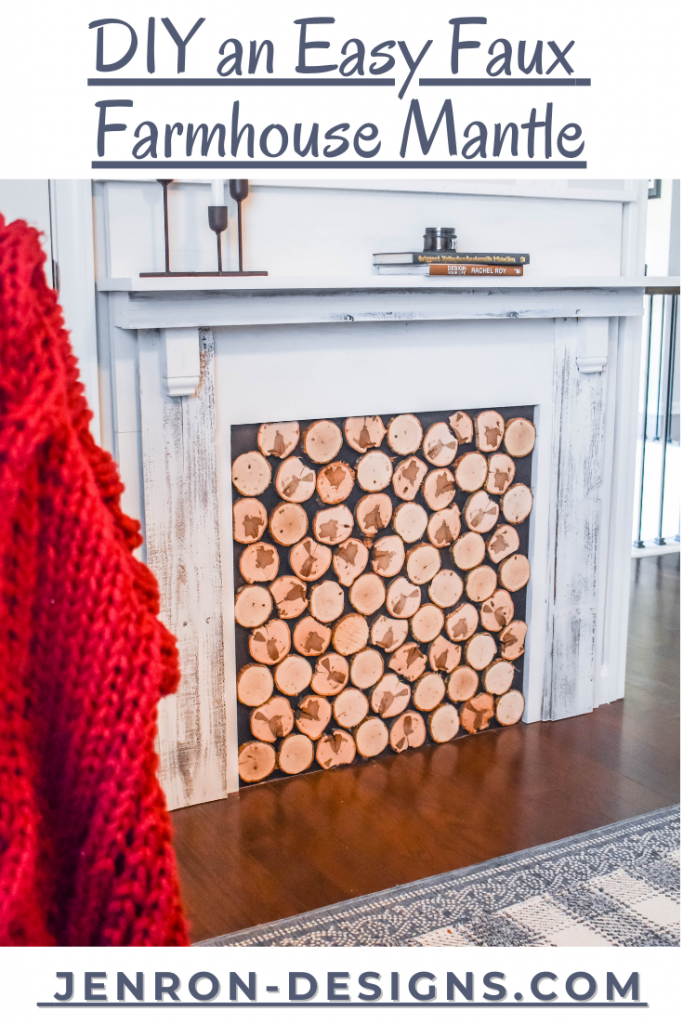
That is so pretty! I love this idea!!! I love the farmhouse feel so much!
You did such a great job! It is so beautiful.
Absolutely stunning. What a difference the mantle makes!
This came out nicely! I love the idea. I’m the worst with DIY projects.
Jo
This looks so incredibly chic and quite fuss free too! I’m surprised by how easy it is to put together. Perfect for a summer home that literally never uses a fire place!
I love that you were able to create this project with materials you already had and the result is gorgeous!
What a cool project – it looks so good in that room! Those slices of wood really do make it look real!
-Madi xo |
Wow this is such a great post on how to make a mantle like this Jen! I have been wanting one too but can not find one that would fit my space, great idea!
I love your writing a lot! Can I keep up a correspondence with you via AOL? I need a lot of expert advice on this space I am working on, and resolve to solve my design problems. Maybe that’s you!Look forward to talking to you.
Hi Rachel I would love to hear all about your design challenges feel free to reach out and we can see what kind of plan we can come up with to suit your needs. Maybe we can feature you on a upcoming post for GET A ROOM!
Wow, wonderful looking mantle it it hard to believe you made it from scratch as a DIY structure! How long have you been blogging for? You make blogging look easy. The overall look of your website is great,let alone the content material! I have a lot to aspire to here.
This is the cutest idea. Perfect for the fireplace feel!
How gorgeous. You did such an amazing job. Love the wood.
What a great idea as we are moving into the fall season. I love the details in your work and the details in explaining your process.
Great re-use of things you’ve at home and leftovers. It certainly added the charm to the space, well done!
I love this DIY mantel so much! It’s a great way to add a cozy element without committing to a whole remodel.
I love how you created this look from start to finish!
Well done! What a neat look, especially the cut logs. Makes having a “fireplace” in any room possible.
This design is everything. I just love it. I think this would be a great idea for the upcoming holidays.
Another masterpiece. Not only I am enjoying your post but I am also learning how to make future DIY projects from scrap resources.