
Replacing Standard Doors with A Sliding Barn Door
Week 4 of the One Room Challenge and we Replacing Standard Doors with A Sliding Barn Door.
Finally, we are installing the sliding barn door, the actual inspiration piece and crowing jewel of this entire project. This is literally what started this entire project, so I am super excited we are now able to getting this installed. Follow along as we show you how to Replacing Standard Doors with A Sliding Barn Door.
WEEKS AT A GLANCE:
WEEK 1 WEEK 2 WEEK 3 WEEK 4 WEEK 5 REVEAL
 In case you are wondering what exactly The One Room Challenge is, so here is the scoop. This event was started by Linda Weinstein @ Calling It Home and is hosted twice a year, in April and October. For the past 14 seasons, the ORC has hosted over 250 interior design & decor bloggers, that have joined together to makeover one room in their homes. The participants have six weeks, from start to finish, in order to complete a full room transformation. To date, more than 2,200 rooms have been transformed through the One Room Challenge and many spaces, have been recognized and featured by several of the hosts seen here:

Inspiration Board & Designs Plan:

*Please note that this was a sponsored post and may contain affiliate links for your convenience. These involve no extra cost to you, but may result in me receiving a small commission – for which I am very grateful! You can view my full advertising disclosure here.
INSTALLING THE SLIDING BARN DOOR:
Okay so first things first, we bought a Raw Wood Finish Barn Door and decided we would stain it the same stain as all our stained wood trim throughout the house.
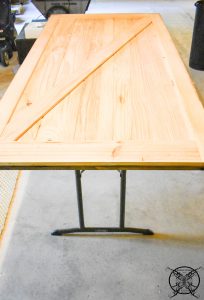 Which is Minwax Jacobean , we hand rubbed in order to get some nice deep stain variations and eliminate any weird brush strokes.
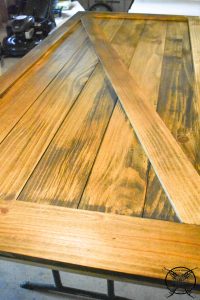
Once the door was dry it was time to install. We attached all the door hardware to the door first, so it would be easy to lift into place when the time came. 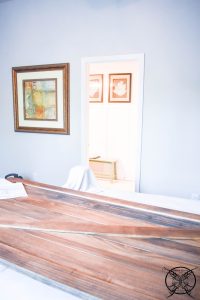
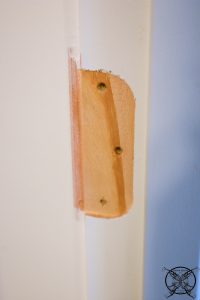
We moved the original door, which also meant the hinges as well. So we will need to fill the wood, sand and repaint the door frame to repair these sites.  I guess we could have replaced the door frame, however this is our second barn door installation and this is the same process we did for first which turned out great.
The next step was to install the header board. Which we placed directly on top of the door frame and then just needed to make sure it was level.
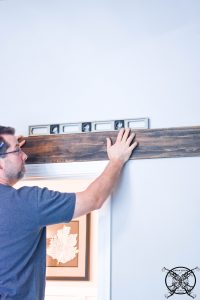
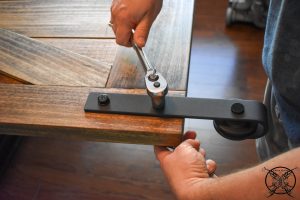
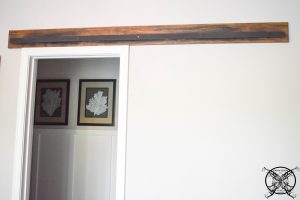
Ron temporarily tacked the board in place, mainly to hold it on the wall while he located the studs, then he was able to permanently anchor it using the provided anchor bolts. 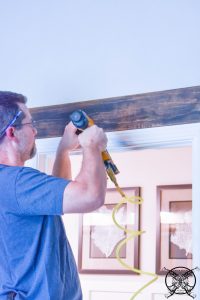 Then using the provided wood screws he permanently attached the metal slide rail to the marks made on the header board, which also went through into some of the studs and the solid header board above the door, for added stability.
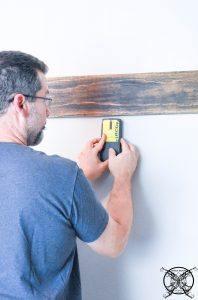
The slide rail was tightened and the door was hoisted into place and tightened down. Then the door stops were added to the track to keep door from going further than you you would like. Of course, all these details are in the clearly marked instruction pack that comes with your barn door.
 I think my favorite part about this new barn door is, now they make them with soft close hardware! So just like the soft close cabinets the doors, they will come to a nice slow, easy stop on their own. I love it so much that I am actually considering getting new hardware for our old master bedroom barn door. The technology has really come along way in three years.

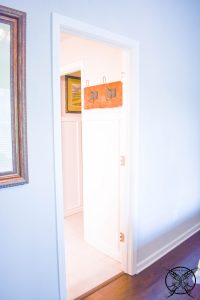
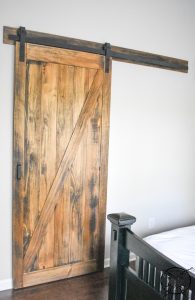
Here is the pretty barn wood door that I have been dreaming of for this room for some time now. Plus I think it really makes a huge difference in the space for the Jack and Jill bathroom now. All we have left is to patch those hinge brackets and this project will be done.
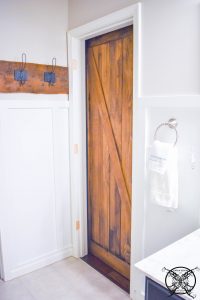
 It really does open up the bathroom area nicely and now our guest will not have to fight with the door to utilize the robe hooks. I just love it when a plan starts to come together.
JUST A SIDE JOB:
Another little side job we added in this week was the television mount. Since all the heavy lifting is pretty much done in the room we felt it was safe to add the flat screen in now. 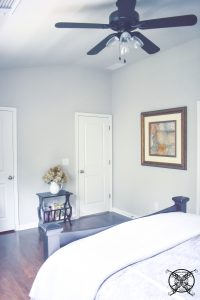
Since it will go on the wall at the end of the bed, and we decided not to keep this little table, seen in the before picture above. I wanted to hide the cable box and all cords to make it a seamless floating tv. The best place to do this was the adjacent closet.
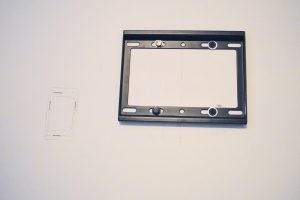
So when mounting the hanging brackets we cut a hole in the wall through to the closet for the cords to run into behind the television. Which works perfectly since the closet shelf is already right there at the perfect height.

 Now for the power. This may require you to get a licensed electrician, since I am married a electrical engineer, I am pretty much all good in that category….now plumbing that is a different story, lol.
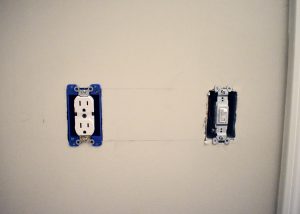
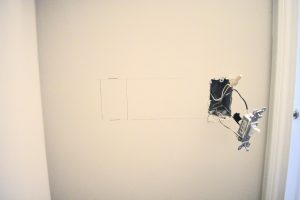 Ron basically tapped off the the un-switched hot wire located at the existing switch location. This allowed him to install a new plug that will be non-switched. So, no the closet light does not have to be left on for the television to work, lol.
Then, we were able to store all “the uglies” as I call them inside the closet. I personally hate to see all the tech pieces that go with televisions and computers, it is one of my biggest pet peeves. Just ask AT& T, I had a very long and delightfully…. “colorful” conversation with several high ranking CEO’s, about why I wanted and required RF remote controls with every television within my operating system. Needless to say, I have RF remotes for every television in my home and televisions I have yet to even purchase yet, lol.
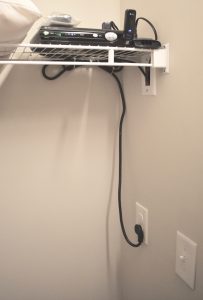
As you can see above, we added a USB, RF transmitter pair with RF enabled remote control in order to switch the channels through the wall without the closet door being open. This also works with cabinets, furniture pieces and anything else you may use to hid your uglies.  Next week we head into week 5 and I am already starting to get shipments in of my products which of course makes it seem just like Christmas around here. I am super excited about picking up our custom sign from Audrey at Six Twenty Two and getting our new found furniture that we picked up at the Sugarboo Warehouse sale put into this room.
THE GAME PLAN:
WEEK 1- Introduction, Inspiration Board, Project Outline, Starting Product Estimation & Procurement
WEEK 2- Clearing the Room, Painting the Walls Base Coat, Painting Tips Sponsored by HANDy Paint Products, CAD Drawing-Wood Wall Placement
WEEK 3- DIY Reclaimed Wood Wall Installation
WEEK 4 – DIY Barn Wood Sliding Door Staining Installation & TV Installation
WEEK 5- Picking Up Custom Orders, Accessories & Room Staging , Fan Blade Refinishing
WEEK 6- FINAL REVEAL
The space is really coming together nicely, Jen. That barn door really gives this room the rustic feel. Have fun receiving all your items in the next week 🙂
The barn door is really cool, makes the whole room look so interesting!
They’re all coming together really nice. I love DIYs! I’d like to do DIY things for my room. It would be helpful for my YouTube channel as well. Haha. Have fun!
Love that door, Jen!!! Looks so good! What a space you have coming together! Can’t wait for more. ~~ Susie
The sliding barn door gives a cool rustic feel to that room.
Wow Jen! You have so much done already! NICE DOORS girlfriend!
I love how the finish on your door turned out!
The stain is so pretty! I love how your room is turning out. Love the tip about the light switch as well. We have a switch in our basement that controls the lights in both rooms. It drives us crazy.
That door is beautiful! And a great solution is you’ve got limited space or in a house with unusual dimensions. Love it!
Thank You Charlotte I really did make a huge difference in the bathroom. I am still perplexed why our builder put some many doors in such tight spaces, we had several places like that, I guess just a flaw in the building plans.
Tee it is going to feel like Christmas came early! I am so excited!!!
Great job on the door!
Love, Love, Love ❤️ 💕 💗 your barn door it is so beautiful! 😍 It really makes a statement in your room and brings home that rustic feel that you are going for, great job my friend.
I absolutely LOVE rustic barn doors in the home. We bought ours ready-made because of budget limitations (and mostly laziness) but yours proves the extra work pays off – It looks so great!
Thank you Kate, our we actually bought pre-made kit as well, we just stained them a custom color to match the room.
The barn door turned out great! I also love your idea of hiding the cords in a closet adjacent to where you placed the tv…so cool!!
Thank you Joanna, I am such a sucker when it comes to hiding cables and cords LOL!
Thank you Emy, I am loving the door! Yeah those switches can be tricky sometimes.
How exciting this room change is! Love to see all the accessories you will choose how it all ends up. This barn door it’s perfect for small rooms, just like our toilet room.
Jen,
The door is a show stopper and I love how your are showing tips on hiding my nemesis the dreaded cords. 🙂
They’re coming together really well, Jen! I love DIYs but never good at it!
Your vision is becoming a reality. Thanks for sharing the details. Now if you could just gift me that room when it is done, I would be ecstatic.
Having small kids, do you think there would be any issue installing a heavy door like this?
I love barn doors and this one looks great in your space girlfriend!
Love this! Sliding barn doors are one of my favorite things. This came out so awesome and I love your step by step.
Hey Jenn,
Thanks for the great question! I would have said yes, with my previous barn door that we put in 3 years ago, because the track is so basic and you could easily get little fingers slammed in the door. I have to say this particular barn door by Jeld-Wen :http://www.jeld-wen.com/en-us/possibilities/farmhouse/designglide , which has the soft close track that is very user friendly and would work great for small children. I love it so much that I am going to re-order the same hard ware for mu master bedroom barn door to make it a smoother operation. I think the technology has just now caught up to the demand of the market so now the products are a much better quality.
This post was jam packed with some really useful tips. I love the door as well as the way you hid the “uglies” for the TV.
What’s up girl friend, I read this post last week and totally meant to comment, because your story-telling style is so witty, keep it up!
Jen I love the barn door it really does make a big difference in your space. Great job!
I have been wanting to add a barn door to our bedroom into to our bathroom and now I want one even more. Love how this looks and they way it opens up the bathroom.
I really like this barn door it does add a lot of space to your room.
Jen I love this door! I need a few of these to come into my home, and the install looked very easy tell Ron thank you.
Love this barndoor it looks great in this room
Love this bardoor it looks great in your room.
Barn Doors have become so popular, which is really surprising to me, since I have had them for years. I love this room and the direction you headed, to me the wall is the showstopper.
I really like how this door operates for the space and adds extra useable space to your rooms.
Xx, Nailil
I love this barn door it really makes your room.
Love the DIY for this barn door we are really wanting to add these to our home too and you made it look very easy. So I think we will give it try.
I have been wanting to add a double barn door to our upstairs media room, the soft close option sounds perfect, I will check it out online, thanks.
Such good information and nice job on the project.
I love a sliding door for bedrooms they give you so much more space in the rooms, and bathrooms.
Great post and it filled with so much useful information in your DIY I learned a lot thank you.