
DIY Architectural Cedar Ceiling Beams
DIY Architectural Cedar Ceiling Beams will outline how to install and build your own cedar ceiling beams from scratch.
I am excited to announce we just built and installed our own custom-made Architectural Cedar Ceiling Beams. This DIY will layout the steps and show you exactly how to make your own beams. No more lifting up heavy land beams up to get a decorative look. This was another one of our quick weekend projects, which only took two days from start to finish. Take a quick look at our room before we added the beams. It was nice, but pretty plain, very vanilla box looking. The flat ceilings were vast, and lacked any kind of personality.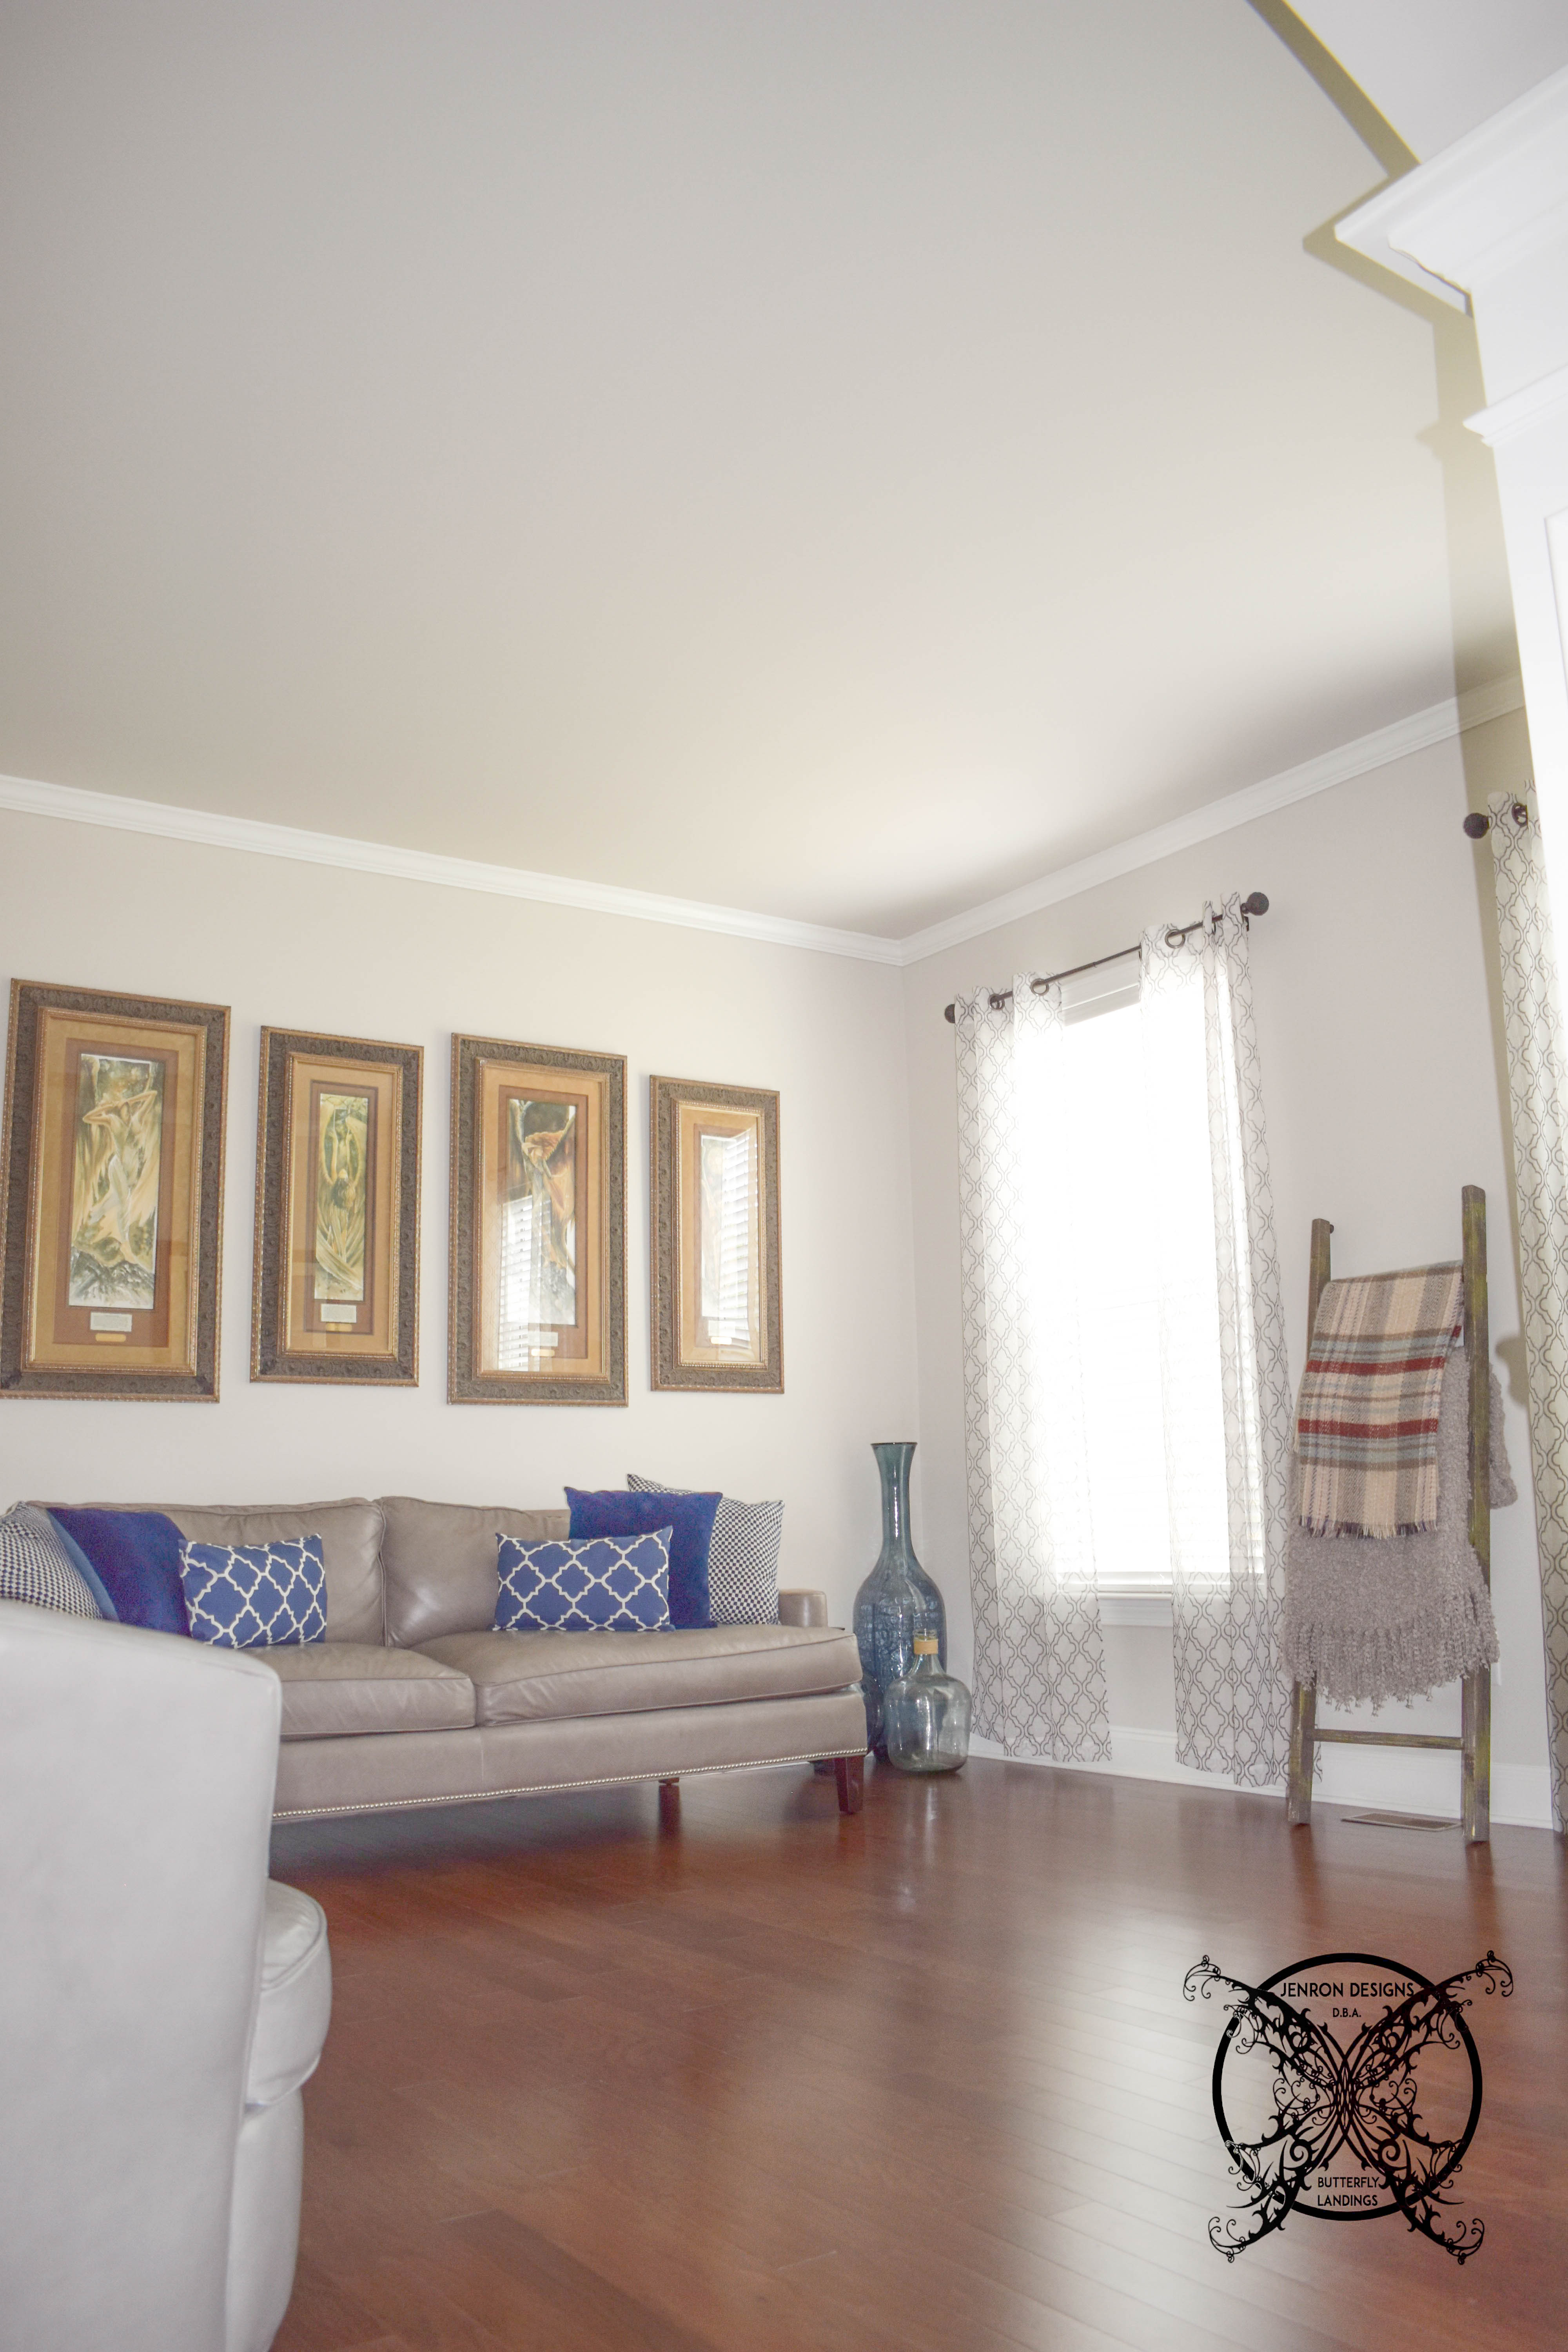 In all honesty I wanted to add beams to the room from the very beginning, I felt like the room really needed the rich warmth of the wood. Unfortunately, like many of our other DIY projects, the cost to install at the time of building was just silly. We chose to put our money into intangible structures that we knew we could not do ourselves after the fact. At the end of the day this $200 project saved us a ton of money and was pretty simple to do.
 So to start our project we first needed to build out the cedar boxes. Prior to building the cedar boxes I decided to stain our cedar plank boards.
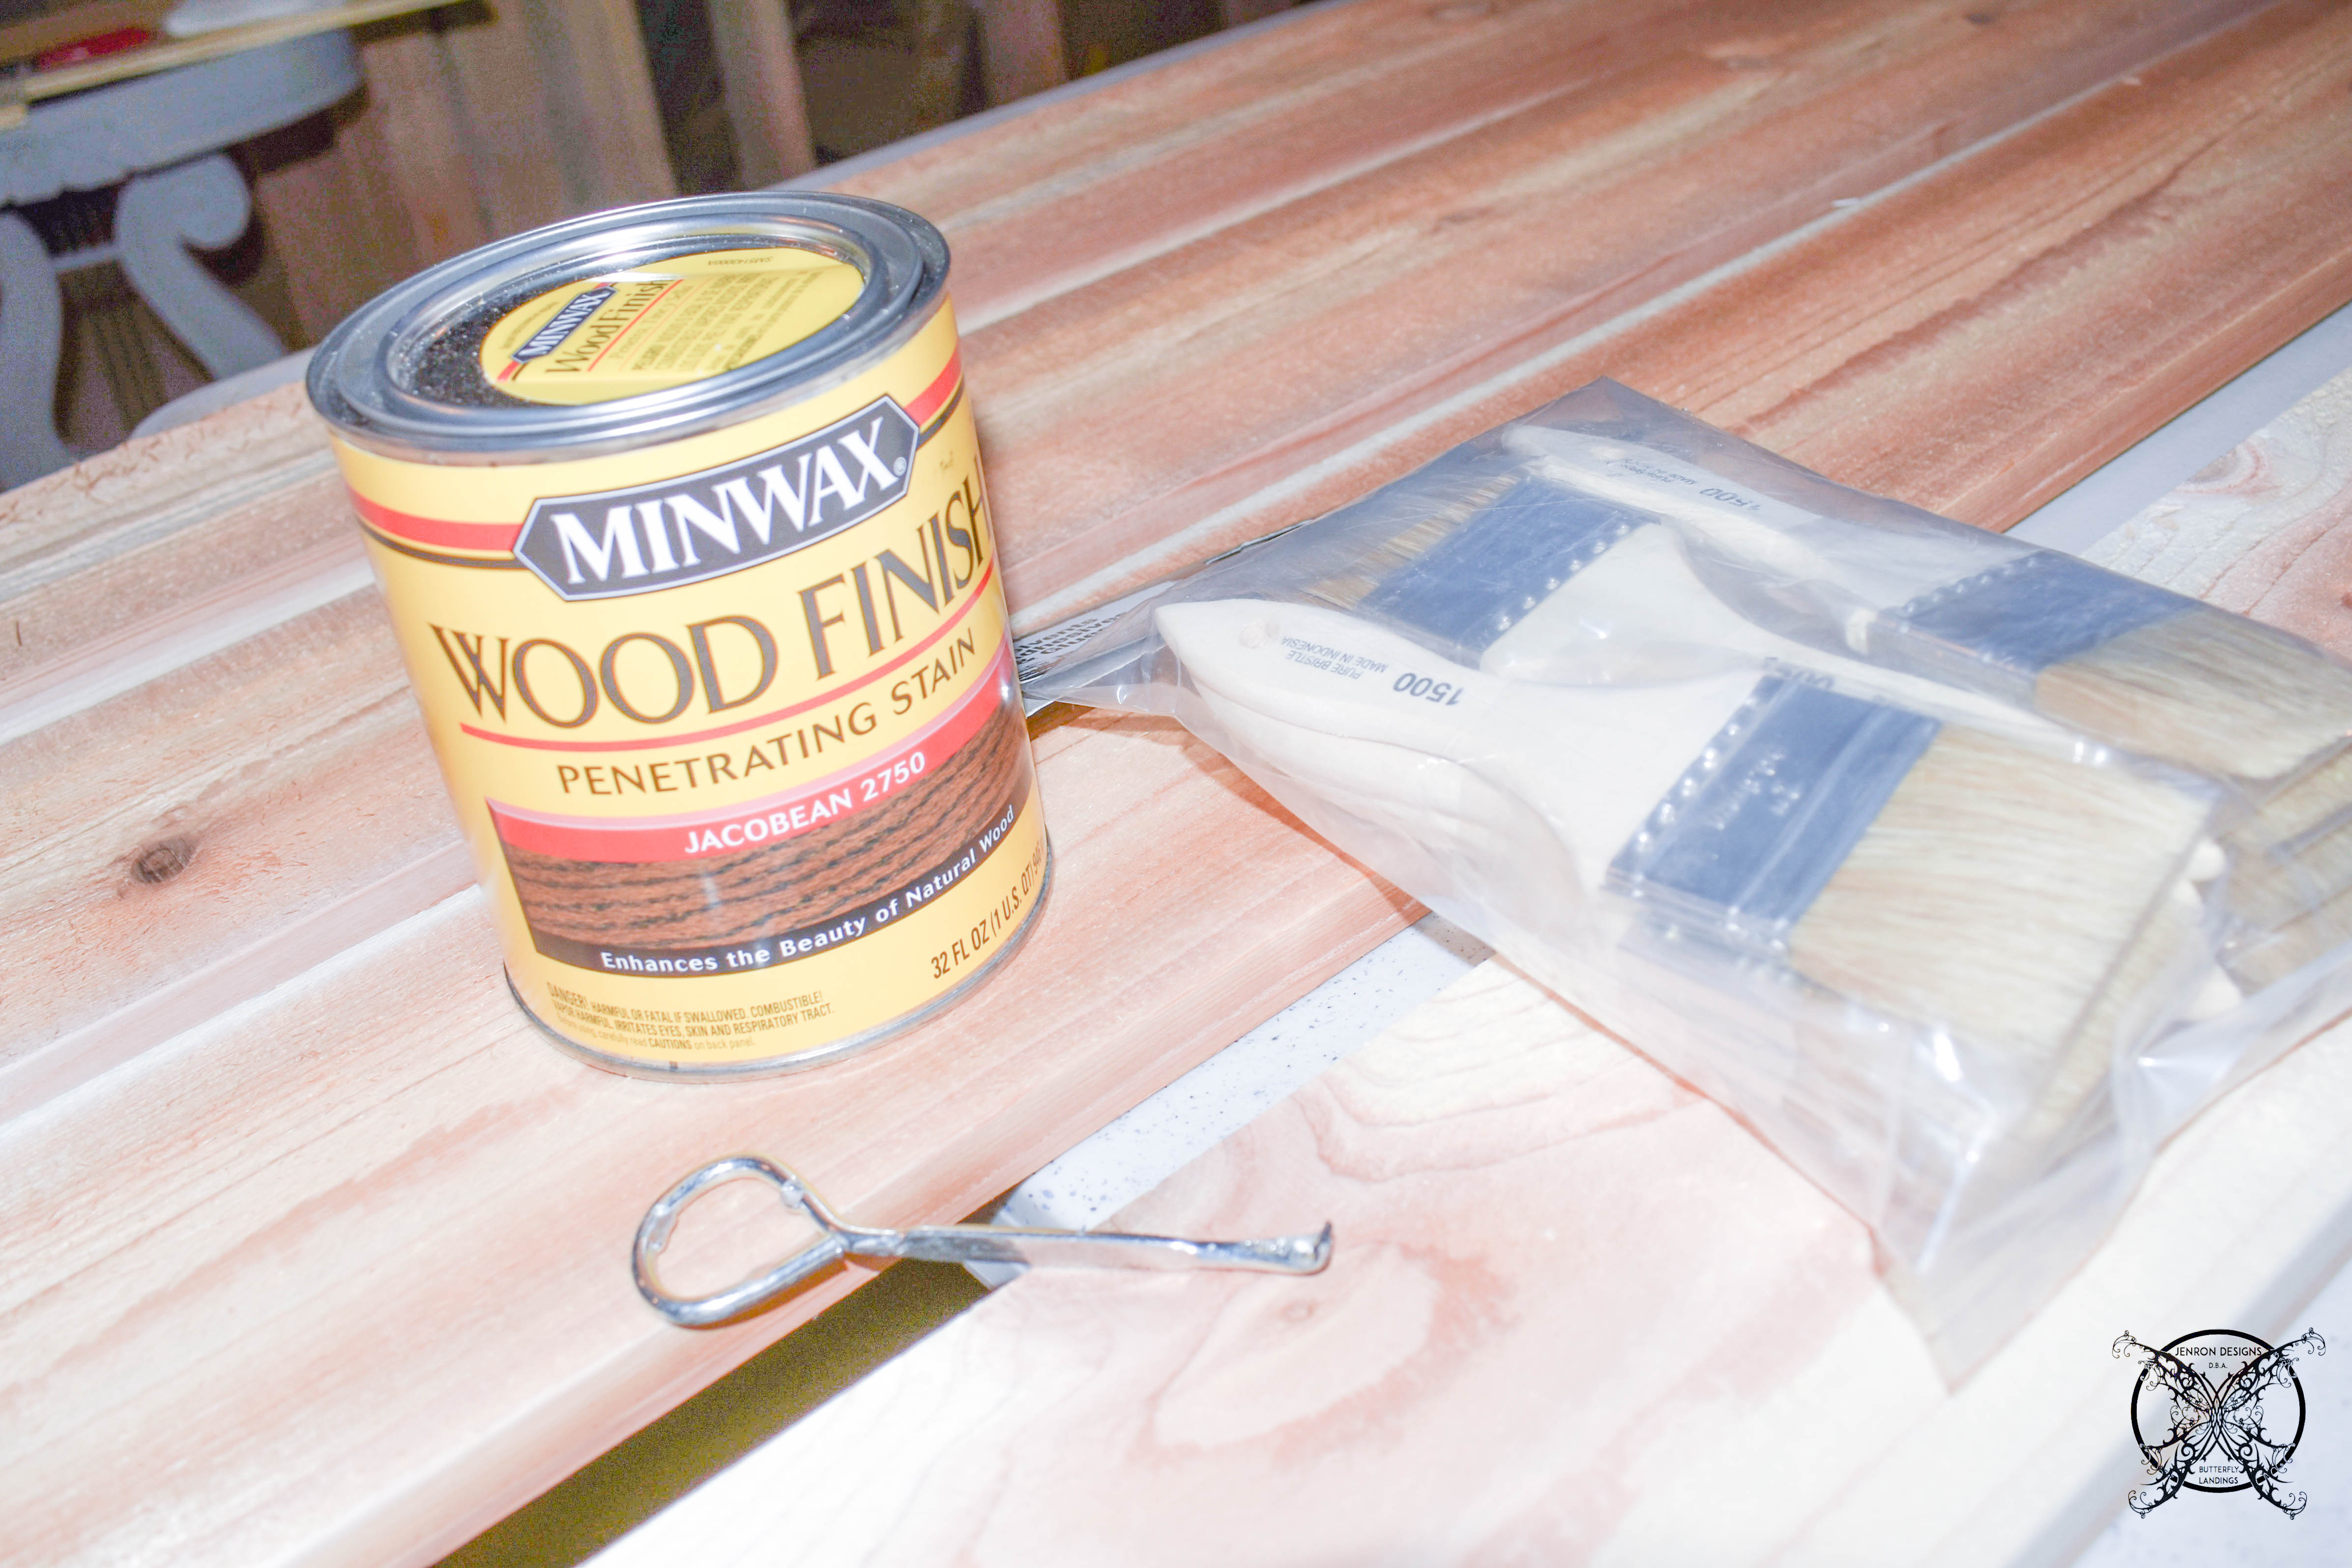
 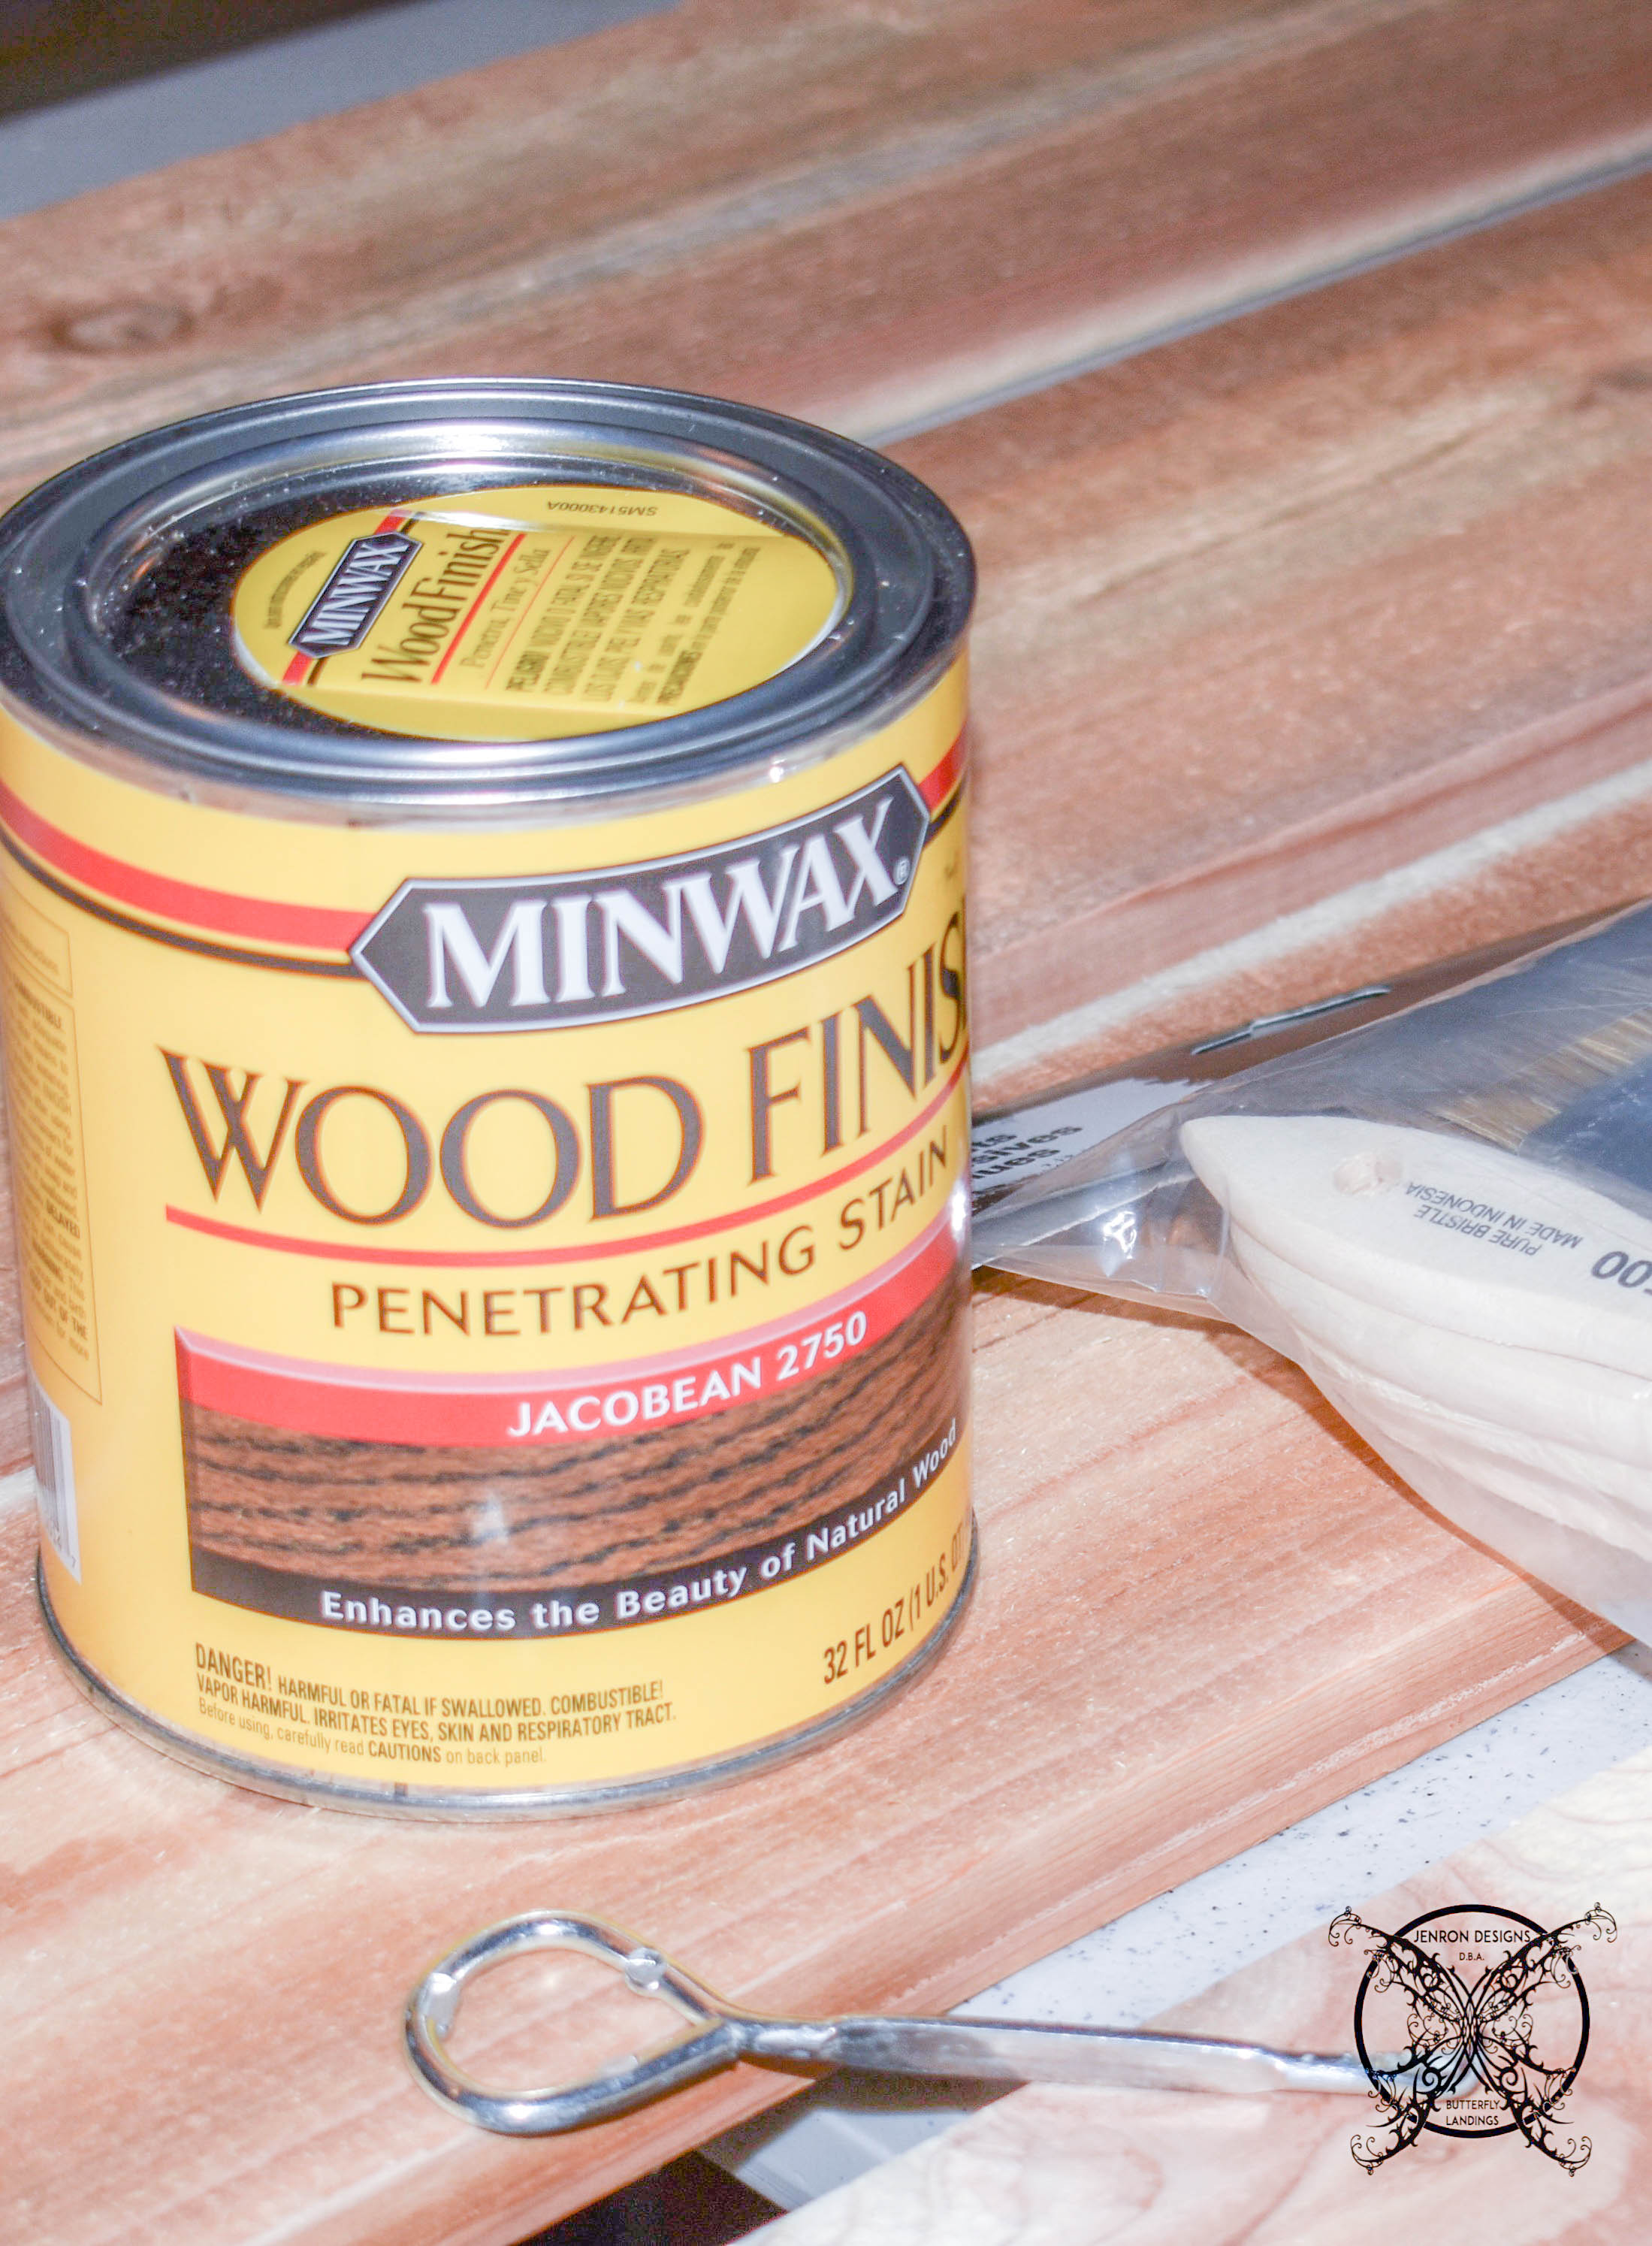 Mainly just for ease of install and I really didn’t want to try and stain them in place. I chose the Minwax Penetrating Interior Wood Stain, Jacobean
 satin color from Minwax to match the rest of our stained doors, handrails and stair treads.
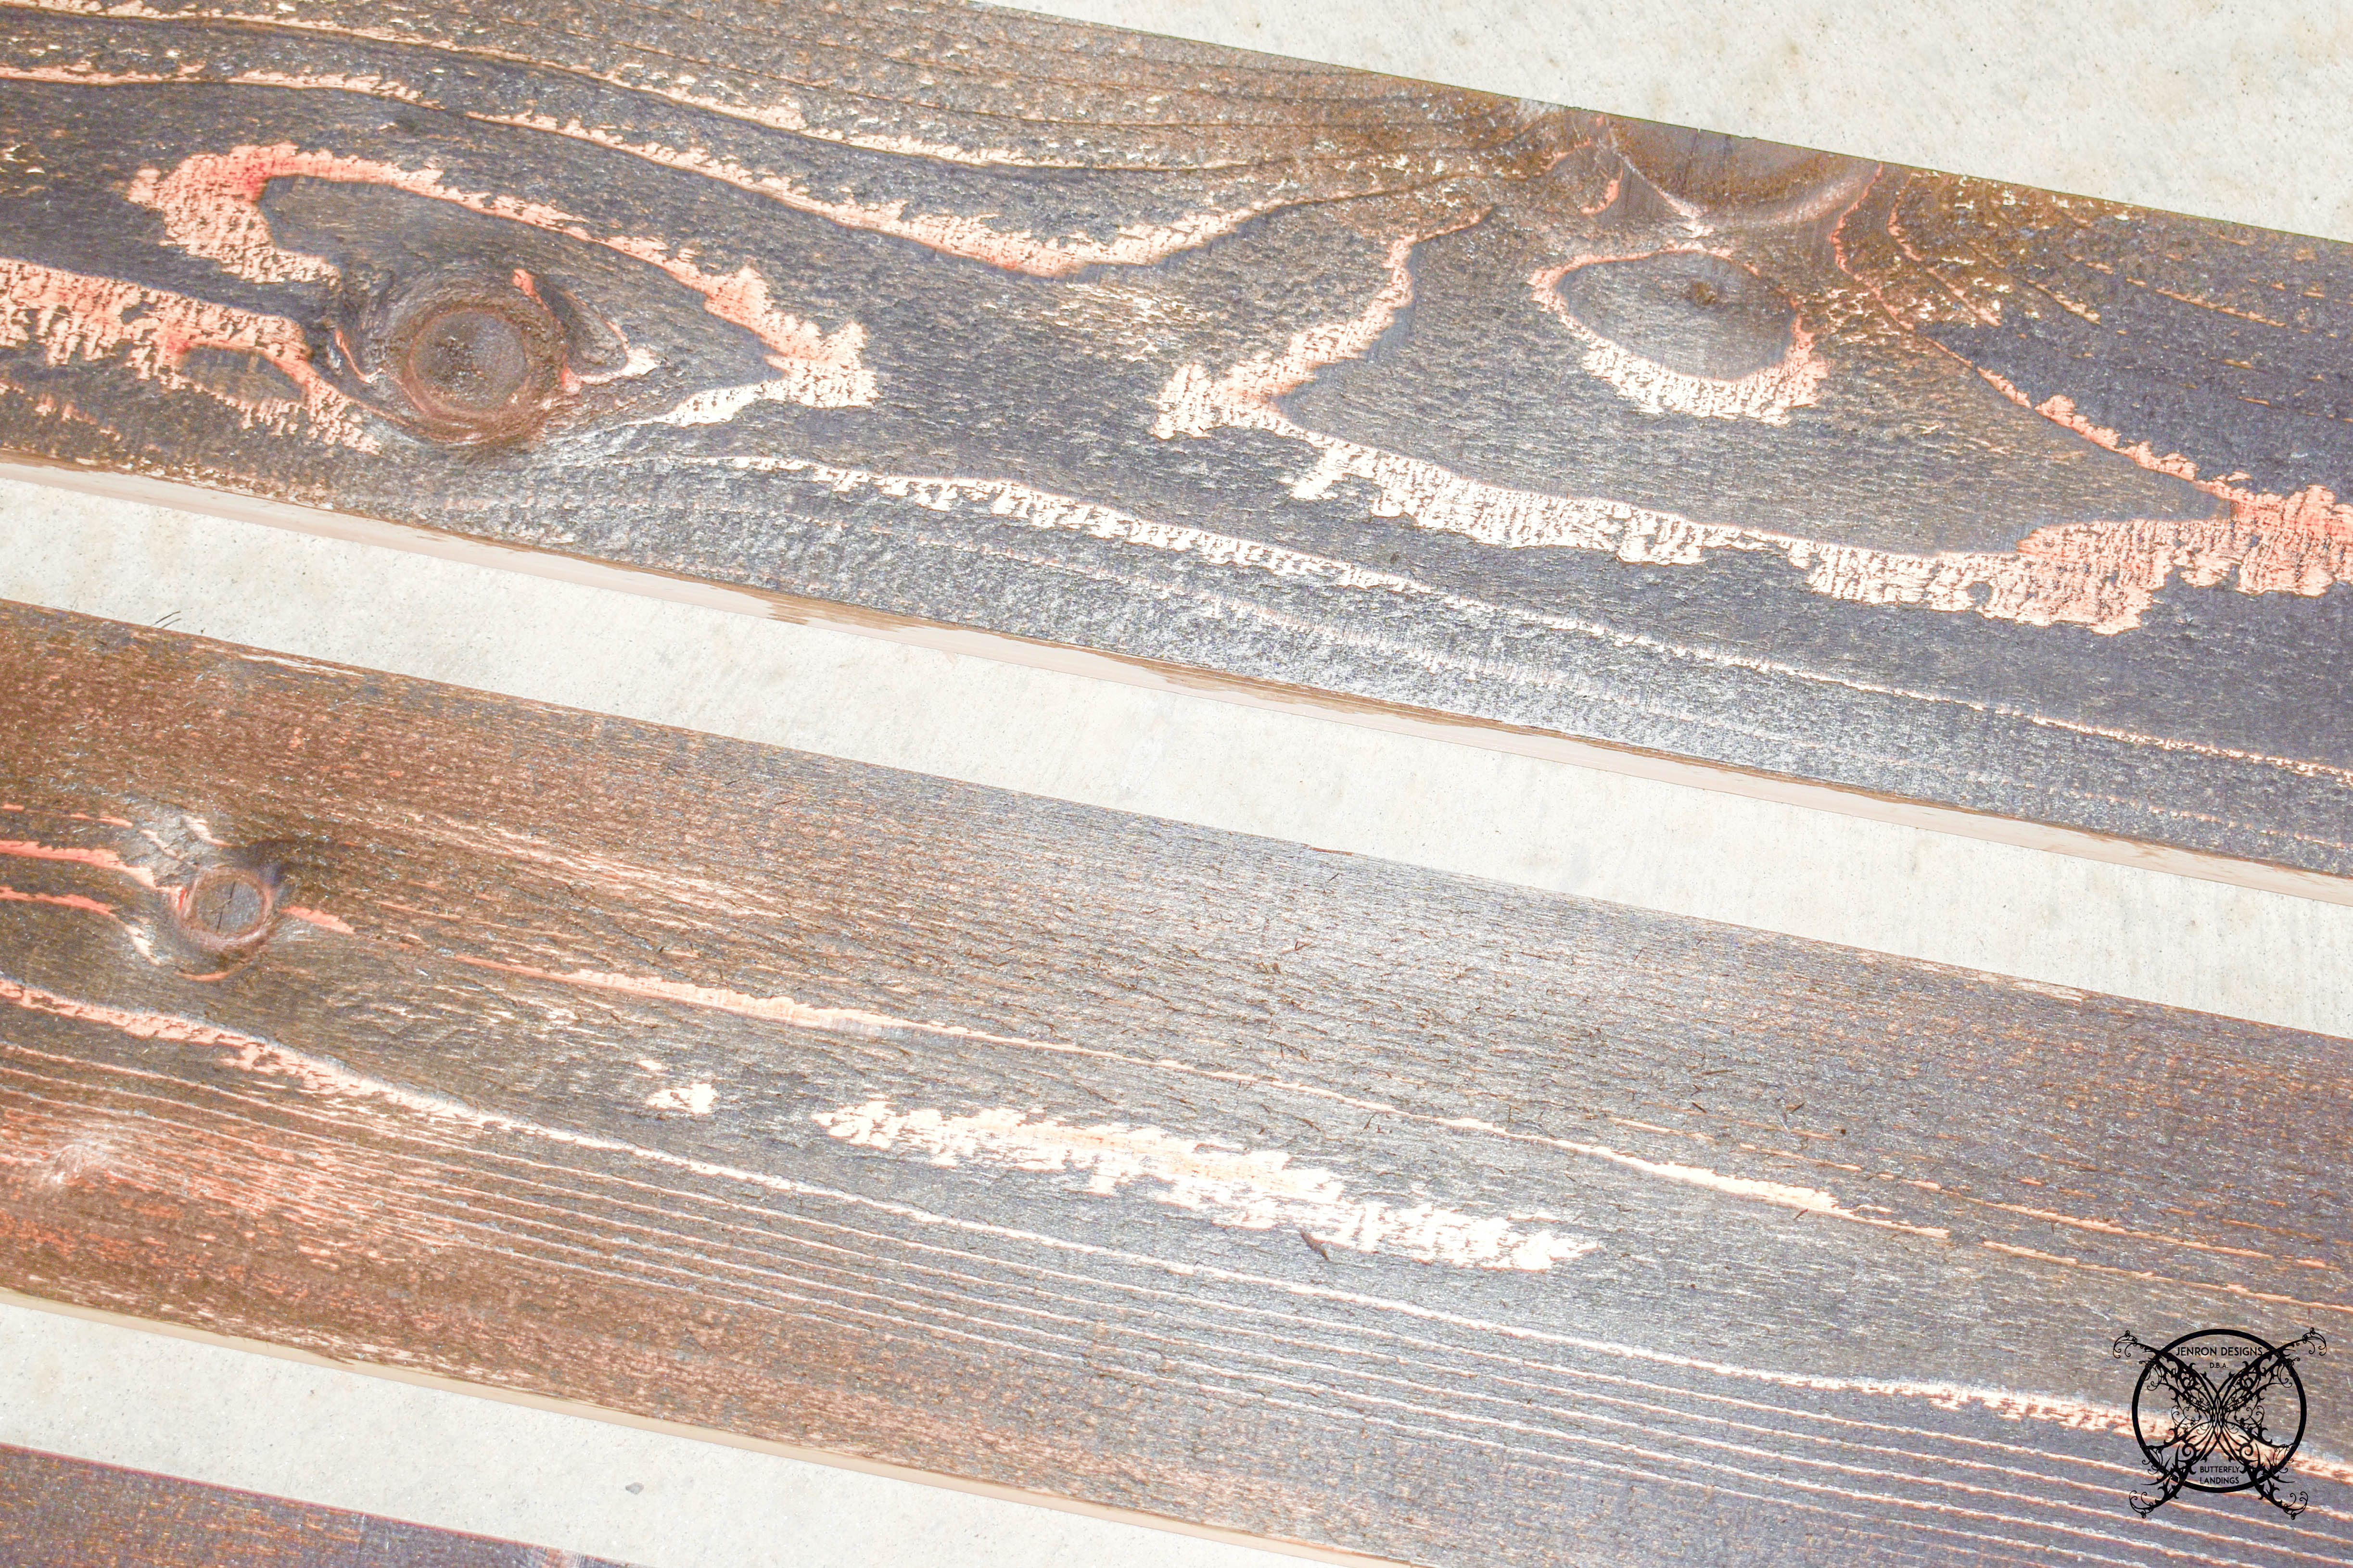 As you can see the cedar grain left a beautiful stain pattern in the raw cedar planks. It almost has a tiger eye look when wet, but it dries down to a more subtle uniform stain color. The next step was to glue the boards together to form a box.
 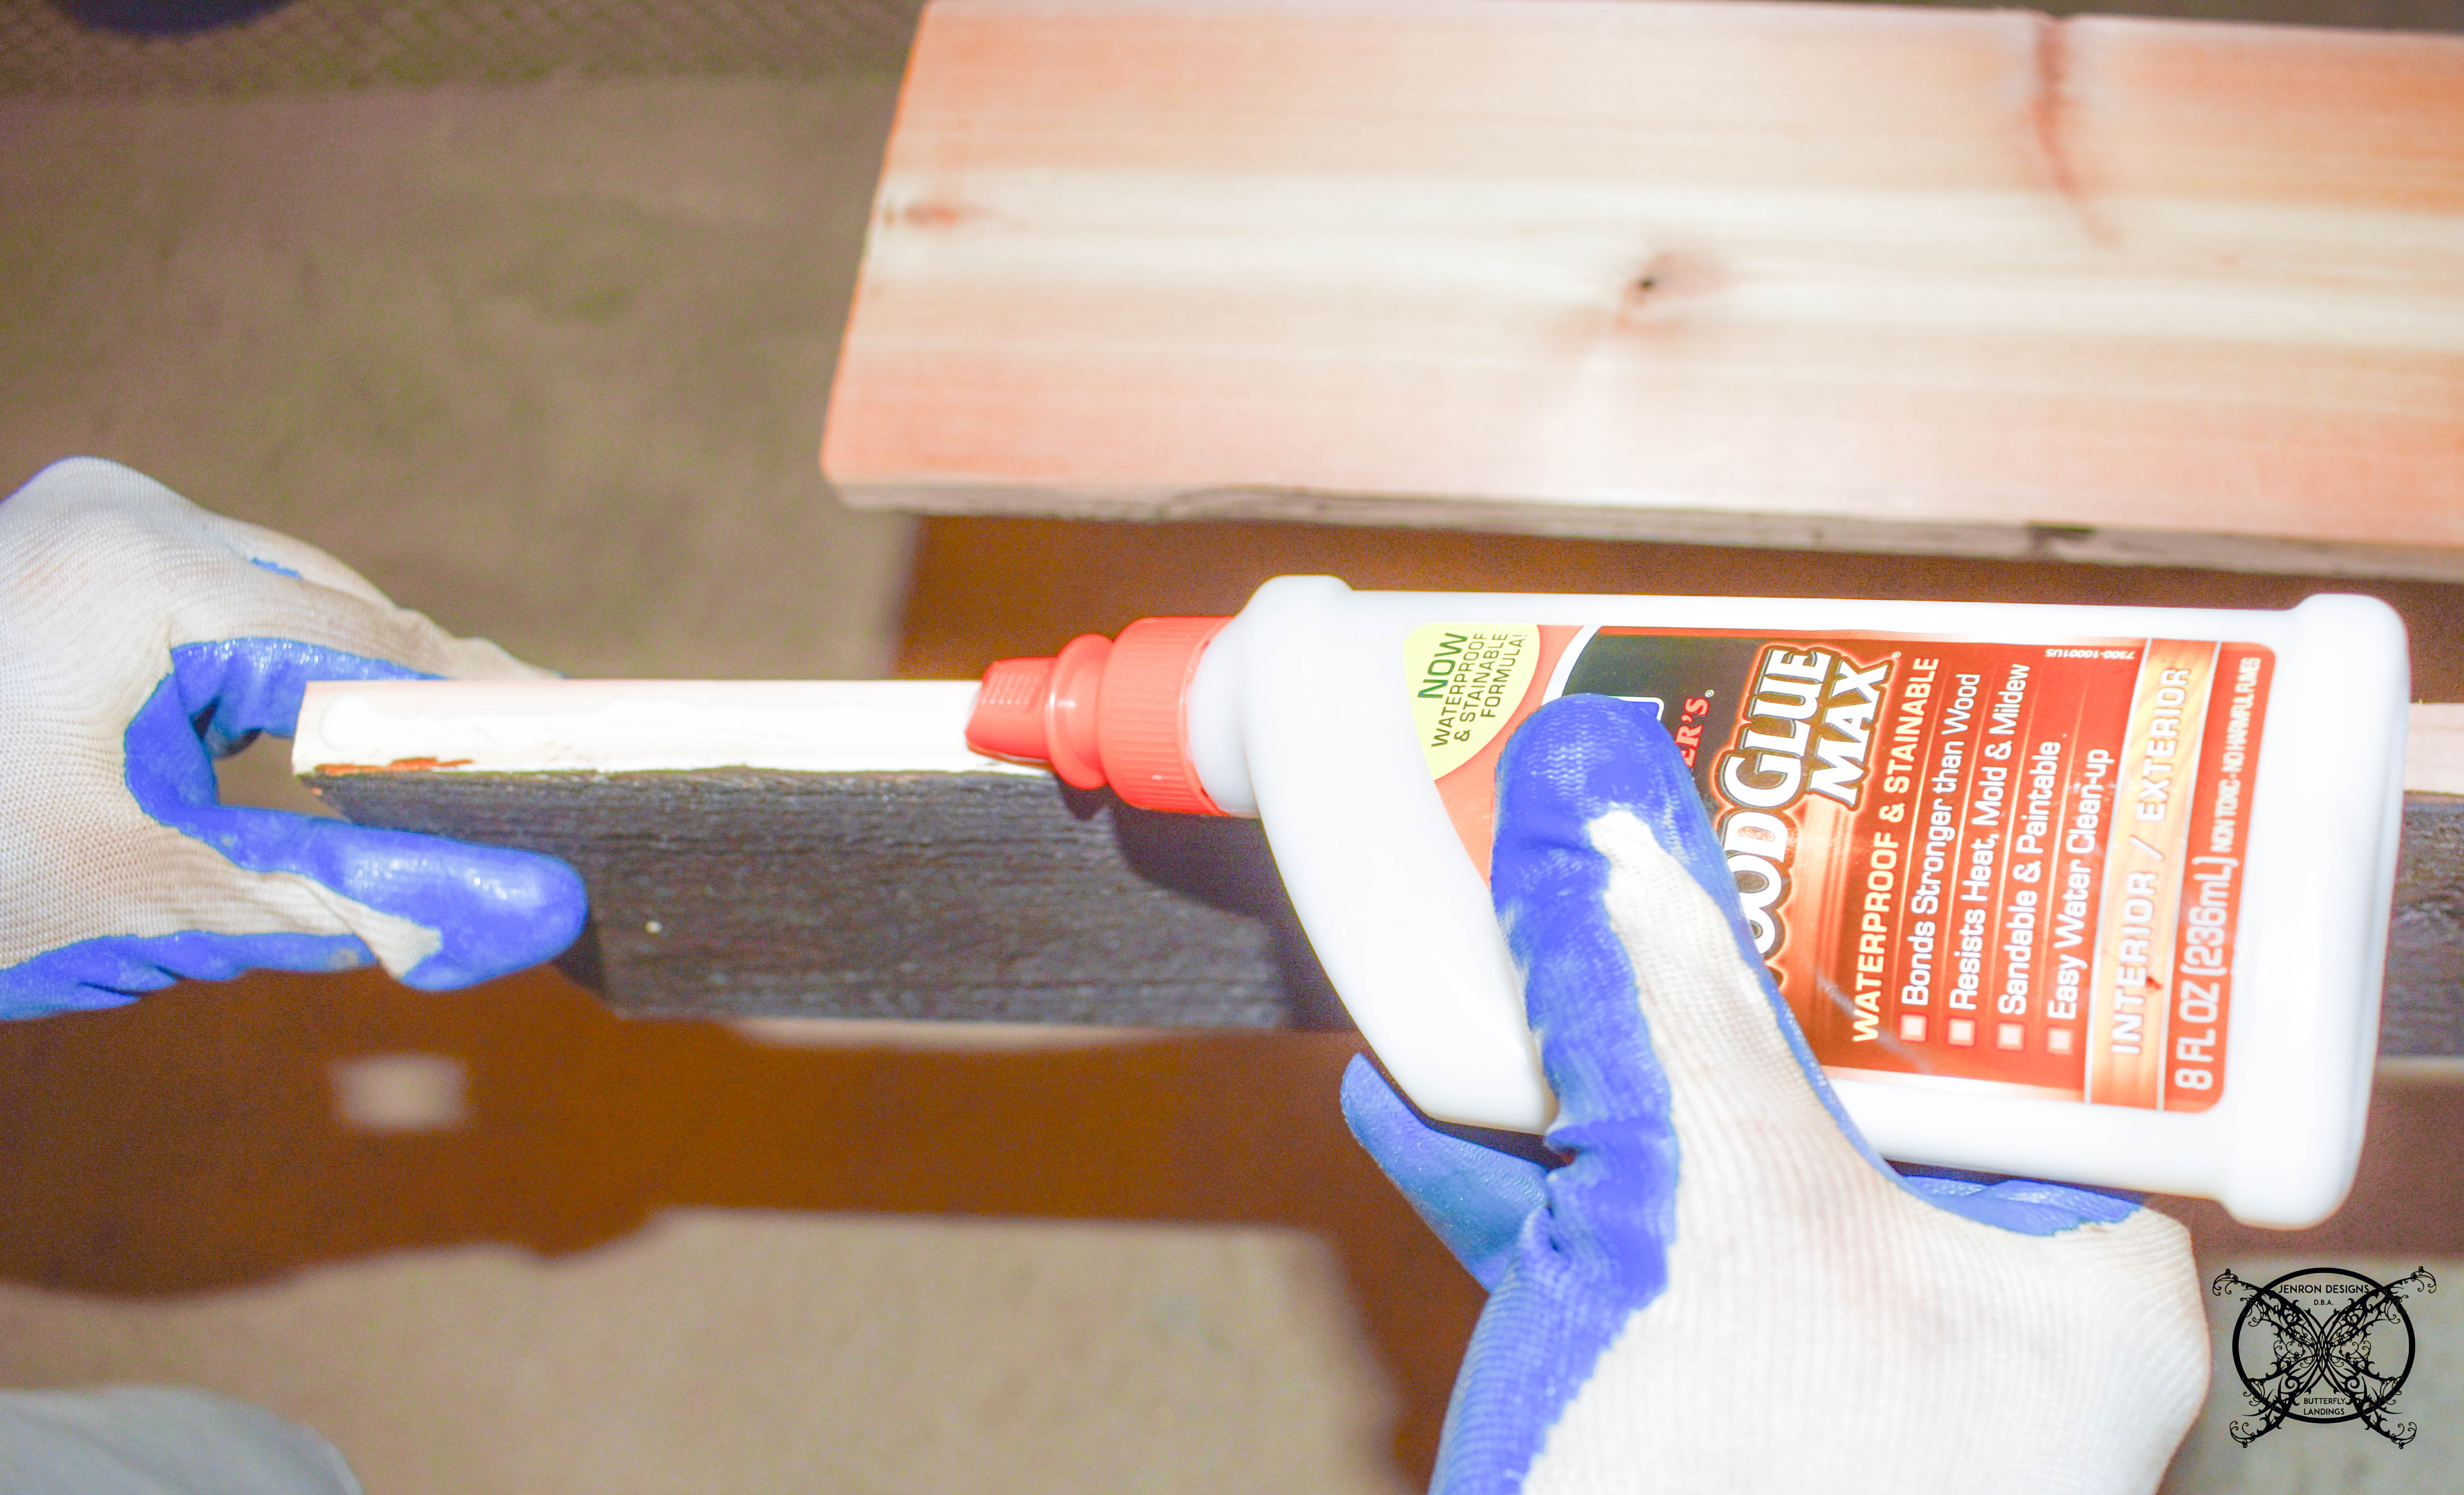 We chose to glue, with Elmer’s E7290 Carpenter’s Wood Glue Max,
 just to avoid possible gaping on down the road. We glued each of the sides to the base and clamped for 12 hours over night to dry. You will have some glue that oozes out, make sure to wipe it off so the stain will still adhere to your cedar.
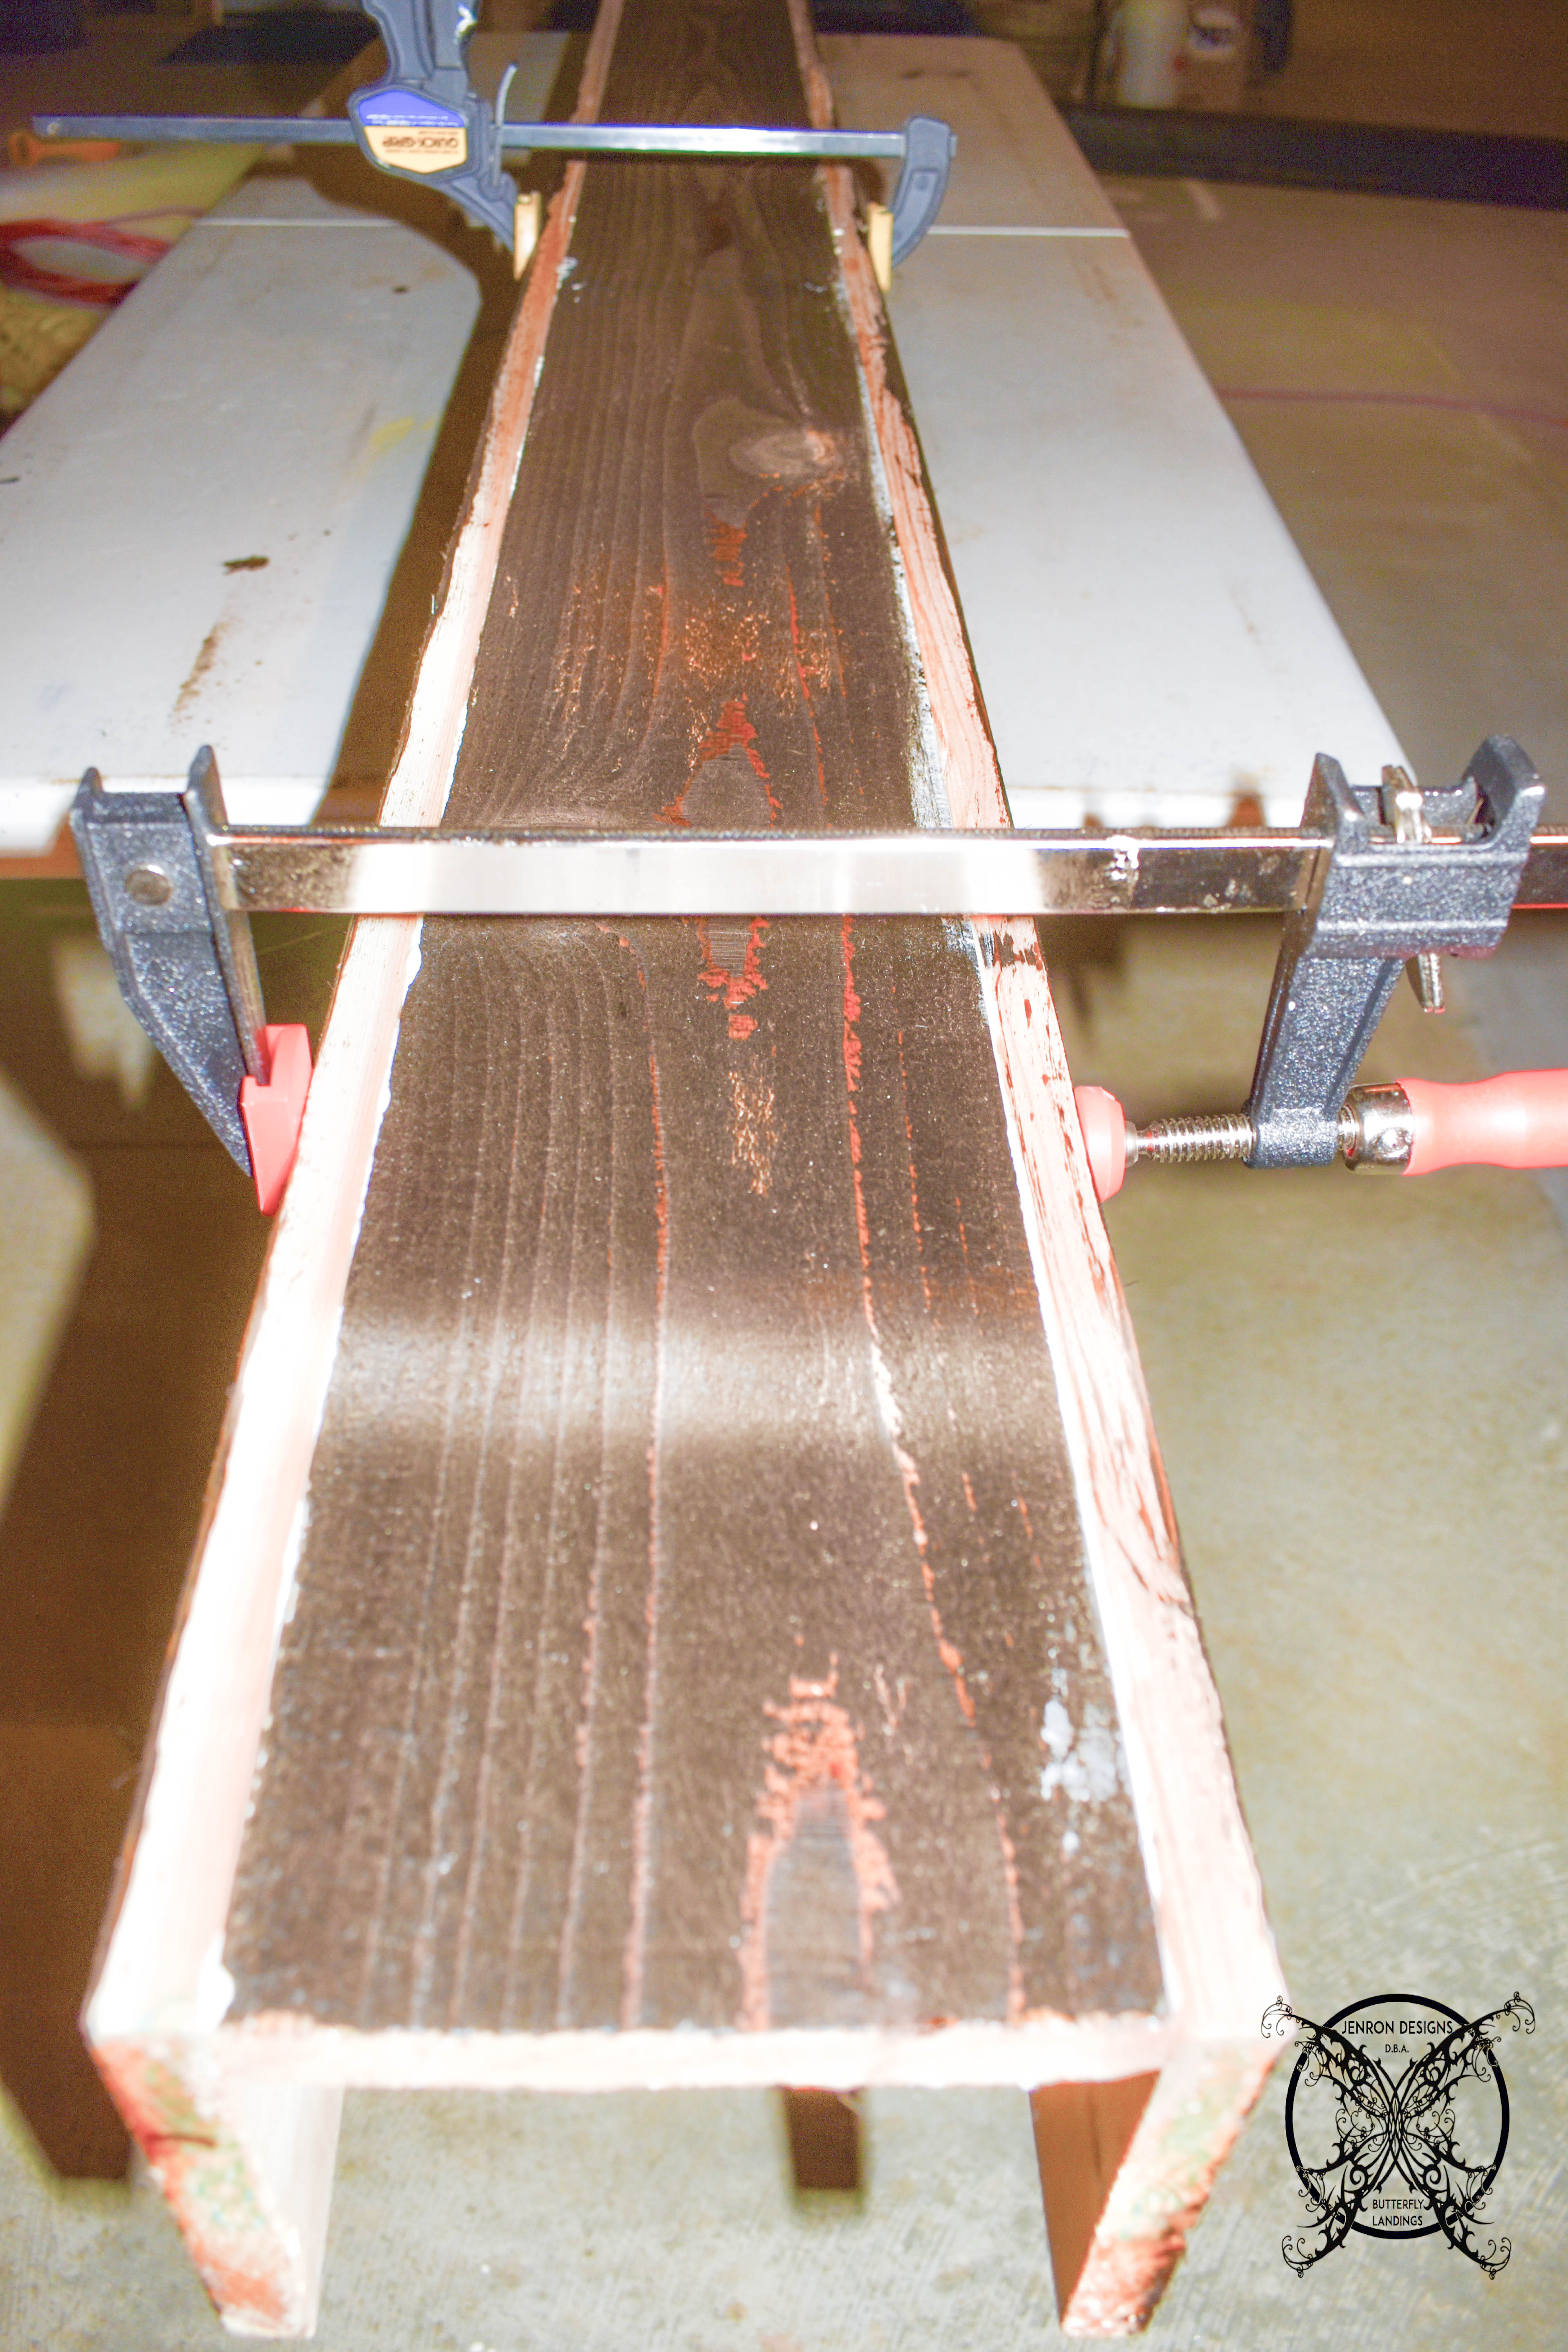 We used these clamps TEKTON Mini 6-Inch x 1-1/2-Inch Ratchet Bar Clamp and 9-Inch Spreader to hold the beams in place. Then we used a brads and a nail gun to secure the beams together for a more permanent use. This will allow us to lift the faux up and secure to the ceiling without the worry of breaking the beam apart.
 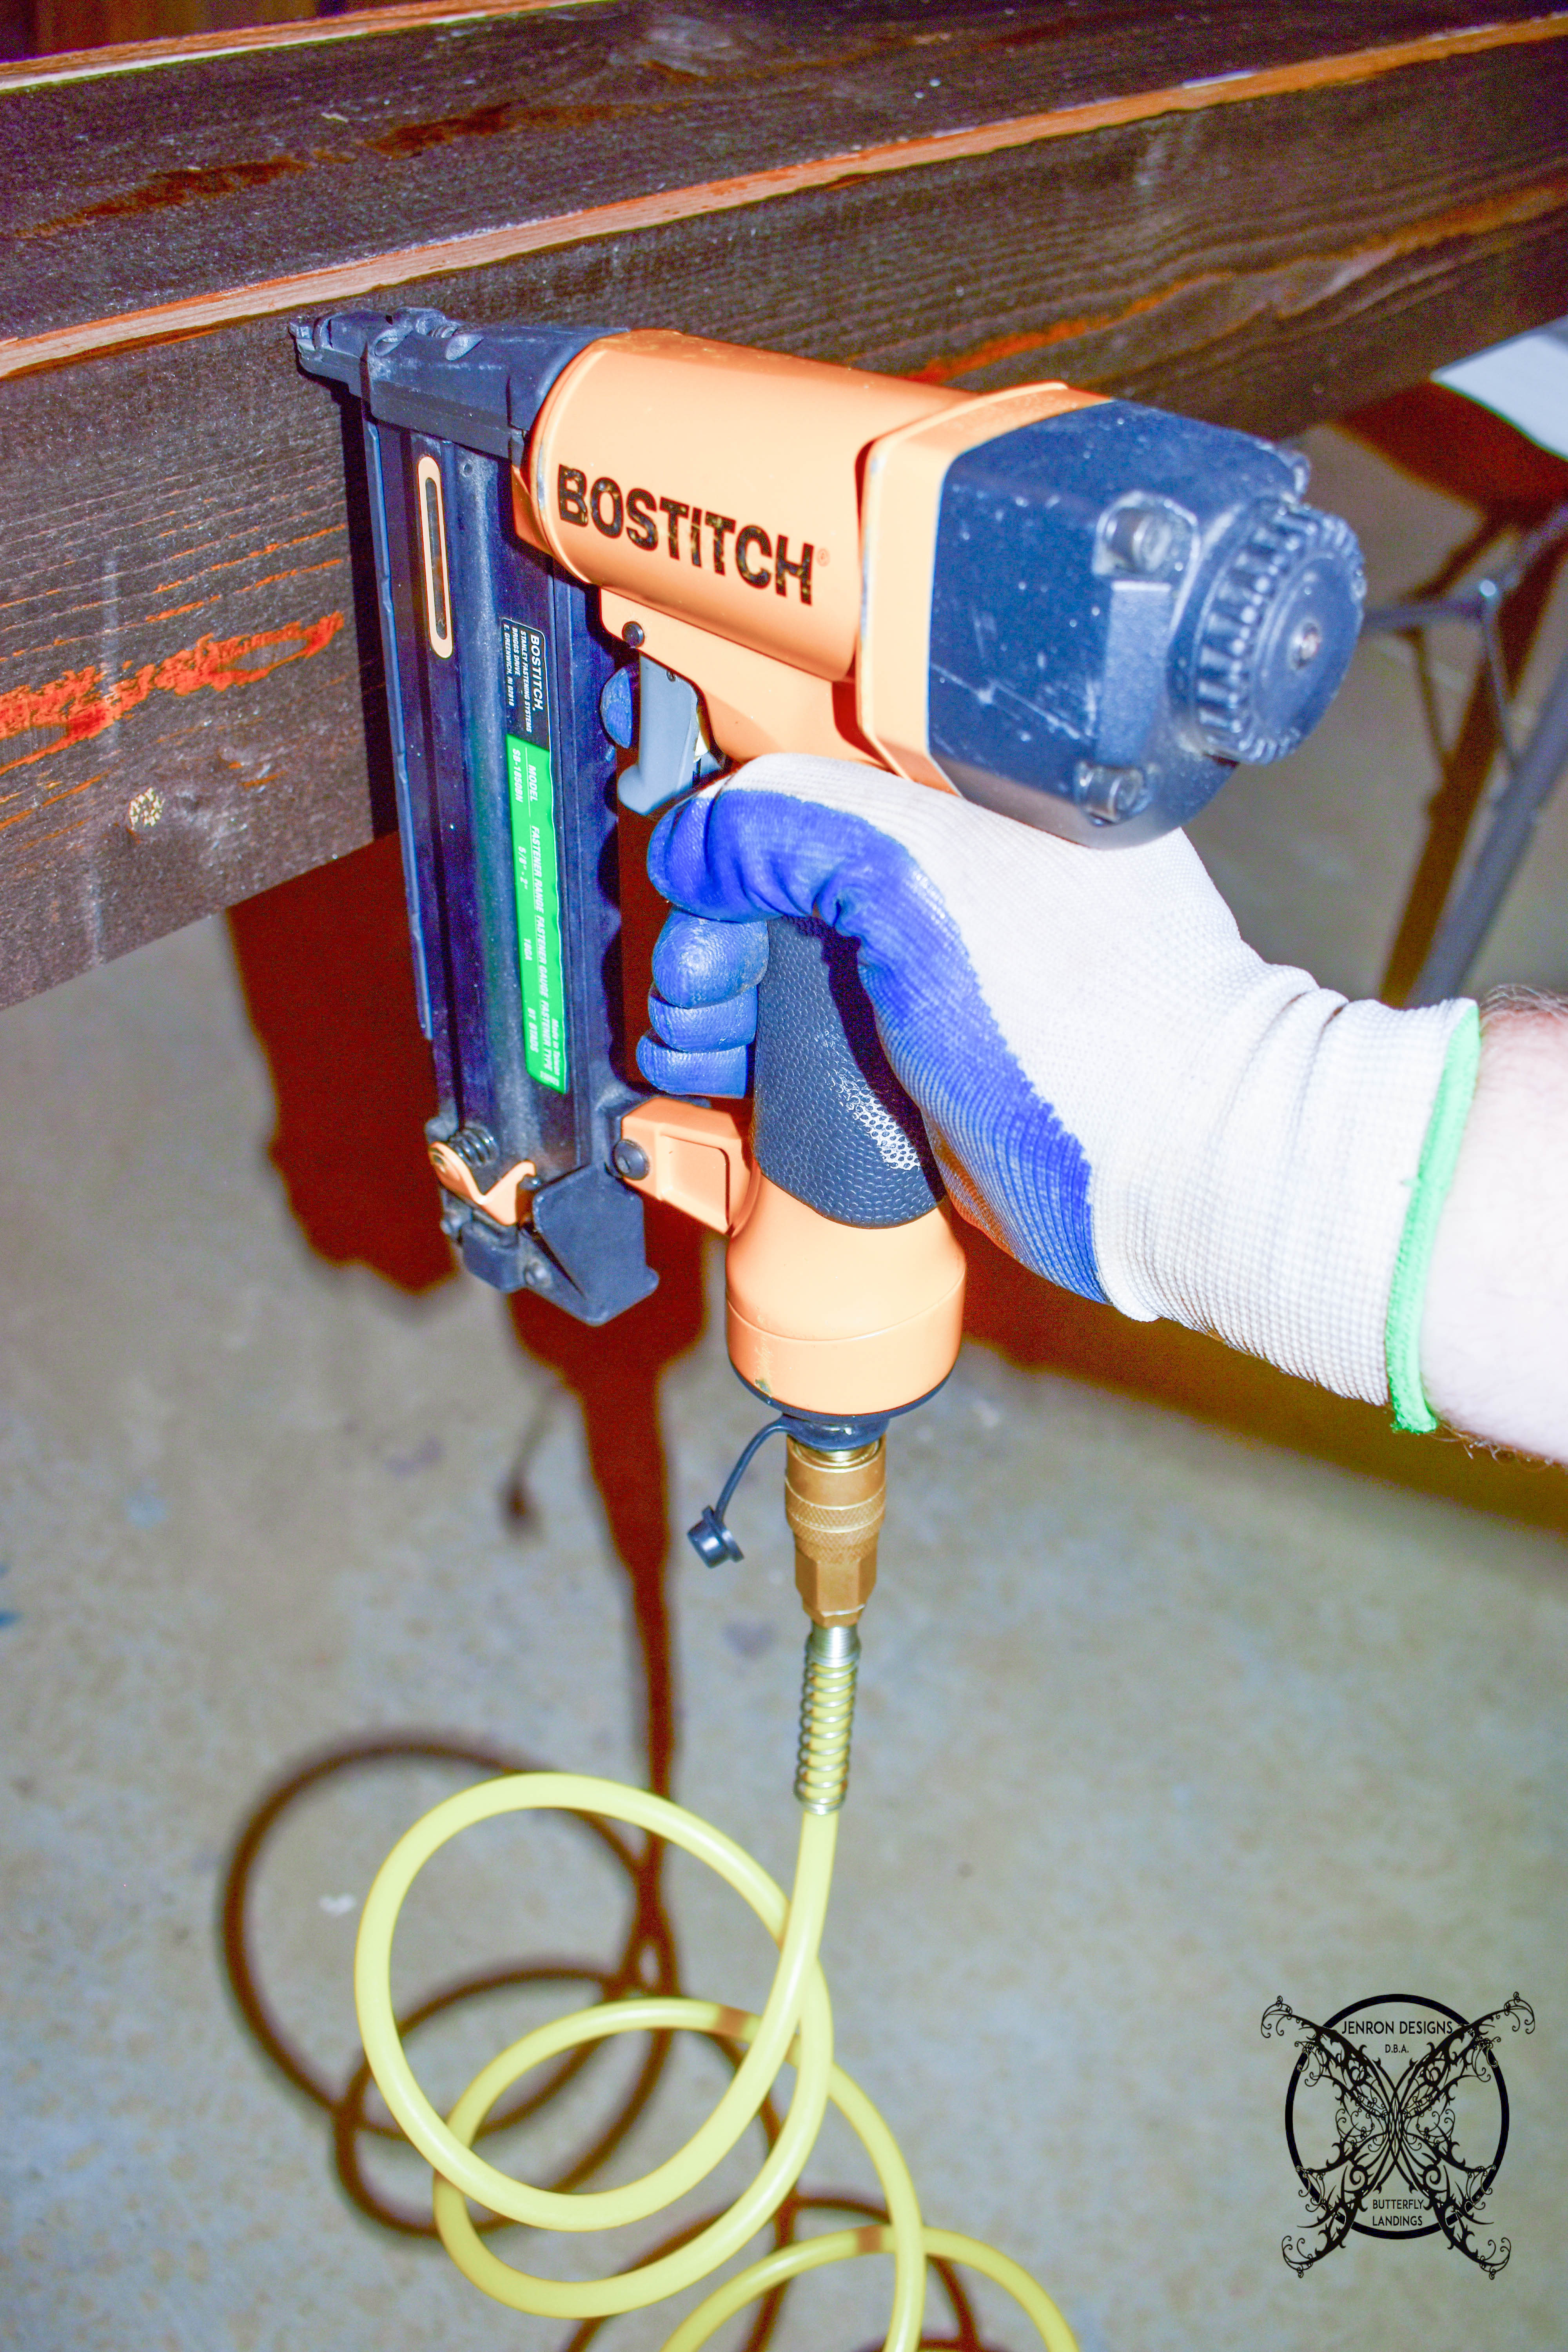 Make sure when choosing your brads you pick one that is very thin, so you do not split the cedar planks. Also confirm that the length will pass through both the front side of the board and at least a 1 1/2″ brad into the back board as well. Once this step is done you are ready to install.
 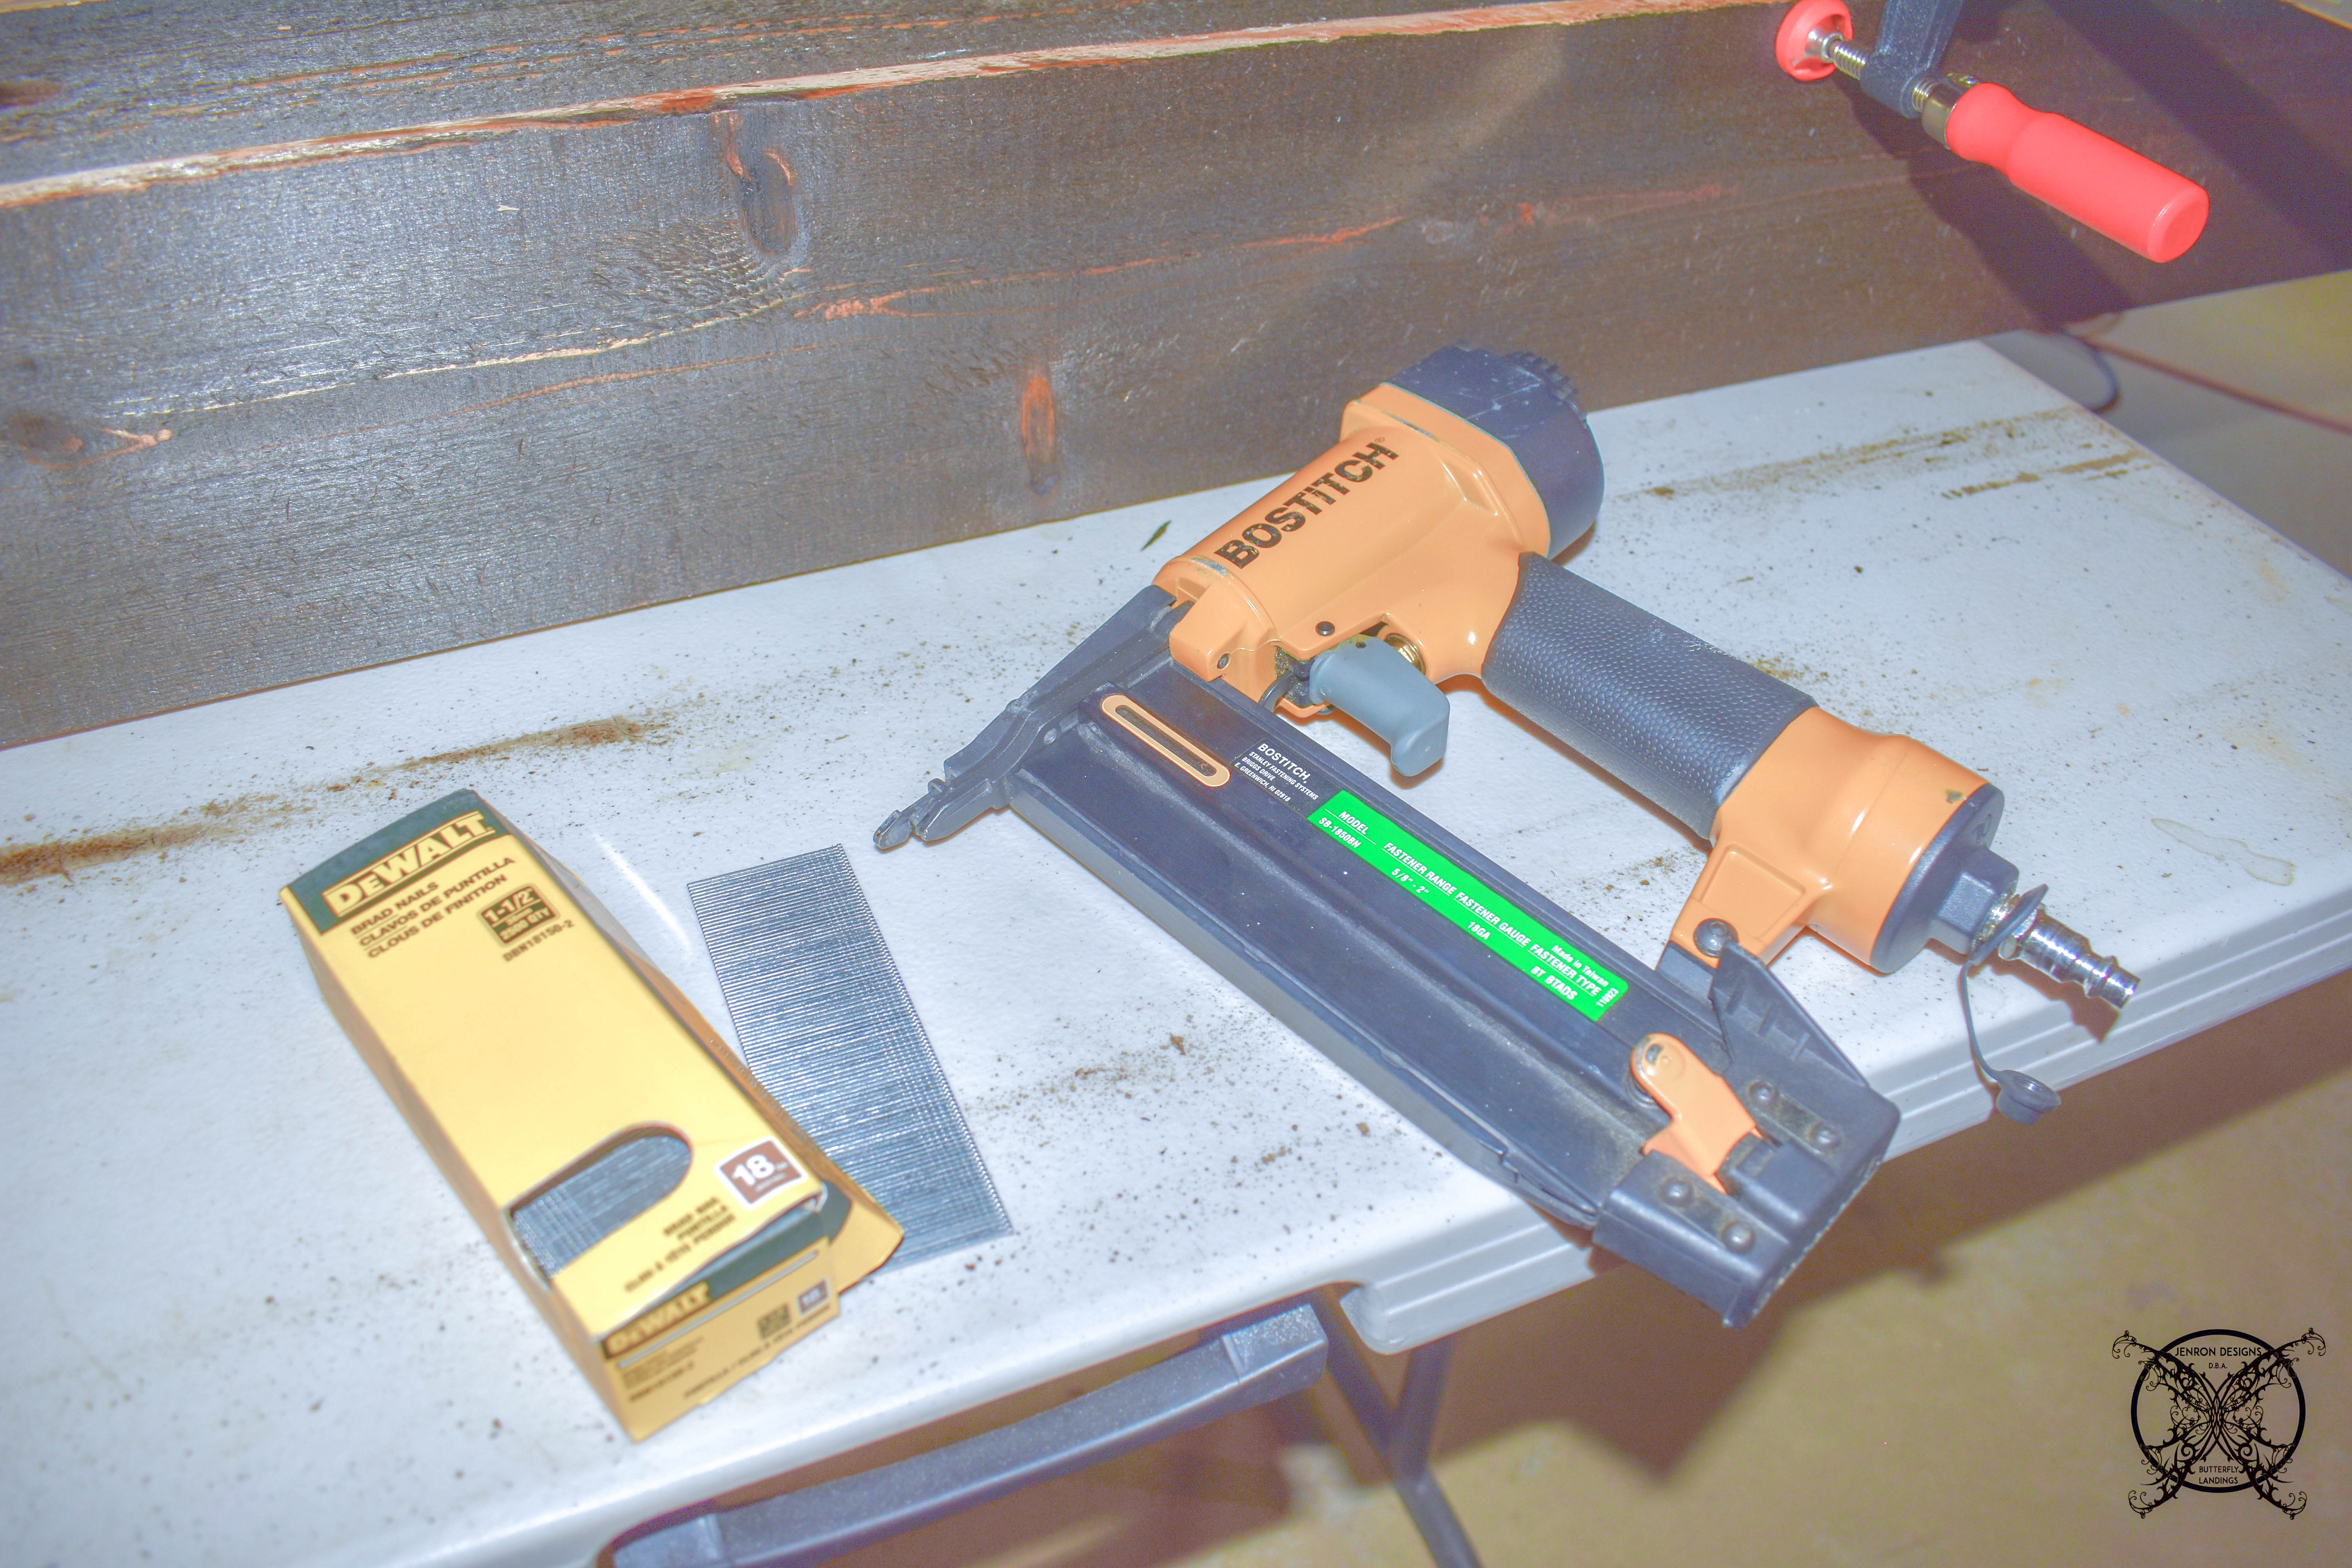 So this next step was completed during the time it took the stain to dry, because there is nothing as boring as watching paint dry, or in this case stain. We are using Minwax Jacobean since it is the stain color for our entire home, meaning doors, handrails, steps.
Designer Tip: Try to stick with existing colors when doing projects to keep a level of continuity in your home. This will make the rooms seem thoughtful and not like an add on. This technique makes the home have a flow to the design verses a chaotic room by room design style.
 We penciled guidelines on to the ceiling. 1 line measured off the wall to make sure the beams would be square in the room, and another line where the ceiling joist are located. You can also use a chalk line or laser line if this is easier. Then we attached 2×6 pine boards to the ceiling with 4″ decking screws. This is the frame work your will attach your cedar boxes too.
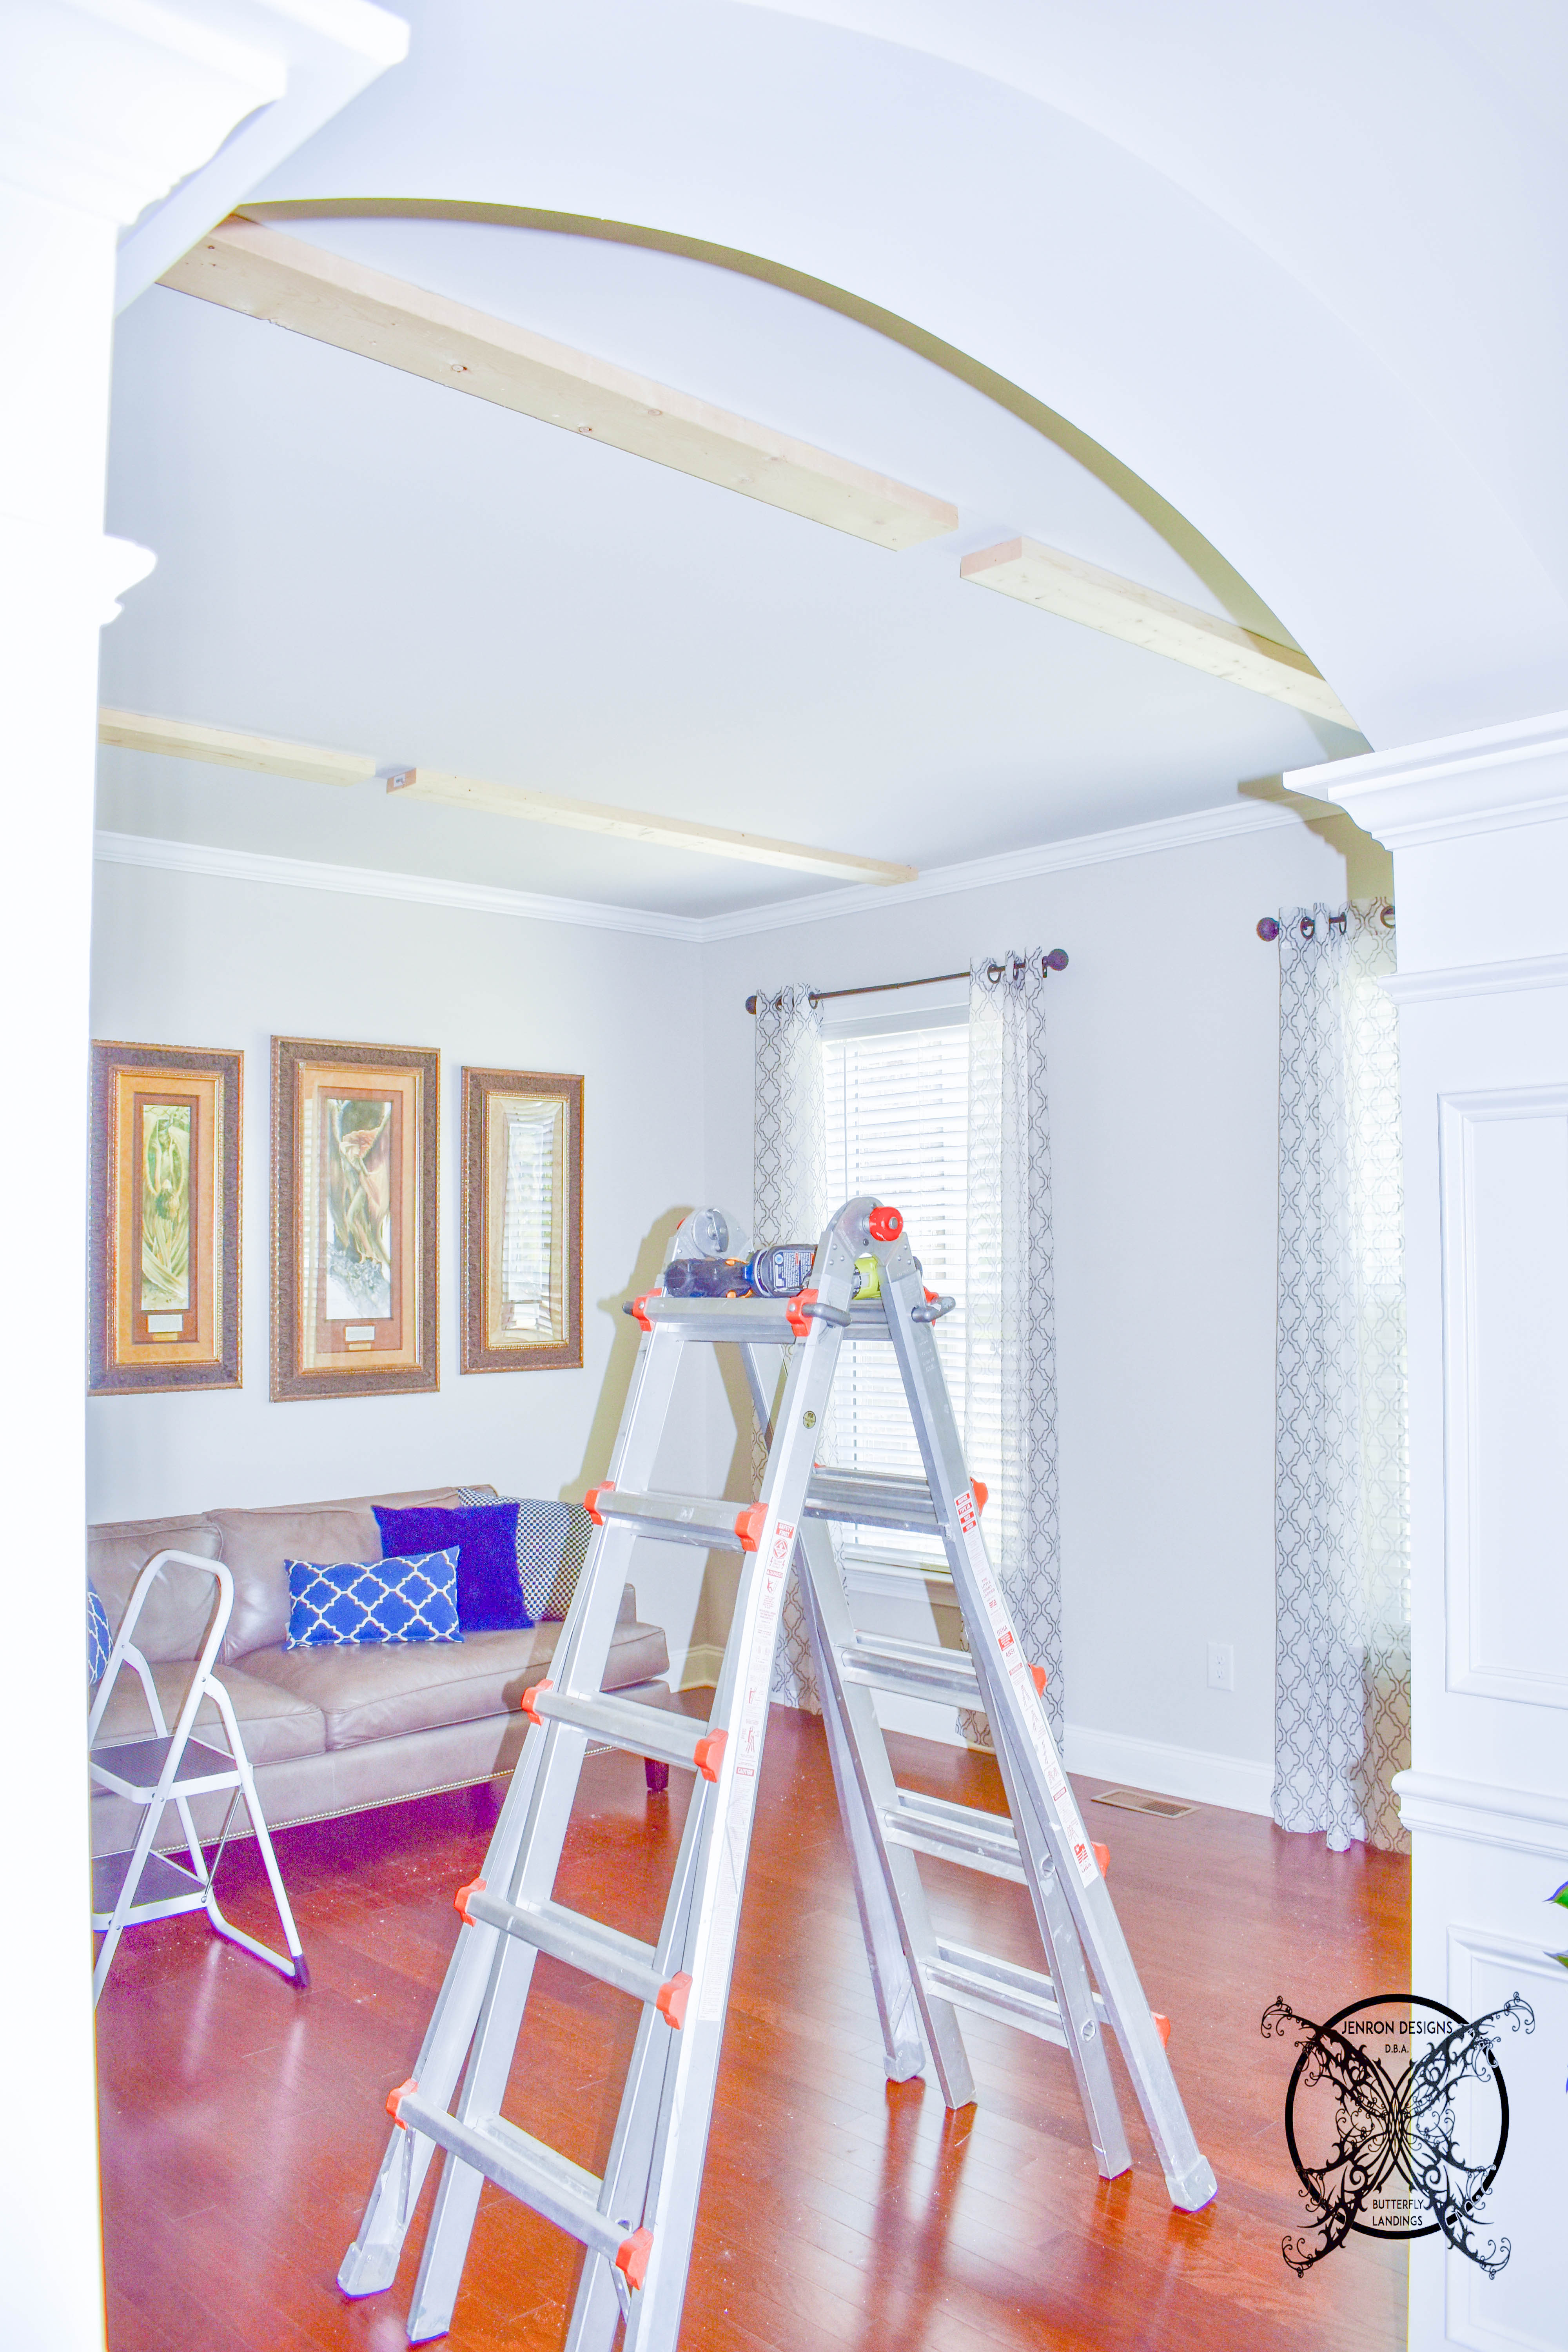 Next we hoisted the faux wrap beams up, placed them on the wooden guide rails and nail them in with a nail gun. Sorry no pictures of this as I too was on a ladder, and assisting in the lift.
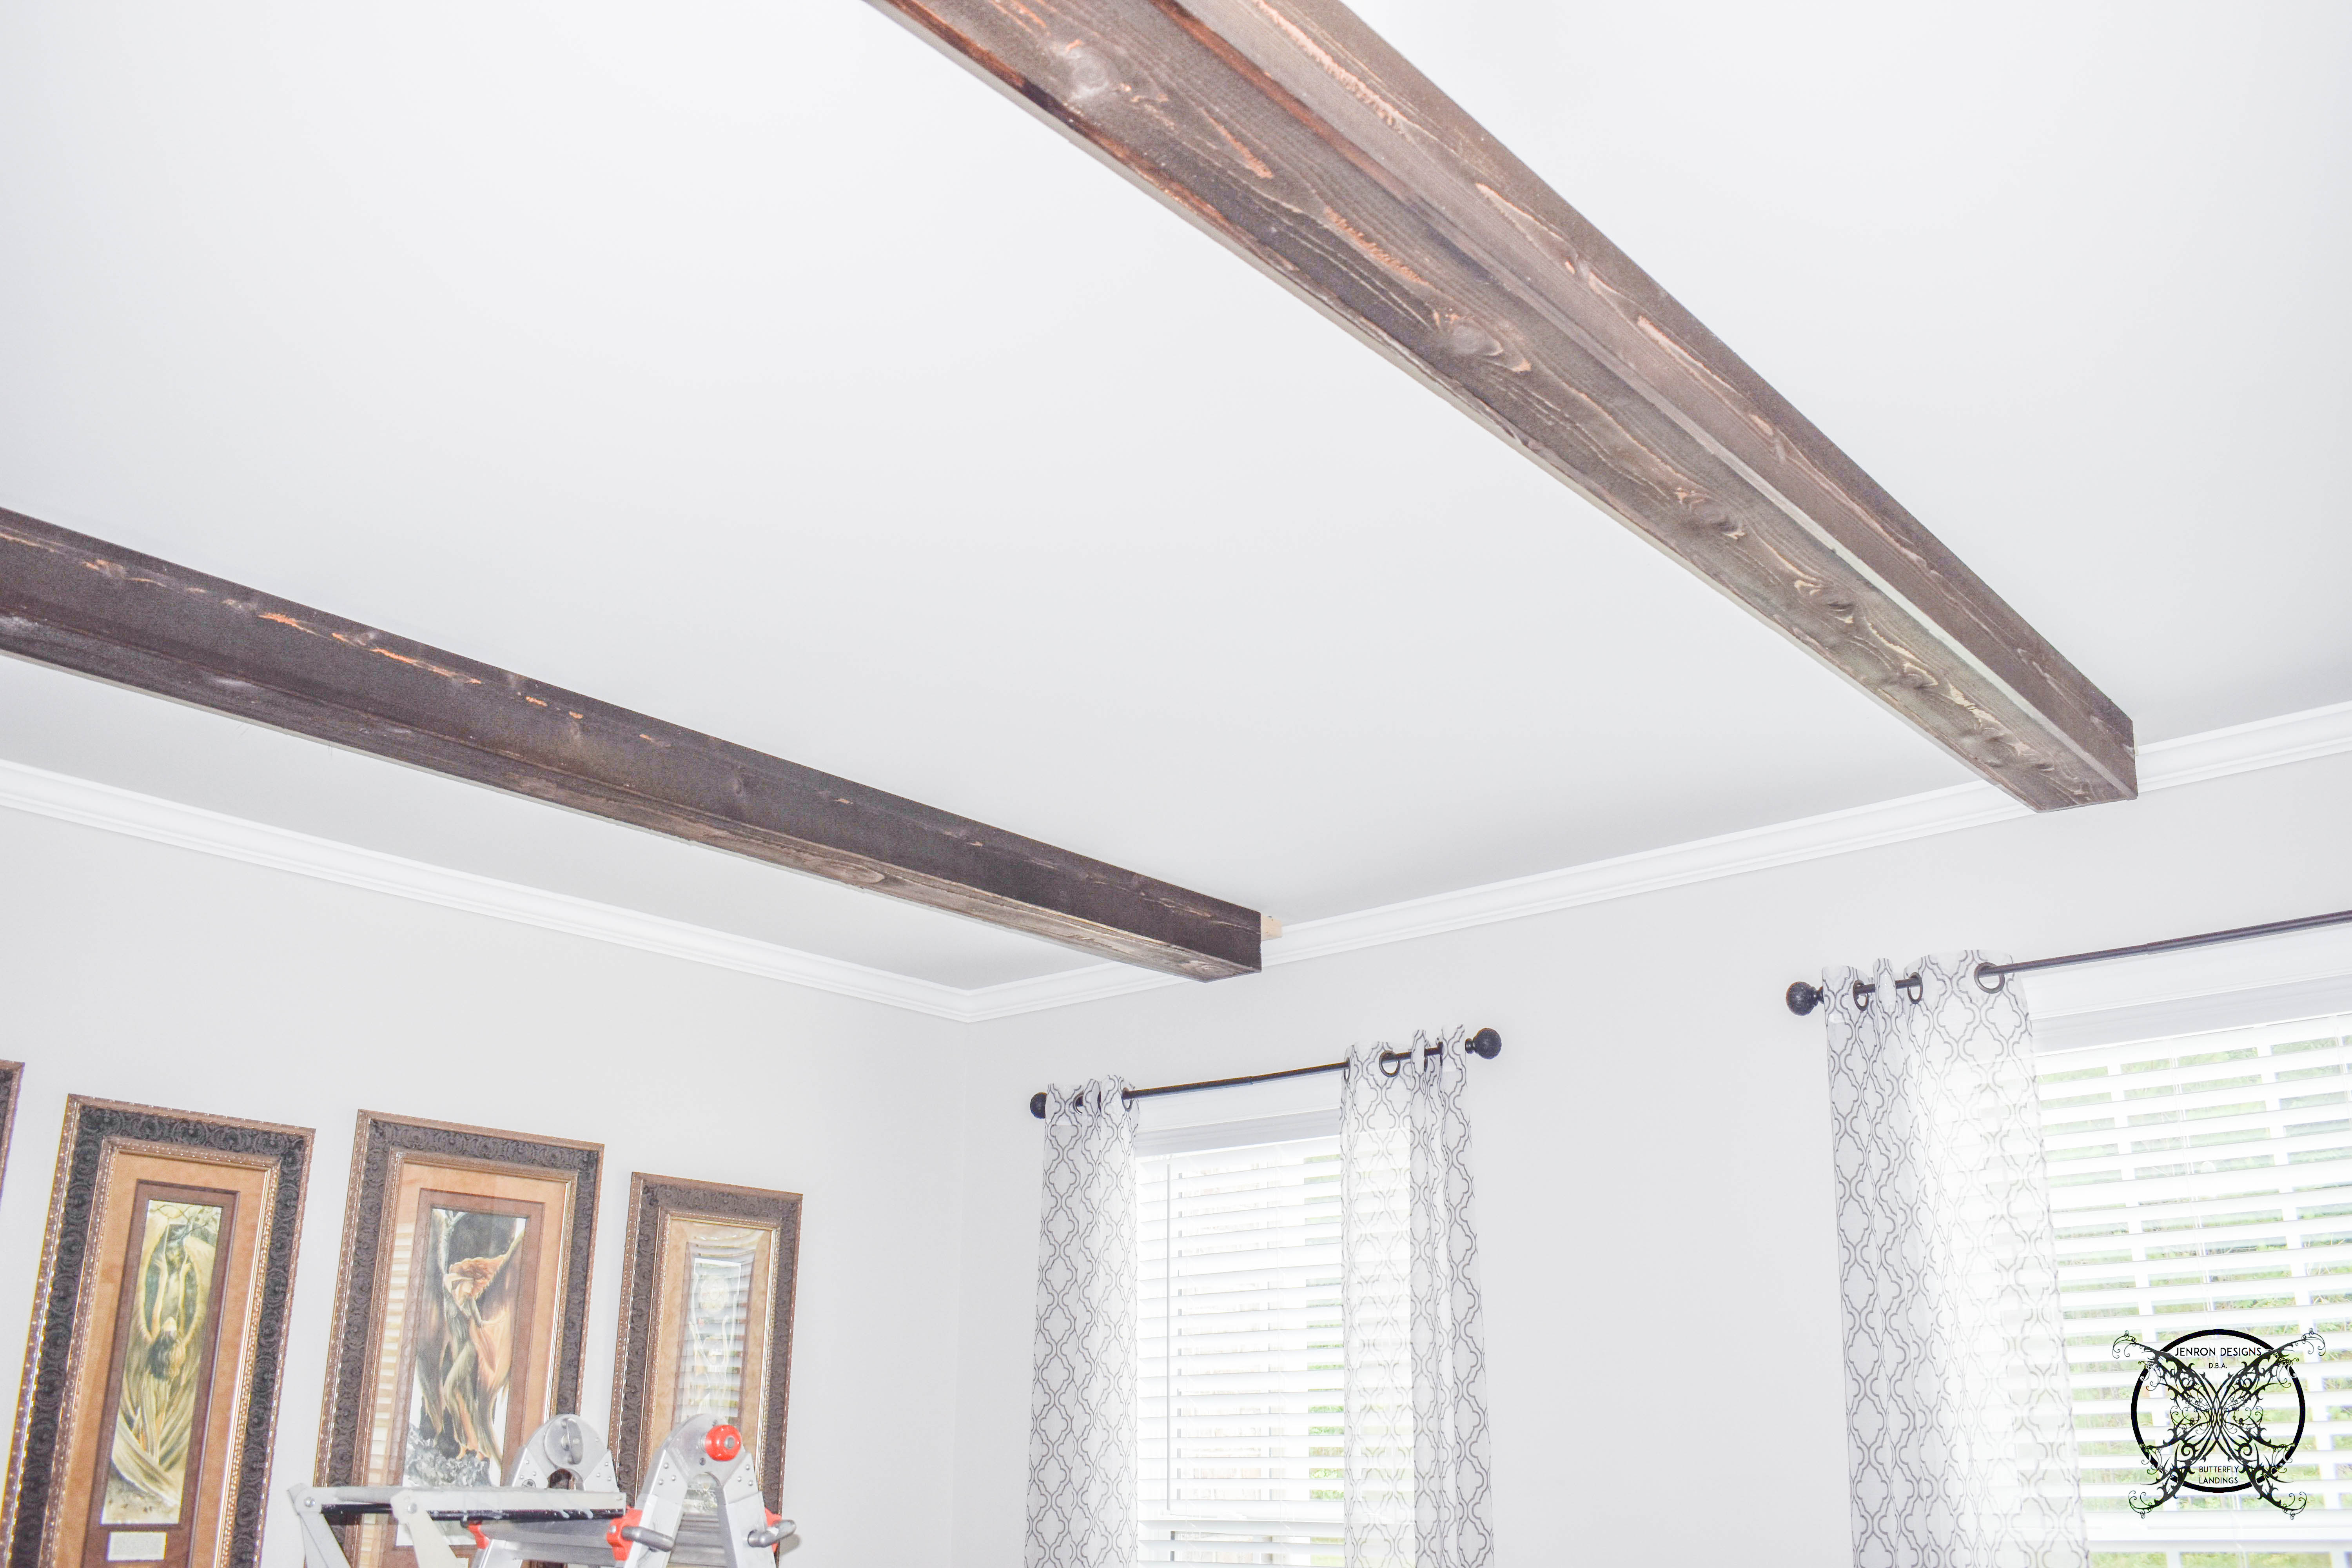 You may be asking why we left space in between the boards, there is really not an answer other than it was easier to transport the two 6′ foot boards than one 12′. Plus the room is 13 1/2′ feet wide, which brings me to the next issue we discovered upon going to purchase supplies, the is called designing-on-the-fly.
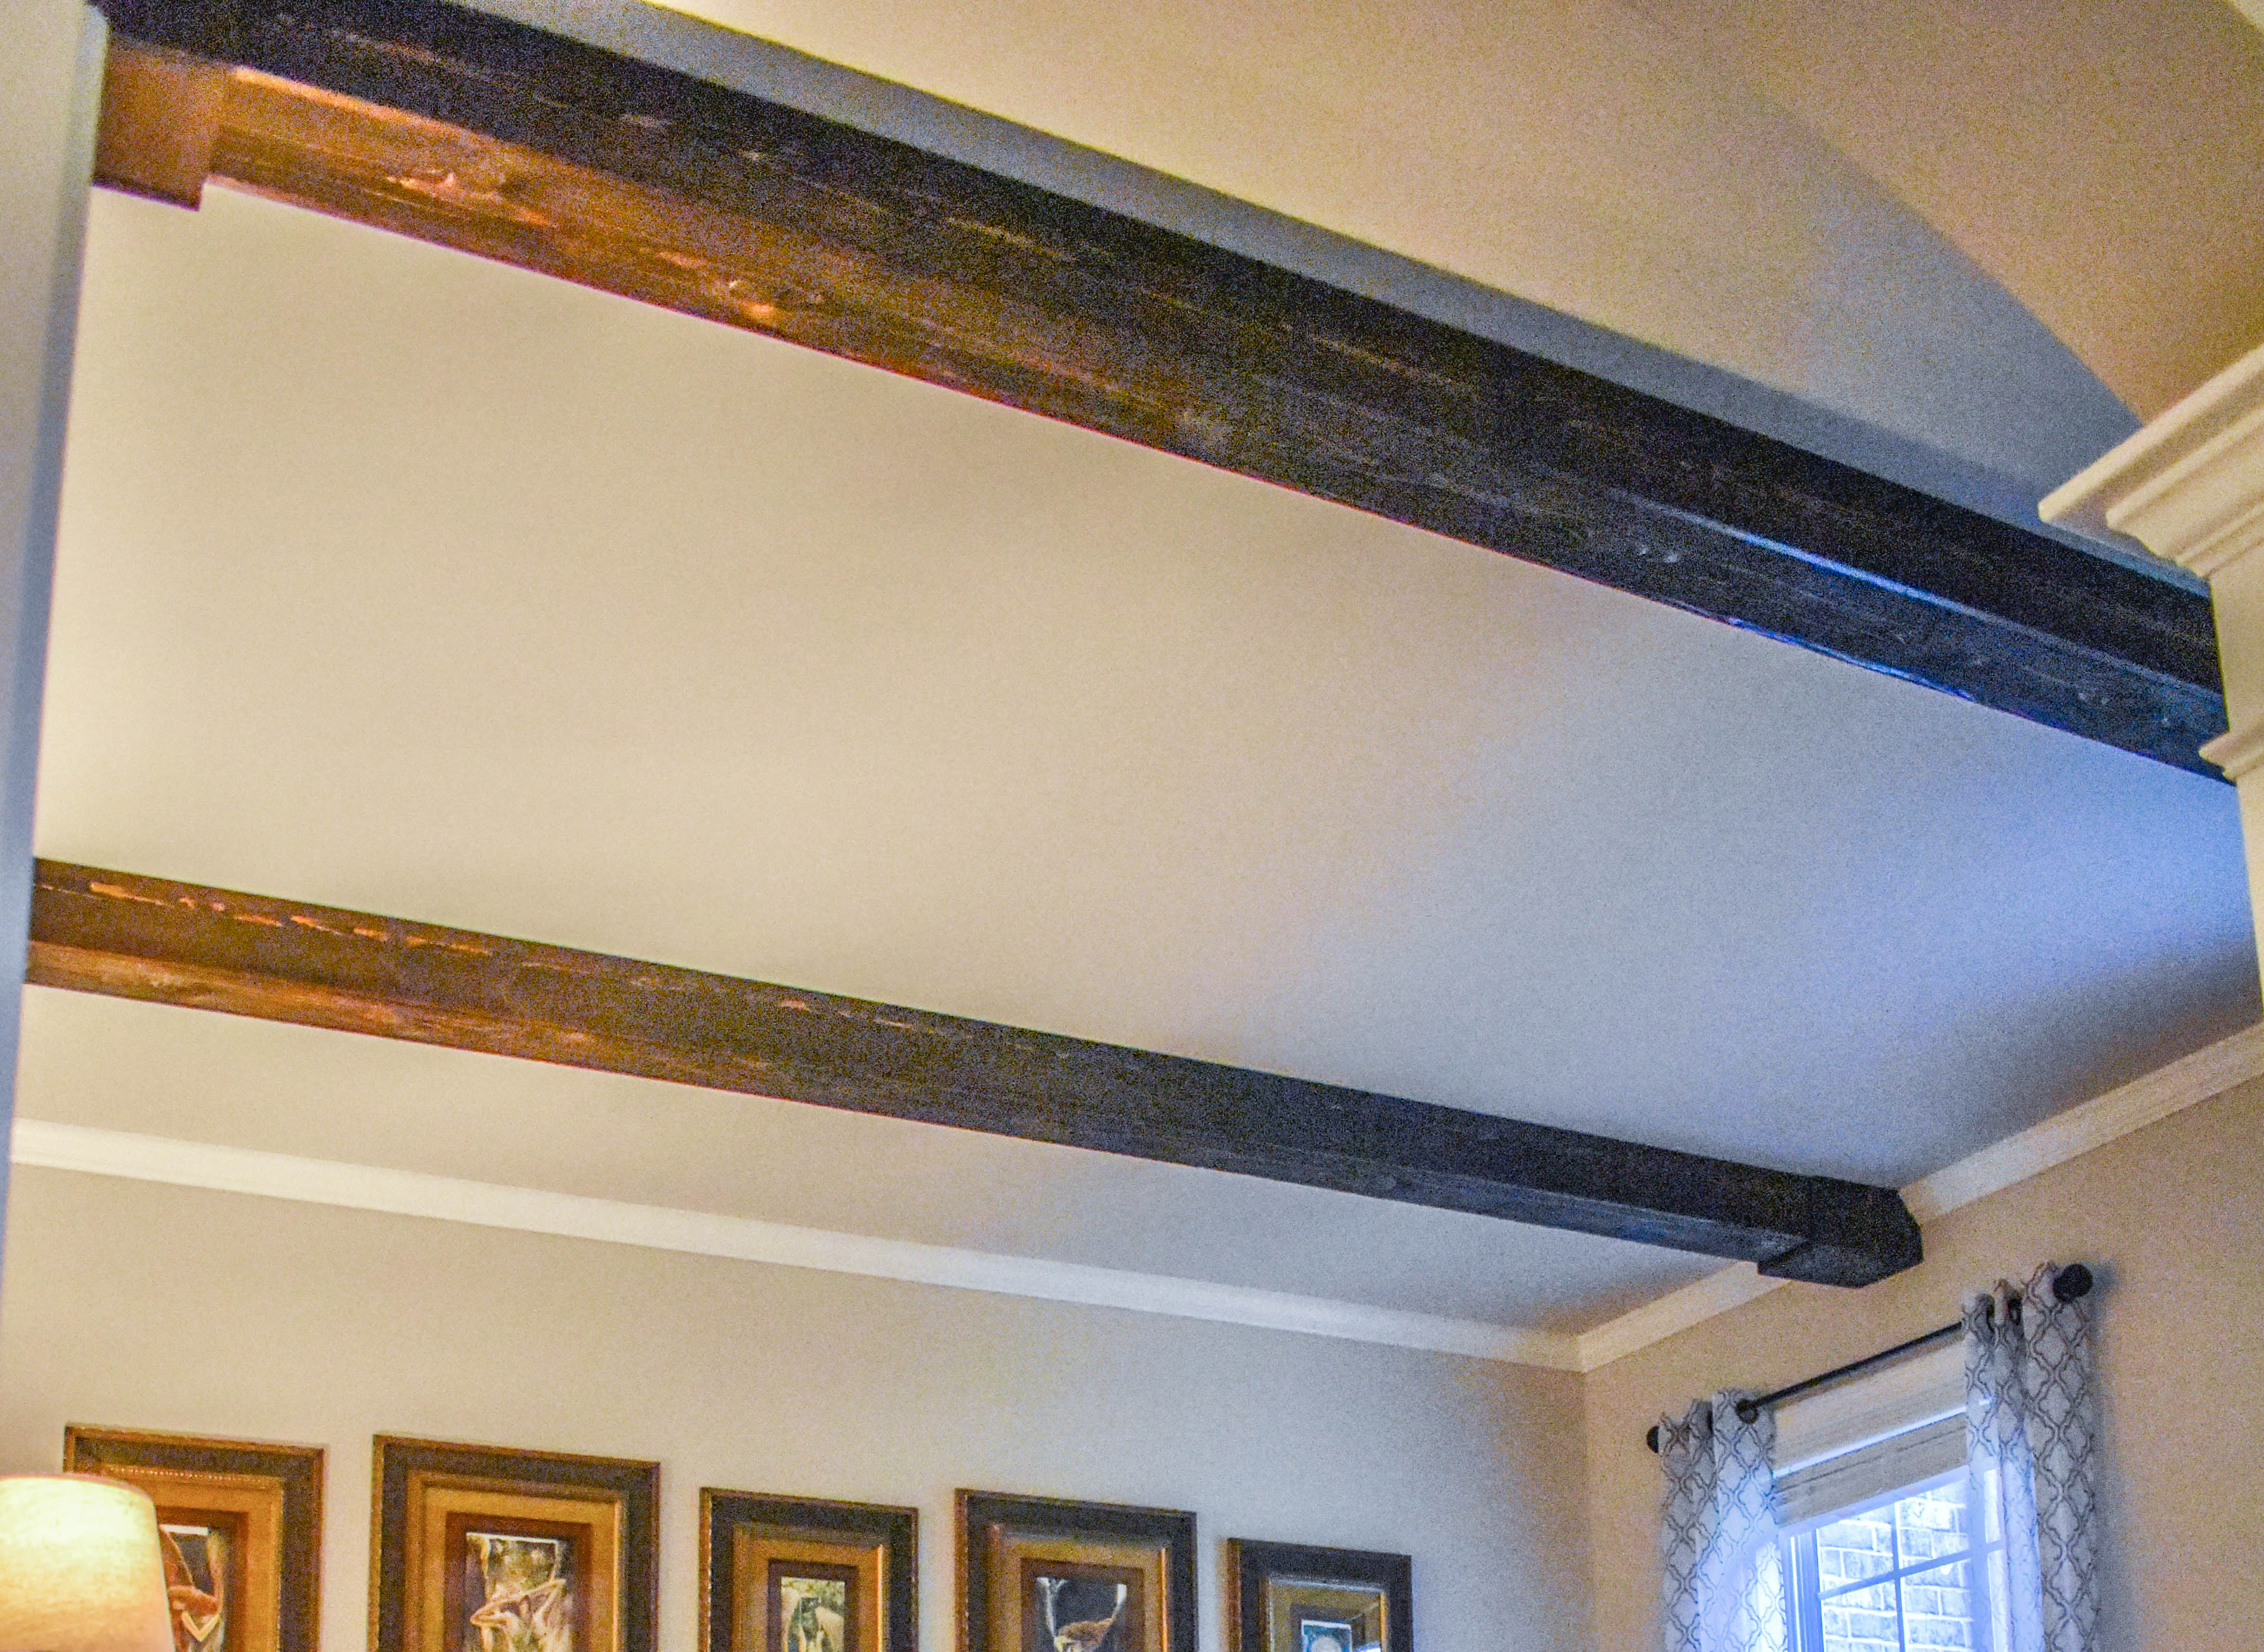 Cedar plank only come in 12′ foot lengths which mean we would have a seam. Well I do not like to see seams anywhere, so we had to come up with a solution. (Side bar Note: I am so anti seams, I requested all my marble countertops be one solid piece with zero seams. Yep I am that person) One thought was to piece the beams together and have metal bands wrap the seam. Which could work but I was not thrilled about the metal bands, I wanted it to look more natural. So we decided to build a 1’foot cedar cap box for either end to wrap the beam and make up the distance.
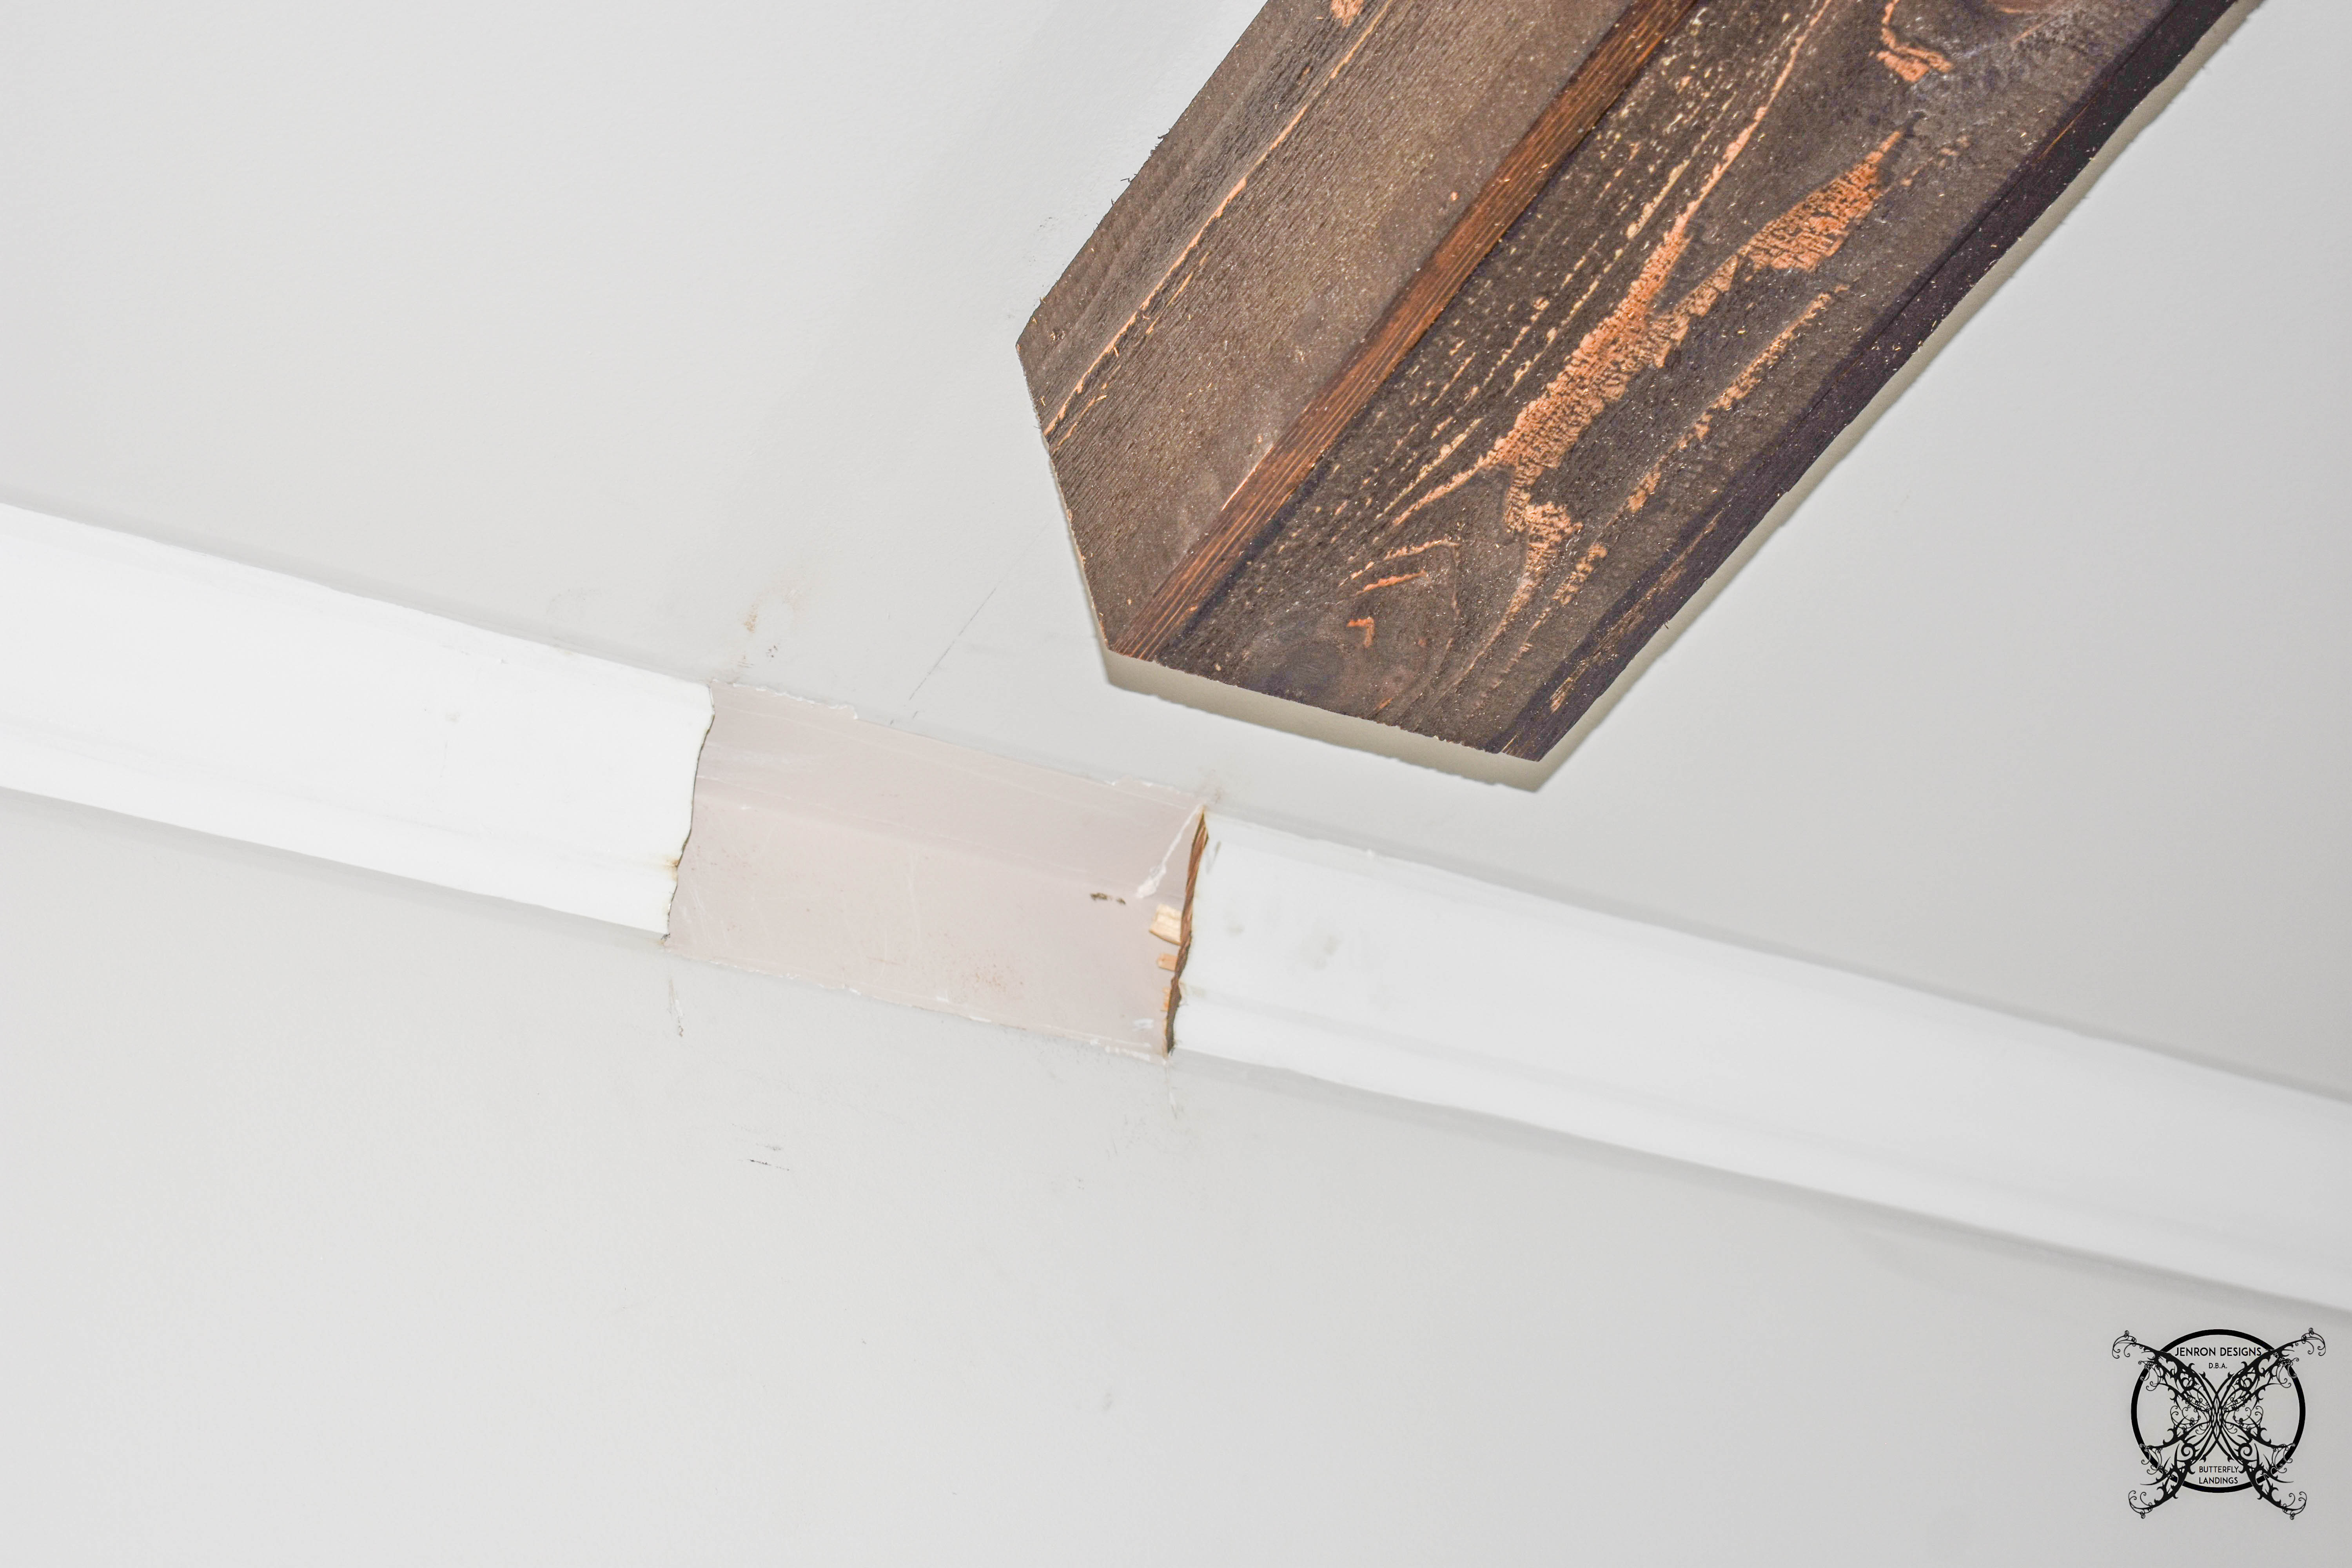 Prior to installing the cap we needed to cut out the crown molding. For this task we used a Dremel Cordless Rotary Tool Kit
, which gave us a precise straight line, which elevated any gaps. Just make sure your measurement is accurate, and based off the final width of your beam and cap.
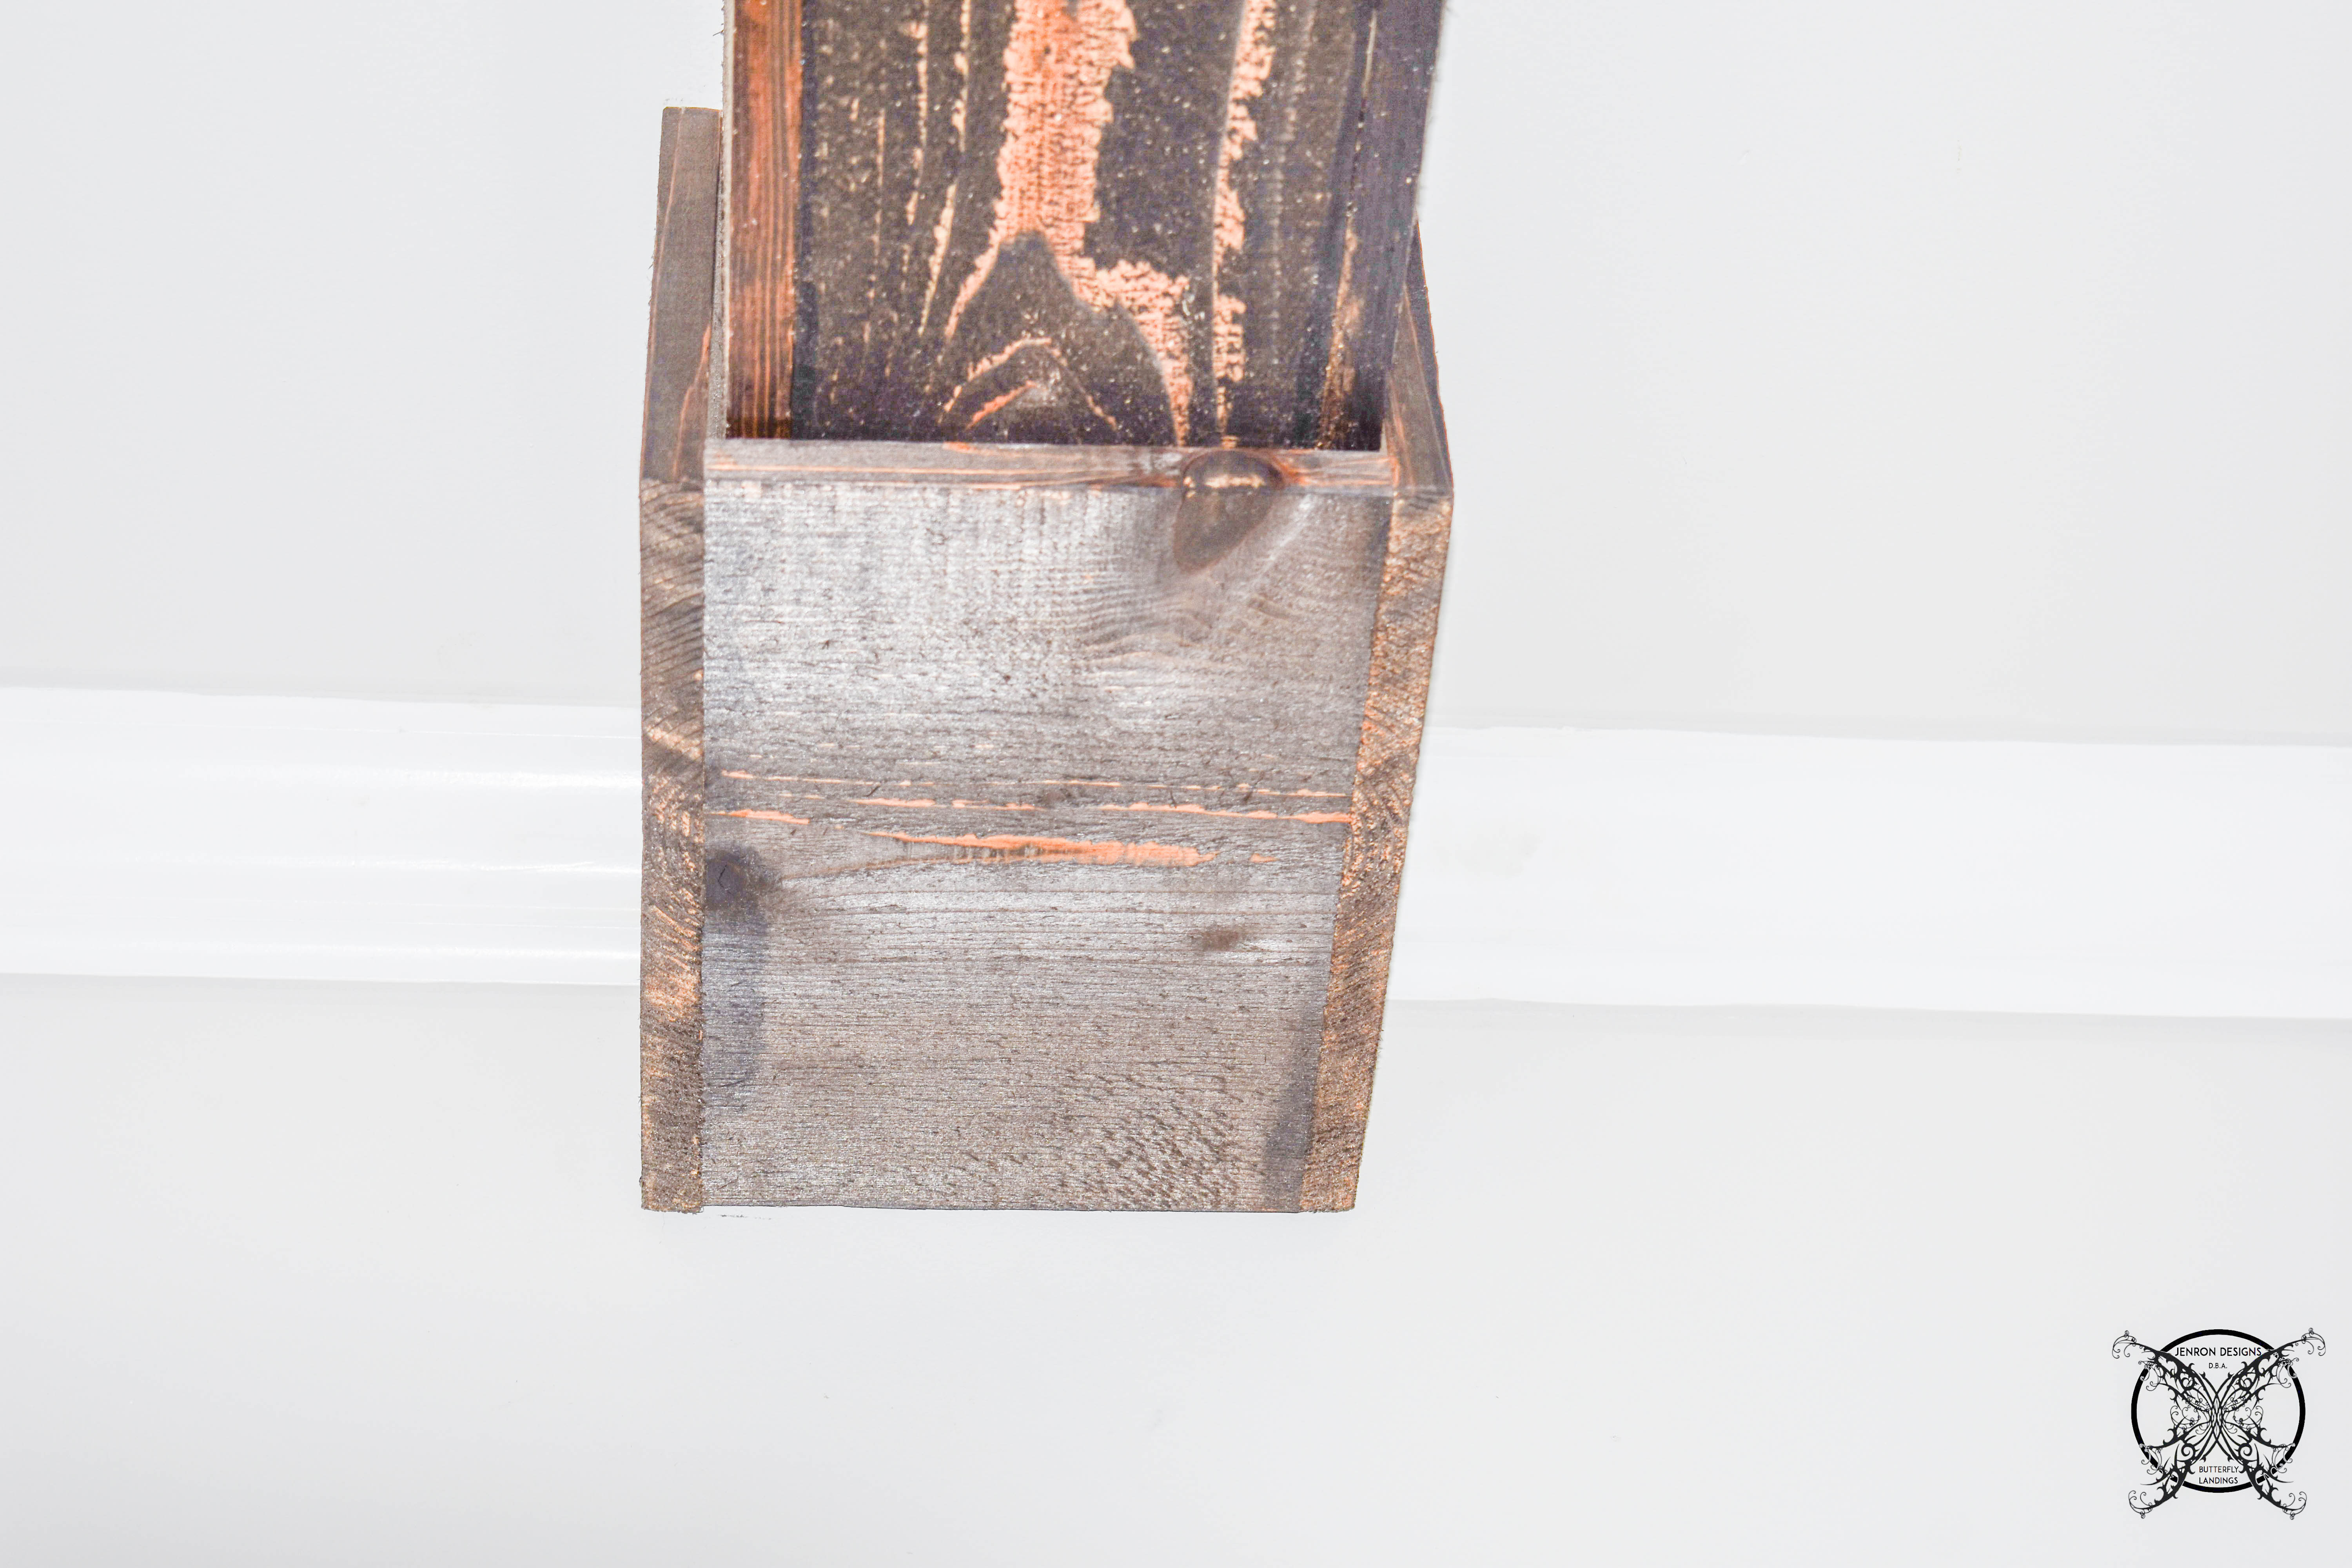 The final step of this project was sliding the cap over the beam into the crown gap and nail into place. So here is a look at the final result of adding our own architectural beams to the living room.
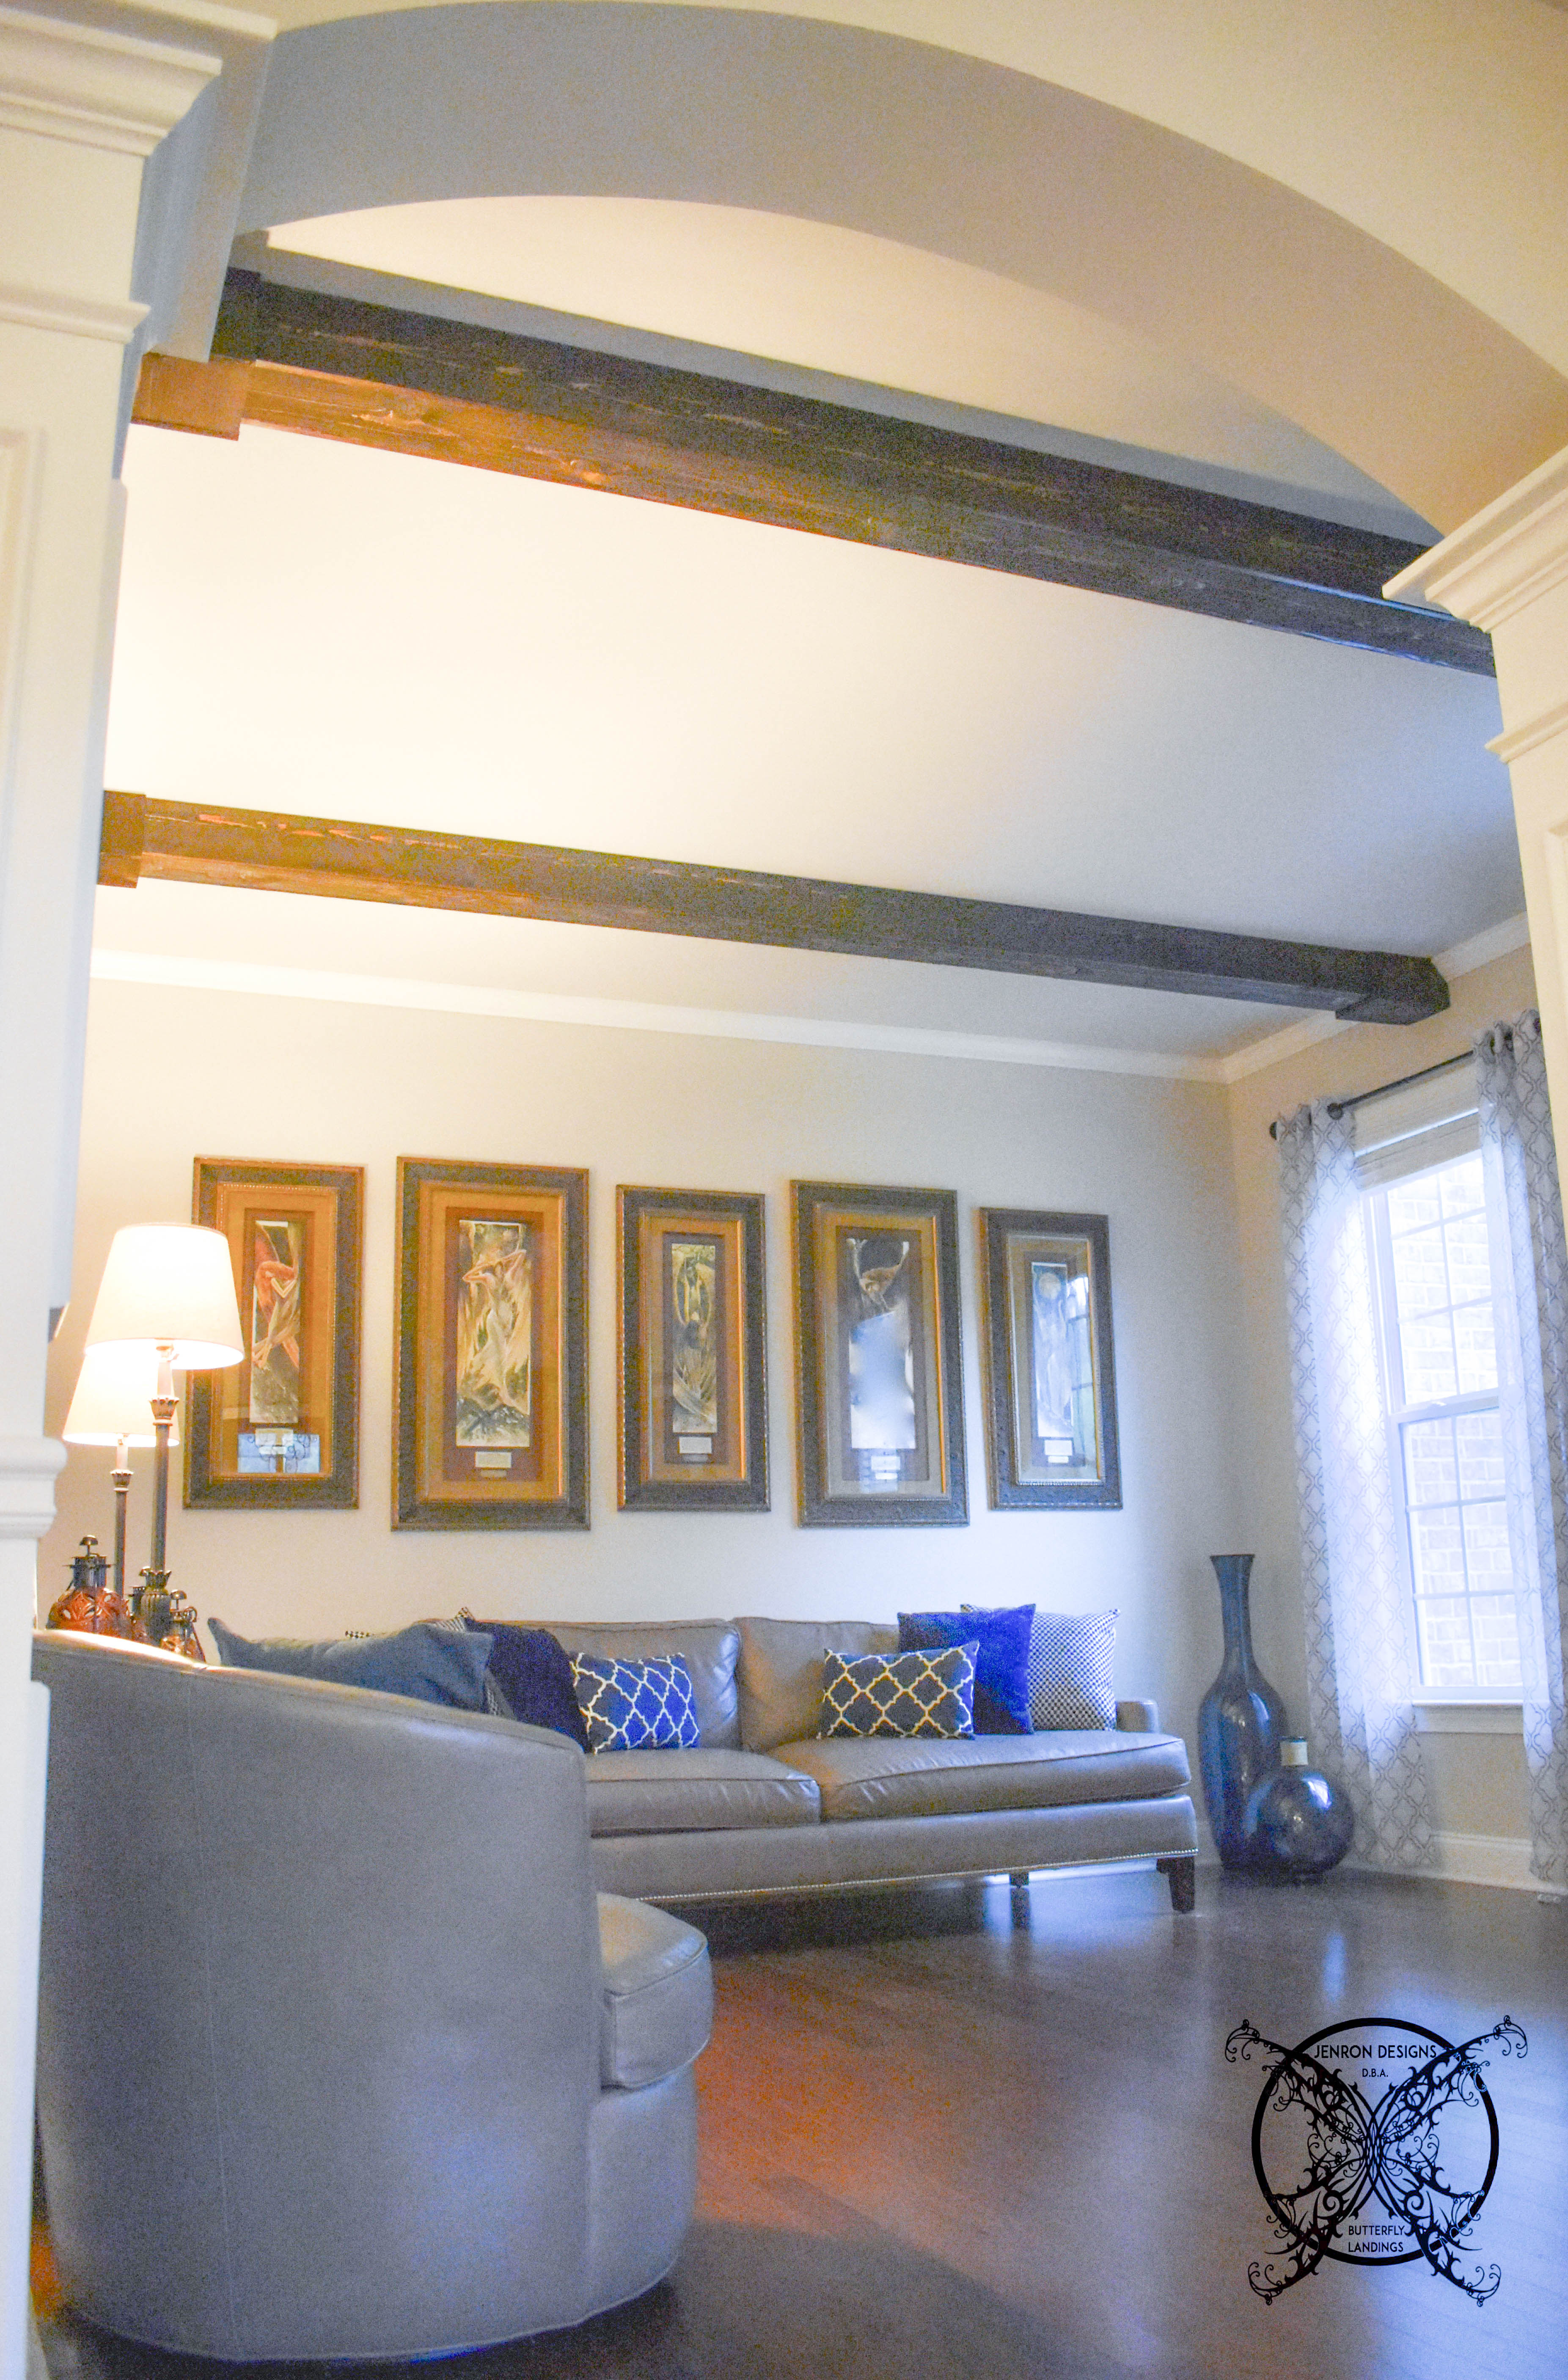 They really make a huge ascetic difference to the entire room, it warms up the space draws the eye to an interesting focal point and truly make the home feel a whole lot more custom.
 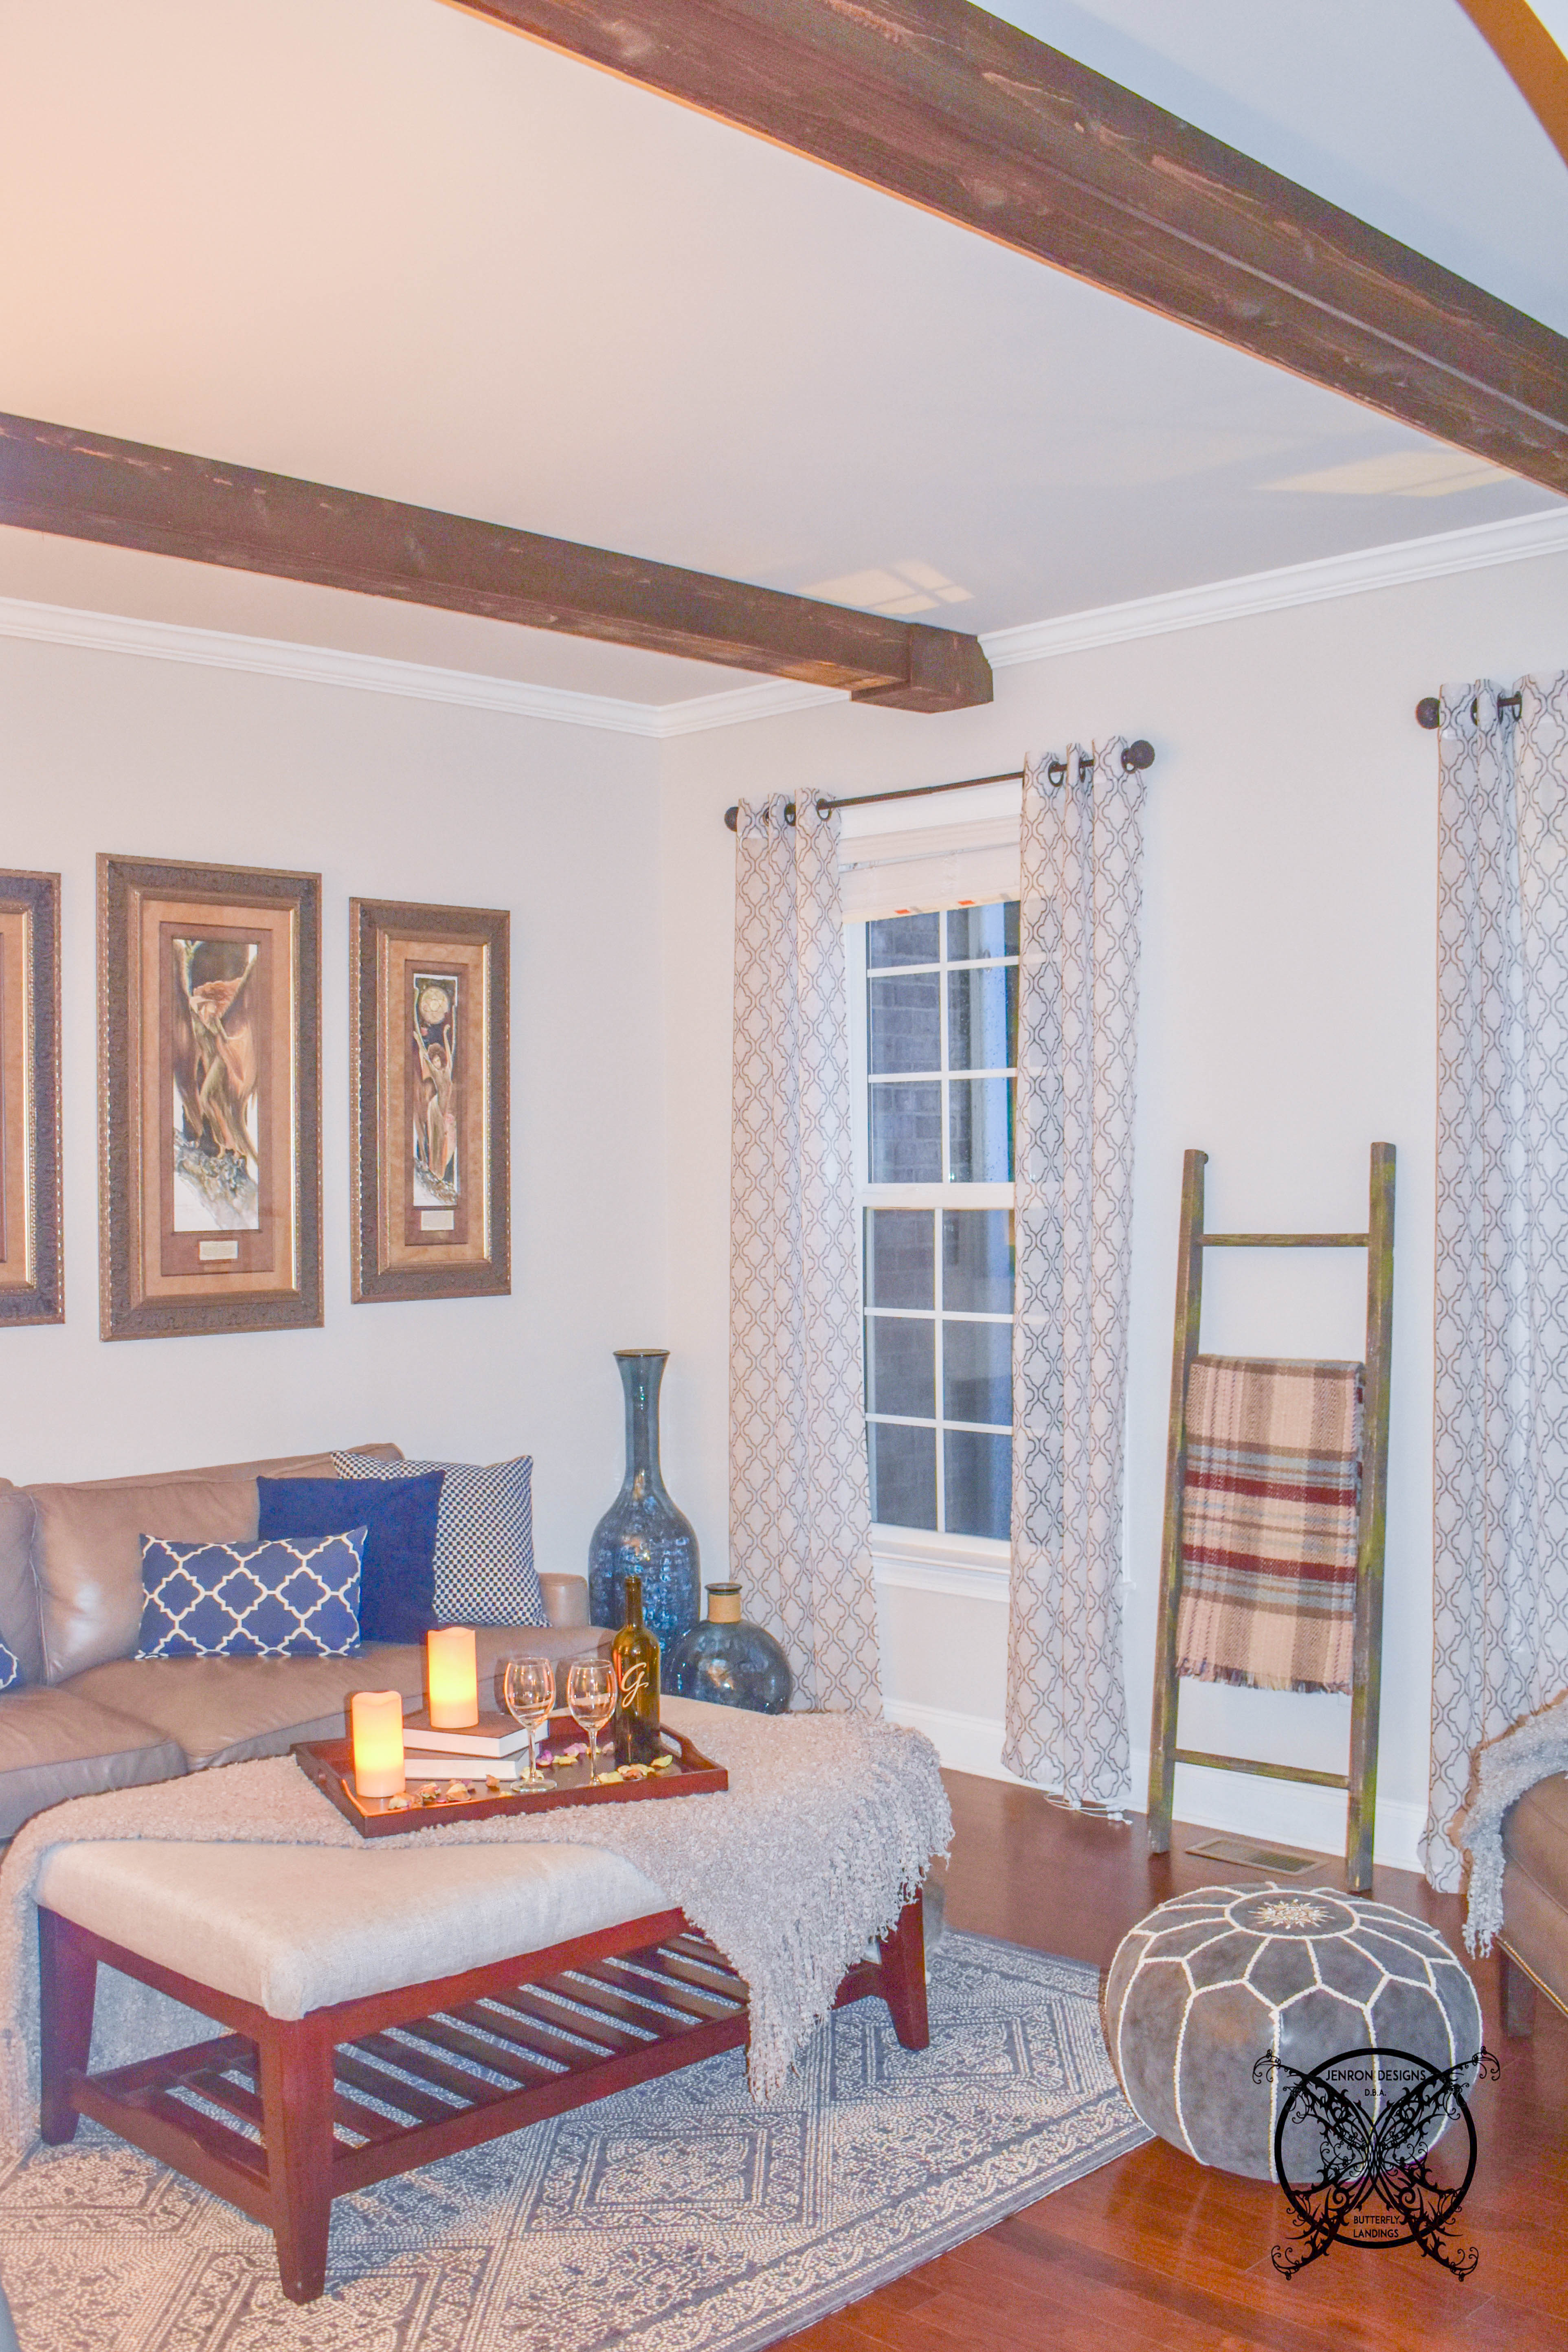 In fact after discussing my husband and I both agree the wooden caps actually make the beams seem less faux and more structural. So that particular project challenge turned into a happy design detail which we will say was all a part of the plan, wink wink.
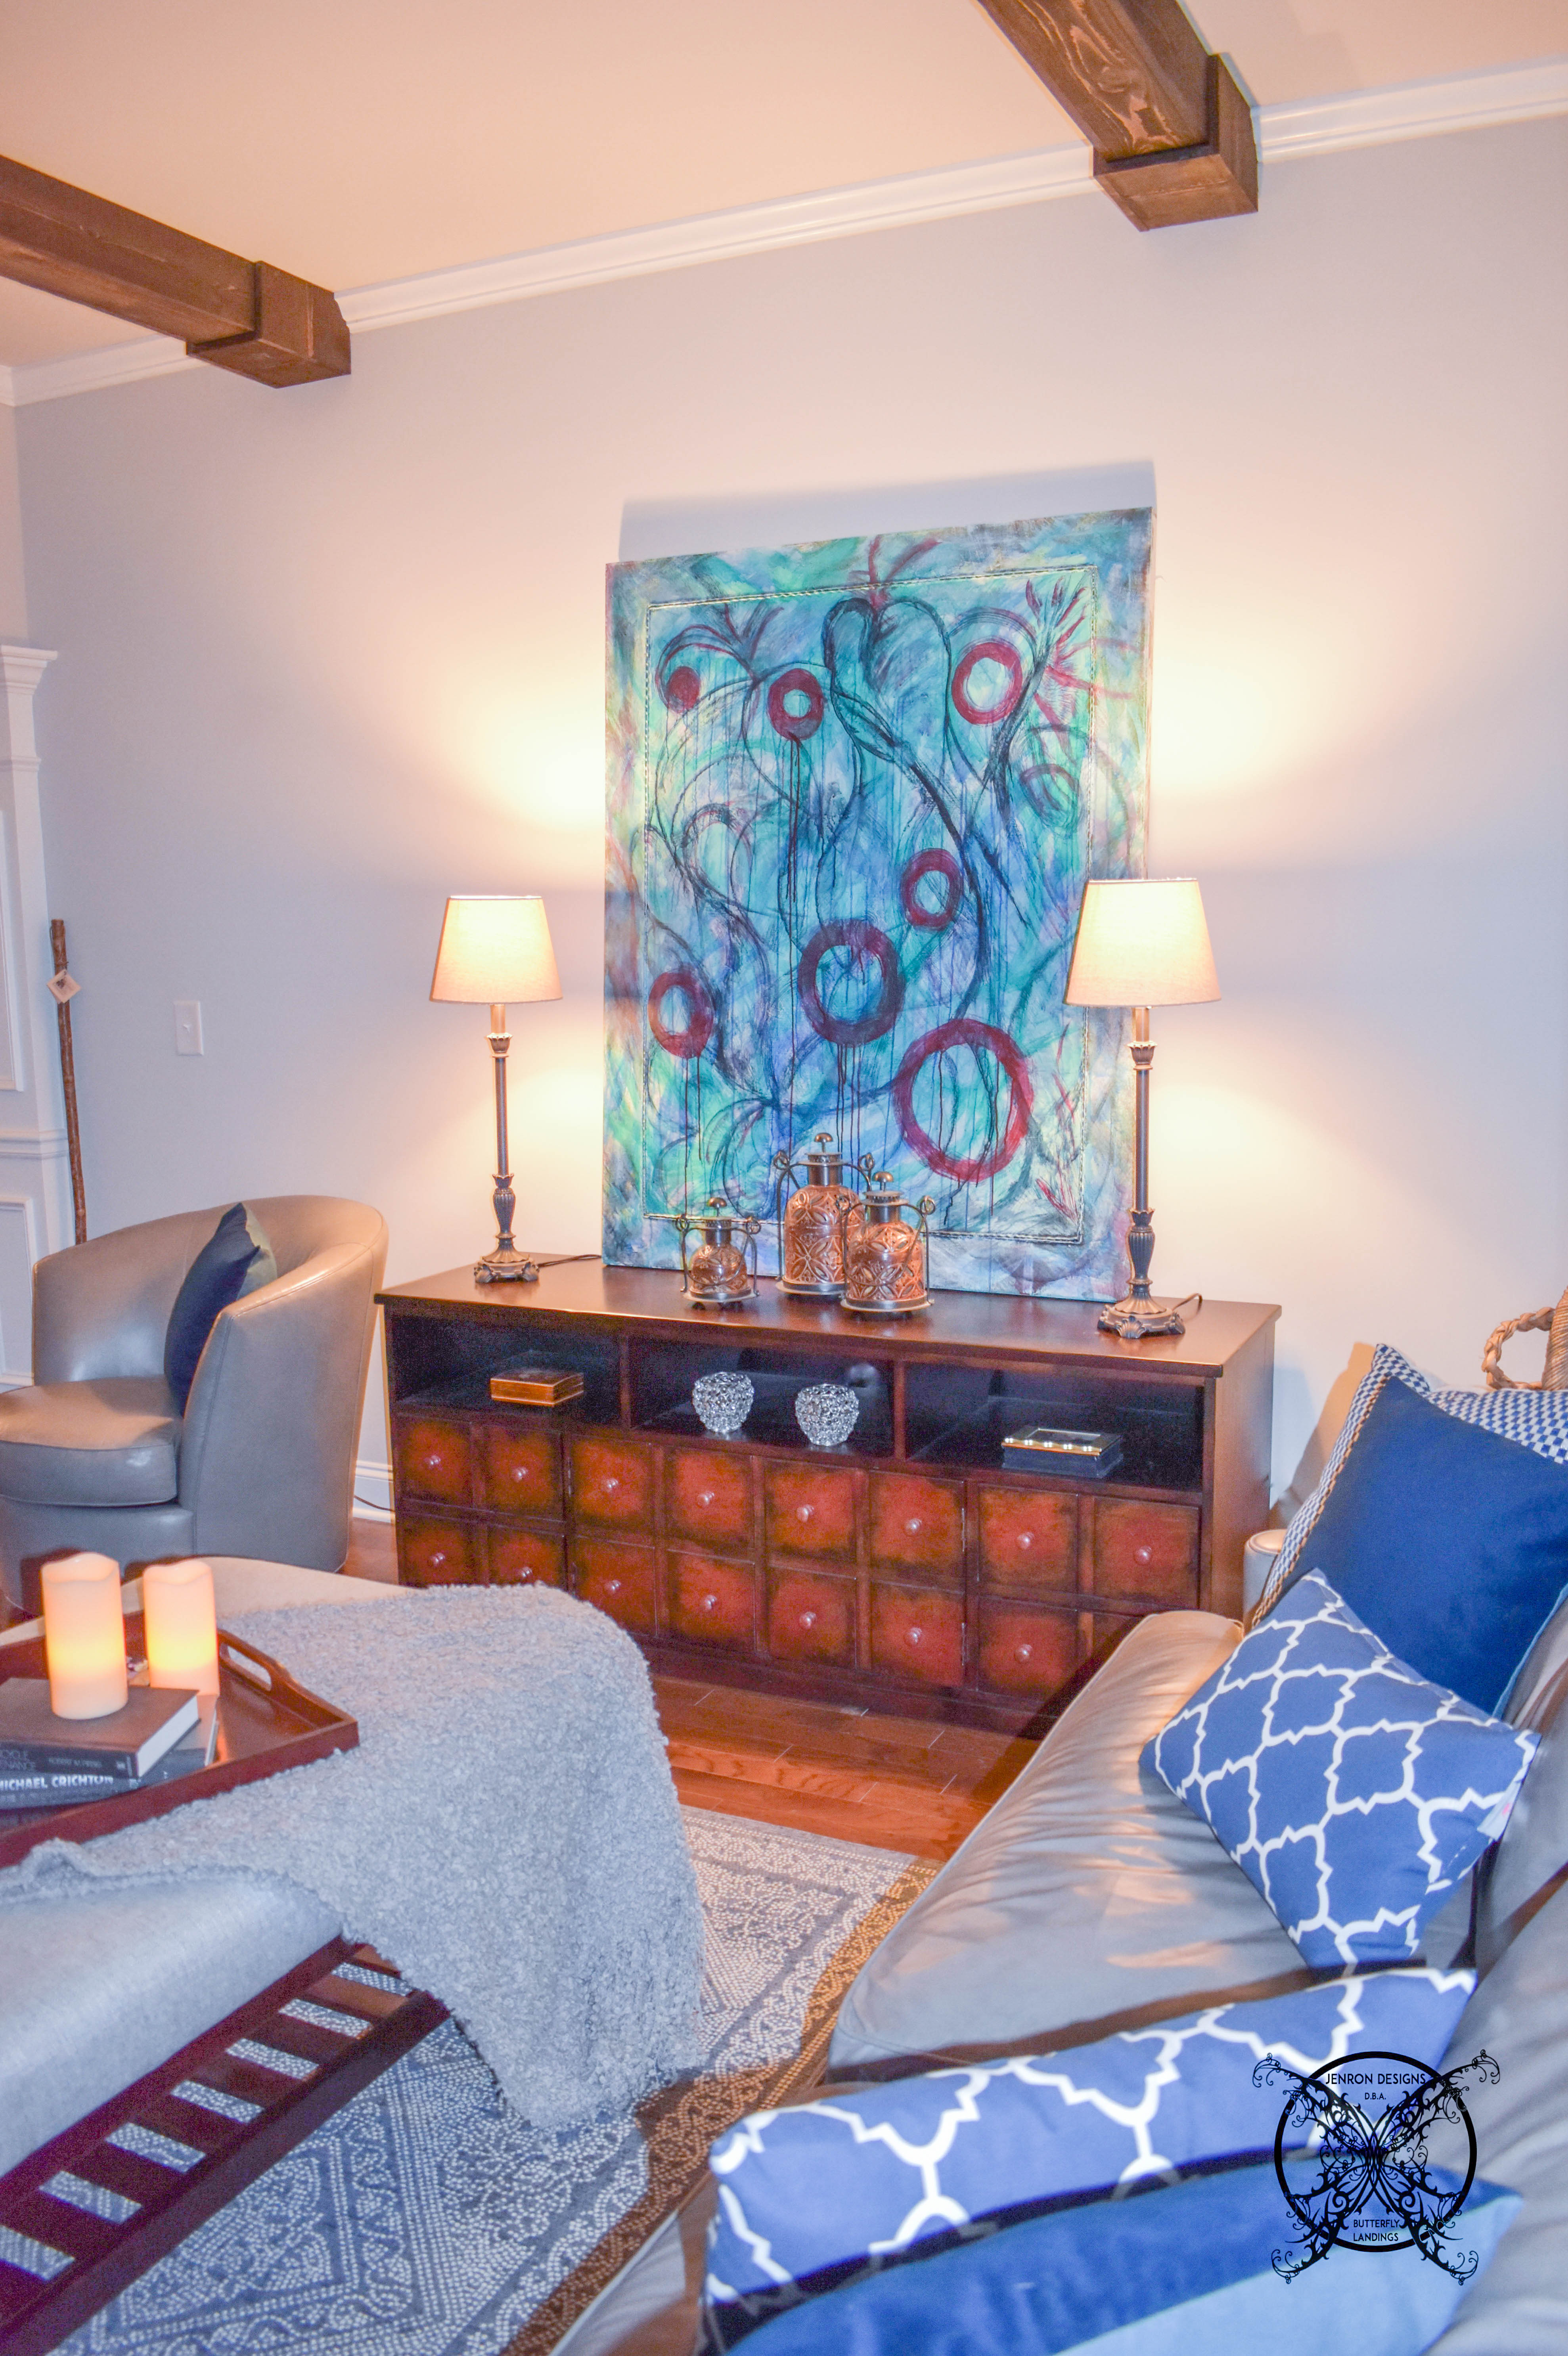
Sign up for our monthly Designer Notes to stay in the know about all of our upcoming projects. [wysija_form id=”1″]
PIN ME for later and be sure to follow us on Pinterest at Jen @ JENRON DESIGNS *This post also contains affiliate links and I will be compensated if you make a purchase after clicking on my links. You can view my full advertising disclosure here.
WALL PAINT- Agreeable Gray Sherwin Williams TRIM PAINT- Pure White Sherwin Williams FLOORS- Mohawk 3″Forrest Lake Oak Color: Oxford SOFA- discontinued Crate and Barrel (Similar) CHAIR- discontinued Crate and Barrel (Similar) SWIVEL CHAIR- Front Gate Shelby Gray ANGEL ART COLLECTION-Patrick Reynolds CONSOLE-Pottery Barn Andover Console VASES-Hayneedle SEAGRASS BASKETS- Charleston Straw Market CURTAINS- J C Penny’s LAMPS- Target LARGE CANVAS ART- JennyGirlGainer Original BLUE VELVET PILLOWS- Pottery Barn CHECKED PILLOWS-HomeGoods TEAL PILLOWS-West Elm– Exact Pattern was Discontinued
Wow! Your beams look amazing, and how easy to do! Great tutorial, they make a world of difference in your room.
Thank you Susanne!! It might be our last big DIY for a while. My husband damaged his shoulder and now will be having surgery to correct it. At least we a headed into the seasonal decor so I can float by for a while.
This looks awesome!! Just what I needed to read, too–we’ve finished out our attic into an office for the hubby and have some structural *ugly* 2x4s we need to cover up! You made this look super easy!!
Stella, I am so glad you enjoyed the post. Yes it really was super easy and the finish project perfect. The pictures just do not do the beams justice, plus you don’t get the rustic smell of cedar from the pictures. Good luck with your project, shoot me a picture the it’s done I would love to see it 🙂
I love your blog and you have a lot of great DIY tutorials, the cedar beams are fantastic. I did see you don’t monetize your blog, you know you can earn additional cash every month, and would do well because your blog content is very high quality. Let me know if you are interested?
Thank you for posting such an easy tutorial. I have wanted ceiling beams for a while but even the faux ones are so expensive. Building the way you did I will be able to put several up at a fraction of the price. Thank you, thank you, thank you!
This is a very good idea. I really make room stand out and look nice. You have a eye for design. Nice job.
Greetings from Germany. Please excuse my English, I am learning. Nice article. I am very interest in these beams and how you created them. I will be reading in English just to learn more. Thank you.
Hello! I simply want to give you a big thumbs up for the excellent info you have got right here on this post, I’ll be returning to your website for more soon for more DIY projects.
I really love these beams. They look so real not faux at all. Thank you for posting how to construct and make them, it looks pretty easy, and I think I will try it.
Great project, and even better instructions. I may have to try it out. How hard could it be right?
These faux cedar beams are amazing I can not believe how easy they are to make. You creative mind has taken something that looks like a million bucks and created it for pennies on the dollar. I can’t wait to try it in my home.
Wow these are pretty special, I can not believe you built them. They give the room a very custom feel. Nice job can’t wait to see more.
I literally can not leave your site it one interesting article after another. I really like this home renovation, great job.
I see your website has lots of interesting content. I really do love this ceiling beam project, it looks so simple and you are right builder charge an arm and a leg for them! Which is so silly now that your showed how easy it is.
Love the beams! I feel really happy to have discovered your web page and look forward to some more cool times reading here. Thanks once again for all the details.
I enjoyed reading this post and I hope that it will make folks think about how much money they can save themselves with this Do It Yourself project. Additionally, thanks for permitting me to comment!
I wanted to send you this bit of love, in order to thank you very for your awesome DIY you have shared at this time. It is really giving of you to convey publicly all this information to a lot of folks. You could have easily distributed an ebook to make some profit on this project. I believe there are a lot more decorative opportunities in the future for all the folks who read through your website.
I wanted to thank you very much for all you’re accomplishing training you are providing me with. I feel like I have my very own version of Joanna Gaines walking me though a project. You have a great blog and I will share it with all my friends.
I am very impressed, I have to say. So excited to encounter a weblog that is actually educative and entertaining. The step by step DIY is so helpful. Your blog concept is excellent! I’m very happy that I stumbled upon this in my search for ceiling beam.
Sending you many thanks for presenting us with these great, do it yourself, ideas. As well as your unique thoughts and commentary on this project. You really are a hidden gem of talent. Just wait until more people find your page, the site might just explode ,and I can say I saw you first.
Wow this is a great idea, I always thought those beams were solid wood. Then I showed this to my husband and he said most of the beams these days are faux beams like what you just built. Then he snatched my iPad away to take a closer look. GUESS WHO’S GONNA GET SOME BEAMS???????? THANK YOU 😀
Thank you for providing individuals with such exceptional possibilities, when they read your blog posts. It really is jam-packed with a ton of great ideas. Of course, I’m not installing cedar beams anytime soon I am 58 years old lol. But this post is undeniably impressive.
After I originally commented on another post, I saw this post. I had to check it out since cedar beams are all the rage right now. Must say, this is a really great diy, and the perfect tutorial by your guys. You could have easily made a e-book and charged for this kind of information, but your chose to keep it free like all you ideas. This is what separates you from the pack.
Hello! I simply would like to give a huge thumbs up for the good data you may have here on this post. I will be coming again to your weblog for more soon.
Such an attention-grabbing project on how to make your own beams. Let me just day that they turned out beautiful and final price…whoa that amazing and very important, good job. I believe that you should write more on this matter, not enough designer to speak on such topics as budget and saving money. You are on to something I think.
You must participate in a contest for all top-of-the-line bloggers here on the web. It is called the ORC, I’ll suggest this site!
Wow and I was impressed with the ship lap, but this project really takes the cake. Thanks for that info.
I needed to create a comment in order to tell you many thanks yet, for the extraordinary secrets you have shared in the above beam project. Thanks
I have been looking for a good tutorial on how to make these. I really want some in my bedroom badly. Thank you for the simple post utilizing these kinds of DIY that most people are really eager to discover.
Faux as in not real? I am confused…..they look real to me. I guess you mean not solid? That hardly counts as faux, pardon my fauxpaux I just think that they are gorge and who cares if the real or faux.
Wow those look great so I want to voice my appreciation to you for your amazing project and the ability to make your own cedar beams. Your important tips and hints means a great deal to me Best wishes!!
Ooooo I have alway wanted beams but I did not think I could just add them in, you have opened a world of possibility to me, thank you.
I just love all your projects. This particular one turned out perfectly and adds so much interest to your living room.
You made some decent faux beam there. I was not not aware they could be made, I thought they had to be the solid heavy ones that would not work in our home. Thanks for opening up our eye to obtainable possibilities.
I appreciate you for giving the insightful, and quite revealing tips on your cedar beams. I must admit I did not know that they were faux until I read the post.
No quesiton this is the place to get all the best info, thanks y’all.
Wow these are faux? They do not look like it all, now I am questioning all the beams I have been seen gin the new homes being built. I thought they were really sold beams but now my husband is telling that they are all made like this, and I am shocked. So I told him WE can totally do this project. He is not thrilled.
I am in love with these beams and they do not look faux at all. I was so surprised when I saw how they were installed. I have been wanting to add some to our home but figured it was a lot of ceiling rework, apparently not!
This is the perfect blog for anyone who desires to do a DIY for cedar beams. Great job and really nice stuff!
It has been a while since I have had time to get out here and see what you have been up too. I love this post a lot. I have been wanted to add beams up in our home but had no idea how to do it. This looks super simple and I think I can talk the hubby into this project now. Thanks so much you made my day.
I want these beams in my house so badly. I keep seeing them everywhere, yes everywhere but MY great room. You made this process look very easy so now I will approach my husband about the possibility of making some. hehehe
Your home is so beautiful and I am totally in love with these beams. The fact that you built them out of cedar and attached them to your ceiling is blowing my mind right now. I really want to add some to my house, and I think after reading this it is more obtainable than I thought.
This is quite an undertaking, especially for a home design process. I do like that you have shown how to make a faux version of the beams and how to affix them to the ceiling. The final outcome is brilliant and beautiful, nice post.
Thanks for all of the hard work on this website.I love this project and your DIY on the faux Cedar Beams. This post will sure have to go viral I have not seem to many people showing exactly how to do this. I feel that my bedroom will have a few beams in it’s future this year, thanks!
OMG I alway thought these were solid beams when I see them, now I am finding out that people make them like a shell and mount them to the ceiling. Wholly cow that is a game changer.
Thank you for each of your efforts on this website. This by far one of the best DIY projectsI have seen, I know you have inspired me to add faux barns to my home now. Please continue to blog their are plenty of people out here that love what you are doing and appreciate you efforts.
Oh my goodness I love these! I had no idea that you just build them, I am stunned. I always though like many others below they were solid and heavy and had to built into the house. I guess those are structural beams not decorative. So as the light build goes off I now have a plan of action to make some beams.
I have to express all my love and appreciation to you for such a great diy. I have been wanting to add some beams to my home desperately.
Thank you for providing so many awesome and beneficial tricks on this project. I have been wanted to add beams to my home. I feel very grateful to have discovered the website and look forward to many more enjoyable minutes reading here. Thanks once again for a lot of things.
I have been watching the last season of fixer upper, which only makes me want to add beams to my home. I saw the last episode and they were using real beams but once installed I could not tell a difference between their’s and yours. Love it thanks for the great DIY!
I actually wanted to send a brief remark to thank you for these fabulous tips you are sharing on this website. My considerable internet lookup has at the end been paid with extremely good details by you. I would believe that most of us website visitors actually are really blessed to live in a remarkable network with so many perfect individuals with good principles. I feel rather grateful to have come across your website page and look forward to some more fabulous moments reading here. Thanks a lot again for a lot of things.
These cedar beams are very beautiful and a fantastic DIY to present on your blog. I know this trend has everyone wanted to add them into their homes. You are very smart to do DIY tutorial on this topic.
Wow these beams are so pretty and you made them for such a great price. Thank you for including the DIY portion so readers can also recreate your fabulous style.
This is a really great post, you should re release it to get more traction with it. I know a ton of people that want to do faux beams and have no idea how to make them. Your DIY is amazing and perfect for DIYer’s on a budget.
I know they make faux beam caps now but they are still pretty expensive. This sis a little bit more labor intensive but it was still worth it for the amount of money you saved! They look great and you would never know that those are not solid cedar, plus they look a lot better than the prefab faux ones.
It’s nearly impossible to find any that is educated about this topic, but you seem like you know what you’re talking about! Thanks for the detailed DIY on to build these beams.
Remarkable things going on here. I am so very satisfied to see your post. Thank you a lot, and I am really looking forward to contact you. Will you kindly drop me a mail?
I’m pretty pleased to discover this great site. I wanted to thank you for your time due to this fantastic read! I definitely really liked every bit of it and I also have you book marked to look at new things in your website.
These beams are amazing! You guys did a really nice job installing them into that crown molding too!
Love this idea too.
These beams a straight up amazing, I love this DIY so much great job, and excellent post.
Your home is so pretty and you always have the best home improvement ideas great job girl!
Jen these cedar beams are great, you guys did such a great job installing them too.
Love this idea ! Hopefully when we buy a house I can do this.
very good post, i definitely love this site, keep on it
It’s not that I want to copy your website, but I really like the design and style. Could you let me know which theme are you using? Or was it tailor made?
Hi Galina it is a WordPress Template that I have altered and added my own little spin on, but the basic layout is available at WordPress.
Hey there, You have done an incredible job. I’ll certainly digg it and personally recommend to my friends. I am sure they will be benefited from this site.
You should join in a contest for one of the finest blogs on-line. I will suggest this site because this such a great DIY and so well thought out.
Love this idea it the value it adds to a home.
This piece of writing provides a clear idea in favor of the new users for blogging, and shows how to run a blog properly not just a sales site or store to make money.
What’s up very nice website! Beautiful .. Wonderful .. I will bookmark your website and take your feeds also and I am glad to find numerous useful articles here. Thank you for sharing. . . .
I am sooooooo glad I stumbled across this post! I was literally having the same dilemma with my need for a 13 ft beam but only having a 12ft plank and was not liking the idea of the metal wraps or seams. I LOVE the look of your end caps though, because it just adds such a lovely detail to the ceiling instead of just a straight post….thank you so much for sharing and the inspiration!!!!
Stacey I am so glad that you found what you needed and the end caps are going to work for you! It is always exciting when we get to hear that our posts have help others to inspire others to achieve their design goals too! We would love to see your finished project when it is finished, all the best!