Building a Custom Window Cornice
Hello my friends, we are entering week 2, ORC Fall 2019: Building a Custom Window Cornice. Check out this easy DIY that will instantly dress up any window.
This season for the Fall 2019 ORC we will be completing our Owners Suite Closet, which is directly off of our on suite Bathroom that we completed this past Spring. That challenge plus our recent Owners Suite Bedroom Renovation just left us excited to finish up the entire Owners Suite. Week 2 is all about ORC Fall 2019: Building a Custom Window Cornice above our window in the closet.
WEEKS AT A GLANCE:
WEEK 1 WEEK 2 WEEK 3 WEEK 4 WEEK 5 REVEAL
Just in case you maybe wondering exactly what is the ORC aka The One Room Challenge here is the full scoop. This event was started by Linda Weinstein @ Calling It Home and is hosted twice a year, in April and October for the past 16 seasons. The ORC has hosted over 300 interior designers & home decor bloggers, that have joined together in this challenge to makeover one room in their own homes. The participants have a total of six weeks, from start to finish, to complete a full room transformation. Over 3,500 rooms have been transformed through the One Room Challenge to date, and many spaces have been recognized and featured by several prestigious sites seen here:
 Thank you to the One Room Challenge Media Partner, Better Homes & Gardens, for your continued support and love for original interior design.

THE INSPIRATION BOARD
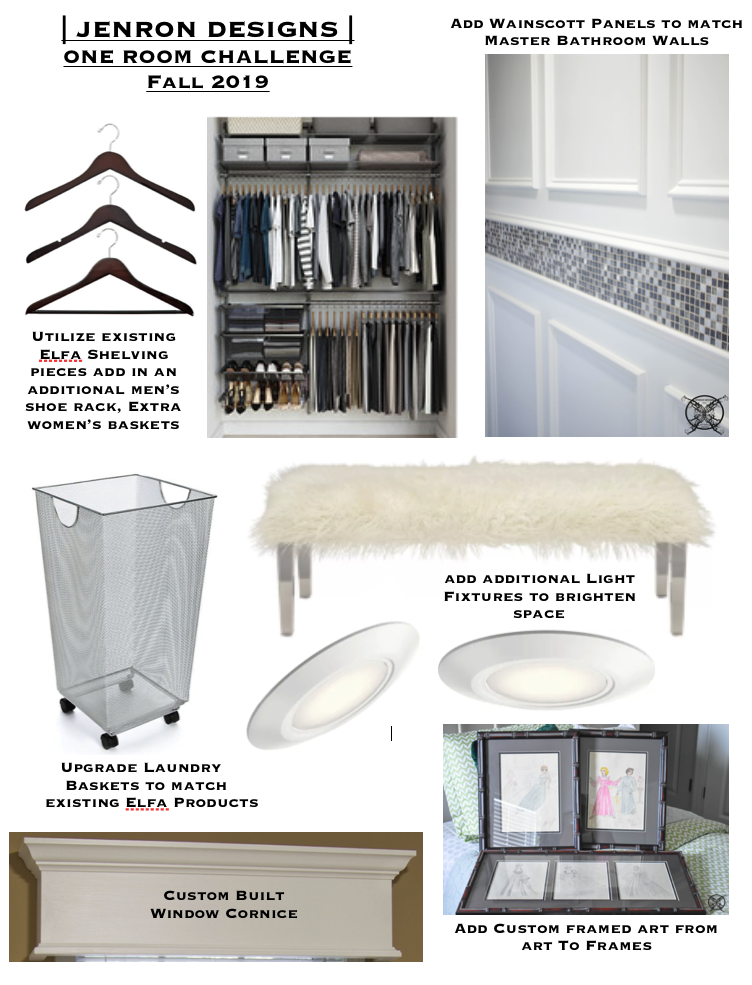 WEEK 2 ORC Fall 2019: Adding a Cornice
This week we are adding a built-in custom cornice to our window in the closet. Let face it all closets already have a lot of fabric inside with the stored clothing, why add more fabric to that space? So the idea to add a permanent built-in wood cornice only makes sense. It will help to balance out an area that is already heavy in soft surfaces. Plus, it will completely accent the proposed Wainscot walls, and evaluate the feel inside the closet.
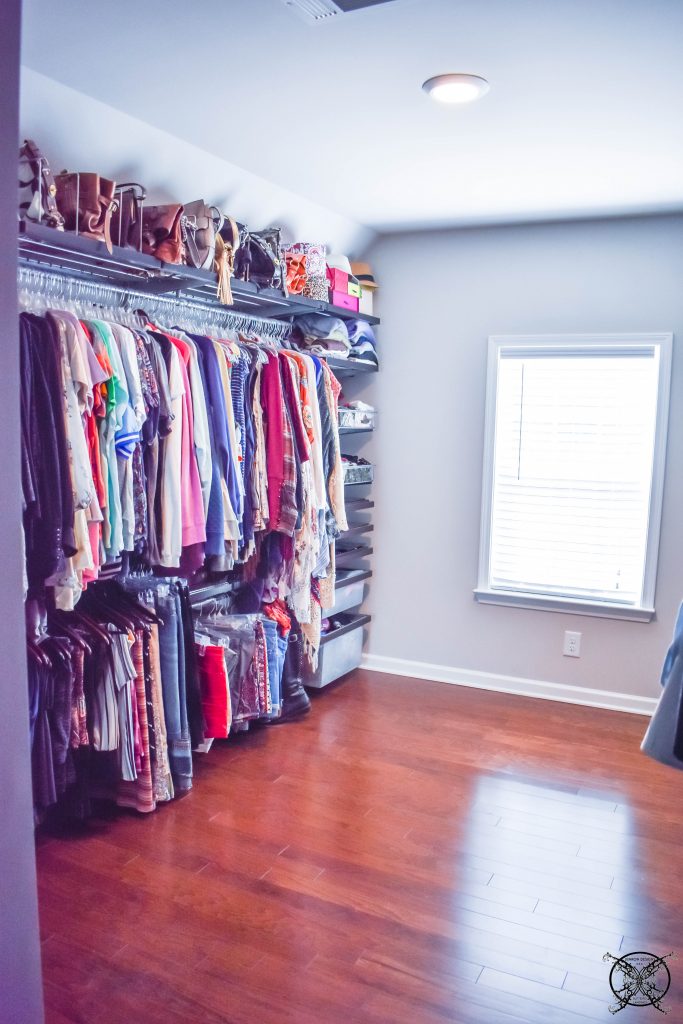 As you can see in the Before picture above we also have a large header area above the window, as we do in all of our closets on the front of our home. This keeps the windows even for our home’s front elevation. However, while it looks great from the outside, inside the windows appear to sit too low in my closets. A simple way to offset this obvious visual design issue is to encase the area above the window to create the illusion of a taller window. This is one of the best interior design tricks out there, and can be used to create, much needed visual height in a room as well.
The DIY Cornice
Here is a simple way to add a DIY cornice to your space. We have found after pre-building cornices and trying to hosit them above windows, that never have square ceilings, that the simplest way to to achieve a uniform look is to build the cornice in place.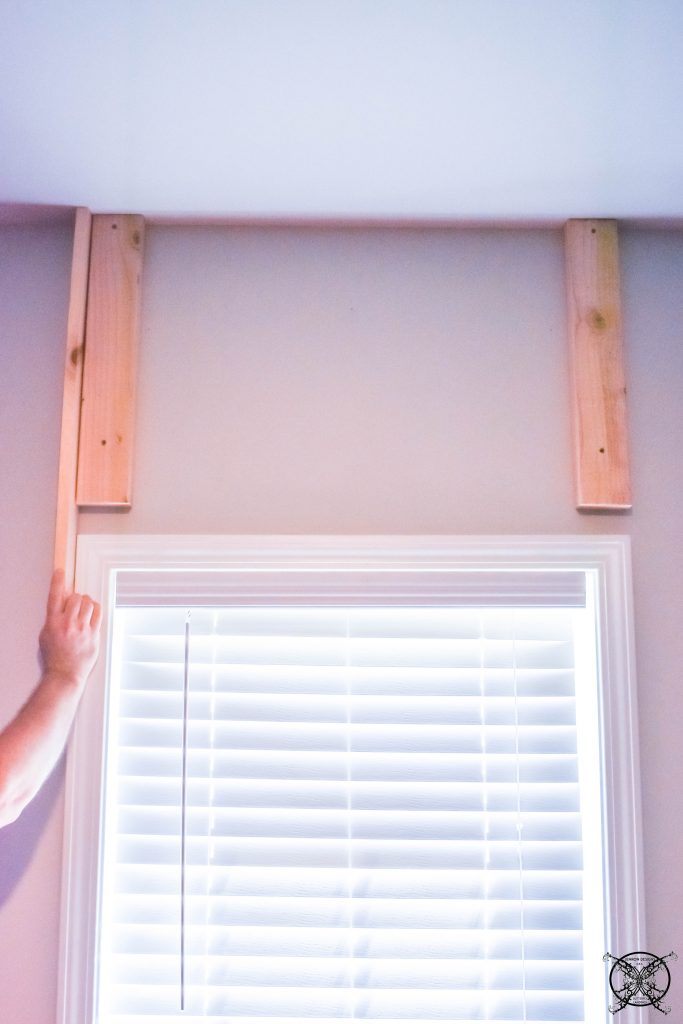 First start by adding in base support boards. For this we used a basic 2 x 4 to mount the side panels directly too. As a general rule of thumb all windows, just like doorways, have a large wooden header board above them, to support the opening. We knew we would be able to attach the mounting boards directly into wood for more stability, so no anchors were needed.
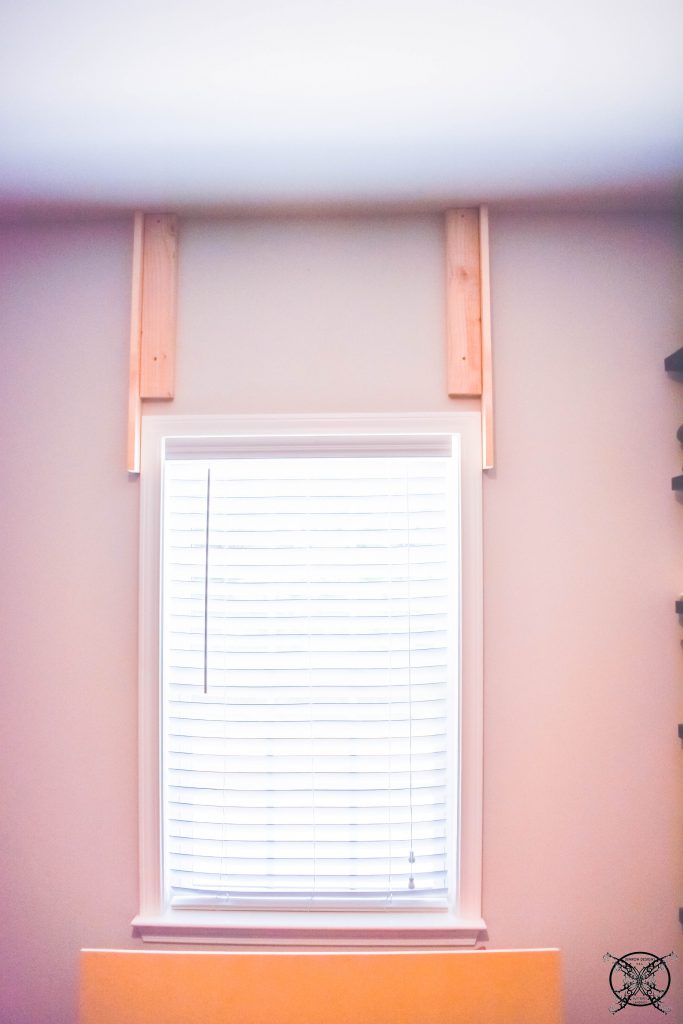 We attached our sides of the cornice directly to these support boards. The sides were measured to the finished size of the cornice. Keep in mind that you will want your cornice to cover the top frame of the window. In our case I also wanted the cornice to cover the header rail of our blinds as well. Personally I always like to cover the mechanics of any window treatment. You will also want the depth of the sides to allow room for future access to change out your blinds as well.
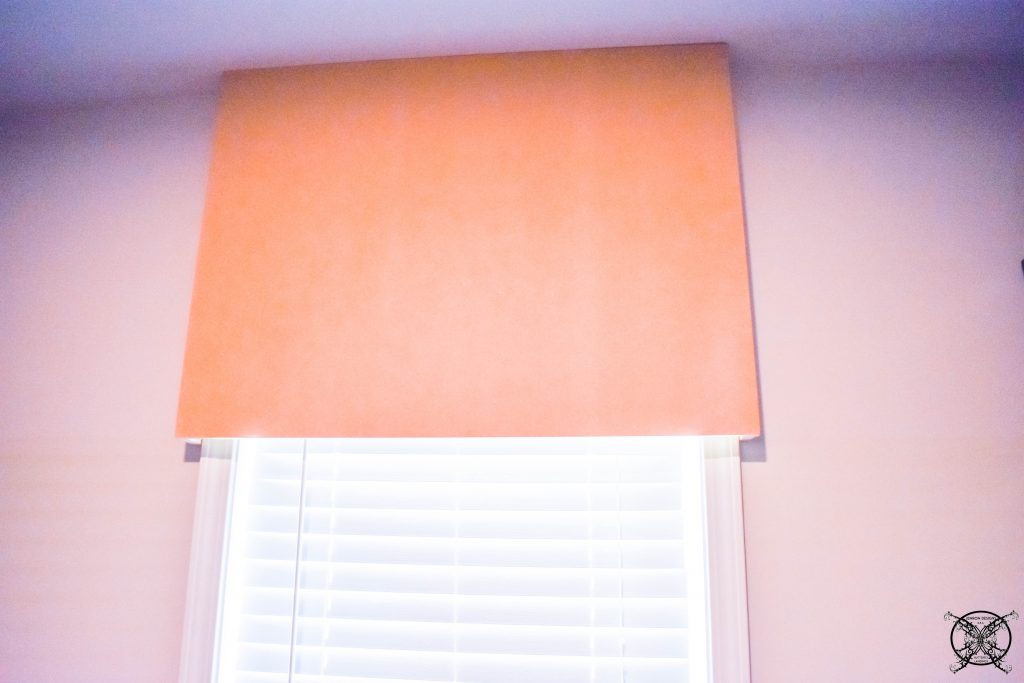 Once the sides are in place you can then add the front of your cornice. For this we used a basic MDF board, since we are planning on painting the finished cornice. This will save you money and they already have a nice smooth surface. In fact MDF boards are what the majority of home builders use in newer homes to create trim, mantles and built-in accents, if your trim is slated to be painted.
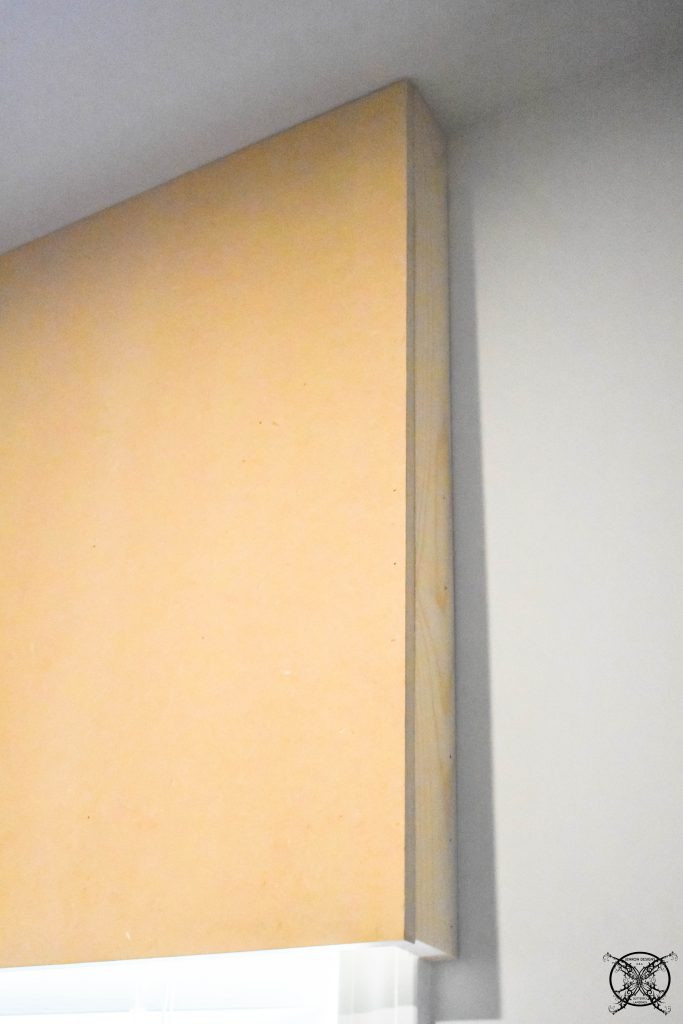 If you want stained wood trim in your home you must use a stain quality of wood, unlike MDF, and there could be variations in the coloring based on the type of wood used. Which besides cost is another reason most homes built today have painted trim.
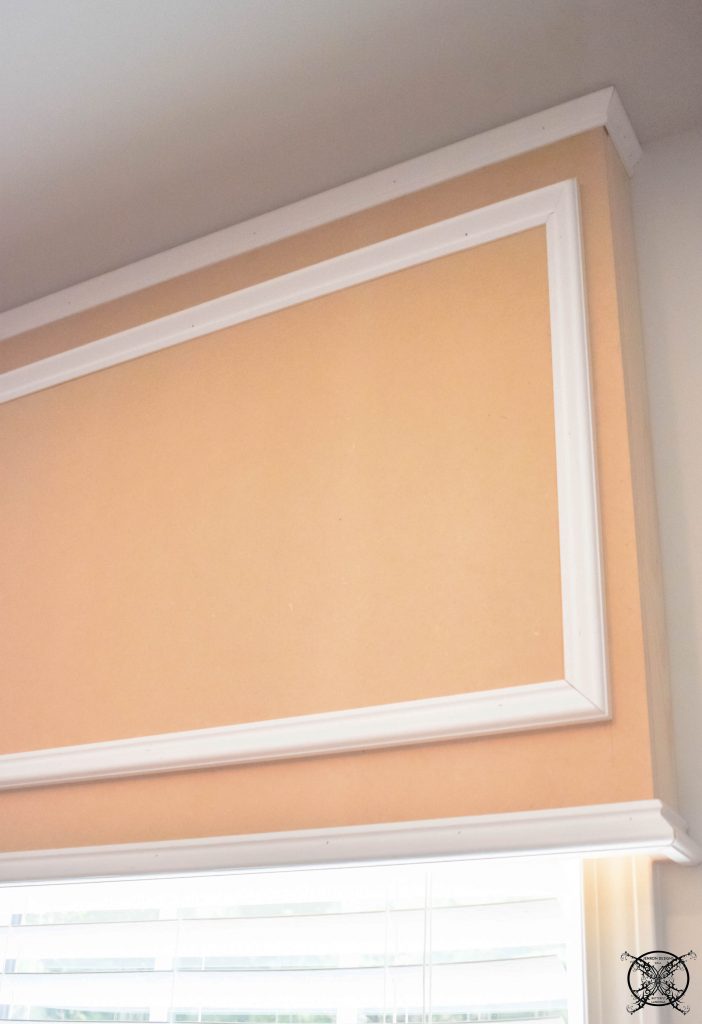 The final step in building this cornice is to add the decorative trim. Since we plan to add Wainscot wall trim to this area, it only makes sense to use the same type of trim for design continuity. In fact, this step could be saved until that part of the construction process and done all at once, which is what we did. Work smarter not harder, right? However, for DIY purposes I wanted to show a complete project, in case you are only building a cornice.
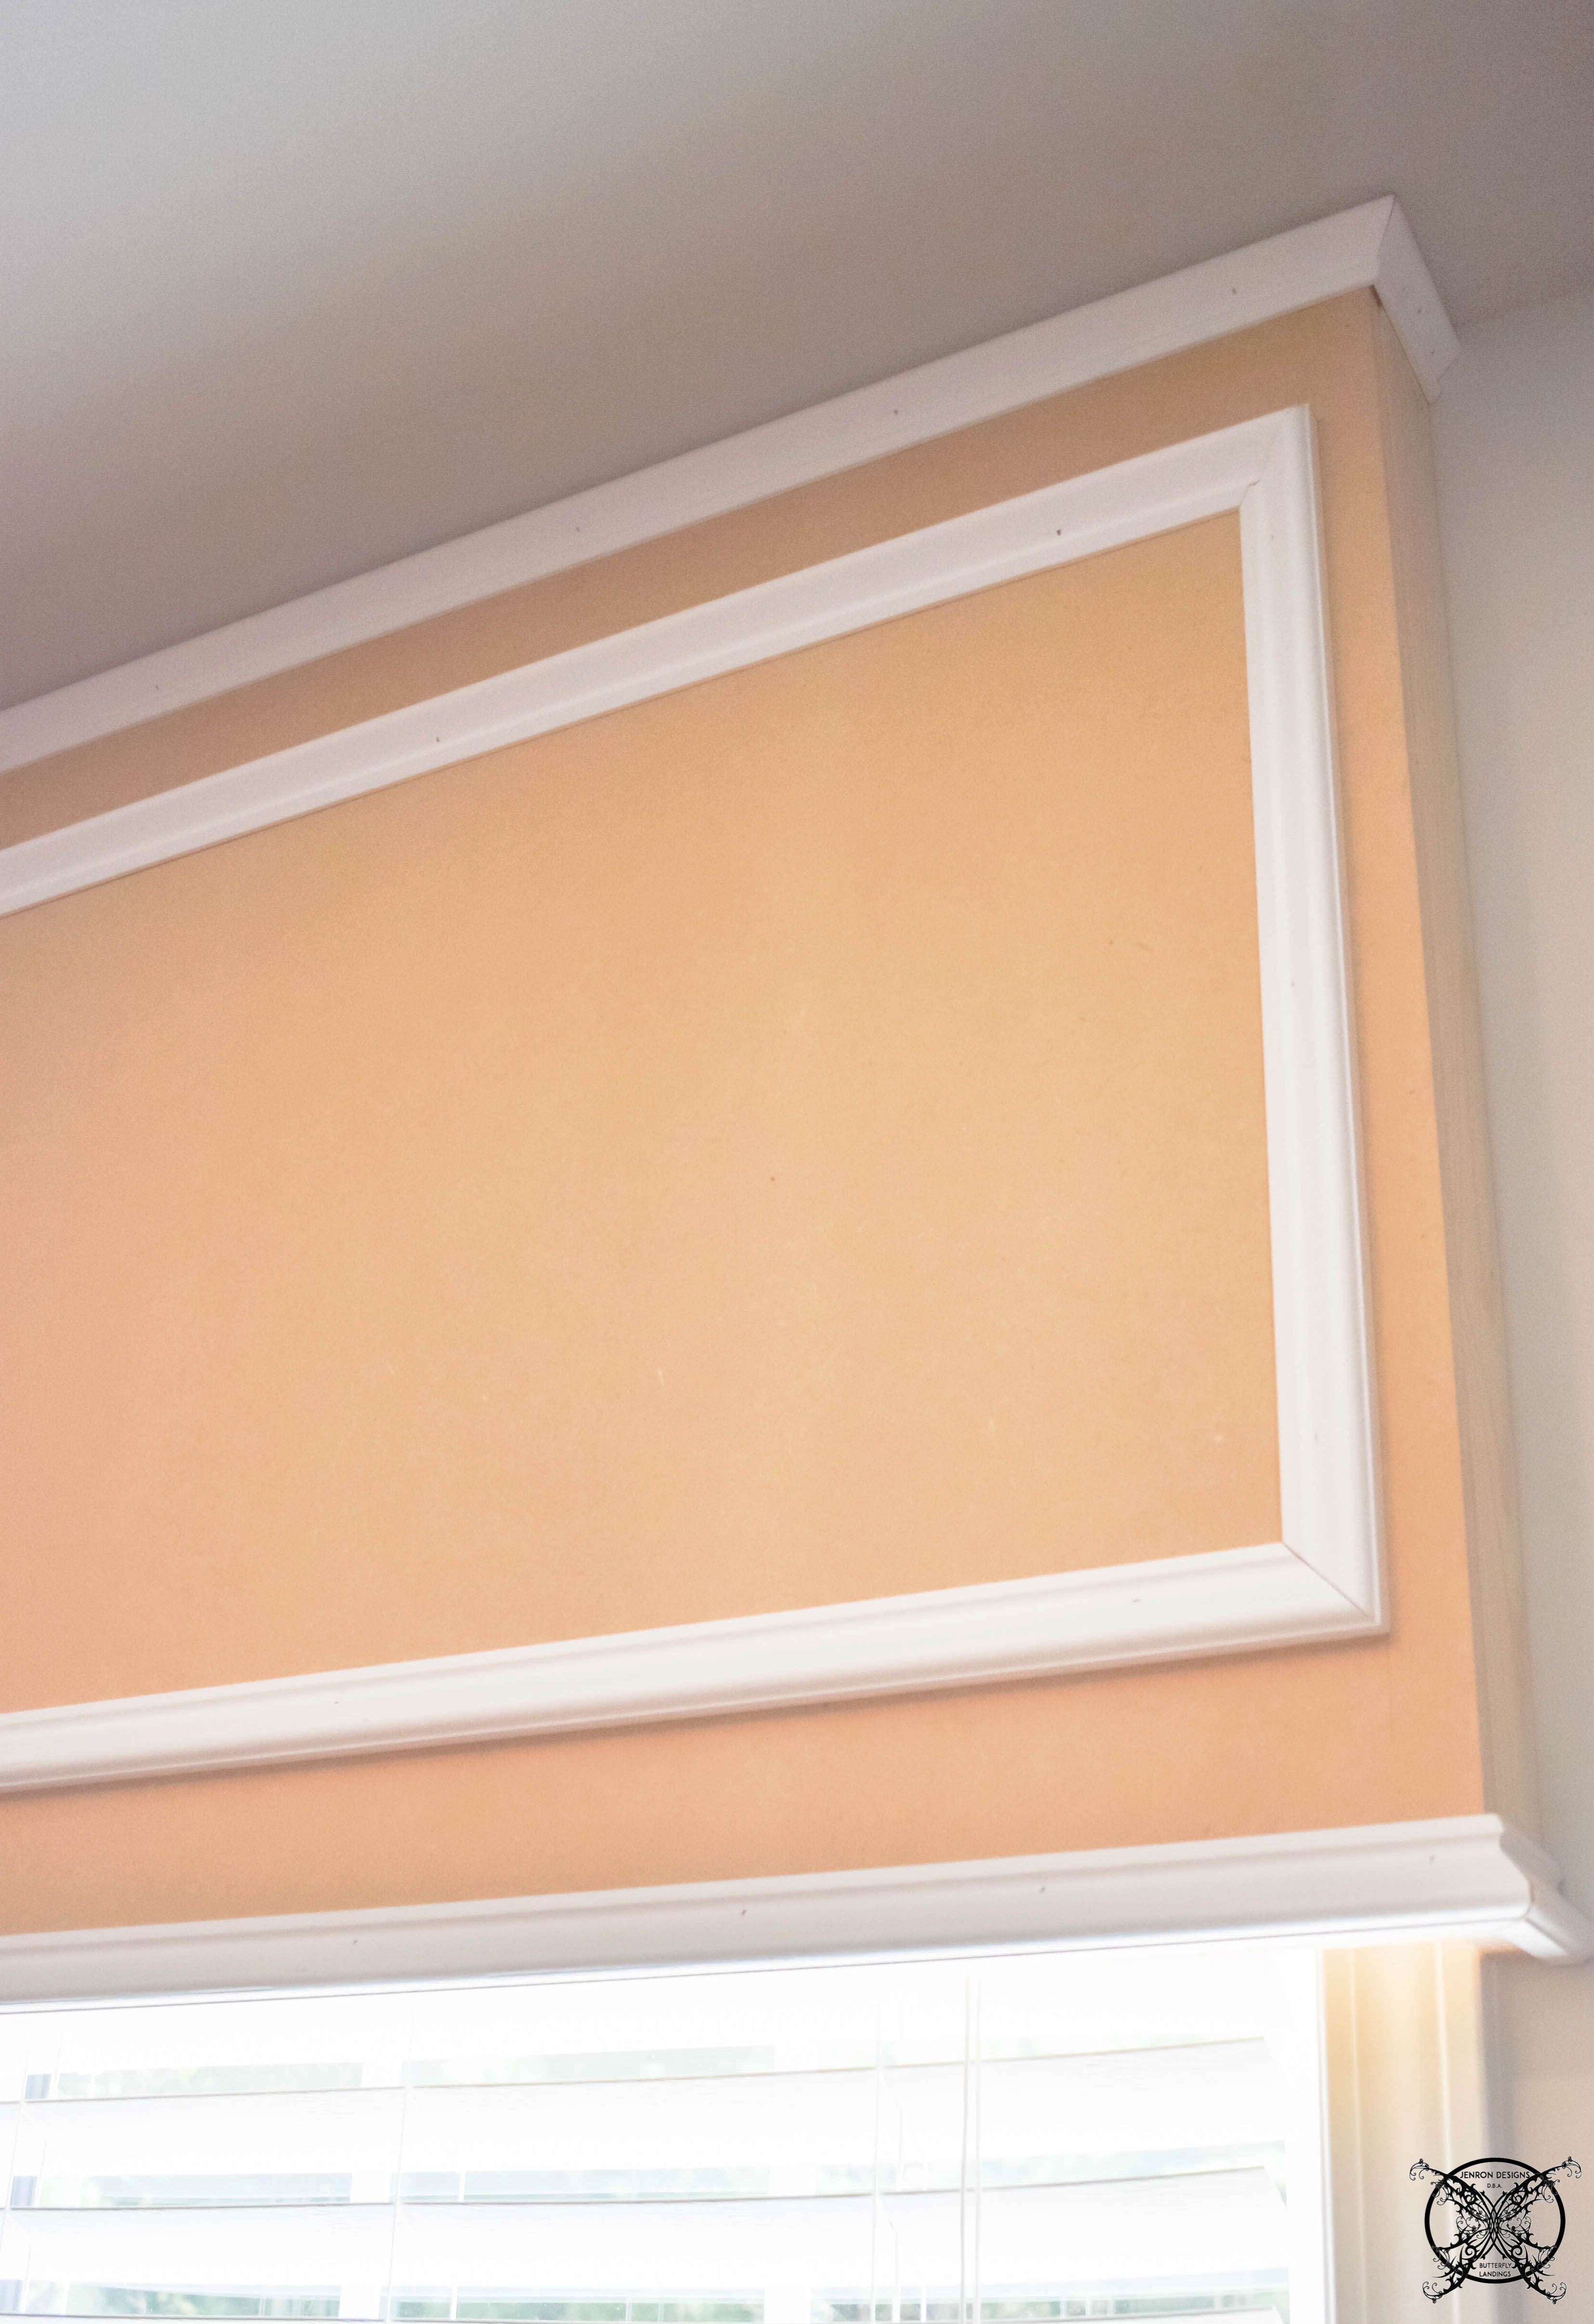
 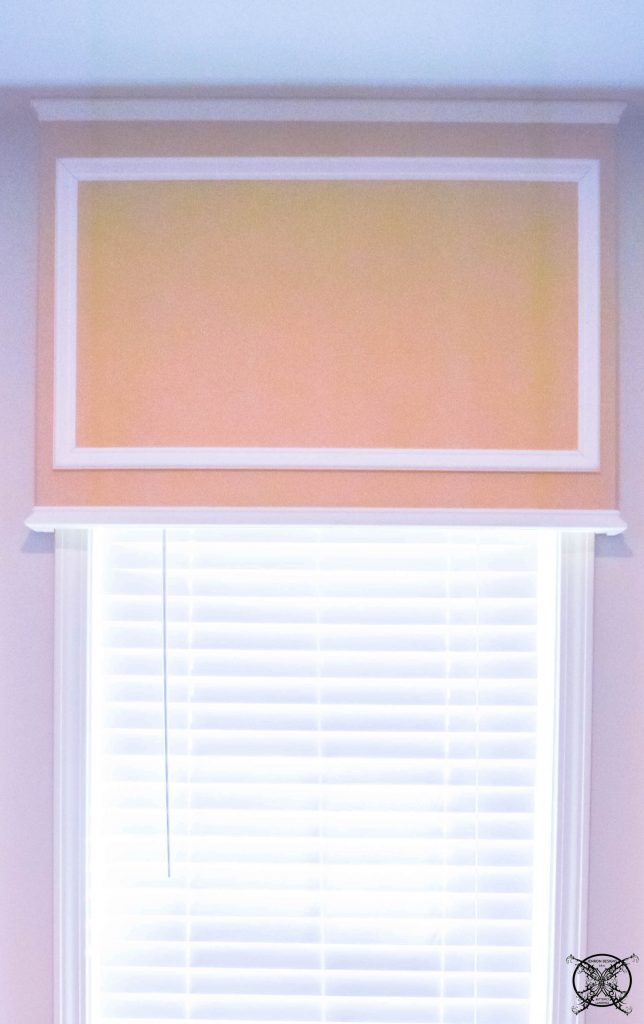 As you can see we added a top trim piece which will hid any gaps you may have due to not having a flat ceiling. I will say I have never worked in a home that has a flat, or square ceiling, EVER, lol. So this step is the way to camouflage these common building flaws. We also added a piece of base trim to finish off the edge and a sudo Wainscot panel. When painted with the rest of the room, the panel will give the feeling of a built-in window treatment. Thus elevating the overall feel of this room, for under $50. This is actually less expense than curtains and will last a lot longer too.
 ![]()
THE PROPOSED SCHEDULE:
WEEK 1: Introduction, Inspiration Board, Ordering and Procurement of Supplies
WEEK 2: Build a Custom Sized Window Cornice
WEEK 3: TRIM- DIY Wainscot Panels
WEEK 4: PAINT – Paint Room, add new Light Fixtures
WEEK 5: ELECTRICAL- Sort & Organize all clothing, Add new Elfa fixtures, Add decorative features
WEEK 6: FINAL REVEAL
Great tutorial! My hubby wants to add something like this to the window in our kitchen. It definitely makes a big impact! Pinning this for later!
Nice and easy DIY, to give a new look to a window. Exciting to see the reveal on some more weeks!
You make it look so easy! Now I may have to add cornice boards all over the place. Love yours, BTW. How perfect with the trim molding. It really amps up the luxe.
Love this project! There are so many different ways to do this, and yours looks great! Looking forward to week three!
Love these diy tips! Can’t wait to see it all come together.
Love the addition of the cornice board!
Amazing job! It’s such an awesome custom feeling but easy DIY project. Thank you for sharing!
This is such an amazing tutorial! I love how detailed it is, I would love to add something like this to my window.
Great Tutorial Jen! It’s really coming along-your closet is going to be gorgeous!
I am looking forward to this. We have a super small closet and need inspo.
Awesome tutorial. This is exactly how we hung our cornices too! And YES the ceiling was soo uneven. Building it in place helps a ton. This looks so regal here!
I already Have closet envy! Looking forward to seeing more!
Jen Loved this week. I can’t wait to see the finished project!
I wish my checklist looked like yours knocking out projects and getting it done.
An impressive share! I’ve just forwarded this onto a friend who has been conducting a little homework on this.Thank you for the great information, and for spending time to talk about this DIY here on your blog.
Hi just wanted to tell your the the whole thing has been great. I love this transformation. I think everyone is getting more from this web page, and your views are fastidious for the support of new people.
First off I would like to say awesome blog! You have an eye for design!
Greetings! I know this is kinda off topic however I’d figured I’d ask. Would you be interested in trading links or maybe guest writing a blog post or vice-versa? My site discusses a lot of the same topics as yours and I feel we could greatly benefit from each other.If you might be interested feel free to send me an e-mail. I look forward to hearing from you! Excellent blog by the way!
It’s hard to come by knowledgeable people for this DIY topic, but you seem like you know what you’re talking about!
Thanks
What’s up mates, how it going? Just wanted to say concerning this article, in my view its truly awesome.