ORC Building Basement Walls
Welcome to Week 3 of the ORC Building Basement Walls. This week we are constructing the walls for our new craft room.
Wow, we have had a busy two week of prep work. Now as we head into week 3 of the ORC Building Basement Walls, we can finally see a little bit more of the framework coming to fruition. In case you have missed a week here are all of the weeks at a glance for you so you can see all of work up to date.
WEEKS AT A GLANCE:
WEEK 1 WEEK 2 WEEK 3 WEEK 4 WEEK 5/6 WEEK 7 REVEAL
Just in case you maybe wondering exactly what The One Room Challenge is, here is the link, and the scoop. This event was started by Linda Weinstein @ Calling It Home and is hosted twice a year, in April and October for the past 15 seasons. The ORC has hosted over 500 interior designers & home decor bloggers, that have joined together in this challenge to makeover one room in their own homes. The participants normally have a total of six weeks, from start to finish, this season will be eight weeks to complete a full room transformation. Over 3,800 rooms have been transformed through the One Room Challenge to date, and many spaces have been recognized and featured by several prestigious sites, such as Better Homes and Gardens.

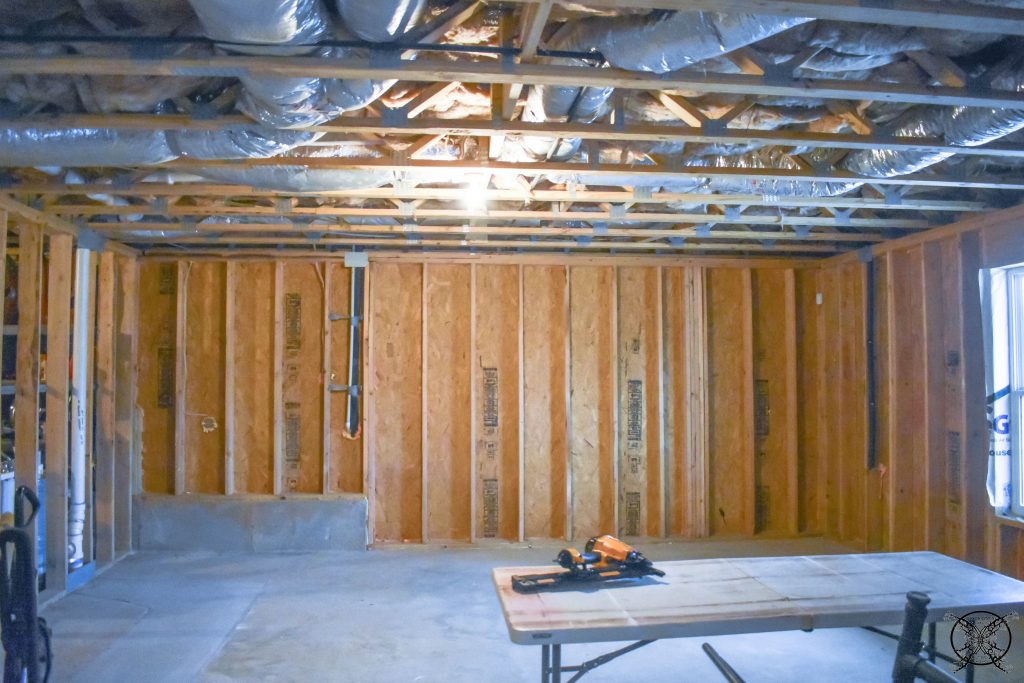
THE BASEMENT BEFORE PICTURE:
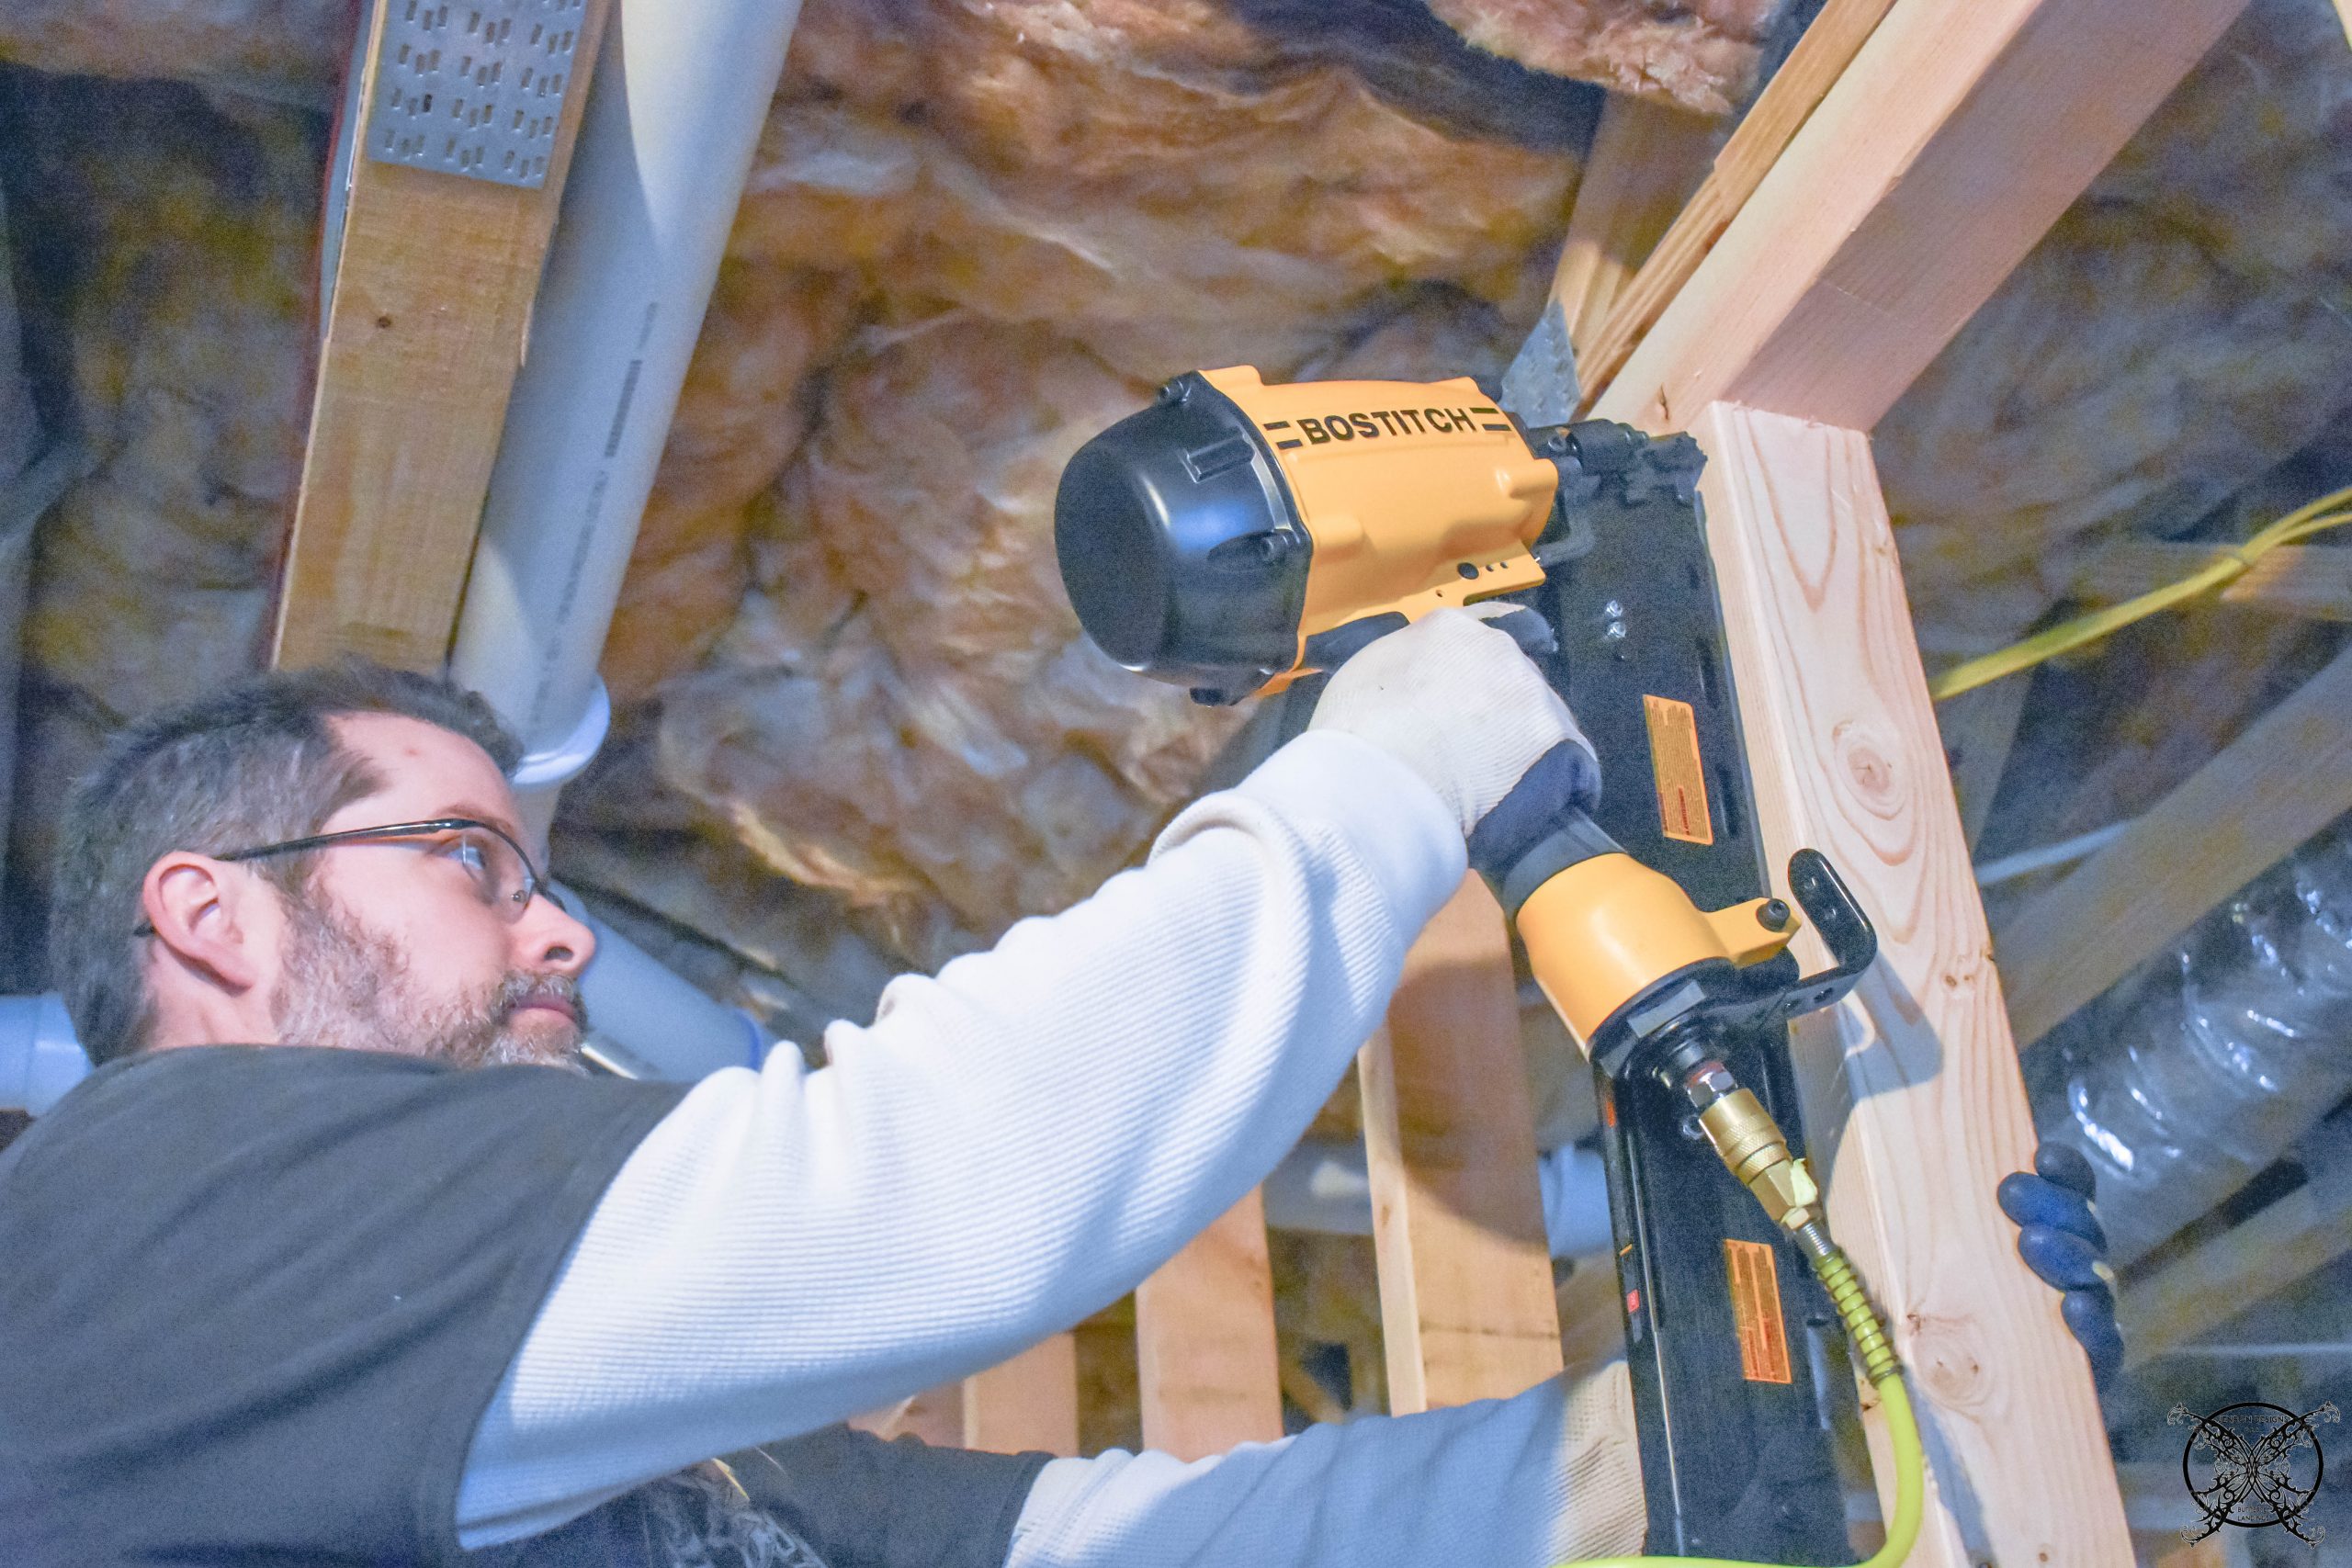
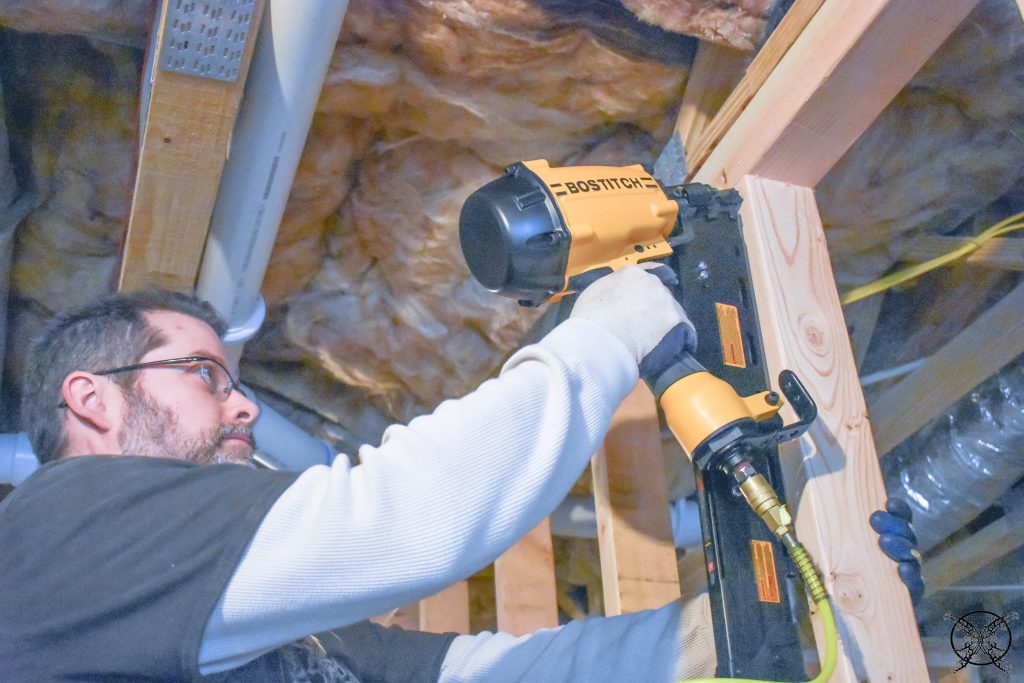
 This week we started to add in the the walls, which does require the correct tools. So Mr. Gainer got a new toy to add to his collection, a framing nailer. I will say that this bad boy is no joke, I now understand that scene from Lethal Weapon 2, where Danny Glover takes down those guys with a framing gun. It might be my weapon of choice these days too, LOL! Let me just say that sparks fly when this little pretty is in use.
 Okay enough about the new toy, moving on, the first step in our project was to layout the walls which we measured out and installed pressure treated baseplates. It is important that this piece is pressure treated since it does come in contact with the concrete slab, even though it is an interior wall, if it touches the concrete slab on grad in anyway it needs to be pressure treated. This is part of the building code in most states, so you may want to check your state code regulations for details.
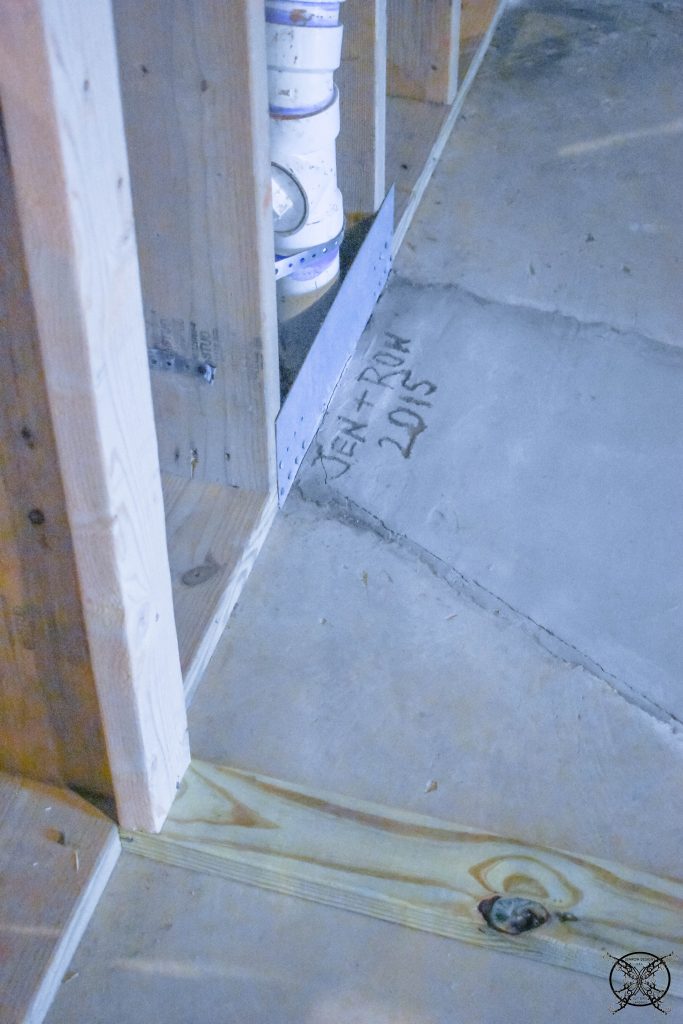 *You may notice the Jen+Ron 2015 craved in the concrete, we did this while building our home in 2015. During a re-pour of the drain pipe concrete in our basement. I guess it is a good thing we closed, lol!
In order to secure the base plate properly you will need a hammer drill to drill through concrete and concrete tapping anchor screws. Tapcon is a great brand and even comes with the concrete bit in the pack for ease. 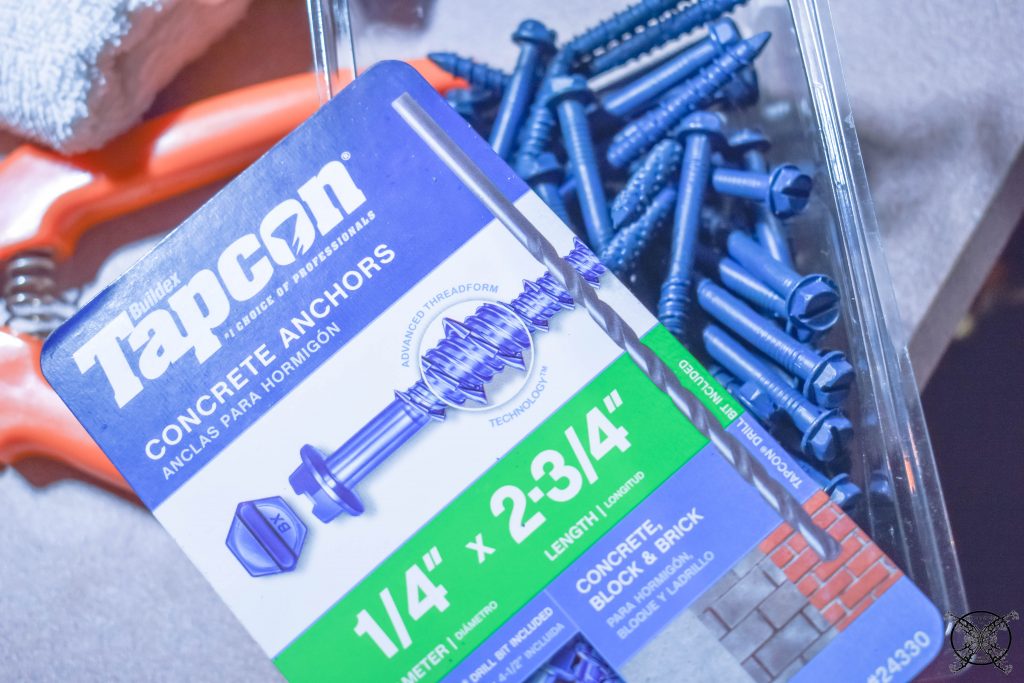 I will say that we did not add the anchors until after we had completely constructed the walls as you can see below. This allowed us just enough sway and movement to shift the walls if needed before we were locked into concrete. Just a little pro tip there, nothing says you have to lock it down first, just as long as you get it locked down.
 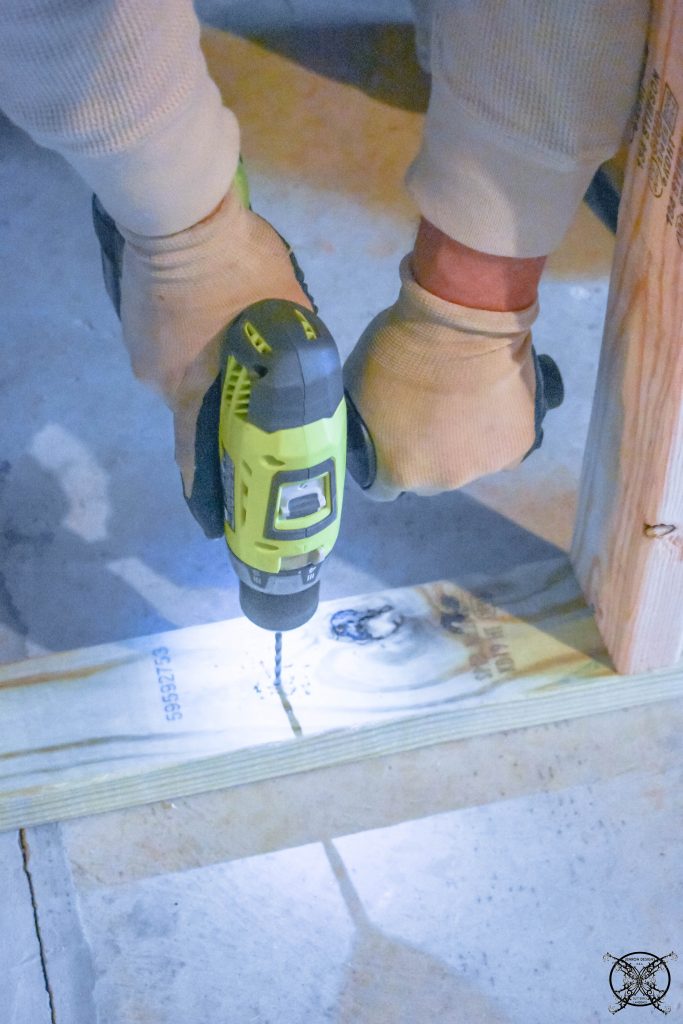 As I mentioned before you may need to shift the wall slightly as you are building it. I should clarify by shifting it, I mean knocking it into place with a sledge hammer, LOL, just in case that was not clear. This handy wall post level does come in handy to make sure that you are getting nice plumb and square studs.
  Once you have you 2×4 studs set on your 16″ centers, which are again industry standards and more importantly the building code, you can break out that framing nailer to pop those 2×4 studs into place. This makes really quick work for framing and walls will just fly up in no time flat. So Ron really loves his new toy.
 Once he got all the wall studs in place, it was time to frame out the doorways. Those are a bit more involved since you need to know what size door will be going in the space. For my craft room we will have two 36″ standard door openings and one 60″ double door opening which will be a sliding barn door going into Ron’s wood shop area, seen here.
 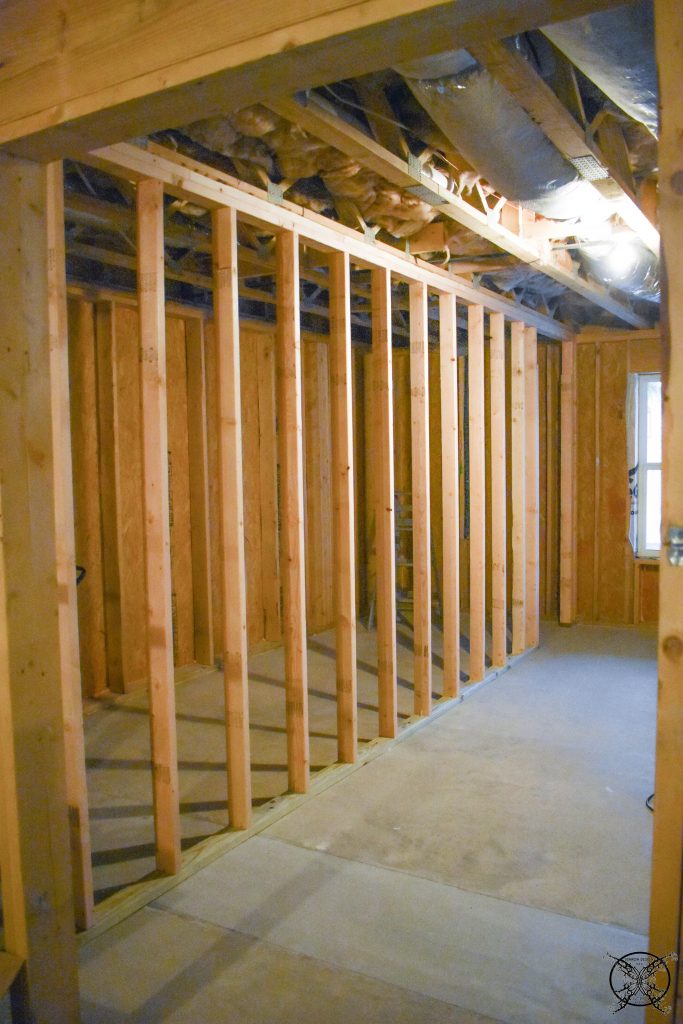 This is one of the 36″ standard door openings, which will lead into the garden shed & storage closet. You can see we added a header board above the cased door opening. We also went we a 36″ opening since this will also be an exterior rated door that will lead to an unconditioned space after the entire basement is complete. We wanted to make sure it had a threshold and proper exterior sealing.
Designer Note- Thinking though the entire project will save you money and rework when you know where a project is slated to end up. This door is actually going to be a repurposed exterior door we will be replacing from another basement room that is being upgraded. The older door which is good condition but just not as decorative will serve as the closet door here.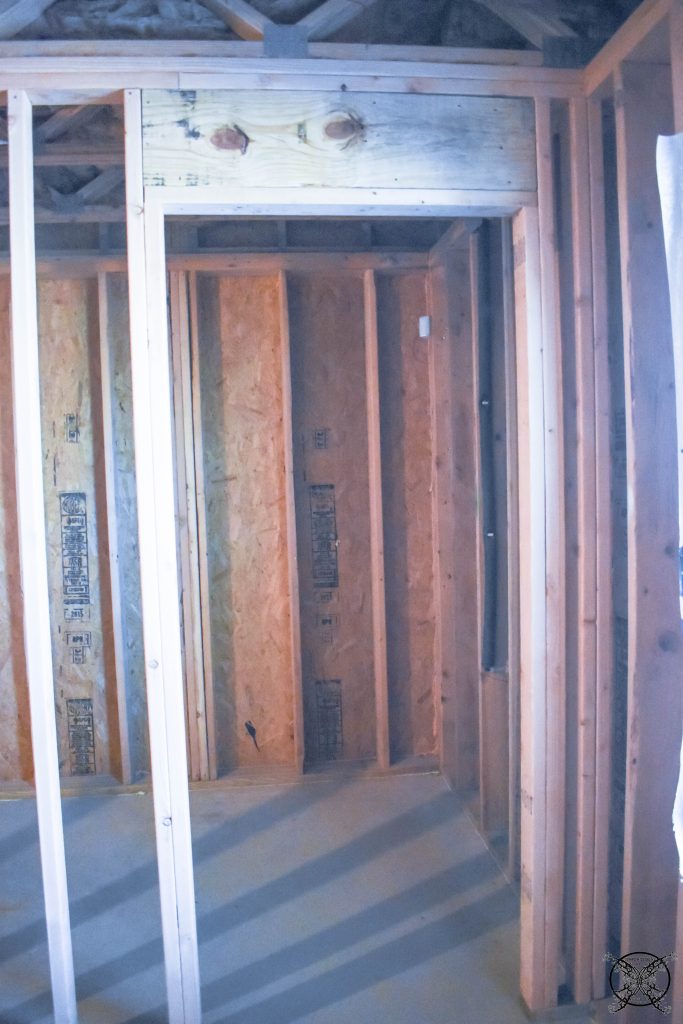
Pulling Wire:
Once he got all the wall studs in place, it was time for Ron to pull wire. As an Electrical Engineer this is truly his strong suit and where he shines, so I have no doubt that we will have more wires than we will ever need. You may remember back in the blueprint stage that we had all the receptacles, light switches and plug locations already marked.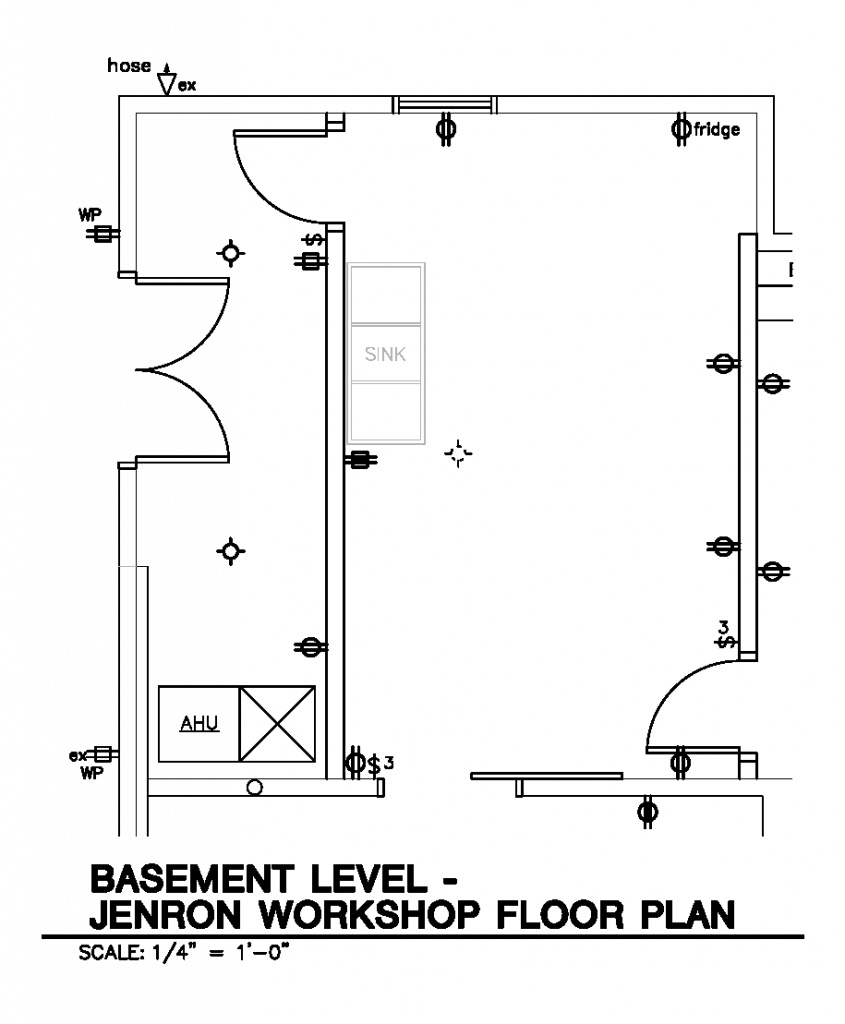
This is the map you will use to know where to run your wire, to make your 3 way or 4 way switches and not overload any of your circuits. Honestly this part of the process is best suited for an electrician to do for you, if you do not have any electrical experience. Most state codes are pretty specific and strict so you must get it right for safety regulations. 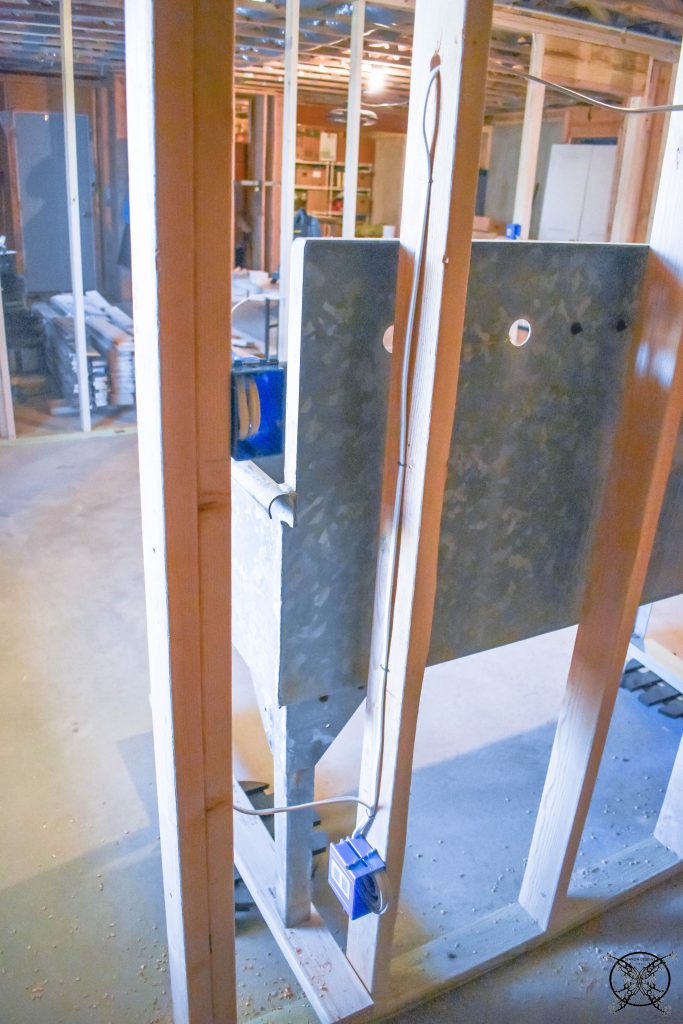 When running the wire you will have to drill holes through your studs to feed the wire through and secure the along the edges of the the stud where the receptacle or switches will be installed. This keeps everything nice and neat inside the walls so you do not accidentally nail of drill through the wire at a later date when hanging artwork or maybe trying to fish additional wires through your walls in a renovation later down the road.
 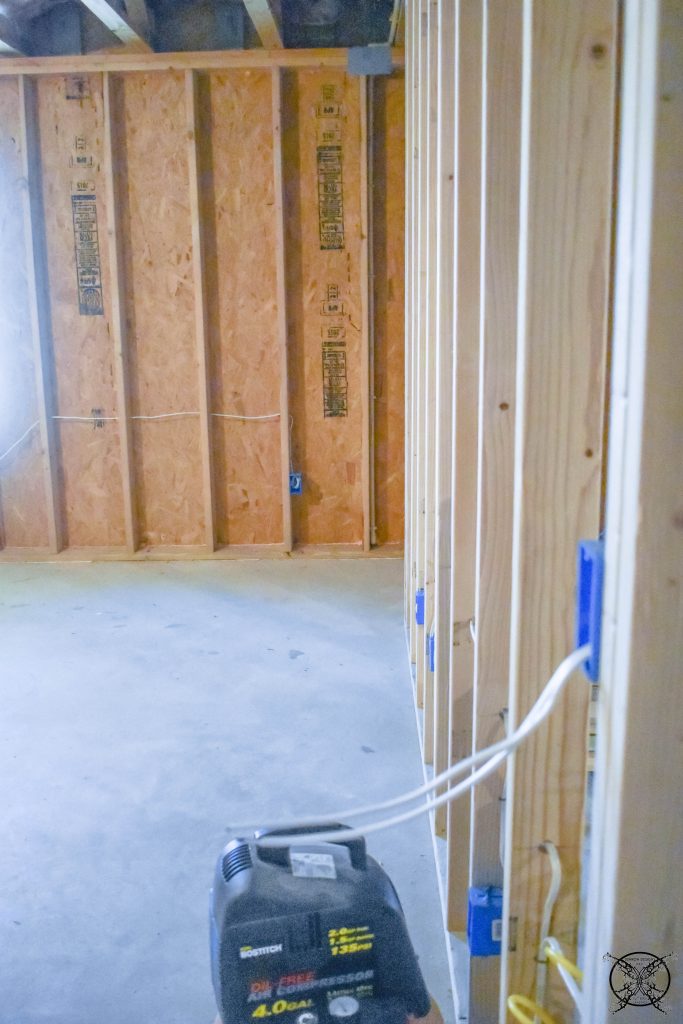 These are the roughed in boxes set with wire waiting for the switches and receptacles to be wired into place for us to test the circuits and make sure that everything is wired properly. Once this is all done we will start to install the insulation and the panels, which are the walls. This room will be a sheetrock free zone since it is my shop space and we need it to be pretty durable for all types of elements.
THE PROPOSED SCHEDULE:
WEEK 1: Introduction & Inspirations
WEEK 2: BLUEPRINTS: Figuring up the amount of supplies needed for all DIY builds
WEEK 3: Building Walls Pulling Wire & Running Electrical
WEEK 4: Insulating & Adding Brick Panels
WEEK 5: The German Schmear
WEEK 6: Casing Trim Out & Doors
WEEK 7: Painting the Floor
WEEK 8: REVEAL
Really, this is beautiful and I love you intriguing designing skills ma’am,
Wow you are extremely handy, well done!
Such a cool challenge, can’t wait to see the room as it gets finished! Good luck!!
Beautiful design here. Would love to see the finished product
That’s awesome! i wish we can see some photos after its done. Basements are sometimes neglected and is just used for storing stuff we don’t need, this could help give ideas to people who wants to renovate their basement.
This looks like a really intense transformation . I know that this is going to look great because of all of the hard work that you guys are putting in .
You’ve got walls! Yay! We have an unfinished basement area so this is really fun to follow along and see how you do it.
You give me hope for my basement. It’s currently just one big room, but I would love to divide it up. Can’t wait to see the finished design.
Wow! You guys are totally amazing! Way more professional than we were …many years ago finishing off our basement on our own. Looking forward to watching your progress.
That’s a lot of hard work! Looking forward to seeing next week’s brick panels:)
How exciting Jen!!!! You got so much accomplished this week, it’s really starting to take shape! Your framing nailer is getting a workout!
Can’t wait to follow along on this space !
Ohhhh! It is fun to see this progress. I bet you are giddy!
So much progress! I love the point when you begin to see things coming together. I can’t wait to see the final reveal!
WOW! What amazing progress you are making. Can’t wait to read week 4’s post!
Walls! What great progress this week! Very impressive that you guys are DIYing most of this! Hubby and I are definitely on the amateur side of DIY. 🙂
Whew, big project! But I bet those walls went up in no time!! You guys are so handy 🙂