Adding Faux Brick Walls
Welcome to the week 4 of the One Room Challenge we are Adding Faux Brick Walls to our home this week.
So we are half way through this 8 week process, as we start this week One Room Challenge we are Adding Faux Brick Walls. I should really say this is the meat and potatoes week, because we are now adding the walls to create this space since all the prep work is basically done up to this point.
WEEKS AT A GLANCE:
WEEK 1 WEEK 2 WEEK 3 WEEK 4 WEEK 5/6 WEEK 7 REVEAL
Just in case you maybe wondering exactly what The One Room Challenge is, here is the link, and the scoop. This event was started by Linda Weinstein @ Calling It Home and is hosted twice a year, in April and October for the past 15 seasons. The ORC has hosted over 500 interior designers & home decor bloggers, that have joined together in this challenge to makeover one room in their own homes. The participants normally have a total of six weeks, from start to finish, this season will be eight weeks to complete a full room transformation. Over 3,800 rooms have been transformed through the One Room Challenge to date, and many spaces have been recognized and featured by several prestigious sites, such as Better Homes and Gardens.

THE BASEMENT BEFORE PICTURE:
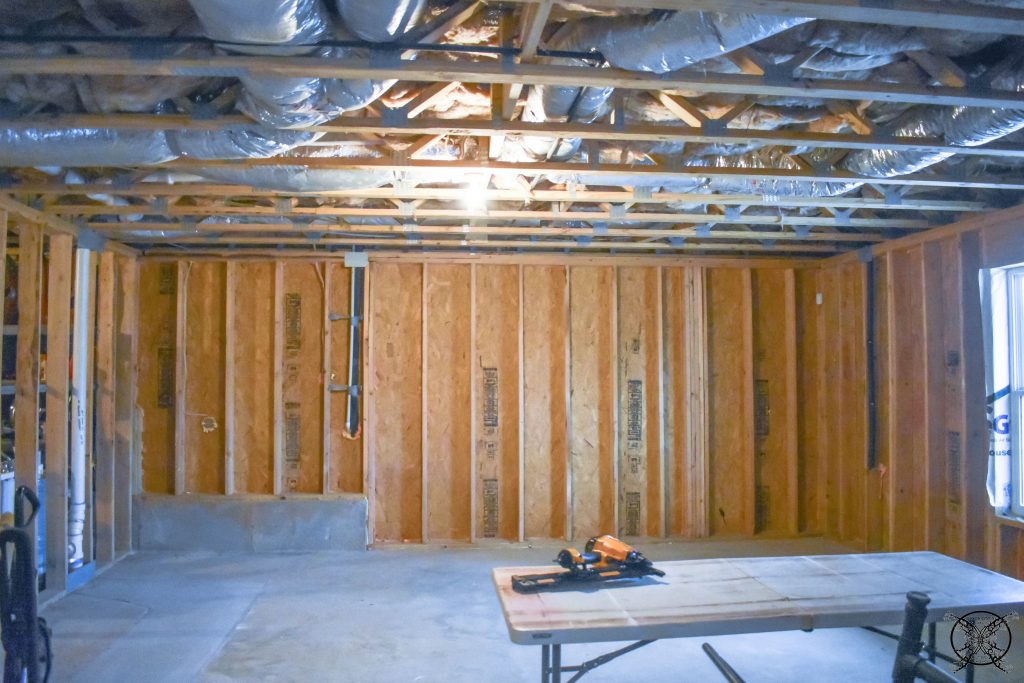
So here is where we started four weeks ago and now we are lining the exterior walls with installation, and this week is ORC Adding Faux Brick Walls. We started off by purchasing several rolls of R-19 insulation for wall cavities. Yes we did a lot of research prior to purchasing and wanted to make sure we picked a brand that checked all the boxes on our list performance, acoustics, sustainability, and environmental. 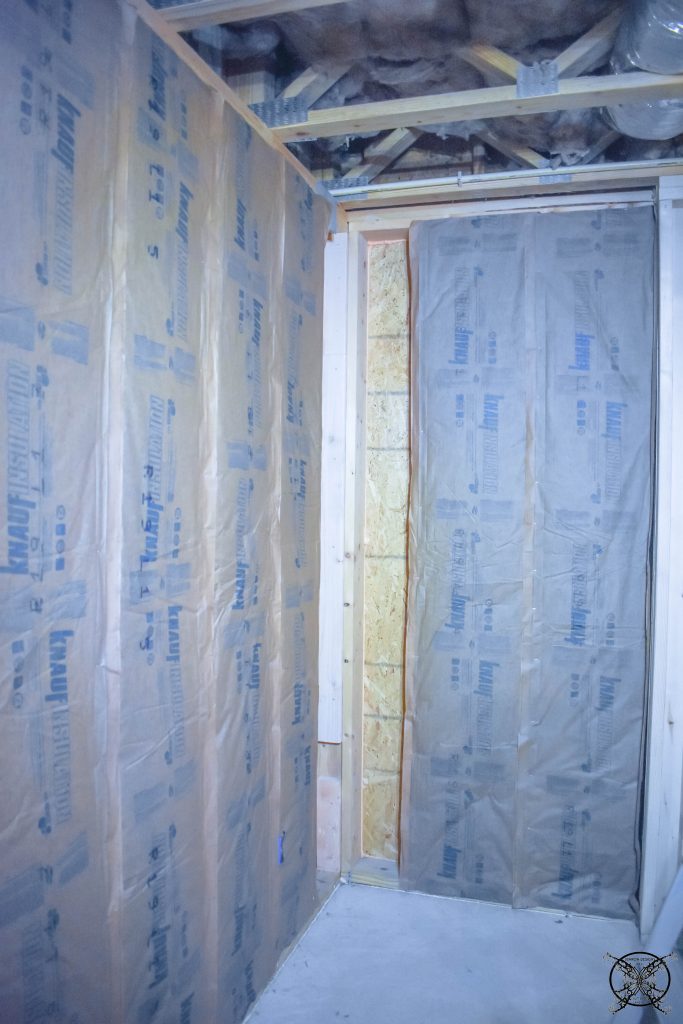 Ron said the installation was super easy, not like the stuff he installed before in pervious jobs. This product was all paper lined pre-cut and ready to fit into wall cavities with ease and lightly attached with a staple gun. It literally took him longer to go buy it than it did to install it. Keep in mind that you will want to cut out small access holes around receptacles and switches, for this he used a basic utility knife. Nothing at all fancy.
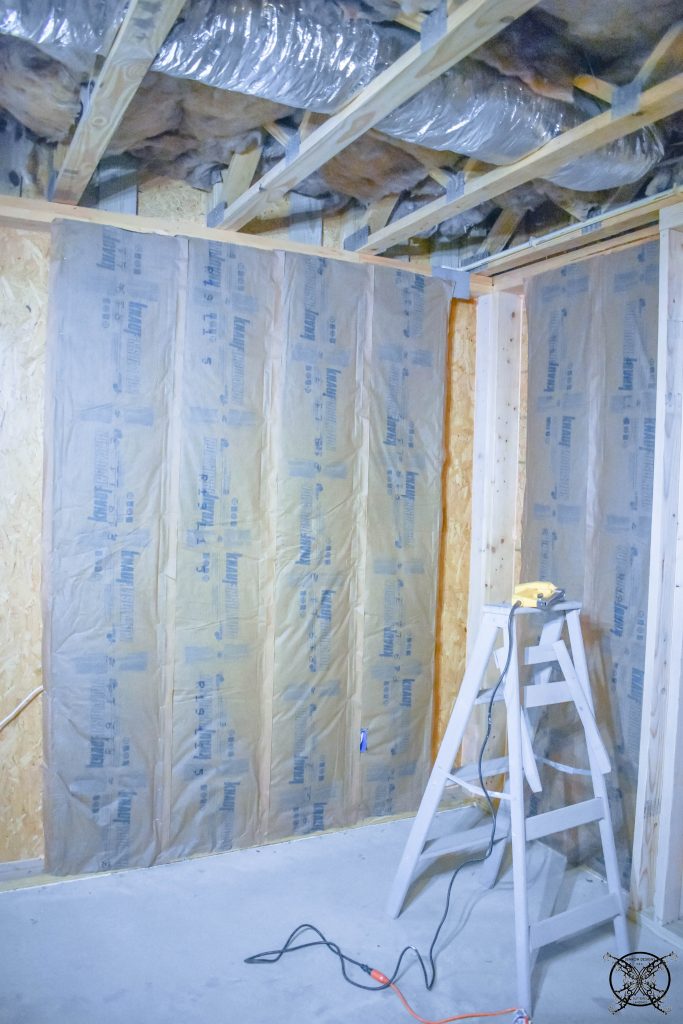
FAUX BRICK WALLS:
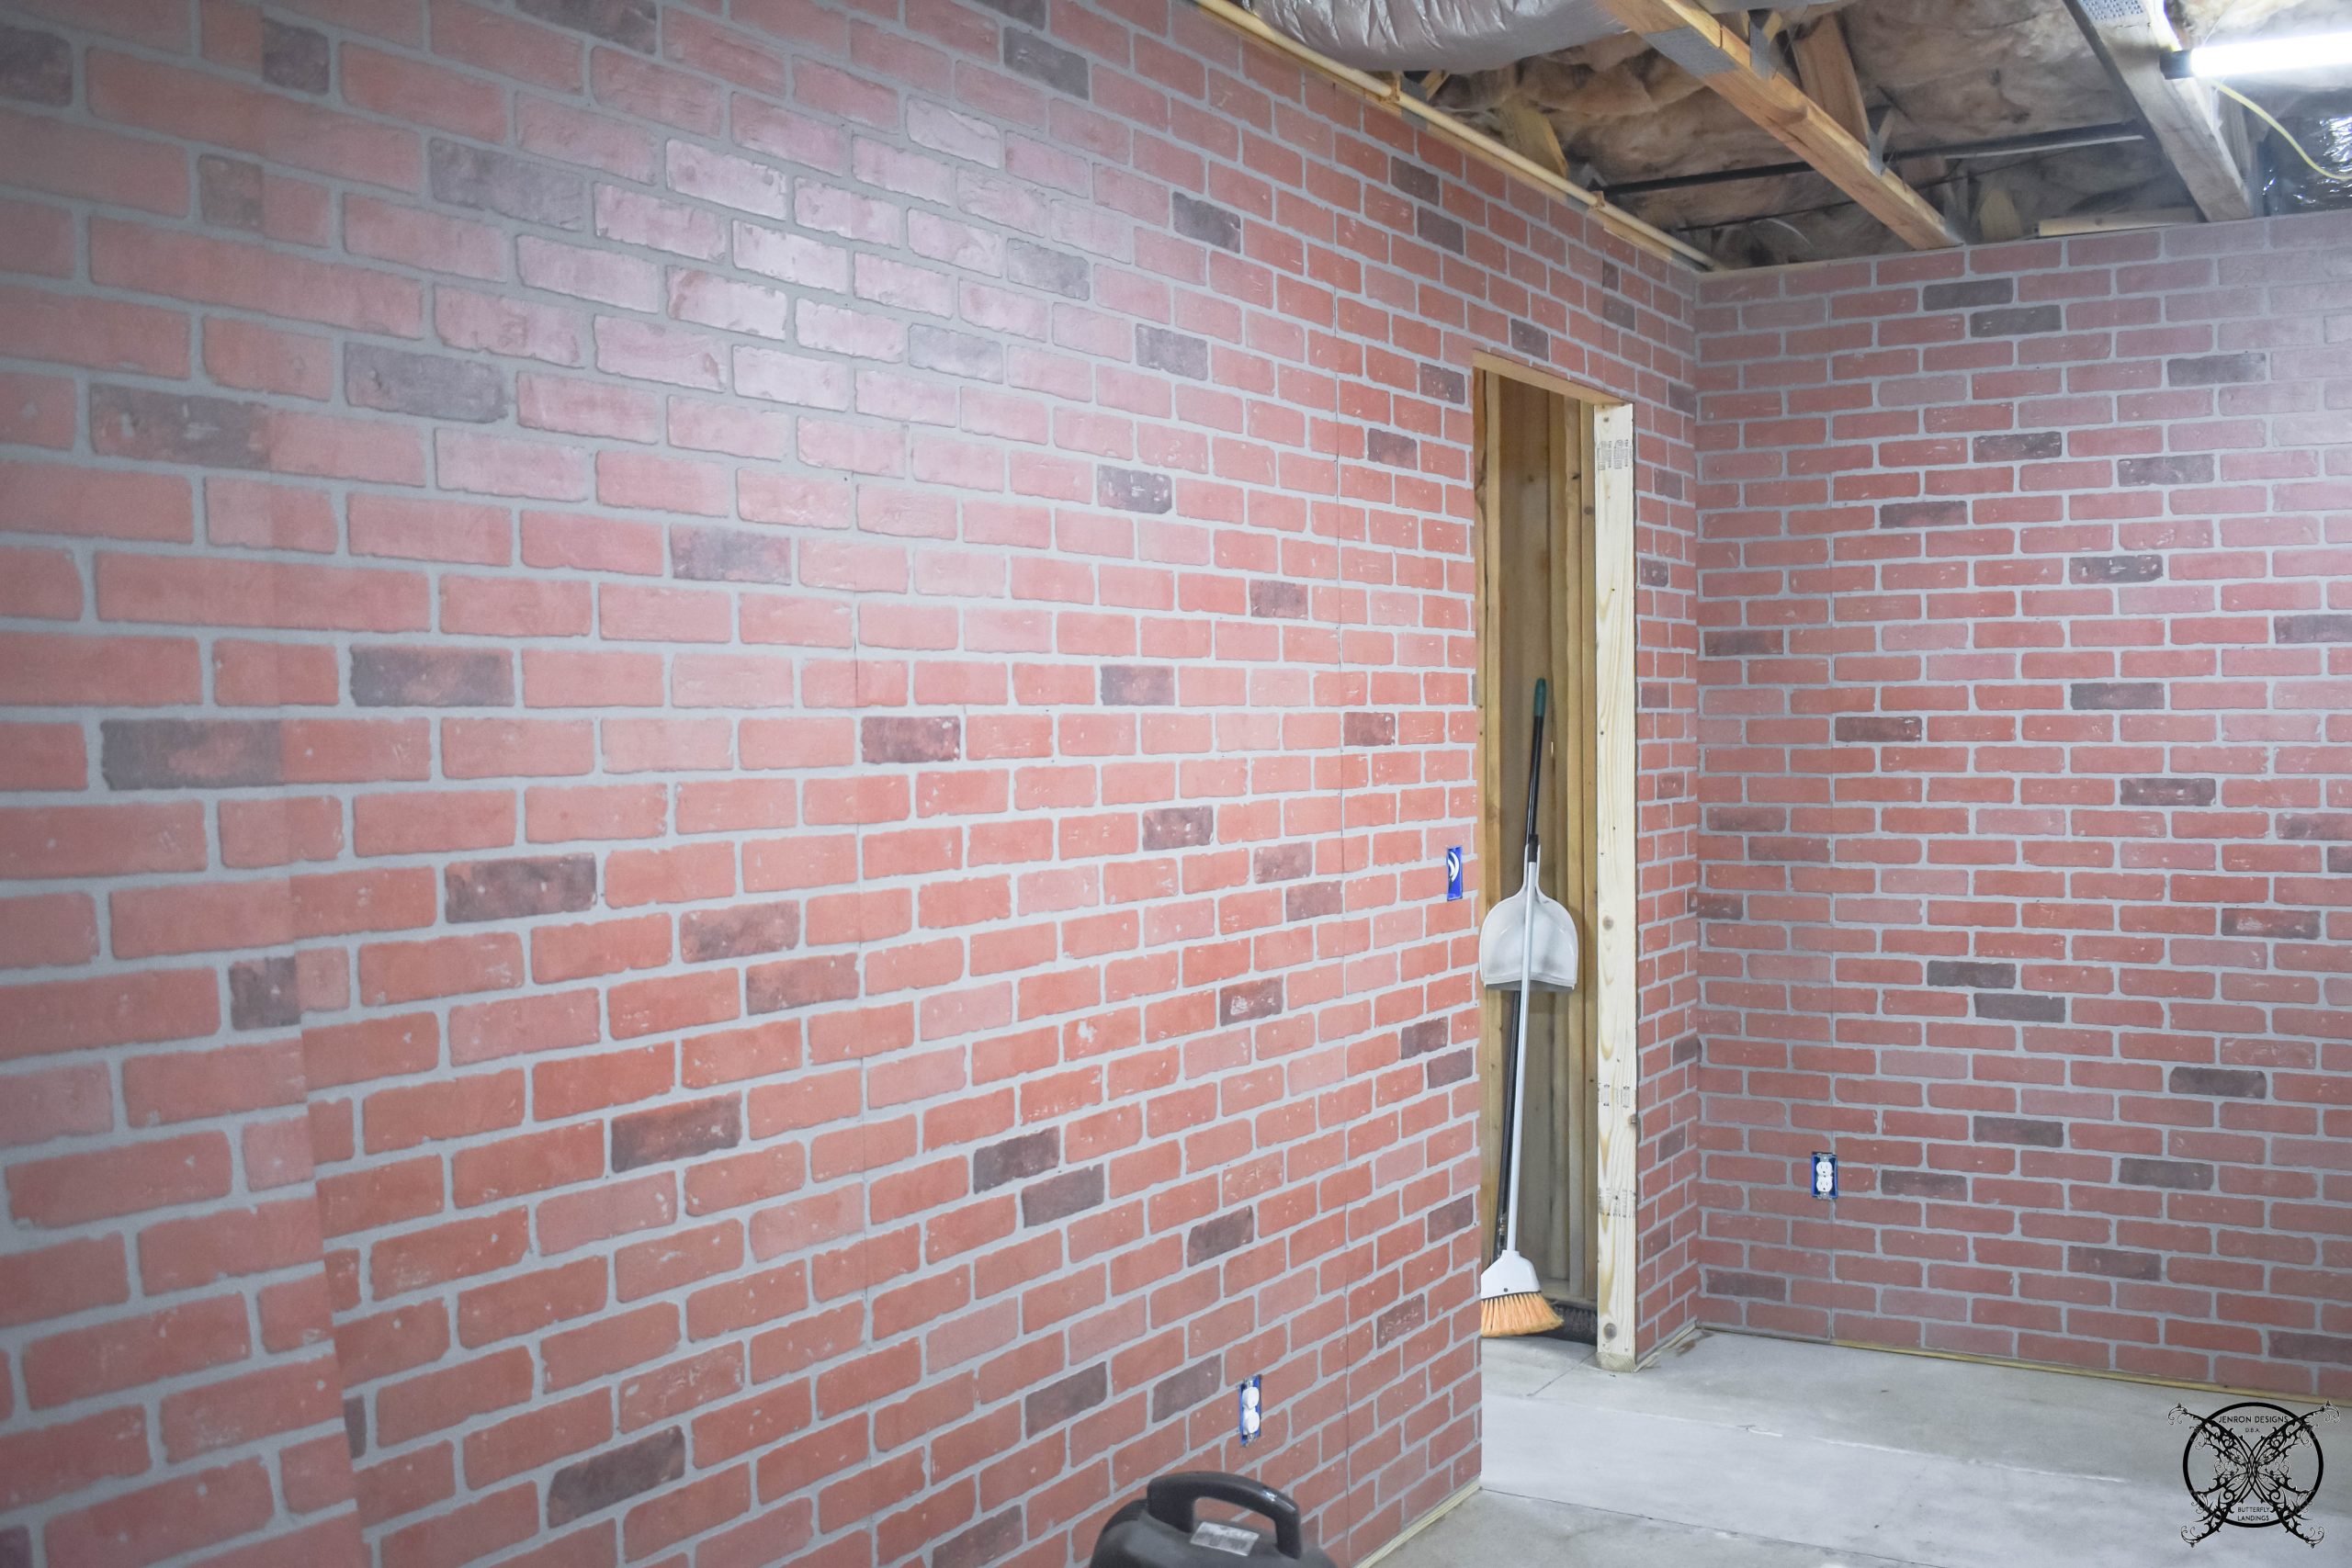
Once we got all the exterior walls insulated, it was time to start installing the faux brick panels. I have to be honest I have been looking at these for almost 5 years nows and I have waivered back and forth on whether on not I wanted to use this product. I knew I wanted to coat it with a German Scmear, so the color was never really an issue, it was more about the seams and it looking real verses faux. As a certified faux finish artist I felt fairly confident that I could indeed make it look real but would it feel real, that was my biggest concern. When I found the magical answer to that, I knew it was time to move forward with this dream project. 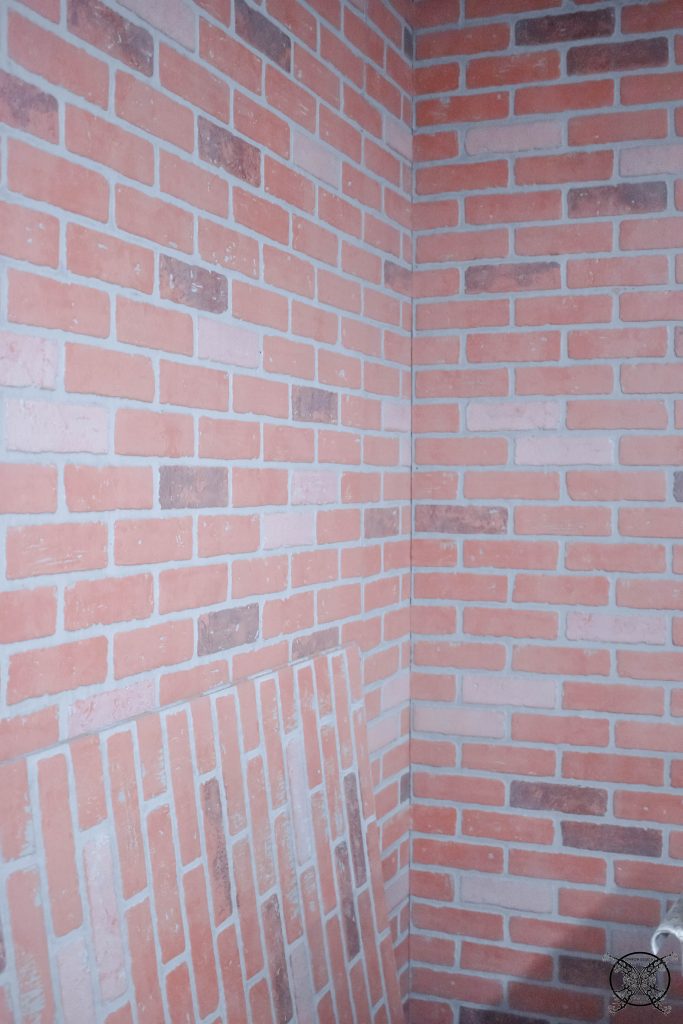 So for normal installation you put this directly over drywall, but that seems like a waste of money since you really do not need to if you studs are properly placed. You can just hang the panels directly on the studs, making sure the ends line up to avoid any weird flapping. I will say in a few places, were we did not build the walls, and our walls were connecting the existing walls we did have to add in a few sister boards to make this work out correctly. In the end I think we added 4 total, which is still a lot less than putting dry wall up and then adding the panels on top.
 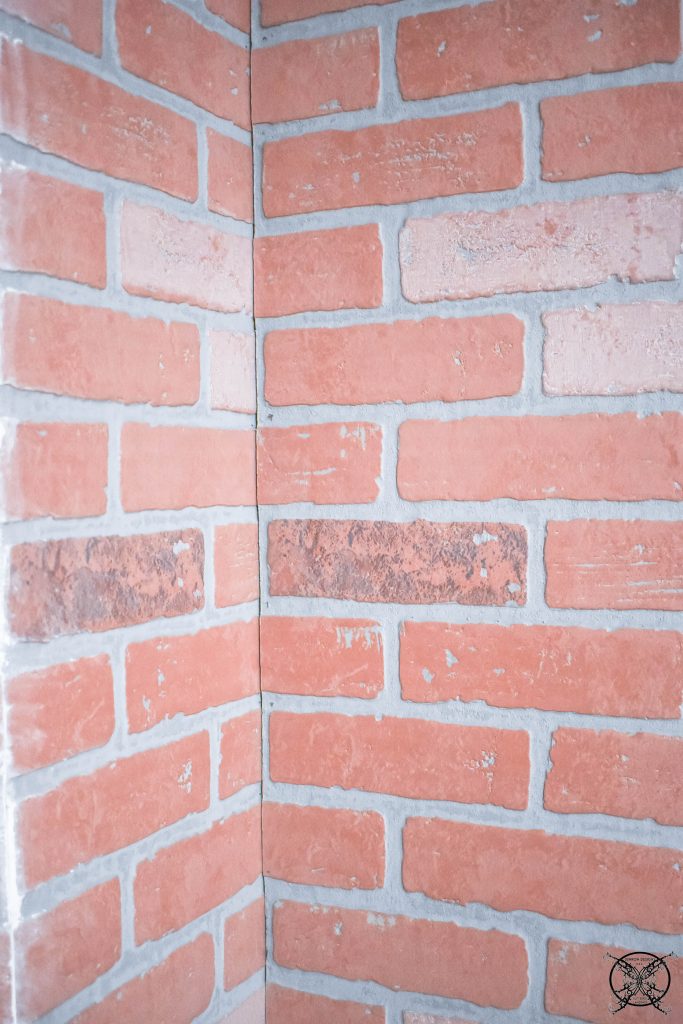 When hanging the panels there is a top and bottom, which you need to keep centered or your brick rows will not line up. They will not line up in any corners that you have to trim the sides off as well, as seen above. This is just a fact of life of this product and I plan to really German Schmear these areas so you will not even notice.
 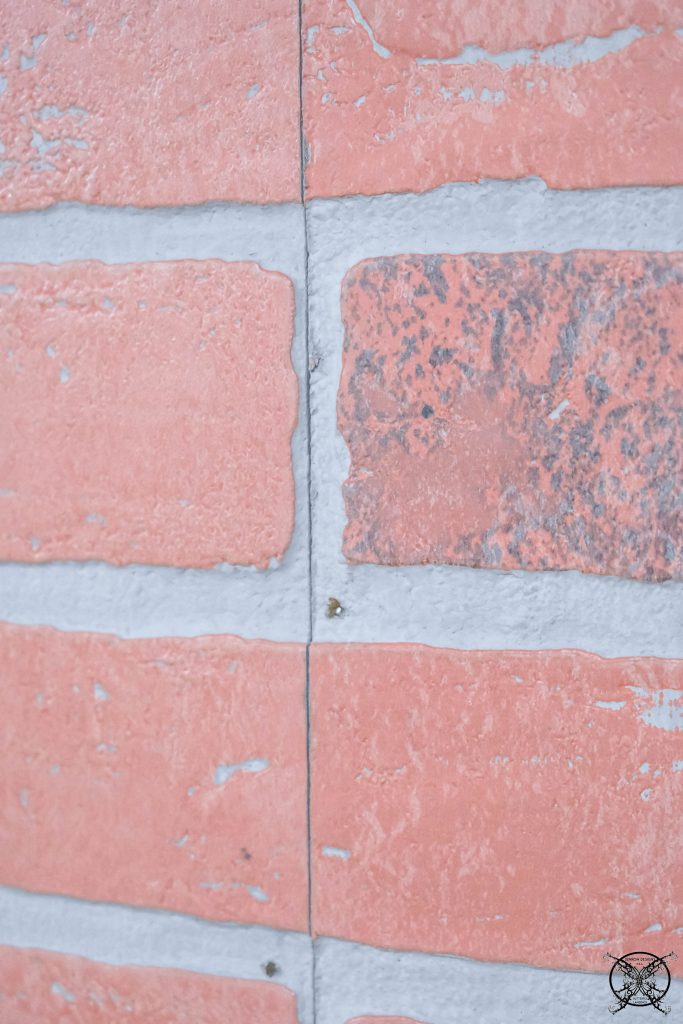 The same is true for the seams, because it is a panel you are going to have seams. However the plan is to German Schmear those seams into submission to, so they do not even show up anymore. I mean let’s be honest I am not a huge fan of this color brick anyways, however if you had asked 20 years ago I loved it and wanted a huge Georgian style home with white columns and this color brick. Today… not so much. Why? Because our taste evolve over time, trends change, and what we think is all the rage at 20 no longer lights our fire at 30, 40 or 50.
 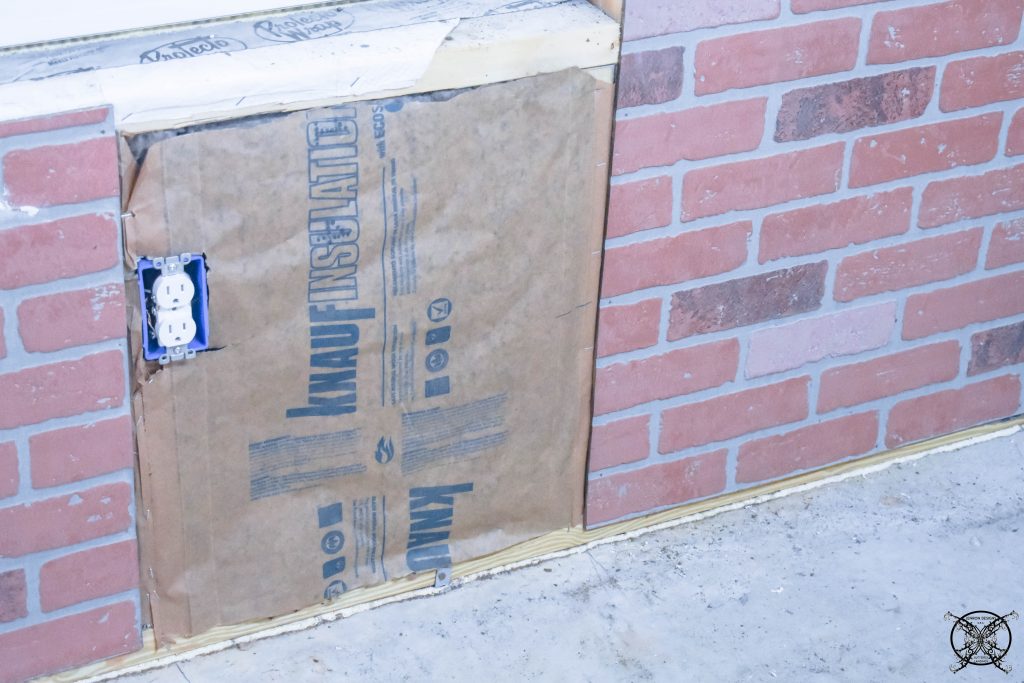 Anyway, as I get back on track you can see above we also had to make a few special cuts around the receptacles, switches, doors and windows. For those we used a handled circular saw and jigsaw. I will go on the record, the panel saw dust is pretty intense, and caused a gookey brown drainage, and at one point we literally had a scary COVID sounding cough, but it was inflammation from inhaling the dust particles since we could not find any masks during the pandemic. So word of advice, if you are cutting these boards, wear a mask and save your lungs and sinuses.
 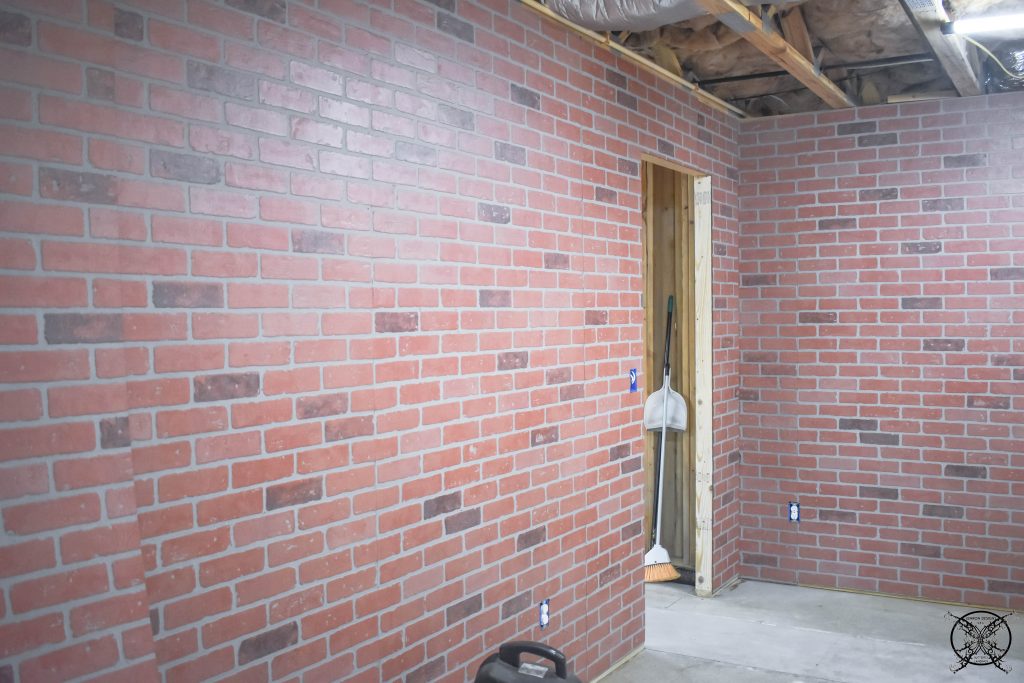 We got all the walls up and the room is now really starting to take shape, next week it is on to the German Schmear. I have a feeling this is the week I am going to be getting my hands dirty, and that pun is completely intended.
THE PROPOSED SCHEDULE:
WEEK 1: Introduction & Inspirations
WEEK 2: BLUEPRINTS: Figuring up the amount of supplies needed for all DIY builds
WEEK 3: Building Walls Pulling Wire & Running Electrical
WEEK 4: Insulating & Adding Brick Panels
WEEK 5: The German Schmear
WEEK 6: Casing Trim Out & Doors
WEEK 7: Painting the Floor
WEEK 8: REVEAL
Wow! This is so fascinating! I’ve never heard of the One Room Challenge. If I didn’t read this post and look at the pictures closely I would’ve thought those were REAL brick walls. This was amazing, a little HGTV on a blog!
If you liked this week wait until you see next week! We are adding a German Schmear Faux Finish over the top of these walls!
Brick really isn’t my thing, but I can’t wait to see what you do with it. You always have great ideas.
Very exciting to see the room coming together! I’m intrigued by the faux brick, from the pictures it definitely looks real. Good luck schmearing next week!
Oh I can’t wait for next week and to see the final reveal!
That looks great – you can’t really tell it’s faux from the picture. Looking forward to the end result!
Can’t wait to see the German Schmearing!!
This is amazing! I time and money-saving tips all in one article.
Oh my gosh this is so much fun to watch unfold Jen! Looking forward to seeing the German Schmear!
It’s really starting to look like a finished room, now. I’m sooo looking forward to seeing the German Schmear and dearly hope you have a tutorial! 😉
Looks great, Jen. We have faux brick walls in our kitchen that we installed many years ago. They consist of real brick facing that are strategically placed on a layer of “mortar.” It was a long and laborious project …your method looks so much easier and it looks so good!
Hey Rosemary we did look at the brick veneer tiles but it needed to adhere to directly sheetrock, or a tile backer board, which we were trying to avoid the double layers and double expense, since it is just my workshop area. So we opted to go with panels since it was a one stop shop so to speak. I think if we had already had sheetrock up we might have gone the other way, but it in our case it seemed counter productive to hang sheet rock just to cover it up, LOL!
I do but it is hard to video while I am literally up to my elbows in joint compound! LOL!
Can’t wait to see the Schmear! It’s coming along so well my friend.
I have seen rock panels before but not brick ones! Happy renovating!
HOLY COW! You guys have been working so hard! Looking great!
I LOVE the faux brick look! We have brick tiling in our guest bathroom and as our kitchen backsplash! It’s just so fun. And a German schmear will look AMAZING! Looking forward to following along 🙂
Wow! That looks amazing! Can’t wait to see the German schmear!
Looking forward to the reveal! This is really cool.
What a great looking room you created with faux brick panels, I love how it turned out I am excited to see the lime wash.