
$100 Room Challenge: New Lights
We are now in Week 2 of the $100 Room Challenge: New Lights and are making a lot of progress on this little outdoor space.
Hi everyone, welcome to week 2 of the $100 Room Challenge: New Lights. If this is your first time seeing the $100 Room Challenge it is a bi-annual challenge sponsored by my friend Erin, from Lemons, Lavender, & Laundry. So, let me give you a little back ground on what the $100 Room Challenge is all about. This challenge takes place twice a year. January and September is when Erin invites us to redo a room in our home using only $100. As you can see the premise of this challenge is real simple: one month, one space, and $100. If you want to know more about the $100 Room Challenge, check out Erin’s post to see how the concept was inspired, and it’s colossal growth since she decided to start it! This season I have decided to work on a Covered Patio, located just outside of the basement. 
Weeks at a Glance:
WEEK 1 WEEK 2 WEEK 3 WEEK 4

*Please note that this post may contain affiliate links for your convenience. These involve no extra cost to you, but may result in me receiving a small commission – for which I am very grateful! You can view my full advertising disclosure here.
The Scheduled Plan:
Week 1: Pressure Wash Patio & Painting
Week 2: DIY Refurbishing Lights & Installing Existing String Lights
Week 3: Focal Window Box or Bench Seat with Cushions
Week 4: Accessorizing- Shop You Home & Reveal
The Before Fixture:
As you can see our original light fixture is basic, small and now cover in some white paint speckles from our ceiling painting. The plan is to replace this fixture with our older garage light fixture that we upgraded this past spring. Plus if you notice there is also a flaw that I just noticed myself on how the electrical was run for this fixture, see the hole above the light filled in with clear caulk? Yep I can no longer unsee that…
 You can see our supply shelf in the basement where we always keep our older fixtures when we replace them. You never know when they may be needed for a rental property, or if you are selling a home. In fact last week we had a neighbor that needed a few replacement fixtures that we were happy to pay it forward and give back. Sometimes you may just need a fixture for a temporary light in a space until the one you ordered comes in, so we always just keep them, in an organized fashion in our replacement areas of our workshop.
 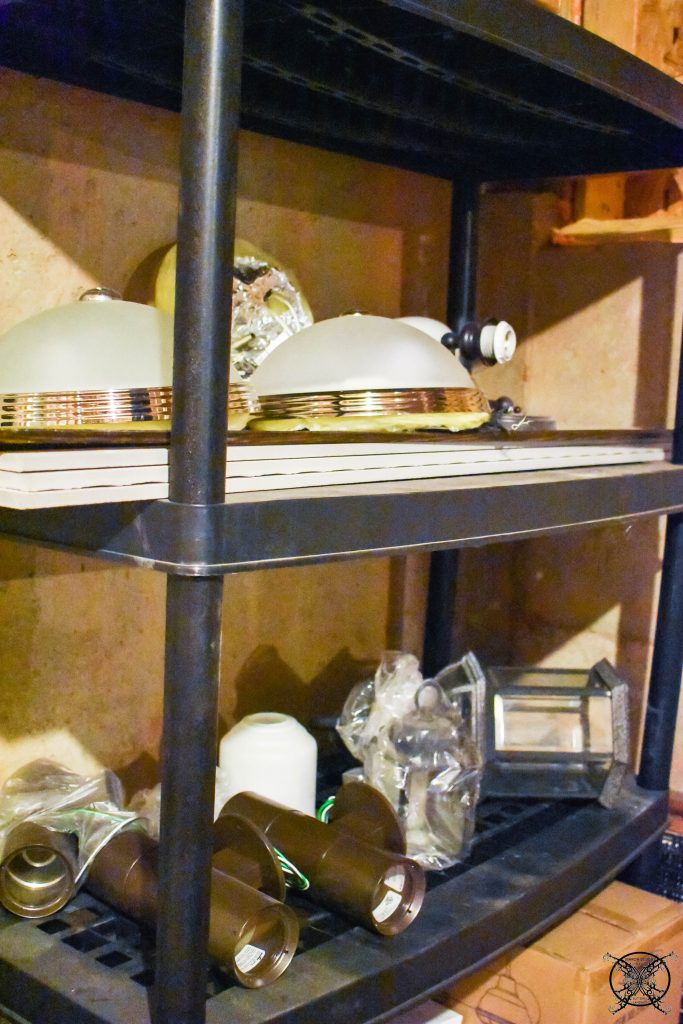 You can probably see the exact same fixture we are replacing on the shelf, which is from our deck and the one next to it is from our garage which is the one we will be using today. Since this fixture was on the front of our home it had a bit of sun damage and weathering, but I am going for a rustic look so I’m hoping to add a little brown craft paint to make this fixture look rusty.
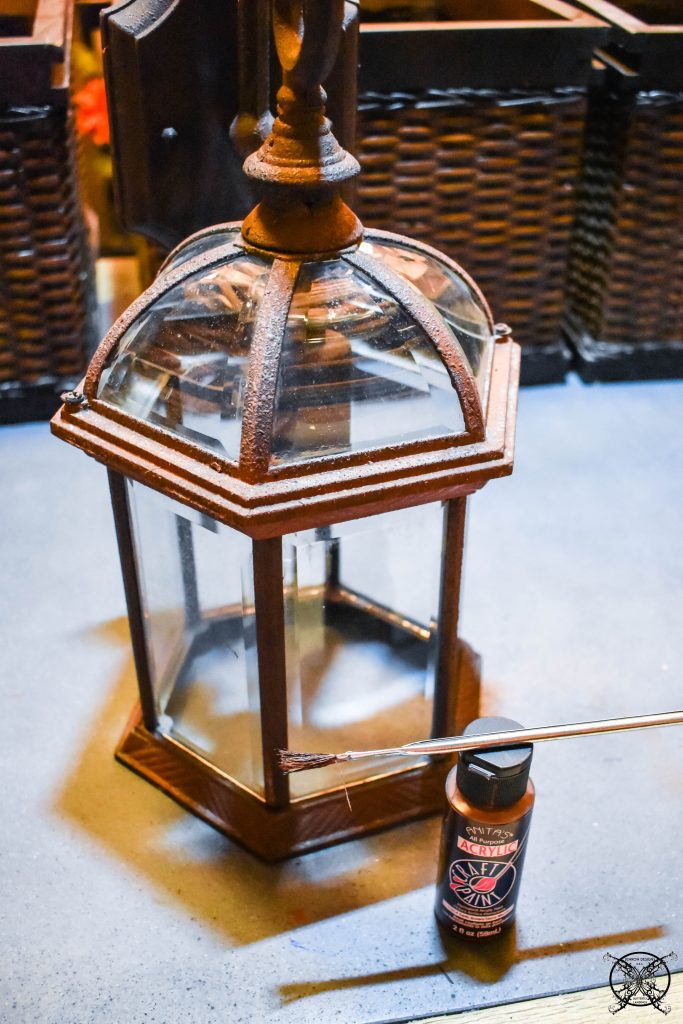 This will give a kind of antique bronze look which goes nicely with the farmhouse fixture we installed on our adjacent deck above.
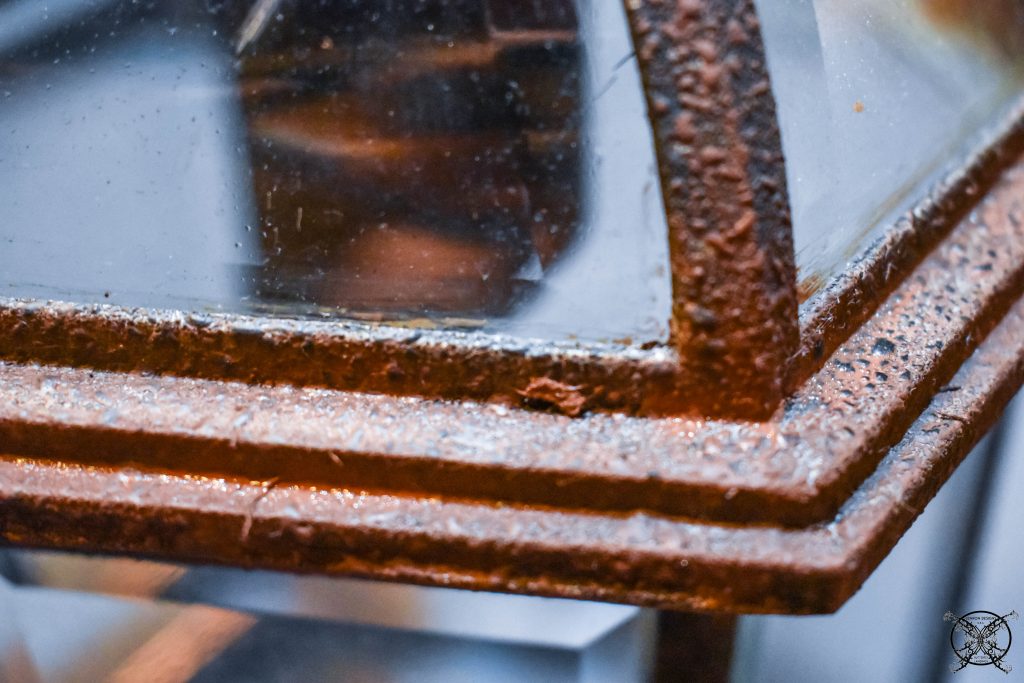 This was my finished product once I got all the paint on the light fixture. I love the large size of this fixture, it covers that unsightly hole I found on the upper side of the original fixture from where the electrical was run too high and the fixture was installed too low. The base plate covers that flaw in the hardy board so my OCD no longer has to be on high alert. Now it looks like the newer version of Charlton Home TuckerLight Fixture and I saved us about $70.
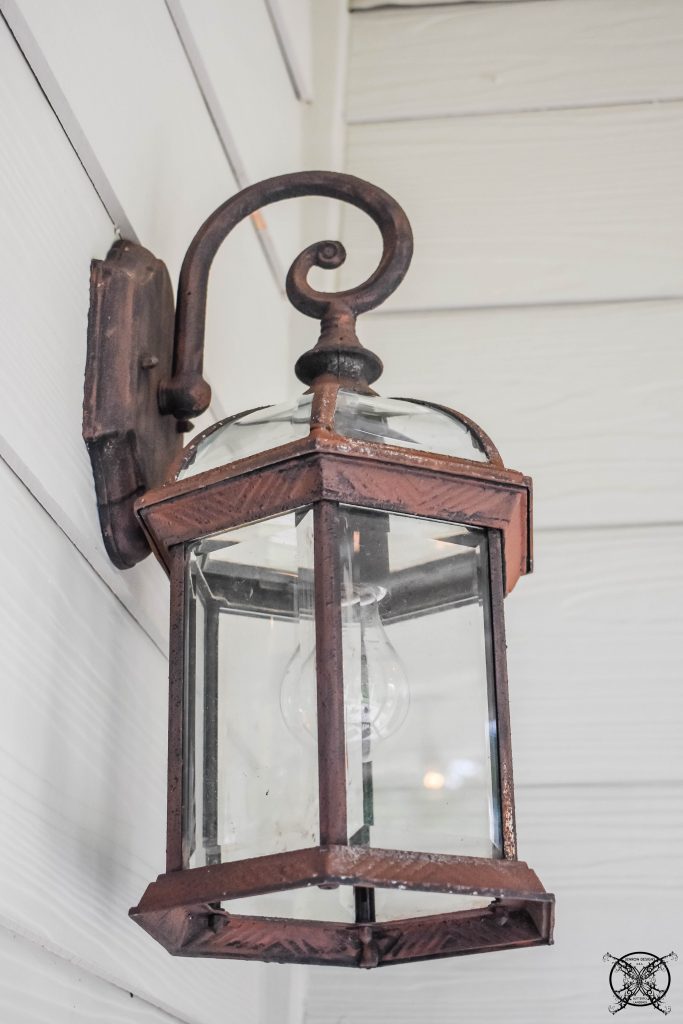
String Lights- I already own, but they are just sitting in a box from the Picnic Under the Stars so I might as well use them right? Clean them up test bulbs and buy hooks to attach to ceiling. So I am looking at the cost of tea cup hooks if I do not already have enough on hand, which I will have to check my supplies. 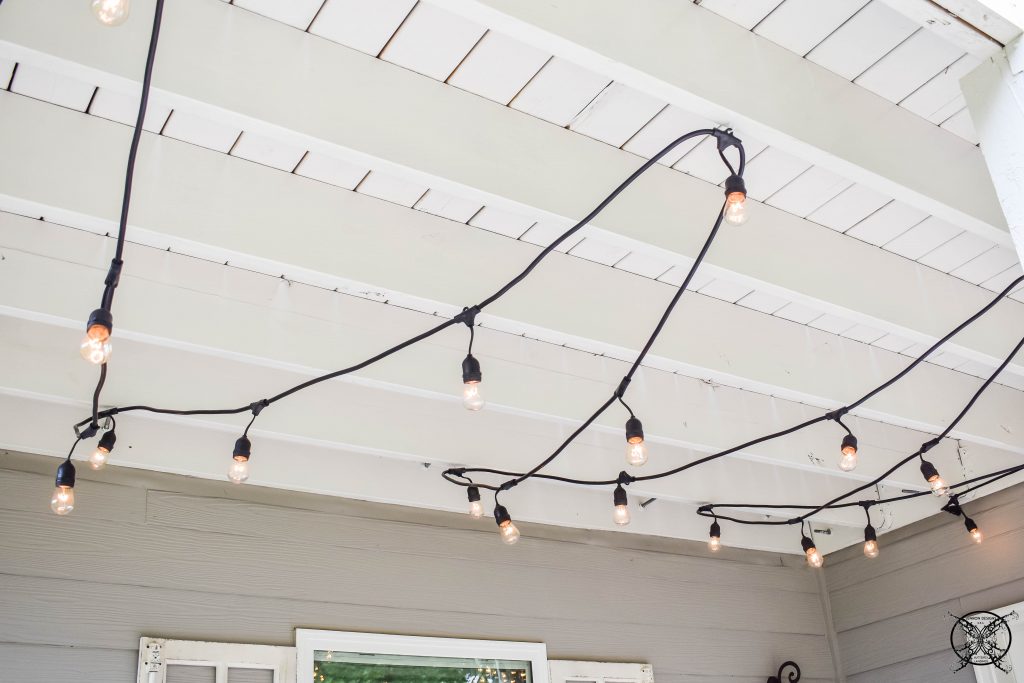 The second part of this process was adding some string lights to the freshly painted ceiling. We did find a dozen or so white tea cup hooks in our hardware drawers so we did not even have to purchase those. These lights were bought 3 years ago for an outdoor party. I have literally had them stored in a box ever since, and I thought why not just run those along the bottom of the ceiling like I did up stairs?
  It gives off a ton of ambient light, more than the single porch light we had previously, plus we just installed a new one. It provides light for the entire space instead of just at the door stoop. Plus it creates and nice room vibe for and outdoor area. So we drilled a few pilot holes and screwed in the white tea cup hooks so they would disappear into the ceiling and strung up our new lighting source.
 The Edison bulbs were still all in good shape and we even had a half a dozen to spare. Plus I still have some fun lantern shades I can add to the tops of the these lights for a fun spring time look if I want to mix things up. I’m just not going with a blue and green color palette right now so those will have to wait until later.
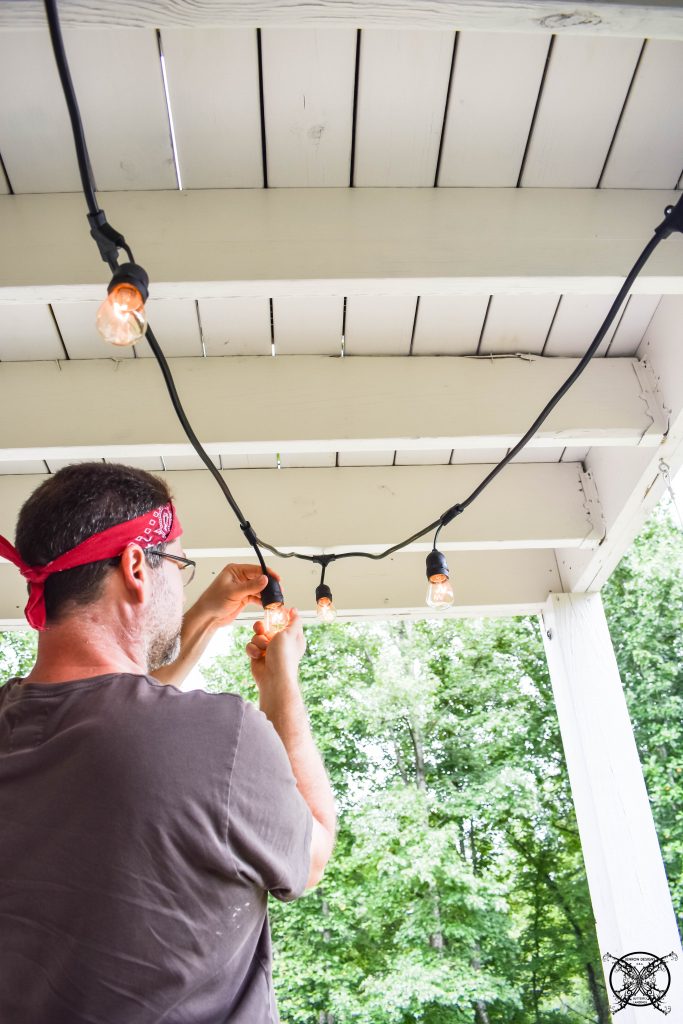
The Budget: ( $100 Available Still)
Week 1: Pressure Washing has already being done on our driveway and rest of home- Included in Home Maintenance Budget (free)
Week 2: Paint- Left Over Trim Paint from Painting our Deck & Screened Porches 2 years ago (free)
Various Paint Supplies- left over pieces from previous painting projects/sponsored posts/etc (free)
String Lights- Previous Owned- Picnic Under the Stars (free)
Porch Light- Refurbished/ Repainted originally from the garage door light we replaced (free) Craft paint/brush owned (free)
BUDGET USED: $0
PIN ME for later and be sure to follow us on Pinterest at Jen @ JENRON DESIGNS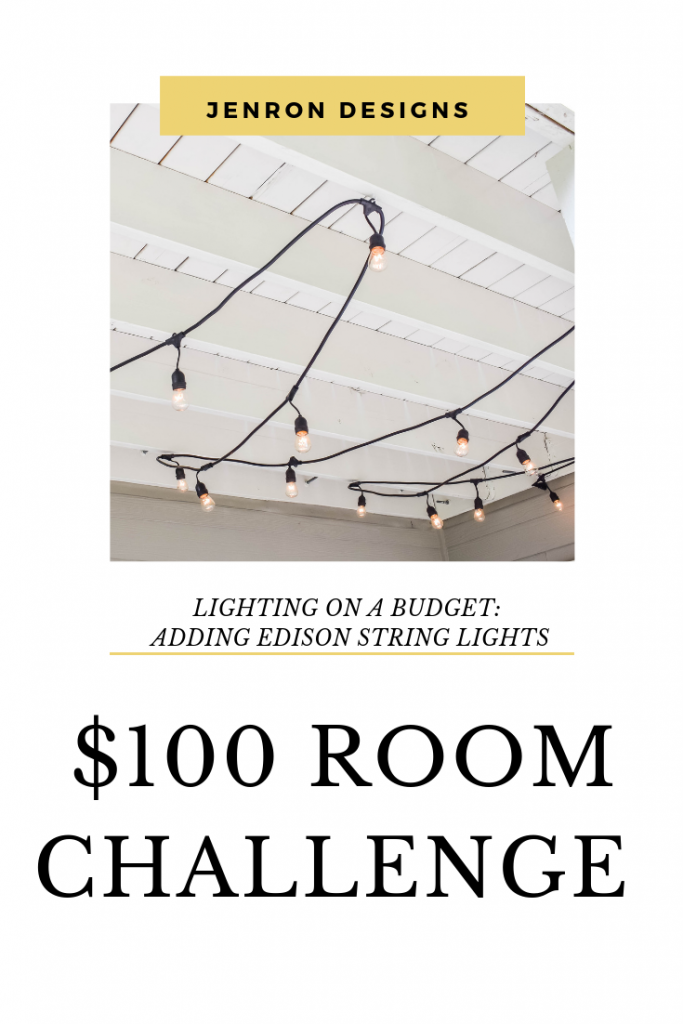
ALSO CHECK OUT ALL MY FRIENDS BELOW THAT ARE ALSO A PART OF THIS SEASON HERE:
<
Your project is really coming along! Your updated light fixture looks great! I am actually putting string lights up this week – for a party for my daughter. We don’t have anything to string them from, so I will be putting posts (that I whitewashed) in cement in planters! I need to complete my project by Friday!
Paint is the best! The lights look awesome!
Jennifer, your porch is going to be so pretty when you are done. Love the idea of the string lighting and re-purposing a light fixture you had for the porch is amazing. Can’t wait to see it come all together.
I’m so jealous that you have done all of that and still have your entire budget remaining! Looking forward to seeing the end results. Especially the cushions and window box! 😉
I have a thing for string lights- they look so good!! And I love how you re-purposed that old outdoor light fixture!!! It looks amazing!!!
Yes to all the string lights! We found some on clearance – but I might be over budget and might have to pull out a strand from the christmas decor boxes! Can’t believe you’ve done so much and haven’t spent a penny yet!!
I love the edison bulb lights! This space is going to be amazing! I can’t wait to see what you do with it.
How great that you already had the light fixture and the string lights. I always love those string lights in outdoor spaces. Can’t wait to see what’s next
My backyard could use some help so this is really inspiring!
Love that you used things that you had already and saved on the budget. Can’t wait to see more! Loving the look of the refurbished light and I am excited to see the rest of the updates!
Beautiful! I love this idea of the $100 room challenge – a great way to jazz up a room on a budget! The string lights add a modern and clean look to your porch. Well done! Looking forward to seeing the end result!
This project looks so pretty so far! Totally loving this challenge
I bet this will look amazing !! thank you so much for sharing this, and proving to us that we don’t need to buy expensive things to make our home looks pretty Lol!
Mira- The Handy Journal-
I like the light fixture and string light. Thanks for the step by step guide. Really lovely.
Wow! What an awesome challenge! It is going to turn out great and I love your ideas!
What a fun challenge to stay on budget but also be creative!!
It’s amazing what new lighting can do. I bet it already looks so pretty out here in the evenings!
This is looking lovely! It’s amazing what a little bit of brown craft paint can do! It looks like a whole new light fixture!
Can’t believe this just all under a $100!! I love the outcome!